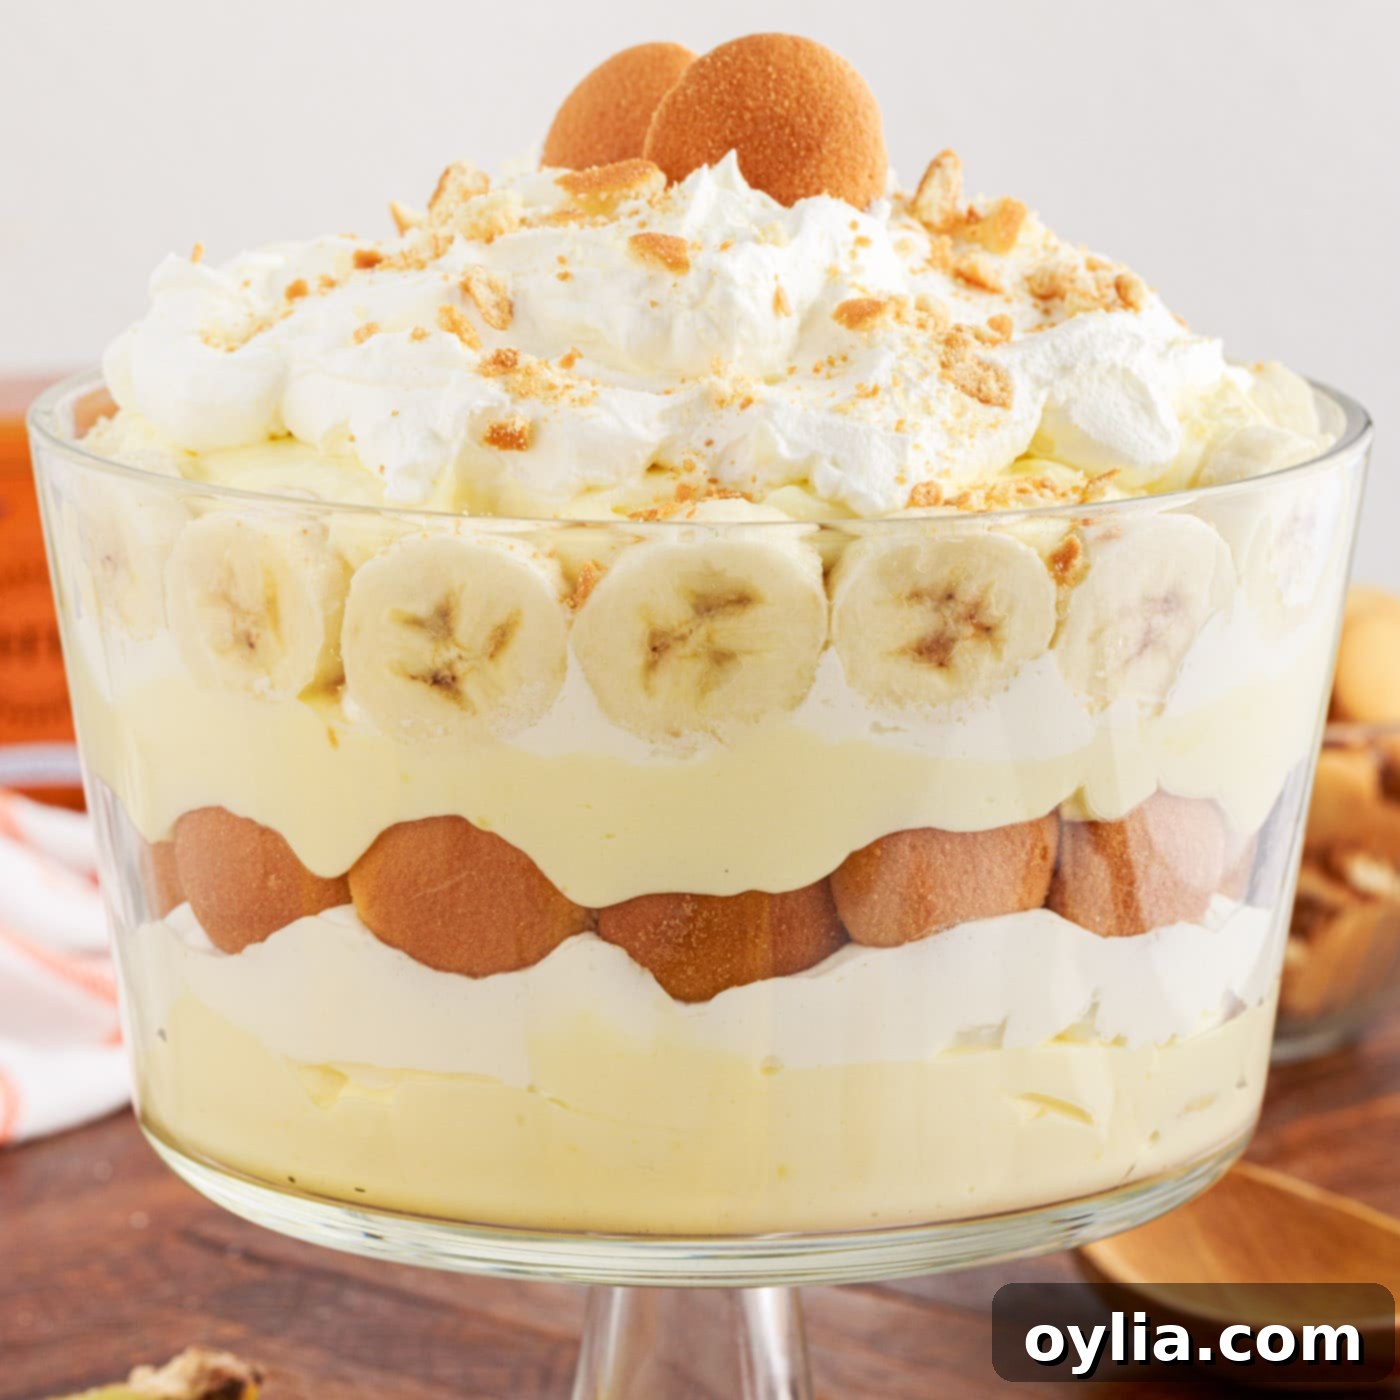
The Best Easy No-Bake Banana Trifle: Creamy, Dreamy Layers with Nilla Wafers
Prepare to impress with this sensational **Banana Trifle**, a dessert that truly embodies bliss. This effortless, no-bake recipe combines luxurious layers of smooth vanilla pudding, light and airy whipped cream, sweet banana slices, and the comforting crunch of Nilla wafers into a spectacular show-stopper. It’s not just a dessert; it’s an experience, perfect for any occasion from casual family gatherings to elegant holiday feasts.
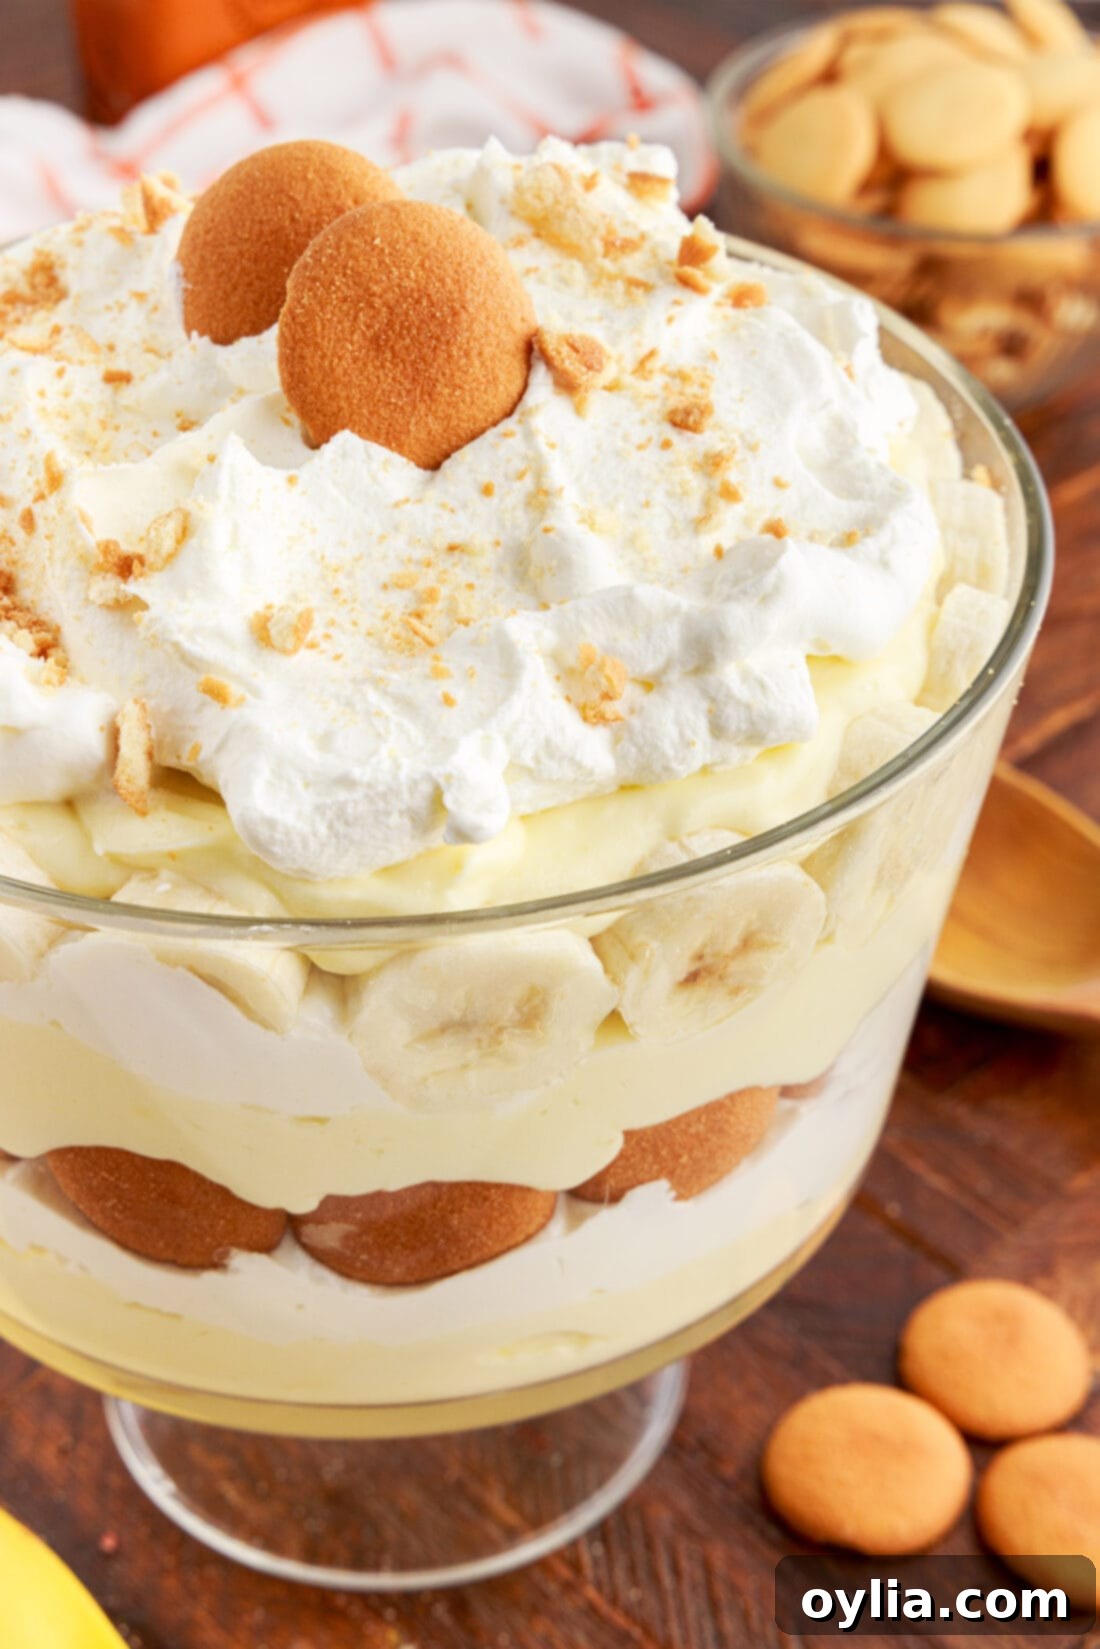
Why This Easy Banana Trifle Recipe Works So Well
This **no-bake banana trifle** stands out for its incredible simplicity and undeniable deliciousness. With just 6 core ingredients, you can whip up a dessert that tastes like it took hours of intricate work. The magic begins with a creamy, rich vanilla pudding mixture, elevated by the addition of cream cheese for an irresistibly smooth texture. This is then beautifully layered with fluffy whipped cream and a generous amount of crushed Nilla wafers, creating a delightful interplay of textures.
What makes this particular **trifle recipe** shine is the contrast it offers. The silkiness of the pudding and whipped cream is perfectly complemented by the satisfying crunch of the cookies, with fresh banana slices adding natural sweetness and moisture. It’s light, creamy, and wonderfully refreshing, making it an ideal dessert for warm weather potlucks, summer barbecues, or even a stunning centerpiece for year-round celebrations, including holiday gatherings. Its layered presentation in a trifle bowl makes it visually appealing and a definite conversation starter.
You can think of this **banana trifle** as a sophisticated, deconstructed version of traditional banana pudding, but with distinct and exciting differences. The cream cheese adds an extra dimension of richness and stability to the pudding layers, while the clear trifle bowl allows each vibrant layer to be showcased. It’s one of the easiest trifles to prepare, requiring no baking, and it’s consistently one of the most welcome desserts at any get-together for its universally loved flavors and charming presentation.
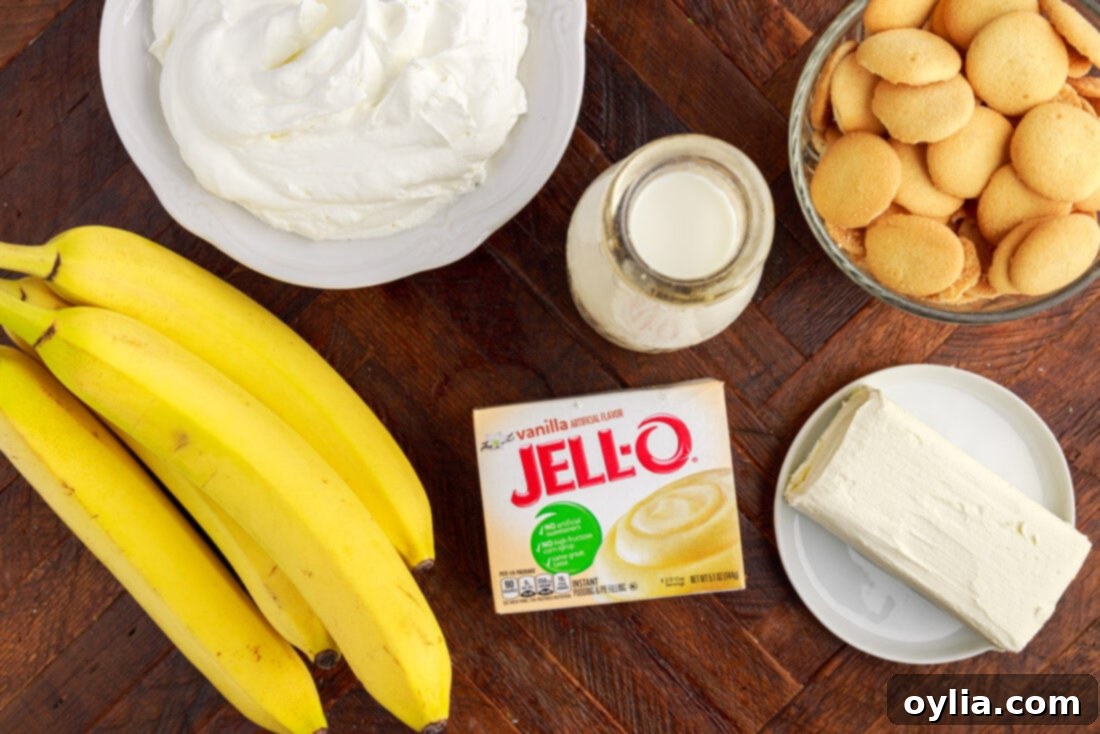
Simple Ingredients for Your Banana Trifle
Creating this magnificent **homemade banana trifle** requires only a handful of readily available ingredients. Opting for good quality ingredients will always enhance the flavor, so choose fresh bananas and rich heavy cream for the best results. You’ll find all exact measurements and detailed instructions in the printable recipe card at the very end of this post.
Ingredient Info and Helpful Substitution Suggestions
Let’s dive deeper into each ingredient to ensure your **banana trifle** is nothing short of perfect:
- WHIPPED CREAM – For truly exceptional flavor and texture, we recommend making your own whipped cream. We used a full 32 oz. carton of heavy whipping cream, sweetened with approximately 3⁄4 cup of granulated sugar (powdered sugar also works beautifully and helps with stability). Begin whipping the heavy cream until soft peaks just start to form. At this point, gradually add the sugar, then continue whipping until stiff, yet still airy, peaks are achieved. Be careful not to overwhip, as it can turn grainy. The powdered sugar is particularly beneficial as it not only sweetens but also contains a small amount of cornstarch, which acts as a stabilizer, preventing the whipped cream from deflating quickly. If you’re short on time or prefer a quicker route, a good quality store-bought whipped topping like Cool Whip is a convenient substitute.
- BANANAS – The bananas are the star of this **banana pudding trifle**. Choose bananas that are ripe but firm, with a few brown flecks – not too green (lack of flavor) and not overly ripe (too mushy). The banana slices incorporated directly into the pudding mixture tend to stay fresh and retain their color for several days when the trifle is properly stored in the refrigerator. However, for any banana slices used for decorative purposes, especially those exposed on the top or around the perimeter of the trifle, a quick toss with a teaspoon of lemon juice is highly recommended. This simple trick prevents browning (oxidation) and keeps your dessert looking fresh and appetizing.
- PUDDING – This recipe specifically calls for instant vanilla pudding mix. It’s crucial to use the instant variety, as cook-and-serve pudding requires heat and will not set properly when simply mixed with cold milk and cream cheese in this no-bake application. The instant pudding is formulated to thicken beautifully without cooking, creating that signature creamy texture.
- CREAM CHEESE – The cream cheese adds an incredible richness and tangy depth to the pudding mixture, setting this trifle apart. To ensure a perfectly smooth, lump-free mixture, it’s vital to properly soften the cream cheese. Remove it from the refrigerator, unwrap it, slice it into small cubes, and let it rest at room temperature for 20-30 minutes on a plate. This allows it to reach a pliable consistency that will easily blend with the other ingredients.
- WHOLE MILK – Whole milk is preferred for this recipe due to its higher fat content, which contributes to a richer, creamier pudding mixture. If you’re looking to slightly lighten the dessert, 2% milk can be used, but avoid skim milk as it may compromise the overall texture and richness.
- NILLA WAFERS – These classic vanilla wafers are integral to the **Nilla wafer trifle** experience, providing a delicate crunch and a familiar, comforting flavor. They soften slightly as they absorb the moisture from the pudding, creating a delightful contrast. If Nilla wafers aren’t available or you’d like to try a variation, other plain cookies like shortbread cookies, graham crackers, or even vanilla sandwich cookies (crushed) can work as substitutes, though the flavor profile will be slightly different.
How to Make This Irresistible Banana Trifle
These step-by-step photos and detailed instructions are here to help you visualize how to make this delightful recipe. For a convenient printable version, complete with precise measurements and instructions, simply Jump to Recipe at the bottom of this page.
- Prepare the Cream Cheese: In a large mixing bowl, beat the softened cream cheese with an electric mixer until it is completely smooth and creamy. This is a crucial step for a lump-free pudding.
- Combine with Milk: Gradually begin beating the whole milk into the cream cheese mixture. Add a small amount of milk at a time, mixing well after each addition until the mixture is uniformly smooth and creamy. As you incorporate more milk, you might want to switch from an electric mixer to a whisk to prevent splatter and ensure thorough blending.

- Whisk in Pudding Mix: Evenly sprinkle the instant vanilla pudding mix over the milk and cream cheese mixture. Vigorously whisk for several minutes (at least 2-3 minutes) until the mixture visibly thickens and achieves a smooth, pudding-like consistency.


- Fold in Whipped Cream: Gently fold in 1 cup of your prepared whipped cream into the pudding mixture. This adds an extra layer of lightness and airiness, making the pudding even more delightful.


- Add Bananas: Slice two of your bananas into even pieces and carefully fold them into the pudding mixture. This ensures every spoonful of your **banana trifle** has a delightful banana flavor throughout.

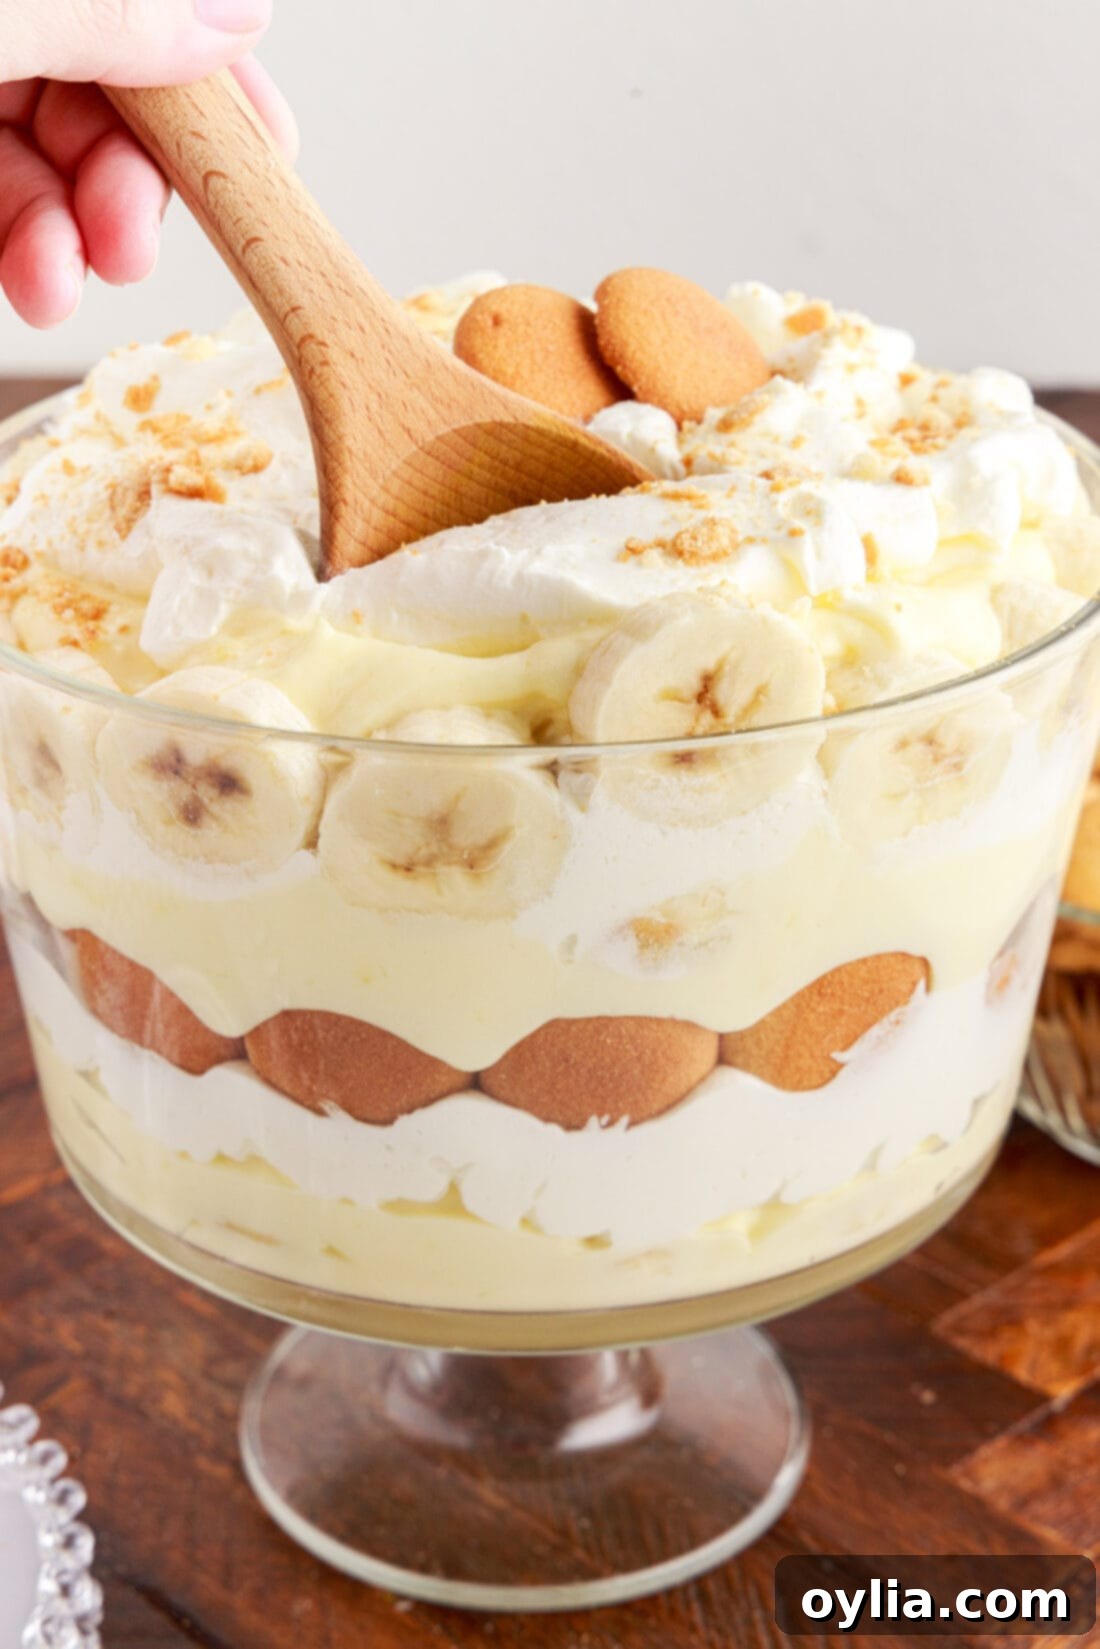
- Assemble the Layers: Now for the fun part – building your **easy banana trifle**! In a large trifle bowl, begin by layering 1⁄3 of the banana pudding mixture, followed by 1⁄3 of the remaining whipped cream. Finish this layer with about 1 1⁄2 cups of crushed Nilla wafers. We designed this recipe for three distinct layers of pudding and whipped cream, with two layers of crunchy Nilla wafers in between, plus some for garnish.


- Decorative Touches (Optional): After laying down the first layer of pudding and whipped cream, you can strategically place whole Nilla wafers around the perimeter of the trifle bowl, pressing them gently against the glass, for a beautiful decorative effect. After the second layer of pudding, whipped cream, and cookies, arrange a circle of your remaining banana slices for another elegant, eye-catching touch. Remember to toss these decorative banana slices with lemon juice if you’re not serving immediately.


- Final Layers: Layer the third and final portions of the pudding mixture and whipped cream.
- Garnish and Chill: For a final decorative touch, place a couple of whole Nilla wafers and sprinkle some crushed crumbles on top of the trifle. Once assembled, cover the trifle and chill it in the refrigerator for at least 4 hours, or preferably overnight, to allow the flavors to meld and the pudding to set completely. This also allows the wafers to soften to the perfect texture.

Frequently Asked Questions & Expert Tips for Your Banana Trifle
To maintain its freshness and beautiful layers, cover your **banana trifle** with plastic wrap, ensuring it’s airtight, or transfer it to an airtight container. Store it in the refrigerator for up to 3 days. The flavors will deepen, and the Nilla wafers will soften to a cake-like consistency.
Absolutely! This **no-bake banana trifle** is an excellent make-ahead dessert. You can prepare it a day in advance, storing it covered in the refrigerator. This allows all the layers to set perfectly and the flavors to fully meld, resulting in an even more delicious treat. Just ensure any exposed banana slices are treated with lemon juice if making more than a few hours ahead.
While it’s technically possible to freeze this trifle, it’s generally not recommended for optimal quality. The bananas are prone to browning and becoming mushy upon thawing, and the whipped cream can change texture. It typically won’t last longer than a week or two in the freezer. For best results, enjoy it fresh or within a few days from the refrigerator.
Yes, absolutely! Creating individual portions of this **banana trifle** is a fantastic idea, especially for events like baby showers, bridal showers, or any party where individual servings are preferred. Simply layer the ingredients into individual dessert cups (those with lids are super convenient!). You can also prepare them in mini trifle dessert cups for an elegant, bite-sized option. The choice is entirely up to you, and both methods yield stunning results!
A classic glass trifle bowl, typically with a pedestal base and straight sides, is ideal as it beautifully showcases the distinct layers of your dessert. However, any large glass serving bowl or even a clear punch bowl can work well. The key is to have transparent sides so the beautiful presentation isn’t hidden!
While this is a classic **banana trifle**, you can certainly experiment with other fruits! Sliced strawberries, raspberries, or even chopped mango could add extra color and flavor. Just be mindful that some fruits release more liquid, which might affect the pudding’s consistency slightly. For best results, consider adding more delicate fruits right before serving.
The Nilla wafers are meant to soften slightly, but to prevent them from becoming completely mushy, you can lightly brush them with a thin layer of melted butter before layering. Alternatively, if you plan to make the trifle more than 12-18 hours in advance, consider keeping some crushed wafers separate and sprinkling them on top just before serving for that ultimate crunch.
Elevate Your Banana Trifle: Serving Suggestions
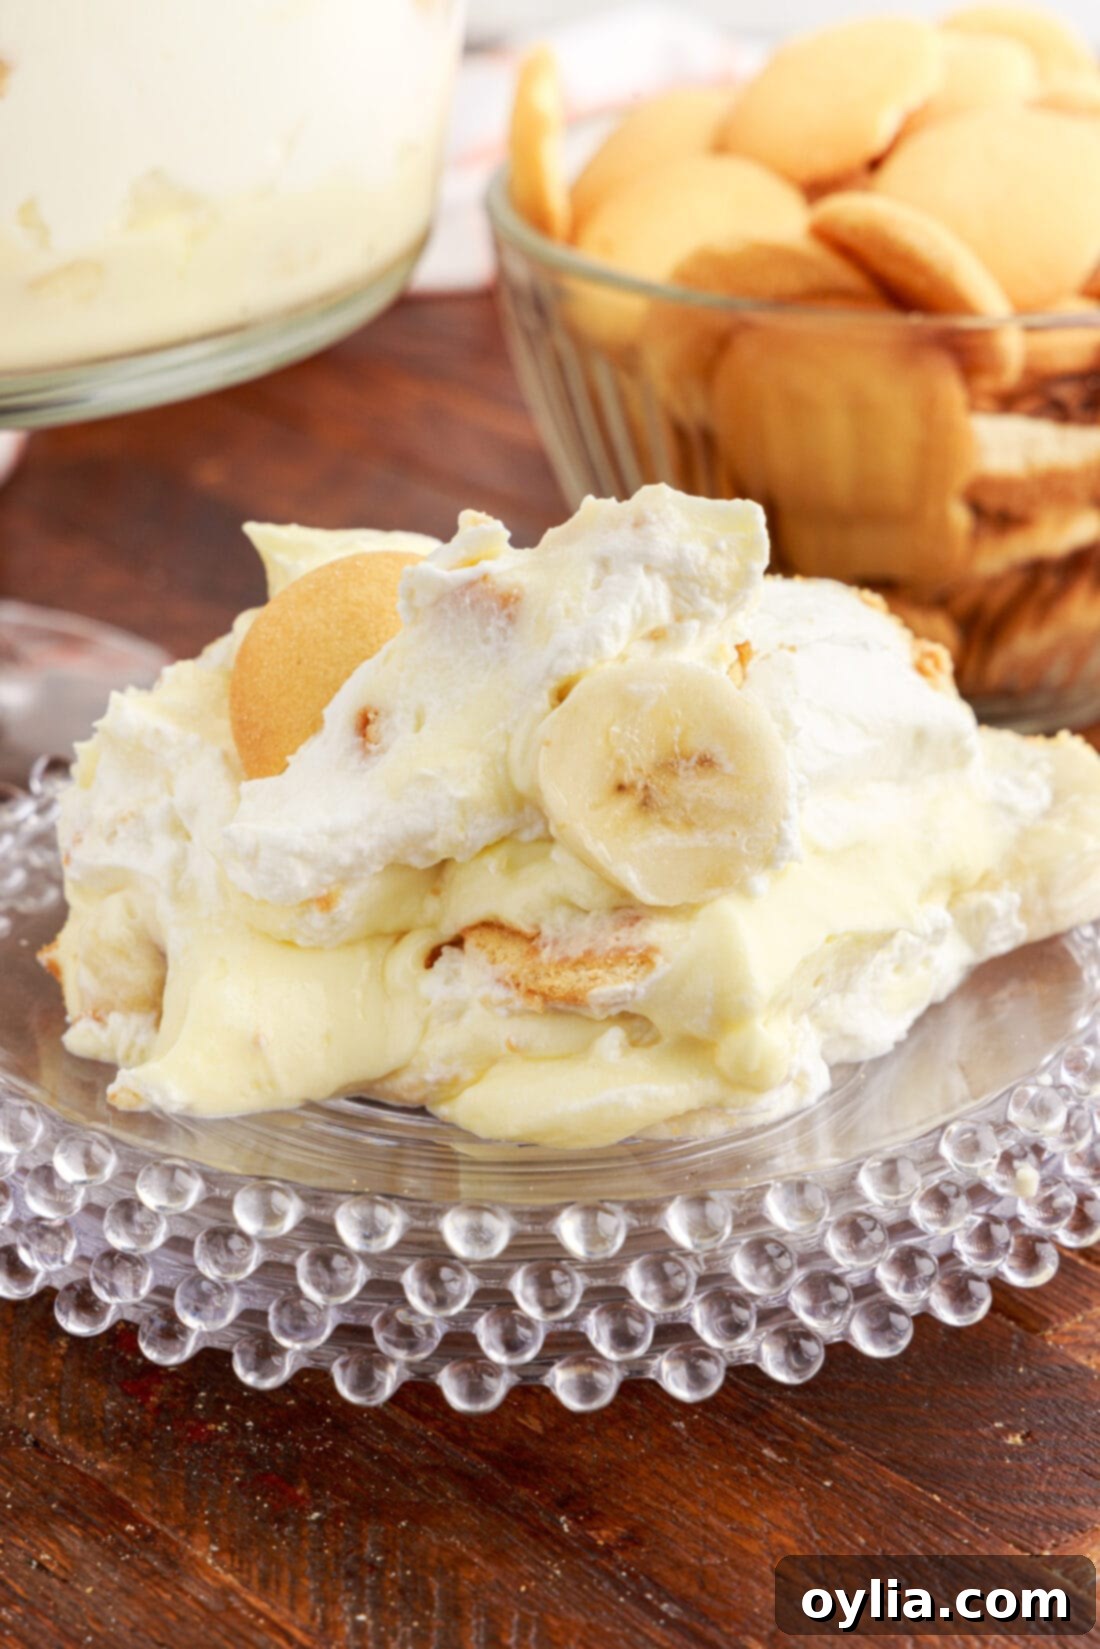
This beautiful **banana trifle** is a showstopper on its own, but a few thoughtful garnishes can take it to the next level. Serve each portion with an extra whole Nilla wafer and a sprinkle of crushed wafers for an added crunch and visual appeal. As previously mentioned, serving this delightful dessert in individual dessert cups is a charming alternative, perfect for parties. Simply layer the ingredients into each cup, cover, and chill them until you’re ready to serve.
When it comes to decorative banana slices, timing is key. If you plan to use fresh banana slices as a decorative ring on the top or exposed layers, it’s best to serve the trifle shortly after assembling to prevent browning. If you’re preparing the trifle more than a few hours in advance, a clever trick is to keep your banana slices primarily within the pudding layers, where they are protected from air. For external decoration, rely on whole Nilla wafers or even chocolate shavings, which hold up beautifully over time. Pair a serving of this creamy, dreamy trifle with a freshly brewed cup of coffee or a light herbal tea for a truly satisfying end to any meal.
Discover More Delicious Trifle Recipes
If you loved this banana trifle, you’ll be thrilled to explore other variations of this delightful layered dessert. Trifles are incredibly versatile and can be adapted to almost any flavor profile. Here are some more fantastic trifle recipes to inspire your next sweet creation:
- Mango Trifle
- Pumpkin Trifle
- Raspberry Trifle
- Lemon Lush Trifle
- Carrot Cake Trifle
I love to bake and cook and share my kitchen experience with all of you! Remembering to come back each day can be tough, that’s why I offer a convenient newsletter every time a new recipe posts. Simply subscribe and start receiving your free daily recipes!
Banana Trifle
IMPORTANT – There are often Frequently Asked Questions within the blog post that you may find helpful. Simply scroll back up to read them!
Print It
Pin It
Rate It
Save ItSaved!
Ingredients
- 8 ounces cream cheese softened
- 3 cups whole milk
- 5.1 ounces instant vanilla pudding mix
- 8 cups whipped cream Cool Whip or homemade, see below
- 3 large bananas
- 11 ounces Nilla wafers 1 box
Things You’ll Need
-
Trifle bowl
-
Electric mixer
-
Mixing bowls
Before You Begin
- *For the whipped cream* – We whipped a full 32 oz. carton of heavy whipping cream and sweetened it with about 3⁄4 cup of granulated sugar (you can also use powdered sugar). Whip until soft peaks form, then add the sugar, then continue whipping until stiff peaks form. Don’t overwhip. Adding confectioners sugar (powdered sugar) to the whipped cream not only helps sweeten, it but also helps stabilize. To make this recipe quicker, you can substitute with Cool Whip.
- Be sure to use instant vanilla pudding for this recipe otherwise the mixture will not set properly.
- To properly soften cream cheese, remove it from the refrigerator, slice it into cubes, and allow it to rest at room temperature for 20-30 minutes on a plate.
- The banana slices that are mixed into the pudding mixture stay fresh for several days if the trifle is stored in the refrigerator. For any banana slices used to form a row around the trifle layers or on top of the trifle, I recommend tossing with a teaspoon of lemon juice to prevent browning.
- If you are using banana slices as a decorative ring, serve the trifle right away. If you are preparing the trifle more than a few hours in advance, I would recommend using whole Nilla wafers as your decorative rings and keep the banana slices protected in the pudding layers.
- To Make in Advance – Prepare the trifle a day in advance and store it, covered, in the refrigerator until you are ready to serve it.
- STORAGE – Cover the trifle with plastic wrap or store in an airtight container kept in the refrigerator for up to 3 days.
- FREEZING – Although it’s possible to freeze this trifle, I wouldn’t necessarily recommend doing so as the bananas are more prone to browning and it simply won’t last longer than a week or two at most in the freezer due to the whipped cream (and sliced bananas).
Instructions
-
In a mixing bowl, beat softened cream cheese with an electric mixer until smooth and creamy.
-
Slowly begin beating the milk into the cream cheese, adding a little at a time until the mixture is smooth. Switch to a whisk as you add more milk to prevent splatter and ensure an even consistency.
-
Sprinkle the instant pudding mix over the milk mixture and whisk vigorously for several minutes until it visibly thickens into a smooth pudding.
-
Gently fold in 1 cup of the prepared whipped cream into the pudding mixture until just combined, creating a lighter, airy texture.
-
Slice 2 of the bananas and carefully fold these pieces into the pudding mixture, distributing them evenly.
-
Assemble the trifle by creating layers: start with 1⁄3 of the banana pudding mixture, followed by 1⁄3 of the remaining whipped cream, and then about 1 1⁄2 cups of crushed Nilla wafers. Repeat this sequence to create three full layers of pudding and whipped cream, with two layers of crushed wafers in between.
-
For a decorative touch, after the first pudding and whipped cream layer, you can place whole Nilla wafers around the perimeter of the trifle bowl. After the second pudding, whipped cream, and cookie layer, arrange the remaining banana (sliced and tossed with lemon juice if desired) in a circle for another beautiful visual element.
-
Layer the third and final portions of pudding and whipped cream to complete the trifle.
-
Garnish the top with a couple of whole Nilla wafers and a sprinkle of crushed crumbles for decoration. Cover and chill in the refrigerator for at least 4 hours (preferably overnight) before serving to allow flavors to meld and layers to set.
Nutrition
The recipes on this blog are tested with a conventional gas oven and gas stovetop. It’s important to note that some ovens, especially as they age, can cook and bake inconsistently. Using an inexpensive oven thermometer can assure you that your oven is truly heating to the proper temperature. If you use a toaster oven or countertop oven, please keep in mind that they may not distribute heat the same as a conventional full sized oven and you may need to adjust your cooking/baking times. In the case of recipes made with a pressure cooker, air fryer, slow cooker, or other appliance, a link to the appliances we use is listed within each respective recipe. For baking recipes where measurements are given by weight, please note that results may not be the same if cups are used instead, and we can’t guarantee success with that method.
