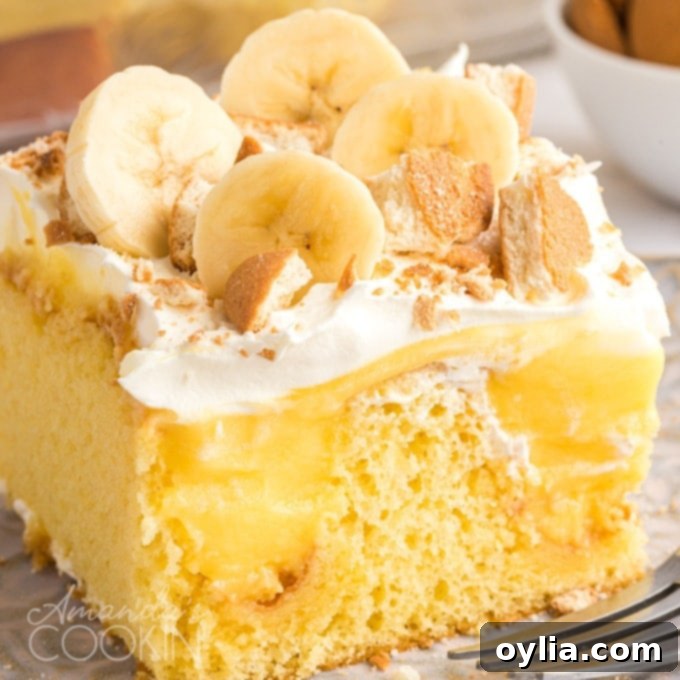
Easy Banana Pudding Poke Cake Recipe: A Quick, Creamy, and Crowd-Pleasing Dessert
Get ready to create a dessert sensation that’s as easy to make as it is delightful to eat! This incredible banana pudding poke cake offers a fun, simplified, and utterly delicious twist on the beloved traditional banana pudding. By leveraging a convenient cake mix, this recipe transforms into a perfectly moist, creamy, and flavorful treat with minimal effort. It’s the ideal choice when you need a fantastic dessert to bring to a potluck, serve at your next backyard cookout, or simply enjoy with family and friends. Prepare to impress everyone with this beautiful and irresistible poke cake!
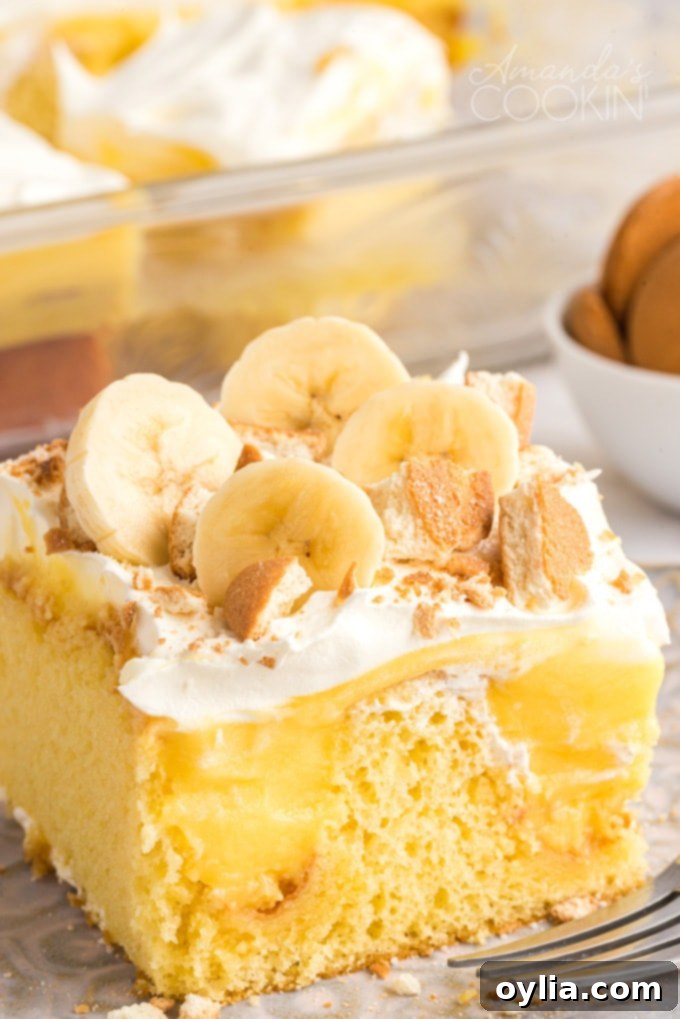
Why This Banana Pudding Poke Cake is Your New Favorite Dessert
While I often enjoy baking from scratch, there are those times when a delicious, budget-friendly, quick, and easy dessert is exactly what’s needed. This Banana Pudding Poke Cake perfectly fits the bill. It’s designed for convenience without compromising on flavor, making it a reliable crowd-pleaser for any gathering. Whether you have unexpected guests, are heading to a potluck, or simply craving a sweet treat, this recipe is sure to delight.
RELATED: You might also enjoy exploring these delightful cake recipes: Strawberry Cake and Pistachio Pudding Bundt Cake.
The Appeal of a Poke Cake
For those unfamiliar, a “poke cake” is a brilliant dessert concept where holes are poked into a freshly baked cake, and then a liquid (like pudding, jello, or sweetened condensed milk) is poured over it, allowing it to soak into the cake, creating incredible moisture and flavor throughout. In this case, creamy banana pudding infuses every bite of our tender yellow cake, creating a dessert that truly melts in your mouth.
Effortless Preparation for Maximum Impact
The beauty of this banana pudding poke cake lies in its simplicity. Starting with a boxed yellow cake mix saves significant time and effort, making it accessible even for novice bakers. The instant banana pudding adds a rich, authentic banana flavor and a luxurious, creamy texture that permeates the cake. Topped with light whipped cream and classic Nilla Wafers, it’s a symphony of textures and flavors that evokes nostalgic memories of classic banana pudding but in a fun, shareable cake format.
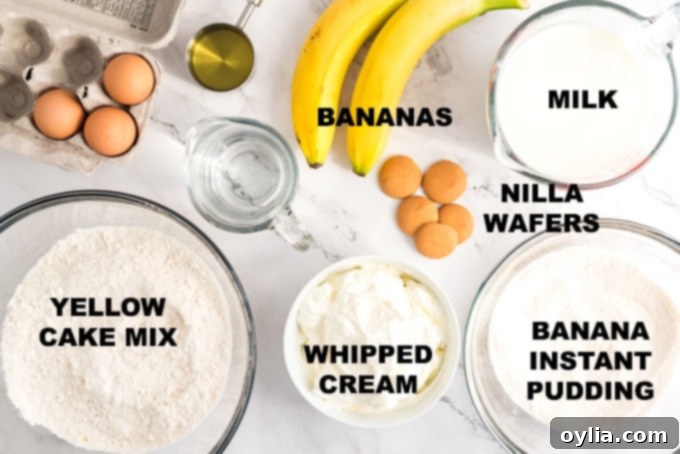
Essential Ingredients for Your Banana Pudding Poke Cake
Gathering the right ingredients is the first step to creating this delightful dessert. Here’s a detailed look at what you’ll need:
- 1 box yellow cake mix, PREPARED: A standard 15.25 oz (or similar size) box of yellow cake mix is perfect. Follow the box instructions for preparation, which typically involves adding eggs, oil, and water. A yellow cake provides a classic, comforting base that complements the banana flavor beautifully.
- 2 small boxes banana instant pudding mix: Look for two 3.4 oz boxes of instant banana pudding. The “instant” part is key for quick setting and infusing the cake efficiently. Make sure it’s not the cook-and-serve variety.
- 2-3 cups cold milk for pudding mix: The exact amount will be specified on your pudding box, usually around 2 cups per small box. Using *cold* milk is crucial for helping the instant pudding set quickly and properly, ensuring a firm, delicious layer.
- 1 container frozen whipped topping, or homemade whipped cream: A standard 8 oz container of frozen whipped topping (like Cool Whip) makes this recipe incredibly easy. If you prefer, freshly made whipped cream can also be used for an extra decadent touch. Simply whip heavy cream with a little sugar and vanilla until stiff peaks form.
- Nilla Wafers, crumbled: These iconic vanilla wafers are a cornerstone of traditional banana pudding and add a delightful crunch and sweet vanilla note to the poke cake. You’ll want to crumble a handful for topping.
- 2 sliced bananas: Fresh, ripe (but not overly ripe) bananas are essential for that authentic banana pudding flavor and a beautiful presentation. They add a fresh, natural sweetness and a soft texture contrast.
Useful kitchen tools: Having the right tools on hand will make your baking process smooth and enjoyable.
- 13×9 baking dish: The perfect size for this sheet cake, ensuring even baking and easy slicing.
- Cooling rack: Essential for allowing the cake to cool completely before adding the pudding, preventing a soggy cake.
- Electric mixer: Handy for preparing the cake mix quickly and ensuring a smooth batter.
- Wooden spoon: Perfect for poking holes in the cake, creating channels for the pudding.
- Mixing bowls: For preparing the cake batter and the instant pudding.
- Liquid measuring cup: For accurately measuring the milk for the pudding.
Expert Kitchen Tips for the Perfect Banana Pudding Poke Cake
Follow these tips to ensure your banana pudding poke cake turns out perfectly every time, from its moist texture to its beautiful presentation.
- Chill for Success: Instant pudding is incredibly simple to prepare and begins to set almost immediately. However, for the best results and easiest application of your whipped topping, it’s highly recommended to chill the cake for at least an hour after pouring the pudding over it. This crucial step allows the pudding to fully set and solidify within the cake’s poked holes, creating distinct, creamy pockets of flavor. After you’ve added the whipped topping, keep the cake covered and refrigerated until you’re ready to serve. This maintains its freshness and structure.
- Prevent Banana Browning: To keep your sliced bananas looking fresh and appealing, always add them along with the crushed Nilla Wafers just before serving the cake. Bananas oxidize quickly when exposed to air, which causes them to turn brown. By waiting until the last moment, you ensure your cake has the freshest, most vibrant appearance and taste.
- Cake Doneness: Ensure your yellow cake is fully baked but not overcooked. You can test for doneness by inserting a toothpick into the center of the cake. If it comes out clean or with a few moist crumbs, it’s ready. Overbaking can lead to a dry cake, which will detract from the overall moistness of the poke cake.
- Even Poking: When poking the holes, aim for even spacing and consistent depth. This ensures the pudding distributes uniformly throughout the cake, so every slice gets a good amount of creamy goodness. A wooden spoon handle or a large chopstick works wonderfully for this task. Wiping the spoon handle between pokes can help prevent cake lumps from sticking.
- Make-Ahead Magic: The cake and pudding layers can be prepared a day in advance. Simply bake the cake, poke the holes, add the pudding, and chill it overnight. Add the whipped topping, Nilla Wafers, and fresh bananas on the day of serving for the best texture and appearance.
How to Make Banana Pudding Poke Cake: Step-by-Step Instructions
Creating this delightful banana pudding poke cake is a straightforward and rewarding process. Follow these steps for a perfect outcome:
- Prepare Your Oven: Begin by preheating your oven to the temperature specified on your yellow cake mix box. This ensures the oven is at the correct temperature for even baking.
- Bake the Cake: Prepare and bake the cake batter according to the directions on your cake mix box, using a 13×9-inch baking pan. Ensure the cake is cooked through, usually indicated by a light golden-brown top and a springy texture when gently pressed.
- Initial Cooling: Once baked, carefully remove the cake from the oven. Let it cool in the pan on a wire rack for at least 5 minutes. This allows the cake to set slightly before the next step.
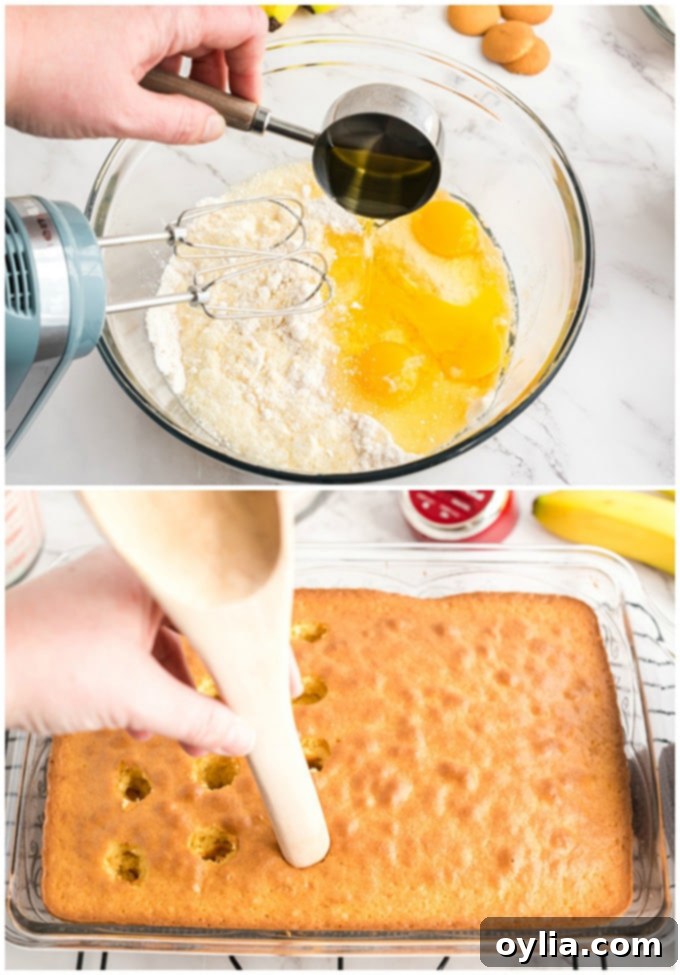
- Poke the Holes: Using the handle of a wooden spoon (or a similar blunt object), poke evenly spaced holes across the surface of the cake. Aim for holes about 1/2 to 1 inch apart, going almost to the bottom of the cake. Wiping the spoon handle occasionally will prevent cake from sticking and pulling out lumps. These holes are essential for the pudding to seep into and moisten the cake.
- Prepare the Pudding: In a separate mixing bowl, combine the cold milk and the banana instant pudding mix as directed on the pudding packet. Whisk vigorously for a couple of minutes until the mixture begins to thicken. It will start to set quickly.
- Infuse with Pudding & Chill: Once the cake has fully cooled (this is important to prevent the pudding from becoming too thin), pour the freshly mixed pudding evenly over the entire surface of the cake. Use an offset spatula or the back of a spoon to gently spread it, ensuring the pudding flows into all the poked holes and fully covers the top. Immediately transfer the cake to the refrigerator and chill for at least 1 hour. This allows the pudding to set completely and bind with the cake, creating a firm and delightful texture.
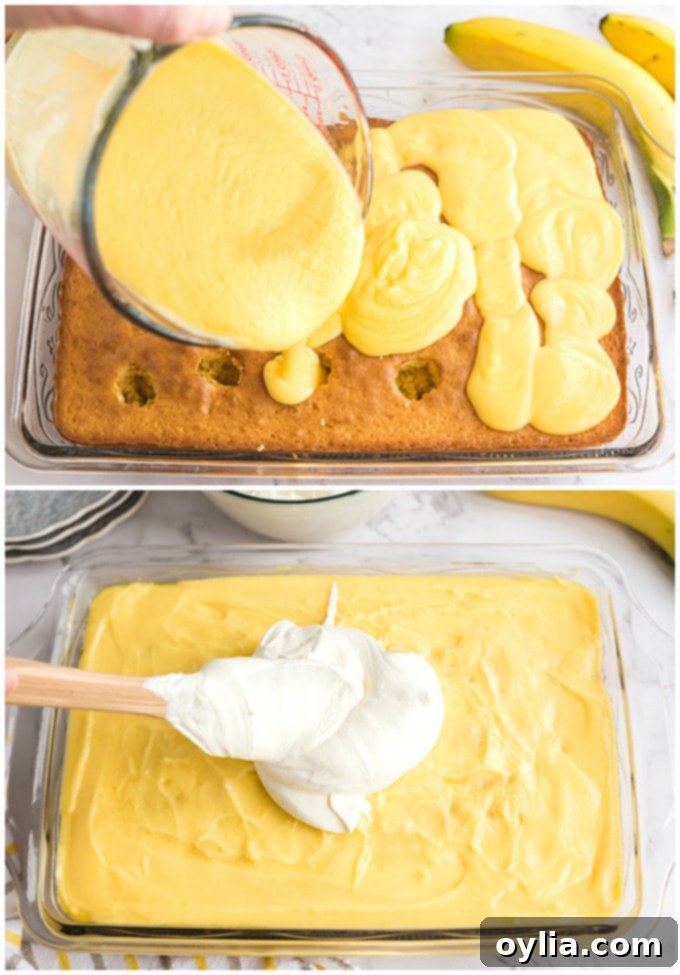
- Add Whipped Topping: Once the pudding layer is firm and chilled, spread your whipped cream or thawed whipped topping evenly over the entire pudding surface. Create soft swirls or smooth it out, depending on your preferred aesthetic.
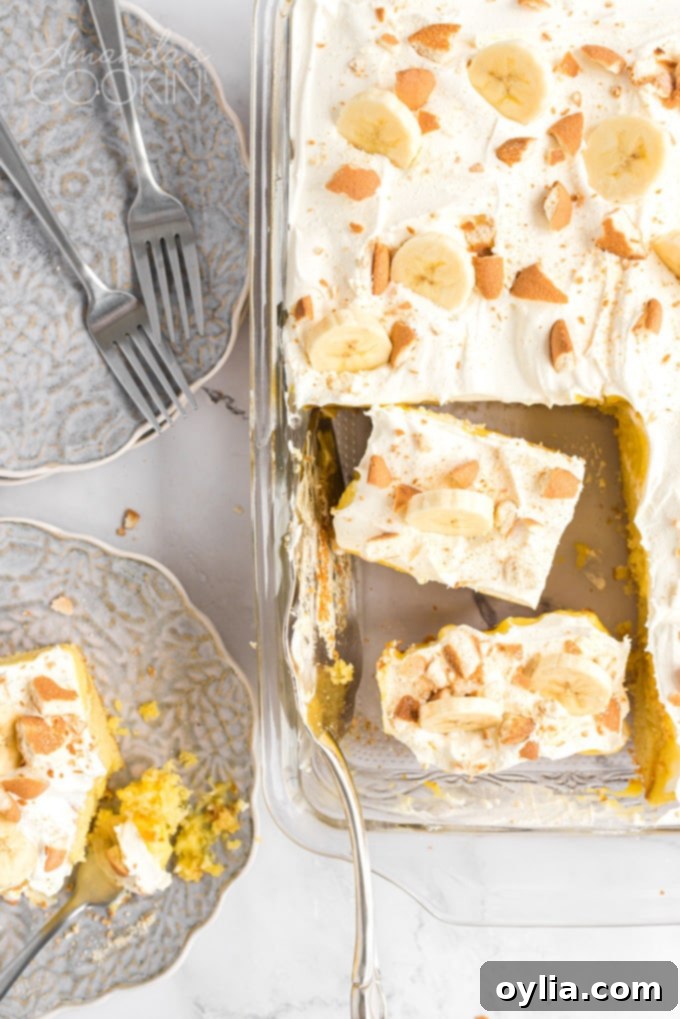
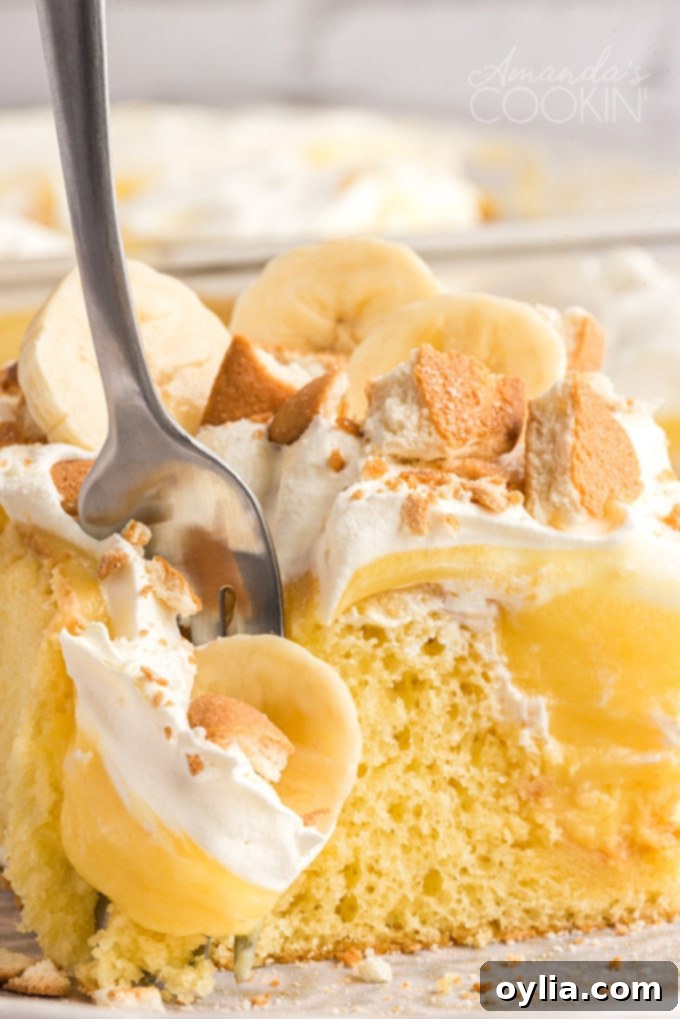
- Garnish and Serve: Just before serving, sprinkle the crumbled Nilla Wafers generously over the whipped topping. Then, arrange the freshly sliced bananas on top. Remember, adding the bananas too early will cause them to brown, so timing is key for a visually appealing dessert. Slice, serve, and enjoy!
Serving and Storage Tips
This banana pudding poke cake is best served well-chilled, allowing all the flavors to meld beautifully and the pudding to maintain its creamy texture. For optimal enjoyment, remove it from the refrigerator about 15-20 minutes before serving to let it soften just slightly, enhancing its luscious appeal.
Store any leftover cake in an airtight container or covered tightly with plastic wrap in the refrigerator. It will remain delicious for 2-3 days. Keep in mind that the fresh bananas will naturally start to brown after the first day, so if you plan on extended storage, you might consider adding the bananas only to the slices you intend to eat immediately.
Frequently Asked Questions (FAQs) About Banana Pudding Poke Cake
Here are some common questions and helpful answers to ensure your banana pudding poke cake experience is a smashing success:
- Can I use homemade cake or pudding?
Absolutely! While this recipe is designed for ease with boxed mixes, you can certainly use your favorite homemade yellow cake recipe and scratch-made banana pudding. Just ensure your cake is fully cooled before poking holes, and your homemade pudding is thick enough to fill the holes without being too runny. - What if I don’t have Nilla Wafers?
No problem! You can substitute Nilla Wafers with other crunchy cookies like shortbread cookies, graham crackers, or even vanilla sandwich cookies (like Oreos, but with vanilla cream). Lightly crushed plain butter cookies also work wonderfully. - Can I make this cake ahead of time?
Yes, you can! The cake can be baked, poked, filled with pudding, and topped with whipped cream a day in advance. Store it covered in the refrigerator. However, for the freshest appearance and taste, it’s best to add the sliced bananas and crumbled Nilla Wafers just before serving to prevent the bananas from browning and the wafers from becoming soggy. - How long does this poke cake last?
When stored properly in the refrigerator, this banana pudding poke cake is best enjoyed within 2-3 days. The texture and freshness of the bananas will diminish over time. - Can I freeze banana pudding poke cake?
Freezing is generally not recommended for this cake. The texture of the whipped topping and fresh bananas can become watery and mushy upon thawing, significantly affecting the overall quality of the dessert. - Can I use a different flavor of instant pudding?
Certainly! Feel free to experiment with other pudding flavors if you want to create a different poke cake variation. Vanilla or butterscotch pudding could be delicious, but for that authentic banana pudding taste, banana instant pudding is key.
We truly hope you love this banana pudding poke cake as much as we do! It’s guaranteed to be a big hit at parties, potlucks, barbecues, and all your holiday gatherings. Its creamy, moist, and utterly delicious profile makes it an unforgettable dessert that everyone will ask for again and again!
MORE DELIGHTFUL DESSERTS YOU WILL LOVE:
- This lemon curd poke cake is positively lovely and perfect for an elegant occasion like a bridal shower or even afternoon tea.
- If you’re an orange lover like me, this orange poke cake is definitely one you will want to try!
- This raspberry poke cake is actually one of my favorites, and I love how you can change out the flavors to whatever you like best.
- If you would like to try some more, you can find all my cake mix recipes here, all my poke cake recipes here, and ALL cake recipes here.
- Check out our Homemade Southern Banana Pudding! Topped with a delicious meringue layer, this banana pudding will be a crowd favorite.
- Don’t miss this Banana Cream Lush with a Bananas Foster sauce!
- Last but certainly not least, you don’t want to miss my all-time favorite Banana Cake recipe – paired with a delicious vanilla cream cheese frosting, this banana cake is moist and always a hit at any party!
- Lemon cream cheese pudding dessert is a no-bake dream!
- This triple Chocolate Poke Cake is a chocolate lover’s dream come true.
- Once you sink your teeth into this Easy Banana Cake topped with a banana-flavored whipped cream frosting, there’s no going back.
Banana Pudding Poke Cake
IMPORTANT – There are often Frequently Asked Questions within the blog post that you may find helpful. Simply scroll back up to read them!
Print It
Pin It
Rate It
Save It
Saved!
Ingredients
- 15 oz box yellow cake mix PREPARED as per box instructions
- 6.4 oz banana instant pudding mix (2 small boxes, approximately 3.4 oz each)
- 3 cups cold milk for pudding mix (check pudding box for exact amount)
- 8 oz container frozen whipped topping or homemade whipped cream
- 2 large bananas sliced (for topping)
- 5 Nilla wafers crumbled (for topping)
Things You’ll Need
-
13×9 baking dish
-
Wire cooling rack
-
Electric hand mixer
-
Wooden spoon
Before You Begin
- The instant pudding is very simple to make and will start to set right away. It will set up better and make it easier to apply the whipped cream or whipped topping if after you’ve added it onto the cake, you then chill it in the fridge for about an hour. After you’ve added the whipped topping you can keep the cake covered in the fridge until you are ready to serve it.
- Once you’re ready to serve you can add the crushed wafers and the sliced bananas. If you put the bananas on it too far ahead of time they will eventually start to turn brown.
Instructions
-
Preheat oven to the temperature specified on your cake mix box.
-
Prepare and bake the cake as directed on your cake mix box for a 13×9-inch pan.
-
Remove the cake from the oven and let it cool in the pan for at least 5 minutes before transferring to a wire rack to cool completely.
-
With the handle of a wooden spoon, carefully poke evenly spaced holes into the cake, almost reaching the bottom, about 1/2 to 1 inch apart. Wiping the spoon handle between pokes will prevent sticking and pulling out cake pieces.
-
In a bowl, mix together the cold milk and both boxes of banana instant pudding as directed on the pudding packets until thickened.
-
Once the cake is fully cooled, pour the mixed pudding over the cake. Spread it evenly to ensure it fills all the poked holes and fully covers the cake’s surface. Refrigerate for at least 1 hour to allow the pudding to set properly, which makes it easier to add the whipped topping.
-
Spread the whipped cream or thawed whipped topping evenly over the set pudding layer on the cake.
-
Just before serving, sprinkle the crumbled Nilla Wafers over the top, followed by the freshly sliced bananas. Remember that bananas will turn brown if cut too far ahead of time.
Nutrition
The recipes on this blog are tested with a conventional gas oven and gas stovetop. It’s important to note that some ovens, especially as they age, can cook and bake inconsistently. Using an inexpensive oven thermometer can assure you that your oven is truly heating to the proper temperature. If you use a toaster oven or countertop oven, please keep in mind that they may not distribute heat the same as a conventional full sized oven and you may need to adjust your cooking/baking times. In the case of recipes made with a pressure cooker, air fryer, slow cooker, or other appliance, a link to the appliances we use is listed within each respective recipe. For baking recipes where measurements are given by weight, please note that results may not be the same if cups are used instead, and we can’t guarantee success with that method.
This post originally appeared here on Jun 10, 2016. It has been updated and expanded for clarity and comprehensive information.
