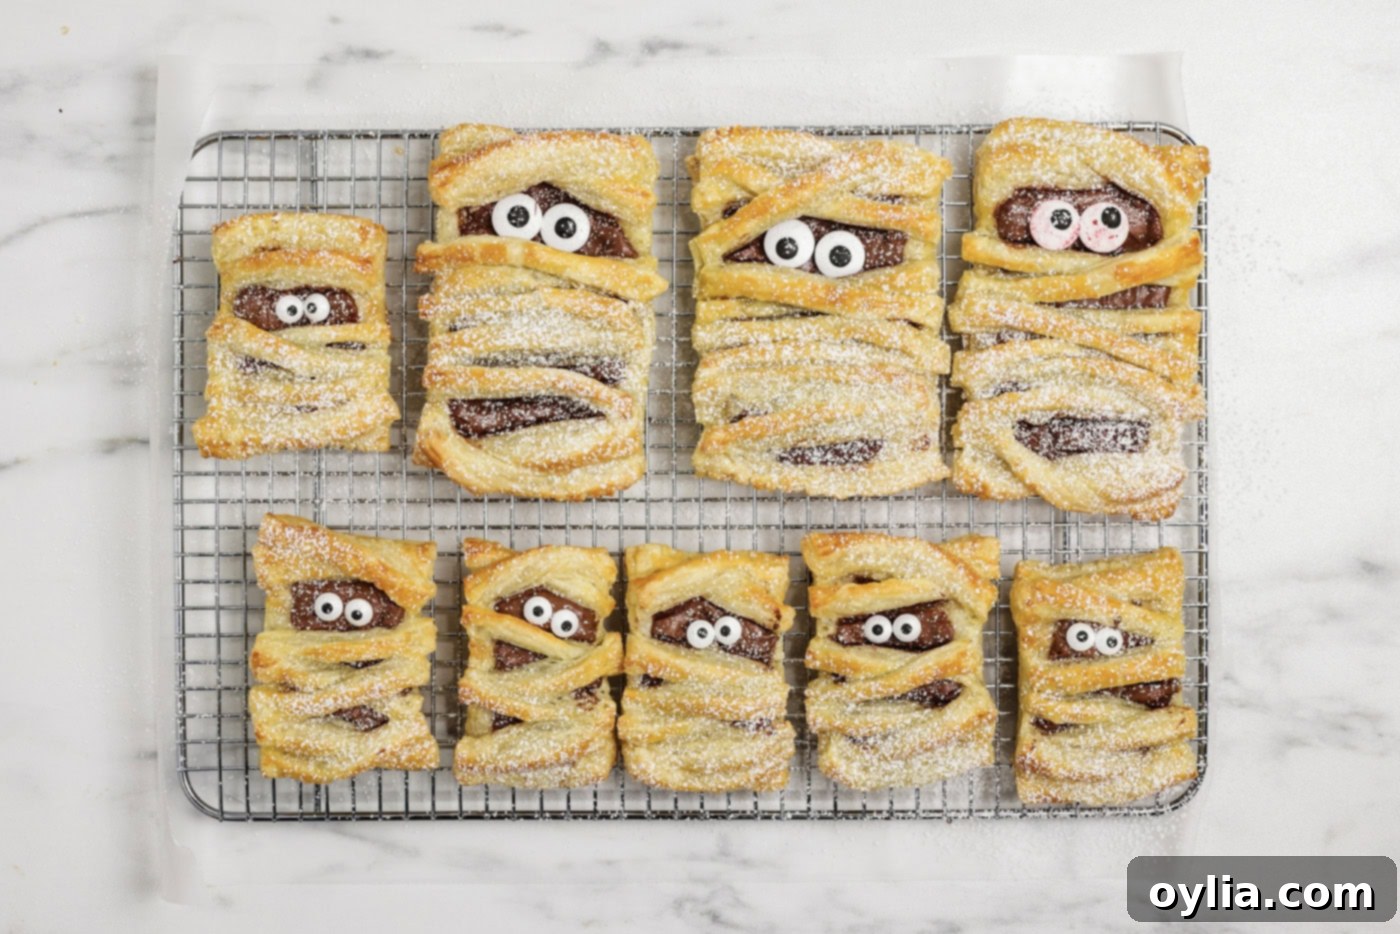
Spooktacular Mummy Hand Pies: An Easy Puff Pastry Halloween Treat Recipe
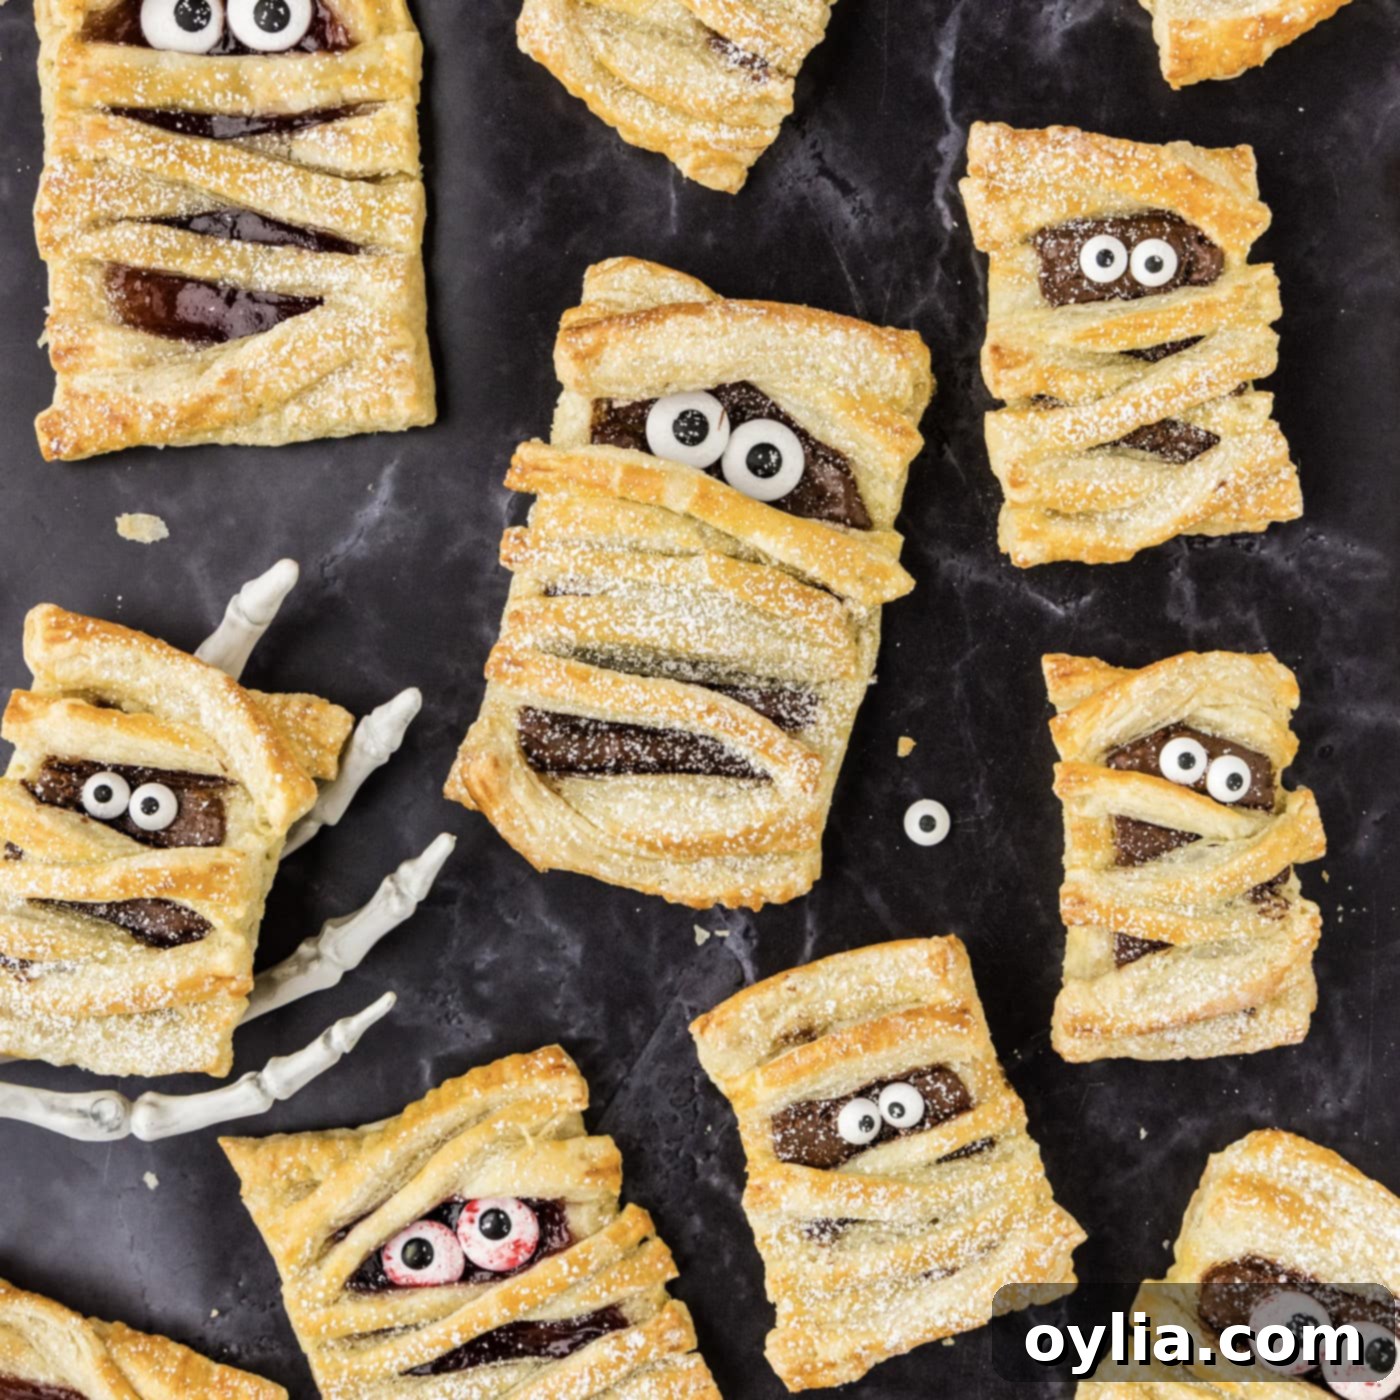
Prepare for a delightful scare this Halloween with these enchanting mummy hand pies! Beneath their deliciously flaky puff pastry “bandages” lies a sweet, gooey surprise of your favorite jam or rich Nutella. These adorable and eerie treats are not just a feast for the eyes; they are incredibly simple to bake, making them an ideal activity for Halloween parties, family fun, or simply a charming spooky snack. Get ready to wrap up some fun and flavor in every golden-brown, bite-sized pastry!
Why This Mummy Hand Pie Recipe is Your Perfect Halloween Companion
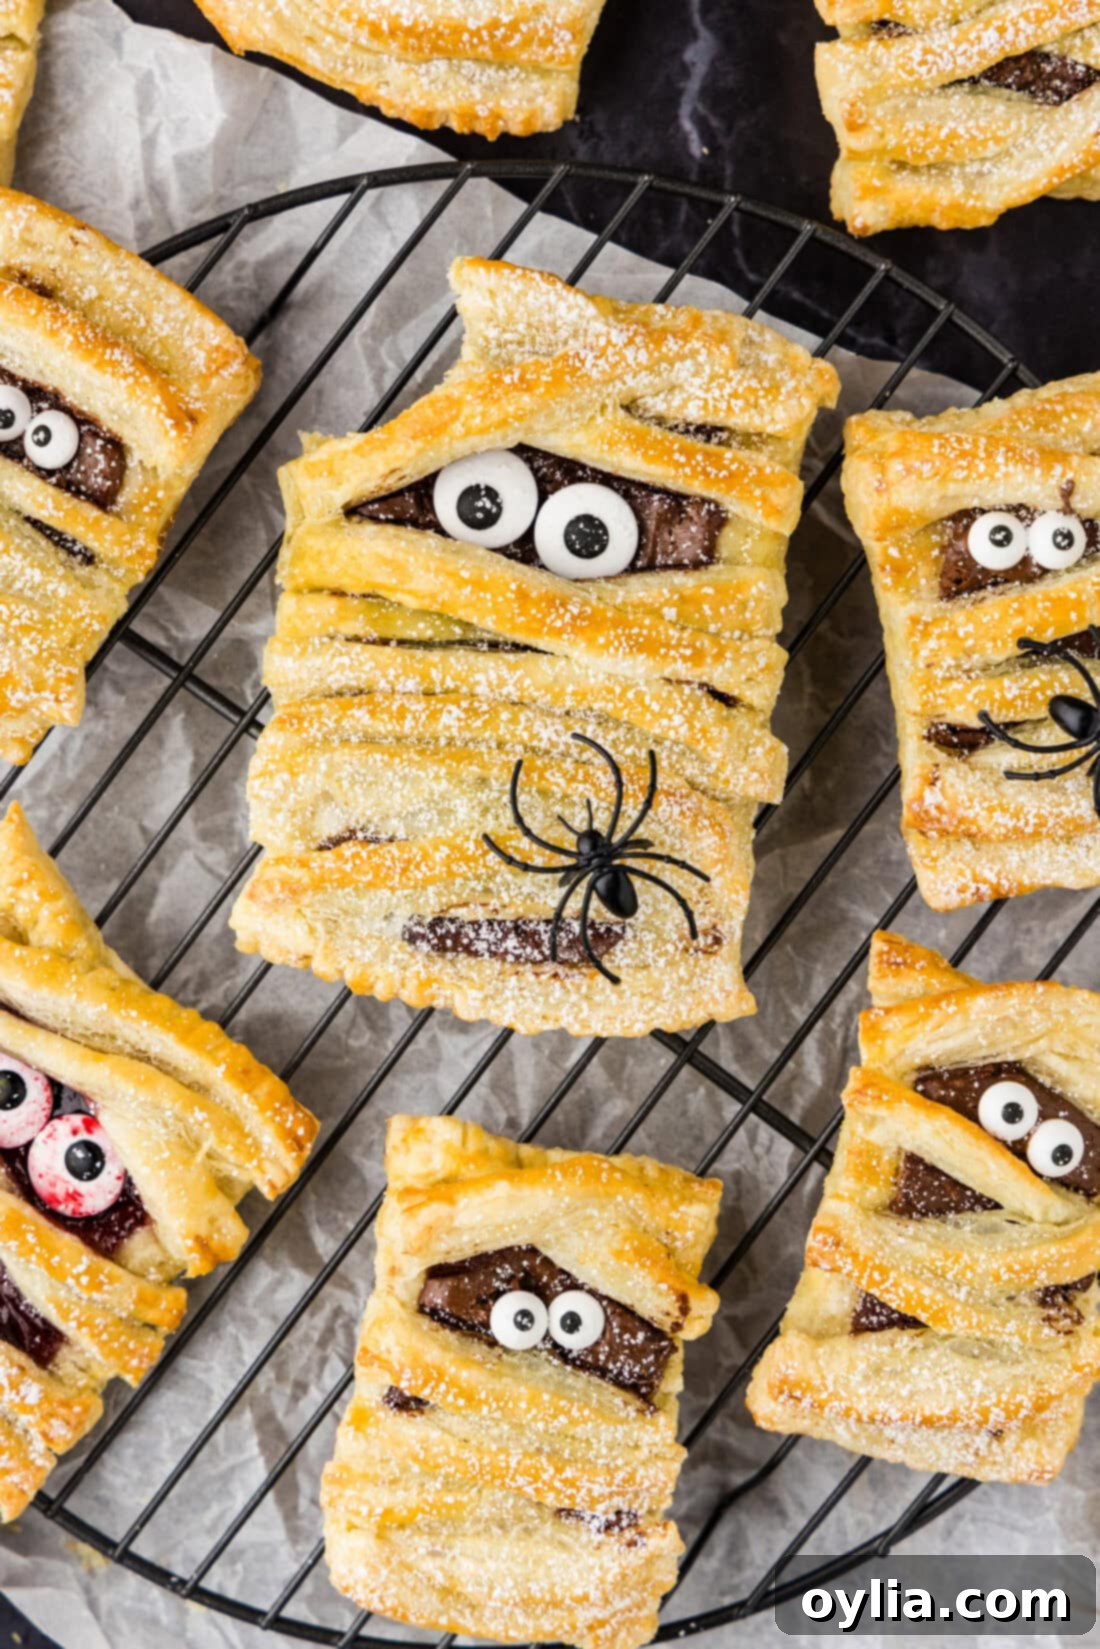
Imagine the joy of biting into a soft, crackly pastry, then discovering a vibrant, sticky red interior of fruit jam – or perhaps the rich, chocolatey goodness of Nutella! These Mummy Hand Pies deliver exactly that delightful surprise. Their unique appeal lies in their incredible versatility, allowing you to customize them with a wide array of sweet fillings. Beyond classic jams and preserves, you could even layer them with chocolate chips and peanut butter for an extra decadent twist. The true secret weapon that makes this recipe a breeze, especially during the often-hectic Halloween season, is the clever use of a box of pre-made puff pastry. This single ingredient simplifies the baking process significantly, cutting down on arduous preparation time without compromising on that irresistible flaky texture.
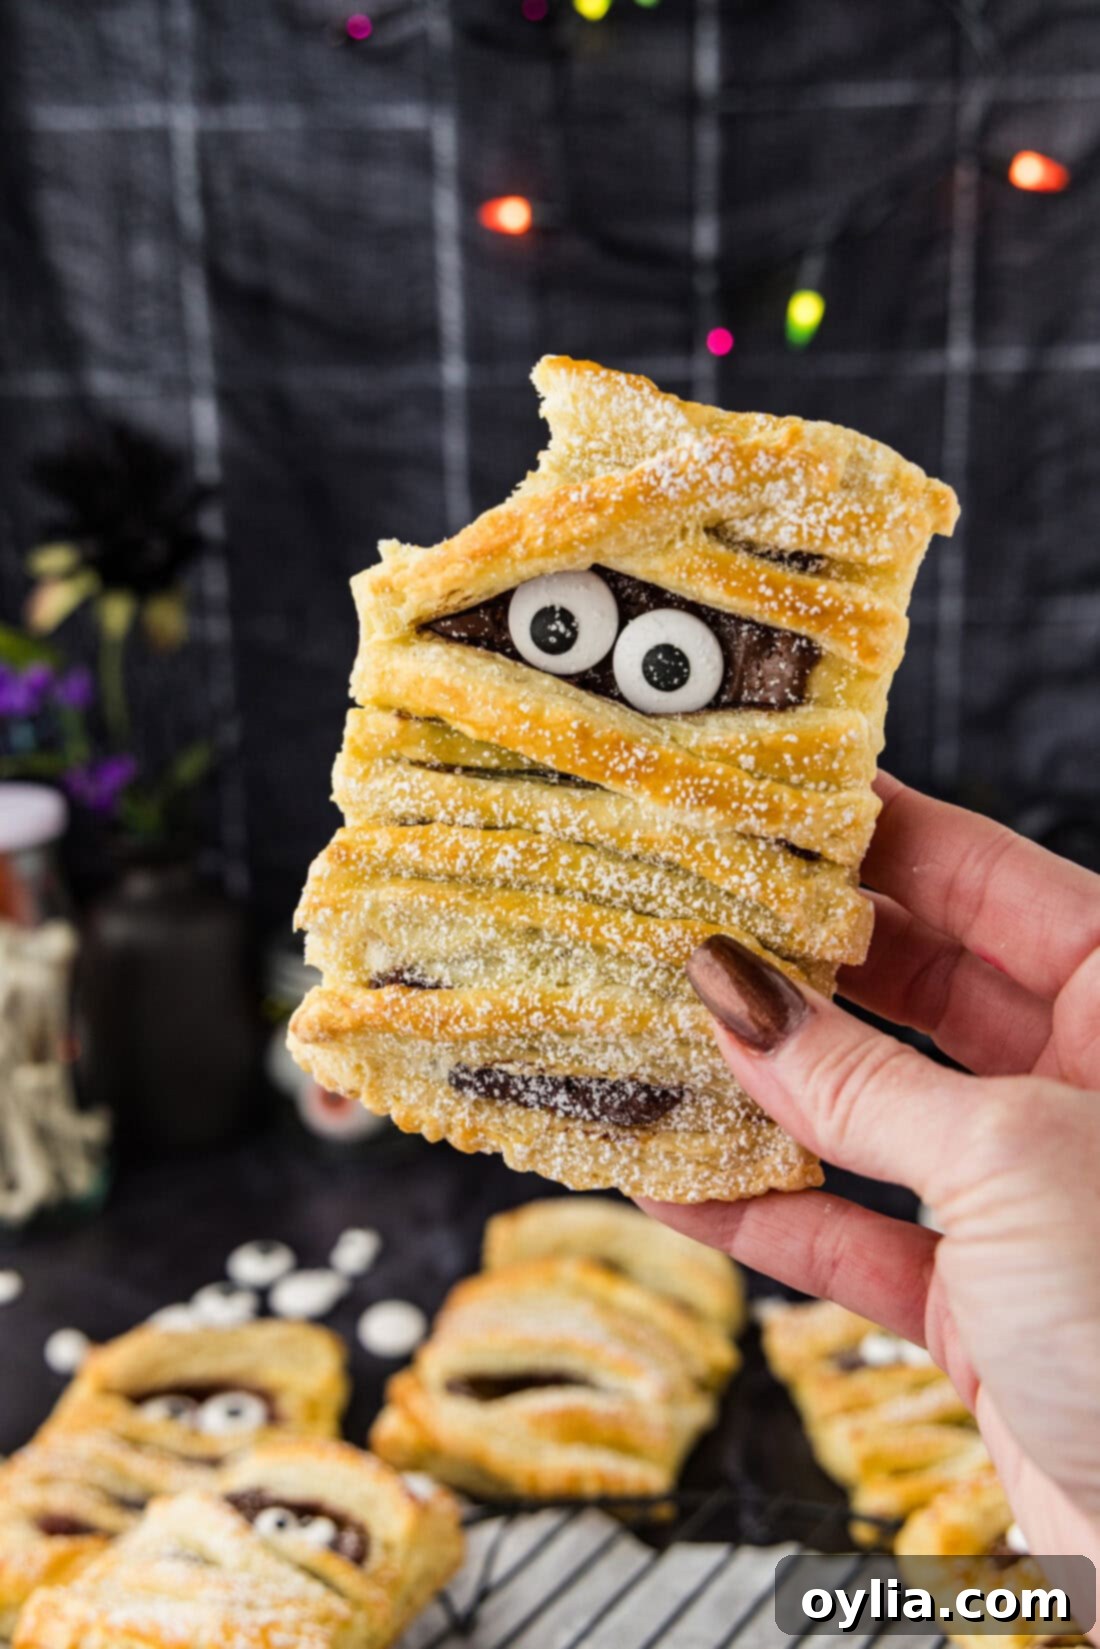
But the advantages don’t stop there. These hand pies are more than just a quick dessert; they’re an experience! They offer a fantastic opportunity to involve the whole family in holiday baking. My stepdaughter, for example, truly loved making these with me. Her enthusiasm was contagious as she helped assemble each pie and even posed for photos, all while eagerly asking when she could finally have one! Her excitement reached new heights when she requested to take a few to school to share with her friends, a testament to their universal kid-friendly appeal. The playful “bandages” and the addition of googly candy eyes transform simple fruit tarts into charmingly spooky Halloween characters, making them perfect for school parties, potlucks, or even a fun, themed breakfast treat at home. A final dusting of powdered sugar adds an extra layer of “cobweb” effect, completing their adorable, eerie look and ensuring they are as visually appealing as they are delicious.
If you’re looking to create a fully themed Halloween meal, these sweet hand pies are an excellent dessert or snack. To keep the spooky spirit alive through your main course, why not consider pairing them with a savory counterpart? For dinner, a fun and frightful option like mummy meatloaf would be a fantastic way to extend the theme. The combination of sweet and savory mummy-inspired dishes is sure to create an unforgettable and delightfully spooky feast for everyone!
Essential Ingredients for Crafting Your Spooky Mummy Hand Pies
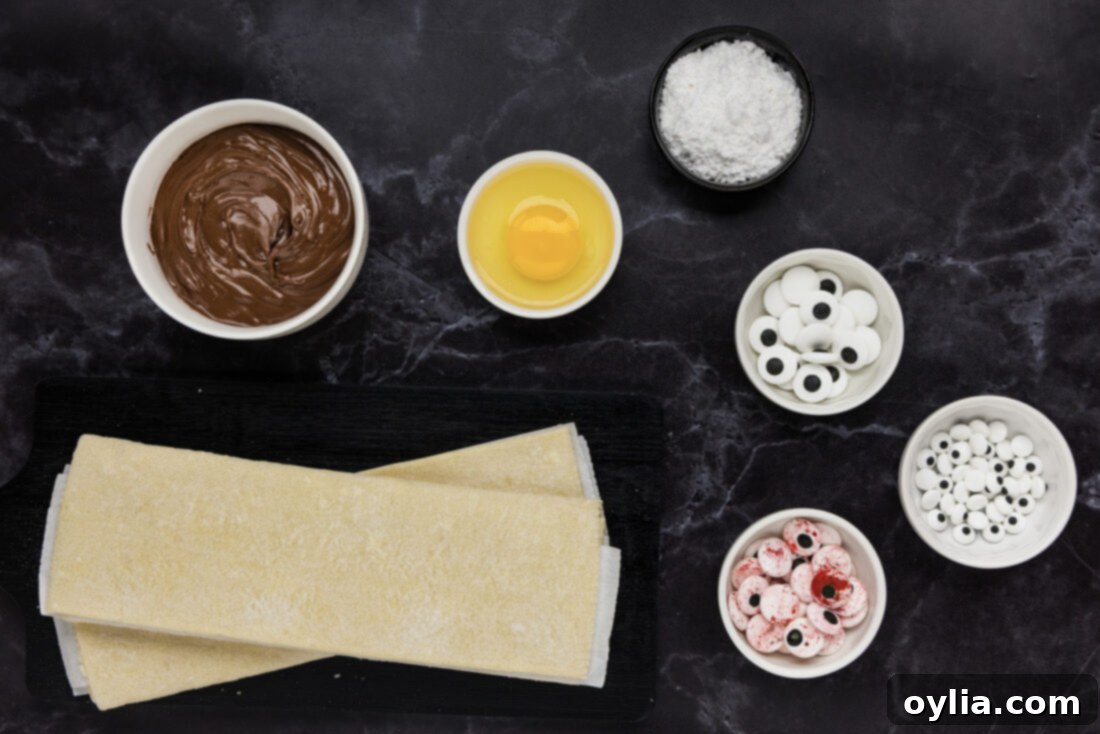
Creating these festive Halloween treats requires only a handful of common ingredients, many of which you might already have stocked in your pantry. The magic truly begins with the flaky puff pastry, which forms the iconic “mummy bandages,” and then transforms with your chosen sweet filling. For a precise and detailed list of all measurements, ingredients, and comprehensive instructions, please refer to the convenient printable recipe card located at the very end of this post. This section provides a helpful overview and essential tips for selecting and preparing each component.
Ingredient Spotlight: Detailed Information and Creative Substitution Ideas
To ensure your Mummy Hand Pies are perfectly spooky and utterly delicious, here’s a closer look at the key ingredients, along with helpful tips and creative substitution suggestions to inspire your baking:
Puff Pastry: The Foundation of Flakiness
These delightful mummy hand pies are made incredibly simple with the use of frozen puff pastry sheets. It’s a fantastic baking shortcut that consistently delivers impressive, restaurant-quality flaky results. When working with puff pastry, timing and temperature are paramount. Be sure to remove the pastry from its package well in advance of baking, particularly if it’s stored in the freezer. You want it to thaw just enough to be pliable and easy to unfold without any tearing or cracking. If it’s too stiff and cold, it will break; if it becomes too warm and soft, it will be sticky and challenging to handle and shape. The ideal texture is still cool to the touch but easily manipulated. Should you encounter any minor cracks while unfolding or cutting, don’t worry! Simply dab a wet finger onto the crack and gently press the pastry together to “mend” it seamlessly. For the best flakiness and buttery flavor, opt for a high-quality brand of puff pastry.
Filling: Endless Sweet Surprises Inside
The customizable filling is truly where the magic happens with these hand pies. For our demonstration, we utilized classic Nutella, vibrant strawberry jam, and luscious blackberry seedless jam, offering a delightful variety of flavors and colors that enhance the “spooky” appeal for Halloween. However, the possibilities for creative fillings are truly boundless:
- Nut Butters: For a creamy, rich, and satisfying interior, consider using smooth peanut butter, almond butter, or cashew butter. These can also be combined with mini chocolate chips for an extra layer of decadence.
- Fruit Preserves & Jams: Beyond the suggested strawberry and blackberry, explore options like tangy apricot preserves, sweet raspberry jam, rich blueberry jam, or even a zesty orange marmalade for a burst of citrus. Choosing smooth varieties generally makes spreading easier and results in a cleaner, more enjoyable bite.
- Pie Fillings: Transform these into miniature fruit pies by incorporating store-bought apple, cherry, or blueberry pie fillings. Just remember to gently drain any excess liquid from the pie filling beforehand to prevent a soggy bottom crust.
- Chocolate & Caramel: For a truly indulgent treat, experiment with melted chocolate, rich chocolate ganache, or a gooey drizzle of caramel sauce. A delightful mix of mini chocolate chips and a spoonful of marshmallow fluff would also create an irresistible, gooey center.
- Seasonal Butters: For a taste of autumn, pumpkin butter or spiced apple butter would be exceptional and perfectly complement the fall festivities.
Feel free to experiment with your favorite sweet combinations! Just be mindful not to overfill the pies, as this can lead to messy leaks during the baking process.
Candy Eyeballs: The Whimsical & Spooky Finishing Touch
A mummy isn’t truly complete without its iconic, watchful eyes! Candy eyeballs are the perfect whimsical addition to these mini hand pies, bringing them to life with an undeniable dash of spooky charm and character. You can find various sizes and styles to match your desired level of eerie cuteness:
- For a more subtle, slightly eerie glance, consider using these small candy eyeballs.
- If you prefer a more pronounced and classic “googly eye” effect that really stands out, regular-sized candy eyeballs work wonderfully and are widely available.
- For an extra gruesome or playfully spooky touch, bloodshot candy eyeballs can elevate the spook factor, ensuring your mummies truly make an impression at any Halloween gathering.
These edible decorations are typically easy to find in most baking supply aisles of major supermarkets or readily available online, especially during the Halloween season. They are absolutely key to transforming your simple, flaky pastries into undeniably adorable and memorable mummies.
Step-by-Step Guide: Crafting Your Own Adorable Mummy Hand Pies
This detailed section provides clear, step-by-step instructions accompanied by photos to help you visualize each stage of the baking process. For a convenient printable version of this recipe, complete with precise measurements and full instructions, you can easily Jump to the Full Recipe Card located at the bottom of this post.
- Prepare Your Oven and Baking Sheet: Begin by preheating your oven to 400°F (200°C). This ensures the oven is at the correct temperature for the pastry to puff properly. Line a large baking sheet with parchment paper. This crucial step prevents the pies from sticking and makes cleanup significantly easier, especially with potentially gooey fillings.
- Thaw the Puff Pastry: Remove the frozen puff pastry from its packaging and allow it to sit at room temperature for approximately 20-30 minutes. The goal is for the pastry to become pliable and easy to handle without tearing or sticking. If it feels too stiff, give it a few more minutes; if it becomes too soft and sticky, chill it slightly in the refrigerator for a few minutes to firm up.
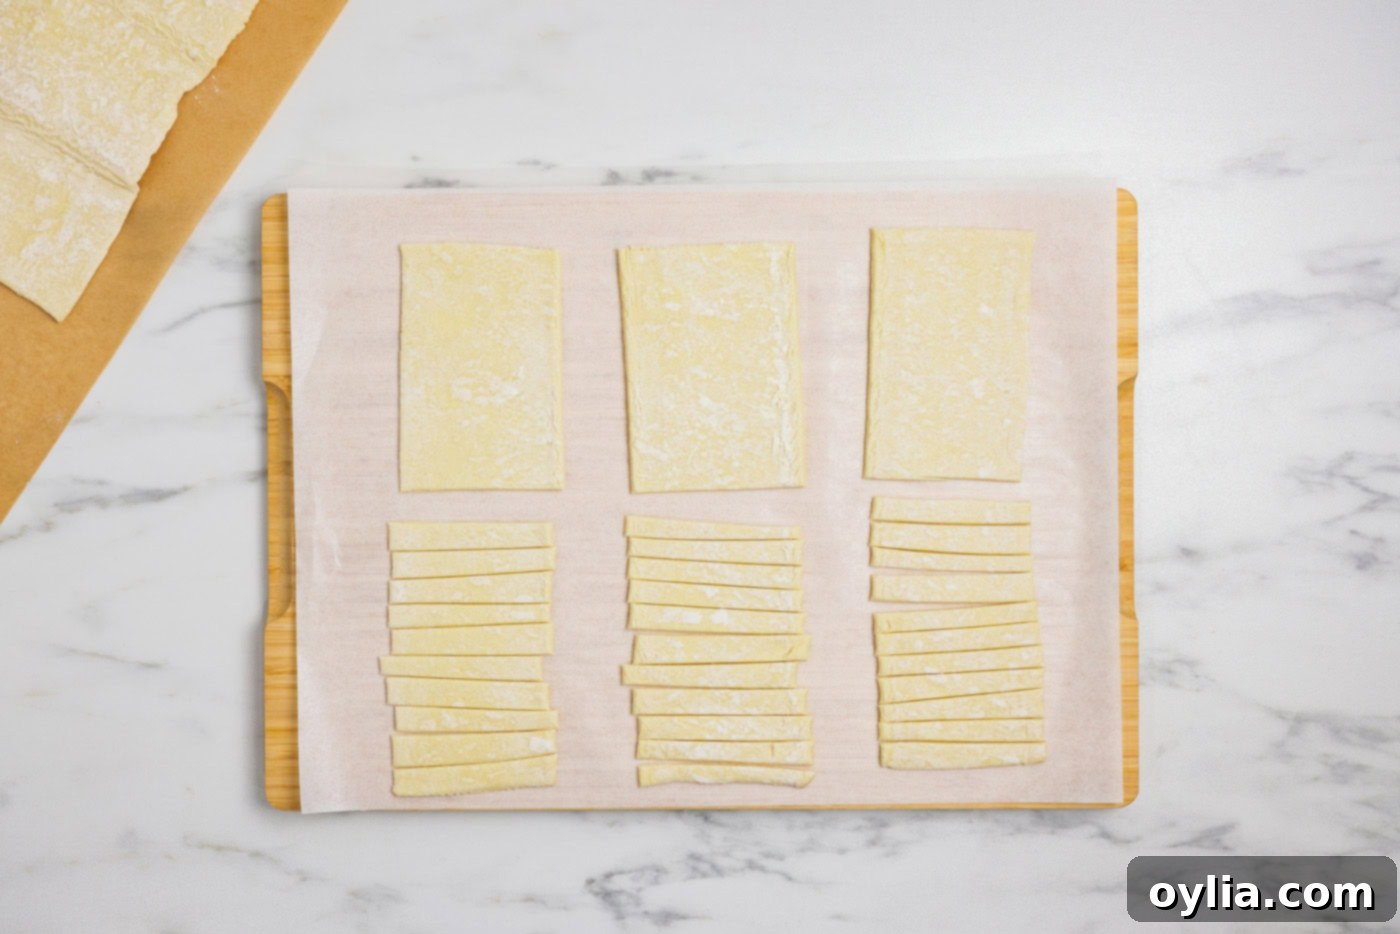
- Cut the Pastry Bases: Gently unfold the thawed puff pastry sheet on a lightly floured surface. Using a pizza cutter or a sharp knife, carefully cut the entire sheet into three equal sections lengthwise. Then, cut each of these three sections in half widthwise. This will yield a total of six rectangular pieces, which will form the sturdy bases of your mummy hand pies.
- Create Mummy Bandages: From these six rectangular bases, select three. Use your pizza cutter or knife to cut these three rectangles into thin strips, approximately ¼ to ½ inch wide. These delicate strips will meticulously serve as the “bandages” for your mummies, giving them their characteristic wrapped and ancient appearance.

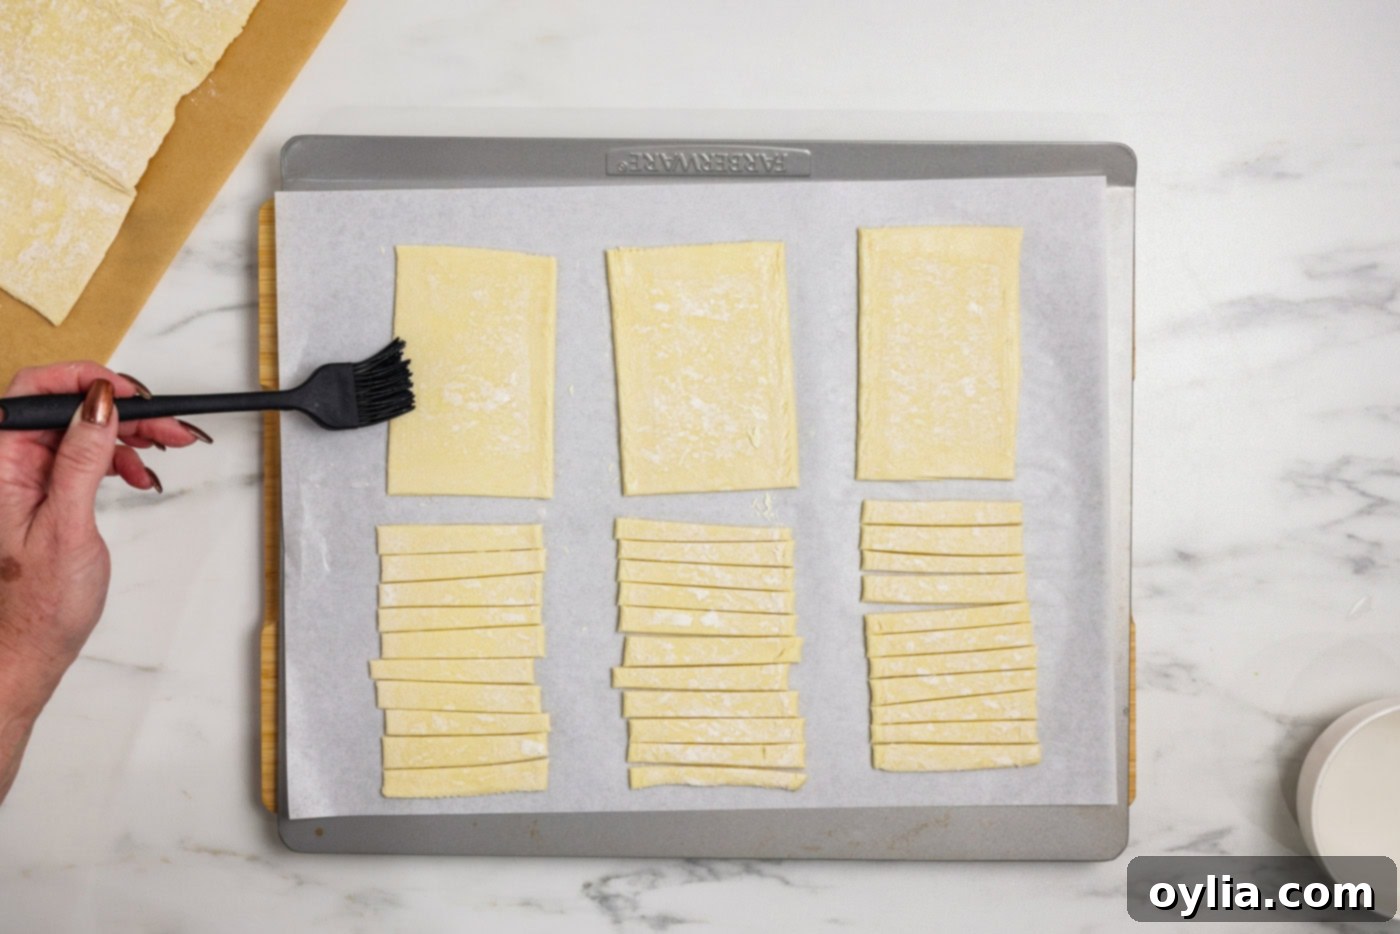
- Moisten Pastry Edges: Using a pastry brush, lightly moisten the edges of the remaining three full rectangular pastry bases with a small amount of water. This acts as a natural adhesive, helping to securely seal the top “bandages” to the bottom crust, which is essential for preventing the sweet filling from oozing out during the baking process.

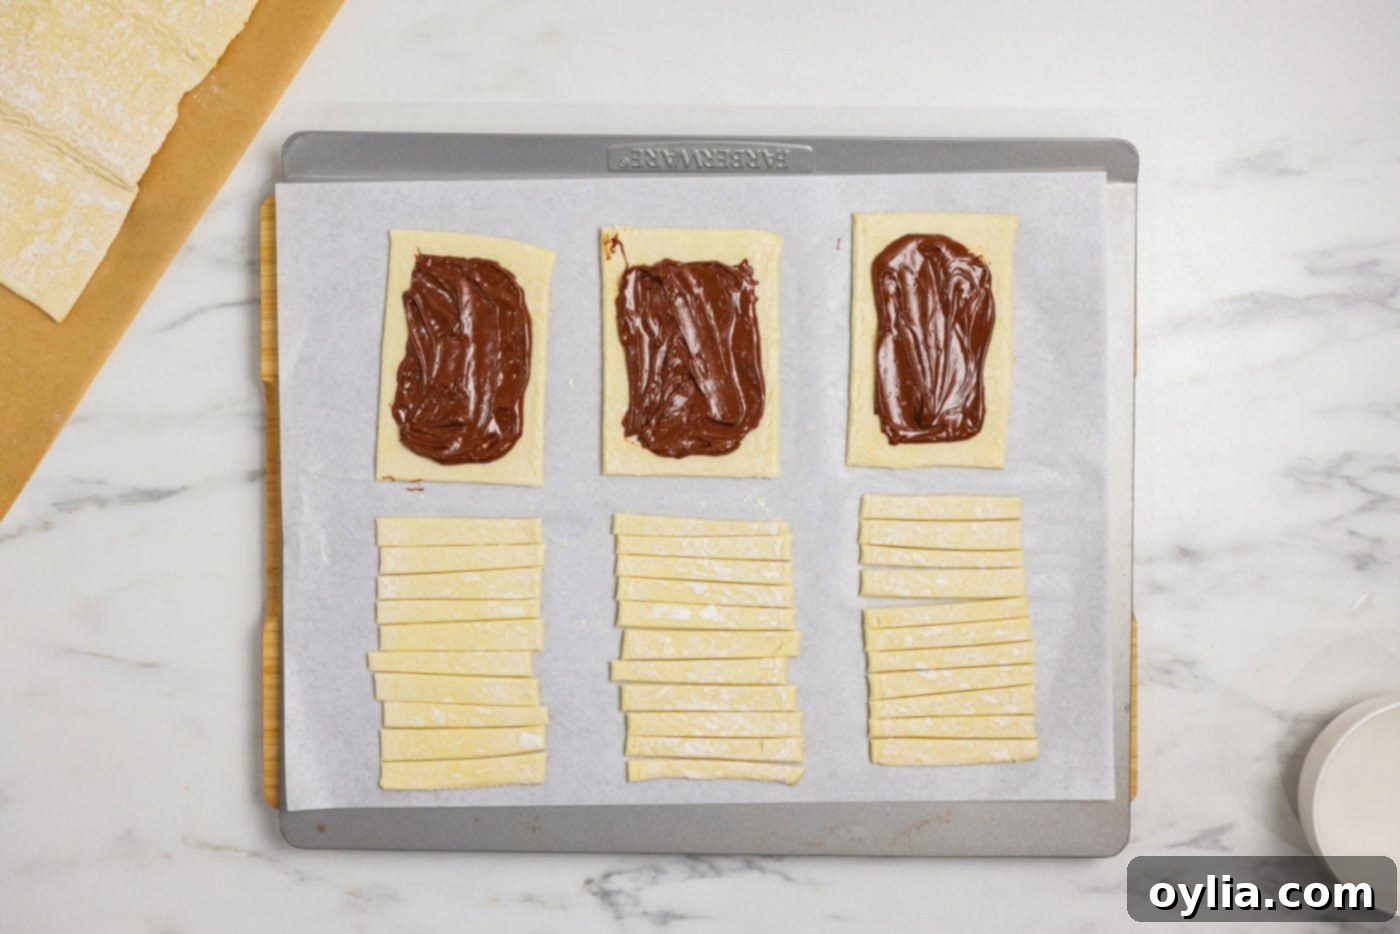
- Add the Sweet Filling: Place about 1 tablespoon of your chosen filling (Nutella or jam) in the very center of each of the three moistened pastry rectangles. Spread the filling out evenly, but be sure to maintain a clear border around the edges of the pastry. This clean border is crucial for proper sealing and preventing leaks.

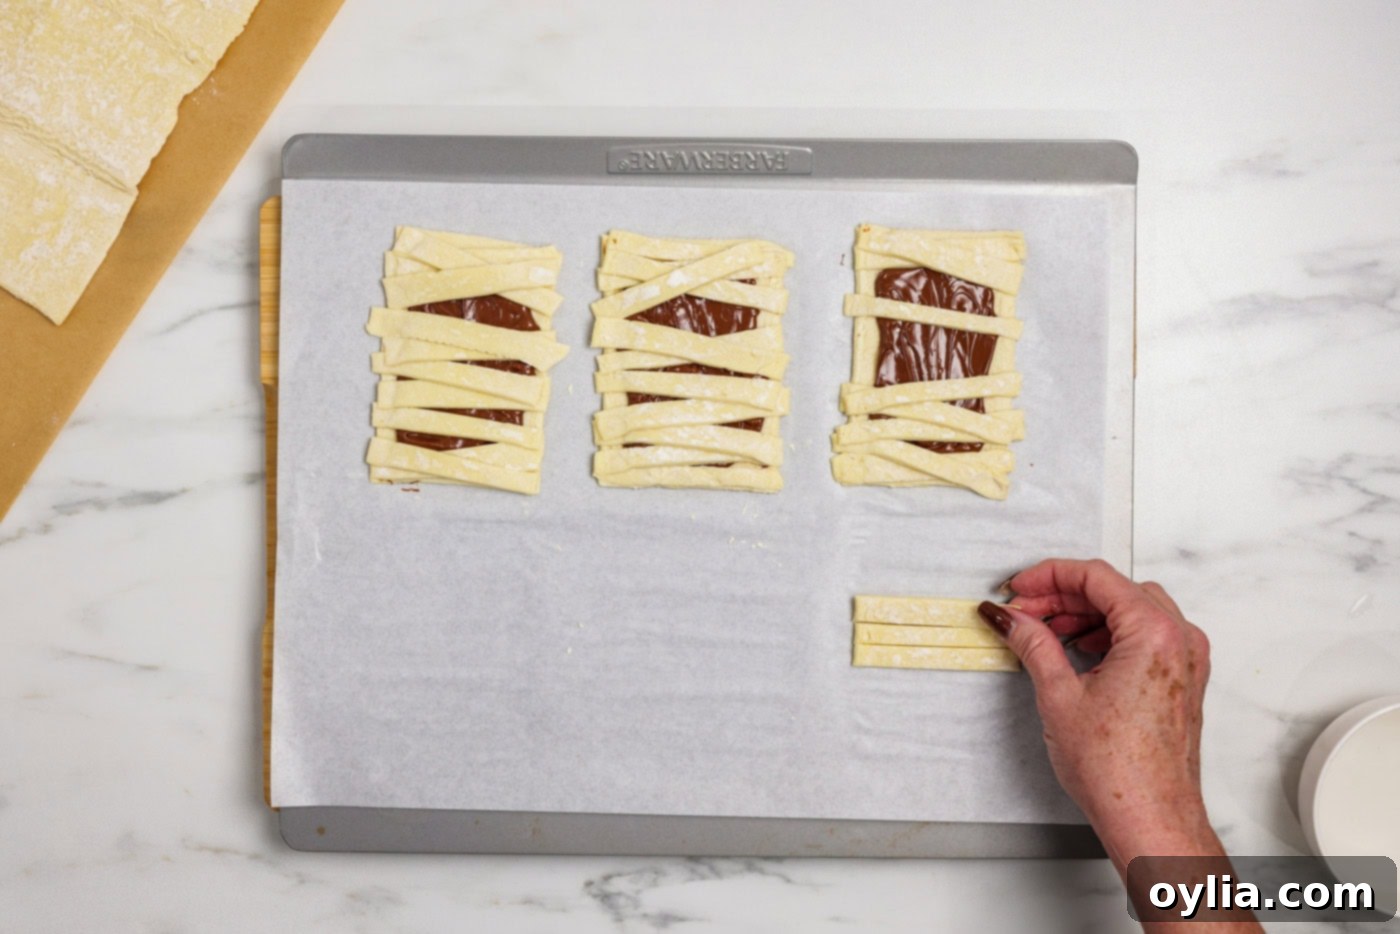
- Form the Mummy Bandages: Carefully place the pastry strips over the filling on each rectangle, criss-crossing them to artfully create a “bandaged” effect. Remember to leave a small, unfilled space in the top third of the pie. This intentional gap is where the candy eyeballs will eventually be placed, forming the mummy’s distinct face.

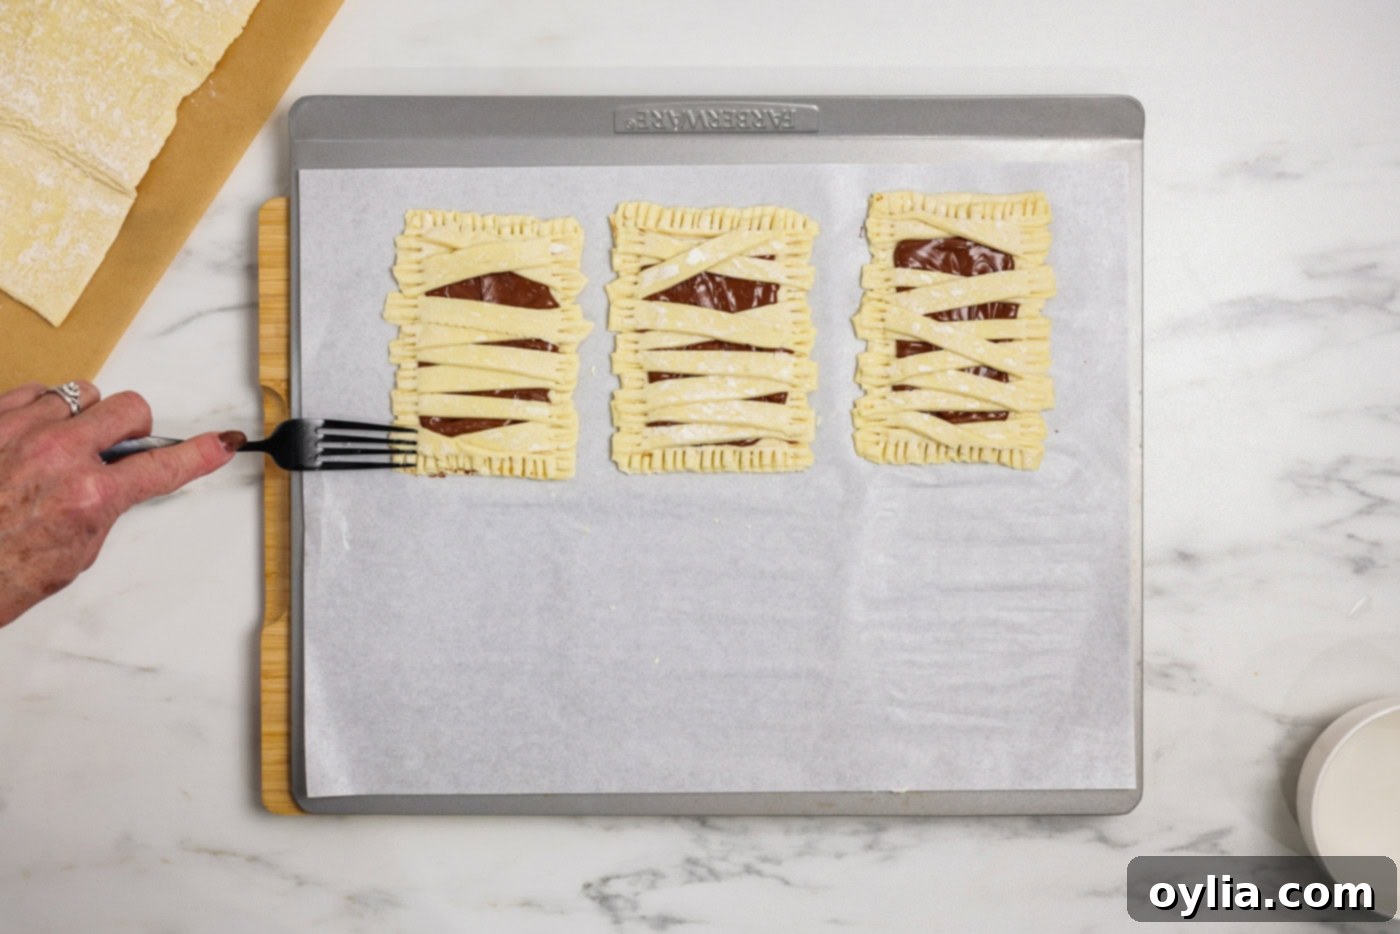
- Seal the Edges: Use the back of a fork to firmly crimp the edges of each hand pie. This not only creates a charming, decorative border but, more importantly, securely seals the pastry, preventing the filling from escaping during the baking process. If desired, you can trim any excessive pastry pieces for a neater and more uniform appearance.

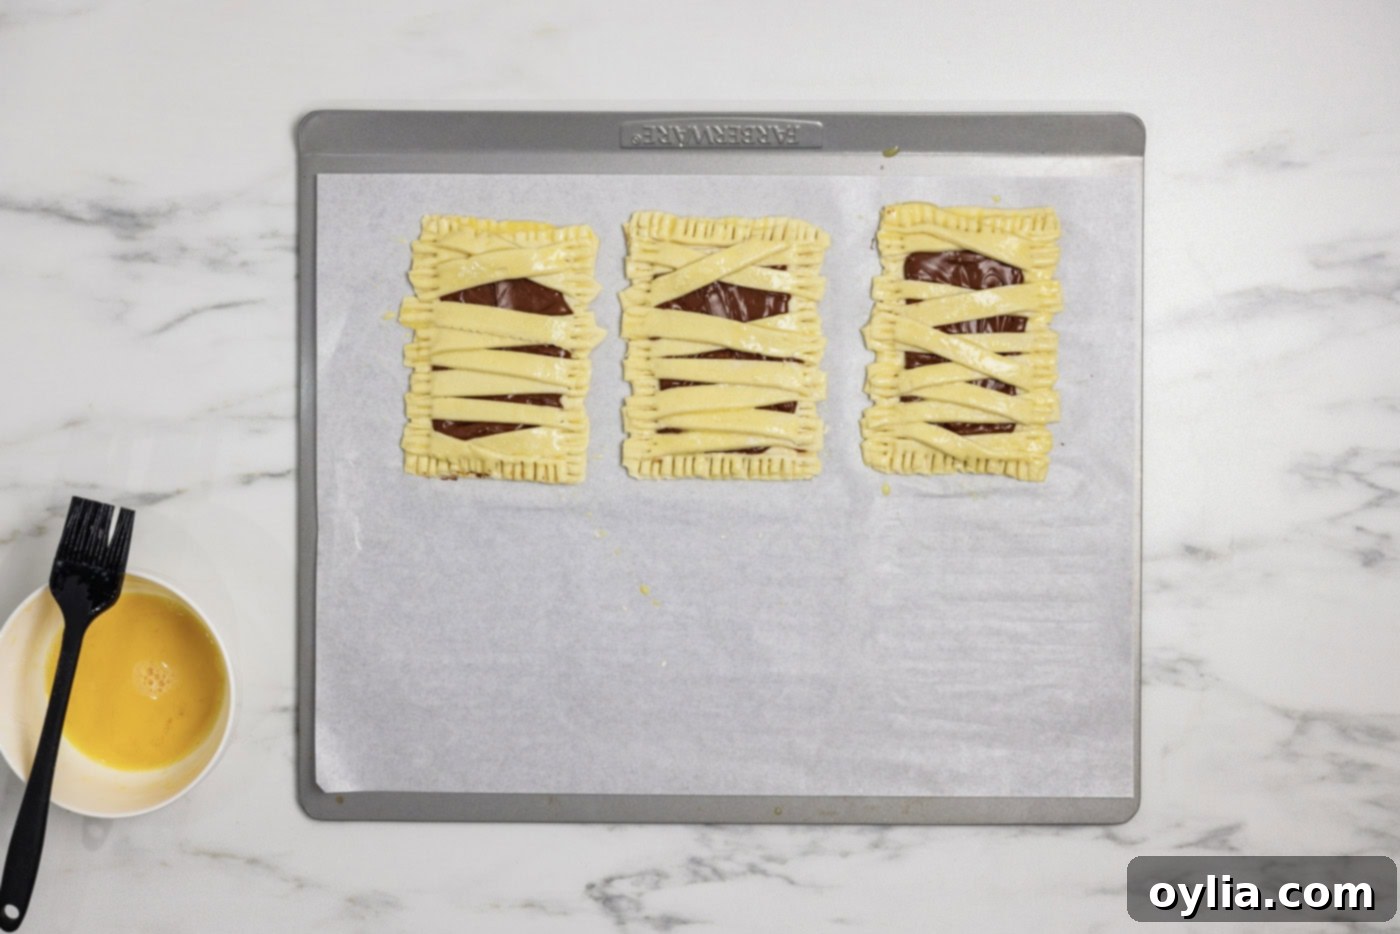
- Apply Egg Wash: In a small bowl, beat one large egg thoroughly to create an egg wash. Lightly brush this egg wash evenly over the entire surface of each mummy hand pie. This step is absolutely vital for achieving that beautiful golden-brown, shiny crust and contributes to an extra layer of crispness.

- Bake to Golden Perfection: Carefully transfer the baking sheet with the prepared hand pies to your preheated oven. Bake for 12-15 minutes. The baking time may vary slightly depending on your specific oven, so monitor them closely. The pastries should puff up significantly and transform into a beautiful golden brown, indicating they are perfectly cooked through and wonderfully flaky.
- Cool Down: Once baked, carefully remove the hot hand pies from the oven. Using a spatula, gently transfer them to a wire rack to cool completely. Cooling on a wire rack allows air to circulate all around the pies, preventing the bottoms from becoming soggy and helping to maintain their desired crispness.
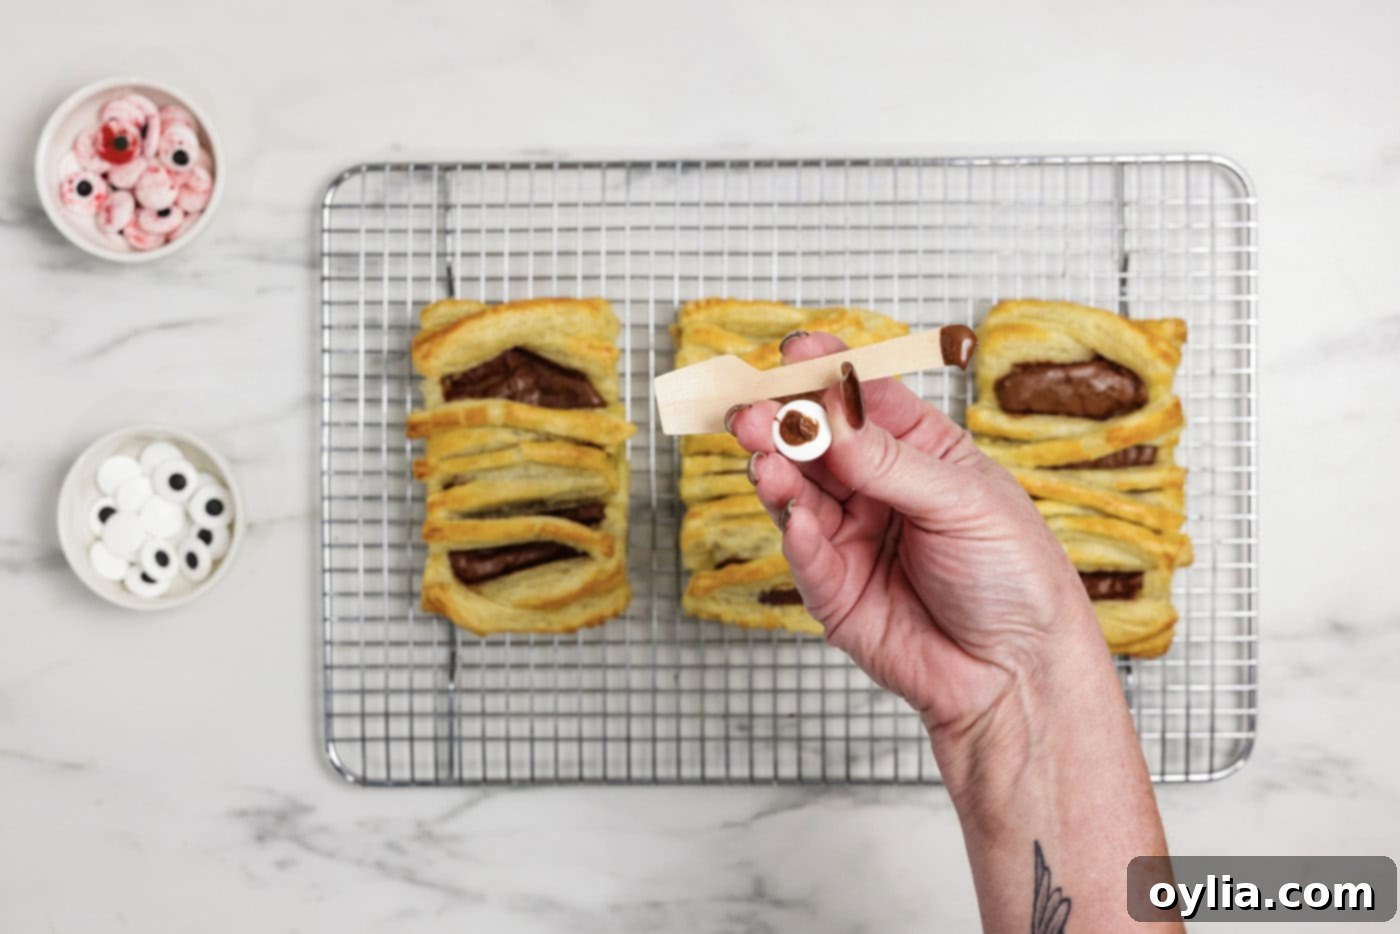
- Add the Spooky Candy Eyeballs: Once the pies have cooled sufficiently (they don’t need to be fully cold, just cool enough to comfortably handle), it’s time to add their signature feature. Dab a tiny amount of Nutella or jam on the back of each candy eyeball and carefully place them in the exposed area at the top of each hand pie. This edible “glue” ensures the eyes stay perfectly in place, truly bringing your adorable mummies to life!

- Dust with Powdered Sugar (Optional): For an extra “cobweb” or ancient, dusty mummy effect, lightly dust the cooled mummies with powdered sugar. Use a fine mesh strainer for an even and delicate application. This step not only enhances their spooky appearance but also adds another layer of subtle sweetness.

- Mini Mummy Variation: To create smaller, bite-sized mummies perfect for party platters or little hands, simply follow all the instructions above. The only modification needed is to cut your puff pastry sheet into 12 pieces instead of 6 in step 3. This adjustment will yield double the amount of adorable mini hand pies, ensuring there’s enough spooky fun for everyone!
Frequently Asked Questions & Expert Tips for Perfect Mummy Hand Pies
To ensure your Mummy Hand Pies are an absolute screaming success and enjoyed to their fullest, here are some common questions and invaluable expert advice:
Once your mummy hand pies have cooled completely to room temperature, it’s best to store any leftovers in an airtight container. They will maintain their deliciousness and a good texture at room temperature for up to 2 days, making them a convenient grab-and-go treat. For slightly extended freshness, you can also store them in the refrigerator for up to 4 days. While they are delightful at room temperature, many people enjoy them slightly warmed. You can gently reheat them in a toaster oven, a conventional oven set to a low temperature (around 250°F/120°C) for a few minutes, or even an air fryer until they are warmed through and the pastry re-crisps. A crucial word of caution: the candy eyeballs are heat-sensitive and can melt or fall off when exposed to direct heat. To avoid any sticky mishaps and preserve your mummies’ adorable expressions, I highly recommend carefully removing the candy eyeballs before reheating your hand pies and reattaching them once warmed.
Absolutely! These hand pies are excellent for making ahead, offering a couple of convenient options. You can assemble them completely (up to the egg wash step), place them on a parchment-lined baking sheet, and then freeze them until they are firm. Once frozen solid, transfer them to an airtight freezer bag or container for up to 1 month. When you’re ready to bake, simply place them directly from the freezer onto a prepared baking sheet and add a few extra minutes (typically 5-10 minutes) to the baking time. Alternatively, you can bake them entirely, let them cool completely, and then store them as described in the previous tip. This flexibility makes them perfect for busy Halloween schedules.
Puff pastry can be a bit delicate, especially if it’s too cold directly out of the refrigerator or freezer. If it cracks when you attempt to unfold it, don’t fret! Simply wet your finger with a tiny bit of water and gently press the cracked edges back together. The moisture will help the pastry adhere to itself. To prevent most cracking issues, ensure your pastry is adequately thawed but still cool to the touch – that sweet spot between frozen and overly soft.
While this particular recipe is designed for sweet fillings, the concept is incredibly adaptable for savory hand pies! Instead of jam or Nutella, you could experiment with fillings like a spoonful of pizza sauce and shredded mozzarella, a savory blend of cooked spinach and feta cheese, or even mini hot dogs wrapped in pastry to create fun “mummy dogs.” Just remember to omit the powdered sugar dusting and adjust any seasonings to complement your chosen savory filling. The egg wash, however, would still be beneficial for achieving a beautifully golden and flaky crust.
The key to perfectly puffed pastry lies in two main factors: consistent oven temperature and proper pastry handling. Ensure your oven is fully preheated to 400°F (200°C) before placing the pies inside. Also, avoid overworking the pastry; handle it gently and quickly to keep it cool. The cold butter layers within the pastry are what create the steam needed for that characteristic puff. If the pastry gets too warm, the butter melts prematurely, resulting in a less airy and flaky texture.
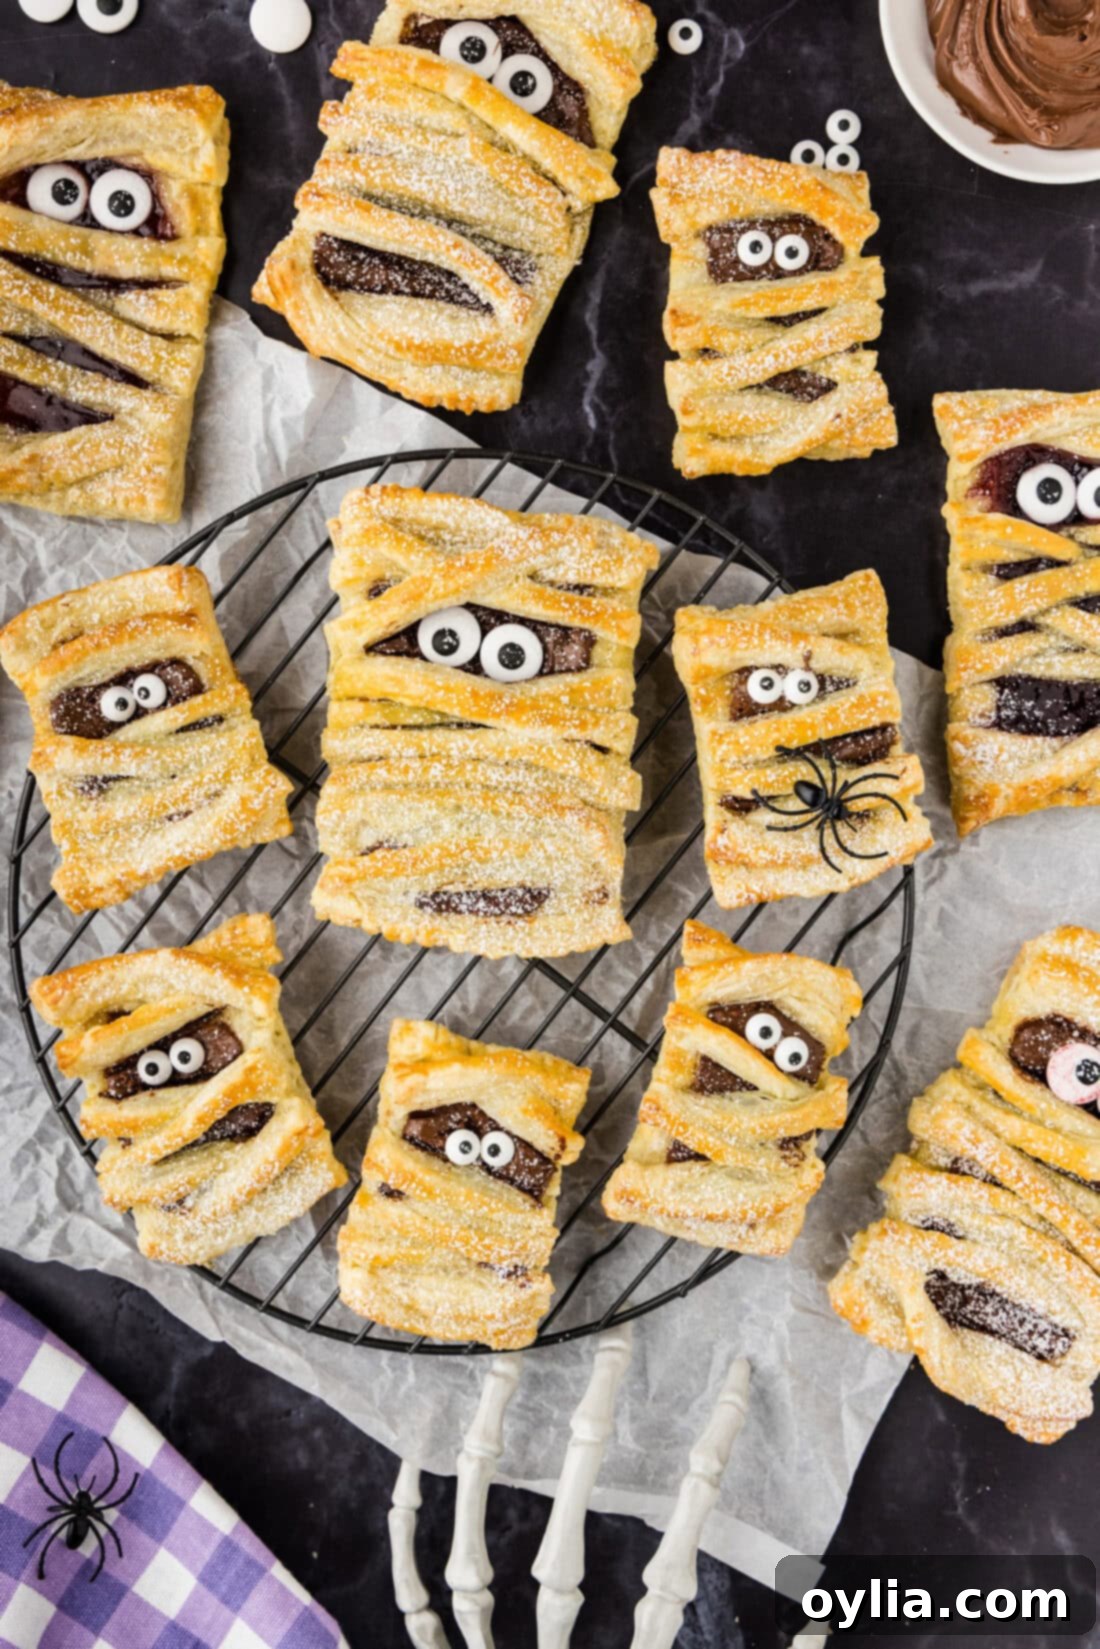
Creative Serving Suggestions for Your Spooky Treats
These Mummy Hand Pies are incredibly versatile and can be presented and enjoyed in a myriad of delightful ways, making them perfect for various occasions. Personally, I firmly believe that a light dusting of powdered sugar truly perfects their mummy-like appearance, giving them an ancient, dusty, or even “cobwebbed” finish that significantly enhances their Halloween charm. However, this aesthetic touch is entirely optional; they are undeniably delicious even without it!
Consider serving these adorable and spooky hand pies for:
- Halloween Breakfast: Kick off a spooky day with a festive and sweet start that kids and adults alike will adore.
- After-School Snack: A delightful and unexpected sweet surprise that is sure to bring smiles after a long day of school.
- Halloween Party Dessert: Their individual size makes them fantastic party desserts that are easy to pick up, serve, and enjoy without needing utensils.
- Lunchbox Treat: Pack one as a special, themed addition to a lunchbox, guaranteed to make lunchtime a little more fun.
- Ghoulish Gatherings: They are a perfect and charming addition to any fall or Halloween-themed gathering, potluck, or dessert table.
- Movie Night Snack: Enjoy them warm with a scoop of vanilla ice cream for a cozy, spooky movie night treat.
You have the wonderful flexibility to enjoy them warmed (remembering to remove those candy eyeballs first!), lightly toasted for extra crispness, or simply at room temperature. Each method offers a slightly different, yet equally delicious, experience – whether you prefer a warm and gooey center or a cool and crisp bite. It’s entirely up to your preference to decide how you’d like to savor these spooky-sweet delights!
Explore More Delightful & Spooky Halloween Recipes
If you’ve thoroughly enjoyed crafting and tasting these Mummy Hand Pies and are eager to discover more fun and frightful recipes to celebrate the season, you’re in luck! Halloween is the absolute perfect time to unleash your creativity in the kitchen with themed snacks, meals, and desserts. Here are some other fantastic Halloween-inspired recipes from our collection that are sure to be a hit with your family and friends, making your celebrations extra special:
- Mini Mummy Pizzas: Another savory twist on the mummy theme, these individual pizzas are quick to assemble, deliciously cheesy, and utterly adorable for a main course or appetizer.
- Spiderweb Taco Dip: A visually striking and incredibly delicious appetizer that is always a crowd-pleaser at any party, featuring a creepy-crawly design.
- Jalapeno Popper Mummies: For those who appreciate a little heat with their spooky treats, these are a perfect blend of creamy, spicy, and flaky, all wrapped up like a mummy.
- Cheese and Pretzel Broomsticks: A super simple, no-bake snack that’s ideal for little helpers and adds a magical, witchy touch to your Halloween food spread.
- Spooky Spider Cookies: Easy sugar cookies decorated with chocolate spiders and web designs, a classic Halloween treat.
- Ghostly Banana Pops: Healthy and fun, these frozen banana slices dipped in white chocolate and decorated with mini chocolate chips look just like friendly ghosts.
These recipes offer a fantastic range of both sweet and savory options, ensuring your Halloween spread is not only delicious but also brimming with creative and memorable themes. Happy haunting, and happy cooking!
I love to bake and cook and share my kitchen experience with all of you! Remembering to come back each day can be tough, that’s why I offer a convenient newsletter every time a new recipe posts. Simply subscribe and start receiving your free daily recipes!
Mummy Hand Pies
IMPORTANT – There are often Frequently Asked Questions within the blog post that you may find helpful. Simply scroll back up to read them!
Print It
Pin It
Rate It
Save ItSaved!
Ingredients
- 17 ounces frozen puff pastry sheet (1 box, typically containing 2 sheets)
- ½ cup Nutella or your favorite fruit jam/preserves (strawberry, blackberry, apricot work great)
- 1 large egg (for egg wash)
- 12 candy eyeballs (2 per hand pie for a spooky stare)
- powdered sugar (optional, for a “cobweb” or dusty mummy effect)
Essential Equipment You’ll Need
-
Baking sheet
-
Parchment paper
-
Pastry brush
-
Fine mesh strainer
-
Pizza cutter (or sharp knife)
-
Wire rack
Before You Begin: Important Notes & Tips for Success
- This recipe is designed to yield 6 regular-sized hand pies, perfect for individual servings. If you’re hosting a larger gathering or prefer smaller, bite-sized treats, you can easily adapt the recipe to make 12 mini hand pies by adjusting the pastry cutting dimensions in step 3.
- Puff Pastry Handling is Key: For the best results, ensure your frozen puff pastry is removed from its package and allowed to thaw at room temperature for 20-30 minutes. The ideal consistency is pliable but still cool to the touch. Avoid letting it become too soft and warm, as it will be difficult to work with and prone to sticking. If you notice any small cracks forming when unfolding, simply use a slightly wet finger to gently press and “mend” the pastry back together.
- Unleash Your Creativity with Fillings: While we highly recommend classic Nutella, strawberry jam, and blackberry seedless jam for their delicious taste and appealing colors, feel free to get creative! Other fantastic options include smooth peanut butter, rich apricot preserves, any variety of your favorite fruit jam, or even seasonal apple or pumpkin butter for a truly autumnal twist. For a richer dessert, you could also experiment with a spoonful of store-bought pie filling (like cherry or apple), just make sure to drain any excess liquid first to prevent sogginess.
- Preheat Oven Accurately: Always preheat your oven for at least 15-20 minutes before baking. An accurately preheated oven ensures the puff pastry puffs up correctly and bakes evenly to a crisp, golden perfection.
Detailed Instructions for Mummy Hand Pies
-
1. Preheat Oven & Prepare Sheet: Preheat your oven to 400°F (200°C). Line a large baking sheet with parchment paper. This vital step prevents the pies from sticking and makes cleanup a breeze, especially with delicious, gooey fillings.
-
2. Thaw Puff Pastry: Remove the 17 ounces frozen puff pastry sheet from its packaging and let it sit at room temperature for 20-30 minutes. It should become pliable and easy to handle, yet still cool to the touch, not overly soft or sticky.
-
3. Cut Pastry Bases: Gently unfold the pastry sheet on a lightly floured surface. Using a pizza cutter or a sharp knife, cut the entire sheet into three equal sections lengthwise. Then, cut each of those three sections in half widthwise. You will now have 6 rectangular pieces, which will serve as the sturdy bases for your hand pies.
-
4. Prepare Mummy Bandages: Take three of the rectangular pastry pieces and cut them into thin strips, approximately ¼ to ½ inch wide. These delicate strips will be artfully arranged to form the distinctive mummy “bandages.”

-
5. Moisten Pastry Edges: Using a pastry brush, lightly brush the edges of the remaining three full rectangular pastry pieces with water. This simple step acts as a natural adhesive, crucial for securely sealing the top strips to the bottom crust and preventing the filling from leaking during baking.
-
6. Add Sweet Filling: Spoon approximately 1 tablespoon of Nutella or jam into the center of each of the three pastry rectangles. Spread it out gently, being careful to leave a clear border around the edges. This border is essential for proper sealing.
-
7. Form Mummy Wraps: Carefully place the cut pastry strips across the Nutella or jam filling, criss-crossing them to artfully create the mummy “bandaged” effect. Remember to leave a small, unfilled space in the top third of each pie where the candy eyeballs will eventually be placed to form the mummy’s face.
-
8. Seal & Crimp: Use the back of a fork to gently but firmly crimp the edges of each hand pie. This not only seals the delicious filling inside but also adds a charming, rustic aesthetic to your mummies. Trim any excessive pastry if desired for a neater look.
-
9. Apply Egg Wash: In a small bowl, beat the 1 large egg thoroughly to create an egg wash. Lightly brush this mixture evenly over the entire surface of each mummy hand pie. This step is crucial for achieving a beautifully shiny, golden-brown, and delightfully crisp crust when baked.
-
10. Bake: Carefully transfer the baking sheet with the prepared hand pies to your preheated oven. Bake for 12-15 minutes. The pies are ready when the pastry has puffed up significantly and turned a delightful golden brown. Keep a close eye on them as oven temperatures can vary.
-
11. Cool: Once baked, carefully remove the hot hand pies from the oven. Using a spatula, gently transfer them to a wire rack to cool completely. This cooling process prevents the bottoms from becoming soggy and helps maintain their desirable crispness.
-
12. Add Eyeballs: Once the pies are cool enough to handle, use a tiny dab of Nutella or jam on the back of each of the 12 candy eyeballs to attach them to the exposed area on the hand pies. This is the magical moment your mummies truly come to life!
-
13. Dust with Sugar (Optional): For an extra spooky, “dusty” mummy effect that enhances their ancient charm, lightly dust the cooled hand pies with powdered sugar. Use a fine mesh strainer for an even and delicate application over all the mummies.
-
14. For Mini Mummies: To create smaller, bite-sized versions perfect for party platters or tiny hands, simply follow all the instructions above. The only modification is to cut your initial puff pastry sheet into 12 pieces instead of 6 in step 3. This adjustment will yield double the amount of adorable mini hand pies, ensuring there’s plenty of spooky fun for everyone!
Expert Tips & Additional FAQs for Mummy Hand Pie Perfection
- Storage and Reheating: To keep your delicious mummy hand pies fresh, store cooled leftovers in an airtight container. They’ll remain delightful at room temperature for up to 2 days, making them perfect for grab-and-go treats. For slightly longer storage, you can refrigerate them for up to 4 days. If you prefer them warm, reheat gently in a toaster, air fryer, or toaster oven. However, a crucial tip: the candy eyeballs are heat-sensitive and can melt or fall off when exposed to direct heat. To avoid any sticky mishaps and preserve your mummies’ adorable expressions, I highly recommend carefully removing the candy eyeballs before reheating your hand pies and reattaching them once warmed.
- Working with Puff Pastry Temperature: The key to achieving beautifully flaky puff pastry is keeping it cool. If your kitchen is warm and the pastry becomes overly soft and difficult to handle, don’t hesitate to pop it back into the refrigerator for 5-10 minutes to firm it up. A lightly floured surface can also help prevent sticking, but use flour sparingly to maintain the pastry’s delicate layers.
- Preventing Filling Leaks: To ensure all that delicious filling stays safely inside, make sure the edges of your pastry are well-sealed with water and crimped firmly with the back of a fork. This creates a tight barrier that traps the filling, preventing it from bubbling out and creating a mess on your baking sheet. Remember, moderation with the filling is also key – about a tablespoon is usually sufficient.
- Achieving the Perfect Golden Crust: The egg wash is your best friend here! A thorough, even brush of beaten egg across the pastry before baking will guarantee a beautifully shiny, golden-brown, and crispy crust that is as appealing to the eyes as it is to the palate.
- Creative Decorating Beyond Powdered Sugar: While powdered sugar creates a fantastic “dusty” mummy look, you can also get creative with other edible decorations. A fine drizzle of melted white chocolate or a simple icing glaze can add extra “bandages” for detail, or a touch of red food coloring mixed into a bit of jam can create a “bloody” effect for truly gruesome mummies!
- Baking Consistency: Oven temperatures can vary, especially with older appliances. Using an inexpensive oven thermometer can help you verify that your oven is truly heating to the proper temperature, ensuring consistent baking results for your hand pies and all your culinary creations.
Nutrition Information (Estimated Per Serving)
The recipes on this blog are tested with a conventional gas oven and gas stovetop. It’s important to note that some ovens, especially as they age, can cook and bake inconsistently. Using an inexpensive oven thermometer can assure you that your oven is truly heating to the proper temperature. If you use a toaster oven or countertop oven, please keep in mind that they may not distribute heat the same as a conventional full sized oven and you may need to adjust your cooking/baking times. In the case of recipes made with a pressure cooker, air fryer, slow cooker, or other appliance, a link to the appliances we use is listed within each respective recipe. For baking recipes where measurements are given by weight, please note that results may not be the same if cups are used instead, and we can’t guarantee success with that method.
