The Ultimate Guide to Making Perfect Classic Buttercream Frosting
Every home baker needs a reliable, go-to buttercream frosting recipe, and this classic version is truly a game-changer. Imagine a frosting that is incredibly smooth, delightfully fluffy, and remarkably quick to create with just four essential ingredients. Butter, pure vanilla extract, fine powdered sugar, and rich heavy cream come together in a symphony of flavor and texture, transforming simple baked goods into show-stopping masterpieces. This recipe is not just easy; it’s a foundational skill that will elevate everything you bake, making your cakes and cupcakes irresistibly delicious.
Why This Buttercream Recipe is a Must-Try
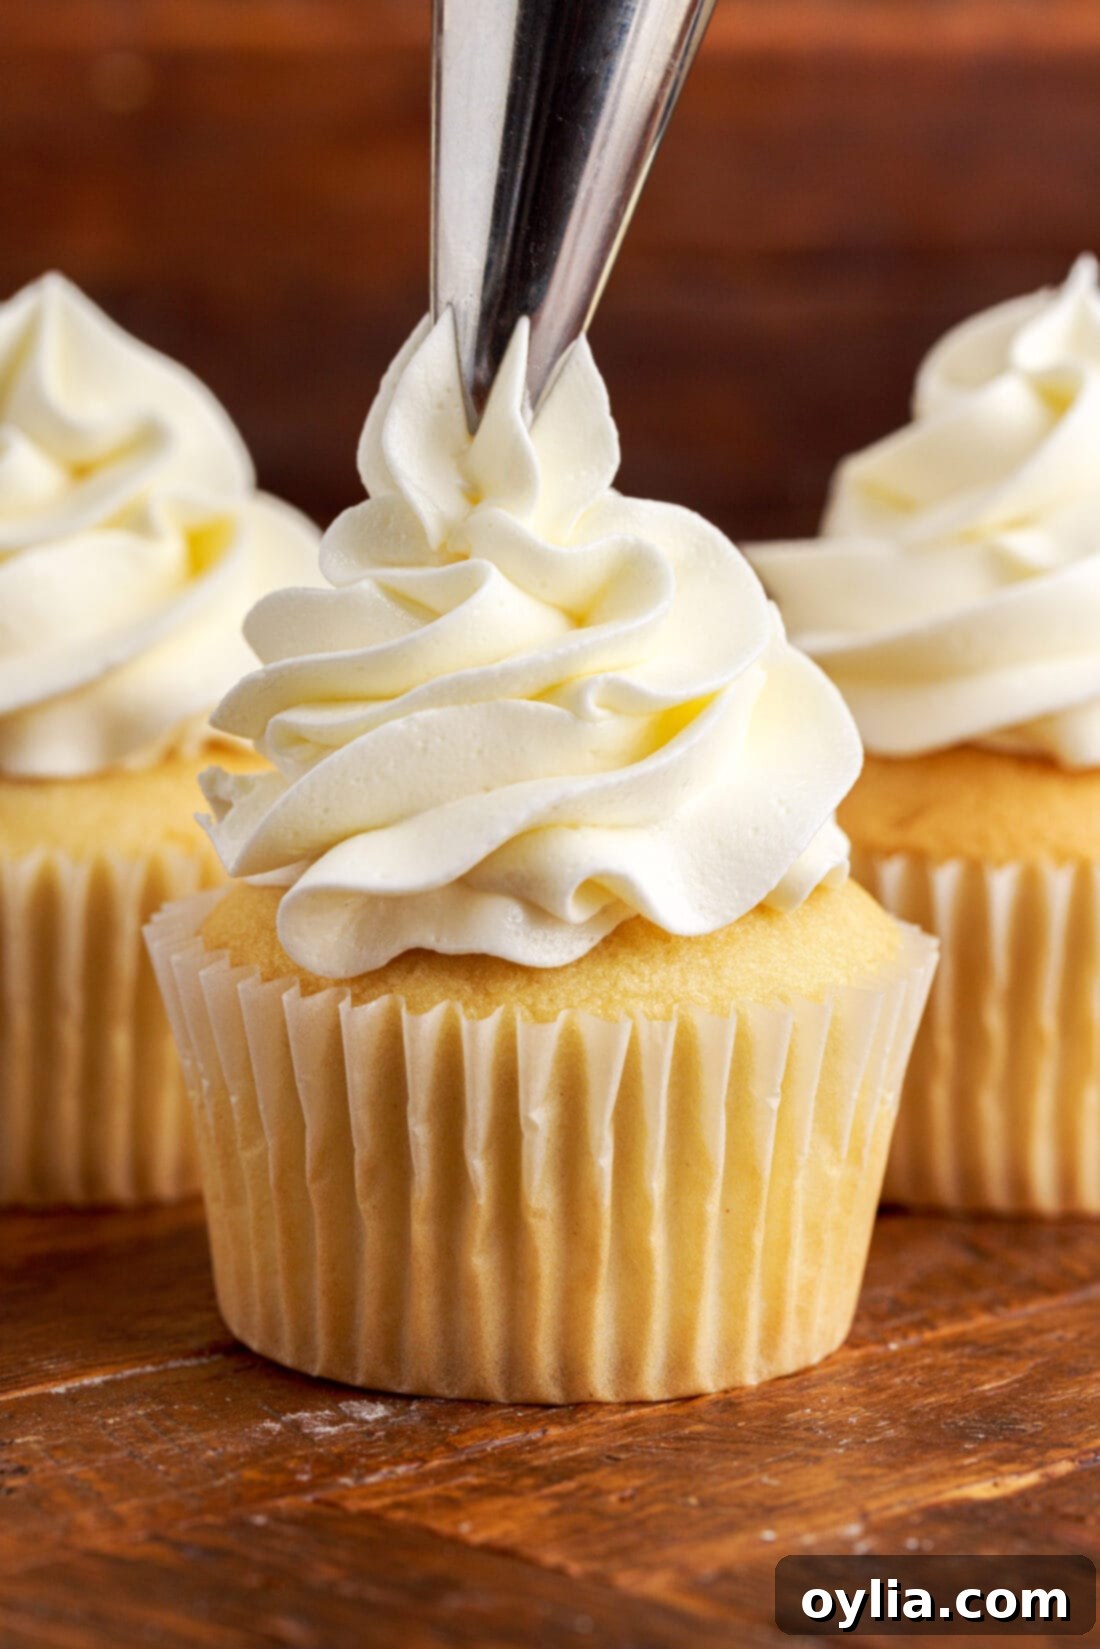
This sweet buttercream frosting stands out as a classic for many reasons, making it an indispensable tool in any baker’s arsenal. Whether you’re aiming to elegantly decorate a towering cake, pipe beautiful swirls onto a batch of cupcakes, or create a luscious filling for pastries, this recipe consistently delivers perfection. Its versatility is unmatched, adapting effortlessly to various decorating techniques and dessert applications. Unlike some finicky frostings, this American buttercream is incredibly forgiving and reliably delicious.
One of the best features of this vanilla buttercream is its adaptability. Want to add a pop of color to your celebrations? Simply incorporate a few drops of gel food coloring to match any party theme or seasonal occasion. From vibrant birthday cakes to pastel baby shower treats, the possibilities are endless. And if your palate yearns for something richer, don’t miss our indulgent chocolate fudge frosting recipe. For those who love a tangy twist, our cream cheese frosting is another fantastic option to explore. This classic vanilla base, however, remains a universal favorite, providing a sweet, creamy balance that complements almost any cake or cookie flavor.
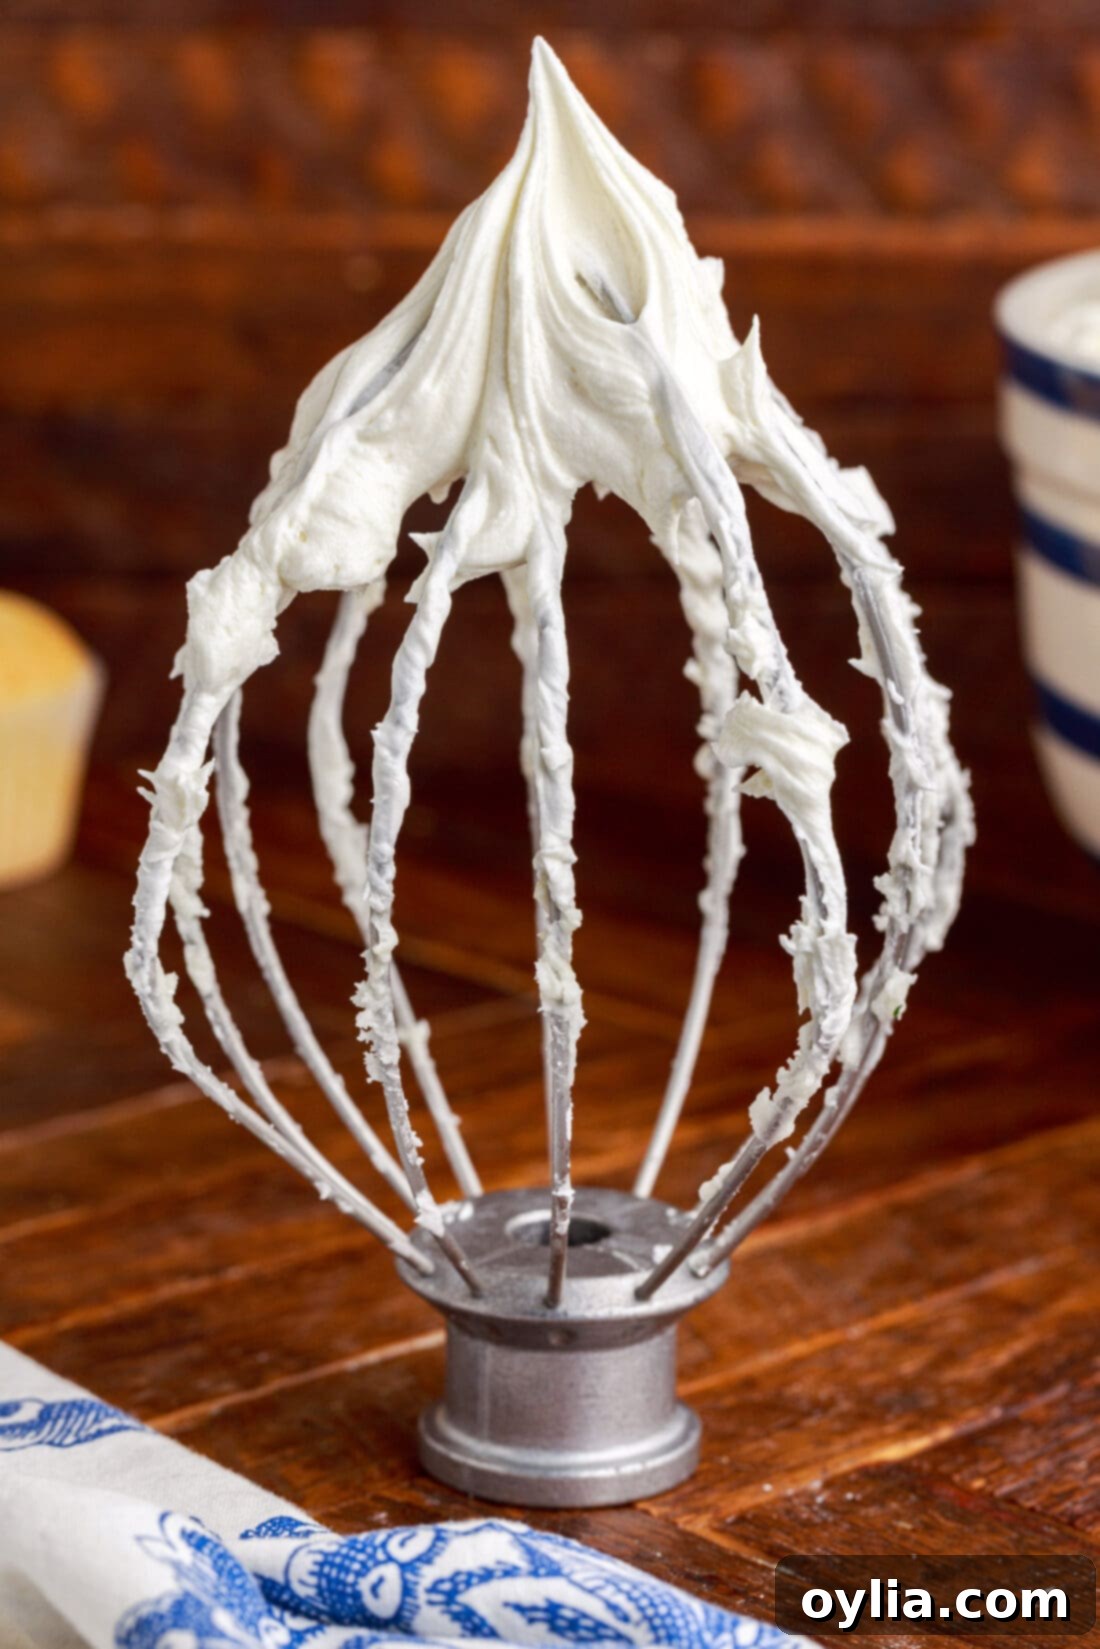
This recipe truly works because it balances simplicity with spectacular results. The method focuses on proper ingredient preparation and mixing techniques, ensuring a stable yet light consistency that holds its shape beautifully for piping and spreading. You won’t find yourself struggling with a frosting that’s too thin or too stiff; instead, you’ll achieve that ideal creamy texture every time. It’s the kind of frosting that makes everyone ask for the recipe!
Simple Ingredients for the Best Buttercream
Creating this delightful buttercream requires a handful of common pantry staples, ensuring that a delicious, homemade frosting is always within reach. The magic lies in the quality of these ingredients and how they are combined. You’ll need:
- **Unsalted Butter:** The foundation of our frosting, providing rich flavor and creamy texture.
- **Vanilla Extract:** Essential for that classic, sweet aroma and taste.
- **Powdered Sugar (Confectioners’ Sugar):** Adds sweetness and structure, dissolving smoothly for a silky finish.
- **Heavy Cream (or Heavy Whipping Cream):** The secret to achieving that coveted light, airy, and fluffy consistency.
For precise measurements and detailed instructions, scroll down to the printable recipe card at the end of this post. Having all your ingredients prepped and ready before you start mixing will make the process even smoother and more enjoyable!
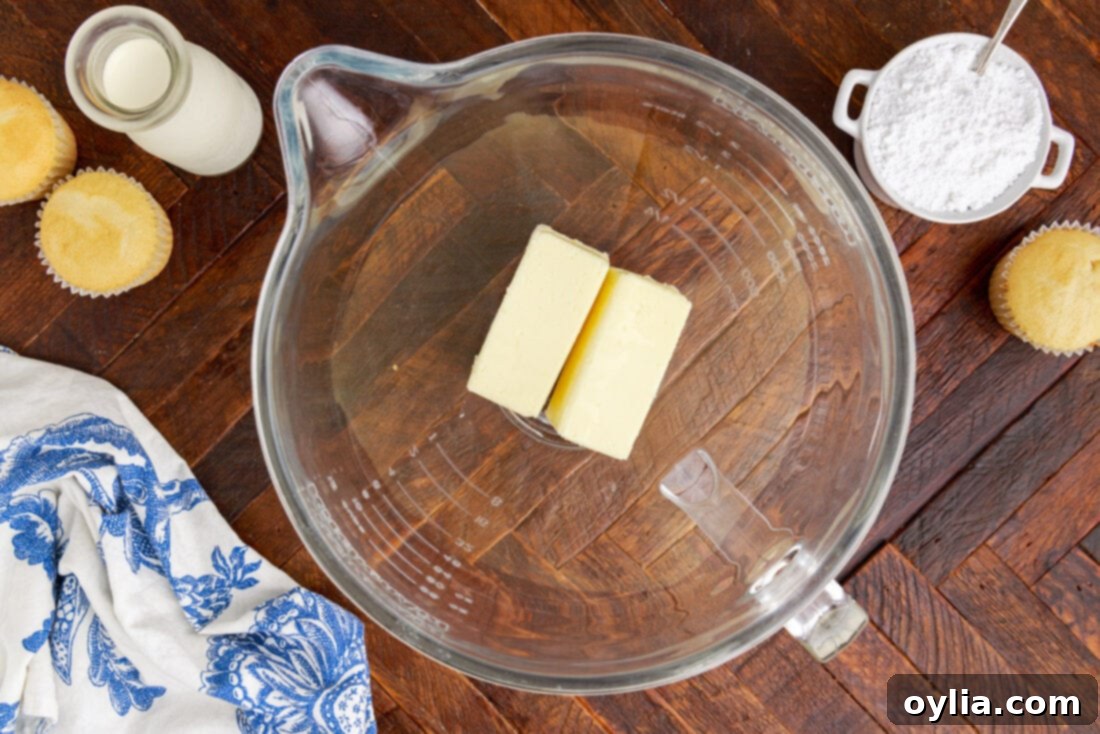
Ingredient Information and Smart Substitution Suggestions
Understanding each ingredient’s role is key to mastering this buttercream and making informed substitutions when necessary.
BUTTER – The type and temperature of your butter are critical. For the best flavor and texture, use good quality butter. We recommend **unsalted butter** as it gives you complete control over the salt content of your frosting. If you only have salted butter, you can use it, but omit any extra salt you might be tempted to add. The most important factor is that your butter is perfectly **softened to room temperature**. This doesn’t mean melted or greasy; it means soft enough to easily indent with a finger, but still cool to the touch. Softened butter creams beautifully, incorporating air for a light texture and emulsifying properly with the other ingredients, preventing a lumpy or greasy frosting. To achieve this, simply slice your butter into cubes and let it sit on your kitchen counter for 30-45 minutes. Never microwave your butter to soften it, as this will melt it unevenly and disrupt the emulsion, leading to a runny, greasy frosting that won’t whip correctly.
HEAVY CREAM – Heavy cream is what gives this buttercream its luxurious, fluffy, and smooth consistency. When whipped, the fat in the cream helps create a stable, airy structure that holds its shape for piping and decorating. While heavy cream is ideal, you can substitute it with whole milk, regular milk, or even almond milk. However, be aware that these substitutions will result in a thinner consistency and a less stable frosting. Milk, especially lower-fat varieties, won’t whip up as well as heavy cream and may produce a runnier frosting that is harder to pipe. If substituting, add the milk very gradually, perhaps starting with half the amount specified for heavy cream, and add more sparingly until you reach your desired consistency. You’ll need to use your best judgment here, as adding too much liquid will prevent the frosting from becoming stable enough for elaborate decorations.
POWDERED SUGAR – Also known as confectioners’ sugar, powdered sugar provides the sweetness and a silky-smooth finish to your buttercream. Its fine texture dissolves easily into the butter, creating a uniform consistency without any grittiness. While not strictly necessary for this recipe, for an extra-smooth frosting, especially if you live in a humid environment or your powdered sugar has a tendency to clump, you can sift it before adding it to the butter. This helps remove any lumps and ensures a truly velvety end product.
VANILLA EXTRACT – A good quality vanilla extract is essential for the classic, comforting flavor of this buttercream. Don’t skimp on this ingredient! Pure vanilla extract offers a much richer and more authentic taste compared to artificial vanilla flavoring. You can also experiment with other extracts like almond, peppermint, lemon, or even a touch of bourbon for different flavor profiles, depending on the dessert you are pairing it with.
How to Make the Best Classic Buttercream Frosting
These step-by-step photos and instructions are here to help you visualize how to make this recipe perfectly. For a printable version of this recipe, complete with precise measurements and instructions, simply jump to the recipe card at the bottom of the page.
-
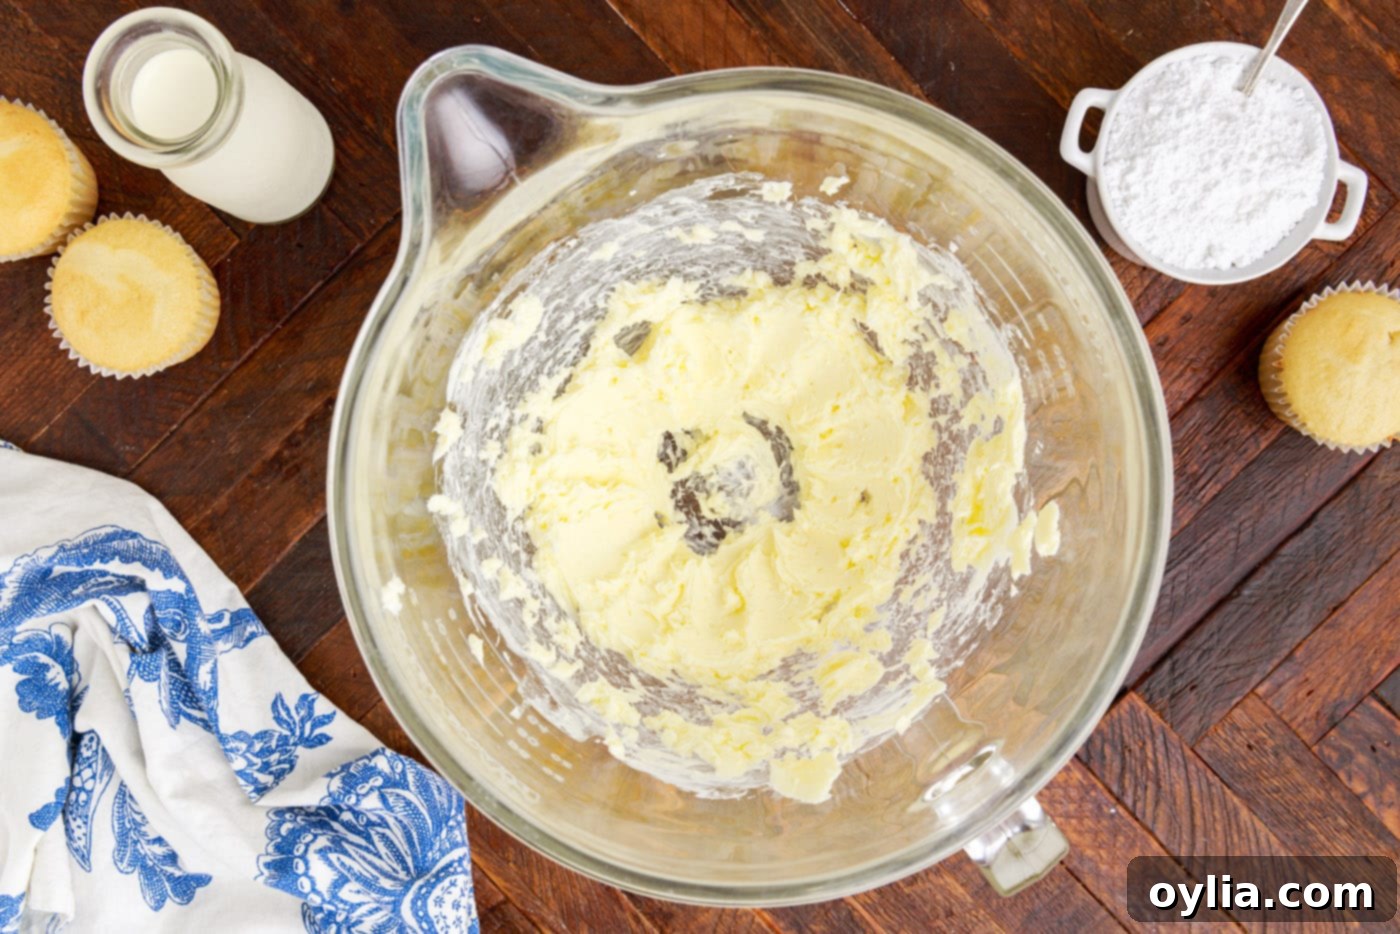
Cream the Butter: Begin by placing your perfectly softened unsalted butter into the bowl of a standing mixer fitted with the whisk attachment. Beat the butter on medium-high speed until it becomes noticeably light, pale in color, and fluffy. This creaming process is crucial as it incorporates air into the butter, which is key to achieving that airy, voluminous texture in your final frosting. Continue beating for 3-5 minutes, scraping down the sides of the bowl periodically to ensure even mixing.

-
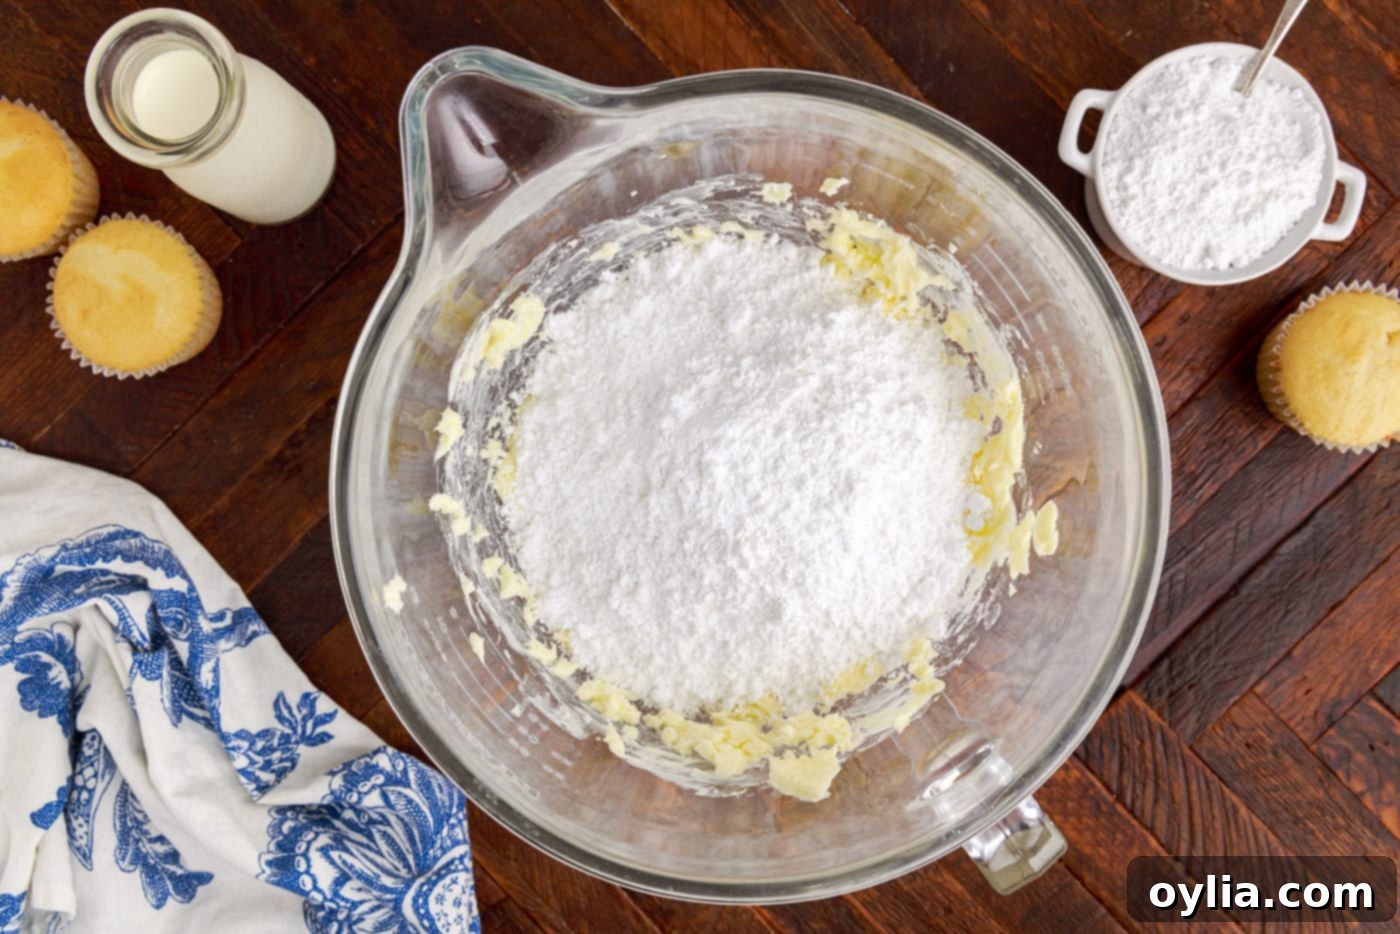
Gradually Add Powdered Sugar: With the mixer on its lowest speed, begin to add the powdered sugar, one cup at a time. Mixing slowly at first is essential to prevent a “sugar cloud” from forming and covering your kitchen! Once most of the sugar is incorporated, you can gradually increase the speed to medium-low, continuing to add the remaining powdered sugar until it’s fully combined and the mixture is thick and crumbly. Scrape down the bowl as needed.

-
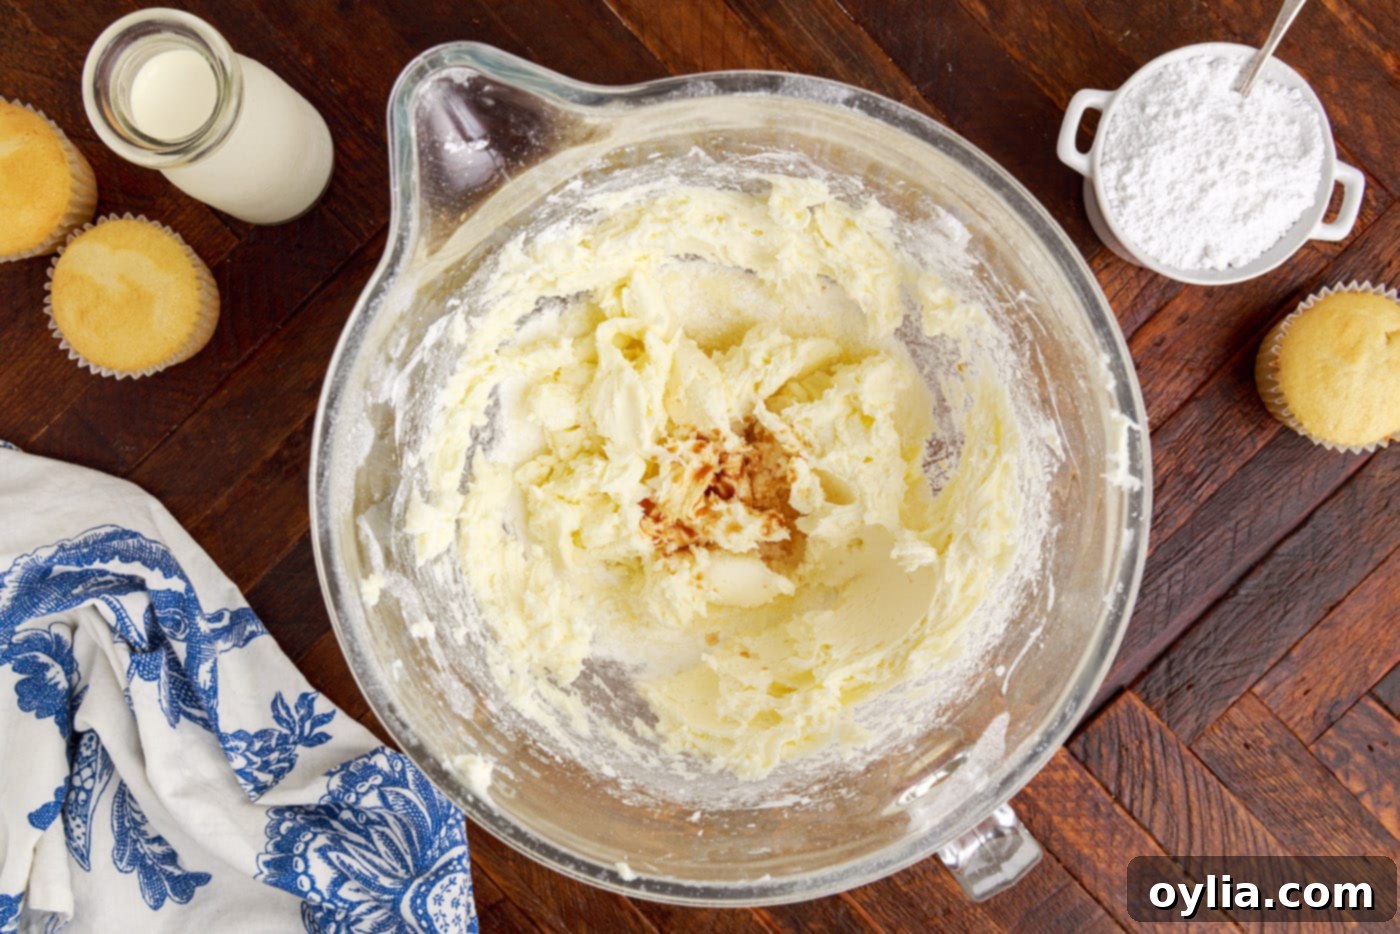
Incorporate Vanilla Extract: Pour in the vanilla extract. Beat it into the mixture on medium speed until it is fully incorporated and the sweet aroma fills your kitchen. This step ensures the vanilla flavor is evenly distributed throughout your frosting.

-
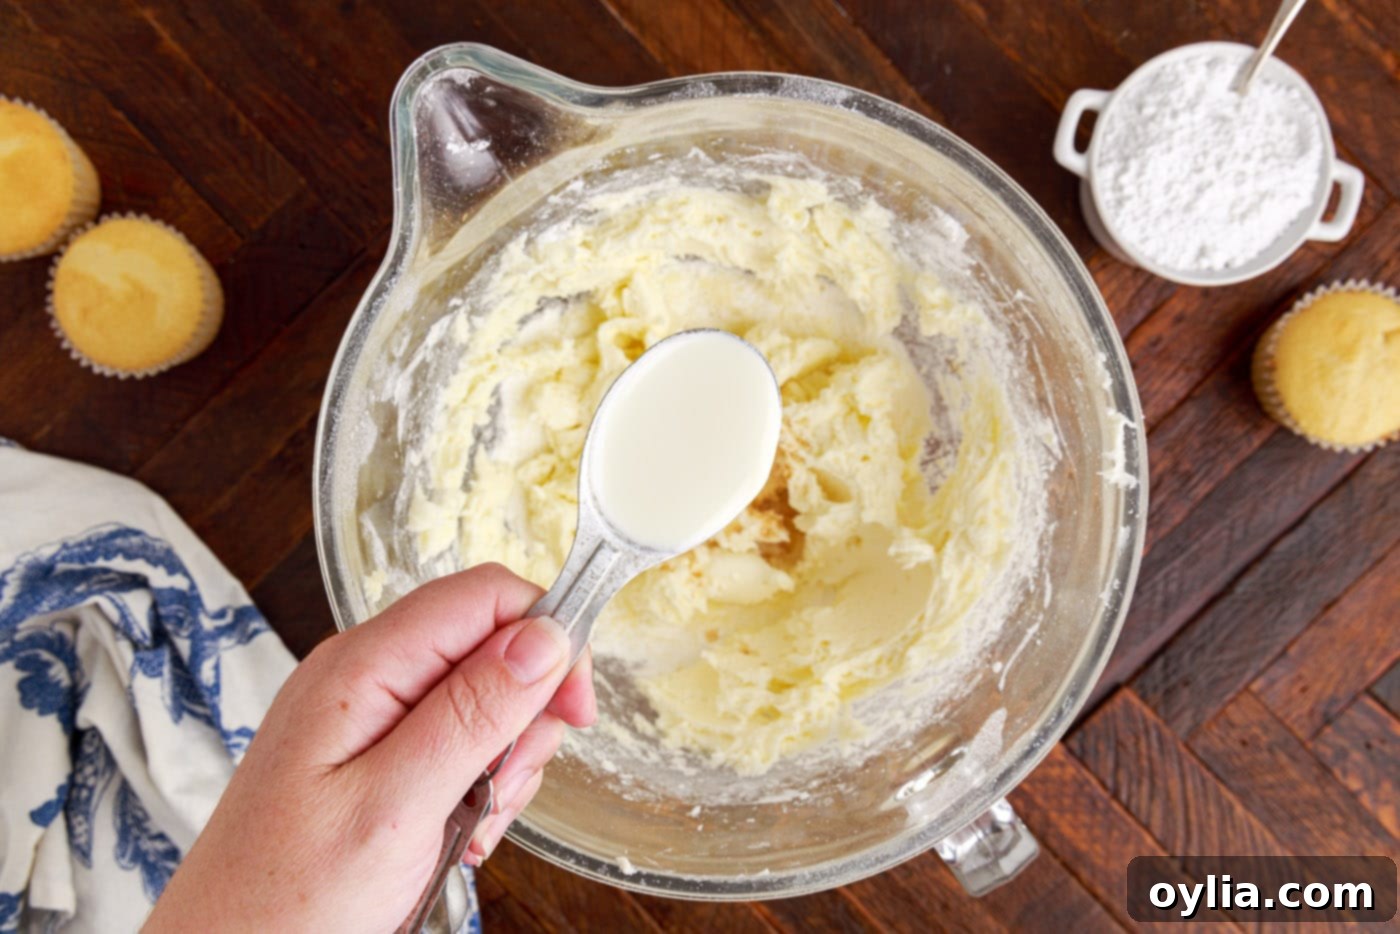
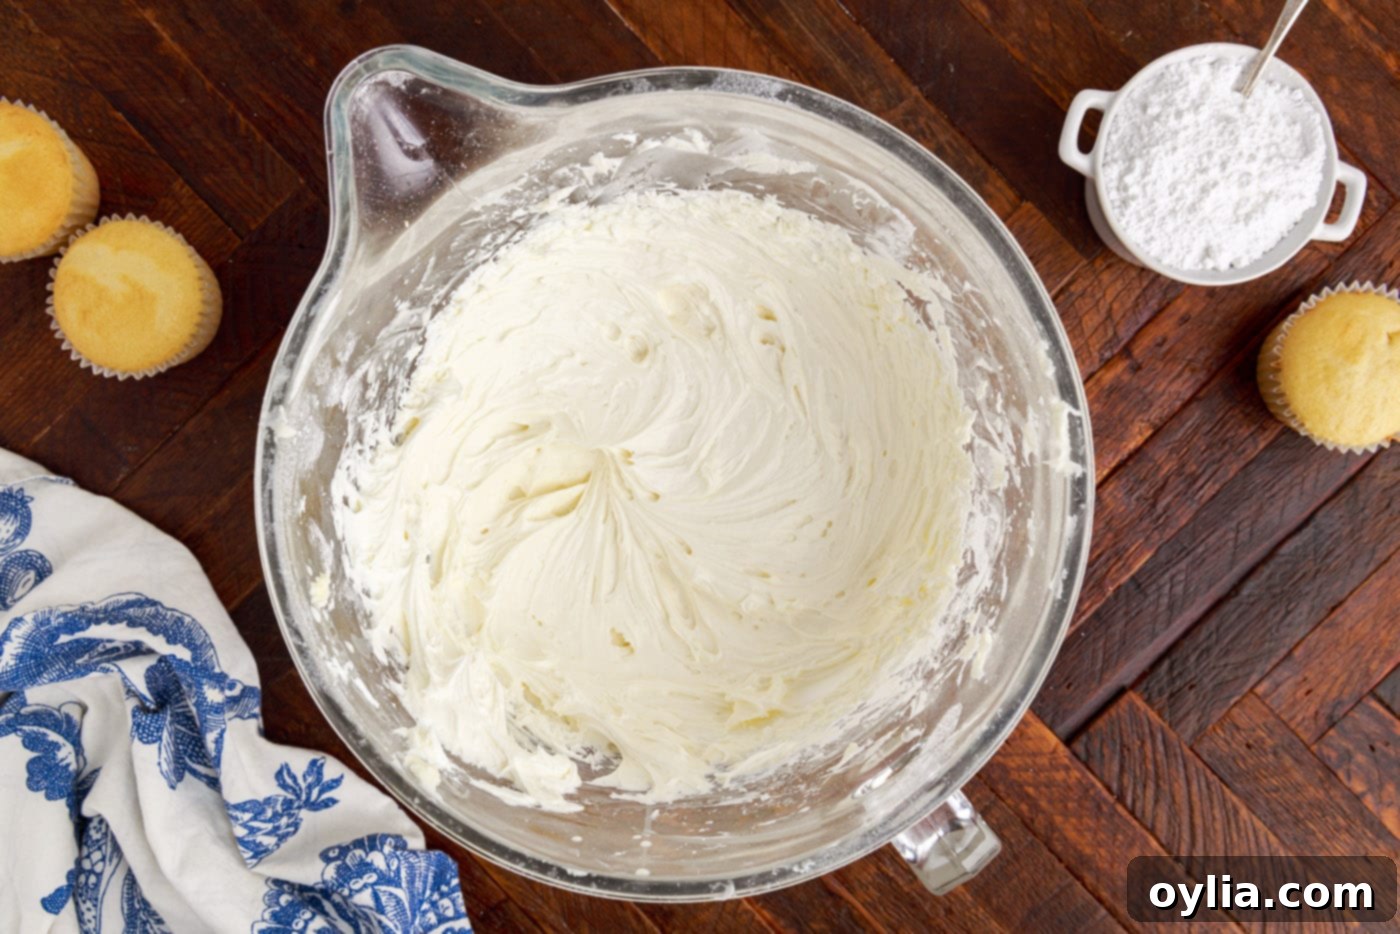
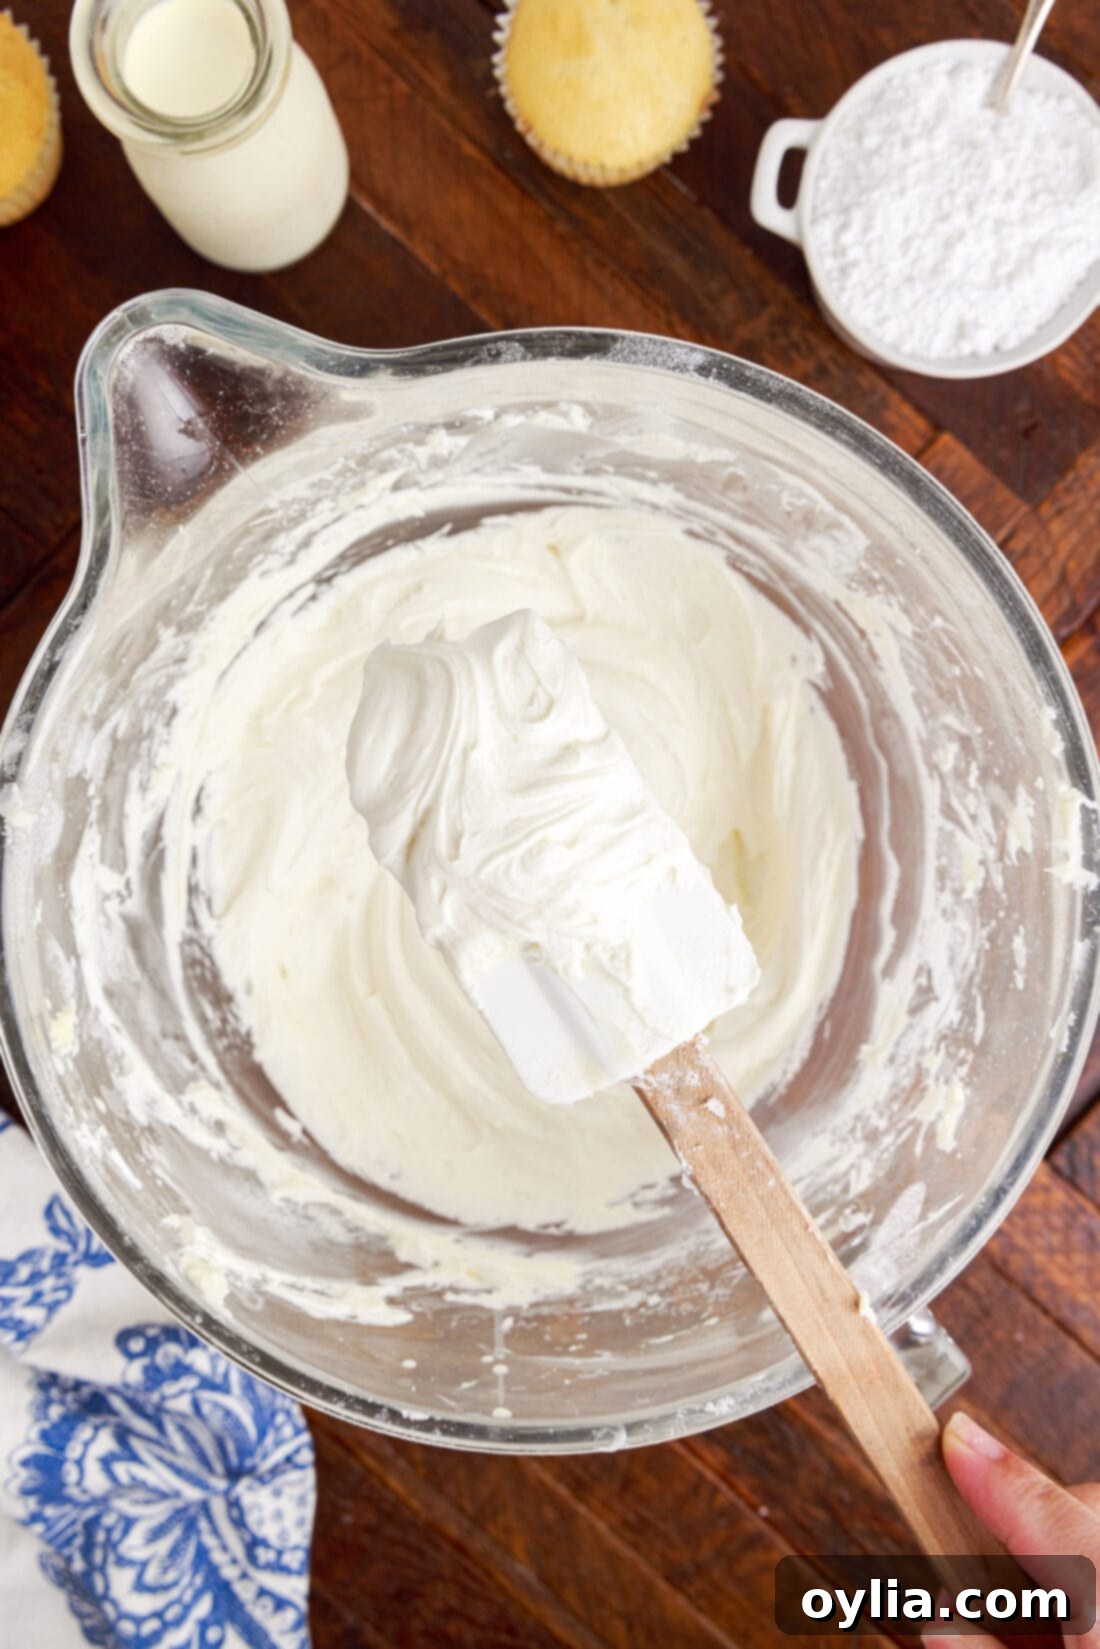
Achieve Perfect Consistency with Heavy Cream: Begin by adding 2 tablespoons of heavy cream to the mixture. Turn the mixer to high speed and whisk vigorously. As it mixes, the frosting will start to transform into a lighter, creamier texture. Stop the mixer, scrape down the sides and bottom of the bowl thoroughly. Assess the consistency. If you desire an even lighter or thinner frosting, add another 1-2 tablespoons of heavy cream, one tablespoon at a time, beating on high speed for about 5 minutes after each addition. Continue until your buttercream is incredibly light, fluffy, and holds beautiful peaks. It should be easy to spread or pipe without being too stiff or too runny. This final whipping stage is where the magic happens, developing the smooth and airy quality of a truly great buttercream.


Frequently Asked Questions & Expert Tips for Buttercream Success
This recipe yields approximately 3 cups of delicious buttercream frosting. This amount is generally sufficient to generously frost a 13×9 inch sheet cake, a standard 9-inch round two-layer cake (with a flat spread), or about 24 cupcakes if you’re spreading the frosting flat with a knife or spatula. However, if your plan involves intricate piping, creating tall swirls on cupcakes, or frosting a larger, multi-tiered cake (like a 2-tiered 9-inch cake), we highly recommend doubling the recipe. Piping uses significantly more frosting than flat spreading, and it’s always better to have a little extra than to run out mid-decoration. Any leftover buttercream can be easily stored for future use!
Proper storage is key to enjoying your homemade buttercream frosting for longer. When stored in an airtight container, this buttercream will keep beautifully in the refrigerator for up to 2 weeks. For longer preservation, you can freeze it for up to 3 months. To use your stored buttercream, first allow it to come to room temperature completely. This can take several hours on the counter. Once softened, return it to your stand mixer and re-beat it on medium-high speed with the whisk attachment for a few minutes until it becomes smooth, light, and fluffy again. You may need to add an extra tablespoon of heavy cream to bring it back to the perfect consistency.
Don’t worry, adjusting buttercream consistency is very easy! If your frosting is too thick, stiff, or not fluffy enough, simply add more heavy cream (or your chosen milk substitute) one teaspoon at a time, beating well after each addition until it reaches your desired consistency. If your frosting is too thin or runny, add more powdered sugar, a quarter cup at a time, mixing thoroughly until it thickens up. Remember to always add slowly and adjust gradually.
Absolutely! This classic vanilla buttercream is a perfect canvas for various flavors and colors. To color your frosting, use gel food coloring (not liquid, as it can thin the frosting). Add a tiny drop at a time until you achieve your desired shade. For different flavors, replace a portion of the vanilla extract with other extracts like almond, lemon, coffee, or even a touch of rum or bourbon. For chocolate buttercream, you can beat in cocoa powder along with the powdered sugar, adjusting cream as needed.
Beyond using softened butter, an often-overlooked tip for ultra-smooth buttercream is to beat it with the paddle attachment on your stand mixer for a few minutes on low speed *after* it’s fully mixed and fluffy with the whisk attachment. This helps to remove any excess air bubbles, resulting in a dense, exceptionally smooth frosting, perfect for creating sharp edges or a polished finish on cakes.
Creative Serving Suggestions for Your Buttercream Frosting
The versatility of this classic buttercream frosting knows no bounds! Beyond simply topping a cake, it can be used in countless creative ways to enhance your favorite desserts. Here are some inspiring ideas:
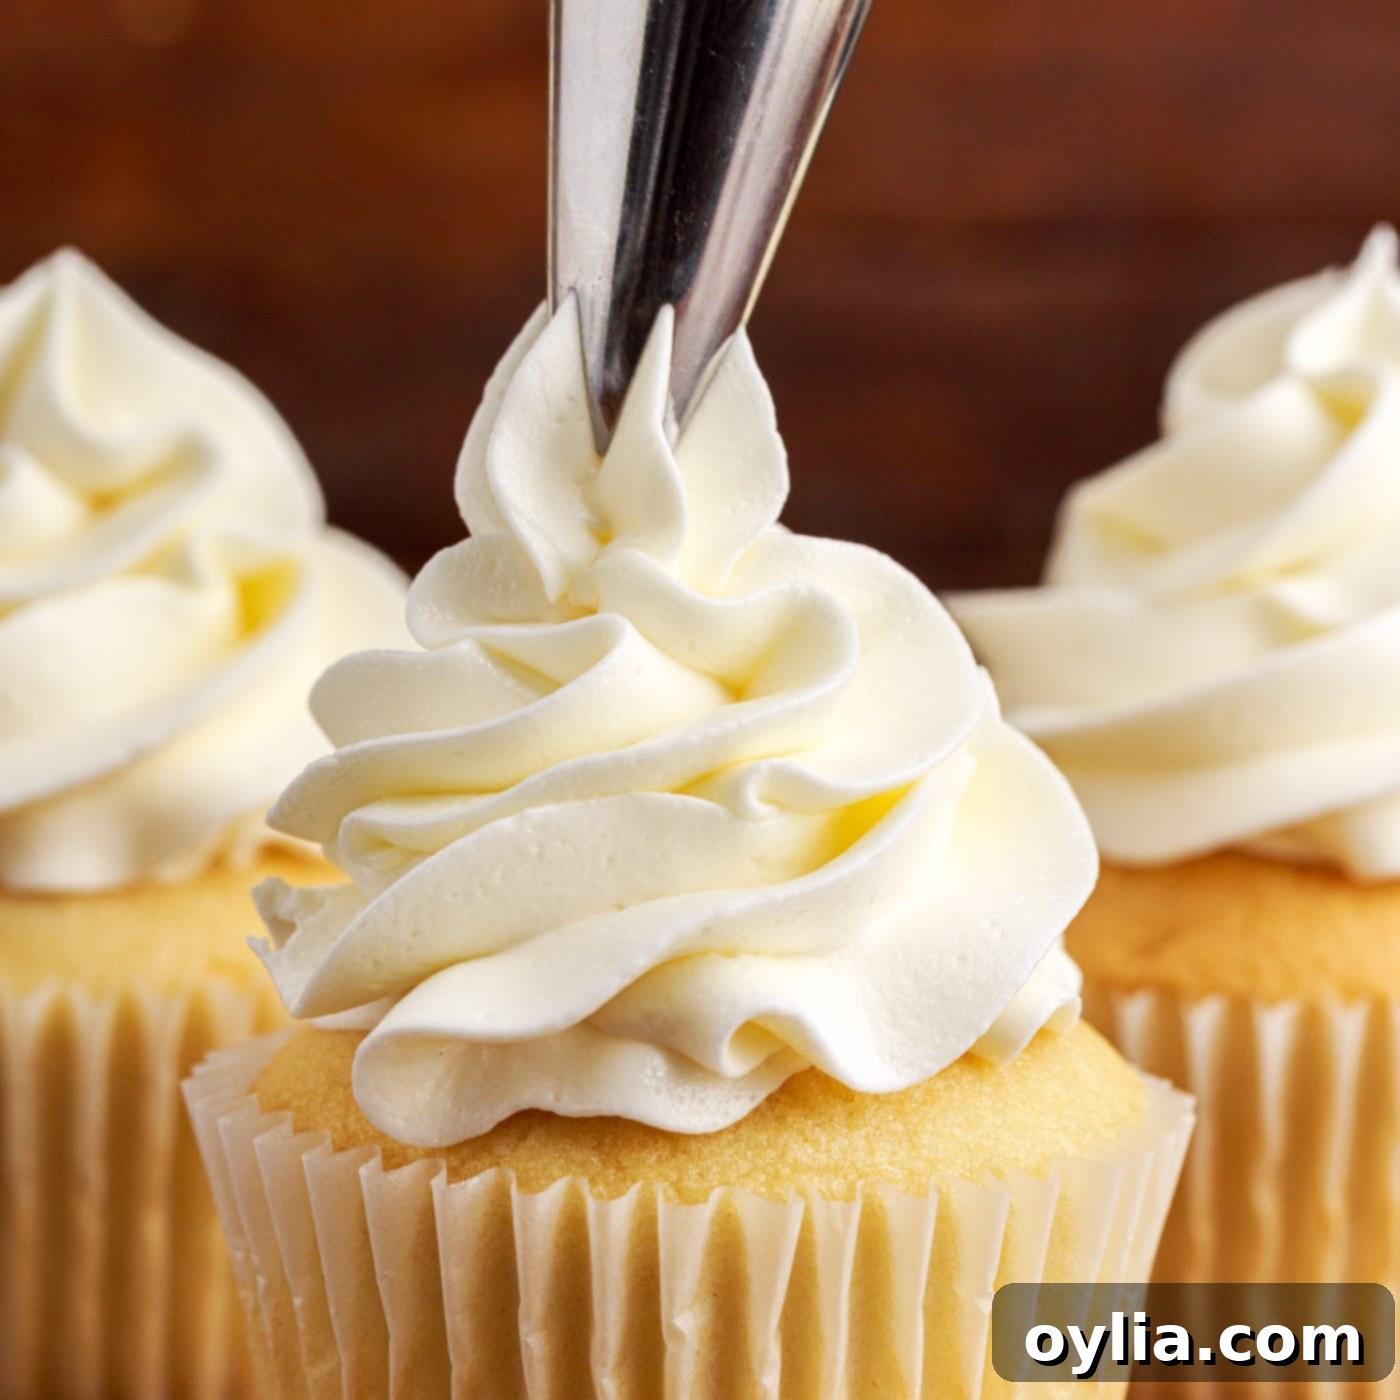
- **Decorating Cakes and Cupcakes:** This is its most common and beloved use. Pipe elegant rosettes, smooth swirls, or spread a rustic layer on your cakes and cupcakes.
- **Filling Pastries:** Use it as a delightful filling for homemade donuts, eclairs, cream puffs, or even macarons. Its stable consistency makes it perfect for holding shape.
- **Brownie and Cookie Topping:** A generous spread of buttercream transforms ordinary brownies into decadent treats. It’s also fantastic sandwiched between two cookies or spread on top of a sugar cookie for a soft, sweet finish.
- **Cake Pops and Truffles Base:** Combine leftover cake crumbs with this buttercream to create the perfect mixture for forming delicious cake balls or truffles, which can then be dipped in chocolate or sprinkles.
- **Dessert Drizzles and Glazes:** If you have extra frosting, thin it out with a little extra heavy whipping cream or milk until it reaches a pourable consistency. This makes a fantastic drizzle or glaze for quick breads, muffins, or fruit tarts, adding a touch of sweetness and moisture.
- **Sweet Spreads:** Enjoy it as a sweet spread on toast, pancakes, or waffles for a luxurious breakfast treat.
No matter how you choose to use it, this buttercream promises to add a touch of sweetness and elegance to every bite!
Delicious Desserts to Pair with Vanilla Buttercream Frosting
This versatile vanilla buttercream is the perfect accompaniment to a wide array of baked goods. Here are some of our favorite recipes that truly shine when topped or filled with this delightful frosting:
- Cake Balls
- Fudge Brownies
- Classic White Cake
- American Flag Cupcakes
- Confetti Cake Mix Cookies
- Double Chocolate Cupcakes
- Baked Cake Donuts (fill the center for an extra sweet surprise!)
I absolutely love to bake and cook, and my passion is sharing my kitchen experiences and delicious recipes with all of you! Remembering to come back each day for new ideas can be tricky, which is why I offer a convenient newsletter every time a new recipe posts. Simply subscribe today and start receiving your free daily recipes directly in your inbox!
Classic Vanilla Buttercream Frosting
IMPORTANT – There are often Frequently Asked Questions within the blog post that you may find helpful. Simply scroll back up to read them!
Print It
Pin It
Rate It
Save ItSaved!
Ingredients
- 1 cup unsalted butter softened to room temperature
- 1 teaspoon pure vanilla extract
- 4 cups powdered sugar (confectioners’ sugar)
- 4 Tablespoons heavy whipping cream (plus more if needed for consistency)
Equipment You’ll Need
-
Stand mixer with whisk attachment (or electric hand mixer)
-
Rubber spatula
Expert Tips & Notes for Success
- **Butter Temperature is Key:** Always use softened butter at room temperature. For perfect consistency, slice your butter into cubes and let it sit on the counter for 30-45 minutes. Avoid microwaving butter, as this will lead to a greasy, unstable frosting.
- **Cream Substitutions:** Heavy cream creates the fluffiest and most stable frosting. You can substitute with whole milk, regular milk, or almond milk, but be aware that the frosting will be thinner and less stable. If using milk, start with half the amount of cream called for and add gradually until desired consistency is achieved, as you’ll likely need less.
- **Storage:** Store buttercream in an airtight container in the refrigerator for up to 2 weeks, or in the freezer for up to 3 months. To use after storage, let it come to room temperature, then re-beat it in your mixer until smooth and fluffy again. You might need a splash more cream.
- **Achieving the Perfect Texture:** The whisk attachment on a stand mixer is ideal for incorporating air and creating a light, fluffy buttercream. If you prefer a denser, super-smooth frosting (great for sharp edges), switch to the paddle attachment and beat on low speed for a few minutes after the frosting is fully mixed and fluffy, to remove air bubbles.
- **Flavor Variations:** Feel free to add a pinch of salt if using unsalted butter to enhance the flavor. You can also experiment with other extracts or even citrus zests for different flavor profiles.
- **Yield & Batch Size:** This recipe yields about 3 cups, enough for a 13×9 inch cake, a 9-inch round two-layer cake, or approximately 24 cupcakes (flat-spread). For piping elaborate designs or frosting a multi-tiered cake, we strongly recommend doubling the recipe to ensure you have plenty. It’s always good to have a little extra, and leftovers freeze well!
Instructions
-
In the bowl of a stand mixer fitted with the whisk attachment, beat the softened butter on medium-high speed until it is light, pale, and fluffy (about 3-5 minutes). Scrape down the sides of the bowl as needed.
-
With the mixer on low speed, gradually add the powdered sugar, one cup at a time, allowing it to fully incorporate. Once most of the sugar is in, increase speed to medium-low and continue mixing until fully combined.
-
Add the vanilla extract and beat on medium speed until well combined and fragrant.
-
Pour in 2 tablespoons of the heavy cream. Increase mixer speed to high and whisk vigorously. Scrape down the sides of the bowl. Add 1-2 more tablespoons of heavy cream, one at a time, beating on high speed for about 5 minutes after each addition, until the frosting is light, fluffy, and reaches your desired consistency.
Nutrition Information (Estimated)
The recipes on this blog are tested with a conventional gas oven and gas stovetop. It’s important to note that some ovens, especially as they age, can cook and bake inconsistently. Using an inexpensive oven thermometer can assure you that your oven is truly heating to the proper temperature. If you use a toaster oven or countertop oven, please keep in mind that they may not distribute heat the same as a conventional full sized oven and you may need to adjust your cooking/baking times. In the case of recipes made with a pressure cooker, air fryer, slow cooker, or other appliance, a link to the appliances we use is listed within each respective recipe. For baking recipes where measurements are given by weight, please note that results may not be the same if cups are used instead, and we can’t guarantee success with that method.
