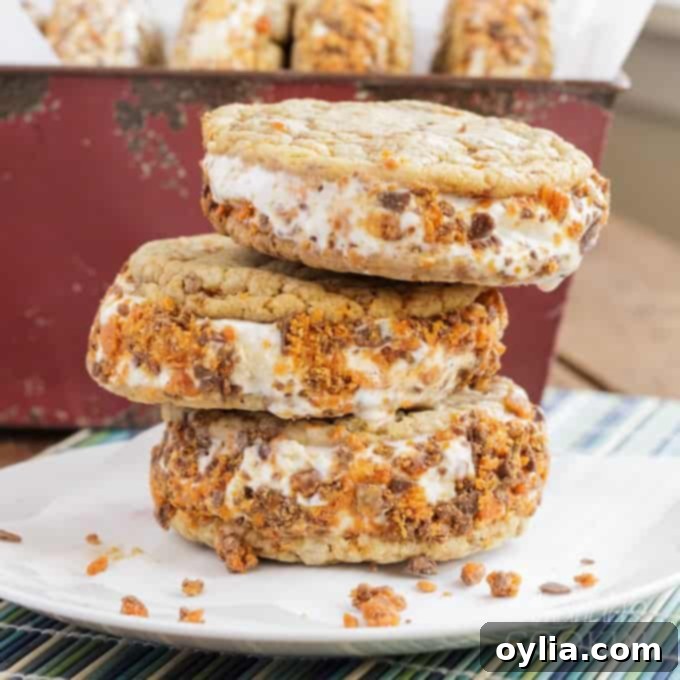
Ultimate Homemade Butterfinger Ice Cream Sandwiches: Your Perfect Summer Treat
July is a month synonymous with summer fun, sunshine, and, most importantly, ice cream! It’s not just National Ice Cream Month, but July 16th is celebrated as National Ice Cream Day – a double dose of delight for dessert lovers everywhere. In honor of this sweet occasion, and in partnership with Breyers and Mirum, we’re thrilled to present a dessert that takes creative ice cream indulgence to a whole new level: the sensational Butterfinger Ice Cream Sandwiches!
Why Butterfinger Ice Cream Sandwiches Are a Game-Changer
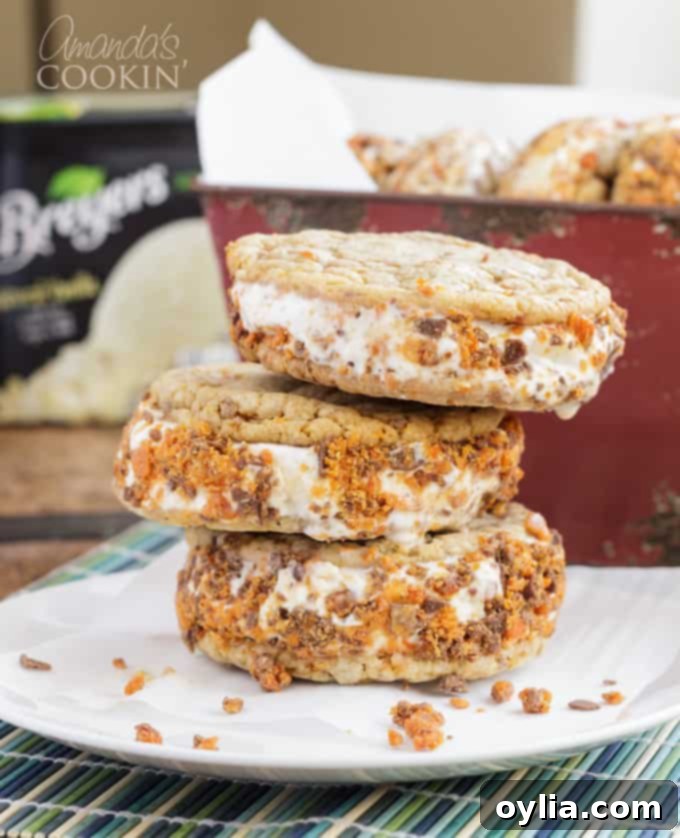
Forget your run-of-the-mill chocolate chip ice cream sandwiches. While those are a beloved classic, they often come with a common complaint: frozen chocolate chips can be surprisingly hard and challenging to bite through, sometimes even feeling like tiny rocks. That’s where the magic of Butterfinger comes in, transforming a familiar treat into something truly extraordinary. Imagine the delightful, unmistakable crunch and distinct peanut buttery flavor of Butterfinger bits perfectly complementing creamy vanilla ice cream, all nestled between two soft, chewy cookies. It’s a texture and flavor explosion that will have Butterfinger enthusiasts absolutely drooling!
The inspiration for this recipe struck during a serendipitous trip to Walmart. While perusing the baking aisle, I discovered Butterfinger Baking Bits. It was an instant “aha!” moment. These small, irregularly shaped pieces of crispy, peanut-butter-flavored candy are uniquely ideal for incorporating into cookies. They provide that signature Butterfinger experience – a delightful crispiness and rich flavor – without becoming unpleasantly hard when frozen. This discovery immediately paved the way for creating a homemade ice cream sandwich that promises not just ease of eating, but an unbeatable, crave-worthy flavor profile that stands out from the crowd.

The Perfect Pairing: Breyers Natural Vanilla Ice Cream
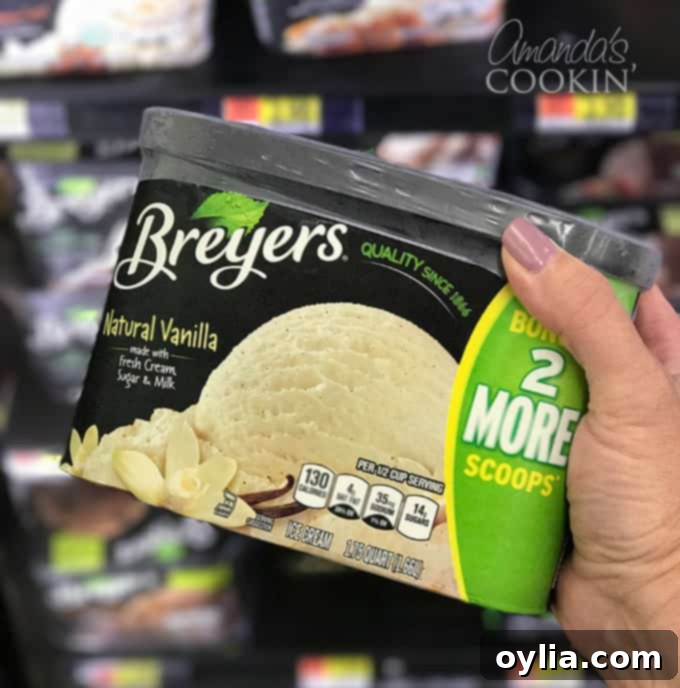
Choosing the right ice cream is absolutely paramount for an exceptional ice cream sandwich experience, and Breyers Natural Vanilla is consistently my top choice. Its renowned, velvety smooth texture is simply unbeatable, primarily because it’s lovingly crafted with fresh cream and milk. Equally important, Breyers is committed to quality, using non-GMO ingredients, which ensures a pure, authentic vanilla flavor. This rich, genuine vanilla acts as a perfect canvas, providing a harmonious and balanced counterpoint that never overshadows the vibrant taste and delightful crunch of the Butterfinger bits.
The luxurious creaminess of Breyers makes it an incredibly versatile ingredient, extending far beyond these delectable sandwiches. It’s fantastic as a generous scoop in my refreshing homemade slushies, which are always a hit in the summer. For more grown-up gatherings, I often add a hearty dollop to these indulgent root beer float cocktails. These Butterfinger Ice Cream Sandwiches, however, truly shine as a universally loved dessert. They transcend the specific celebration of National Ice Cream Month, making them absolutely ideal for any summer get-together, a festive birthday party, a casual backyard barbecue, or even a memorable family reunion. They’re a guaranteed crowd-pleaser that adds a unique, homemade touch and a burst of flavor to any occasion.
The Art of Eating Your Butterfinger Ice Cream Sandwich
These delightful treats do have one charming characteristic: they melt quickly! While perhaps not ideal for a long, leisurely picnic under the hot midday sun, they are absolutely perfect for a backyard barbecue, a poolside party, or any outdoor gathering where immediate consumption is part of the joyous experience. To enjoy them at their absolute best, simply pull these homemade ice cream sandwiches out of the freezer approximately 5-10 minutes before you plan to serve them. This brief softening period allows the cookies to become perfectly chewy and the ice cream just slightly pliable.
Then, hand them out to eagerly awaiting hands, preferably outdoors! There’s something wonderfully nostalgic, carefree, and truly summer-like about watching creamy ice cream drip down a child’s face – or even an adult’s! – onto the cool grass on a warm day. It’s part of the authentic charm of a homemade ice cream sandwich.
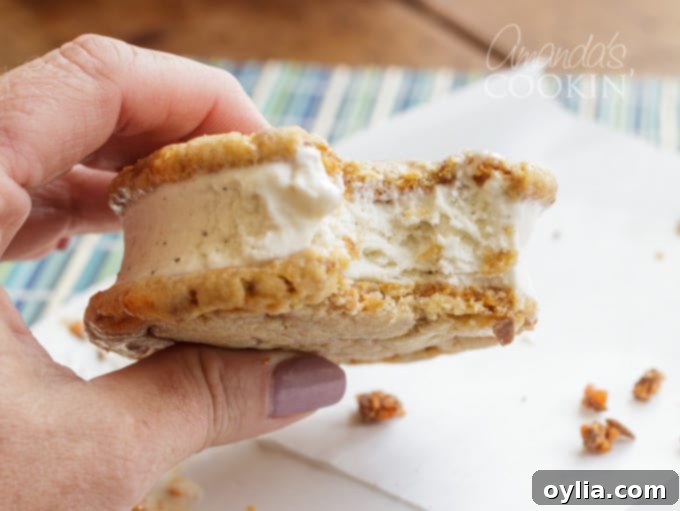
In fact, there’s a truly *right* way to savor these Butterfinger ice cream sandwiches, maximizing every crunchy, creamy, and chewy sensation. Begin by gently licking all the delightful Butterfinger bits and creamy Natural Vanilla ice cream from the edges. This initial taste, a perfect blend of signature crunch and smooth, cool vanilla, is pure bliss. The soft, chewy cookies will take a moment to soften to their ideal consistency, so keep licking at that dreamy ice cream until you can comfortably start to nibble at the cookie edges. Eventually, you’ll be able to take a full bite, but I personally find it much more enjoyable to continue nibbling around the perimeter. This allows the ice cream to get just a little melty again, creating that perfect soft-serve texture, before you go in for another full-circle lick. It’s a delightful, repetitive cycle of crunch, cream, and chew – rinse and repeat for maximum enjoyment and a truly immersive dessert experience!
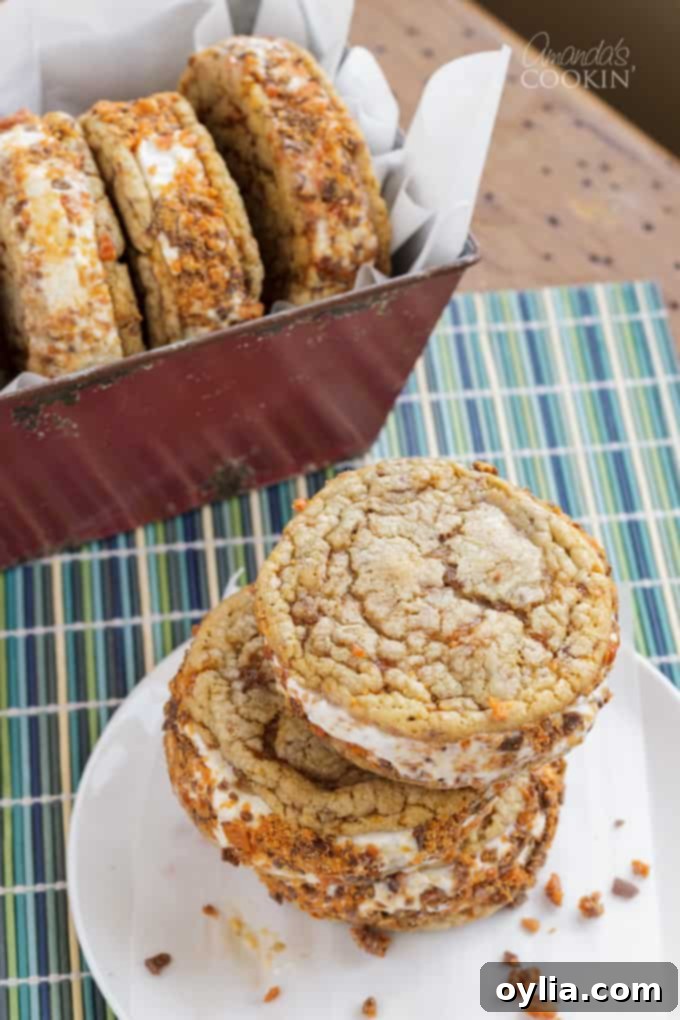
Crafting Your Own Butterfinger Ice Cream Sandwiches: A Step-by-Step Guide
Creating these incredible Butterfinger ice cream sandwiches is a deeply rewarding process, starting with the very foundation: the cookies. While you *can* adapt your own favorite chocolate chip cookie recipe, I genuinely recommend using my perfected big, soft chocolate chip cookie recipe. It’s been specifically developed to yield large, chewy cookies that are absolutely ideal for holding generous scoops of ice cream without becoming brittle or overly hard when frozen. Many standard cookie recipes would require doubling to achieve the substantial, jumbo size needed for these sandwiches; my recipe inherently accounts for this, producing 36 substantial cookies that are perfect for pairing.
The key modification to my classic cookie recipe is simple but crucial for these specific treats: you will substitute 1 1/2 bags (which amounts to 15 ounces) of Butterfinger Baking Bits for the chocolate chips or chunks that the original recipe calls for. This ensures that every bite of your cookie has that irresistible Butterfinger flavor and characteristic crunch, perfectly complementing the creamy ice cream. For your utmost convenience, the printable recipe card provided below integrates these Butterfinger adjustments directly, so you don’t have to do any mental math.
Ingredients for the Ultimate Butterfinger Ice Cream Sandwiches:
- My big, soft chocolate chip cookie recipe ingredients (with Butterfinger Baking Bits substitution as noted)
- 2 (10-ounce) bags of Butterfinger Baking Bits, divided (15 oz for cookie dough, 5 oz for rolling the finished sandwiches)
- 2 (1.5-quart) containers of Breyers Natural Vanilla Ice Cream
Helpful Kitchen Tools for Smooth Sailing:
- Jelly roll pan (essential for spreading the ice cream layer evenly)
- Ice cream scoop (perfect for portioning consistent cookie dough balls)
- Parchment paper (critical for non-stick baking and ensuring easy removal of the ice cream slab)
- Mixing bowl (for preparing cookie dough and softening ice cream)
- Wooden spoon (a versatile tool for mixing and stirring)
- Large circular cookie cutter (approximately 3.5 inches in diameter, to perfectly match the size of your baked cookies)
- Knife (useful for chopping any larger Butterfinger pieces if needed)
- Spatula (for shaping warm cookies, spreading ice cream, and gently lifting ingredients)
- Cutting board
Preparing the Ice Cream Layer:
To prepare your ice cream for cutting into perfect circles, you’ll first need to allow it to soften slightly. Remove both 1.5-quart cartons of Breyers Natural Vanilla Ice Cream from the freezer and let them sit at room temperature for approximately 10-15 minutes. This brief period ensures the ice cream becomes pliable without melting completely. While the ice cream is softening, you can focus on baking your delicious Butterfinger cookies.
Once the ice cream has reached a scoopable but not soupy consistency, transfer it to a large mixing bowl. Stir it thoroughly and vigorously, reminiscent of how you might have stirred ice cream as a child. This action helps to achieve a super-smooth, even consistency, breaking down any lingering ice crystals and making it easier to spread uniformly. Next, line a jelly roll pan (typically around 10×15 inches) with parchment paper. Make sure the parchment paper generously overlaps all sides of the pan; these overhangs will serve as convenient “handles” for easy removal of the frozen ice cream slab later.
Pour the softened, thoroughly stirred ice cream into the lined pan and spread it evenly across the entire surface using a spatula. Achieving a uniform thickness here is essential for ensuring all your ice cream sandwich fillings are consistently sized. Once spread, carefully place the pan back into the freezer for at least 2 hours, or until the ice cream is completely firm and solid enough to allow for clean, precise cuts with a cookie cutter.
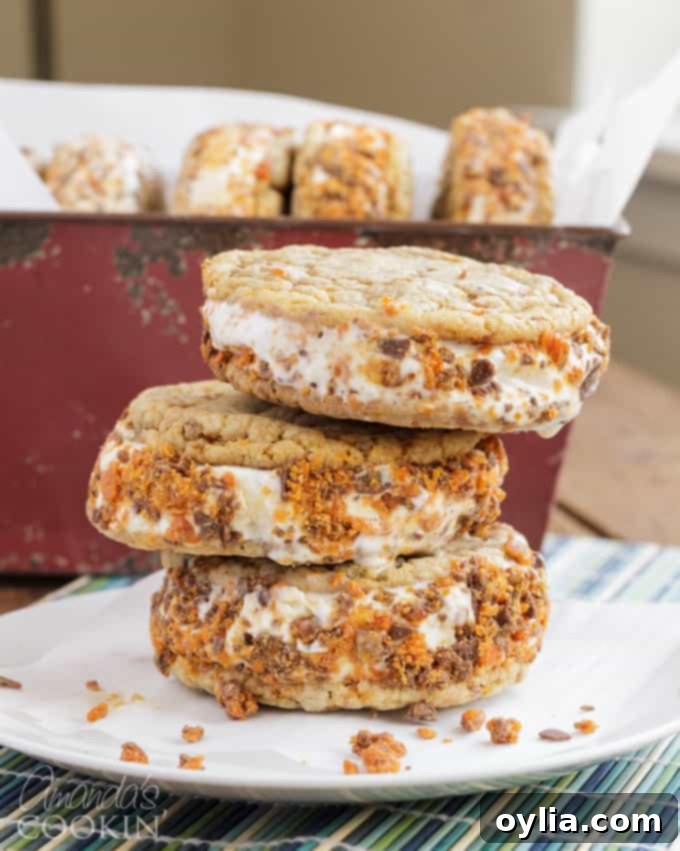
Pro Tips for Perfect Butterfinger Cookies and Assembly
Cookie Baking Masterclass:
- Invest in a Kitchen Scale for Precision: Precision is an unsung hero in baking, especially when you need consistent results for items like ice cream sandwiches. An inexpensive, digital kitchen scale (I personally love and recommend an Ozeri kitchen scale, which typically runs around $15) is an invaluable tool. I use mine constantly to weigh all my ingredients, ensuring accuracy and repeatable success with every batch. It truly makes a difference.
- Weigh Your Cookie Dough for Uniformity: This tip is absolutely crucial for achieving uniformly sized cookies, which are paramount for perfectly matched and attractive ice cream sandwiches. After you’ve finished mixing your dough (incorporating the 15 ounces of Butterfinger Baking Bits), weigh the total dough in ounces. Then, divide that total weight by 36. This calculation will give you the exact target weight for each individual cookie ball. By measuring out each dough ball by weight, you are guaranteed 36 perfectly round, consistently sized, and beautiful cookies every single time. Skipping this step risks having mismatched cookies, which can complicate the assembly process and affect the final aesthetic.
- The Secret to Soft Cookies: For ice cream sandwiches, the texture of your cookies is everything. You want them to be delightfully soft and slightly under-baked. This specific texture is key because it prevents them from becoming rock-hard and brittle when they’re frozen alongside the ice cream. I found that baking mine for precisely 11 minutes achieved that ideal chewy, tender consistency. Always keep a close eye on your oven, as individual baking times can vary significantly.
- Choosing the Right Cookie Cutter: My cookie recipe is designed to yield 36 substantial cookies, each approximately 3 1/2-inches wide. Therefore, you will need a circular cookie cutter of a similar size to accurately cut out your ice cream middles. Don’t worry if you don’t possess a specific “cookie cutter” labeled for this purpose – a standard biscuit cutter, a sturdy plastic drinking glass, or even an old plastic hamburger press (like the one very similar to this picture that I’ve had for years!) can all work perfectly well.
Streamlined Assembly Preparation:
- Cool Down is Key: It’s absolutely critical that all your baked cookies are completely cooled to room temperature before you even think about starting the assembly process. Warm cookies will unfortunately melt the ice cream almost instantly upon contact.
- Prepare Your Freezing Tray: Have an empty baking sheet or another flat pan handy. Make sure this pan is lined with parchment paper. This will be the designated spot where you transfer your finished ice cream sandwiches for their final deep freeze.
- Butterfinger Rolling Station: Grab a flat plate and generously pour the remaining 5 ounces of Butterfinger Baking Bits onto it. This will be your convenient station for rolling the edges of your finished sandwiches, adding that fantastic extra flavor, crunch, and visual appeal.
- Parchment Wraps for Individual Sandwiches: Take your roll of parchment paper and cut it into strips, each roughly 3 inches wide by 12 inches long. These will be used to individually wrap around each assembled sandwich, which is vital for preventing them from sticking together in the freezer and making them incredibly easy to grab and serve later.
- Work Smart, Not Hard – Ice Cream Melts!: Be mindful that ice cream is prone to melting quickly, especially in a warm kitchen. Depending on how fast you’re able to work, you might find it beneficial to place some of the assembled sandwiches into the freezer in batches to prevent excessive melting while you continue to finish making the others.
- Clean Hands, Happy Chef: Keep a stack of paper towels or a damp cloth readily available right next to your workspace. Your fingers are likely to get sticky during assembly, and quick clean-ups make the entire process much more pleasant and efficient.
- Water Bath for Your Cutter: Fill a medium-sized bowl with plain tap water. Dipping your cookie cutter into this water between each cut of ice cream is a simple yet effective trick. It creates a non-stick surface, preventing the ice cream from clinging to the cutter and ensuring clean, perfectly round circles every time.
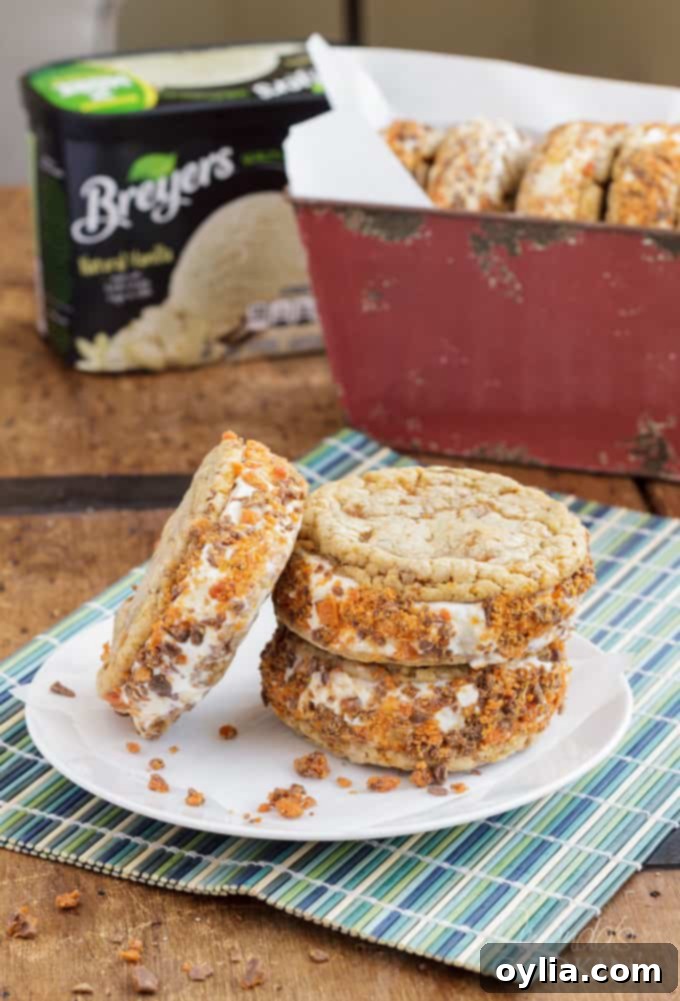
Assembling Your Irresistible Butterfinger Ice Cream Sandwiches
Once your homemade Butterfinger cookies are thoroughly cooled and your ice cream slab is perfectly firm in the freezer, it’s time for the final, most exciting part: assembly! Remember to work quickly and efficiently to prevent the ice cream from melting too much during this stage, especially if your kitchen is warm.
- Cut the Ice Cream Circles: Remove the pan of firm ice cream from the freezer. Have your chosen cookie cutter (approximately 3.5 inches) ready, and remember to dip it into your bowl of water after each cut. Firmly press the cookie cutter into the ice cream to create precise circles. Continue this process until you have 12 perfect ice cream circles, re-dipping the cutter in water each time to ensure clean, non-stick cuts.
- Trim and Taste the Excess: Use an icing spatula or a thin, flat knife to carefully remove any excess ice cream that remains around your perfectly cut circles. Do not let this delicious extra ice cream go to waste – it’s a well-deserved chef’s perk or a tasty bonus for a keen helper!
- Keep it Chilly (If Needed): If at any point you notice the ice cream circles starting to soften significantly, or if you’re working in a particularly warm environment, don’t hesitate. Immediately pop the pan of cut ice cream circles back into the freezer for a few minutes to re-firm. This ensures a stable foundation for your sandwiches.
- Pair Your Cookies: Lay out all 36 of your completely cooled Butterfinger cookies. Take a moment to match them into 18 pairs of similar size. This step is incredibly quick and easy if you followed the crucial tip to weigh your cookie dough during the baking process, ensuring uniform cookies.
- Time to Sandwich!: Now, working quickly, use a spatula to gently lift one of your firm ice cream circles. Place it onto the flat side of one cookie. Then, take another matched cookie and carefully place its flat side on top of the ice cream, gently pressing down just enough to form a cohesive sandwich. Be careful not to press too hard and squish the ice cream.
- Roll in Butterfinger Bits: Immediately after assembling each sandwich, take it to your prepared plate of reserved Butterfinger Baking Bits. Roll the outside edges of the freshly made ice cream sandwich in these bits. This step adds a fantastic extra layer of crunch, an intensified Butterfinger flavor, and a beautiful visual texture.
- Wrap and Freeze for Storage: Take one of your pre-cut parchment strips (about 3″ x 12″) and tightly wrap it around the outside edge of each finished ice cream sandwich. This wrap is crucial; it helps hold the sandwich’s shape, protects it from freezer burn, and makes it incredibly easy to grab and serve later. Place the individually wrapped sandwiches onto your prepared pan, which is destined for the freezer.
- Final Freeze for Perfection: Freeze the assembled sandwiches until they are completely solid and firm throughout. While several hours in the freezer will suffice, for the absolute best texture, stability, and ease of handling, leaving them overnight in the freezer is highly recommended. This allows all the components to meld together perfectly. Enjoy your ultimate homemade Butterfinger Ice Cream Sandwiches!
Be sure to watch the video embedded below to see each step of this delightful process in action, from baking the perfect cookies to assembling your epic ice cream sandwiches! These homemade Butterfinger ice cream sandwiches are truly a spectacular way to celebrate summer, gather with cherished family and friends, and honor National Ice Cream Month. And don’t forget, you can find all the high-quality ingredients and supplies you need at your local Walmart – for ultimate convenience, you can even order online and pick them up!
Share Your Sweet Creations!
How will you be celebrating the irresistible joy of ice cream this season? We would absolutely love to see your homemade Butterfinger Ice Cream Sandwiches! Be sure to share your delightful sweet creations on social media and tag us using the hashtags #CelebratewithBreyers and #Walmart. Dive in and enjoy every last crunchy, creamy, and utterly delicious bite!

Watch the Recipe Video:
For those who prefer a visual guide, here’s a comprehensive video demonstrating the entire process. Watch closely as we walk you through baking the perfect cookies and assembling your epic Butterfinger ice cream sandwiches:
Butterfinger Ice Cream Sandwiches
IMPORTANT – There are often Frequently Asked Questions within the blog post that you may find helpful. Simply scroll back up to read them!
Print It
Pin It
Rate It
Save ItSaved!
Ingredients
- 8.5 ounces cake flour 2 1/4 cups
- 8.5 ounces all purpose flour 2 cups
- 1.25 tsp baking soda
- 1.5 tsp baking powder
- 1.5 tsp Kosher salt
- 2.5 sticks unsalted butter room temperature
- 10 ounces light brown sugar 1.25 cups packed
- 8 ounces granulated white sugar 1 cup, plus 3 tablespoons
- 2 large eggs
- 2 tsp vanilla extract
- 20 ounces Butterfinger Baking Bits, divided 2 10-ounce bags
- 3 quarts Breyers Natural Vanilla Ice Cream 2 1.5-quart containers
Instructions
Bake the Cookies:
-
Sift the cake flour, all-purpose flour, baking soda, baking powder, and Kosher salt into a large bowl using a wire whisk. This step ensures all dry ingredients are thoroughly combined and aerated, leading to a lighter, more even cookie texture. Set this dry mixture aside.
-
In the bowl of an electric stand mixer fitted with the paddle attachment, cream together the room-temperature unsalted butter, light brown sugar, and granulated white sugar until the mixture is very light, fluffy, and pale in color. This process usually takes about five minutes. This step is crucial for incorporating air, which contributes to the cookies’ tender and chewy texture. Add the large eggs, one at a time, mixing well after each addition to ensure they are fully incorporated. Stir in the vanilla extract. With the mixer on low speed, gradually add the reserved dry ingredients to the wet mixture, mixing just until they are combined. Be careful not to overmix, as this can develop the gluten too much, leading to tough cookies. Finally, with a rubber spatula, gently fold in 15 ounces (1 and one-half of the 10-ounce bags) of the Butterfinger Baking Bits until they are evenly distributed throughout the dough.
-
Cover the cookie dough tightly with plastic wrap and refrigerate it for a minimum of two hours. This chilling process is essential; it allows the flavors to meld, prevents the cookies from spreading too much during baking, and results in thicker, chewier cookies that are perfect for ice cream sandwiches.
-
When you’re ready to bake, preheat your oven to 350 degrees Fahrenheit (175°C). Line insulated baking sheets with parchment paper. Using an ice cream scoop (and ideally weighing each dough ball for consistent size, as per our tips above), scoop the dough into 36 uniform balls and place them onto the prepared sheets, spaced sufficiently apart. Bake for 10-12 minutes. Remember, for ice cream sandwiches, slightly under-baked cookies are best as they will retain their desirable softness when frozen.
-
As soon as you remove the baking sheet from the oven, while the cookies are still warm and pliable, use a spatula or the back of a large spoon to gently shape the outer edges of the cookies. This technique helps to make them perfectly round and even, which is crucial for easier matching and assembly of your ice cream sandwiches.
-
Allow the cookies to cool on the baking sheet for 5 minutes to firm up slightly. After this initial cooling, carefully transfer them to wire cooling racks to cool completely to room temperature. This complete cooling is vital before you begin assembling your ice cream sandwiches to prevent premature melting.
-
While your cookies are cooling, prepare your ice cream layer. Take the two 1.5-quart containers of Breyers Natural Vanilla Ice Cream out of the freezer and let them sit at room temperature for approximately 10-15 minutes. This allows the ice cream to soften just enough for easy mixing and spreading.
-
Line a jelly roll pan (approximately 10×15 inches) with parchment paper, ensuring that the paper overlaps all sides of the pan. These parchment overhangs will act as convenient handles for easy removal of the frozen ice cream slab later. Place the softened ice cream into a large bowl and stir it vigorously with a wooden spoon or spatula until it is smooth and free of any ice crystals, resembling a soft-serve consistency. Pour the stirred ice cream into the lined pan and spread it evenly across the entire surface using a spatula. Achieving a uniform thickness is important for consistent ice cream sandwich fillings. Place the pan back into the freezer until the ice cream is completely firm and solid enough to cut clean circles, which will take at least 2 hours or longer.
Assembly Process:
-
Once the ice cream is firm, remove the pan from the freezer. Have your chosen circular cookie cutter (around 3.5 inches) ready. Dip the cookie cutter into a bowl of water, then press firmly into the ice cream to cut out circles. Repeat this process, re-dipping the cutter in water after each cut to prevent the ice cream from sticking and to ensure clean, perfect circles. You should be able to get 12 circles from the slab.
-
Use an icing spatula or a thin, flat knife to carefully remove any excess ice cream from around the cut circles. Don’t let this delicious excess go to waste; it’s a perfect little treat for the chef!
-
If you find the ice cream circles beginning to soften during this process, or if you’re working in a warm kitchen, quickly place the pan of cut ice cream circles back into the freezer for a few minutes to re-firm before continuing with the assembly.
-
Lay out all 36 of your completely cooled Butterfinger cookies. Carefully match them into 18 pairs of similar size. This step is made considerably easier if you followed the tip to weigh your cookie dough, ensuring uniform cookies.
-
Working quickly, use a spatula to gently lift one of the firm ice cream circles. Place it onto the flat side of one cookie. Then, take another matched cookie and place its flat side on top of the ice cream, gently pressing down just enough to form a cohesive sandwich. Avoid pressing too hard, which could squish the ice cream out.
-
Immediately after assembling each sandwich, take it to your prepared plate of reserved 5 ounces of Butterfinger Baking Bits. Roll the outside edge of the newly made ice cream sandwich in these bits. This adds a fantastic extra layer of crunch, an intensified Butterfinger flavor, and a visually appealing finish.
-
Take one of your pre-cut parchment strips (approximately 3″ x 12″) and tightly wrap it around the outside edge of each finished ice cream sandwich. This individual wrapping helps the sandwiches maintain their shape, prevents freezer burn, and makes them incredibly easy to grab and serve later. Place the wrapped sandwiches onto your prepared pan, which is ready to go into the freezer.
-
Freeze the assembled sandwiches until they are completely solid and firm throughout. This will typically take several hours. For the absolute best texture, stability, and ease of handling, leaving them to freeze overnight is highly recommended. This allows all the components to meld together perfectly, creating a truly irresistible treat. Enjoy your ultimate homemade Butterfinger Ice Cream Sandwiches!
Nutrition
The recipes on this blog are tested with a conventional gas oven and gas stovetop. It’s important to note that some ovens, especially as they age, can cook and bake inconsistently. Using an inexpensive oven thermometer can assure you that your oven is truly heating to the proper temperature. If you use a toaster oven or countertop oven, please keep in mind that they may not distribute heat the same as a conventional full sized oven and you may need to adjust your cooking/baking times. In the case of recipes made with a pressure cooker, air fryer, slow cooker, or other appliance, a link to the appliances we use is listed within each respective recipe. For baking recipes where measurements are given by weight, please note that results may not be the same if cups are used instead, and we can’t guarantee success with that method.


