Rich & Easy Chocolate Walnut Fudge: The Perfect Homemade Treat & Gift
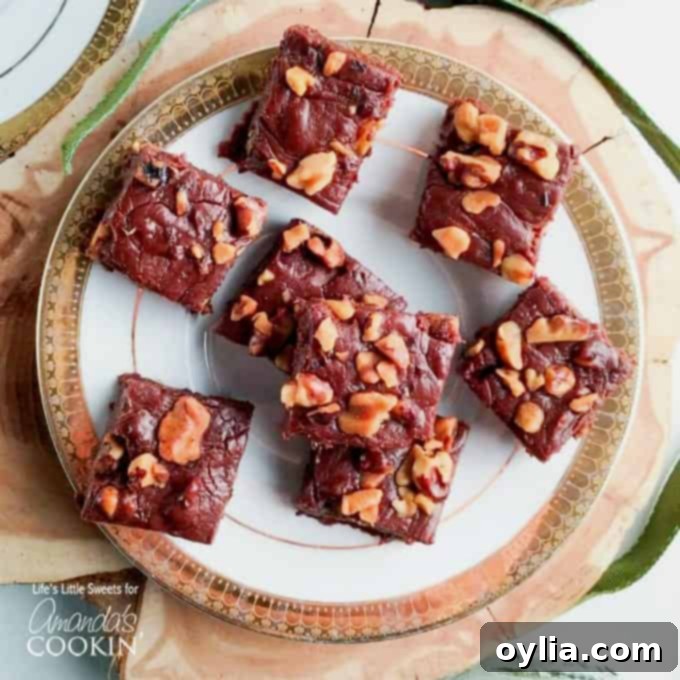
Indulge in the decadent delight of homemade Chocolate Walnut Fudge! This exquisite recipe yields a treat that is wonderfully buttery, incredibly smooth, and generously studded with perfectly toasted walnuts throughout. Forget complicated candy-making techniques; this easy, melt-in-your-mouth fudge recipe requires absolutely no candy thermometer, making it accessible for even beginner bakers. It’s the ideal confection for elegant gift-giving, offering a thoughtful touch for any occasion. Plus, the recipe makes a generous batch, ensuring you’ll have plenty to share, and perhaps a secret stash for yourself to satisfy any lingering chocolate candy craving!
There’s something truly special about homemade fudge. The aroma that fills your kitchen, the anticipation as it sets, and that first bite of creamy, rich sweetness are unparalleled. While store-bought fudge can be good, nothing compares to the freshness and superior flavor of a batch made from scratch. This particular Chocolate Walnut Fudge recipe has been perfected to ensure a consistently smooth texture and deep, satisfying chocolate taste, elevated by the earthy crunch of toasted walnuts.
Why This Chocolate Walnut Fudge Recipe Is a Must-Try
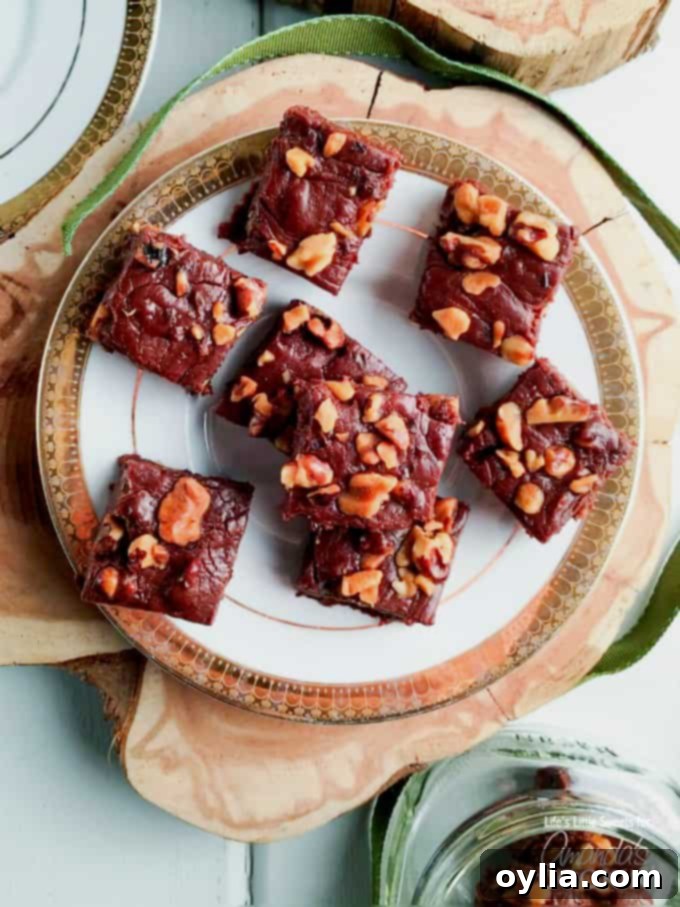
This isn’t just another fudge recipe; it’s a game-changer. Our Chocolate Walnut Fudge stands head and shoulders above anything you can find in a store, primarily because of its incredible ease of preparation and the superior ingredients used. One of its most appealing aspects is that it eliminates the need for a candy thermometer. Many home cooks are intimidated by candy making, fearing the precise temperature requirements, but this recipe bypasses that concern entirely, making delicious homemade fudge accessible to everyone.
The secret to its luxuriously smooth and creamy texture lies in the inclusion of mini marshmallows and high-quality butter. These ingredients melt down beautifully, creating a silky base that ensures every bite is pure bliss. The entire process, from start to finish, can be completed on your stovetop in one large saucepan in approximately 15 minutes of active cooking time. Once mixed, a brief 30-minute cooling period at room temperature, followed by an hour in the refrigerator, is all it takes for this magnificent fudge to set perfectly.
The Irresistible Flavor of Toasted Walnuts
While chocolate is undoubtedly the star, the toasted walnuts play a crucial supporting role, elevating this fudge from great to truly exceptional. Toasting the walnuts is a simple step that makes a profound difference in flavor. The heat coaxes out a deeper, richer, and nuttier profile, which harmonizes exquisitely with the sweet chocolate and aromatic vanilla. This added depth creates a more complex and satisfying taste experience that raw walnuts simply cannot achieve.
If you’re pressed for time or simply prefer, you can certainly skip the toasting step and use raw chopped walnuts. However, for the ultimate flavor, we highly recommend taking the extra 8-10 minutes to toast them. Just be sure to keep a close eye on them in the oven, as nuts can go from perfectly golden to burnt very quickly. The enhanced flavor profile is well worth the minimal effort.
Perfect for Gifting and Holiday Gatherings
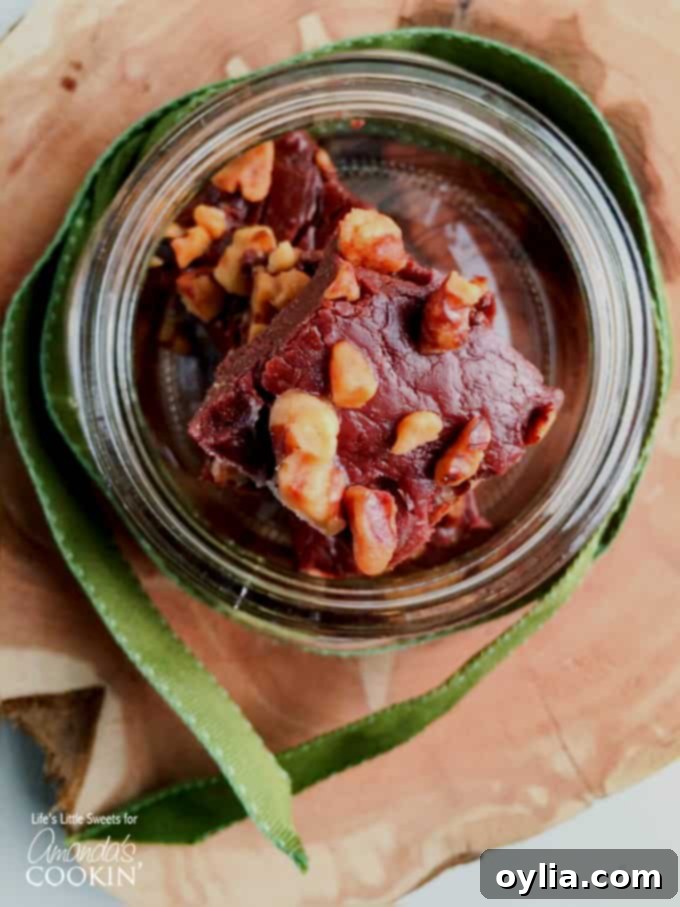
This chocolate walnut fudge isn’t just a treat for your taste buds; it’s also a fantastic recipe for sharing. Its straightforward steps make it a fun and rewarding activity to do with kids, introducing them to the joy of homemade baking. Beyond family fun, it truly shines as a thoughtful, edible gift, especially around the holidays. Imagine presenting beautifully wrapped squares of this homemade fudge to friends, family, or even as a special gesture for teachers or colleagues. It’s a gift that speaks volumes of care and effort.
For holiday entertaining, a platter of this rich fudge adds a touch of elegance and indulgence to any dessert spread. Its robust flavor and satisfying texture make it a crowd-pleaser, sure to impress your guests. Whether it’s for Thanksgiving, Christmas, or any festive occasion, this fudge is guaranteed to be a hit.
Tips for Success with Your Homemade Fudge
- Quality Ingredients Matter: For fudge, the quality of your ingredients directly impacts the final taste and texture. Use real butter (unsalted is best for control over saltiness), pure vanilla extract, and especially high-quality semi-sweet chocolate. A good chocolate will melt more smoothly and provide a richer, more authentic flavor.
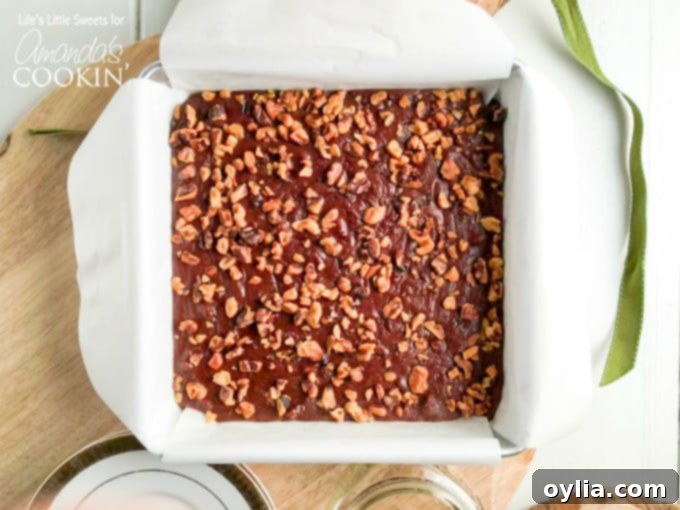
- Proper Pan Preparation: Don’t skip greasing your pan and lining it with parchment paper, allowing for an overhang. This step is crucial for effortlessly lifting the fudge out of the pan once it’s set, ensuring clean cuts and a beautiful presentation.
- Gentle Heat and Constant Stirring: When melting the butter, marshmallows, sugar, cream, and salt, use medium heat and stir gently but consistently. This prevents scorching the ingredients at the bottom of the pan and ensures a uniform, smooth mixture. Patience here pays off in a perfectly creamy fudge.
- Toasting Walnuts: As mentioned, toasting your walnuts significantly enhances their flavor. Keep a close watch on them in the oven, as they can burn quickly. Aim for a fragrant, golden-brown hue.
Variations & Customizations for Your Fudge
While this classic chocolate walnut fudge is delightful on its own, don’t hesitate to experiment with variations to suit your taste or the occasion:
- Nut Substitutions: Not a fan of walnuts? Pecans, almonds, or even a mix of nuts can be used. Remember to toast them for enhanced flavor.
- Extract Alternatives: Replace half of the vanilla extract with almond extract for a subtle nutty aroma, or a few drops of peppermint extract for a festive twist.
- Chocolate Choices: Experiment with dark chocolate for a more intense flavor, or milk chocolate for a sweeter, milder fudge. White chocolate chips can also be incorporated for a marbled effect.
- Extra Mix-ins: Stir in a handful of miniature chocolate chips, crushed peppermints, or a drizzle of caramel before pouring into the pan for added texture and flavor.
- Decorative Toppings: Before the fudge sets, sprinkle with sea salt flakes, colorful sprinkles, or a dusting of cocoa powder for a professional finish.
Remember, this Chocolate Walnut Fudge should be stored in an airtight container in the refrigerator. It will maintain its freshness and delightful texture for up to 5 days. However, based on experience, we doubt it will last anywhere near that long once your family and friends discover its irresistible charm!
There are affiliate links in this post. That means if you buy something from that link, I will earn a small commission, but it won’t cost you anything additional.
Chocolate Walnut Fudge Recipe
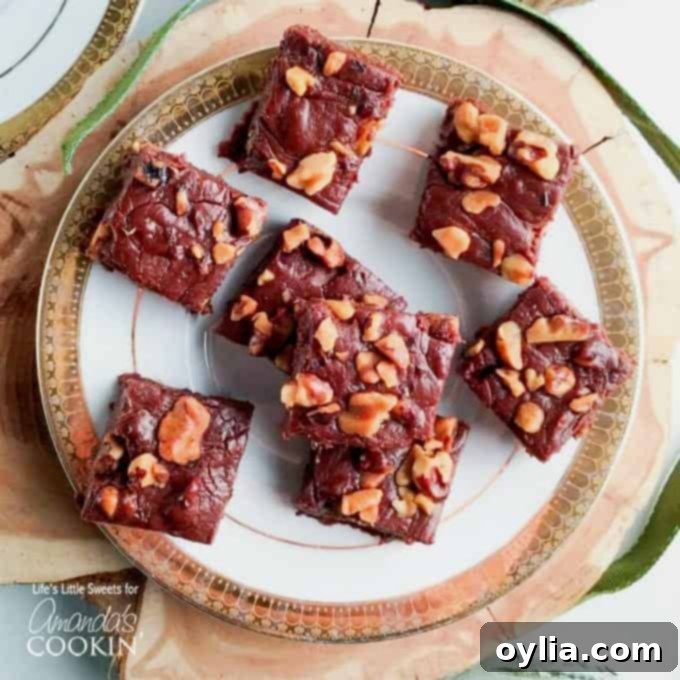
This Chocolate Walnut Fudge is buttery and smooth with toasted walnuts throughout. This easy to make, melt-in-your-mouth fudge recipe is great for gift-giving and makes plenty to keep some for yourself to satisfy any chocolate craving!
Course: Desserts | Cuisine: American | Servings: 36 pieces | Prep Time: 15 mins | Cook Time: 15 mins | Chill Time: 1 hr 30 mins | Total Time: 1 hr 55 mins
Author: Amanda Davis
IMPORTANT – There are often Frequently Asked Questions within the blog post that you may find helpful. Simply scroll back up to read them!
Ingredients for Chocolate Walnut Fudge
- 4 tablespoons of unsalted butter, plus more for greasing the 8″ x 8″ pan
- 3 cups of mini marshmallows
- 1 cup sugar (organic pure cane sugar works very well)
- ½ cup heavy cream (heavy whipping cream works as well)
- ½ teaspoon kosher salt
- ½ teaspoon pure vanilla extract
- 12 ounces semi-sweet chocolate (use the best quality you can find, it does make a difference)
- 1 cup walnuts, chopped
Kitchen Tools You May Find Helpful for Chocolate Walnut Fudge
- 8″x 8″ baking pan
- parchment paper
- cookie sheet
- a sharp knife
- cutting board
- baking spatula
- wooden spoon
- mason jars or boxes, if you are gift giving
- decorative and festive ribbon, if you are gift giving
Before You Begin
You can store this Chocolate Walnut Fudge in the refrigerator in an airtight container for up to 5 days. For longer storage, see our FAQ section below for freezing tips!
Instructions for Making Chocolate Walnut Fudge
- Preheat your oven to 350°F (175°C). Spread the chopped walnuts evenly onto a cookie sheet. Bake for 8-10 minutes. It’s crucial to stay near the oven and monitor them closely to prevent burning. Remove the walnuts when they are toasted to your desired level of crispness and aroma. (I prefer mine toasted for the full 10 minutes for a deeper flavor, but adjust based on your preference.)
- Prepare your 8″ x 8″ pan by greasing it lightly with butter. Then, line the pan with two pieces of parchment paper, crisscrossed, ensuring there is an overhang on all sides. This overhang will act as handles later for easy removal. Lightly butter the parchment paper as well, then set the prepared pan aside.
- In a large saucepan, combine 4 tablespoons of butter, 3 cups of mini marshmallows, 1 cup of sugar, ½ cup of heavy cream, and ½ teaspoon of kosher salt over medium heat. Stir the mixture gently but continuously until all the mini marshmallows have completely melted and the mixture is smooth and combined. This process typically takes about 8-10 minutes.
- Remove the saucepan from the heat. Immediately stir in ½ teaspoon of pure vanilla extract, 12 ounces of semi-sweet chocolate chips, and ½ cup of the freshly toasted walnuts. Continue stirring until the chocolate is fully melted and all ingredients are thoroughly incorporated into a rich, smooth fudge mixture.
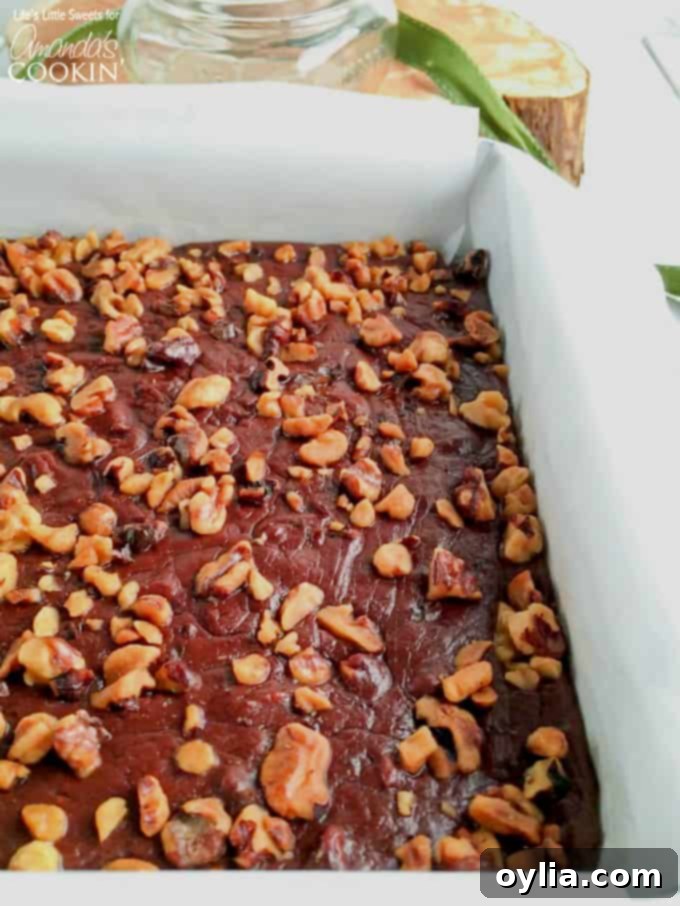
- Pour the warm fudge mixture evenly into your prepared 8″ x 8″ pan. Evenly sprinkle the remaining ½ cup of toasted walnuts over the top of the fudge. Allow the fudge to cool undisturbed at room temperature for 30 minutes. After this initial cooling, cover the pan and transfer it to the refrigerator to set completely for at least 1 hour.
- Once the fudge is completely firm, use the parchment paper overhang to gently lift the entire slab of fudge from the pan and place it onto a cutting board. Use a sharp knife to cut the fudge into desired serving squares. Serve and enjoy your delicious homemade Chocolate Walnut Fudge!
Frequently Asked Questions About Chocolate Walnut Fudge
Can I make this fudge without marshmallows?
This particular recipe relies on mini marshmallows for its signature smooth texture and ease of preparation without a candy thermometer. Substituting them would require significant adjustments to the sugar and liquid ratios, effectively making it a different recipe. For best results, we recommend sticking with the marshmallows in this recipe.
How do I know if my walnuts are toasted enough?
Toasted walnuts should be fragrant and lightly golden brown. Be careful not to let them get too dark, as they can quickly become bitter. You’ll typically smell their rich, nutty aroma before they become visibly dark, which is a good indicator they are ready.
Can I freeze this chocolate walnut fudge?
Yes, fudge freezes very well! To freeze, first cut the fudge into squares. Then, wrap each piece tightly in plastic wrap, followed by a layer of aluminum foil. Place the wrapped pieces in an airtight freezer-safe container or bag. It can be stored in the freezer for up to 2-3 months. Thaw in the refrigerator overnight or at room temperature for a few hours before serving.
What kind of chocolate is best for this fudge?
We recommend using good quality semi-sweet chocolate chips or chopped chocolate bars (about 60% cacao). The better the chocolate, the richer and more delicious your fudge will be. Avoid using baking chocolate that is too bitter unless you adjust the sugar content.
My fudge didn’t set, what went wrong?
If your fudge didn’t set, it’s often due to not being cooked long enough, or the ratio of ingredients was slightly off. Ensure you cook the mixture until the marshmallows are completely melted and the mixture is smooth, as this helps it reach the right consistency. Also, ensure it chills for the recommended time in the refrigerator.
You are truly going to love this Chocolate Walnut Fudge. Let it become your new “go-to” fudge recipe whenever you’re craving a sweet, satisfying, and utterly delicious treat!
Tried this Recipe? Pin it for Later!
Follow on Pinterest @AmandasCookin or tag #AmandasCookin!
The recipes on this blog are tested with a conventional gas oven and gas stovetop. It’s important to note that some ovens, especially as they age, can cook and bake inconsistently. Using an inexpensive oven thermometer can assure you that your oven is truly heating to the proper temperature. If you use a toaster oven or countertop oven, please keep in mind that they may not distribute heat the same as a conventional full sized oven and you may need to adjust your cooking/baking times. In the case of recipes made with a pressure cooker, air fryer, slow cooker, or other appliance, a link to the appliances we use is listed within each respective recipe. For baking recipes where measurements are given by weight, please note that results may not be the same if cups are used instead, and we can’t guarantee success with that method.
Recipe Attribution
This recipe is inspired by Simple Chocolate Fudge from marthastewart.com
