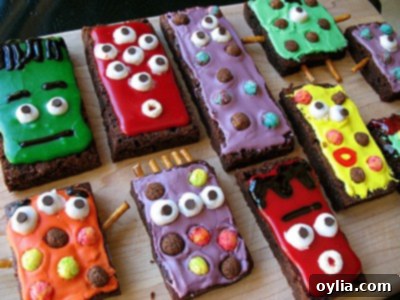
Easy Monster Brownies: Spooktacular Halloween Treats for a Ghoulishly Good Time
As someone who lives and breathes crafts, especially when Halloween rolls around, I find myself in a creative frenzy each year. There’s just something about the spooky season that sparks an undeniable urge to create! Lately, my crafting obsession has revolved around making all sorts of monsters. So, when the fantastic team at General Mills presented a challenge to several food bloggers – to whip up a festively sweet Halloween treat using their cereals – I practically leaped at the opportunity. I instantly knew what I would bring to life: the most adorable (and delicious!) Monster Brownie Treats!
These aren’t just any brownies; they are little edible monsters, bursting with personality and vibrant colors, thanks to some creative decorating. They embody everything I love about Halloween: fun, a touch of whimsy, and plenty of opportunities for creativity. Plus, they’re incredibly easy to make, making them perfect for involving little hands in the kitchen.
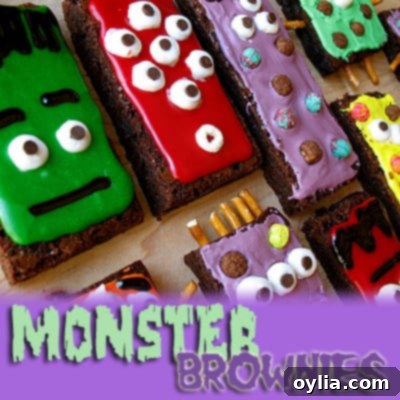
Unleash Your Inner Mad Scientist: Crafting Brownie Monster Treats
Presenting my very own Brownie Monster Treats! Because decorating can be the most time-consuming (and arguably, the most fun!) part of this project, I opted for convenience by using a boxed brownie mix. This simple shortcut allows us to focus our energy on bringing our monstrous creations to life. Of course, if you have a cherished homemade brownie recipe, feel free to use that instead. For these particular monsters, I selected three vibrant and textural cereals: Trix, Cheerios, and Cocoa Puffs. To keep the process smooth and genuinely kid-friendly, I also relied on Betty Crocker decorating cookie icing. This pre-packaged icing is a game-changer for effortless decorating.
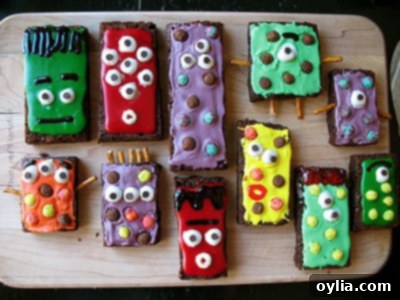
These pre-filled icing bags are quite brilliant! They make the decorating process incredibly simple – just snip the tip and squeeze. While they offer a wide array of colors, my local grocery store had a limited selection of red, green, and white. To achieve the desired spectrum for my monsters, I supplemented with a few drops of gel food coloring. A little tip from my experience: the pre-packaged icing dries much smoother and holds its shape better than homemade or color-mixed gels. So, if possible, I highly recommend purchasing the specific colors you need to ensure the best results and the smoothest finish for your monster brownies.
Here’s another fantastic feature of using this type of icing: it dries completely! Unlike some gel icings that remain sticky, this “Royal Icing in a bag” sets firm, meaning you can easily package your delightful monster brownies in cellophane gift bags without worrying about smudging your artistic efforts. This makes them ideal for Halloween party favors, bake sales, or sweet gifts for friends and teachers. And while you’re busy crafting, don’t forget to check out my tutorial on how to make recycled bread tag monsters – they make the perfect festive closures for your treat bags!
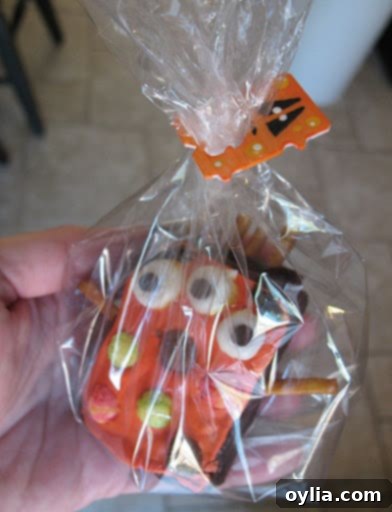
Now, let’s get to the main event: crafting these adorable and delicious Halloween monster brownies!
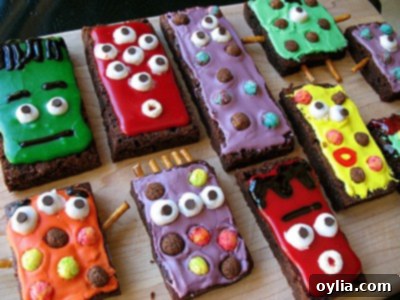
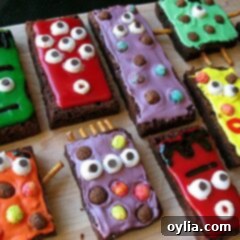
Monster Brownies Recipe
IMPORTANT – There are often Frequently Asked Questions within the blog post that you may find helpful. Simply scroll back up to read them!
Print It
Pin It
Rate It
Prevent your screen from going dark
Amanda Davis
Ingredients
- Boxed brownie mix (plus ingredients to prepare according to package directions, typically eggs, oil, and water)
- Betty Crocker Cookie Icing in desired colors (red, green, white, purple, orange, etc.)
- Cheerios (any variety for monster eyes)
- Cocoa Puffs (for textured monster skin or features)
- Trix cereals (for colorful monster spots or hair)
- Mini chocolate chips (for pupils of the eyes)
- Pretzel sticks (for arms, legs, or horns)
- Red and black decorator gel (for mouths, scars, or hair details)
- ¼ cup powdered sugar (for the Cheerio eye glaze)
- milk (a few drops for the Cheerio eye glaze)
- Optional: Gel food coloring (if mixing your own icing colors)
- Optional: New paintbrush (for applying mixed icing)
Instructions
Prepare the Brownies
-
First, prepare your boxed brownie mix according to the package instructions. Once baked, allow the brownies to cool completely. For extra clean cuts, I find it helpful to refrigerate the brownies for at least an hour (or longer) before slicing. This firms them up and prevents crumbling.
-
When your brownies are firm and ready to be cut, carefully trim off the edges. (These “bonus bites” are perfect for a chef’s treat, or you can share them!) Then, cut the remaining brownies into various sized rectangles and squares. Don’t be afraid to get creative with your shapes; irregular cuts can make for even more unique monster bodies! I even cut some of the odd-shaped leftovers into triangles for pointy-headed monsters.
Make the Monster Eyes (Important First Step!)
-
It’s crucial to make the monster eyes first to allow them sufficient time to dry and set. To create these fun, edible eyeballs, you’ll need Cheerios, mini chocolate chips, powdered sugar, and a tiny bit of milk. Place the powdered sugar into a small bowl. Using a spoon, gradually stir in milk, a very little bit at a time (start with about a teaspoon, then add a couple of drops as needed). You want to achieve a thick, dippable glaze consistency, similar to pancake syrup but slightly thicker. If it’s too thin, add more powdered sugar; too thick, add more milk drop by drop.
-
Drop a few Cheerios into the glaze, ensuring they are fully coated. Use a clean spoon or a fork to carefully lift each glazed Cheerio out of the mixture, allowing any excess glaze to drip off. Place the coated Cheerios onto a wax paper-lined cookie sheet. This prevents them from sticking as they dry.
-
Immediately, while the glaze is still wet, place a mini chocolate chip, upside down, into the center of each glazed Cheerio. The flat side of the chip should be facing up, resembling a pupil. Gently press the mini chip into the glaze to ensure it adheres well. Set the cookie sheet aside in a cool, dry place for at least 30 minutes to an hour (or longer if humidity is high) to allow the glaze to harden completely. This will make them much easier to handle when decorating your brownies.
Icing Colors and Application
-
While you could certainly prepare your own Royal icing (I have several recipes myself!), for this kid-friendly and quick Halloween project, prepackaged cookie icings like Betty Crocker are a fantastic shortcut. They come in convenient tubes that are easy for small hands to manage. As mentioned, if your local store has a limited color selection like mine did, you can easily add a few drops of gel food coloring to white icing to achieve your desired shades. Simply squeeze some white icing into a small bowl, add a drop or two of gel color, and mix thoroughly with a spoon or a clean paintbrush until the color is consistent.
-
If you end up mixing your own colors or find the pre-packaged tubes a bit unwieldy for spreading, a new, clean paintbrush (reserved only for food use!) can be an excellent tool. It allows for smooth, even application of the icing over your brownie surfaces, creating a perfect canvas for your monster designs.
Decorating Your Monsters
-
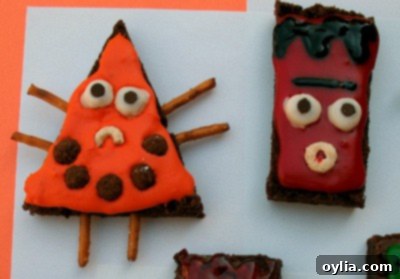
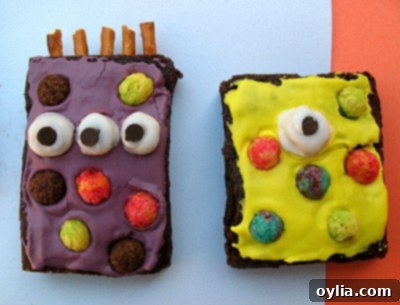
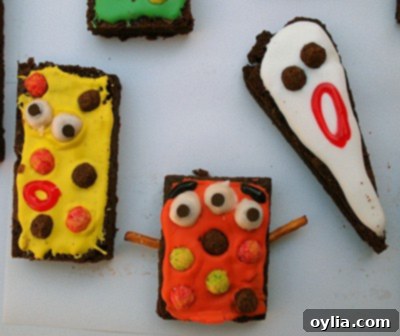
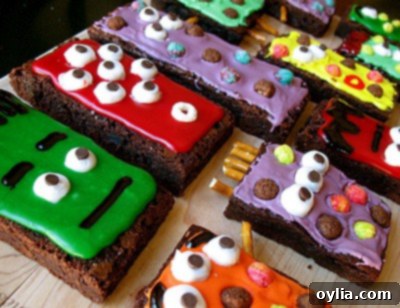
Once your brownies are iced (and the icing is still wet enough to adhere decorations but not too runny), it’s time for the fun to begin! Gently press Trix and Cocoa Puffs cereals into the frosted brownies. These can become colorful polka dots, textured monster fur, or even spiky hair. Next, carefully lift the pre-made Cheerio eyes from the waxed paper using a toothpick or a small offset spatula. Gently press them onto the frosted brownie in various configurations – one big eye, two googly eyes, or even three for a truly unique creature!
-
Add more monster details using pretzel sticks for arms, legs, or horns. Break them into smaller pieces if needed for varied lengths. Finally, grab your red and black decorator gels to draw on eyebrows, mouths (think crooked smiles, sharp fangs, or silly grimaces!), stitches, scars, or wild monster hair. Let your imagination run wild! Each monster can have its own distinct personality.
Tried this Recipe? Pin it for Later!
Follow on Pinterest @AmandasCookin or tag #AmandasCookin!
The recipes on this blog are tested with a conventional gas oven and gas stovetop. It’s important to note that some ovens, especially as they age, can cook and bake inconsistently. Using an inexpensive oven thermometer can assure you that your oven is truly heating to the proper temperature. If you use a toaster oven or countertop oven, please keep in mind that they may not distribute heat the same as a conventional full sized oven and you may need to adjust your cooking/baking times. In the case of recipes made with a pressure cooker, air fryer, slow cooker, or other appliance, a link to the appliances we use is listed within each respective recipe. For baking recipes where measurements are given by weight, please note that results may not be the same if cups are used instead, and we can’t guarantee success with that method.
Tips for Spooktacular Monster Brownie Success
- Get Kids Involved: This recipe is fantastic for children! Let them help cut the brownies into shapes, dip the Cheerios, place the chocolate chip pupils, and, of course, decorate the monsters with icing and cereal. Supervise closely, especially with the decorating gel.
- Cool Completely: Don’t rush the cooling process for your brownies. Warm brownies will be messy to cut and impossible to ice smoothly. Refrigerating them really helps.
- Creative Cuts: Experiment with cookie cutters for fun monster shapes beyond just squares and rectangles. Think ghosts, bats, or even Frankenstein heads!
- Cereal Substitutions: Feel free to swap out cereals based on what you have or your preference. Fruity Pebbles, Captain Crunch, or even crushed Oreos could add different textures and colors.
- Candy Additions: Elevate your monsters with other Halloween candies! Gummy worms can be squiggly hair, mini marshmallows can be extra eyes, or candy corn can make pointy noses or teeth. Sprinkles are always a welcome addition for extra sparkle.
- Storage: Store your decorated monster brownies in an airtight container at room temperature for up to 3-4 days. If the icing is fully dried, they stack quite nicely with parchment paper in between layers.
Then, the best part: you eat them! Nom, nom, nom.
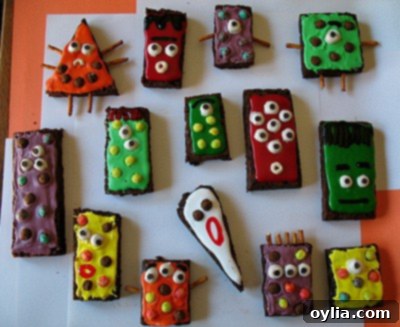
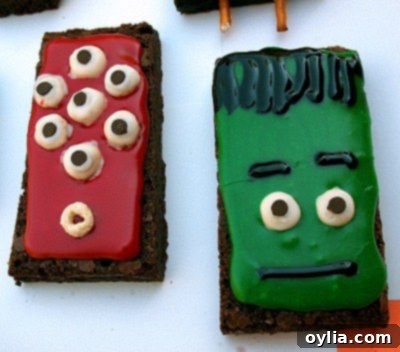
Here are some close-up examples to spark your imagination and give you some monstrous ideas for decorating your own unique brownie creatures!
More Spooktacular Halloween Recipes
If you’re planning a full Halloween feast or looking for more fun ways to celebrate, be sure to check out these other fantastic Halloween-themed recipes and crafts from my collection:
- Ghost Brownies: Another hauntingly good brownie variation!
- Mummy Meatloaf: A savory and creative main course for your Halloween dinner.
- Witch Finger Cookies: Creepy, crunchy, and deliciously sweet.
- Halloween Candy Apples: A classic fall treat with a festive twist.
- Marshmallow Frankensteins: Simple, no-bake treats perfect for little ones.
- Jalapeno Popper Mummies: A spicy and fun appetizer for adult gatherings.
- Spider Web Taco Dip: A crowd-pleasing dip that looks perfectly spooky.
More Monster-Themed Crafts from My Blog
My love for monsters extends beyond the kitchen! Head over to my craft blog, Crafts by Amanda, for more monstrously good ideas to get into the Halloween spirit:
- Monster Treat Bags: Perfect for packaging your monster brownies!
- Bread Tag Monsters: A super creative way to reuse and recycle.
- Juice Box Monsters: Turn everyday items into adorable monsters.
- Halloween Luminaries: Set a spooky mood with these glowing decorations.
Whether you’re baking, crafting, or simply enjoying the festive atmosphere, Halloween is a time for creativity and fun. These Monster Brownies are a testament to how easy and enjoyable it can be to add a personalized, spooky touch to your celebrations. Get ready to impress your friends and family with these ghoulishly good treats!
