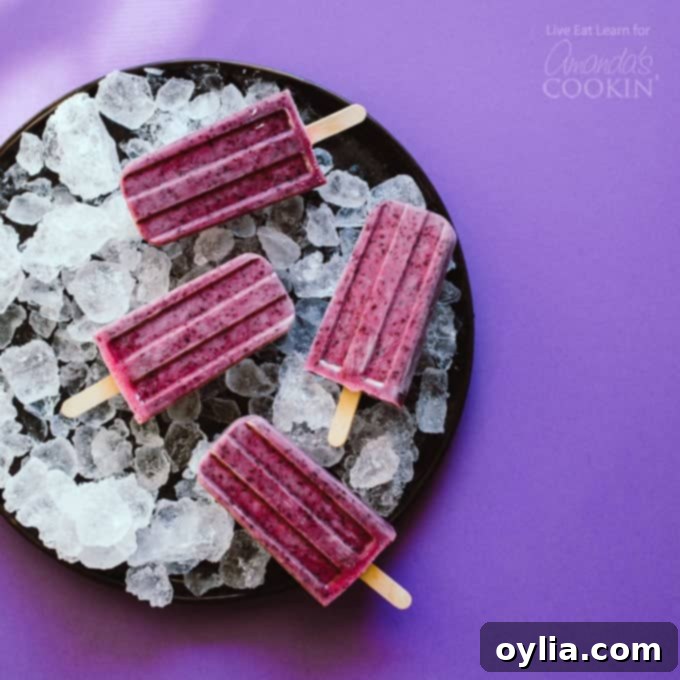
Indulge Guilt-Free: Easy & Healthy Blueberry Cheesecake Popsicles for a Refreshing Summer Treat
As the days grow longer and the sun shines brighter, our cravings for something cool, refreshing, and utterly delicious intensify. Forget the heavy, guilt-inducing desserts, because these Blueberry Cheesecake Popsicles are here to revolutionize your summer treat game! Combining the creamy, tangy goodness of cheesecake with the sweet, vibrant burst of fresh blueberries, these popsicles are not just a simple pleasure; they’re actually healthy too!
This delightful recipe takes the beloved flavor combination of blueberry and cheesecake and transforms it into an icy, invigorating dessert. It’s surprisingly similar in taste and texture to a no-bake blueberry cheesecake, but in a convenient, handheld form. With just four core ingredients and minimal hands-on time, you’ll be enjoying these luscious frozen treats in no time, making them the ultimate antidote to a scorching summer day. Prepare to make these a staple in your freezer!
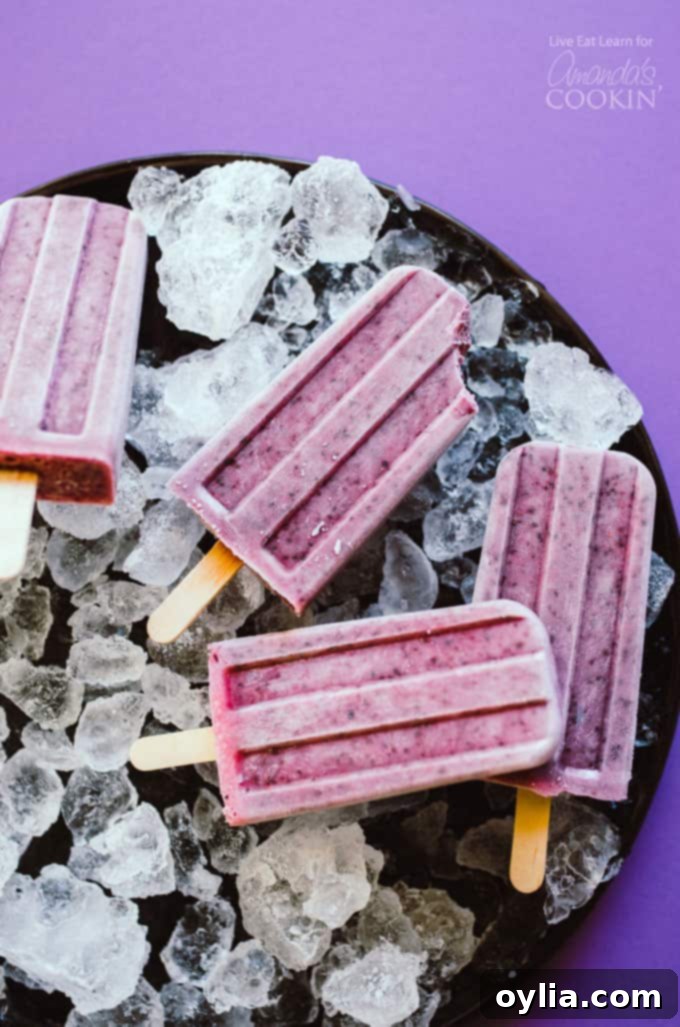
The Ultimate Summer Treat: Homemade Blueberry Cheesecake Popsicles
There’s something uniquely satisfying about homemade popsicles. They transport you back to childhood summers, offering a simple joy that store-bought versions rarely match. For me, investing in a quality popsicle mold was one of the most worthwhile impulse buys I’ve ever made. It opened up a world of possibilities, proving that virtually anything that makes a good smoothie can also make an amazing popsicle. And if you know me, you know how much I love a good smoothie!
The versatility of homemade popsicles is truly astounding. You can craft energizing breakfast popsicles packed with oats and fruit, guilt-free healthy snack popsicles, or even sophisticated boozy adult versions for an evening indulgence. But today, we’re focusing on a timeless classic with a healthy twist: Blueberry Cheesecake Popsicles. This recipe brings us back to flavor basics, showcasing how simple ingredients can create something truly extraordinary. With just 4 essential ingredients and a mere 5 minutes of active preparation time, these popsicles are designed for maximum flavor and minimal fuss.
Why This Recipe is a Game Changer for Healthy Summer Snacking
What sets these Blueberry Cheesecake Popsicles apart is not just their incredible taste, but also their fantastic texture and surprising health benefits. The natural fiber from the fresh blueberries plays a crucial role, preventing these frozen delights from turning into solid, icy blocks. Instead, they freeze into a beautifully smooth, slightly soft consistency that melts deliciously in your mouth.
Furthermore, the combination of rich cream cheese and creamy yogurt creates an extra luxurious, velvety texture. These ingredients don’t just add to the mouthfeel; they also contribute to the “cheesecake” experience while adding beneficial proteins and probiotics. It’s a win-win: a treat that feels indulgent but is genuinely good for you. You can enjoy these without any of the guilt often associated with creamy desserts, knowing you’re nourishing your body while satisfying your sweet tooth.
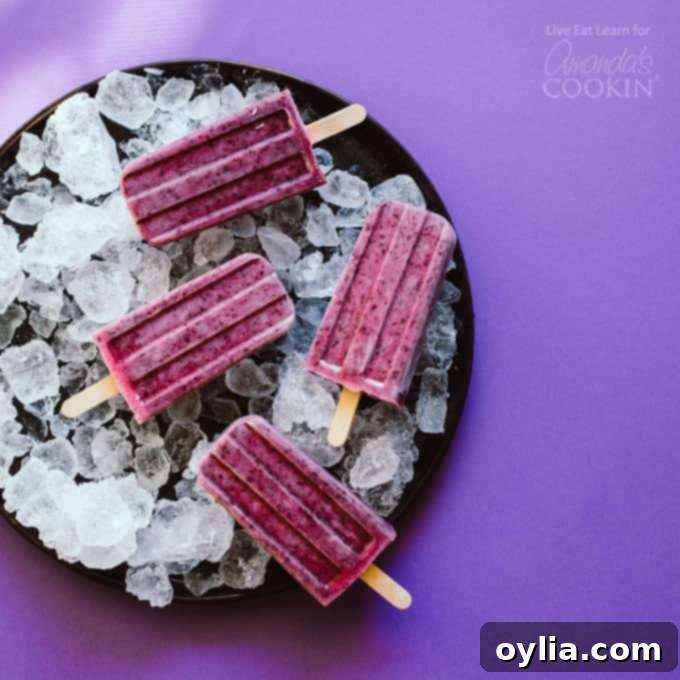
A Healthier Indulgence: The Power of Simple Ingredients
One of the best aspects of these homemade Blueberry Cheesecake Popsicles is the simplicity and wholesomeness of their ingredients. We’re talking about just four core components, each bringing something special to the table, both in terms of flavor and nutrition. This minimalist approach allows the natural goodness of the fruit and dairy to shine, creating a dessert that’s free from artificial flavors, colors, and excessive sugars often found in store-bought frozen treats.
To make these Blueberry Cheesecake Popsicles you’ll need:
- 1 cup blueberries: Fresh or frozen, blueberries are the star of the show, providing natural sweetness, vibrant color, and a host of health benefits.
- ½ cup cream cheese: This is where the “cheesecake” magic happens, adding a rich, tangy creaminess that elevates the flavor profile.
- ½ cup yogurt: Greek yogurt is ideal for its thickness and protein content, contributing to the smooth texture and a slight tang. Plain, unsweetened yogurt allows you to control the sweetness.
- 2 Tbsp honey or maple syrup (to taste): These natural sweeteners offer a healthier alternative to refined sugars, allowing you to adjust the sweetness level to your preference.
The Nutritional Benefits Behind Each Ingredient:
- Blueberries: These tiny powerhouses are loaded with antioxidants, fiber, and vitamins C and K. The fiber content not only aids digestion but also contributes to the smooth, less-icy texture of the popsicles. Their natural sweetness means you need less added sugar.
- Cream Cheese: While providing that signature cheesecake tang and richness, cream cheese also offers some protein and calcium. Choosing a light cream cheese can further reduce the fat content without sacrificing flavor.
- Yogurt: Especially Greek yogurt, it’s an excellent source of protein, which helps keep you feeling full and satisfied. It also provides beneficial probiotics for gut health and adds to the creamy, soft texture, making the popsicles delightfully smooth.
- Honey or Maple Syrup: These natural sweeteners provide a delicious sweetness with a lower glycemic index compared to table sugar. Honey offers trace minerals and antibacterial properties, while maple syrup contains antioxidants. You have the flexibility to adjust the quantity based on the sweetness of your blueberries and personal preference.
Essential Kitchen Tools for Popsicle Perfection
Having the right tools can make the process even smoother and more enjoyable. While you don’t need a professional kitchen setup, a few key items will ensure your Blueberry Cheesecake Popsicles turn out perfectly every time.
- Blender: A good blender is crucial for achieving that silky-smooth consistency. It ensures all ingredients are thoroughly combined, breaking down the blueberries and cream cheese into a uniform mixture.
- Popsicle mold: This is the star of your popsicle-making adventure. Silicone molds are often preferred for easy removal, but stainless steel or plastic molds work great too. Choose a mold that suits the size and shape of popsicles you desire.
- Popsicle sticks: Reusable or traditional wooden sticks, these are essential for holding your frozen treats. Many molds come with their own sticks or reusable handles.
- Measuring cups and spoons: Accurate measurements are key for consistent results, especially when balancing the sweetness and tanginess of this recipe.
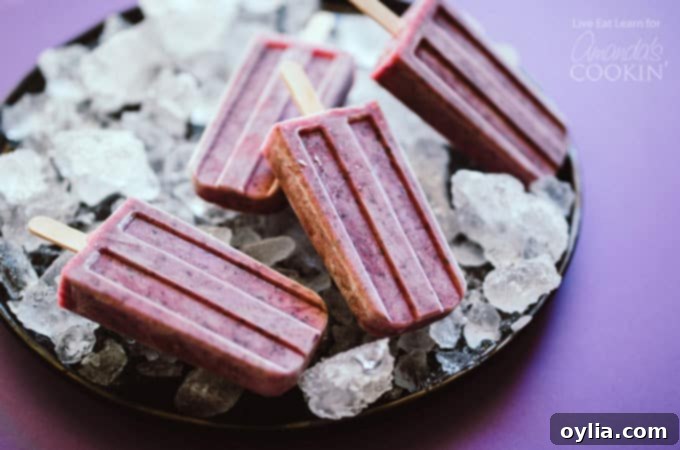
Crafting Your Own Blueberry Cheesecake Popsicles: A Simple Guide
Making these popsicles is honestly so easy. There’s no need for complicated steps like making a simple syrup or handling a long list of obscure ingredients. This recipe is designed for maximum flavor with minimal effort, making it perfect for both seasoned home cooks and absolute beginners. The beauty lies in its straightforwardness: simply blend, pour, and freeze. That’s it!
Step-by-Step: Blending Your Way to Bliss
- Combine All Ingredients: In your trusty blender, combine the blueberries (fresh or frozen), cream cheese, yogurt, and your chosen sweetener (honey or maple syrup). Start with the recommended amount of sweetener, knowing you can always adjust it later.
- Blend Until Smooth: Process the mixture until it is completely smooth and creamy. There should be no lumps of cream cheese or large pieces of blueberry visible. A smooth consistency is key for that perfect popsicle texture. Taste the mixture at this stage and add more honey or maple syrup if you prefer a sweeter popsicle. Remember, flavors tend to be less intense when frozen, so a slightly sweeter mixture now will result in a perfectly sweet popsicle.
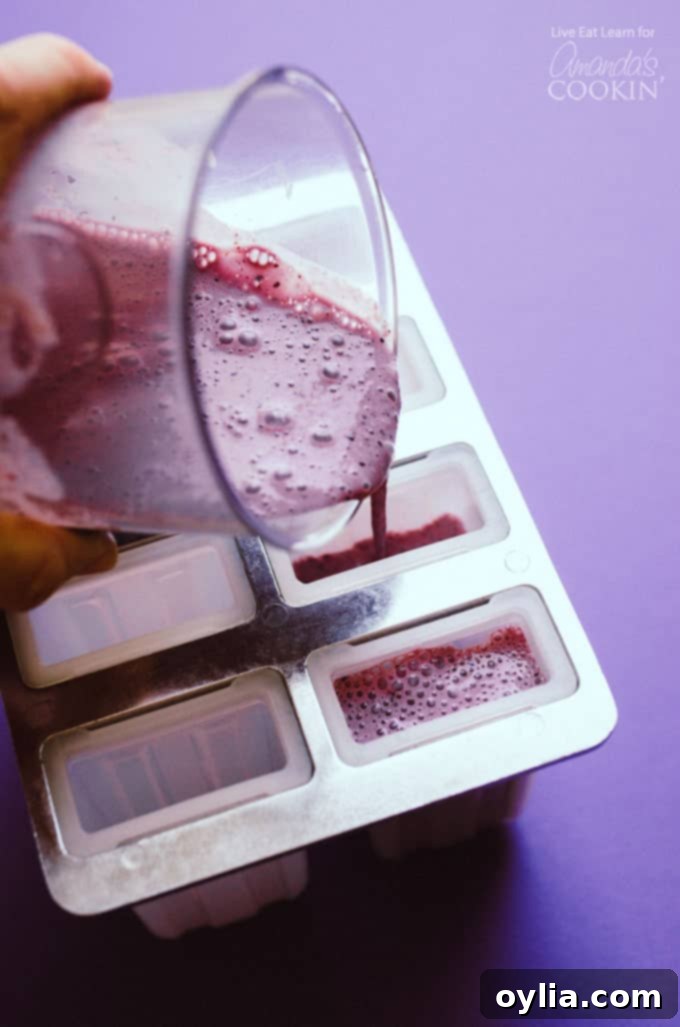
- Prepare the Molds: Carefully pour the blended mixture into your popsicle molds. It’s important to leave a little space at the top of each mold – about a quarter to half an inch – as the mixture will expand slightly as it freezes.
- Insert Sticks & Freeze: Gently insert a popsicle stick into the center of each filled mold. Ensure the sticks are straight so your popsicles are easy to hold once frozen. Transfer the molds to the freezer and allow them to freeze until completely hard. This usually takes at least 4 hours, but for best results, overnight freezing is recommended.
- Easy Removal: Once frozen solid, removing the popsicles from the mold is a breeze. Briefly run the outside of the mold under warm water for a few seconds. This gentle warmth will slightly loosen the popsicles, allowing them to slide out easily without breaking.
Customization and Variations: Make It Your Own
While the classic Blueberry Cheesecake Popsicle is undeniably delicious, this recipe serves as an excellent base for experimentation. Don’t be afraid to get creative and tailor these frozen treats to your unique taste preferences or what you have on hand.
Fruit Swaps and Add-ins:
- Mixed Berry Delight: Instead of just blueberries, try a blend of raspberries, strawberries, and blackberries for a vibrant “mixed berry cheesecake” flavor.
- Lemon Zest: A touch of lemon zest (about ½ teaspoon) blended into the mixture can brighten the “cheesecake” flavor, adding a refreshing citrusy note that pairs beautifully with berries.
- Vanilla Extract: A splash of pure vanilla extract (½ teaspoon) can deepen the creamy notes and add a subtle warmth to the flavor profile.
- Chocolate Chips: For a more decadent treat, stir in a handful of mini chocolate chips after blending, before pouring into molds.
- Granola Crunch: For a bit of texture, you can sprinkle a small amount of crushed granola into the bottom of the molds before pouring the mixture, or gently swirl it in.
Sweetener Adjustments:
- Dates: For a completely fruit-sweetened option, soak a few pitted dates in warm water for 10 minutes, then blend them with the other ingredients.
- Stevia or Monk Fruit: If you’re looking to reduce sugar content, a natural, calorie-free sweetener like stevia or monk fruit can be used to taste.
- Agave Nectar: Another great plant-based alternative to honey, agave nectar can be used in equal measure.
Tips for Perfect Popsicles Every Time
Achieving that ideal popsicle consistency and flavor is easy with a few simple tricks.
- Don’t Overfill: Always leave a little room at the top of your molds for expansion during freezing. Overfilling can lead to uneven popsicles or a sticky mess.
- Taste Test Before Freezing: As mentioned, flavors can mellow when frozen. Taste your blended mixture before pouring it into molds and adjust sweetness or tanginess as needed.
- Ensure Sticks Are Straight: For easy handling, make sure your popsicle sticks are inserted straight into the center of each mold.
- Thorough Freezing: Patience is key! Ensure your popsicles are completely frozen solid before attempting to remove them. This prevents them from breaking or having a slushy center.
- Warm Water Trick: The warm water method for removal is your best friend. A quick dip or rinse under warm tap water helps release the popsicles cleanly without excessive force.
Storage and Shelf Life
Once your Blueberry Cheesecake Popsicles are perfectly frozen, you’ll want to store them properly to maintain their freshness and flavor. After removing them from the molds, you can wrap each popsicle individually in plastic wrap or parchment paper. This helps prevent freezer burn and keeps them from sticking together. Store the wrapped popsicles in an airtight container or a freezer-safe bag. When stored correctly, these delicious treats will last in your freezer for up to 2-3 weeks, though they are usually too tasty to last that long!
Frequently Asked Questions (FAQ)
Here are answers to some common questions you might have about making these healthy and delicious popsicles:
- Can I use frozen blueberries?
- Absolutely! Frozen blueberries work just as well as fresh ones. They might even make the mixture colder, aiding in a quicker freeze. There’s no need to thaw them beforehand; just toss them straight into the blender.
- What kind of yogurt should I use?
- Greek yogurt is highly recommended due to its thick consistency and higher protein content, which contributes to a creamier popsicle. Plain, unsweetened Greek yogurt allows you to control the sweetness perfectly. However, regular plain yogurt can also be used, though your popsicles might be slightly less thick.
- Can I make these dairy-free?
- Yes! To make these popsicles dairy-free, substitute the cream cheese with a dairy-free cream cheese alternative and the regular yogurt with a plain, unsweetened dairy-free yogurt (like coconut, almond, or cashew-based yogurt). Ensure these alternatives are thick and creamy for the best texture.
- My popsicles are too icy, what did I do wrong?
- If your popsicles are too icy, it might be due to a higher water content in your ingredients or an imbalance in the fat/sugar ratio. Ensure you’re using full-fat cream cheese and Greek yogurt if not aiming for dairy-free. Also, ensure your blueberries are well-blended, as any large ice crystals from frozen fruit can contribute to iciness. Adding a little more sweetener (which acts as an anti-freeze) can also help.
- How long do they need to freeze?
- For best results, aim for at least 4 hours, but ideally overnight. The longer they freeze, the firmer and less prone to melting quickly they will be. Always check for complete hardness before attempting to remove them from the molds.
- Can I use different sweeteners?
- Yes, feel free to use your preferred natural sweetener. Agave nectar, stevia, or even a sugar substitute like erythritol can work. Adjust the quantity to your taste as different sweeteners have varying levels of potency.
Conclusion: Your New Favorite Summer Dessert
These Healthy Blueberry Cheesecake Popsicles are more than just a recipe; they’re an invitation to enjoy the summer season with vibrant flavors and guilt-free indulgence. Easy to make, incredibly delicious, and packed with wholesome ingredients, they offer the perfect balance of creamy richness and fruity freshness. Whether you’re hosting a backyard barbecue, looking for a quick cool-down snack, or simply craving something sweet and satisfying, these homemade frozen treats are guaranteed to hit the spot.
So, grab your blender, gather your simple ingredients, and whip up a batch of these delightful popsicles. You’ll be amazed at how such minimal effort can yield such maximum enjoyment. Get ready to make these a recurring favorite in your summer dessert rotation!
Blueberry Cheesecake Popsicles
IMPORTANT – There are often Frequently Asked Questions within the blog post that you may find helpful. Simply scroll back up to read them!
Print It
Rate It
Save ItSaved!
Ingredients
- 1 cup blueberries
- ½ cup cream cheese
- ½ cup yogurt
- 2 Tbsp honey or maple syrup to taste
Instructions
-
Combine all ingredients in a blender until smooth, adding more honey as needed to suit your taste.
-
Pour into molds, leaving a little space at the top for them to expand. Insert sticks and freeze until hard (at least 4 hours).
-
Run the mold under warm water for a few seconds to loosen them up, then remove from the mold.
Nutrition
The recipes on this blog are tested with a conventional gas oven and gas stovetop. It’s important to note that some ovens, especially as they age, can cook and bake inconsistently. Using an inexpensive oven thermometer can assure you that your oven is truly heating to the proper temperature. If you use a toaster oven or countertop oven, please keep in mind that they may not distribute heat the same as a conventional full sized oven and you may need to adjust your cooking/baking times. In the case of recipes made with a pressure cooker, air fryer, slow cooker, or other appliance, a link to the appliances we use is listed within each respective recipe. For baking recipes where measurements are given by weight, please note that results may not be the same if cups are used instead, and we can’t guarantee success with that method.
More Refreshing Popsicle Recipes
If you’ve fallen in love with homemade popsicles, there’s a whole world of frozen possibilities waiting for you. Here are some other fantastic popsicle recipes to try, perfect for any taste or occasion:
- Creamsicle Popsicles – A nostalgic trip down memory lane with a creamy citrus twist.
- Cherry Yogurt Popsicles – Sweet and tangy, a simple fruit and yogurt blend.
- Green Smoothie Popsicles – A fun and healthy way to get your greens, even for picky eaters!
- Mint Chocolate Popsicles – A cool and decadent flavor combination.
- Mango Yogurt Popsicles – Tropical sweetness meets creamy yogurt for a delightful treat.
- Raspberry Mango Popsicles – A vibrant and fruity blend that’s bursting with flavor.
- Strawberry Banana Popsicles – A classic, kid-friendly combination that’s always a hit.
- Blueberry Cheesecake Popsicles – (You’re already here!)
- Assorted Fruit Popsicles – Simple, refreshing, and customizable with any of your favorite fruits.
This post originally appeared here on Jun 19, 2018. It has been updated and expanded for comprehensive content and improved reader experience.
