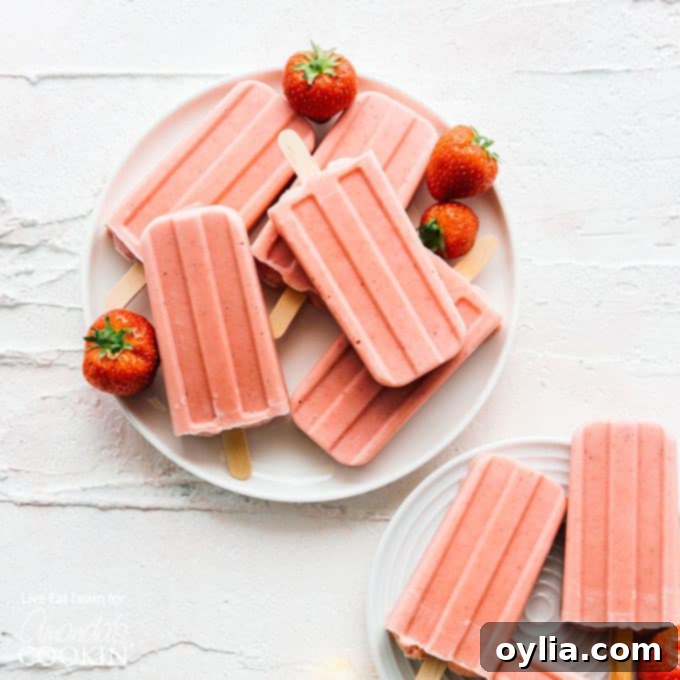
Easy & Healthy Strawberry Banana Popsicles: The Ultimate Summer Treat
Dive into summer with these incredibly delicious and effortlessly easy Strawberry Banana Popsicles! Imagine your favorite fresh strawberry banana smoothie, but in a creamy, frozen form that’s perfect for a hot day. These homemade popsicles are not only simple to whip up but also a fantastic, healthy alternative to store-bought treats, making them an ideal staple to keep stashed in your freezer all season long. Get ready to enjoy a burst of natural fruit flavor with every refreshing bite!
Why Homemade Strawberry Banana Popsicles Are a Must-Have This Summer
Summer is synonymous with icy treats, and there’s nothing quite like a homemade popsicle to beat the heat. Forget those sugary, artificial store-bought options! Making your own popsicles at home is not just incredibly easy and delicious, but it also gives you complete control over the ingredients. This means healthier, more wholesome snacks for you and your family.
The beauty of homemade popsicles lies in their simplicity and versatility. As a general rule, any great smoothie can be transformed into an even greater frozen treat. And what’s more classic and universally loved than the combination of sweet strawberries and creamy bananas? These delightful popsicles capture the essence of summer, offering a refreshing and satisfying dessert that’s packed with natural goodness. They’re perfect for poolside lounging, backyard barbecues, or just a simple afternoon pick-me-up.
Simple Ingredients for Irresistible Strawberry Banana Popsicles
The beauty of these popsicles lies in their minimal and wholesome ingredient list. You likely have most of these on hand already!
To make these delicious Strawberry Banana Popsicles, you’ll need:
- 1 cup fresh strawberries: Ensure they are ripe, hulled, and quartered. Ripe strawberries provide the best natural sweetness and vibrant color.
- 2 ripe bananas: The riper, the better! Overripe bananas (with brown spots) are naturally sweeter and create a creamier texture when blended and frozen.
- ½ cup yogurt: You can use plain, vanilla, or even strawberry-flavored yogurt. Greek yogurt will yield an extra creamy and protein-rich popsicle. For a dairy-free option, unsweetened coconut or almond yogurt works wonderfully.
- 2 Tbsp honey or sugar: This is your primary sweetener. Adjust the amount to your taste preferences and the ripeness of your fruit. Maple syrup is another great natural alternative.
Essential Kitchen Tools for Easy Popsicle Making:
Having the right tools makes the process even smoother:
- Blender: A powerful blender is key to achieving a perfectly smooth and creamy mixture, free of chunks.
- Popsicle mold: Reusable popsicle molds are a great investment for year-round homemade frozen treats. There are many fun shapes and sizes available!
- Popsicle sticks: If your mold requires them, ensure you have a good supply of wooden or reusable plastic sticks.
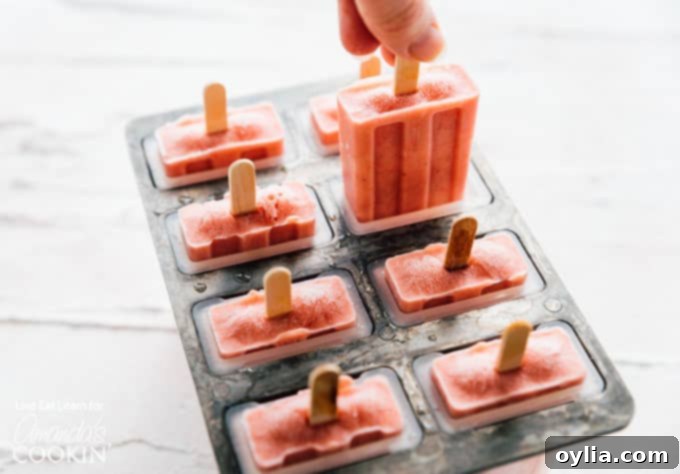
How to Make Creamy Strawberry Banana Popsicles: Step-by-Step
Making these creamy, fruity popsicles couldn’t be simpler! It’s a quick process that yields incredibly rewarding results.
- Prepare the Fruit: Start by hulling and quartering your fresh strawberries. Peel your ripe bananas. The riper your fruit, the more naturally sweet and flavorful your popsicles will be.
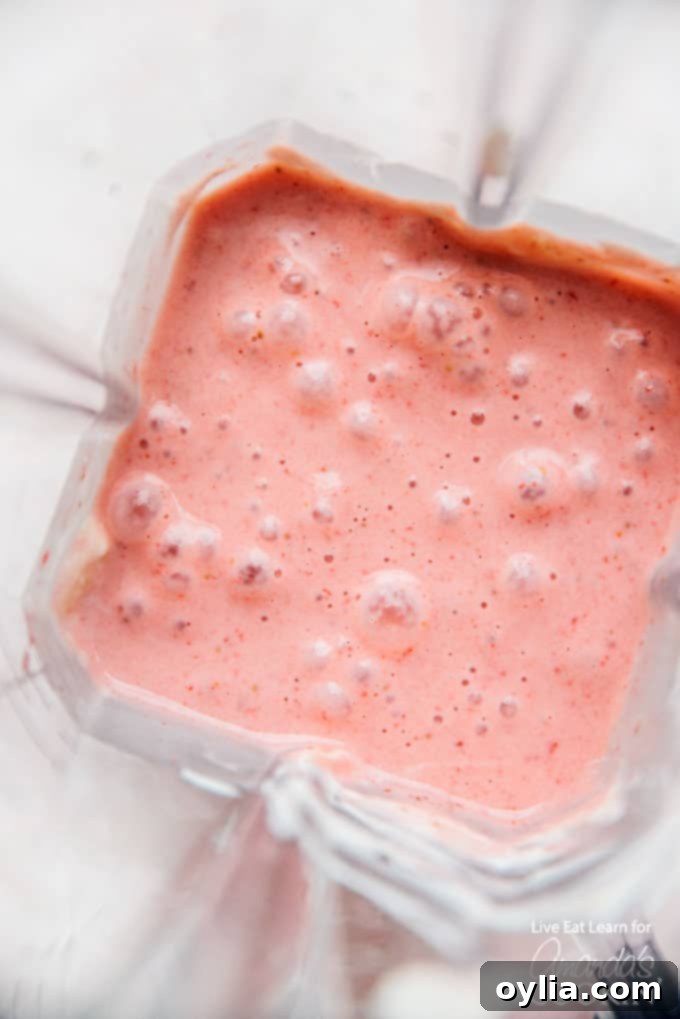
- Blend All Ingredients: Add the prepared strawberries, bananas, yogurt, and your chosen sweetener (honey or sugar) into a blender. Blend until the mixture is completely smooth and creamy. There should be no visible fruit chunks.
- Taste and Adjust Sweetness: This is a crucial step! Taste the blended mixture. Remember that flavors tend to be less intense when frozen, so don’t be afraid to add a little more honey or sugar than you think you might need to achieve your desired sweetness. Blend again briefly to incorporate any added sweetener.
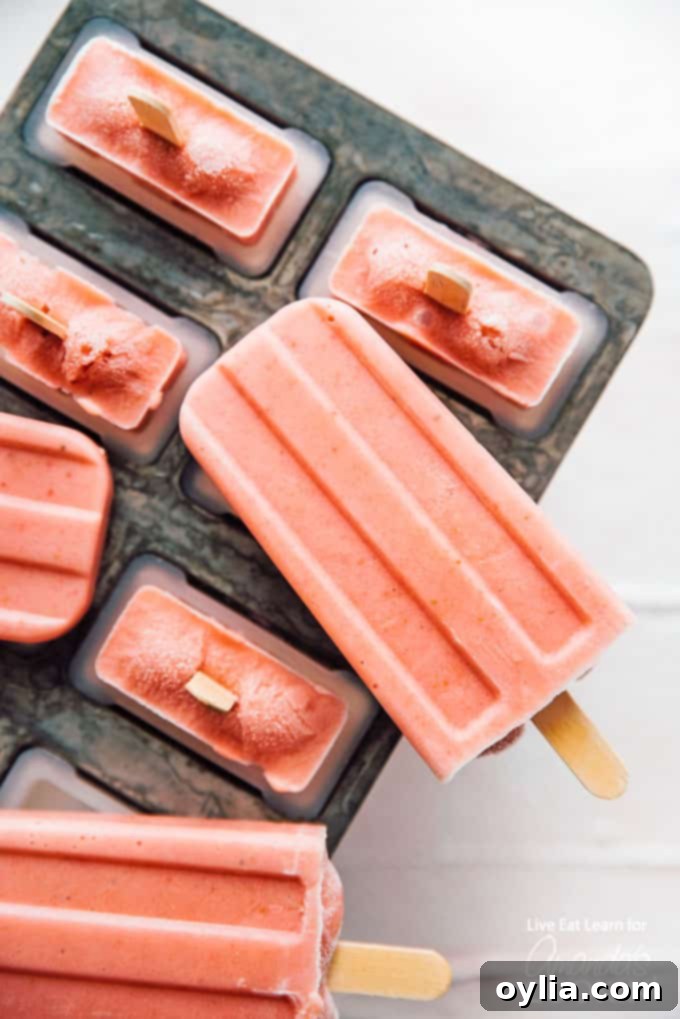
- Pour into Molds: Carefully pour the smoothie mixture into your popsicle molds. Be sure to leave a small amount of space at the top of each mold – about ¼ to ½ inch – as the mixture will expand slightly when frozen.
- Insert Sticks and Freeze: Insert your popsicle sticks into the filled molds. Place the molds in the freezer and allow them to freeze until completely solid. This usually takes at least 4 hours, but for best results and firm popsicles, overnight freezing is recommended.
- Remove and Enjoy: Once frozen solid, run the popsicle mold under warm water for a few seconds. This helps to loosen the popsicles from the mold, making them easy to remove. Gently pull each popsicle out and serve immediately!
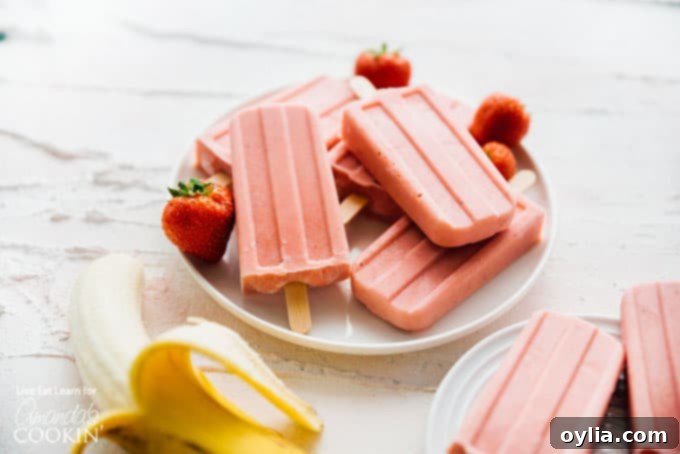
Tips and Variations for the Best Strawberry Banana Popsicles
While the basic recipe is fantastic, there are many ways to customize these popsicles to your liking and ensure perfect results every time:
Achieving Optimal Sweetness and Flavor:
- Use Ripe Fruit: This cannot be stressed enough! The natural sugars in ripe strawberries and bananas are what give these popsicles their incredible flavor and sweetness. If your fruit isn’t very ripe, you might need to add a bit more sweetener.
- Taste Test Before Freezing: Always taste the blended mixture before pouring it into molds. Frozen treats have a slightly muted flavor, so the mixture should taste a little sweeter than you’d prefer for a smoothie.
- Adjust Sweetener: Honey is a great natural choice, but maple syrup or agave nectar also work well. For a less processed option, you can even use pitted dates blended into the mixture.
Yogurt Choices and Textures:
- Plain Yogurt: Offers a tangy contrast that balances the fruit’s sweetness, and allows the fruit flavors to shine.
- Vanilla Yogurt: Adds a subtle warmth and creamy depth of flavor.
- Strawberry Yogurt: Boosts the strawberry flavor for an even fruitier experience.
- Greek Yogurt: For an extra thick, creamy, and protein-packed popsicle, Greek yogurt is an excellent choice.
- Dairy-Free Options: Unsweetened coconut milk, almond milk yogurt, or cashew milk yogurt can be used for a vegan or dairy-intolerant version. Note that some dairy-free alternatives might result in a slightly icier texture.
Creative Add-ins and Variations:
- Boost of Nutrients: Add a tablespoon of chia seeds or flax seeds to the blender for extra fiber and omega-3s. They also help create a slightly thicker texture.
- Hidden Veggies: For a nutrient boost without altering the flavor too much, try adding a handful of spinach (it blends completely unseen!).
- Tropical Twist: Add a splash of coconut milk or a few chunks of mango to the blend for a more tropical flavor profile.
- Citrus Brightness: A squeeze of fresh lemon or lime juice can brighten the flavors and add a zesty kick.
- Chocolate Drizzle: For a decadent touch, once the popsicles are frozen, melt some chocolate chips and drizzle over the popsicles, then refreeze briefly to set.
Storage Tips:
Once your popsicles are fully frozen and removed from their molds, store them in an airtight freezer bag or container. This prevents freezer burn and helps maintain their freshness and flavor for up to 2-3 weeks.
Frequently Asked Questions About Strawberry Banana Popsicles
Can I use frozen fruit instead of fresh?
Absolutely! Using frozen strawberries and bananas is a great option, especially if fresh produce isn’t in season or readily available. In fact, using frozen fruit can sometimes create an even creamier, thicker consistency and help the popsicles freeze faster. If using all frozen fruit, you might need to add a tiny splash of milk or water to help your blender get started, but be careful not to make the mixture too thin.
How long do homemade popsicles last in the freezer?
When stored properly in an airtight container or freezer bag, these strawberry banana popsicles will stay fresh and delicious for about 2 to 3 weeks. Beyond that, they might start to develop freezer burn or lose some of their vibrant flavor and creamy texture.
Are these popsicles truly healthy?
Yes! These popsicles are made with wholesome, natural ingredients: fruit, yogurt, and a small amount of natural sweetener. They are a much healthier alternative to many store-bought options that are often loaded with high-fructose corn syrup, artificial flavors, and dyes. With fresh fruit and yogurt, they offer vitamins, minerals, and probiotics (from yogurt).
What if I don’t have a popsicle mold?
No problem! You can get creative. Small paper cups or even ice cube trays can work. Pour the mixture into the cups or trays, and once they’ve frozen for about an hour (or when the mixture is firm enough to hold a stick upright), insert a wooden popsicle stick into each. Freeze until completely solid. To remove, simply tear off the paper cup or gently twist the ice cube tray.
More Refreshing Popsicle Recipes to Try
If you’ve fallen in love with making homemade popsicles, you’re in for a treat! Explore more delicious frozen dessert ideas:
- Mint Chocolate Popsicles
- Cherry Yogurt Popsicles
- Mango Yogurt Popsicles
- Creamsicle Popsicles
- Green Smoothie Popsicles
- Raspberry Mango Popsicles
- Strawberry Banana Popsicles (yes, these too!)
- Blueberry Cheesecake Popsicles
- Simple Fruit Popsicles
And for true popsicle enthusiasts, don’t forget to check out my cookbook For the Love of Popsicles for even more creative and delightful recipes!
Strawberry Banana Popsicles
IMPORTANT – There are often Frequently Asked Questions within the blog post that you may find helpful. Simply scroll back up to read them!
Print It
Pin It
Rate It
Save ItSaved!
Ingredients
- 1 cup fresh strawberries hulled and quartered (or use frozen)
- 2 ripe bananas
- ½ cup plain yogurt (can sub vanilla, strawberry, or a dairy-free alternative)
- 2 Tbsp honey (or sugar, adjust to taste)
Instructions
-
Combine all ingredients (strawberries, bananas, yogurt, and honey/sugar) in a blender. Blend until the mixture is completely smooth and creamy. Taste the mixture and add more honey or sugar if needed, remembering that flavors are less intense when frozen.
-
Pour the blended mixture into your popsicle molds, leaving a small space (about ¼ to ½ inch) at the top of each mold to allow for expansion during freezing. Insert the popsicle sticks firmly into the molds.
-
Place the filled molds in the freezer. Freeze for at least 4 hours, or preferably overnight, until the popsicles are completely solid.
-
To easily remove the popsicles, run the mold under warm water for a few seconds. This will slightly loosen the edges, allowing you to gently pull them out of the mold. Serve immediately and enjoy!
Nutrition
The recipes on this blog are tested with a conventional gas oven and gas stovetop. It’s important to note that some ovens, especially as they age, can cook and bake inconsistently. Using an inexpensive oven thermometer can assure you that your oven is truly heating to the proper temperature. If you use a toaster oven or countertop oven, please keep in mind that they may not distribute heat the same as a conventional full sized oven and you may need to adjust your cooking/baking times. In the case of recipes made with a pressure cooker, air fryer, slow cooker, or other appliance, a link to the appliances we use is listed within each respective recipe. For baking recipes where measurements are given by weight, please note that results may not be the same if cups are used instead, and we can’t guarantee success with that method.
