Spatchcock Chicken: The Secret to Perfectly Crispy, Juicy, and Faster Roasted Whole Chicken
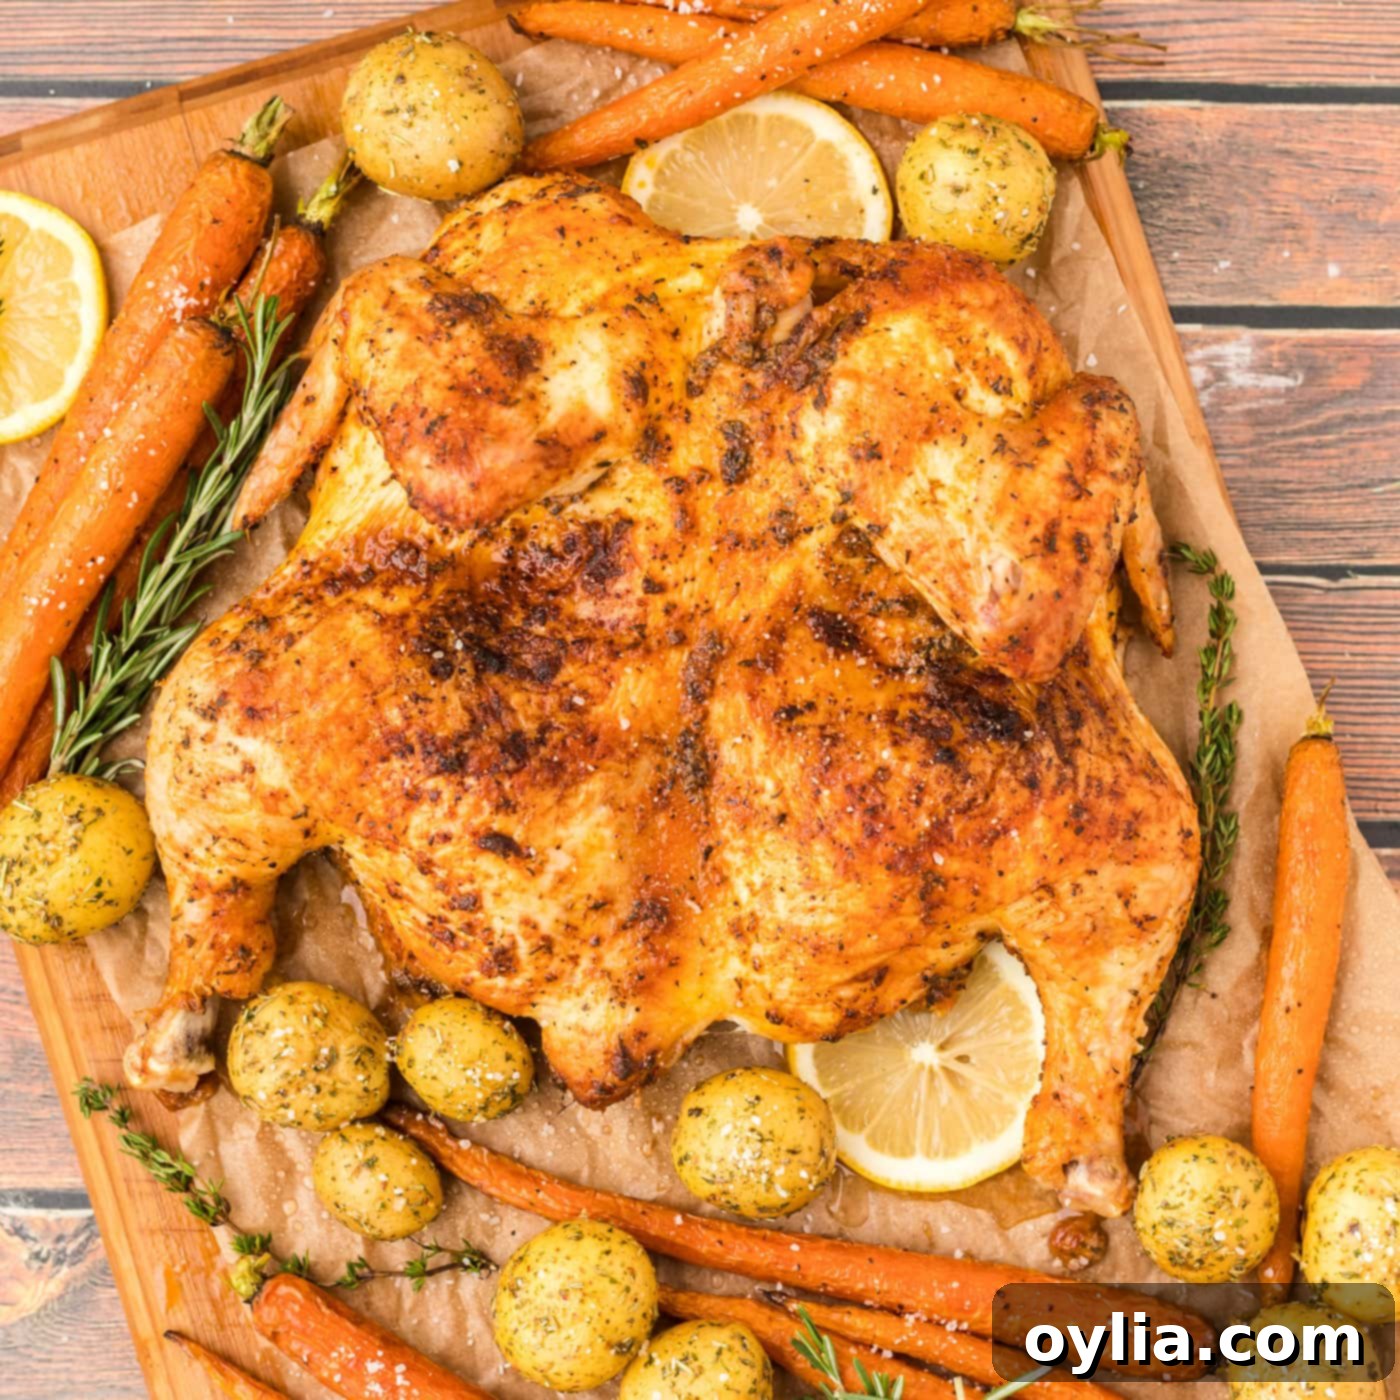
Prepare to revolutionize your Sunday roast with this incredible spatchcock chicken recipe. Forget dry breasts and unevenly cooked meat; this method guarantees a whole chicken that’s bursting with flavor, incredibly juicy throughout, and crowned with irresistibly crispy golden skin. Our secret lies in a vibrant lemon pepper, paprika, and garlic salt rub that infuses every bite with aromatic goodness, all roasted to perfection in your oven.
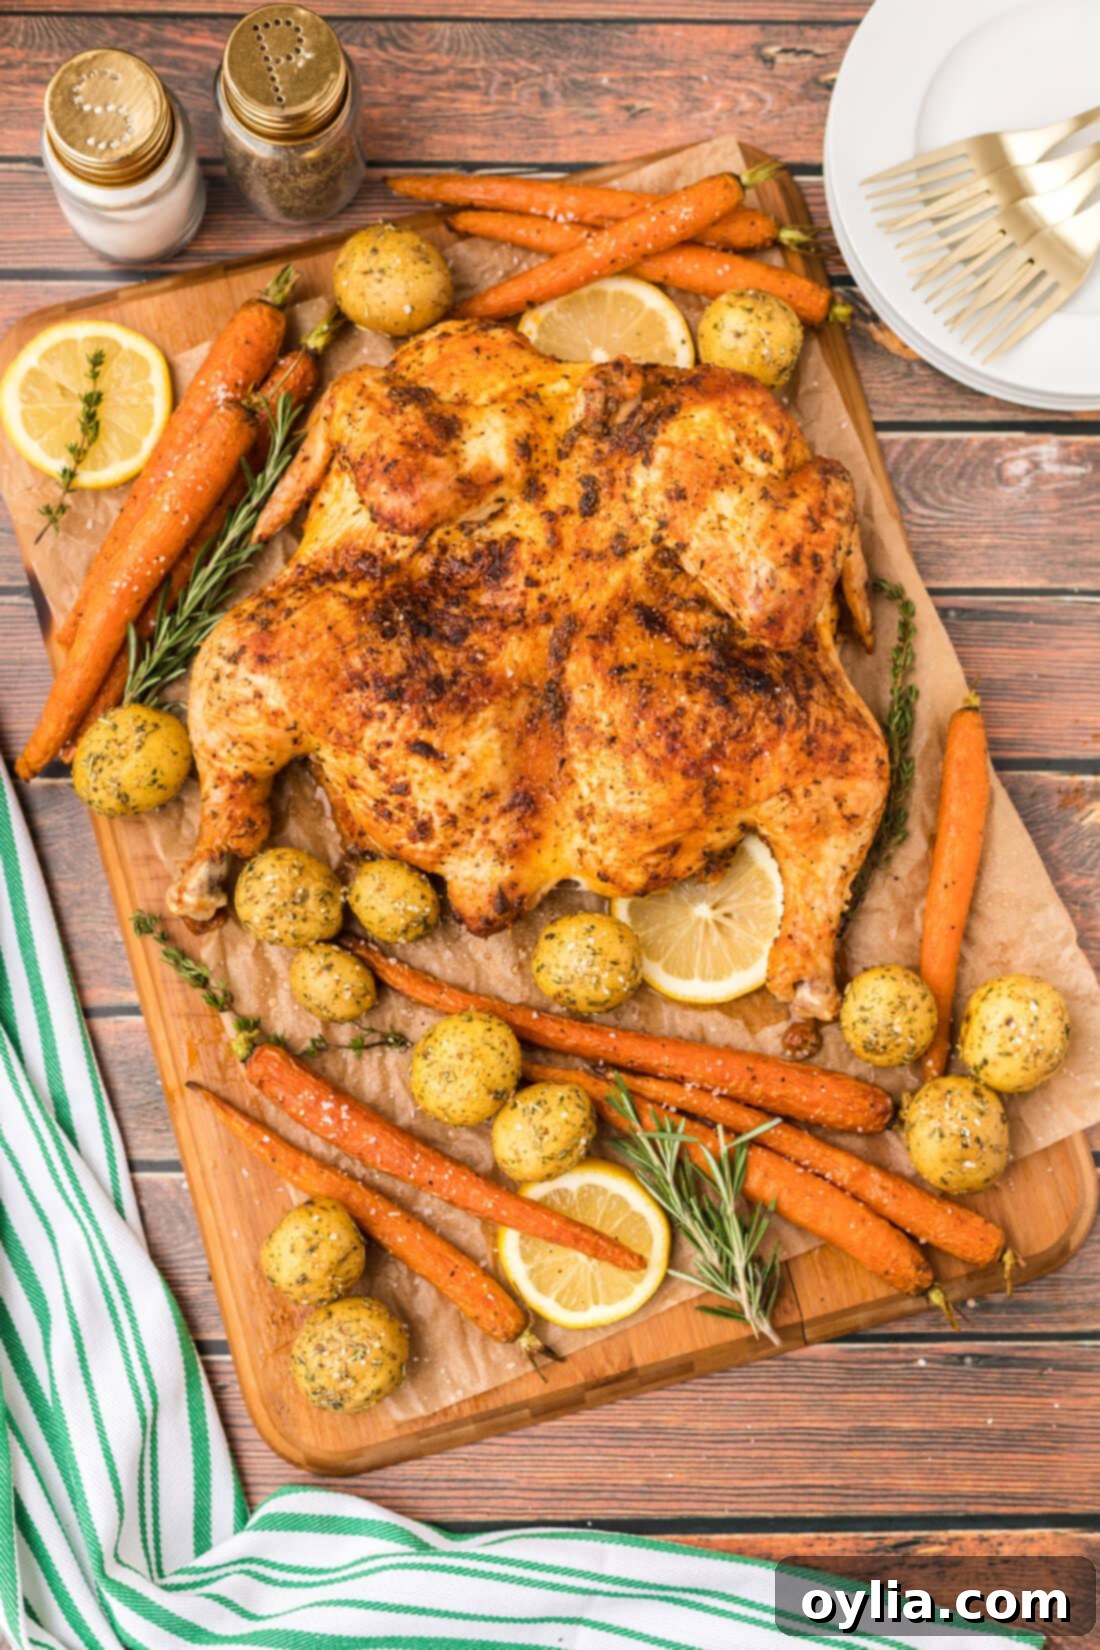
Why Spatchcock Chicken is a Game Changer for Your Kitchen
Spatchcocking, also known as butterflying, is a revolutionary method for cooking a whole chicken. It involves removing the backbone and flattening the bird, allowing it to cook much faster and more evenly than traditional roasted chicken. This technique isn’t just a culinary trick; it’s a science-backed approach to achieving superior results.
Have you ever experienced the frustration of dry chicken breasts while waiting for the dark meat to fully cook? Or perhaps a beautifully browned skin on top, but a pale, soft underside? Spatchcocking eliminates these common pitfalls. By flattening the chicken, all parts of the bird are exposed to the same amount of heat at roughly the same time. This means the delicate breast meat and the more robust dark meat cook simultaneously, reaching optimal doneness without one drying out.
Beyond even cooking, spatchcocking dramatically reduces roasting time, making a whole roasted chicken a viable option for weeknight dinners, not just special occasions. The flattened surface also maximizes skin exposure, resulting in an incredibly crispy, golden-brown exterior that is simply irresistible. Say goodbye to unevenly cooked, less-than-perfect chicken and hello to a uniformly tender, juicy, and flavorful bird with the best golden-crisp skin you’ve ever tasted.
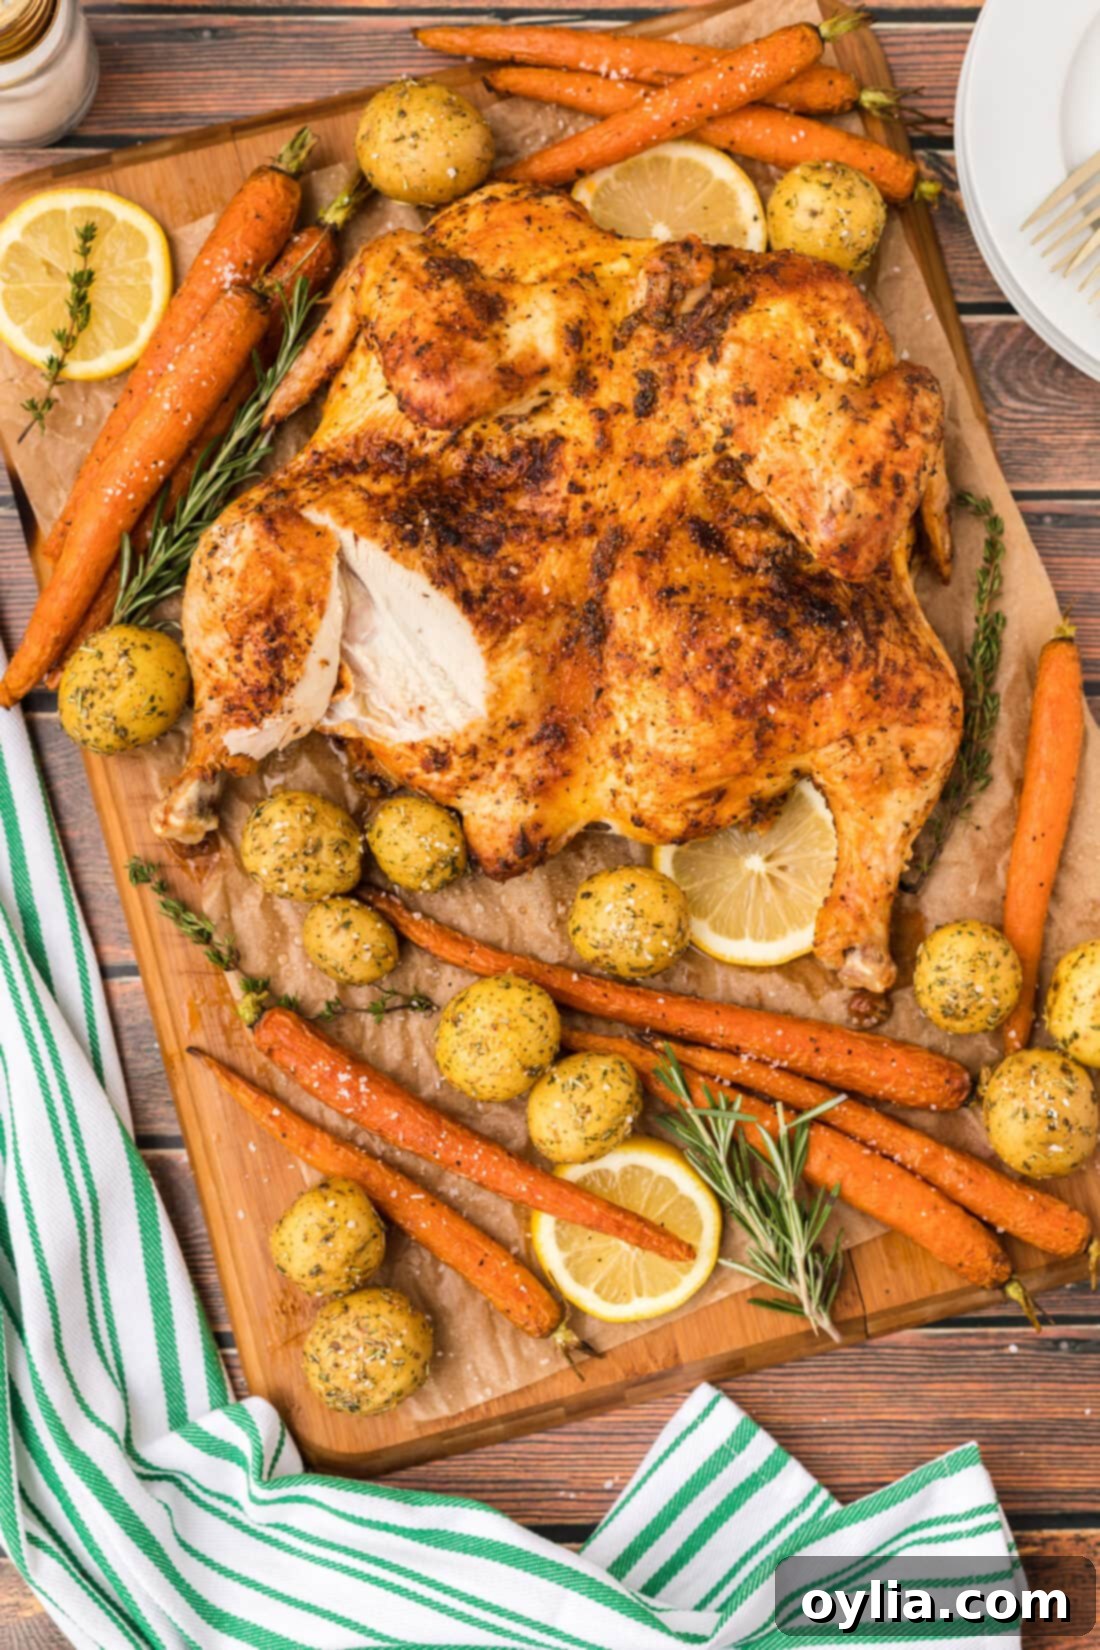
Essential Ingredients for Your Perfect Spatchcock Chicken
Crafting a memorable spatchcock chicken begins with a few simple, high-quality ingredients. Our recipe uses a flavor-packed rub that guarantees a savory and zesty kick. Below is a detailed look at what you’ll need, along with some tips for best results. You can find all specific measurements and comprehensive instructions in the printable recipe card at the end of this post.
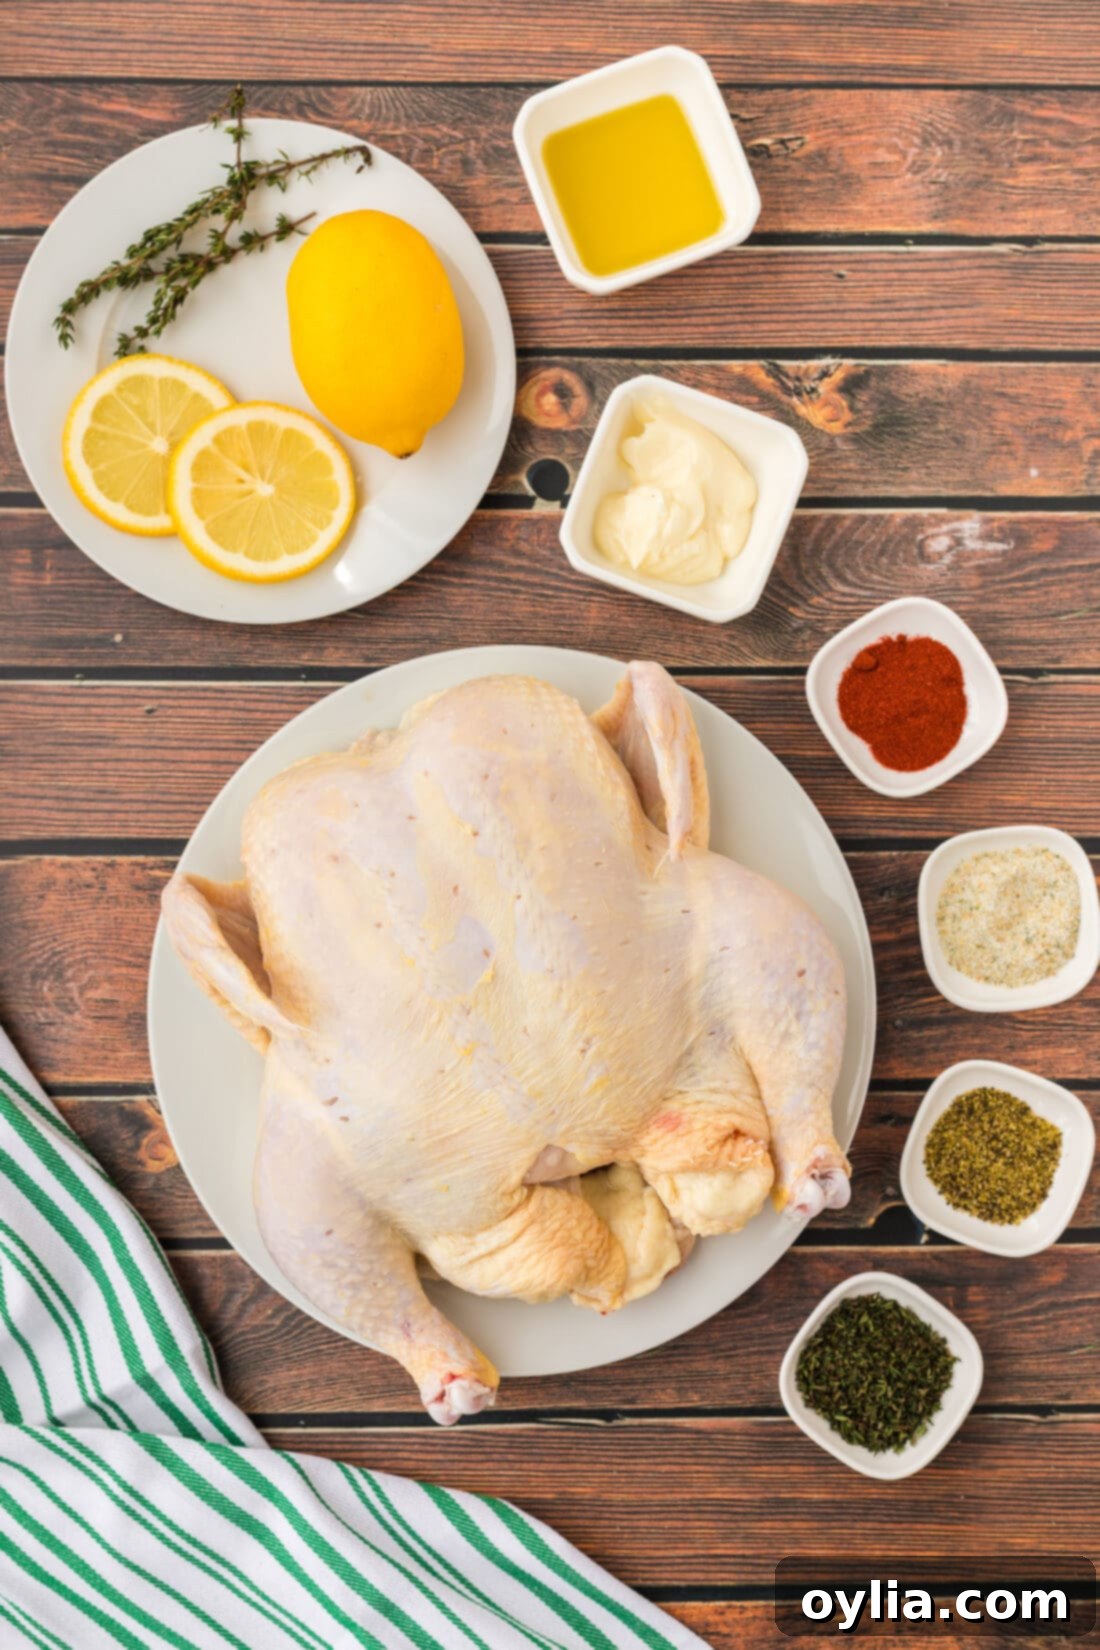
Ingredient Information and Smart Substitutions
- Whole Chicken: For this recipe, a 4 1/2 pound raw whole chicken is ideal. The size allows for optimal cooking time and serves a good number of people. It’s crucial to let the chicken sit at room temperature for about 20-30 minutes before you begin preparation. This helps the chicken cook more evenly and prevents the exterior from cooking too quickly while the interior remains cold.
- Olive Oil: Extra virgin olive oil is used as the base for our flavorful rub. It not only helps the spices adhere to the chicken but also contributes to the beautiful browning and crispiness of the skin. If you don’t have olive oil, a neutral oil like avocado oil or grapeseed oil can be used as a substitute.
- Smoked Paprika: This spice is key for adding a deep, smoky flavor and a rich, appealing color to your chicken. Regular paprika can be used in a pinch, but you’ll miss out on the distinctive smoky notes. A touch of cayenne pepper can be added for a hint of heat if desired.
- Garlic Salt: A convenient blend of salt and garlic powder, garlic salt provides both seasoning and a beloved savory aroma. If you only have garlic powder and salt separately, combine them, ensuring you adjust the salt content to your preference. Fresh minced garlic can also be incorporated for an even more pungent garlic flavor.
- Lemon Pepper: This vibrant seasoning adds a bright, zesty kick that beautifully complements the richness of the chicken. It typically includes black pepper, lemon zest, and other spices. If you don’t have lemon pepper, you can create a similar flavor profile by combining freshly ground black pepper with finely grated lemon zest.
- Butter: Well-softened butter, almost pudding-like in consistency, is essential for achieving that ultra-crispy skin. It provides a rich fat layer that helps render the skin perfectly while adding incredible flavor. Unsalted butter is recommended so you can control the salt content from the garlic salt. If you prefer, a dairy-free butter alternative can be used.
How to Master Spatchcock Chicken: Step-by-Step Guide
These step-by-step photos and detailed instructions are here to guide you through making this incredible recipe. For a quick reference, you can Jump to Recipe to get the printable version of this recipe, complete with precise measurements and instructions at the bottom.
- Prepare Your Oven: Begin by preheating your oven to a steady 400°F (200°C). This ensures the oven is at the correct temperature when the chicken goes in, promoting even cooking and crispy skin from the start.
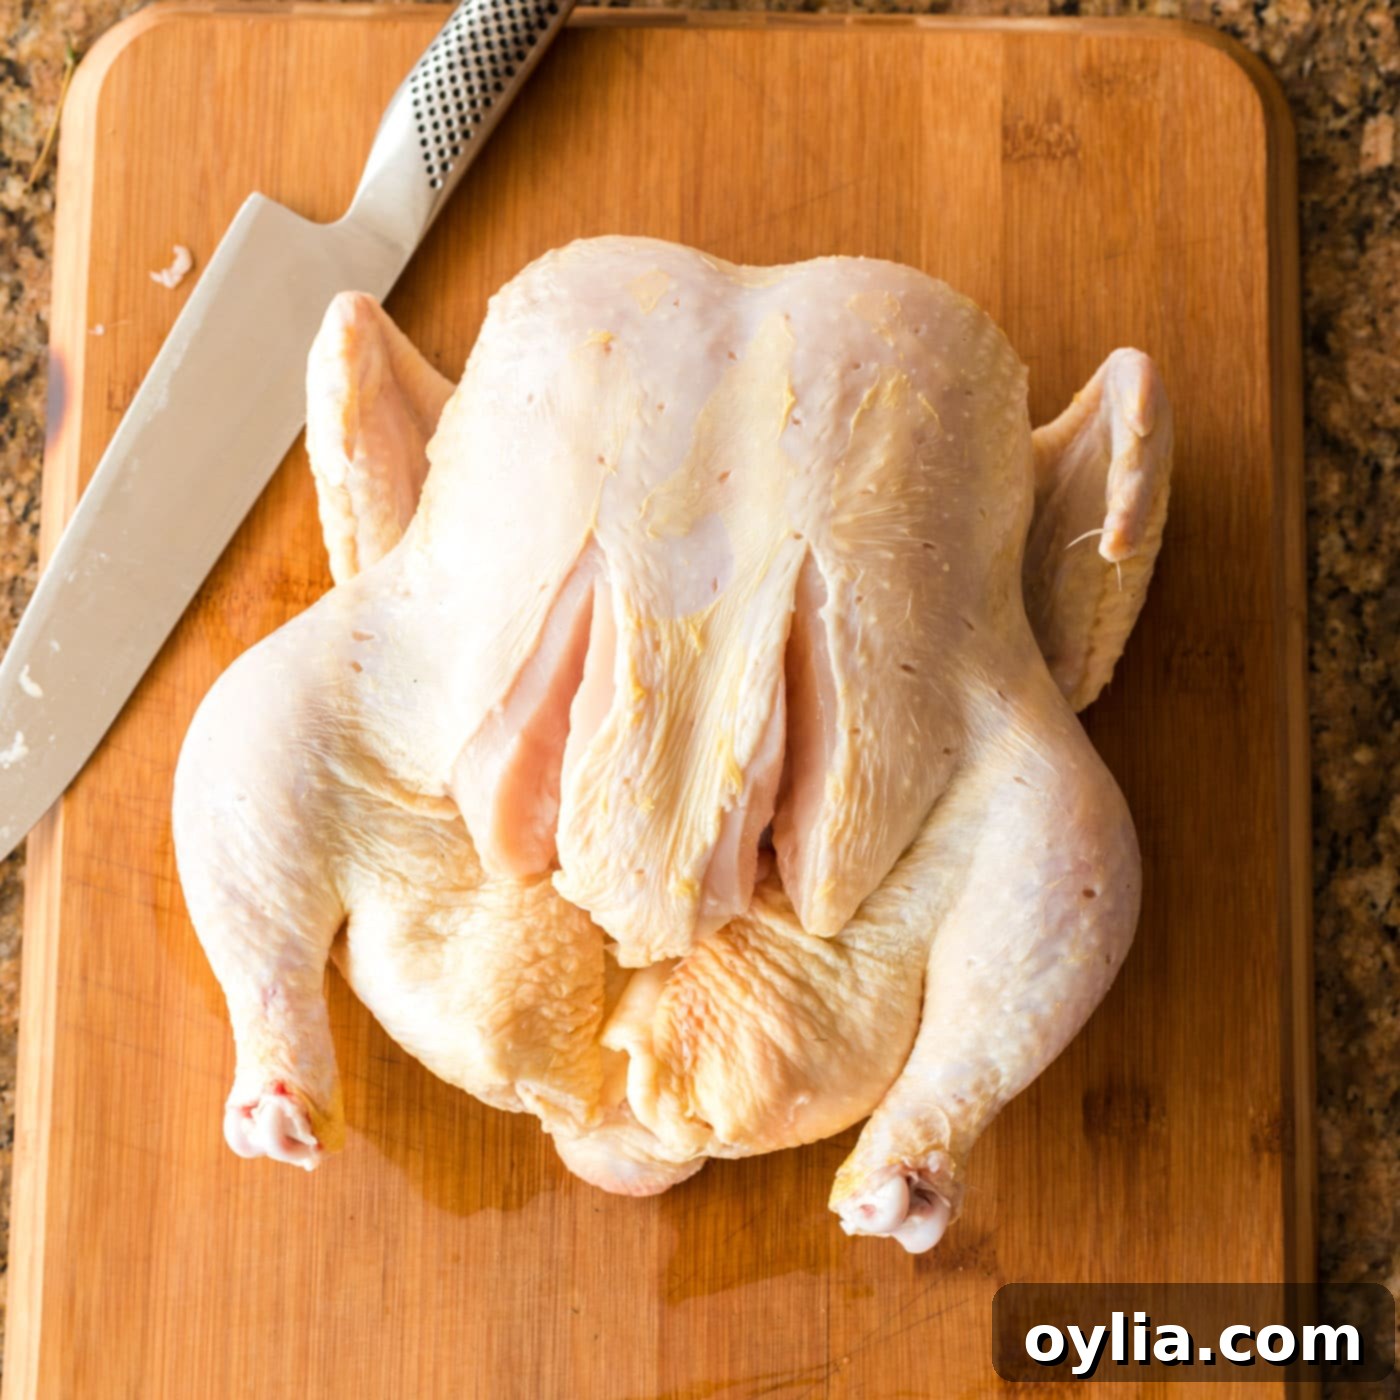
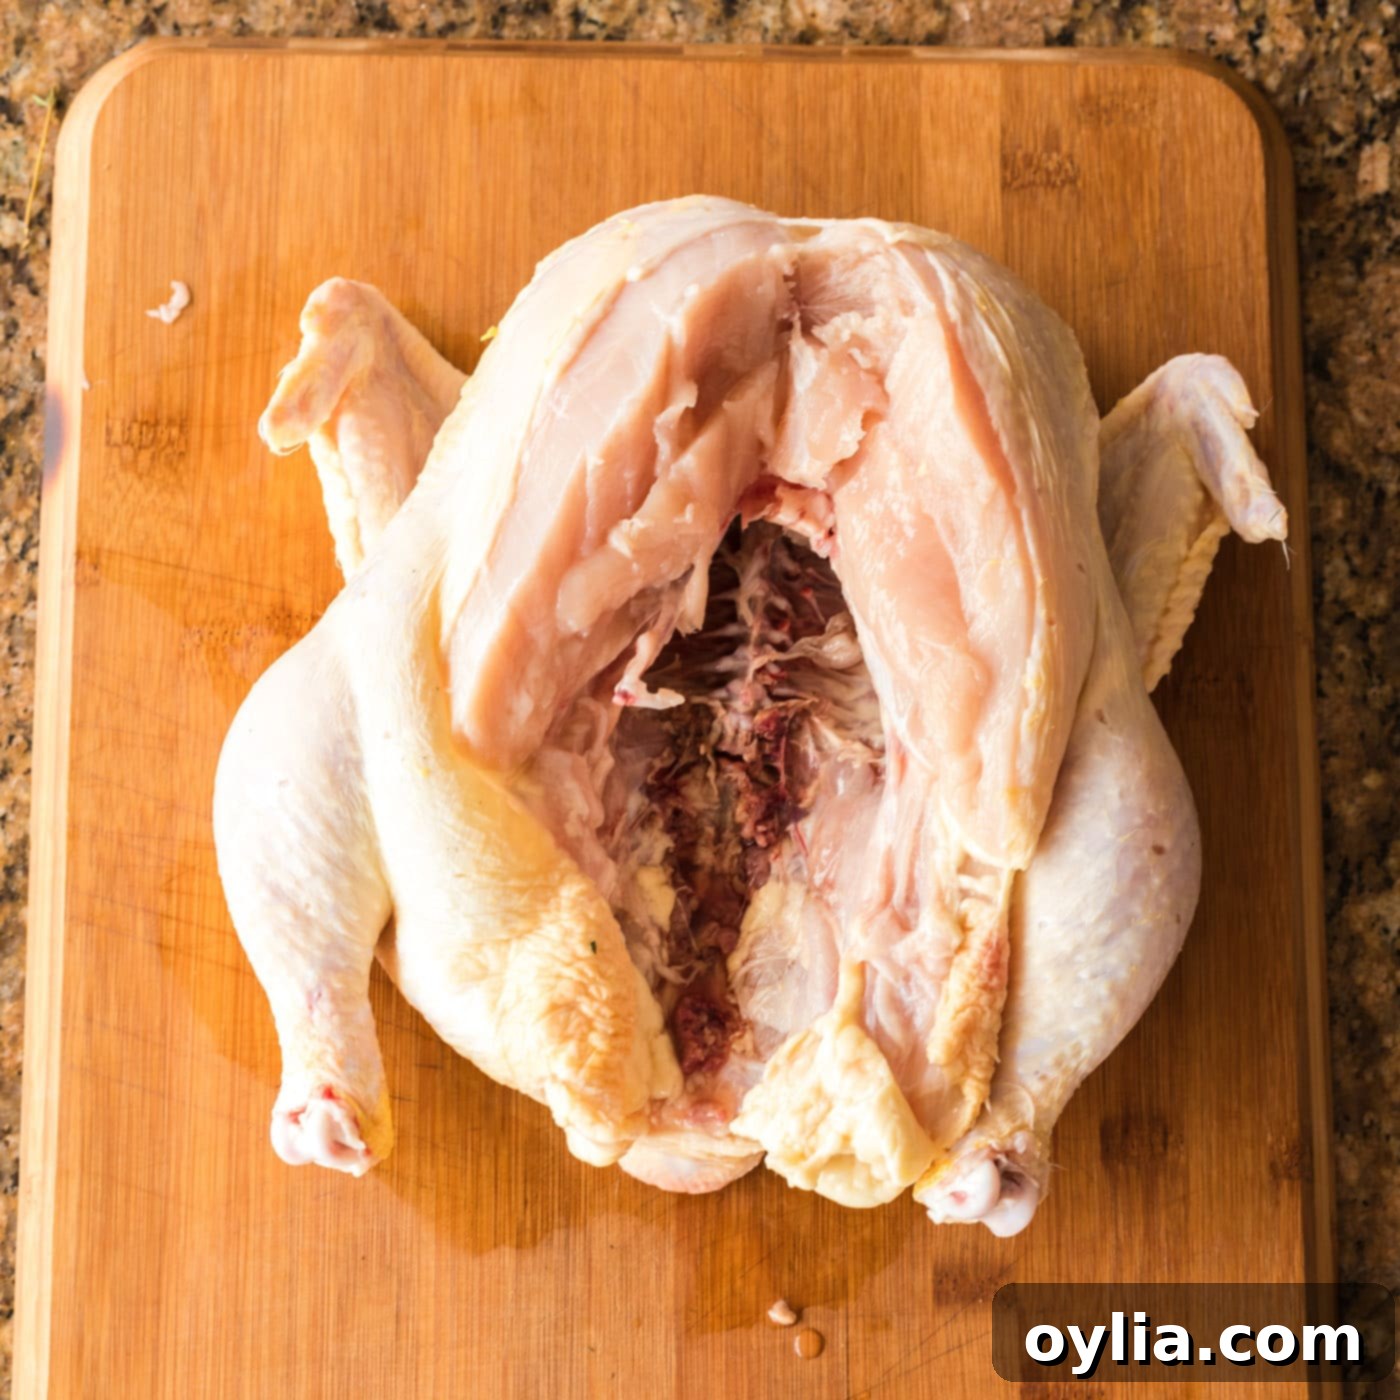
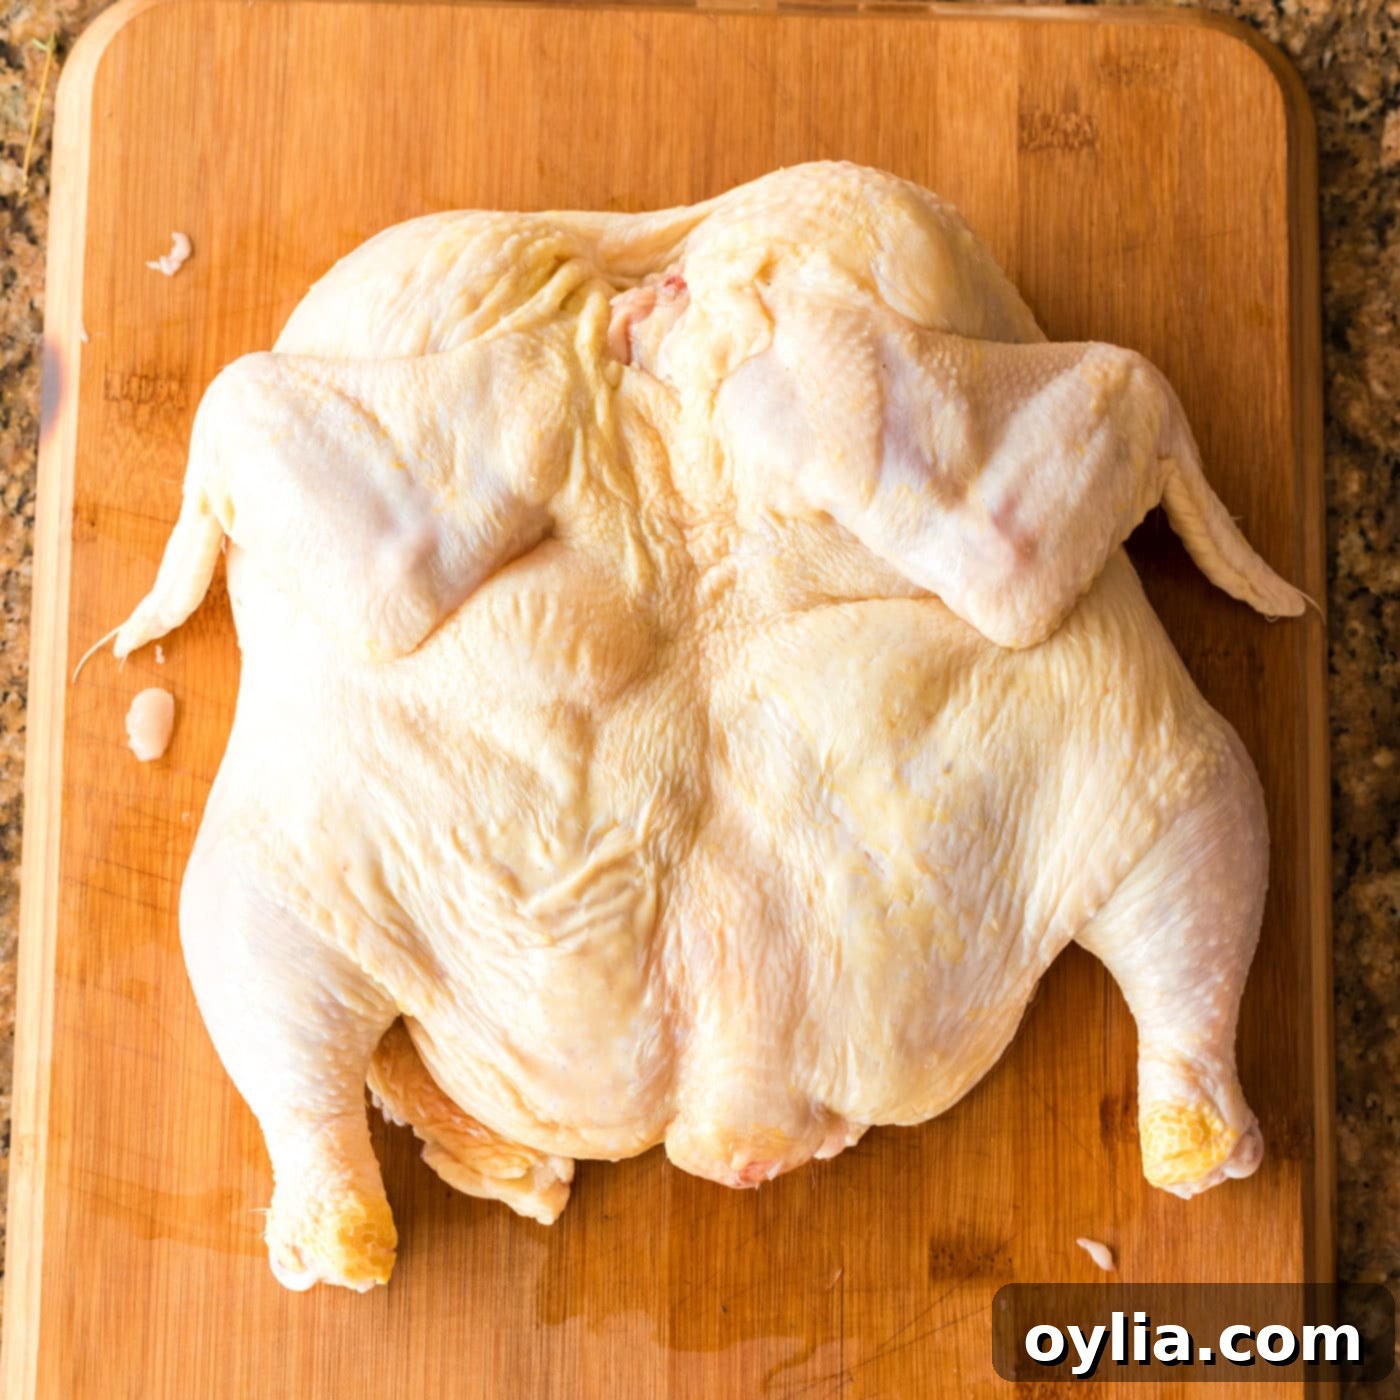
- Remove the Backbone: Place your whole chicken breast-side down on a sturdy cutting board. Using a sharp chef’s knife or, even better, a pair of heavy-duty kitchen shears, make two precise cuts along each side of the spine. Carefully cut all the way up the spine to completely remove it. This is the core of the spatchcocking technique.
EXPERT TIP: Aim to cut as close to the spine as possible to maximize the meat left on the chicken. The removed backbone can be discarded, placed on the baking pan with the chicken to cook (the meat can be picked off later), or saved for making a flavorful chicken stock or broth.


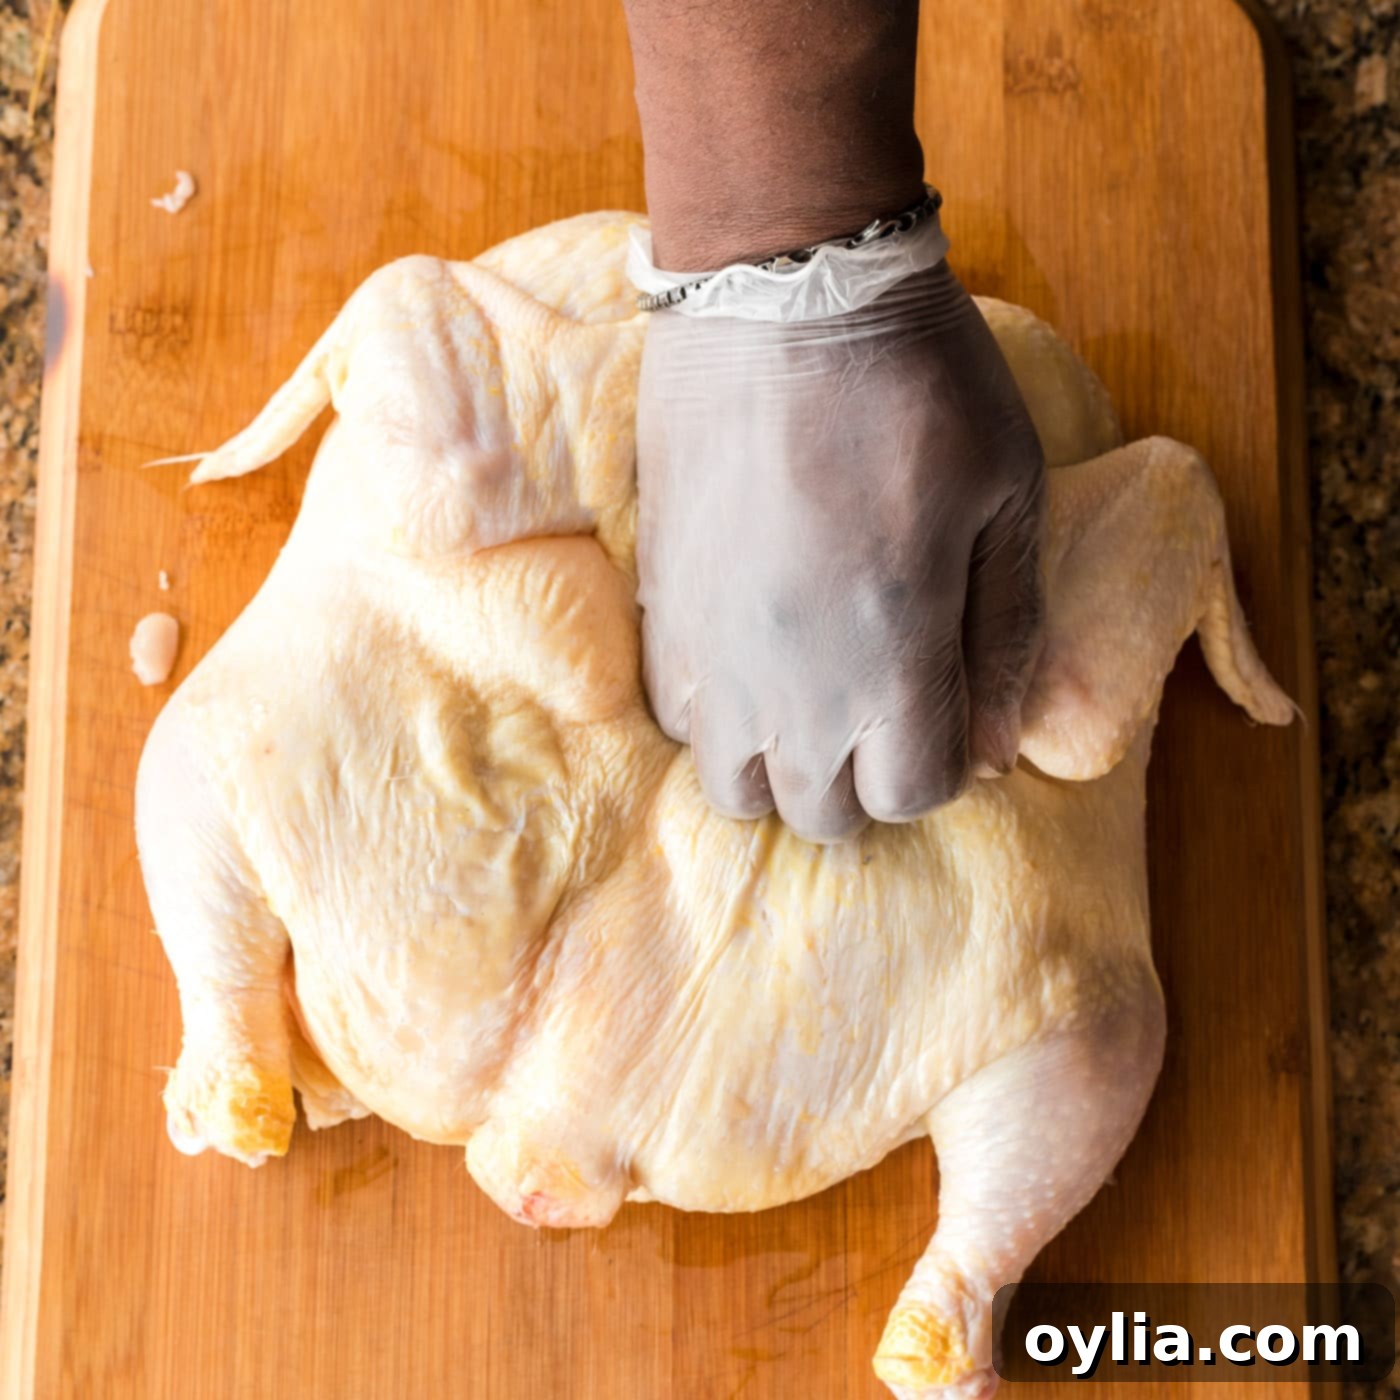
- Flatten the Bird: Once the spine is removed, flip the chicken over so it’s breast-side up. Using the heel of your hand or even a sturdy pan, apply firm, even pressure to the breastbone until you hear a crack. This action flattens the chicken completely, ensuring that it lies flat on the baking sheet and cooks evenly.


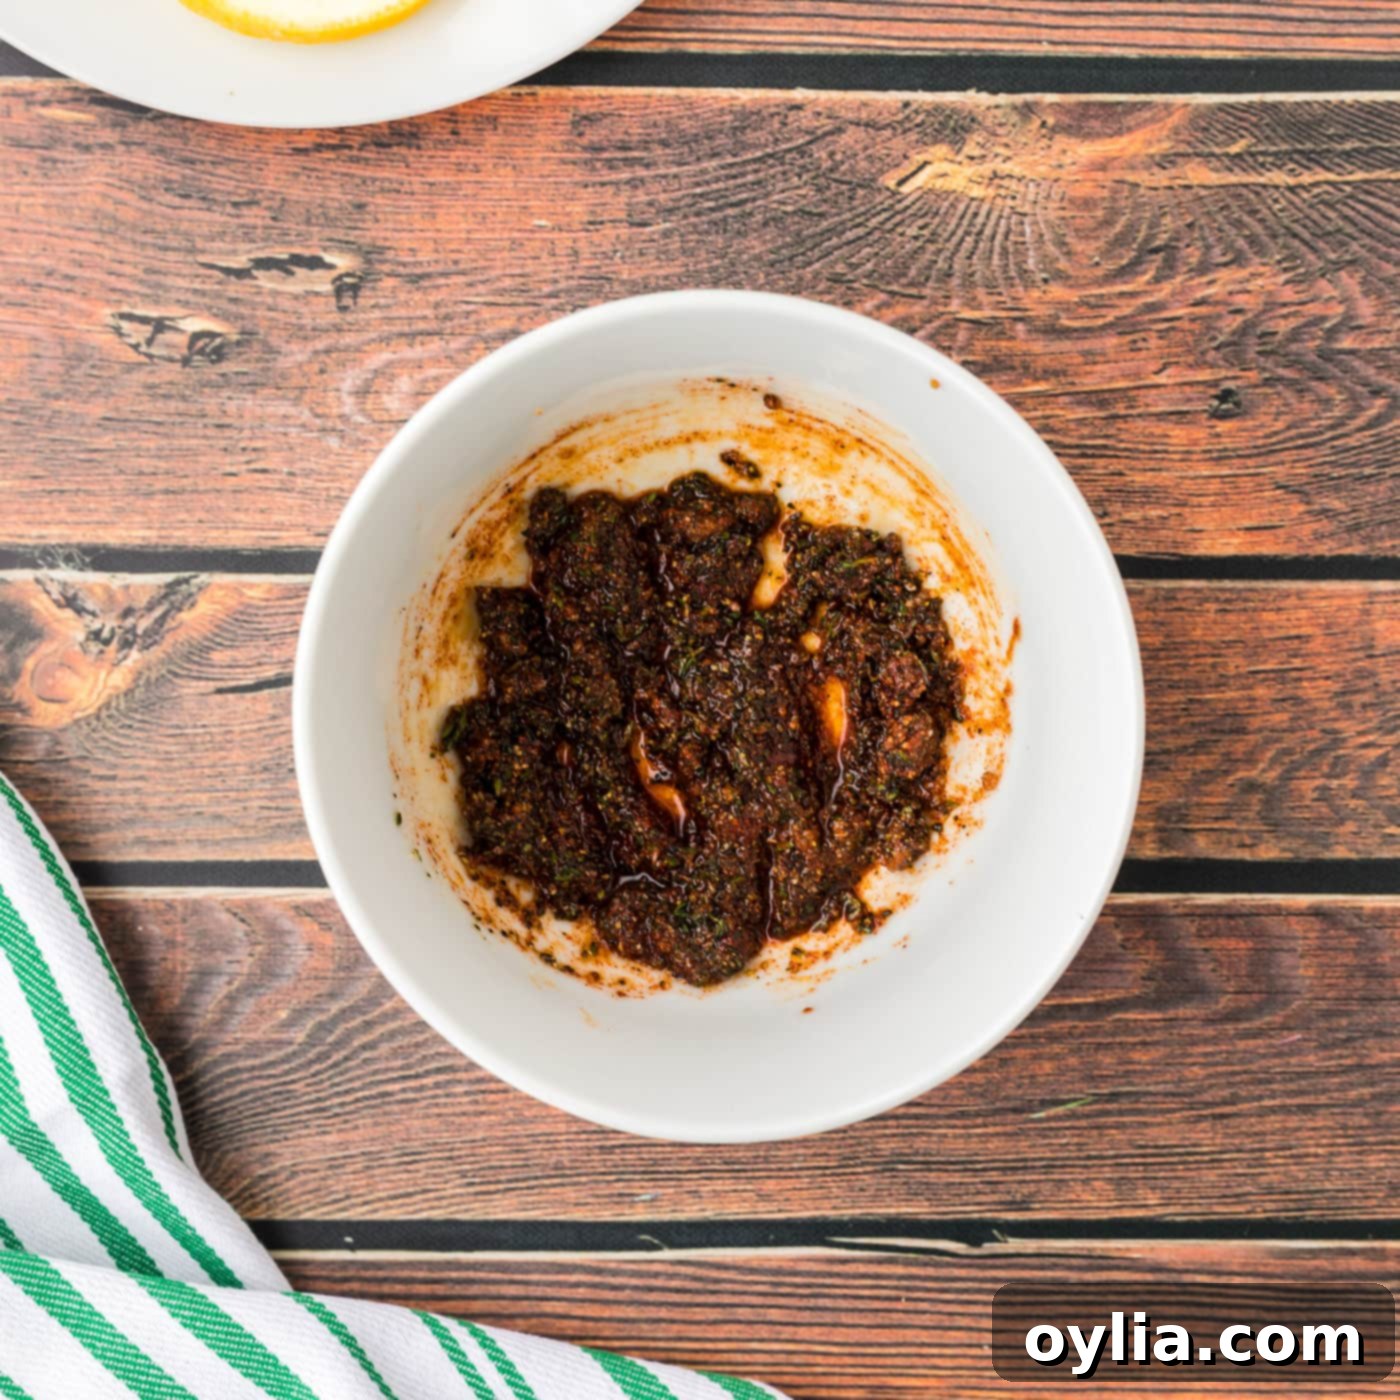
- Prepare the Flavorful Rub: In a small bowl, combine the olive oil, smoked paprika, garlic salt, and lemon pepper. Mix these ingredients thoroughly until they form a thick, uniform paste. This ensures that the flavors are well-integrated and easy to apply.

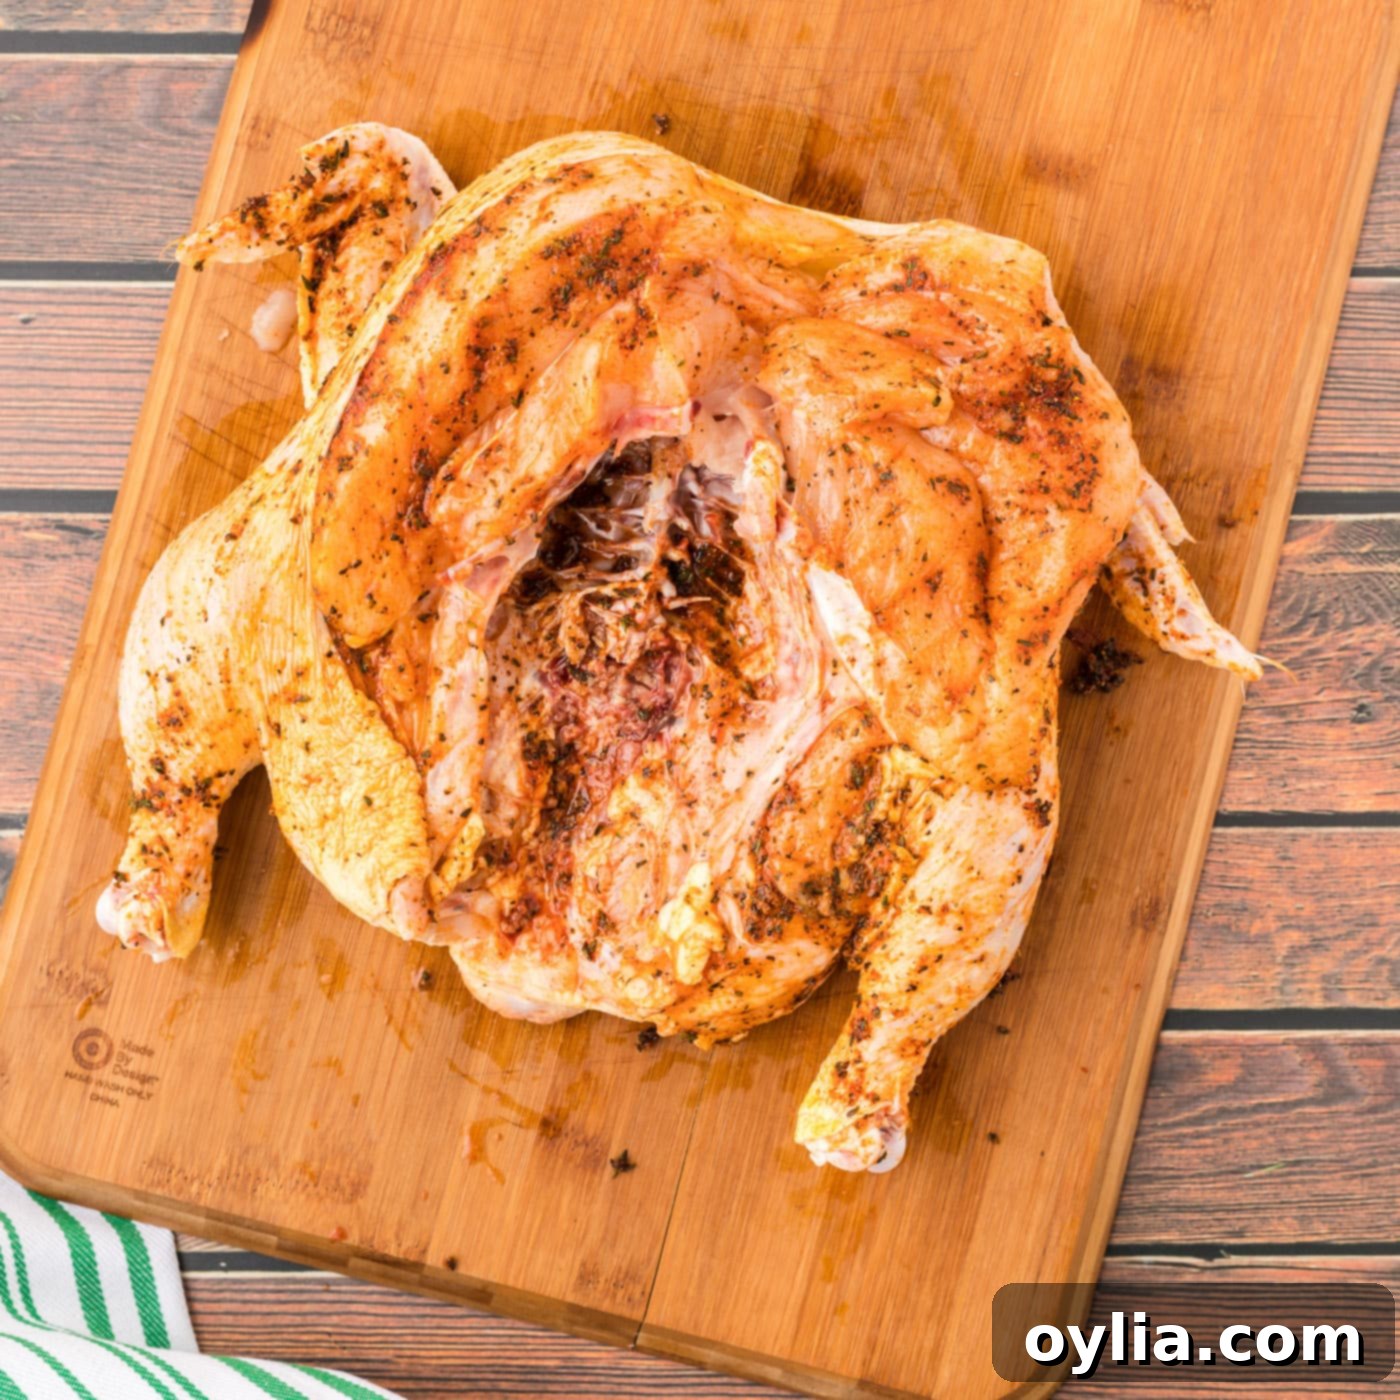
- Season the Chicken: Take half of the prepared spice paste and generously rub it onto the bottom (meat side) of the flattened chicken. Ensure even coverage, working the paste into all the nooks and crannies. Then, flip the chicken over to its top (skin side) and apply the remaining paste, massaging it thoroughly over the entire skin surface. This dual-sided application ensures maximum flavor penetration.

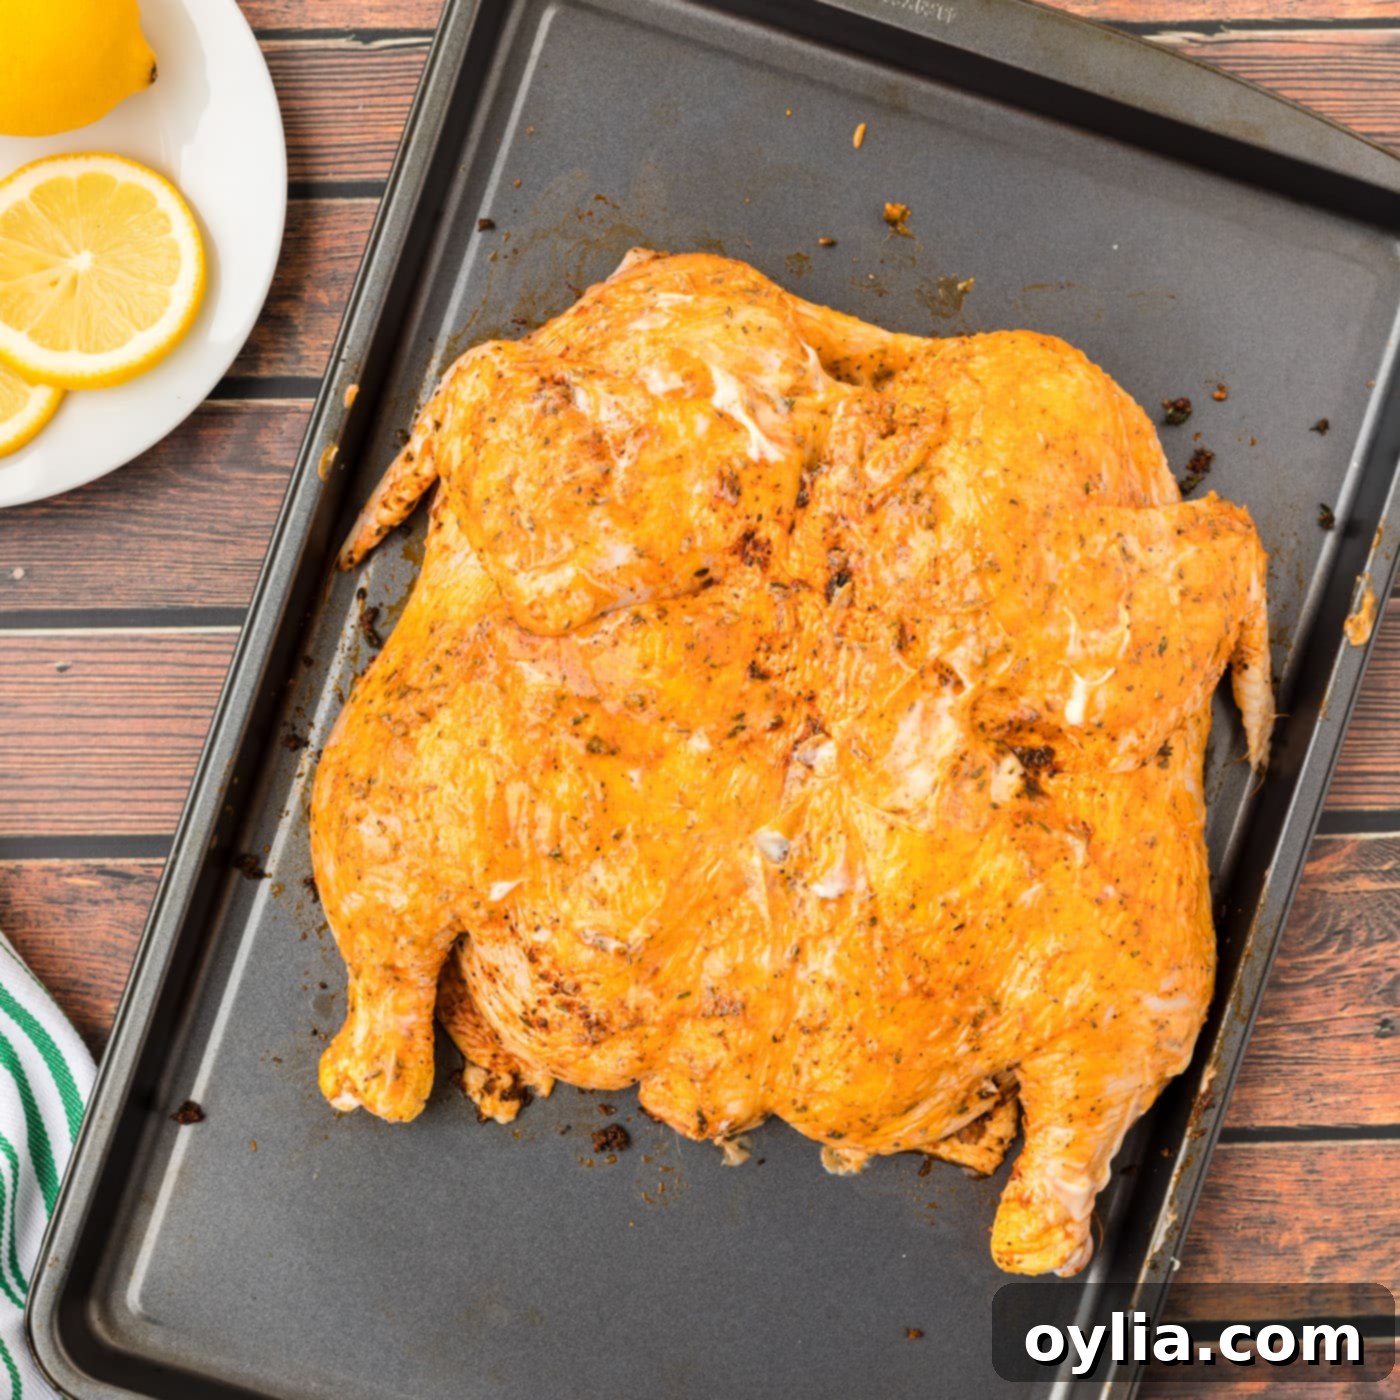
- Apply the Butter: Gently rub the well-softened butter (it should have a texture similar to thick pudding) over the entire top surface of the spice-rubbed chicken skin. This layer of butter is crucial for achieving that desirable golden-brown, crispy skin and adds another layer of rich flavor.
- Roast to Perfection: Carefully transfer the seasoned and buttered chicken onto a baking sheet, preferably one with a wire rack to allow for air circulation. Place it into your preheated oven and bake for approximately 45 minutes. The exact cooking time may vary slightly depending on your oven and the size of your chicken. The key is to roast until the internal temperature reaches 165°F (74°C) in the thickest part of the thigh, without touching the bone.

Frequently Asked Questions & Expert Tips for Success
Absolutely! Adding vegetables to the pan alongside your spatchcock chicken is a fantastic way to create a complete meal with minimal extra effort. Hearty vegetables like carrots, potatoes (cut into 1-inch pieces), green beans, and asparagus work wonderfully. Simply toss them in a little olive oil and season them with salt, pepper, and perhaps some additional paprika or garlic powder before arranging them around the chicken on the baking pan. The chicken drippings will infuse them with incredible flavor as they roast.
The most reliable way to ensure your spatchcock chicken is perfectly cooked and safe to eat is by using an instant-read thermometer. Insert the thermometer into the thickest portion of the meat, typically the thigh, making sure not to touch any bone. The chicken is fully cooked when the internal temperature registers 165°F (74°C). For best results, allow the chicken to rest for 10-15 minutes after removing it from the oven. This allows the juices to redistribute, resulting in an even more tender and juicy bird.
Several factors contribute to ultra-crispy skin. First, ensure the chicken skin is as dry as possible before applying the rub. You can pat it thoroughly with paper towels. For an even crispier result, consider leaving the seasoned chicken uncovered in the refrigerator for a few hours or overnight. This further dries out the skin, leading to a much crispier finish. Also, make sure to use a baking sheet with a wire rack so air can circulate all around the chicken, preventing a soggy bottom.
Yes, you can definitely do some prep work ahead of time! You can spatchcock the chicken, pat it dry, apply the rub, and even rub it with butter a day in advance. Cover it loosely with plastic wrap or foil (or leave uncovered if aiming for extra crispy skin) and store it in the refrigerator. This allows the flavors to meld beautifully and saves you time on cooking day. Just remember to let it sit at room temperature for 20-30 minutes before roasting.
While a sharp chef’s knife can do the job, a sturdy pair of kitchen shears makes removing the backbone significantly easier and safer. You’ll also need a reliable cutting board, a small bowl for mixing the rub, and a baking sheet (preferably with a wire rack) for roasting.
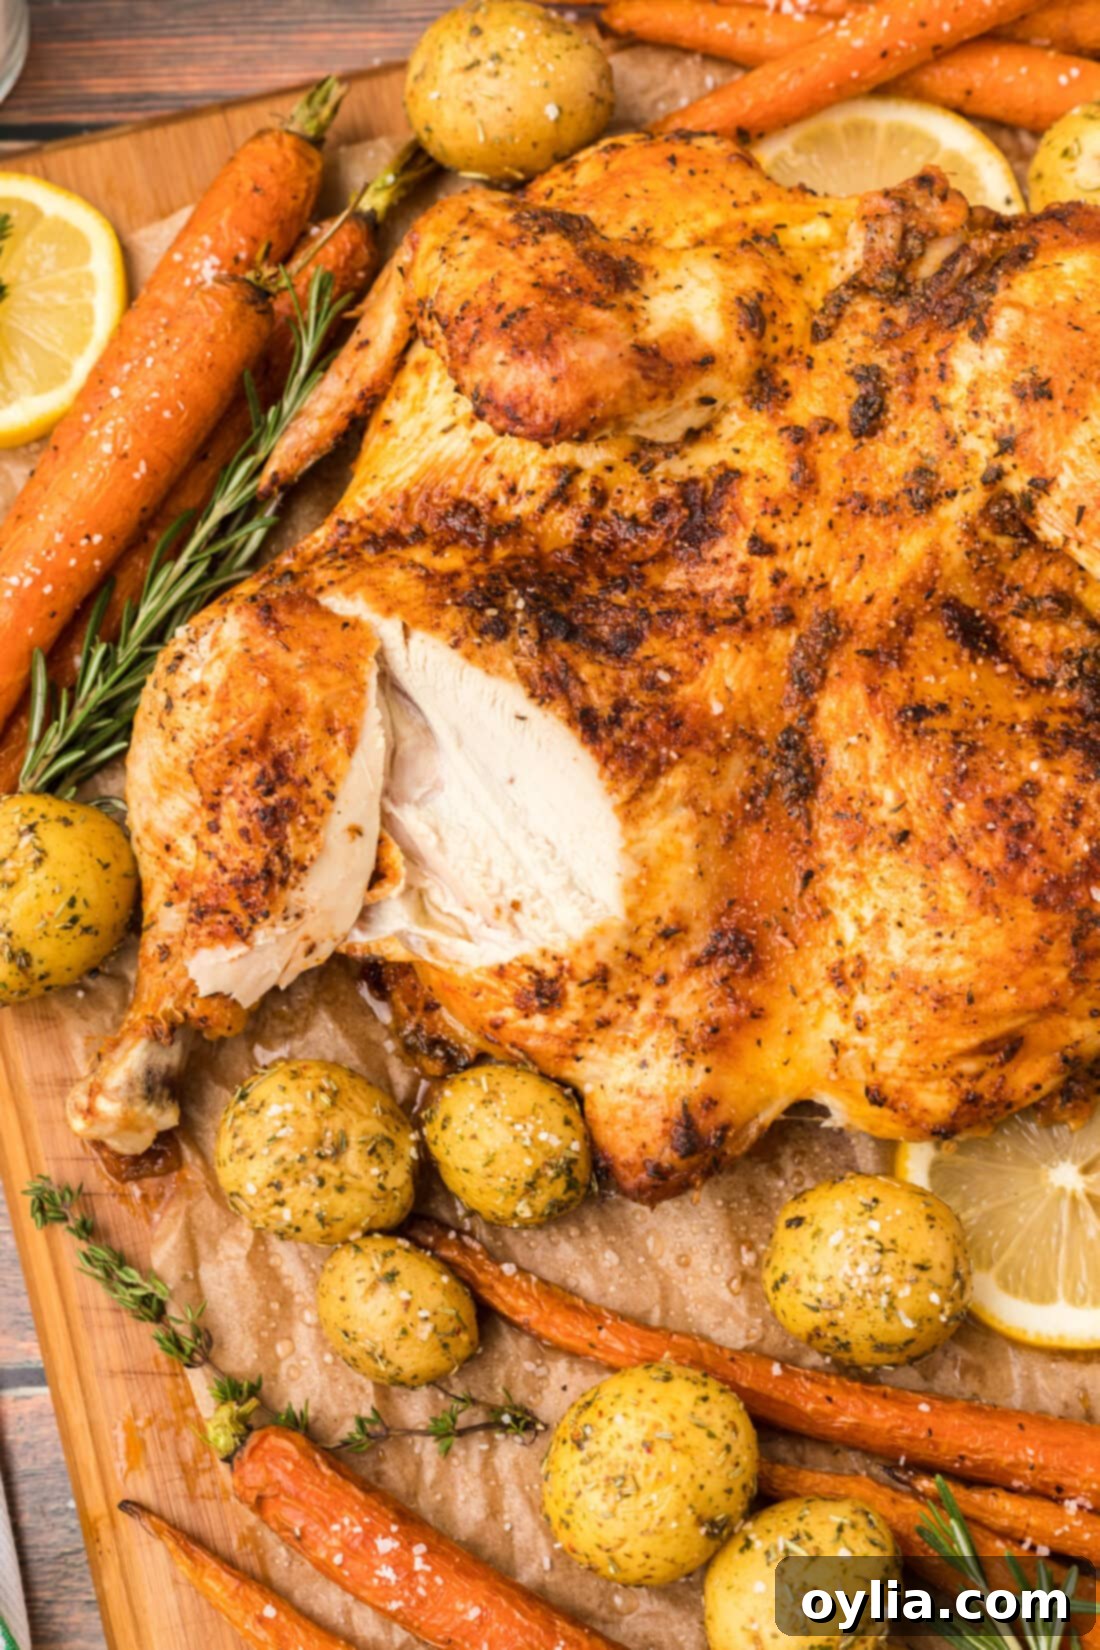
Delicious Serving Suggestions for Your Spatchcock Chicken
Once your beautifully roasted spatchcock chicken is ready, allow it to rest for a few minutes before carving. This resting period is crucial for the juices to redistribute, ensuring every slice is incredibly moist. Carve your chicken as you would normally, using a sharp chef’s knife or carving set, separating the breasts, thighs, and drumsticks.
This versatile chicken pairs wonderfully with a variety of side dishes. For a light and fresh accompaniment, serve it with a crisp green salad tossed with a vinaigrette. Heartier options include fluffy dinner rolls, creamy mashed potatoes, or a vibrant medley of roasted vegetables such as tender carrots, perfectly browned potatoes, crisp asparagus, savory roasted green beans, or nutrient-rich broccoli. The drippings from the chicken can also be used to make a quick pan sauce or gravy to pour over your meal. Enjoy this truly satisfying and impressive dish!
Explore More Delicious Chicken Recipes
If you loved this spatchcock chicken recipe, you’re in for a treat! We have a wide array of chicken recipes that cater to every taste and occasion. Whether you’re looking for a quick weeknight dinner or something special for guests, our collection has you covered:
- Garlic Chicken
- Chicken Marsala
- Chicken Cacciatore
- Spicy Oven Fried Chicken
- Crockpot Sticky Chicken
- Baked Chicken Thighs
- Chicken Divan
I love to bake and cook and share my kitchen experience with all of you! Remembering to come back each day can be tough, that’s why I offer a convenient newsletter every time a new recipe posts. Simply subscribe and start receiving your free daily recipes!
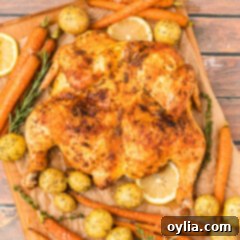
Spatchcock Chicken
IMPORTANT – There are often Frequently Asked Questions within the blog post that you may find helpful. Simply scroll back up to read them!
Print It
Pin It
Rate It
Save ItSaved!
Ingredients
- 4 ½ pounds whole chicken
- 1 ½ Tablespoons olive oil
- ½ Tablespoon smoked paprika
- ½ Tablespoon garlic salt
- ½ Tablespoon lemon pepper
- 1 ½ Tablespoons butter well softened
Things You’ll Need
-
Chef’s knife or good kitchen shears
-
Cutting board
-
Baking sheet
Before You Begin
- A sharp knife is very helpful in spatchcocking a chicken. There is some bone that needs to be cut through, so make sure you sharpen your knife well first. You can also use a really good pair of kitchen shears if you have them.
- You can use an instant read thermometer to gauge when the chicken is done cooking. Insert the thermometer into the thickest portion of the meat, typically the breasts, and when it registers 165F it’s done cooking.
- Feel free to add vegetables to the pan alongside the chicken like carrots, potatoes, green beans, and asparagus. Toss them in olive oil and season to taste before adding to the pan.
Instructions
-
Preheat oven to 400 F (200°C).
-
Place chicken breast side down on cutting board. Using a sharp chef’s knife or kitchen shears, place two cuts along each side of the spine. Cut all the way up the spine to remove it.
TIP: The closer you can get to the spine, the less meat you will remove. However, you can simply place the spine on the baking pan with the chicken and cook that meat as well, or use it to make chicken stock.
-
After removing the spine, turn the chicken over and use the palm of your hand to apply firm pressure to the breastbone and flatten the bird completely.
-
Mix oil, paprika, garlic salt, and lemon pepper together in a small bowl to form a smooth paste.
-
Rub half of the paste onto the bottom (meat side) of the chicken. Turn chicken over and rub the remaining paste generously on the top (skin side) of the chicken.
-
Rub the well-softened butter (should be pudding-like texture) evenly over the top of the spice paste, covering the entire skin.
-
Bake in the preheated oven for approximately 45 minutes, or until an instant-read thermometer inserted into the thickest part of the thigh reads 165°F (74°C).
Nutrition
The recipes on this blog are tested with a conventional gas oven and gas stovetop. It’s important to note that some ovens, especially as they age, can cook and bake inconsistently. Using an inexpensive oven thermometer can assure you that your oven is truly heating to the proper temperature. If you use a toaster oven or countertop oven, please keep in mind that they may not distribute heat the same as a conventional full sized oven and you may need to adjust your cooking/baking times. In the case of recipes made with a pressure cooker, air fryer, slow cooker, or other appliance, a link to the appliances we use is listed within each respective recipe. For baking recipes where measurements are given by weight, please note that results may not be the same if cups are used instead, and we can’t guarantee success with that method.
