The Ultimate Easy Strawberry Slab Pie: Perfect for Summer Gatherings
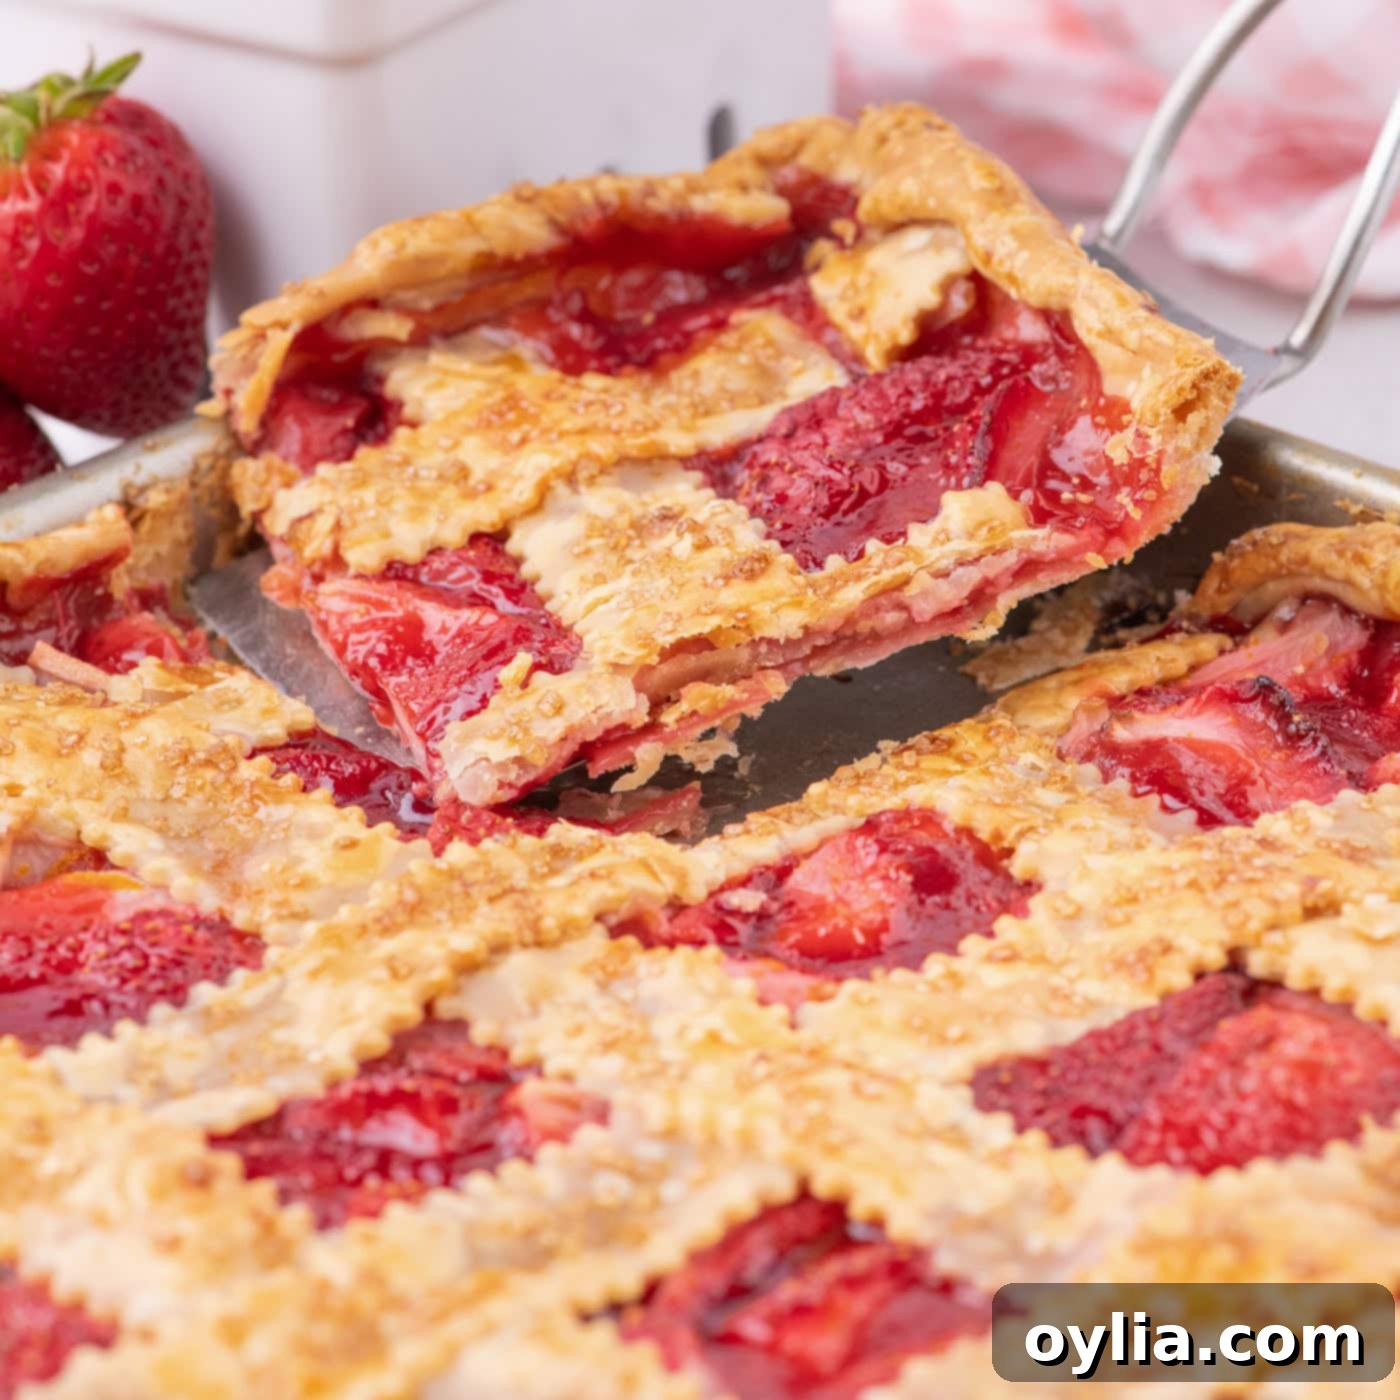
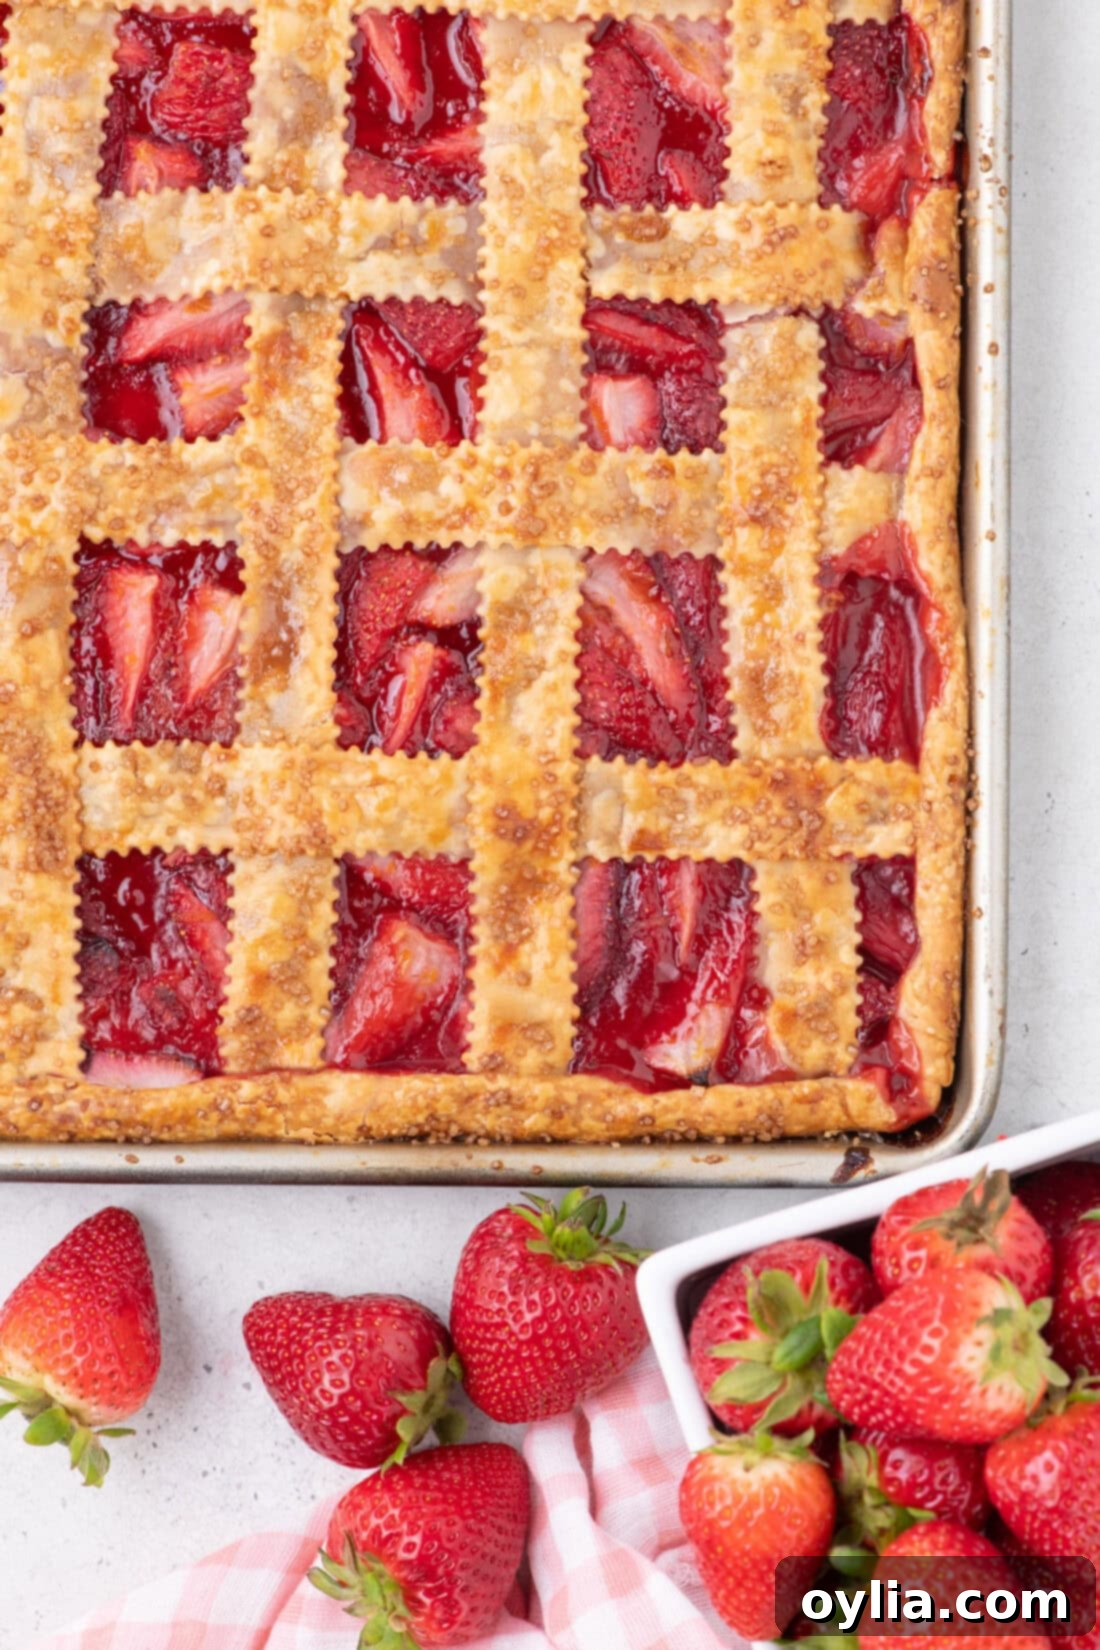
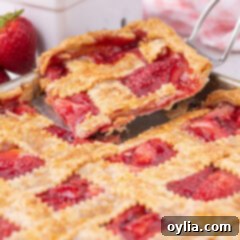
Get ready to impress with this stunning Strawberry Slab Pie, where a luscious, vibrant fresh strawberry filling peeks invitingly through a golden, buttery, and flaky lattice top. This recipe makes baking an absolute breeze, especially with the clever use of premade pie crusts, making it the absolute **best summer dessert for feeding a crowd** without spending hours in the kitchen!
Why This Strawberry Slab Pie Recipe is Your New Summer Favorite
Imagine biting into a slice of pure summer bliss – that’s precisely what you get with every mouthful of this exquisite strawberry slab pie. It’s an absolutely welcome addition to any backyard barbecue, potluck, or family reunion. You’ll instantly fall in love with the delightful contrast between the wonderfully flaky texture of the homemade-tasting crust and the burst of sweet, fresh, and juicy strawberries within. This dessert strikes the perfect balance, feeling both light and satisfying, with an ideal strawberry-to-crust ratio that ensures every bite is heavenly.
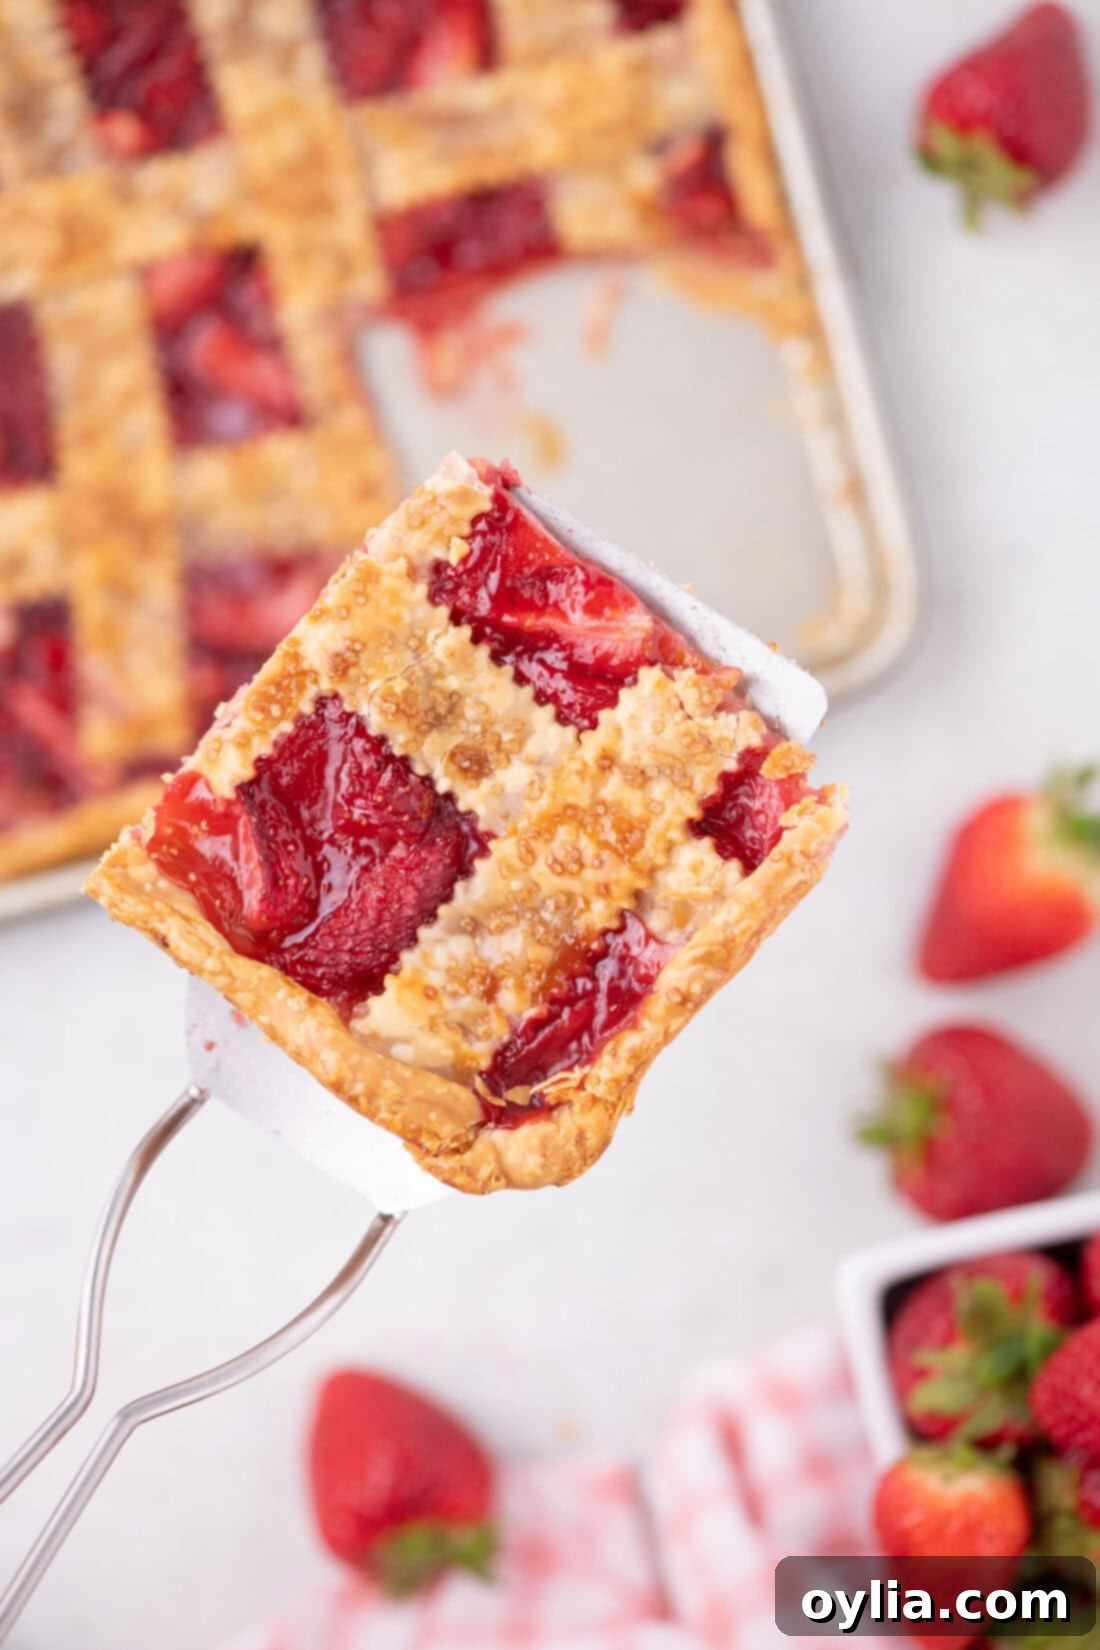
Slab pies, by their very nature, are incredibly easy to make and are brilliantly designed for feeding a large gathering. Unlike traditional round pies that yield fewer, larger slices, slab pies are baked in a rectangular pan, allowing you to cut them into numerous squares. This means you can effortlessly serve a considerable number of people without the fuss of preparing multiple individual pies. Our Strawberry Slab Pie, much like our popular Cherry Slab Pie, has become a go-to summer dessert for countless get-togethers. The secret to its convenience lies in simple ingredients, most notably using high-quality pre-made pie crusts, which streamline the entire baking process, leaving you more time to enjoy your summer festivities and less time confined to the kitchen.
Beyond the ease of preparation, this strawberry slab pie truly captures the essence of summer. The aroma of ripe strawberries baking with a hint of citrus zest fills your home, promising a treat that’s both comforting and refreshing. It’s a versatile dessert that can be dressed up with a scoop of vanilla ice cream or a dollop of fresh whipped cream, or enjoyed simply on its own. Its large format makes it inherently shareable, fostering a sense of community and joy around the dessert table. This isn’t just a pie; it’s a celebration of summer’s bounty, designed for sharing and savoring.
Essential Ingredients for Your Perfect Strawberry Slab Pie
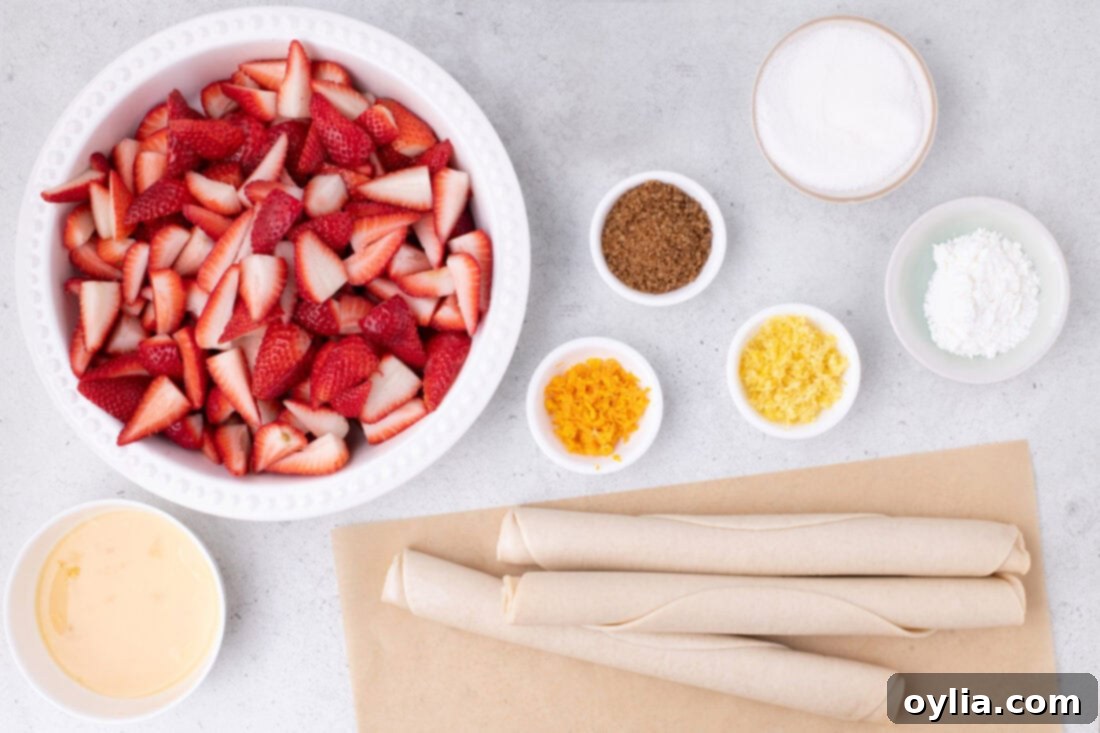
Crafting this delightful easy strawberry slab pie requires a few simple, accessible ingredients. The magic happens when these components come together to create a harmonious blend of textures and flavors that define a truly unforgettable summer dessert. Below, we detail each key ingredient and offer helpful tips and substitution suggestions to ensure your pie is a resounding success. You can find all precise measurements and detailed instructions in the printable recipe card at the very end of this post.
Ingredient Spotlight & Expert Substitution Advice
- Strawberries: The star of our show! Using fresh, ripe strawberries is paramount for the best flavor and texture in this slab pie. They offer a natural sweetness and vibrant juiciness that truly elevates the dessert. If you’re lucky enough to use smaller, freshly picked strawberries, you might notice they release less liquid than larger, store-bought varieties. In this case, you can reduce the amount of cornstarch from 4 tablespoons to 3 tablespoons to ensure the filling sets perfectly without being overly stiff. For a delightful flavor boost, consider adding a hint of balsamic vinegar or a dash of black pepper to your strawberries – it wonderfully enhances their natural sweetness!
- Pie Crust: Our recipe champions convenience without sacrificing quality by using pre-made pie crusts. We recommend two 14.1-ounce boxes of Pillsbury pie crusts (totaling 28.2 ounces), which typically provide three individual crusts, enough for the bottom and lattice top of your slab pie. This saves significant time and effort, making this recipe truly accessible. However, if you prefer a fully homemade touch, feel free to prepare your own pie crust from scratch. Just ensure you have enough dough for a large rectangular base and the lattice strips.
- Granulated Sugar: Essential for sweetening the fresh strawberries to perfection. Adjust the amount slightly based on the sweetness of your berries and your personal preference.
- Cornstarch: This acts as our thickening agent, ensuring the strawberry filling is beautifully set and not too runny. As mentioned, adjust the quantity if using less juicy, freshly picked strawberries. Arrowroot powder is a suitable alternative if you don’t have cornstarch.
- Finely Grated Orange Zest & Lemon Zest: These citrus zests are not just for decoration; they add a bright, zesty counterpoint to the sweetness of the strawberries, enhancing their flavor and adding a lovely aromatic depth. Don’t skip these!
- Egg: Used for the egg wash, which gives the crust its beautiful golden-brown color and a subtle sheen.
- Water: Mixed with the egg to create the perfect consistency for the egg wash.
- Turbinado Sugar: This coarse sugar is sprinkled generously over the lattice top before baking. It adds a wonderful crunch, sparkling visual appeal, and a delicate caramelized sweetness to the crust. If you don’t have turbinado sugar, regular granulated sugar will work, but the coarse texture of turbinado is highly recommended for that extra special touch.
How to Make the Best Easy Strawberry Slab Pie: A Step-by-Step Guide
These step-by-step photos and instructions are here to help you visualize how to make this delicious recipe. For a quick reference, you can Jump to Recipe to get the printable version, complete with precise measurements and detailed instructions at the bottom of this post.
Preparing the Flavorful Strawberry Filling
- Preheat your oven to 375°F (190°C). This ensures your oven is at the correct temperature for even baking once your pie is assembled.
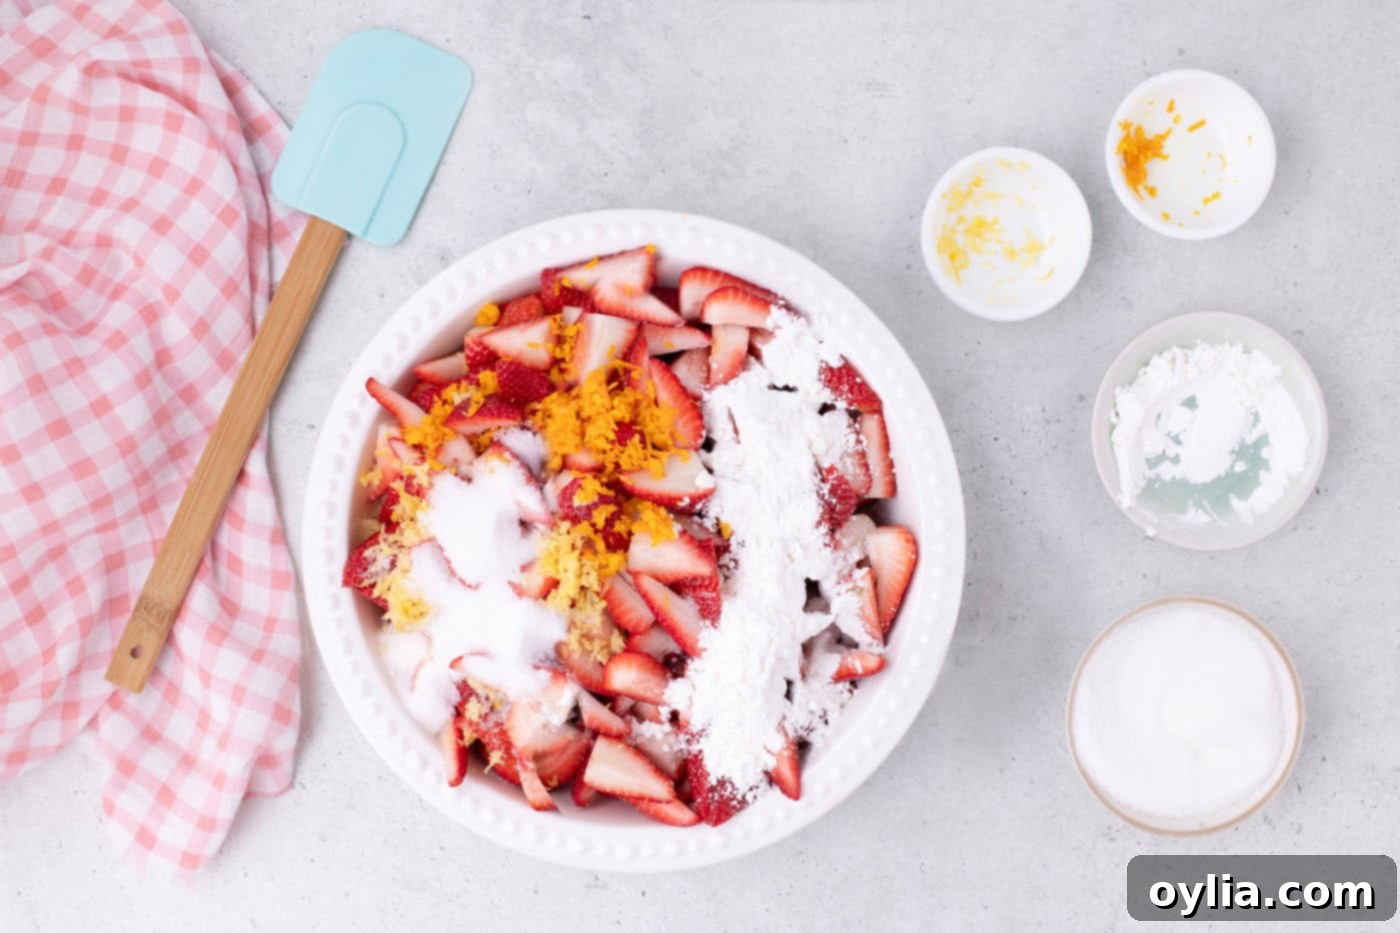
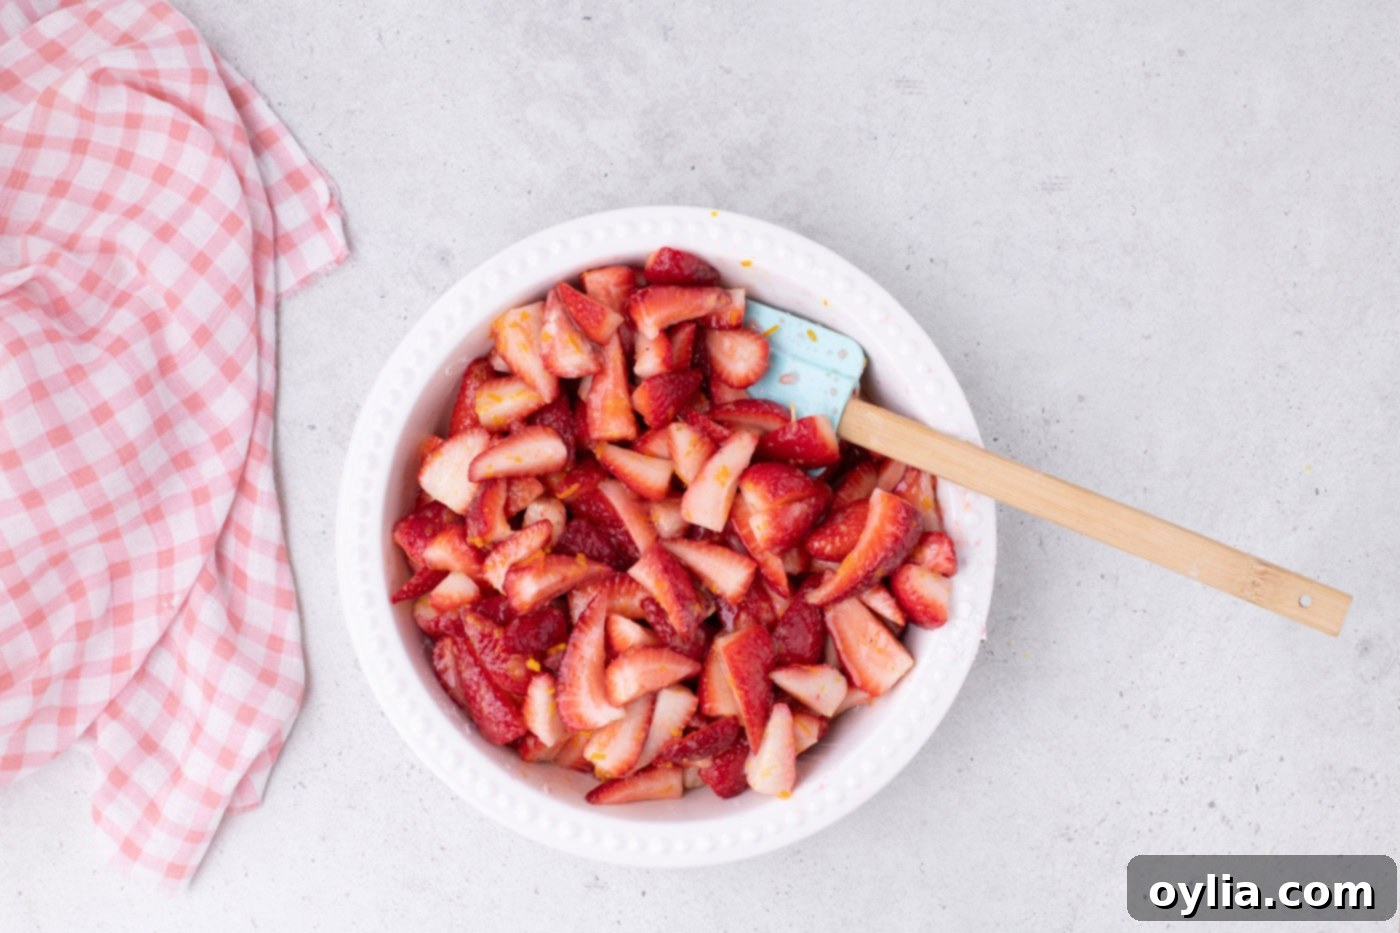
- In a medium-sized mixing bowl, combine the hulled and quartered fresh strawberries with the granulated sugar, cornstarch, finely grated orange zest, and lemon zest. Gently stir these ingredients together using a soft silicone spatula until everything is well combined and the strawberries are evenly coated. Allow the strawberries to sit and macerate while you prepare the pie crust. This resting time helps the flavors meld and the strawberries release some of their natural juices, which will then be thickened by the cornstarch during baking.

Combine the fresh strawberries with sugar, cornstarch, and citrus zests. 
Ensure the strawberries are evenly coated for a perfectly flavored filling.
Preparing and Assembling the Slab Pie Crust
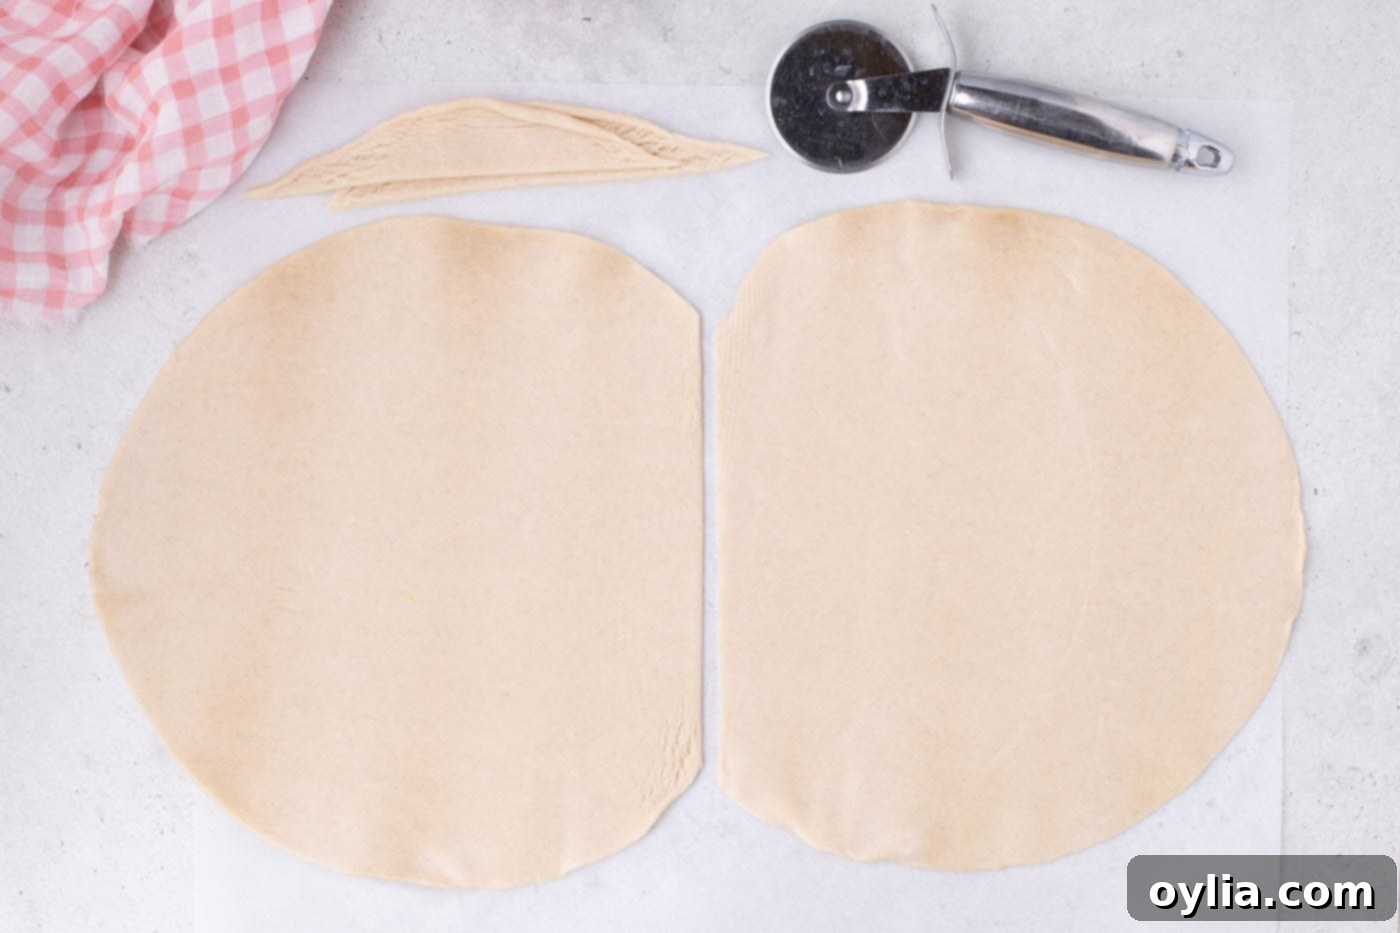
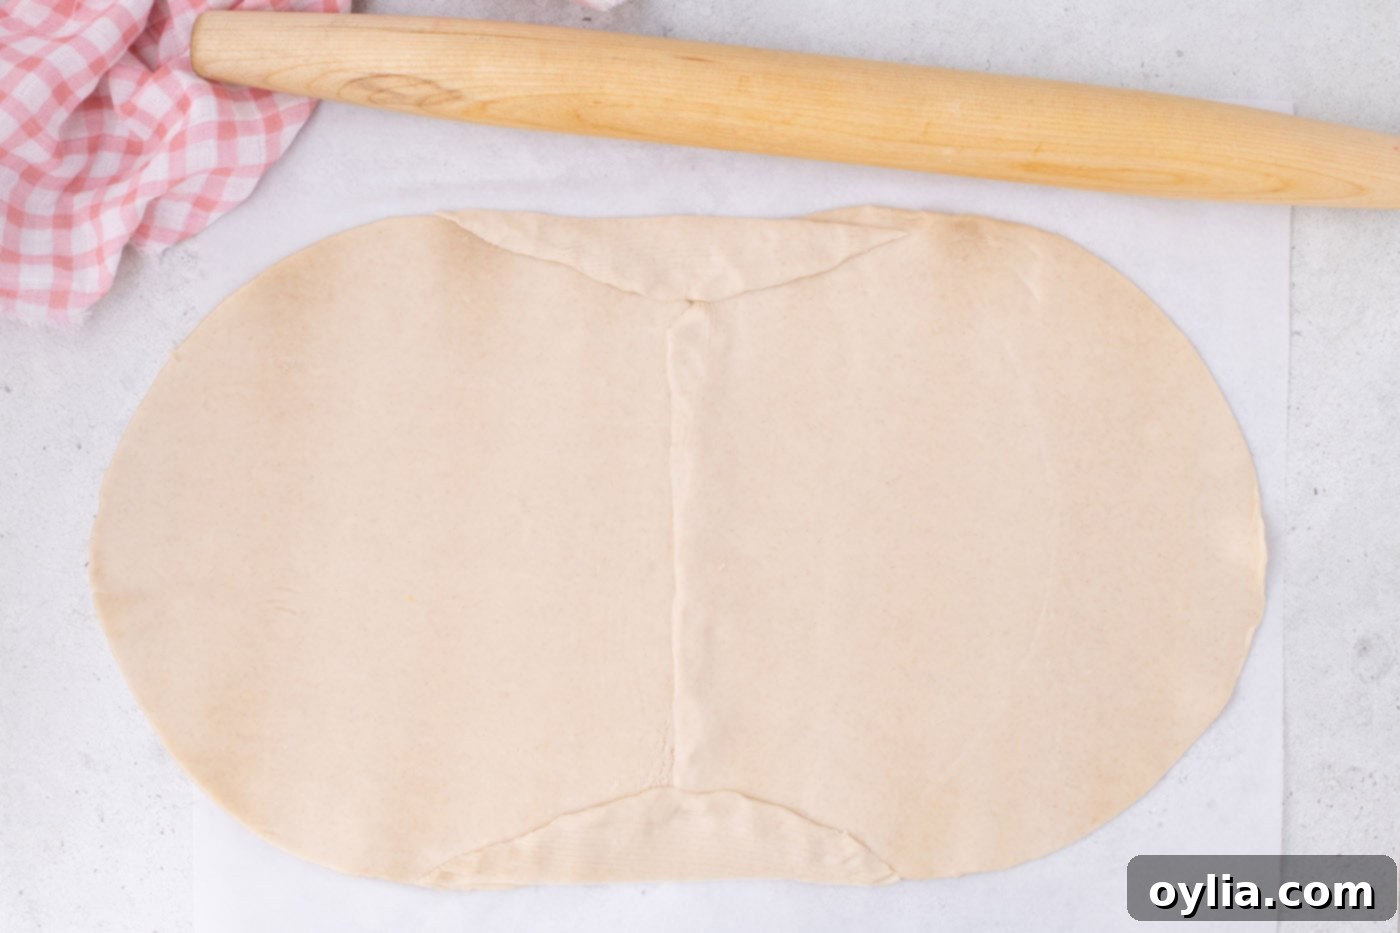
- Carefully unroll two sheets of your pre-made pie crusts and lay them side by side on a clean, parchment-lined surface. Trim approximately 1 ½ inches from the side of each pie crust and set these scraps aside; they will be used later to help form the rectangular base.

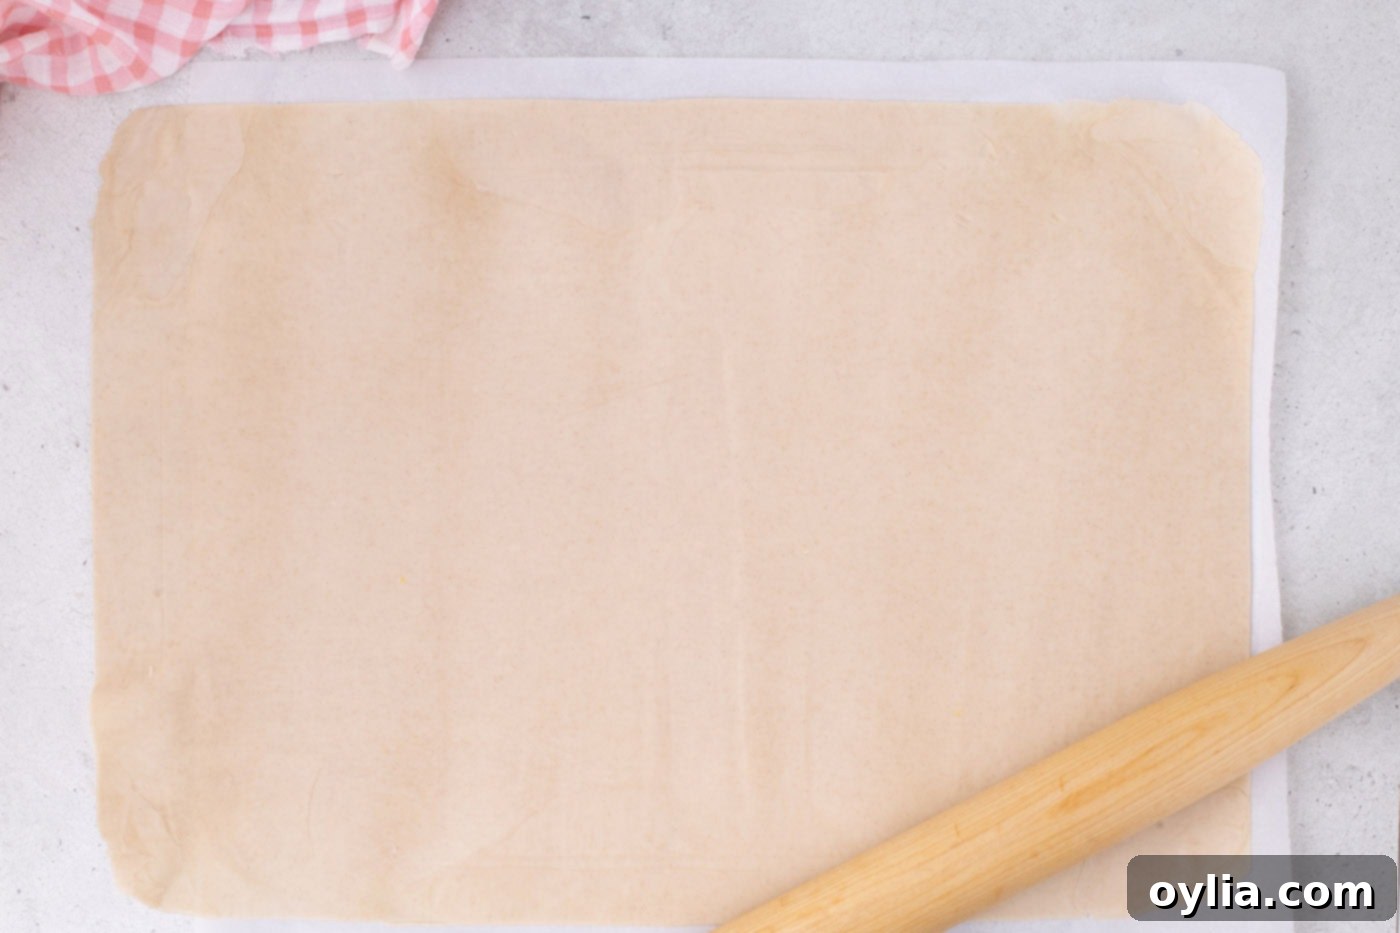
Carefully trim your pie crusts, saving the scraps for later use. - To create the rectangular base for your slab pie, slightly overlap the trimmed edges of the two pie crusts. Then, use the reserved scraps to fill in any gaps along the top and bottom where the two circles join, effectively forming a cohesive rectangular sheet. Using a rolling pin, gently roll the dough out until it is approximately 1 ½ to 2 inches larger on all sides than your 10×15-inch jelly roll pan. This extra overhang will be used to crimp the edges later.

Seamlessly join the pie crusts to form a single, larger rectangle. 
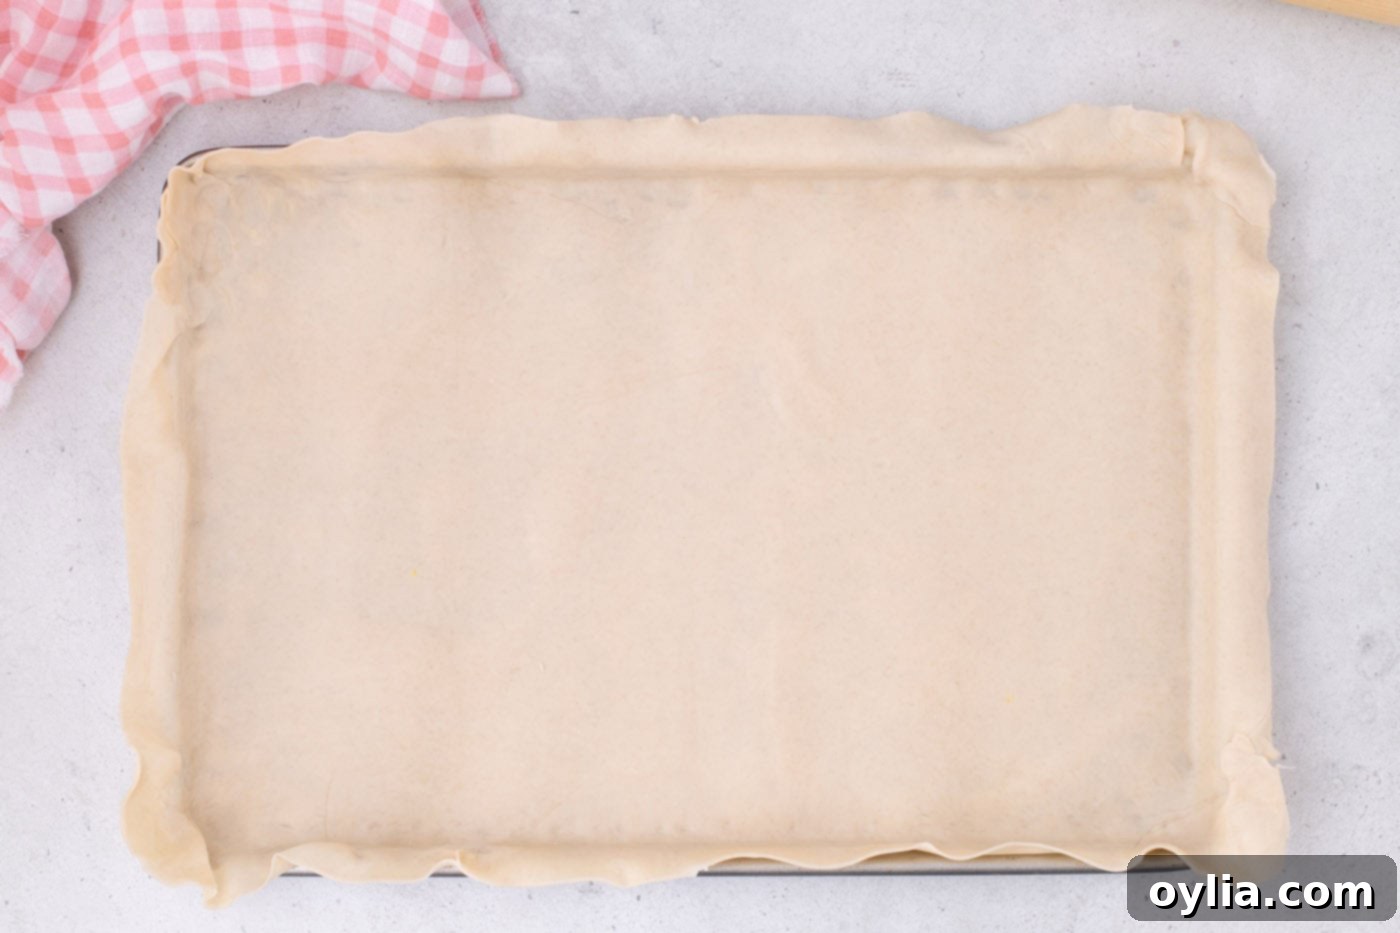
Roll out the dough to be larger than your pan, creating a generous overhang. - Carefully drape the enlarged pie crust over your rolling pin, then gently transfer and place it into an ungreased 10×15-inch jelly roll pan. Take your time to carefully press the crust into all the corners and up the sides of the pan, ensuring there are no gaps or air pockets. This forms a solid foundation for your filling.

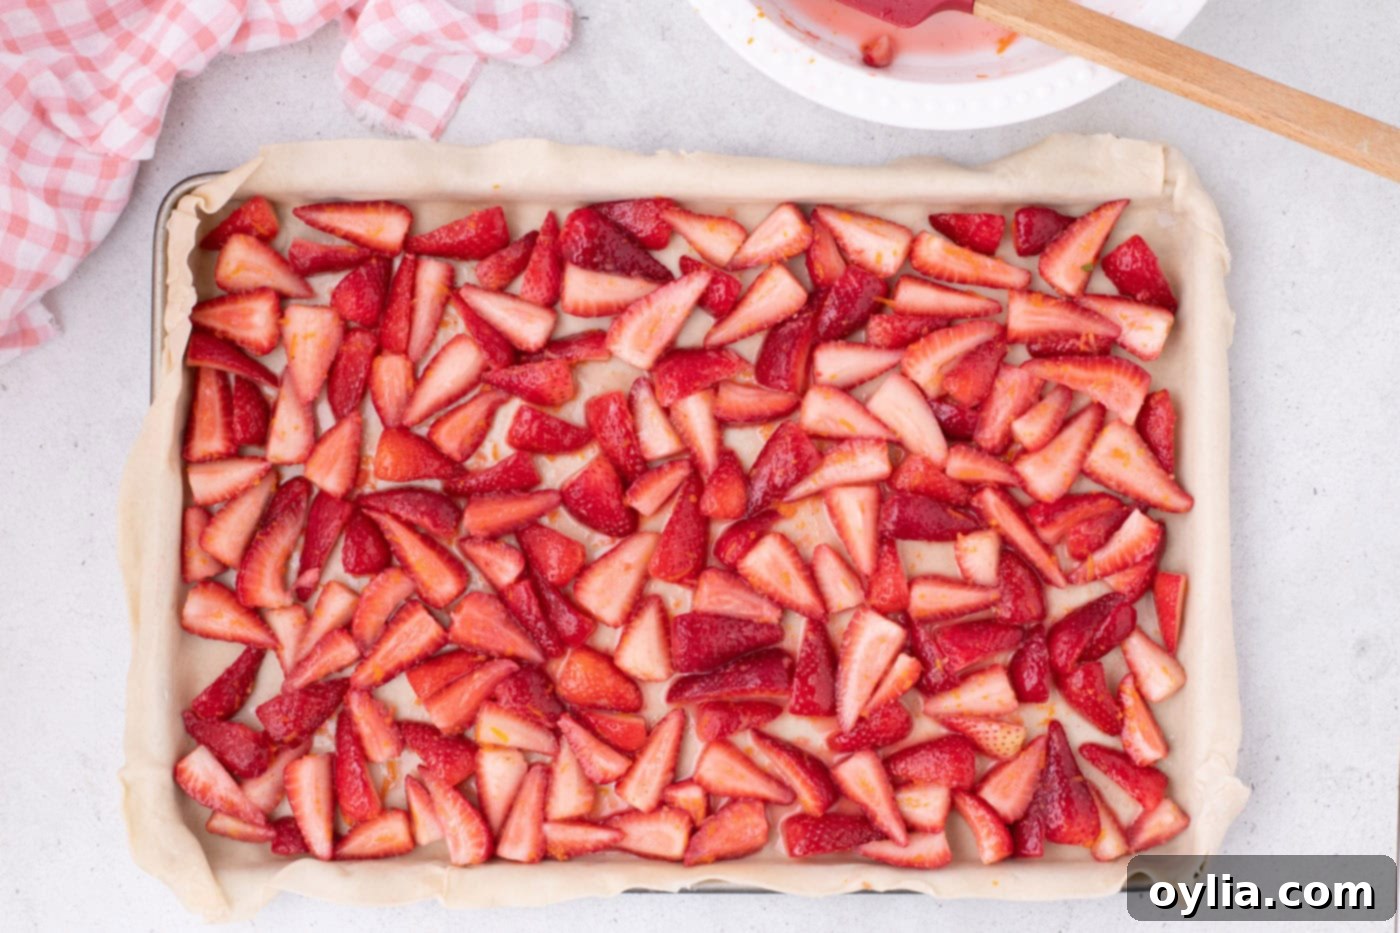
Gently press the crust into the pan, ensuring full coverage. - Give the macerated strawberries one final stir to redistribute the sugar and cornstarch, then evenly add them (along with any accumulated juices) into the prepared pie crust in the jelly roll pan.

Fill the crust generously with the luscious strawberry mixture. - Place the entire pan in the refrigerator. This brief chill helps keep the crust firm while you prepare the decorative lattice strips, preventing it from becoming too soft or sticky.
Crafting the Beautiful Lattice Weave for Your Strawberry Slab Pie
Creating a lattice top might seem intimidating, but with these clear steps, you’ll master it in no time. This decorative weave not only looks beautiful but also allows steam to escape, preventing a soggy crust and ensuring your fruit filling cooks perfectly.
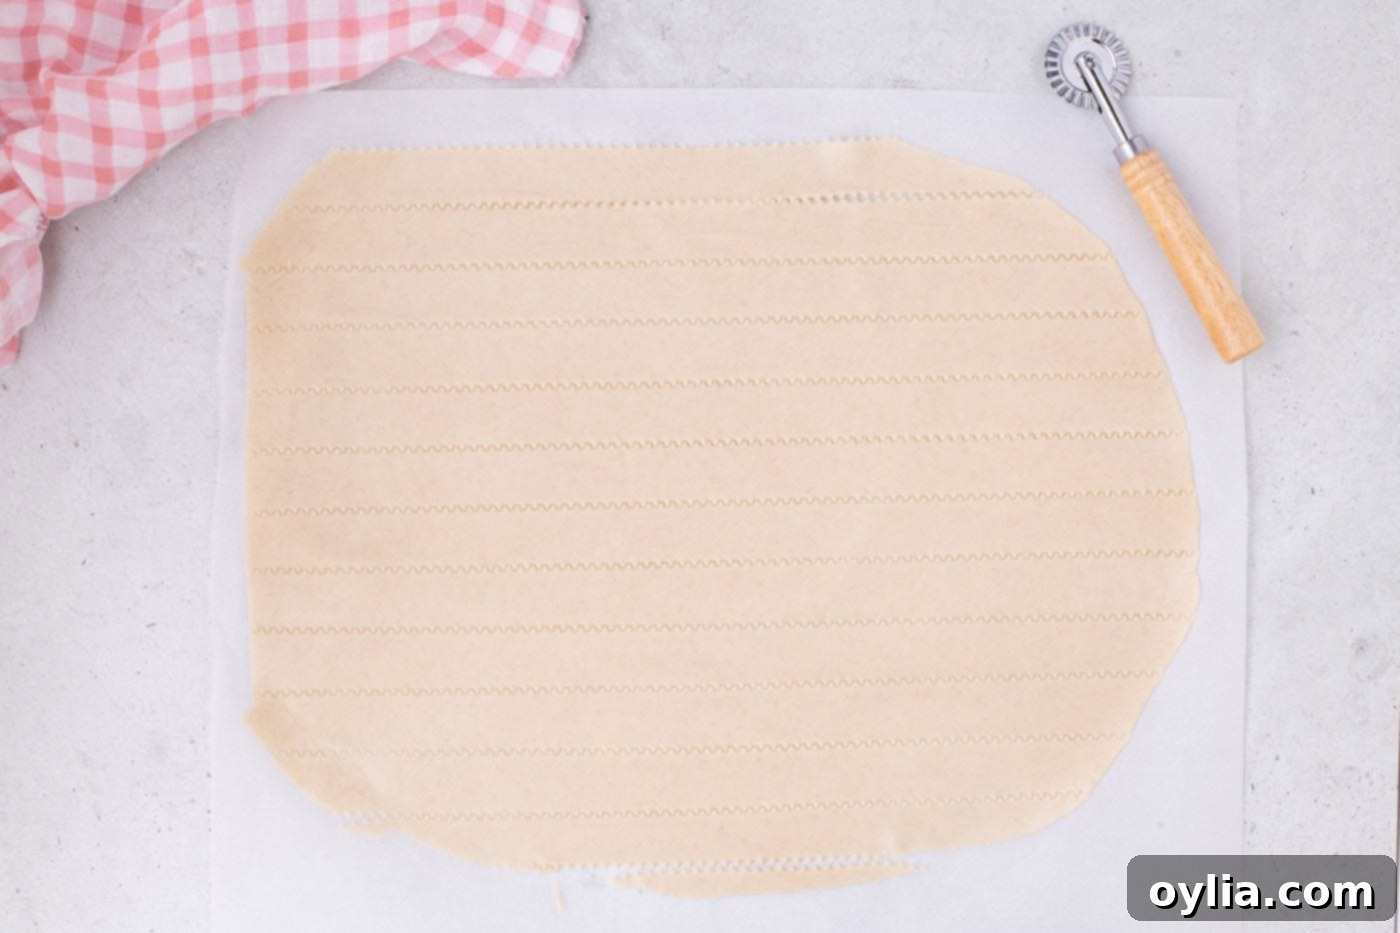
- Unroll the third sheet of pie crust and place it on a parchment-lined surface. Roll it into a rectangular shape measuring approximately 17 x 12 inches. Using a pizza cutter (or a pastry wheel) and a metal ruler for precision, cut 12 evenly sized 1-inch wide, 17-inch long horizontal strips. Next, trim 7 of these strips to measure 12 inches in length. You will now have 5 long (17-inch) strips and 7 shorter (12-inch) strips.

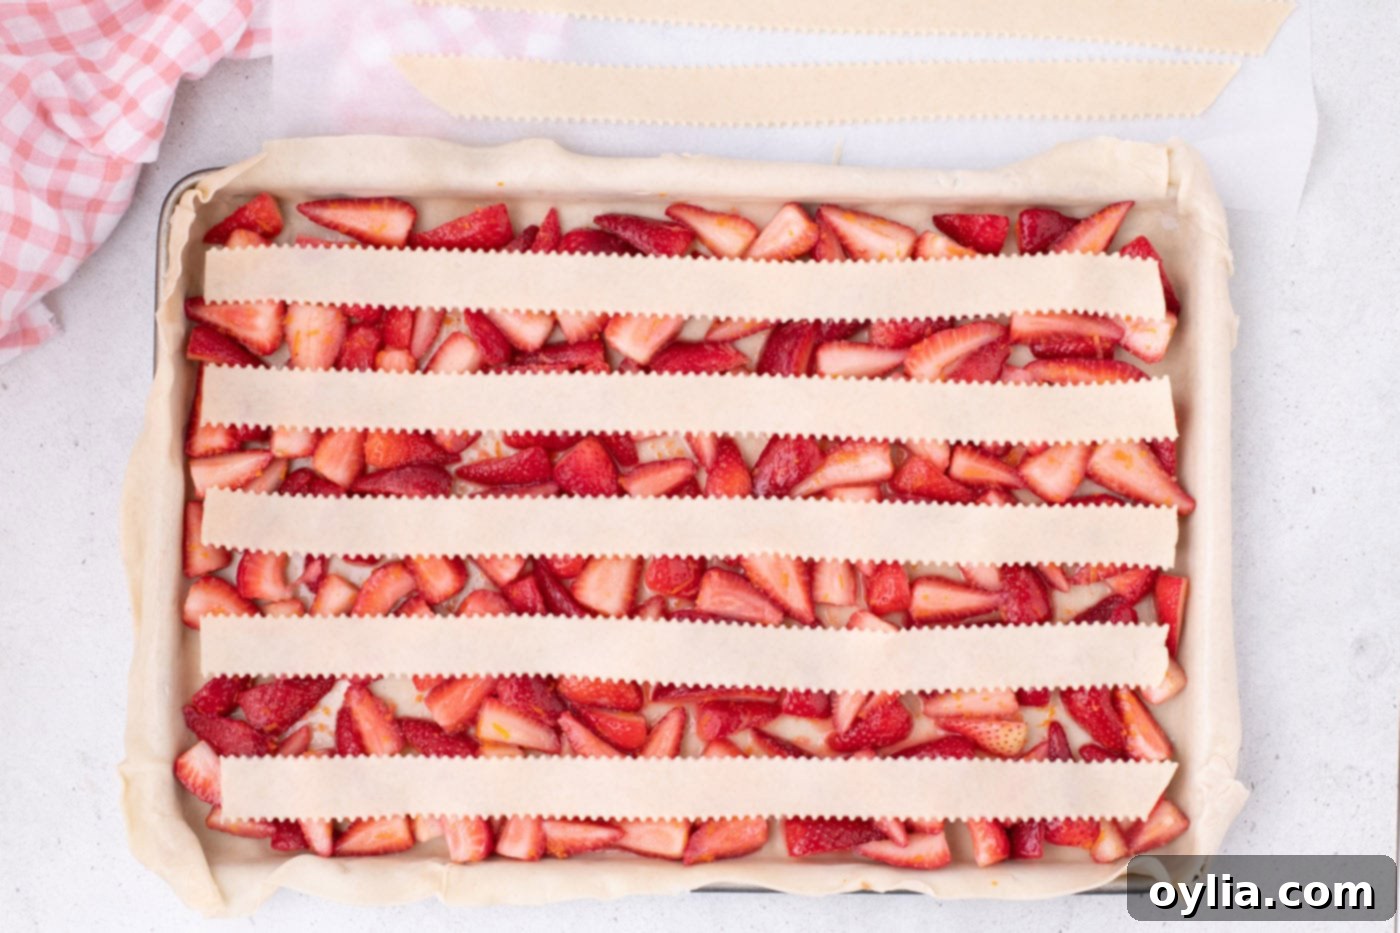
Use a ruler and pizza cutter for perfectly uniform lattice strips. - Retrieve your chilled pie from the refrigerator. Take 5 of the long (17-inch) strips and carefully place them horizontally across the strawberry filling, spacing them approximately 1 inch apart. These will form the foundation of your lattice.

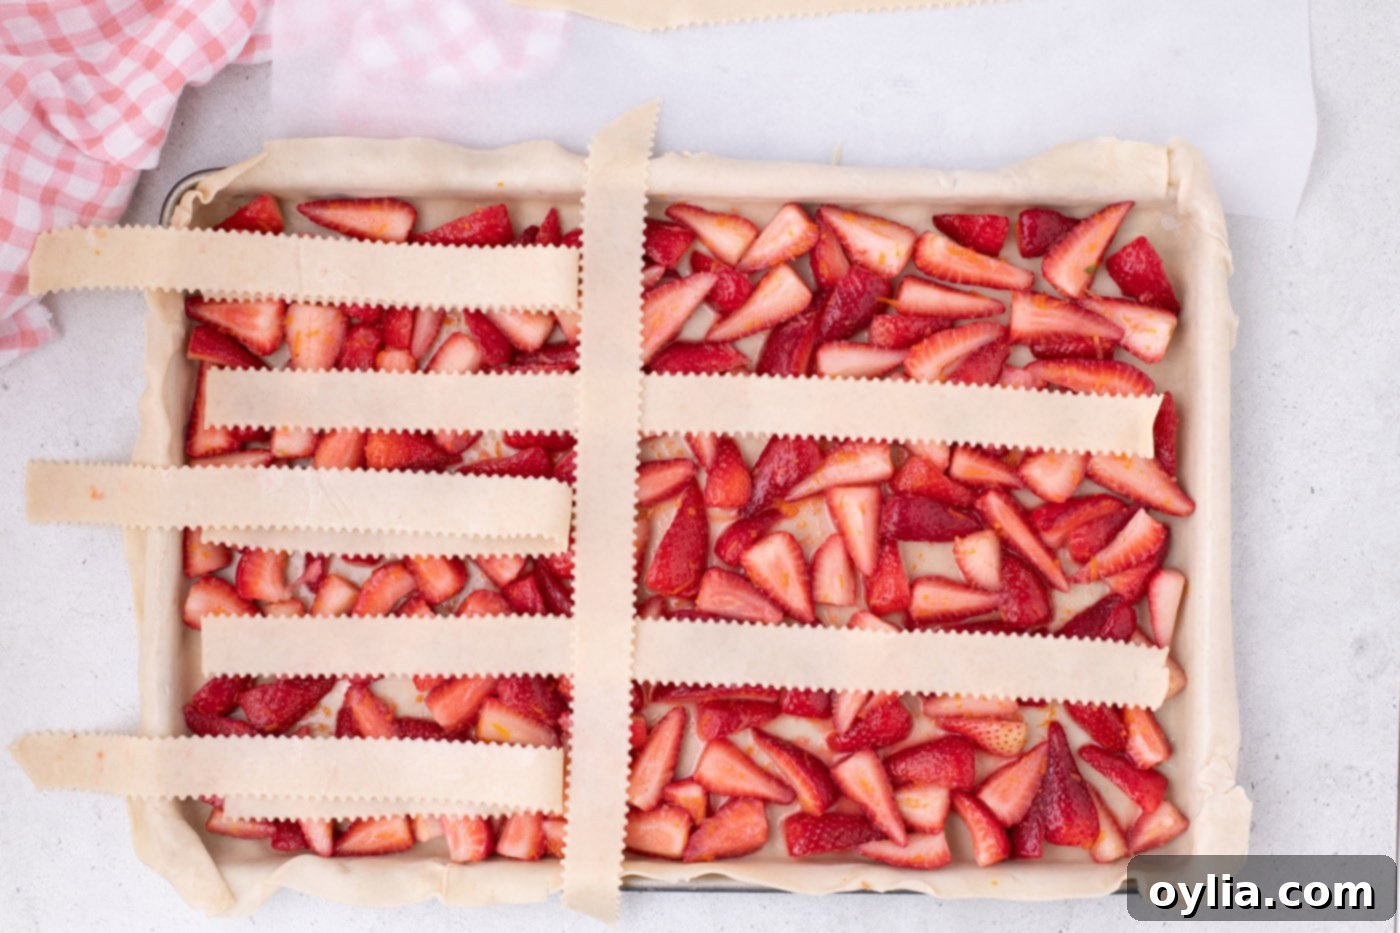
Lay the initial horizontal strips evenly across the pie. - To begin the lattice weave, start from the top. Fold every other horizontal strip (strips 1, 3, and 5) halfway back towards the left-hand side of the pan.
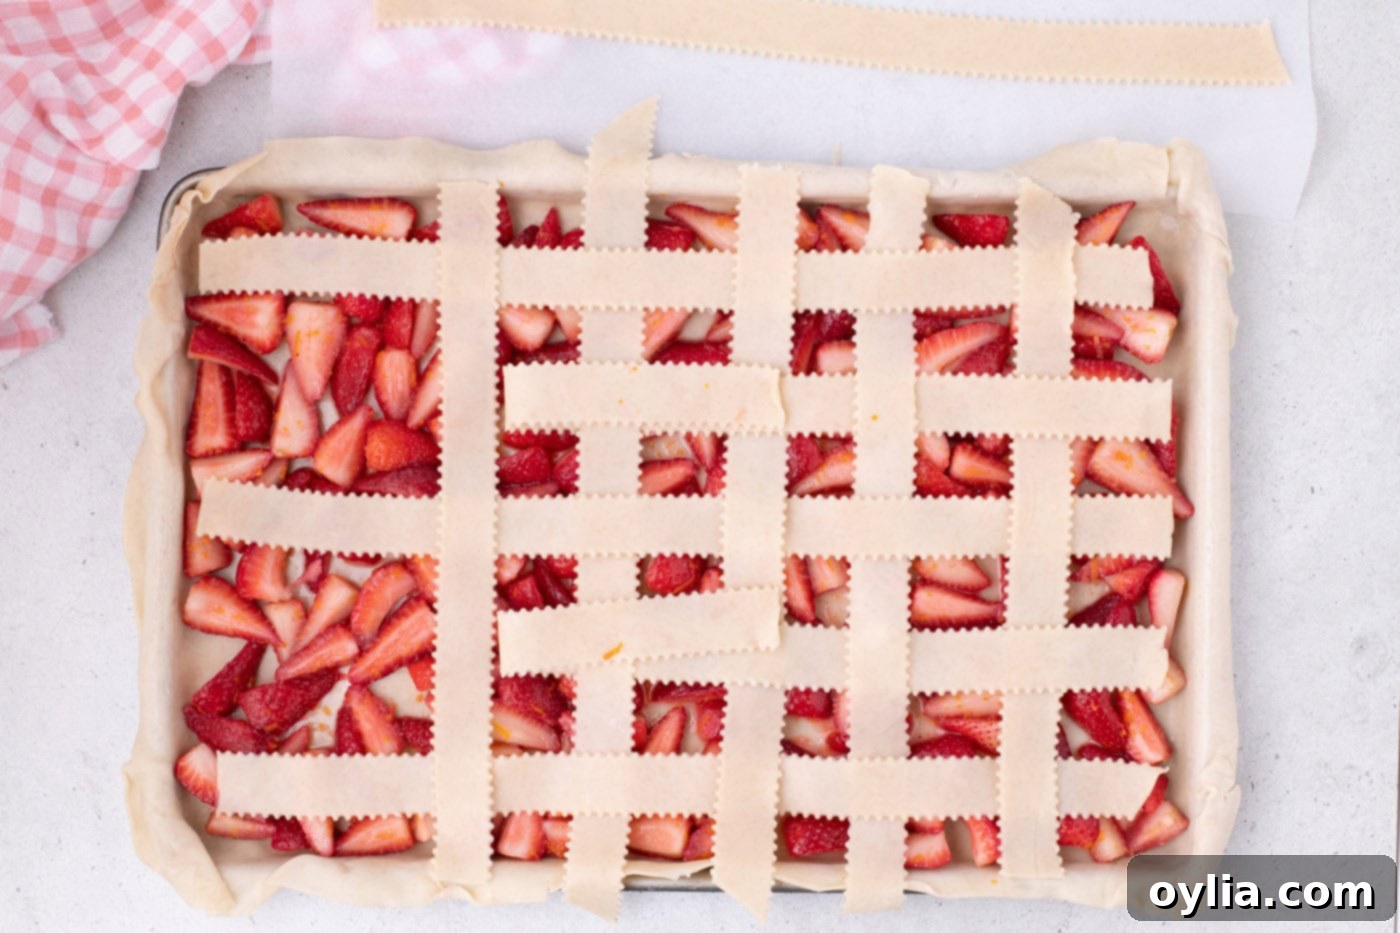
- Now, place one of the shorter (12-inch) strips approximately 1 inch off-center, laying it perpendicularly over the unfolded horizontal strips. Ensure it lies straight.

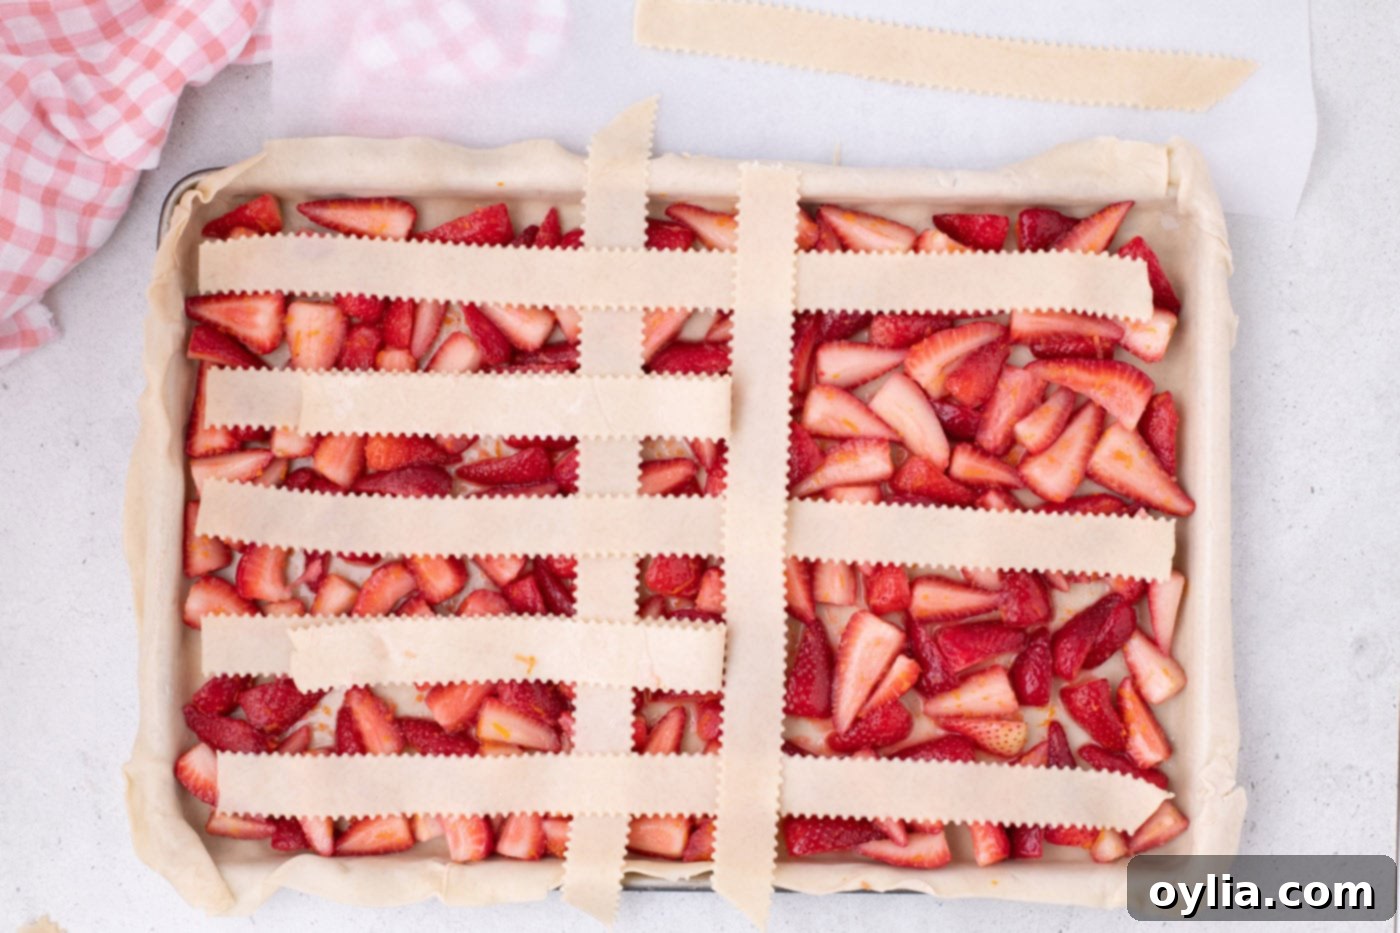
Begin your lattice by folding back alternate strips and placing a vertical strip. - Gently unfold strips 1, 3, and 5 back over the short strip you just laid down, securing it in place. Next, fold back the *alternating* horizontal strips (strips 2 and 4). Lay down a second shorter strip 1 inch away from the first one, perpendicular to the horizontal strips. Unfold strips 2 and 4 back over this second short strip. Continue this weaving process, alternating which horizontal strips you fold back, until all your shorter strips have been woven into a beautiful lattice pattern over the strawberries. This creates the classic woven look.

Continue weaving, alternating strips to create the intricate pattern. 
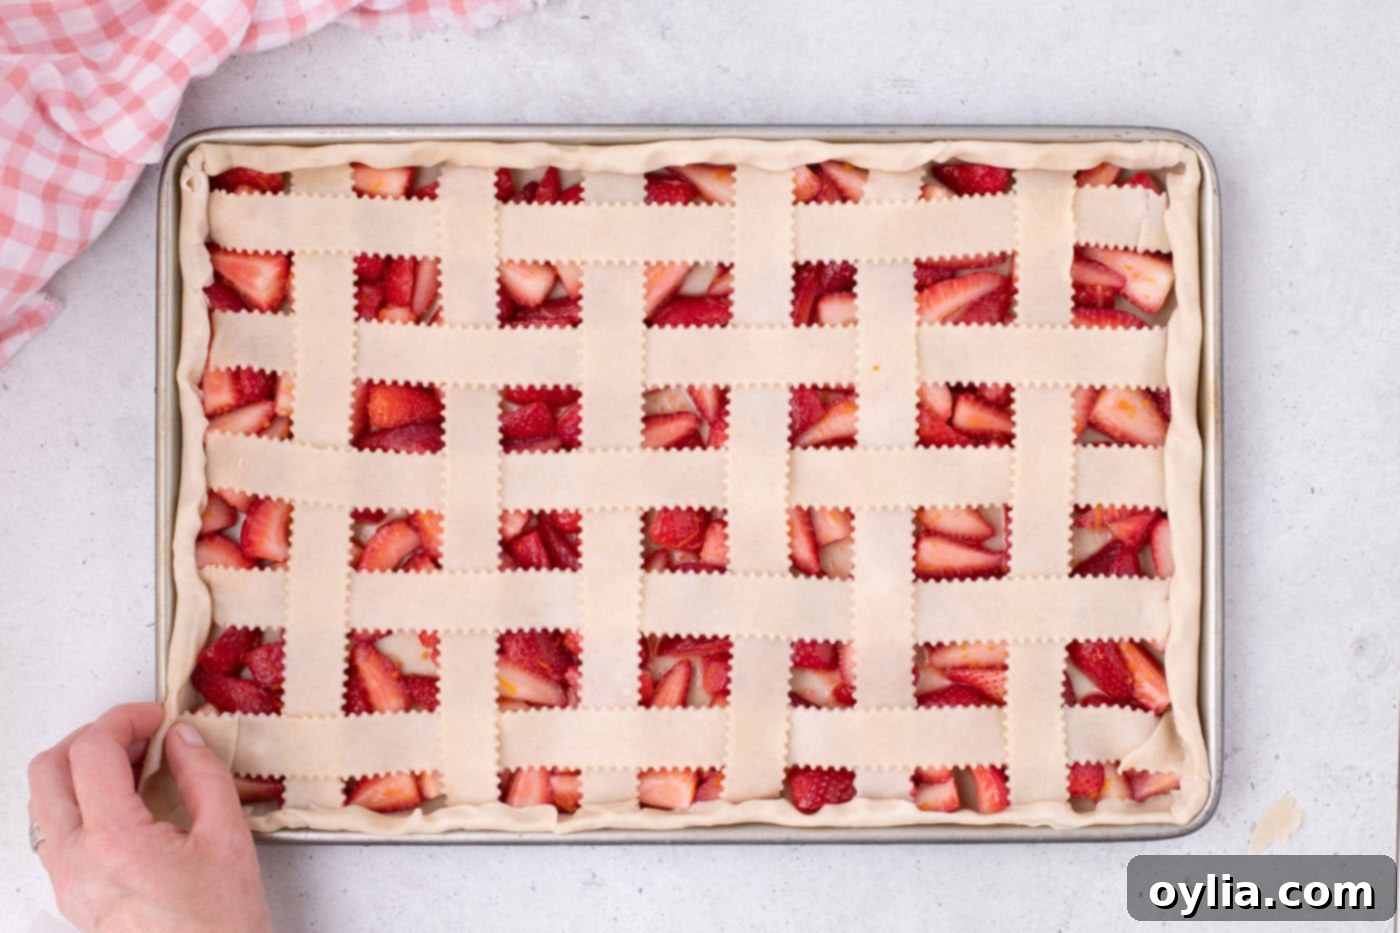
The completed lattice top, an impressive finish to your pie. - Once the lattice is complete, carefully fold the overhang of the bottom crust over the lattice strips. Pinch the edges of the crust and lattice together to form a secure seal all around the perimeter of the pie. You can crimp the edges decoratively with your fingers or a fork for a polished look.

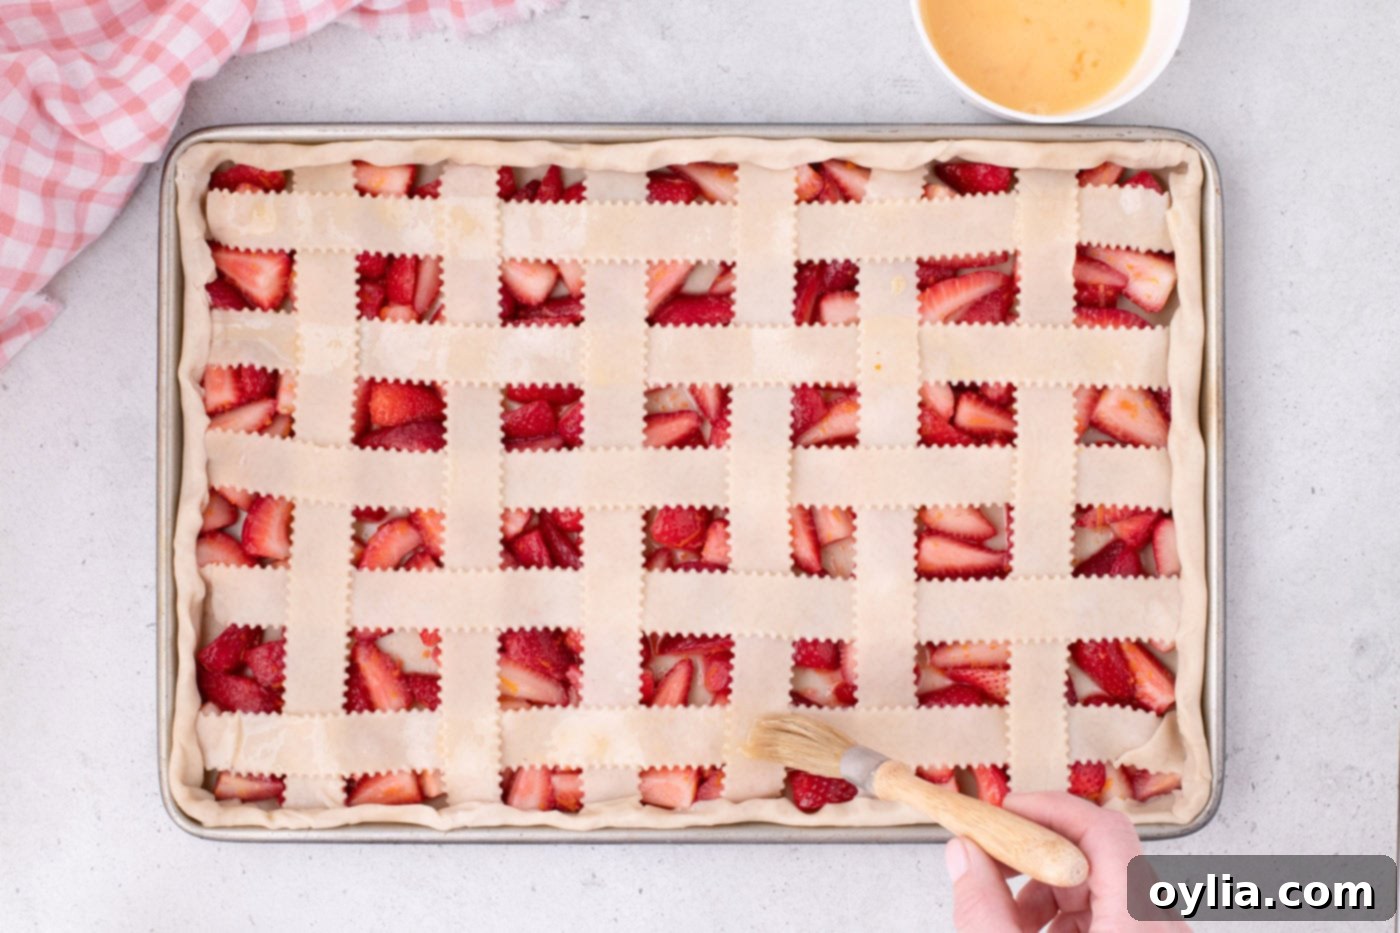
Seal the edges of the crust and lattice for a perfect finish. - In a small bowl, whisk together the large egg and 1 tablespoon of water to create an egg wash. Using a pastry brush, generously brush this egg wash over the entire lattice top and the crimped edges of the pie crust. Immediately after, liberally sprinkle the turbinado sugar over the top. This will give your pie a gorgeous golden-brown color and a delightful sparkling crunch.

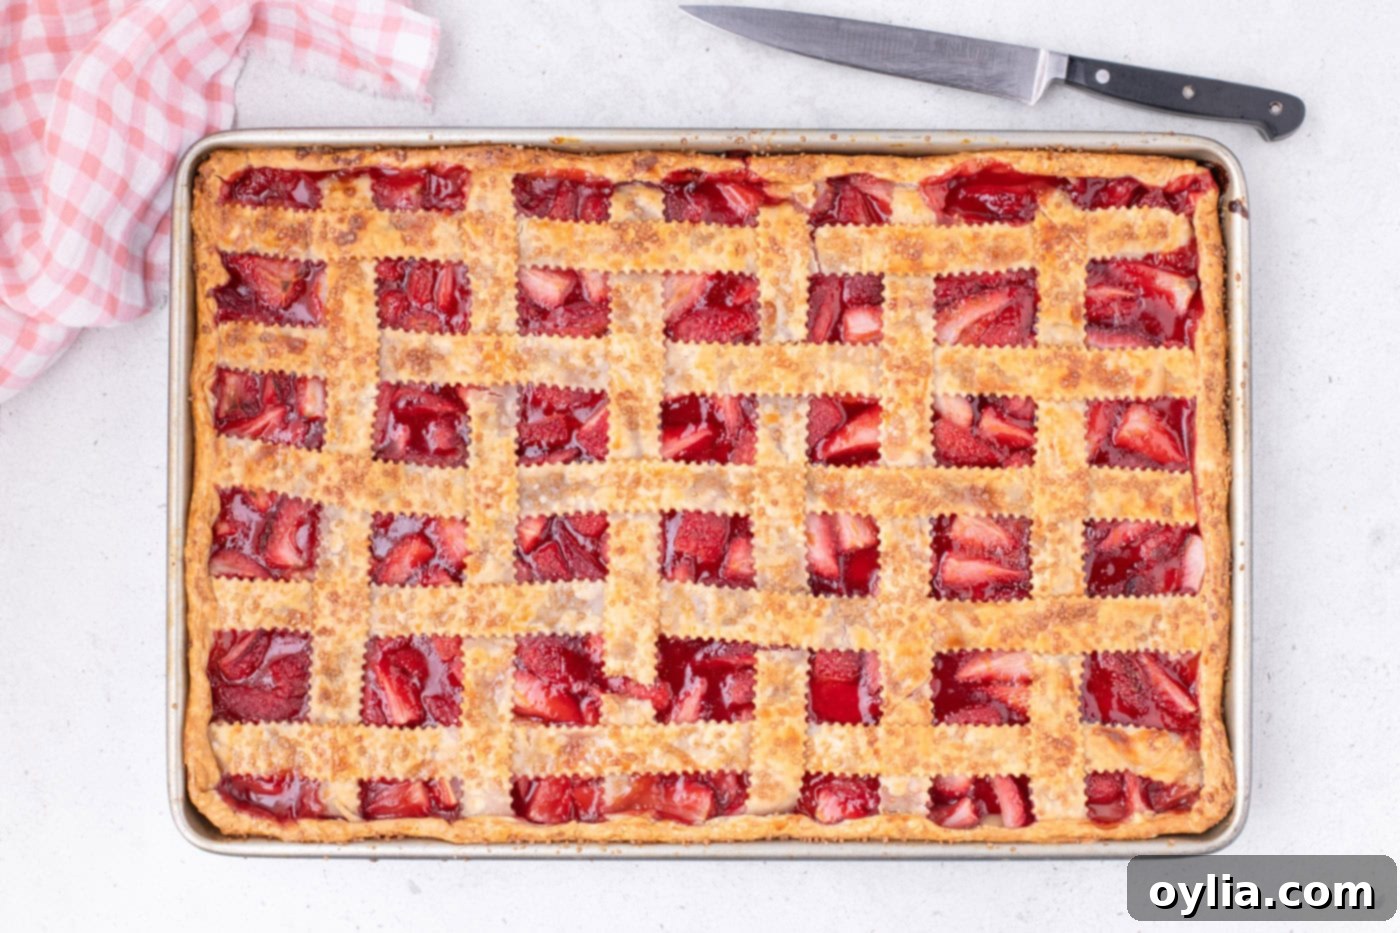
The egg wash and turbinado sugar add a beautiful golden crust and delightful crunch. - Bake the pie in your preheated oven for 40-45 minutes. The pie is perfectly baked when the crust achieves a beautiful golden-brown color, and the fruit filling is visibly bubbling through the lattice, indicating it has thickened and cooked through. Keep an eye on it to prevent over-browning. If the crust starts to brown too quickly, you can loosely tent it with aluminum foil.

Bake until golden and bubbly, a sign of perfectly cooked pie! - Once baked, carefully remove the pan from the oven and place it on a wire rack. Let the pie cool completely for at least 1-2 hours before slicing and serving. This crucial cooling period allows the filling to fully set, ensuring clean slices and preventing a runny pie. Patience is key for the perfect slice!
Frequently Asked Questions & Expert Tips for Strawberry Slab Pie Success
While it might be tempting for convenience, we highly recommend using fresh berries for this recipe. Frozen berries tend to hold significantly more liquid, which can lead to a soggy pie and a less desirable texture in the filling. If you absolutely must use frozen, make sure to thaw them completely and drain off as much excess liquid as possible before mixing them with the sugar and cornstarch. You may also need to increase the cornstarch by an extra tablespoon to compensate for any remaining moisture.
Yes, absolutely! For an even quicker and simpler approach, you can certainly substitute with canned strawberry pie filling. We would suggest using about 2 cans, or approximately 40 ounces, of your favorite strawberry pie filling. Because you are substituting with a pre-made filling that is already thickened, you will likely need to reduce the bake time to closer to 30-35 minutes. Always keep a close eye on your pie in the oven; the filling should be bubbling around the edges, and the crust should be a beautiful golden brown. Even with canned filling, you can still enhance the flavor by topping it with freshly grated lemon and orange zest before adding the lattice top if desired – it makes a noticeable difference!
You can certainly get a head start! The strawberry mixture (strawberries, sugar, cornstarch, and zest) can be prepared a day ahead of time and stored covered in the refrigerator. However, for the best results and to prevent a soggy crust, the assembly of the entire slab pie (placing the filling into the crust, adding the lattice, and baking) should ideally be done and baked on the same day it will be served. If you assemble it too far in advance without baking, the moisture from the fruit can seep into the crust, making it less flaky.
Leftover strawberry slab pie is wonderful! To keep it fresh, store any leftovers in an airtight container in the refrigerator for up to 3 days. For longer storage, you can freeze individual slices or the whole pie (if well-wrapped) for up to 3 months. When reheating from frozen, allow it to thaw in the refrigerator overnight, then warm gently in a low oven (around 300°F/150°C) until heated through and the crust crisps up slightly. This will bring back some of its freshly baked charm.
Don’t let the lattice intimidate you! If weaving seems too daunting, you absolutely can cover the pie with a regular, solid top crust. Just make sure to cut several slits (vent holes) into the top of the crust to allow steam to escape during baking. This is crucial for preventing a soggy crust and ensuring even cooking of the filling. You can also use a cookie cutter to cut out shapes (like small stars or hearts) from the top crust and arrange them decoratively, or simply lay strips randomly for a rustic “shaker” style top. The most important thing is that you enjoy the process and the delicious outcome!
A standard 10×15-inch jelly roll pan (also sometimes called a half-sheet pan) is perfect for this recipe. Its shallow depth and rectangular shape are ideal for creating a thinner, crowd-pleasing pie that’s easy to slice into squares. Ensure your pan is ungreased, as the pie crust contains enough fat to prevent sticking, and an ungreased pan can help the bottom crust crisp up nicely.
Serving Suggestions for Your Delicious Strawberry Slab Pie
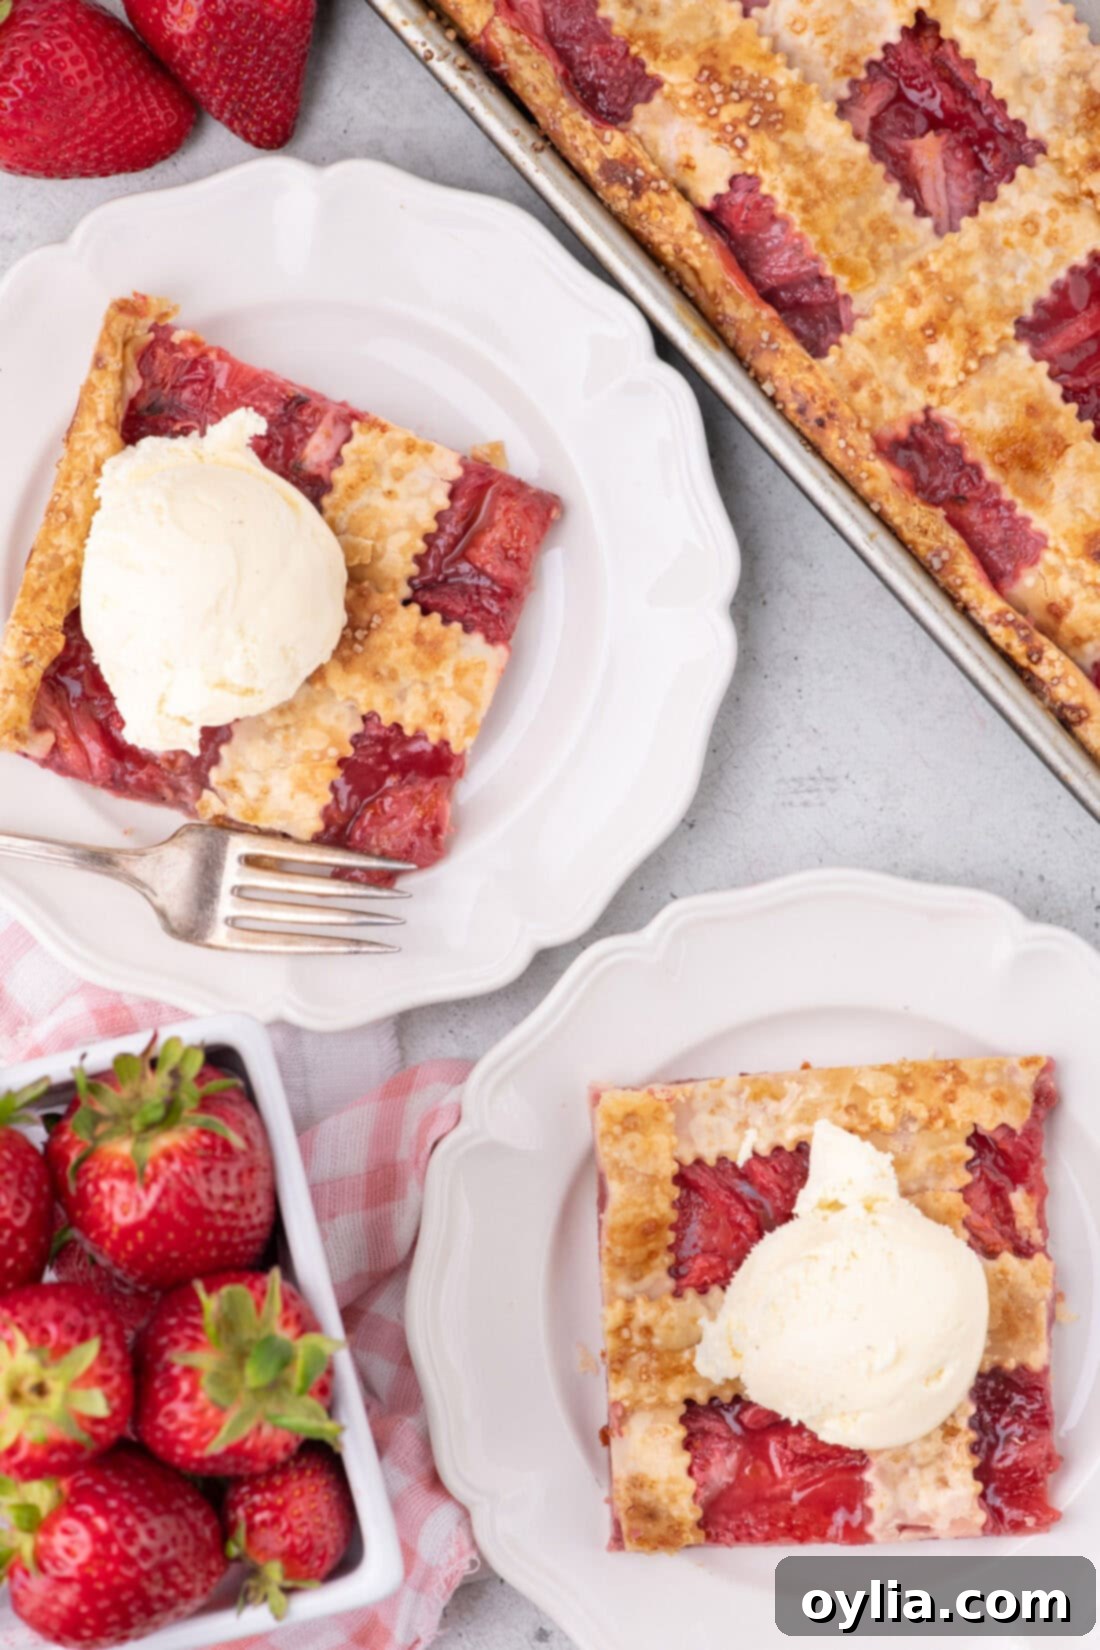
This Easy Strawberry Slab Pie is designed to be the star of any summer gathering! Its generous size and vibrant flavors make it ideal for serving at casual summer potlucks, lively backyard barbecues, festive cookouts, or even just a sweet family dessert. While utterly delicious on its own, it truly shines when paired with classic accompaniments.
For an indulgent treat, serve a warm slice of strawberry slab pie with a generous scoop of creamy vanilla ice cream. The cold, melting ice cream creates a delightful contrast with the warm, fruity filling. Alternatively, a dollop of freshly whipped cream adds a light, airy richness that perfectly complements the strawberries. You can also sprinkle a few fresh mint leaves for an extra touch of freshness and color.
One of the best qualities of this slab pie is its versatility when it comes to serving temperature. It’s absolutely fantastic served warm, straight from the oven (after it’s had a chance to set), where the fruit filling is soft and the crust is still tender. It’s equally delightful chilled, offering a refreshing coolness on a hot day, or simply at room temperature. No matter how you choose to enjoy it, this strawberry slab pie promises a truly memorable dessert experience. Enjoy every single, perfect bite!
More Irresistible Summer Dessert Recipes You’ll Love
If you’re a fan of delightful fruit desserts, especially during the warmer months, then you’re in luck! Here are some more fantastic recipes that capture the essence of summer, perfect for sharing with family and friends:
- Cherry Slab Pie: Another crowd-pleasing slab pie featuring juicy, tart cherries.
- Strawberry Icebox Cake: A no-bake dream, layered with cream and fresh strawberries.
- Strawberry Dream Dessert: Light, fluffy, and full of strawberry goodness.
- Strawberry Shortcake Trifle: A stunning layered dessert that’s perfect for entertaining.
- Apple Slab Pie: A comforting classic, scaled up for a larger crowd.
I absolutely adore baking and cooking, and I find immense joy in sharing my kitchen experiences and cherished recipes with all of you! Remembering to come back and check for new recipes each day can sometimes be tough, which is why I offer a convenient newsletter delivered straight to your inbox every time a new recipe posts. Simply subscribe here and start receiving your free daily recipes, ensuring you never miss a delicious update!
Strawberry Slab Pie
IMPORTANT – There are often Frequently Asked Questions within the blog post that you may find helpful. Simply scroll back up to read them!
Print It
Pin It
Rate It
Save ItSaved!
Ingredients
- 28.2 ounces premade pie crusts two 14.1 ounce boxes of Pillsbury pie crusts
- 2 pounds strawberries hulled and quartered, about 6 cups
- ¾ cup granulated sugar
- 4 Tablespoons cornstarch
- 1 teaspoon finely grated orange zest
- 1 teaspoon finely grated lemon zest
- 1 large egg
- 1 Tablespoon water
- 3 Tablespoons turbinado sugar
Things You’ll Need
-
Mixing bowls
-
15×10 jelly roll pan
-
Rolling pin
-
Pizza Cutter or pastry cutter
Before You Begin: Important Tips for Success
- Smaller, freshly picked strawberries naturally release less juice than larger, store-bought strawberries. If you are fortunate enough to use hand-picked berries, consider reducing the amount of cornstarch to 3 tablespoons to prevent the filling from becoming too thick.
- If the idea of creating a lattice top feels overwhelming, don’t worry! You can easily cover the pie with a single, solid sheet of pie crust instead. Just be sure to cut several decorative slits into the top of the crust to allow steam to vent properly during baking, which helps prevent a soggy bottom crust.
- For the absolute best texture and flavor in your slab pie, it is always best to use fresh strawberries. Frozen berries contain a lot of excess liquid, which can make the entire pie filling watery and the crust soggy.
- As a convenient alternative, canned strawberry pie filling can be used. We recommend substituting with 2 cans of strawberry pie filling (approximately 40 ounces total). Since this filling is already thickened, you will likely need to reduce the bake time to around 30-35 minutes. Monitor the pie closely in the oven; the filling should be bubbling, and the crust should be golden brown. For an extra touch of flavor, you can still add grated lemon and orange zest to the canned filling before topping with the lattice.
Instructions
-
Preheat your oven to 375°F (190°C).
-
In a medium-sized bowl, combine the hulled and quartered strawberries with the granulated sugar, cornstarch, finely grated orange zest, and lemon zest. Gently stir with a soft silicone spatula until all ingredients are well combined. Let the strawberries sit while you prepare the crust.
-
Unroll 2 sheets of pie crust and lay them side by side on a parchment-lined surface. Trim 1 ½ inches from the side of each pie crust and set these scraps aside for later use.
-
Slightly overlap the trimmed edges of the pie crusts and use the reserved scraps to fill in any gaps where the two circles join, creating a rectangular shape. Roll the dough out until it is about 1 ½ to 2 inches larger on all sides than your 10×15-inch jelly roll pan.
-
Carefully drape the enlarged pie crust over your rolling pin and gently place it into an ungreased 10×15-inch jelly roll pan. Press the crust firmly into the corners and up the sides to ensure there are no gaps.
-
Give the strawberries a final stir and then evenly add them (along with any accumulated juices) to the prepared pie crust in the pan.
-
Place the entire pan in the refrigerator to chill while you prepare the lattice strips.
Making The Lattice Weave
-
Unroll a third sheet of pie crust and place it on a parchment-lined surface. Roll it into a rectangular shape measuring approximately 17 x 12 inches. Using a pizza cutter (or pastry cutter) and a metal ruler, cut 12 evenly sized 17-inch horizontal strips (each 1 inch wide). Trim 7 of these strips to measure 12 inches in length.
-
Taking 5 of the long strips (those measuring 17 inches), place them horizontally across the strawberries, spacing them approximately 1 inch apart.
-
To create the lattice weave: starting from the top, fold every other horizontal strip (strips 1, 3, and 5) halfway back towards the left-hand side of the pan.
-
Place one of the shorter (12-inch) strips 1 inch off-center, laying it perpendicularly across the unfolded horizontal strips.
-
Unfold strips 1, 3, and 5 back over the short strip you just laid down. Now, fold back the *alternating* strips (strips 2 and 4) and lay down a second shorter strip 1 inch away from the first one. Unfold strips 2 and 4 over this second strip. Repeat this process until all your strips have been beautifully woven together, completing your lattice top.
-
Fold the overhang of the bottom crust over the lattice strips and firmly pinch them together all around the perimeter to form a secure seal. You can crimp decoratively with your fingers or a fork.
-
In a small bowl, whisk together the large egg and 1 tablespoon of water to create an egg wash. Brush this egg wash generously over the entire lattice top and the crimped edges of the pie crust. Then, generously sprinkle the turbinado sugar over the brushed surface.
-
Bake for 40-45 minutes, or until the crust is a beautiful golden brown and the fruit filling is visibly bubbling through the lattice openings. If the crust begins to brown too quickly, loosely tent the pie with aluminum foil.
-
Remove the pan from the oven and place it on a wire rack to cool completely for 1-2 hours before slicing and serving. This cooling time is crucial for the filling to set properly, ensuring clean, perfect slices.
Expert Tips & FAQs
- Leftover strawberry slab pie can be stored in an airtight container in the refrigerator for up to 3 days. For longer preservation, you can freeze individual slices or the whole pie (well-wrapped) for up to 3 months.
Nutrition
The recipes on this blog are tested with a conventional gas oven and gas stovetop. It’s important to note that some ovens, especially as they age, can cook and bake inconsistently. Using an inexpensive oven thermometer can assure you that your oven is truly heating to the proper temperature. If you use a toaster oven or countertop oven, please keep in mind that they may not distribute heat the same as a conventional full sized oven and you may need to adjust your cooking/baking times. In the case of recipes made with a pressure cooker, air fryer, slow cooker, or other appliance, a link to the appliances we use is listed within each respective recipe. For baking recipes where measurements are given by weight, please note that results may not be the same if cups are used instead, and we can’t guarantee success with that method.
