Easy & Cheesy Dorito Casserole: Your Ultimate Weeknight Taco Bake
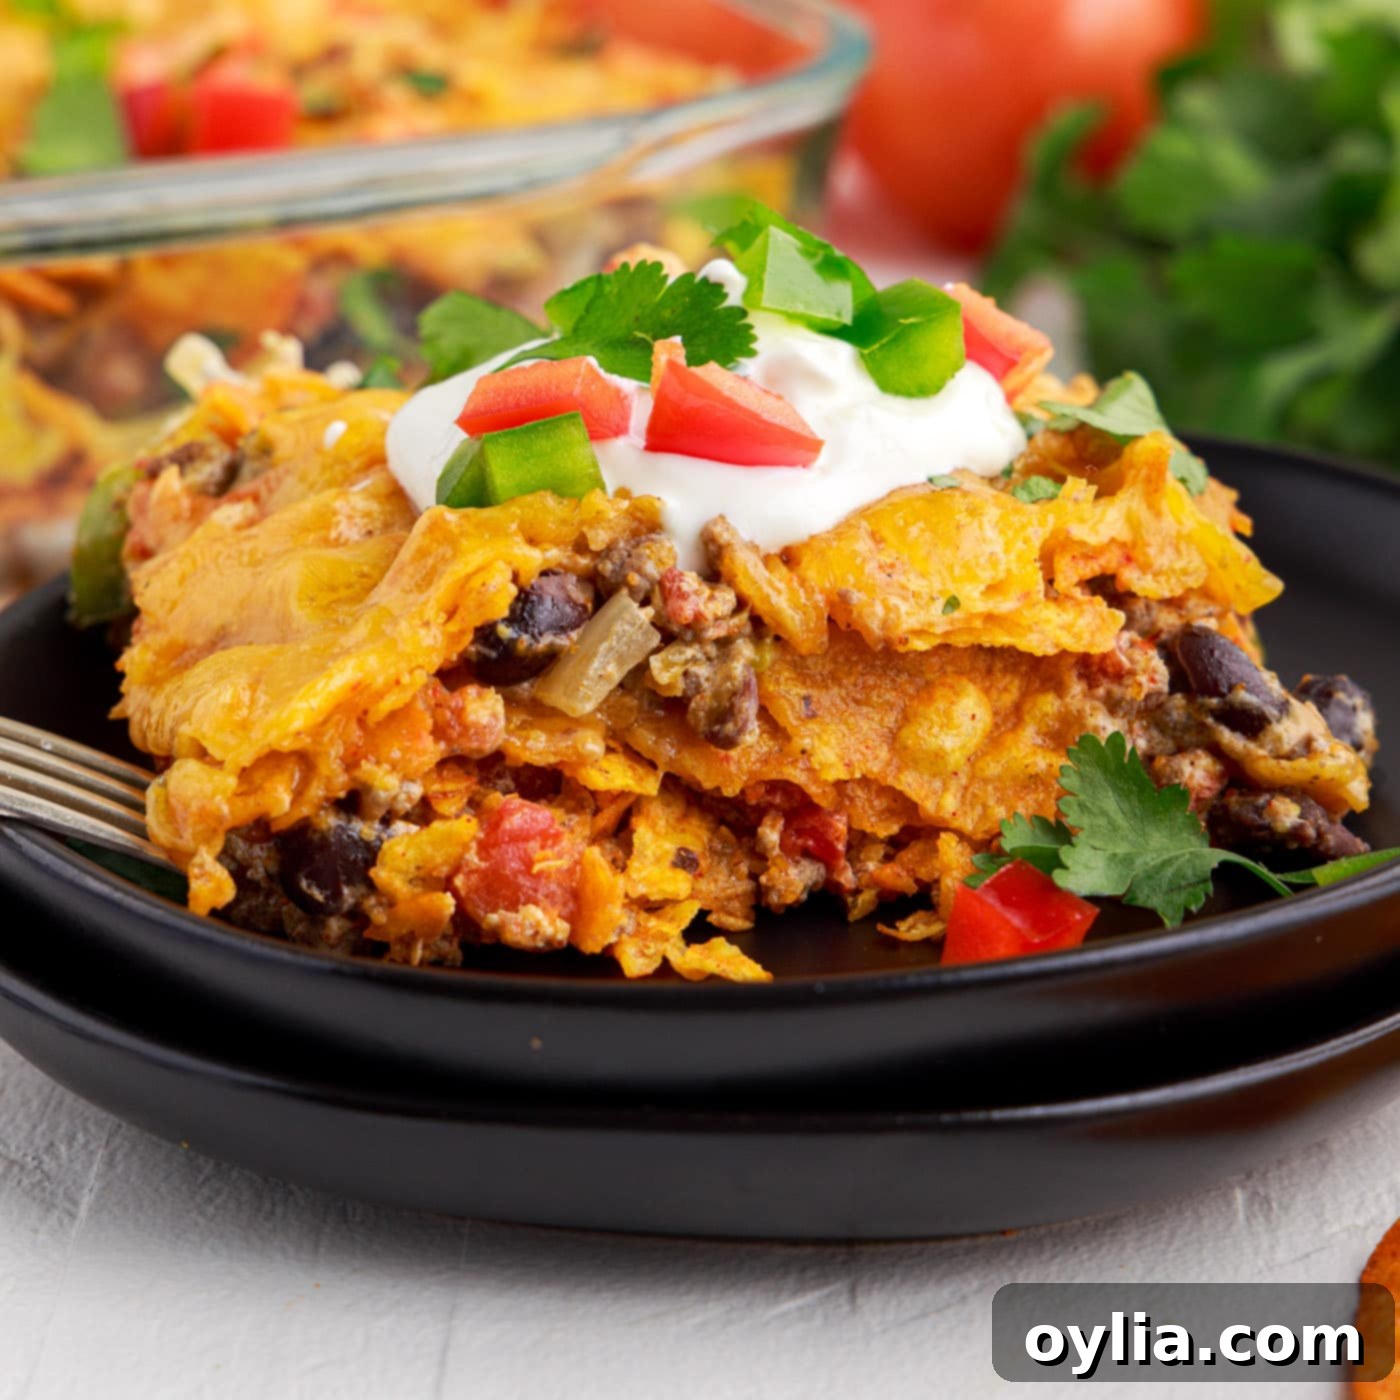
Craving something quick, satisfying, and bursting with flavor? Look no further than this incredible Dorito Casserole recipe! It’s a true weeknight hero, combining the irresistible crunch of nacho cheese chips with savory ground beef, vibrant vegetables, and plenty of gooey cheese. This dish takes all the delicious elements you love in a classic taco and transforms them into a hearty, comforting bake that the whole family will adore. Forget boring dinners; this easy casserole brings excitement and a delightful texture symphony to your table, making it a guaranteed crowd-pleaser.

Why This Easy Dorito Casserole Works
This cheesy beef Dorito casserole isn’t just another weeknight meal; it’s an experience. The genius lies in its simplicity and the incredible combination of textures and flavors. Imagine all your favorite taco fillings – perfectly seasoned ground beef, a medley of onions and bell peppers, hearty beans, and rich, melted cheese – all layered with crispy, flavorful Doritos. Each spoonful offers a satisfying crunch followed by a tender, savory bite, making it incredibly hard to resist.
What truly makes this taco bake with Doritos a standout is its adaptability. It’s designed to be effortlessly customized to fit your family’s preferences or whatever ingredients you have on hand. Whether you prefer a different type of meat, a variety of chips, or extra veggies, this recipe is a fantastic canvas for culinary creativity. It’s an excellent way to use up ingredients, minimize food waste, and still deliver a robust, exciting meal that beats the takeout menu any day. Plus, it comes together quickly, meaning less time in the kitchen and more time enjoying delicious food with loved ones.
Key Ingredients for Your Dorito Casserole
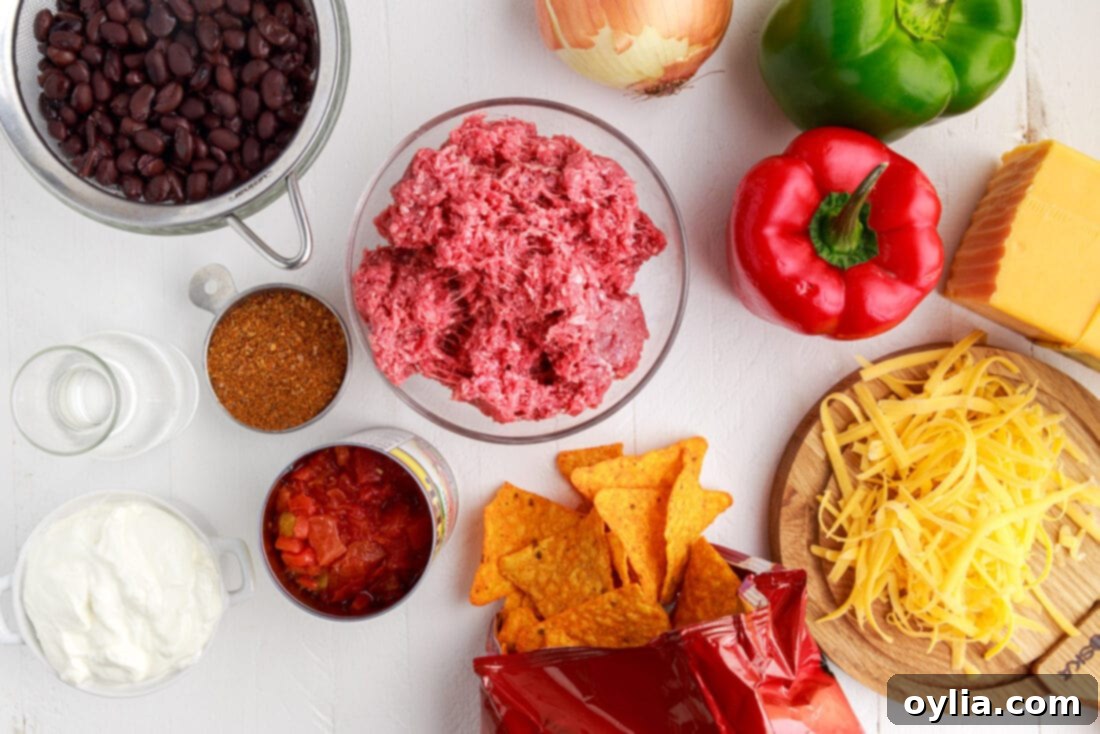
Creating this delicious Dorito casserole requires a handful of readily available ingredients. While the full list with precise measurements can be found in the printable recipe card at the end of this post, here’s a glimpse at the stars of the show and why they make this dish so special:
- Nacho Cheese Doritos: The foundation of crunch and cheesy flavor.
- Ground Beef: The savory heart of the casserole, packed with protein.
- Onion & Bell Peppers: Aromatic vegetables that add freshness and a subtle sweetness.
- Taco Seasoning: The essential blend of spices that brings all the taco-inspired flavor.
- Water: To help the seasoning meld with the meat.
- Rotel Tomatoes: Diced tomatoes with green chilies for a hint of heat and tang.
- Sour Cream: Adds a creamy richness and balances the spice.
- Black Beans: For extra heartiness, fiber, and texture.
- Shredded Cheddar Cheese: The final layer of gooey, melted perfection.
Gathering these simple ingredients is the first step towards a truly unforgettable dinner. Don’t worry if you don’t have every single item; this recipe is forgiving, and we’ll cover some fantastic substitution suggestions next!
Ingredient Information and Smart Substitution Suggestions
Flexibility is key to a great weeknight dinner, and this Dorito casserole recipe is incredibly versatile. Here are some detailed tips and substitution ideas to help you make it your own:
Choosing Your Meat
The original recipe calls for ground beef, which provides a rich, hearty base for this casserole. For a leaner option, you can easily substitute it with ground turkey or ground chicken. Both will absorb the taco seasoning beautifully. If you’re looking for an even quicker preparation, shredded rotisserie chicken works wonderfully; just shred it and mix it directly with the seasoned sauce, skipping the browning step.
Regarding seasoning, while a packaged taco seasoning mix is convenient, making your own offers control over flavor and sodium. If you prefer to go homemade, our homemade taco seasoning mix is an excellent choice. It typically includes a blend of chili powder, cumin, paprika, onion powder, garlic powder, and a pinch of cayenne for a perfect Tex-Mex profile.
The All-Important Chips
We absolutely love the classic Nacho Cheese Doritos for their vibrant flavor and satisfying crunch. However, don’t limit yourself! Cool Ranch Doritos offer a tangy alternative that many find equally delicious. If you prefer a milder flavor, or want to make it gluten-free (check chip labels), plain tortilla chips are a fantastic substitute. Just be sure they are sturdy enough to hold up in the casserole.
When it comes to the amount of chips, 10 ounces is a good starting point for a balanced casserole. You can certainly reduce the number of chips if you prefer a more “filling-heavy” dish with less crunch. Conversely, if you’re a true chip lover and want to increase the quantity, it’s crucial to adjust the moisture in the meat mixture. Chips are absorbent, and adding more can dry out your casserole. To compensate, consider adding an extra dollop of sour cream, a bit more salsa, or even a can of cream of chicken soup to the meat mixture. This ensures every layer remains flavorful and moist, preventing a dry outcome.
Other Key Ingredients and Tweaks
- Rotel Tomatoes: These canned diced tomatoes with green chilies add a lovely texture and a mild kick. If you can’t find Rotel, a can of plain diced tomatoes combined with a small can of diced green chilies or a finely minced jalapeño (seeds removed for less heat) will work perfectly.
- Beans: Black beans are used here for their earthy flavor and creamy texture, but pinto beans or kidney beans would also be delicious. Always remember to drain and rinse canned beans thoroughly to remove excess sodium and improve flavor.
- Cheese: Medium cheddar cheese melts beautifully and offers a familiar, comforting flavor. For a bolder taste, try a Mexican blend, Monterey Jack, or even a spicy pepper jack cheese if you like extra heat. Freshly shredded cheese melts smoother and tastes better than pre-shredded.
- Vegetables: Feel free to experiment with other diced vegetables in your meat mixture. Corn, zucchini, or even finely chopped carrots can add extra nutrients and flavor.
By keeping these tips in mind, you can easily adapt this Dorito Casserole to your family’s preferences and dietary needs, ensuring a delicious outcome every time.
Step-by-Step: How to Make Dorito Casserole
These step-by-step photos and instructions are here to help you visualize how to make this recipe. You can Jump to Recipe to get the printable version of this recipe, complete with measurements and instructions at the bottom.
- Prepare Your Dish and Oven: First, grab a 9×13 casserole dish and give it a good spray with non-stick cooking spray. This crucial step prevents sticking and makes cleanup much easier. While you’re doing that, preheat your oven to 350 degrees Fahrenheit (175°C) so it’s ready to go when your casserole is assembled.
- Lay the Chip Foundation: Take your Doritos and gently crush them. You want them broken into bite-sized pieces, not a fine powder, to retain some texture. Sprinkle about 1 cup of these crushed chips evenly across the bottom of your prepared baking dish. This forms the essential crunchy base for your Dorito beef casserole.
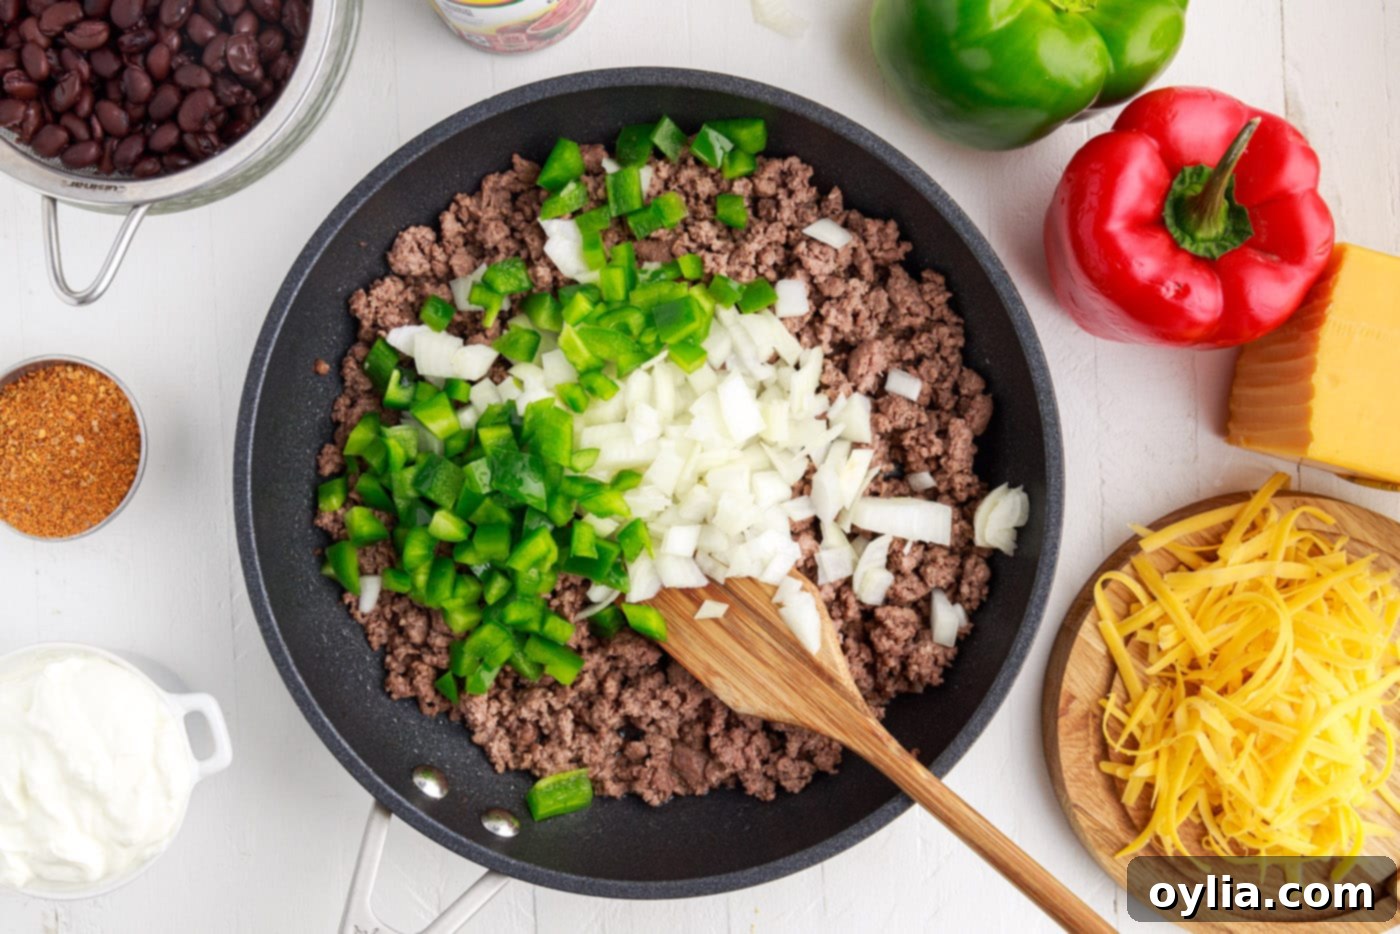
- Cook the Beef and Veggies: In a large skillet, brown your ground beef over medium heat. As it cooks, break it up into small crumbles. Once it’s mostly browned, drain off any excess grease to prevent the casserole from becoming oily. Then, add your diced onion and diced bell pepper to the skillet. Sauté them with the beef for about 5 minutes, or until the vegetables begin to soften and become fragrant. This step infuses flavor into the meat mixture.
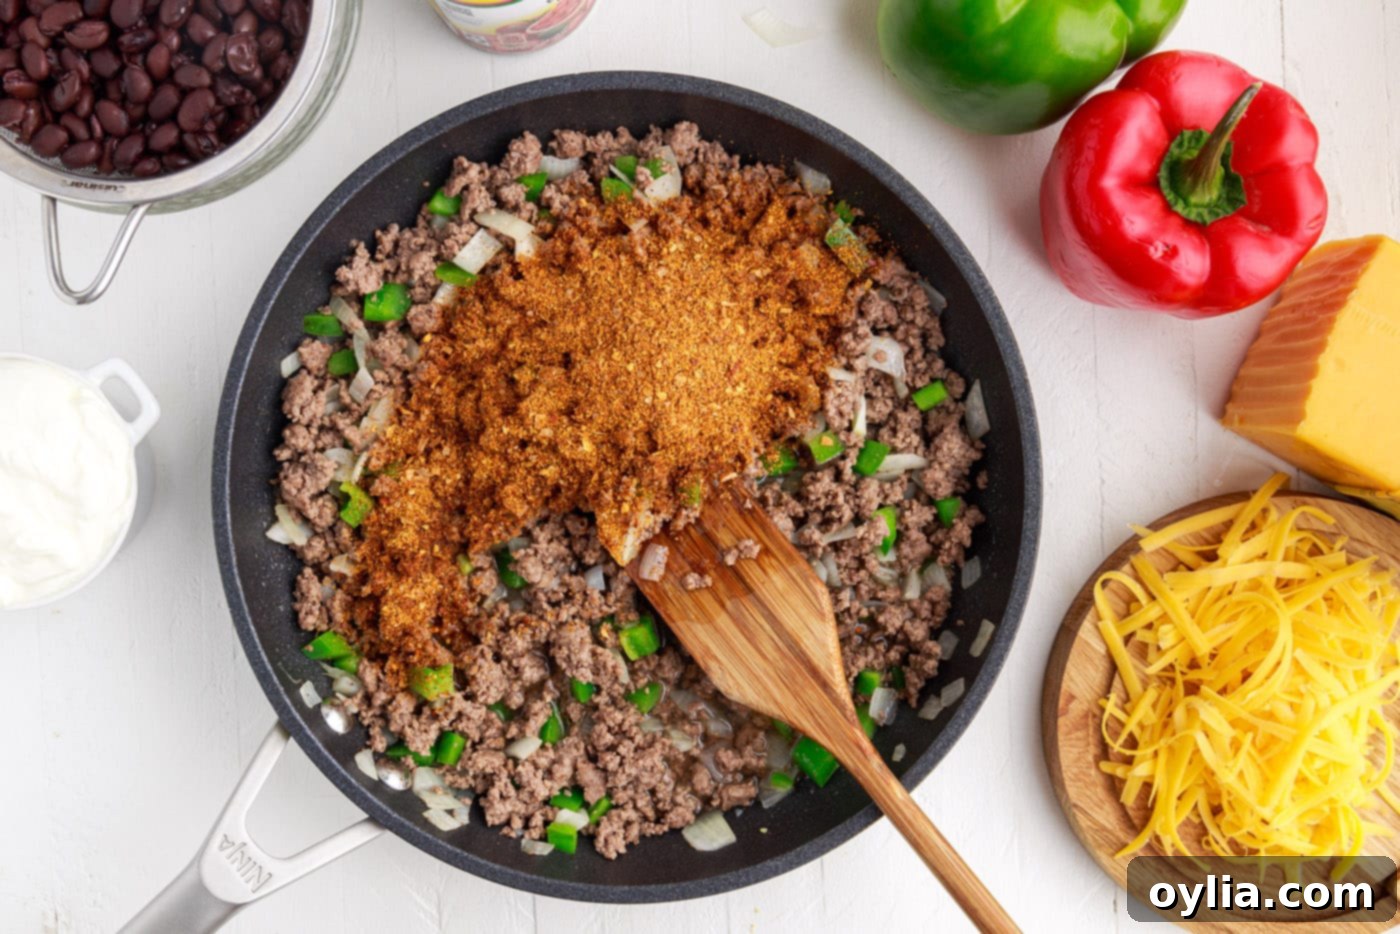
- Season the Meat Mixture: Stir in the taco seasoning and water with the cooked beef and vegetables. Mix everything thoroughly to ensure the seasoning is evenly distributed. Bring the mixture to a gentle simmer and cook for another 5 minutes, stirring regularly. This allows the spices to bloom and the flavors to meld beautifully, creating that iconic taco taste for your easy taco casserole.


- Add Creaminess and Tang: Remove the skillet from the heat and stir in the drained Rotel tomatoes and sour cream. Mix until everything is completely combined and creamy. The sour cream adds a wonderful richness and helps bind the mixture, while the Rotel contributes a mild spice and acidity.
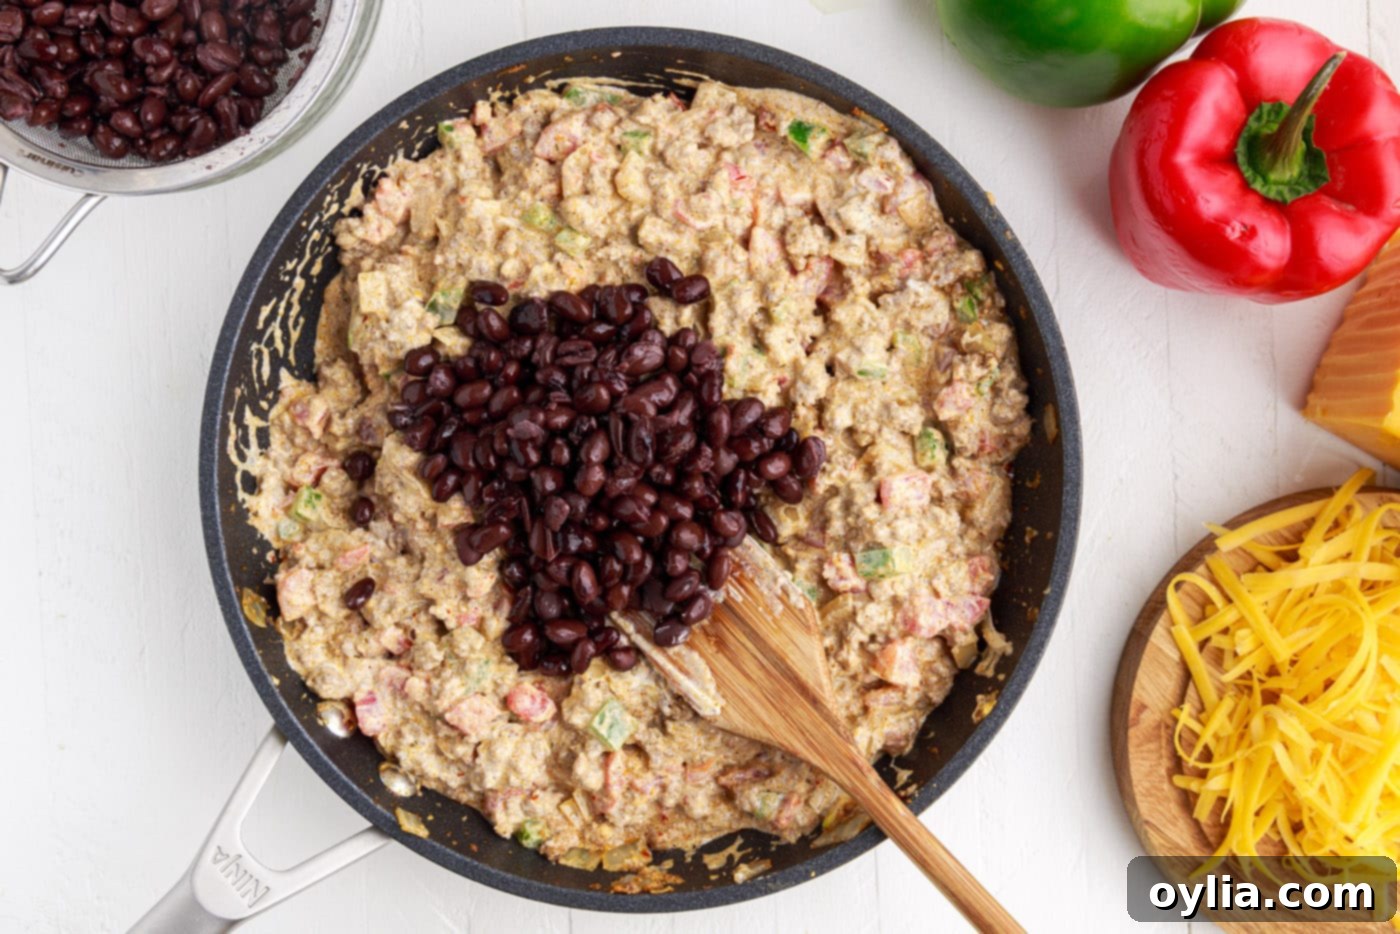
- Incorporate the Beans: Gently fold the drained and rinsed black beans into the meat mixture. Be careful not to mash them, you want them to remain mostly intact for texture.

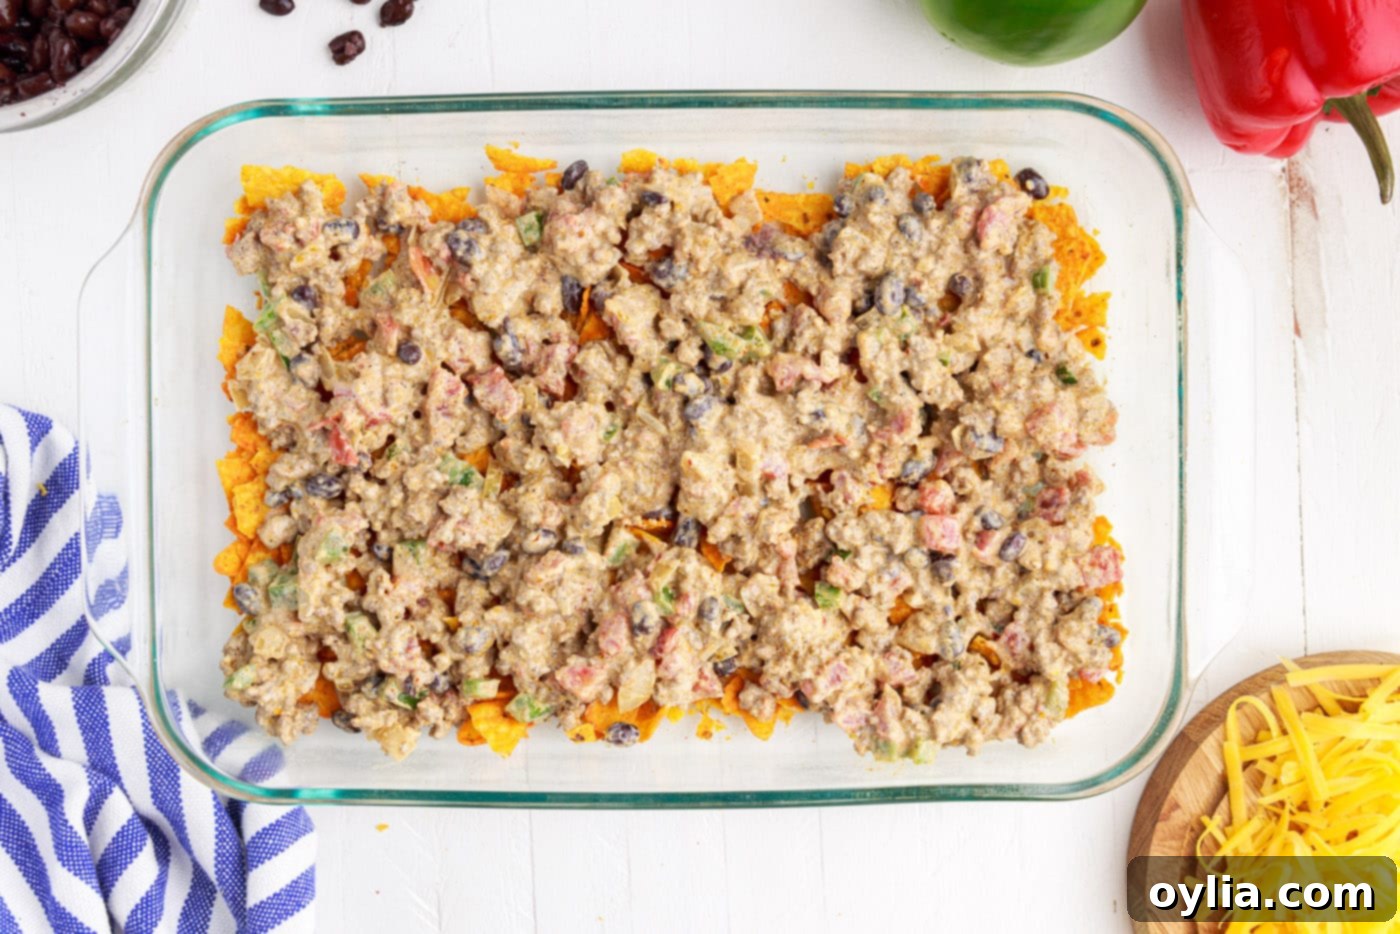
- First Layer of Meat: Spread half of your flavorful meat and bean mixture evenly over the crushed Doritos in the casserole dish. This creates a solid, savory layer.

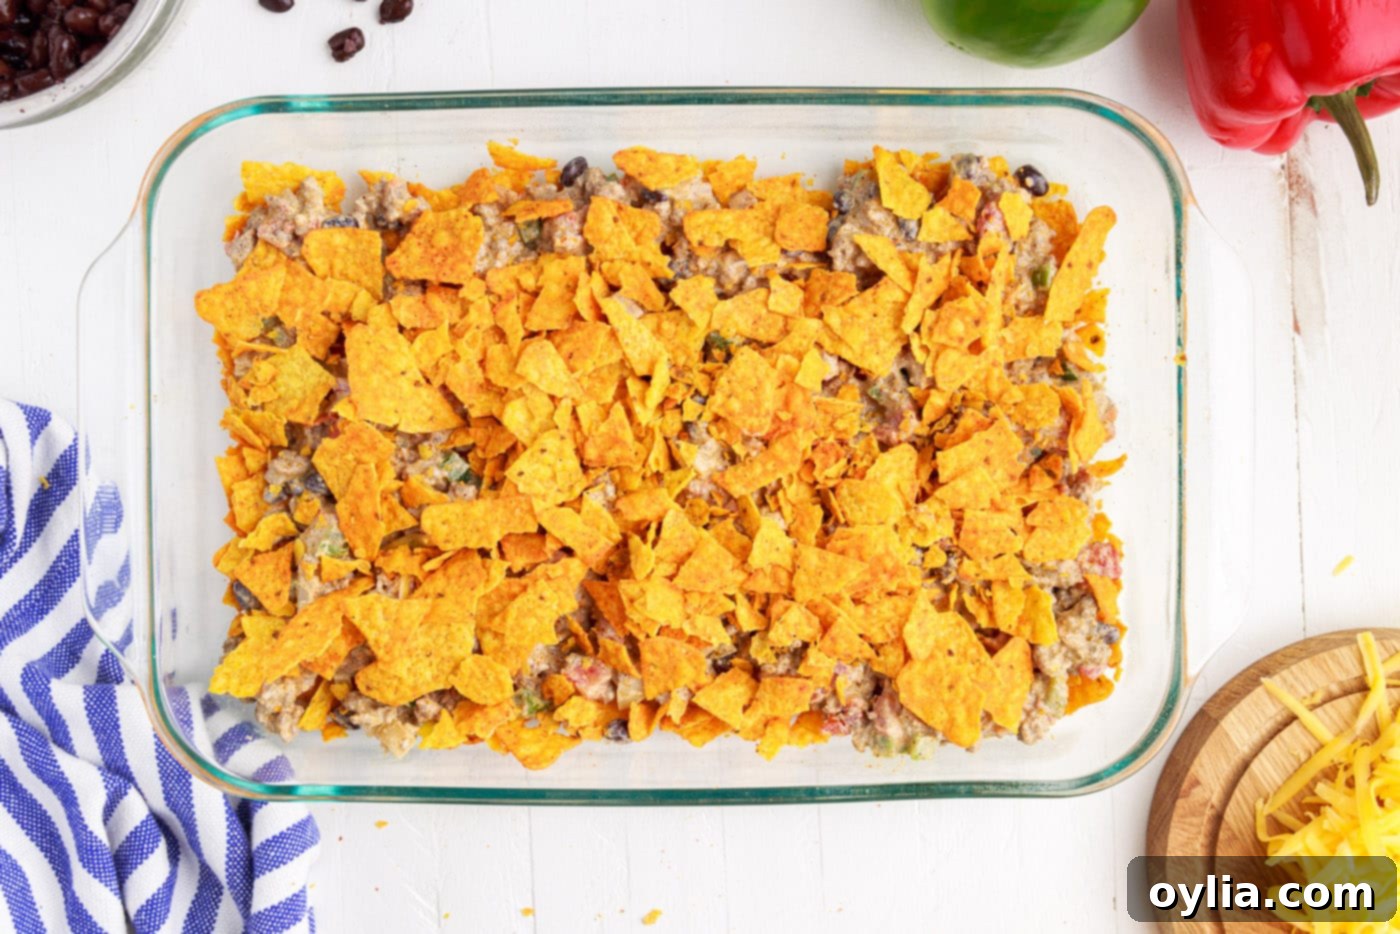
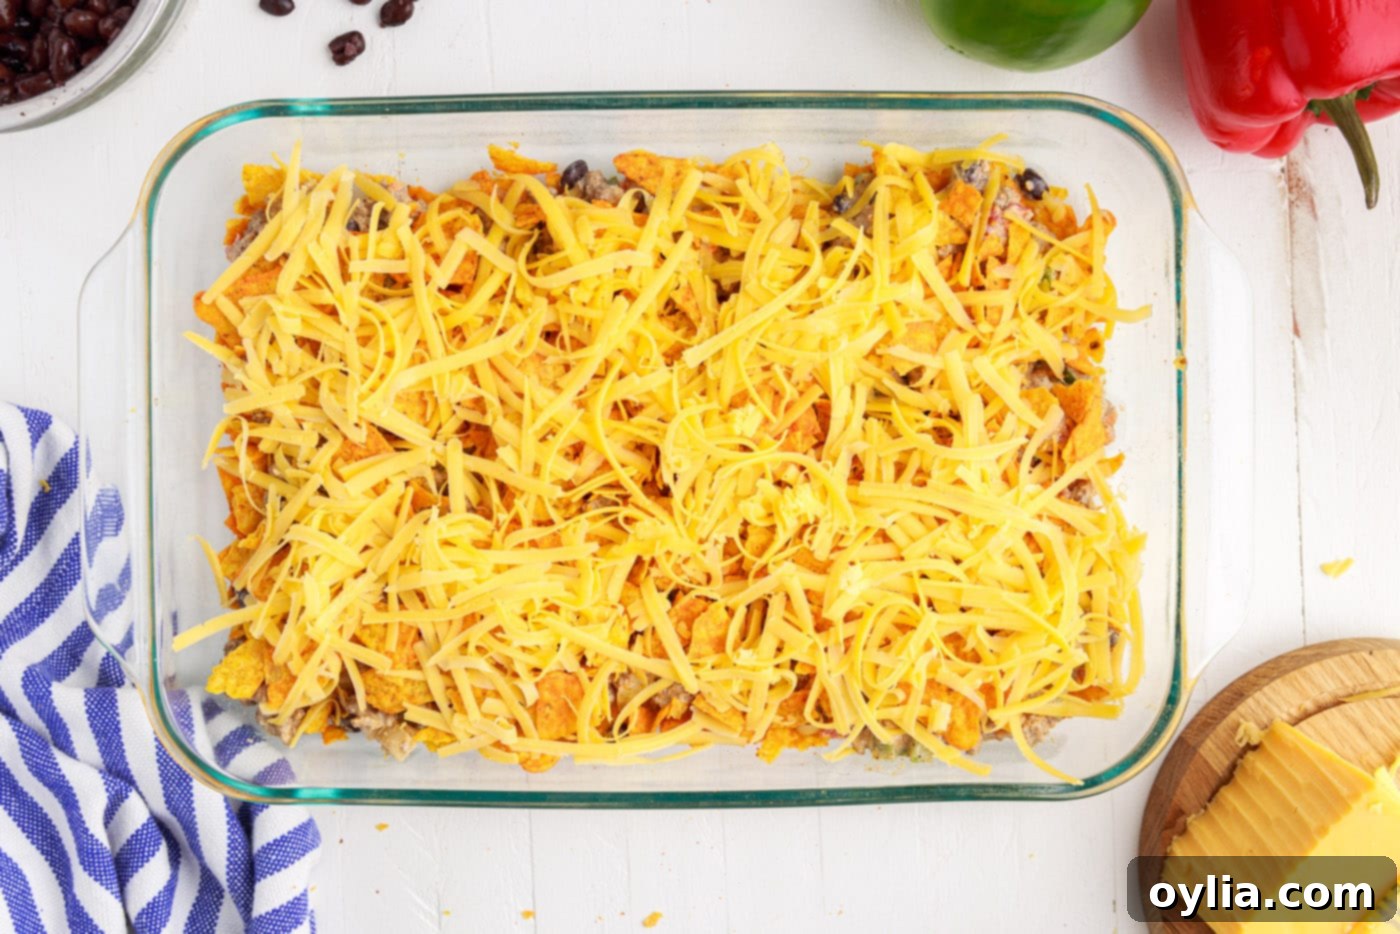
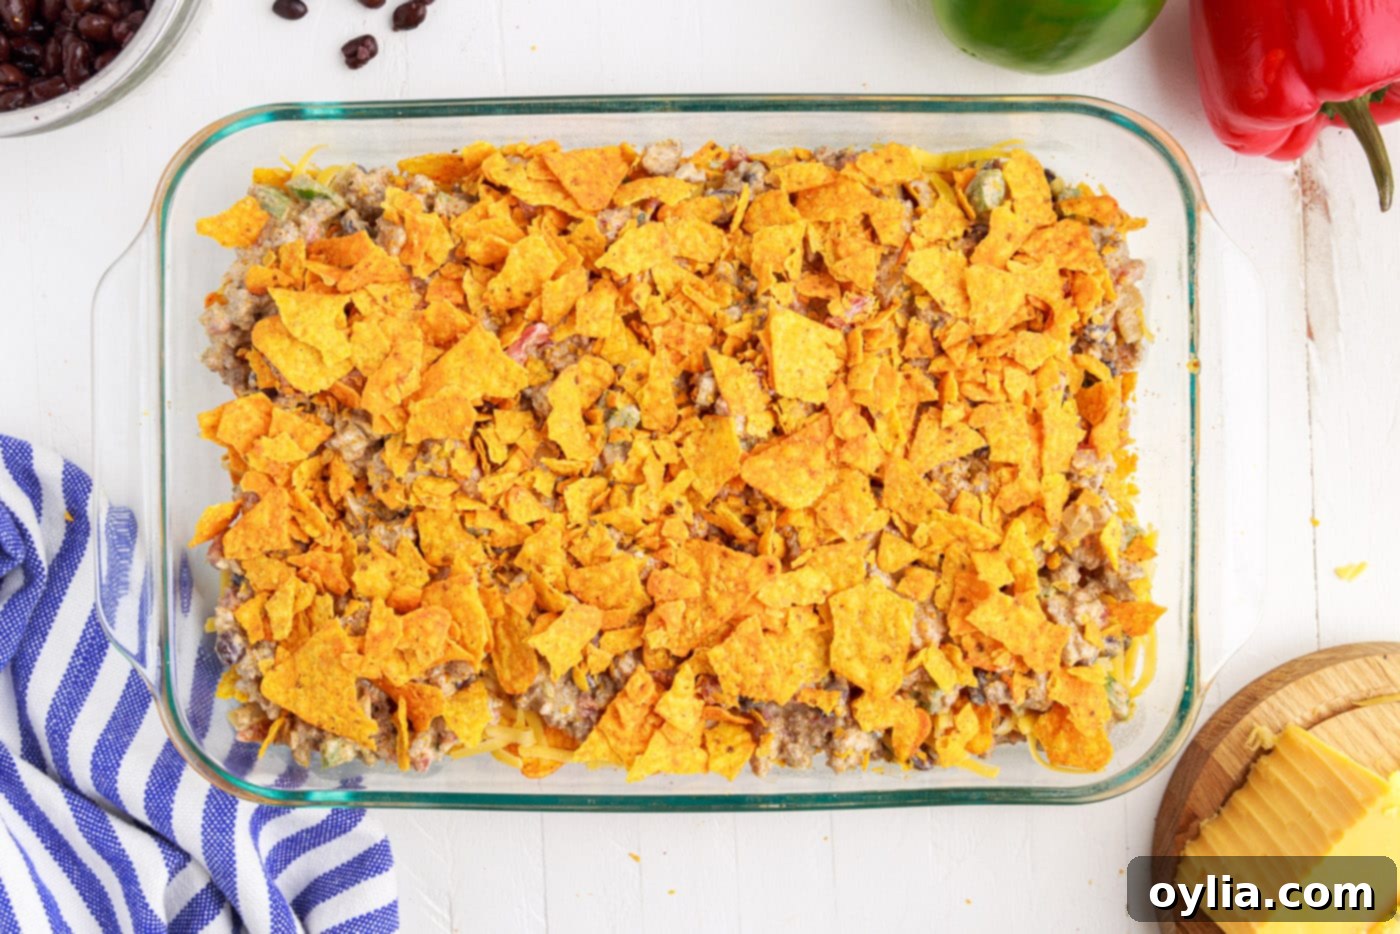
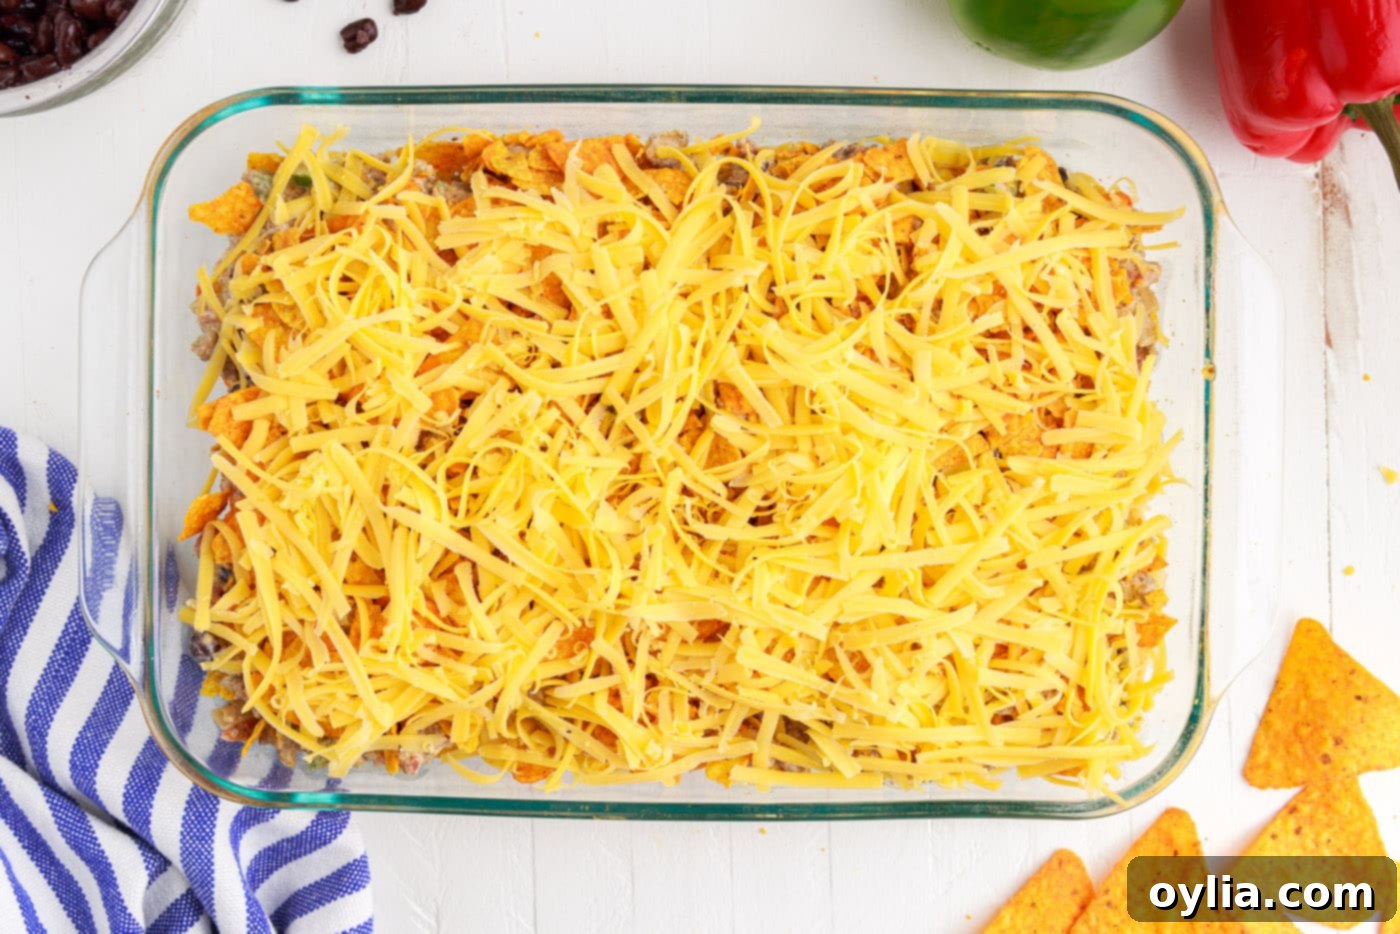
- Chips and Cheese: Place another generous layer of crushed chips over the meat mixture. Then, evenly spread half of your shredded cheese over these chips. This creates a delightful middle layer of crunch and cheesiness.


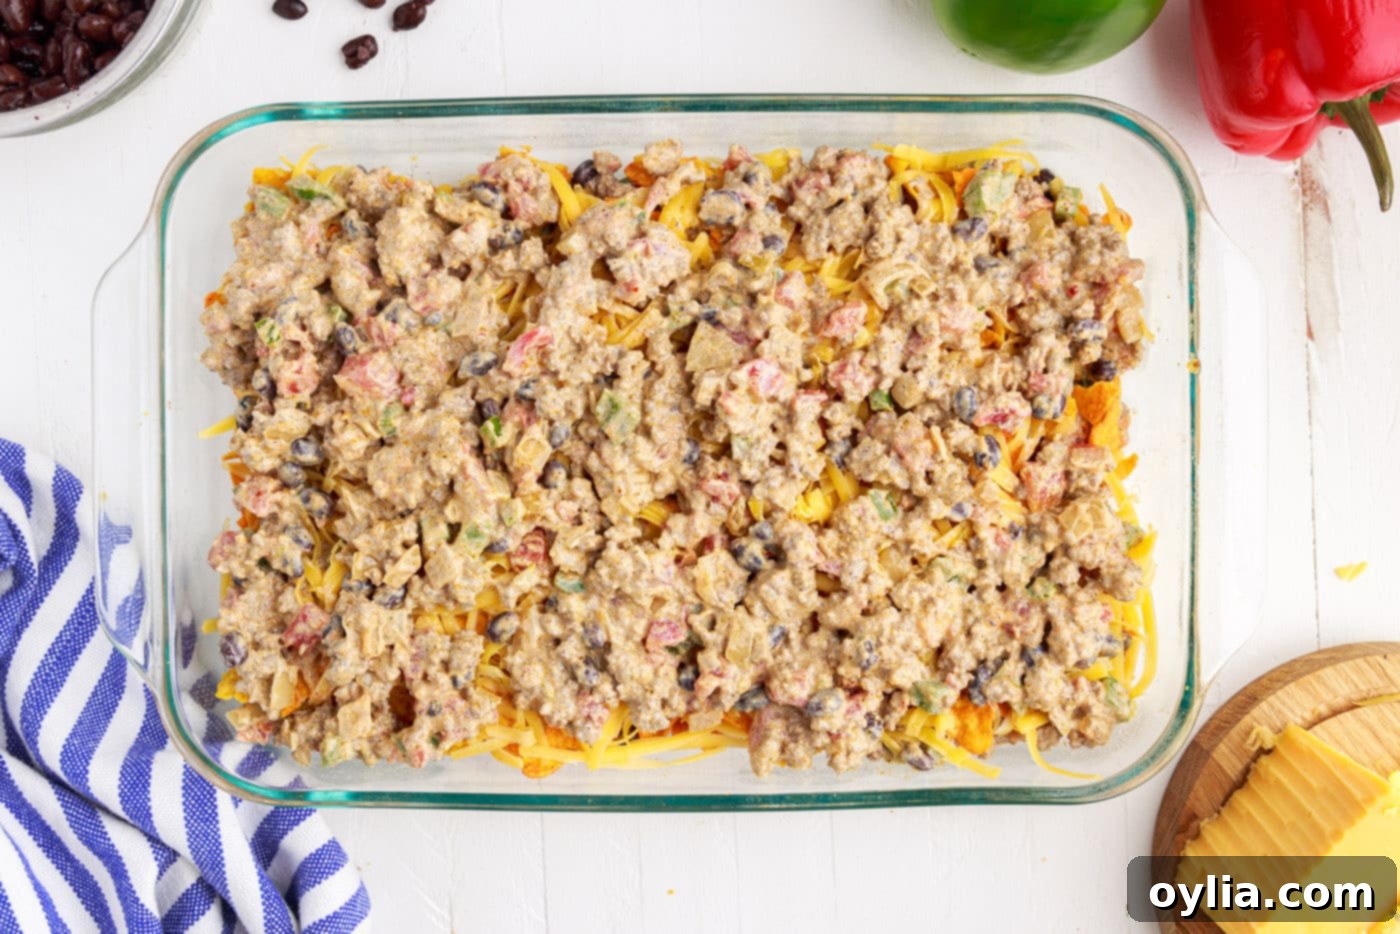
- Final Layers: Repeat the layering process: spread the remaining meat mixture, followed by the rest of the crushed chips, and finally, top with the remaining shredded cheese. This ensures every bite is packed with all the delicious components of this cheesy Dorito bake.


- Bake to Perfection: Cover the casserole dish tightly with aluminum foil. Bake for approximately 20 minutes. The foil helps steam the casserole, ensuring the ingredients heat through evenly and the cheese melts perfectly without drying out the top layer of chips. Your casserole is done when the cheese is fully melted and the entire dish is hot and bubbly.
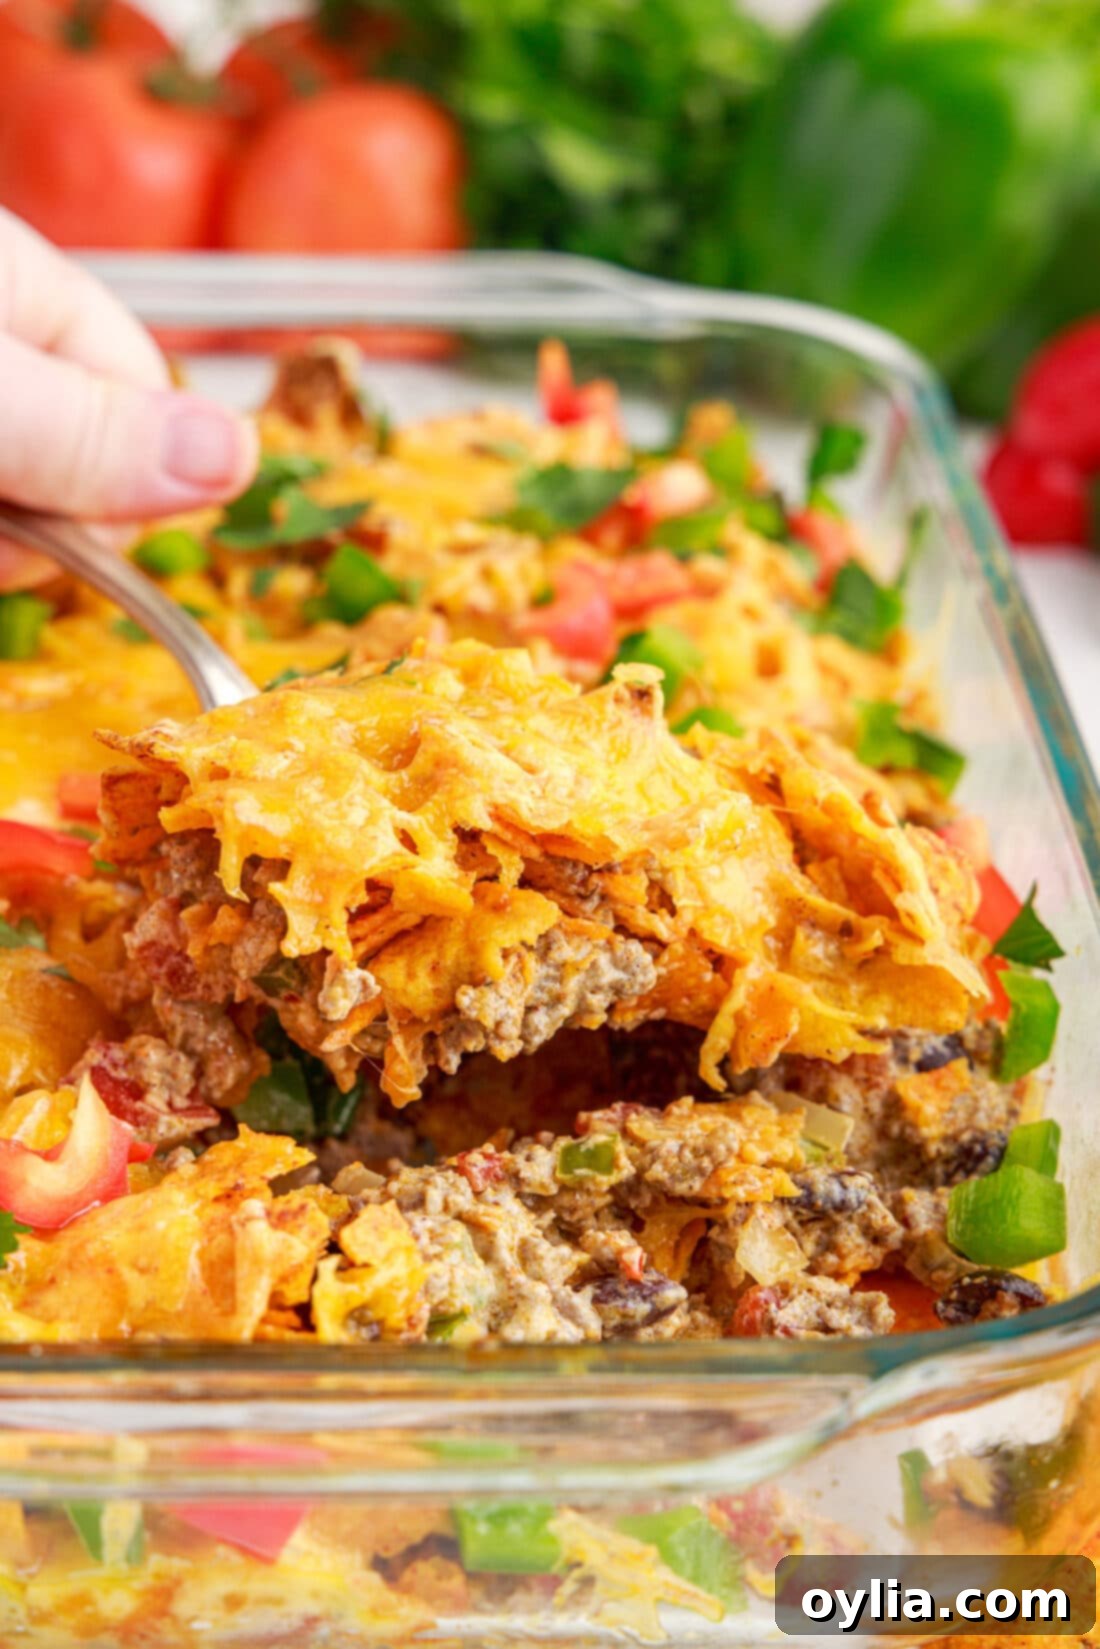
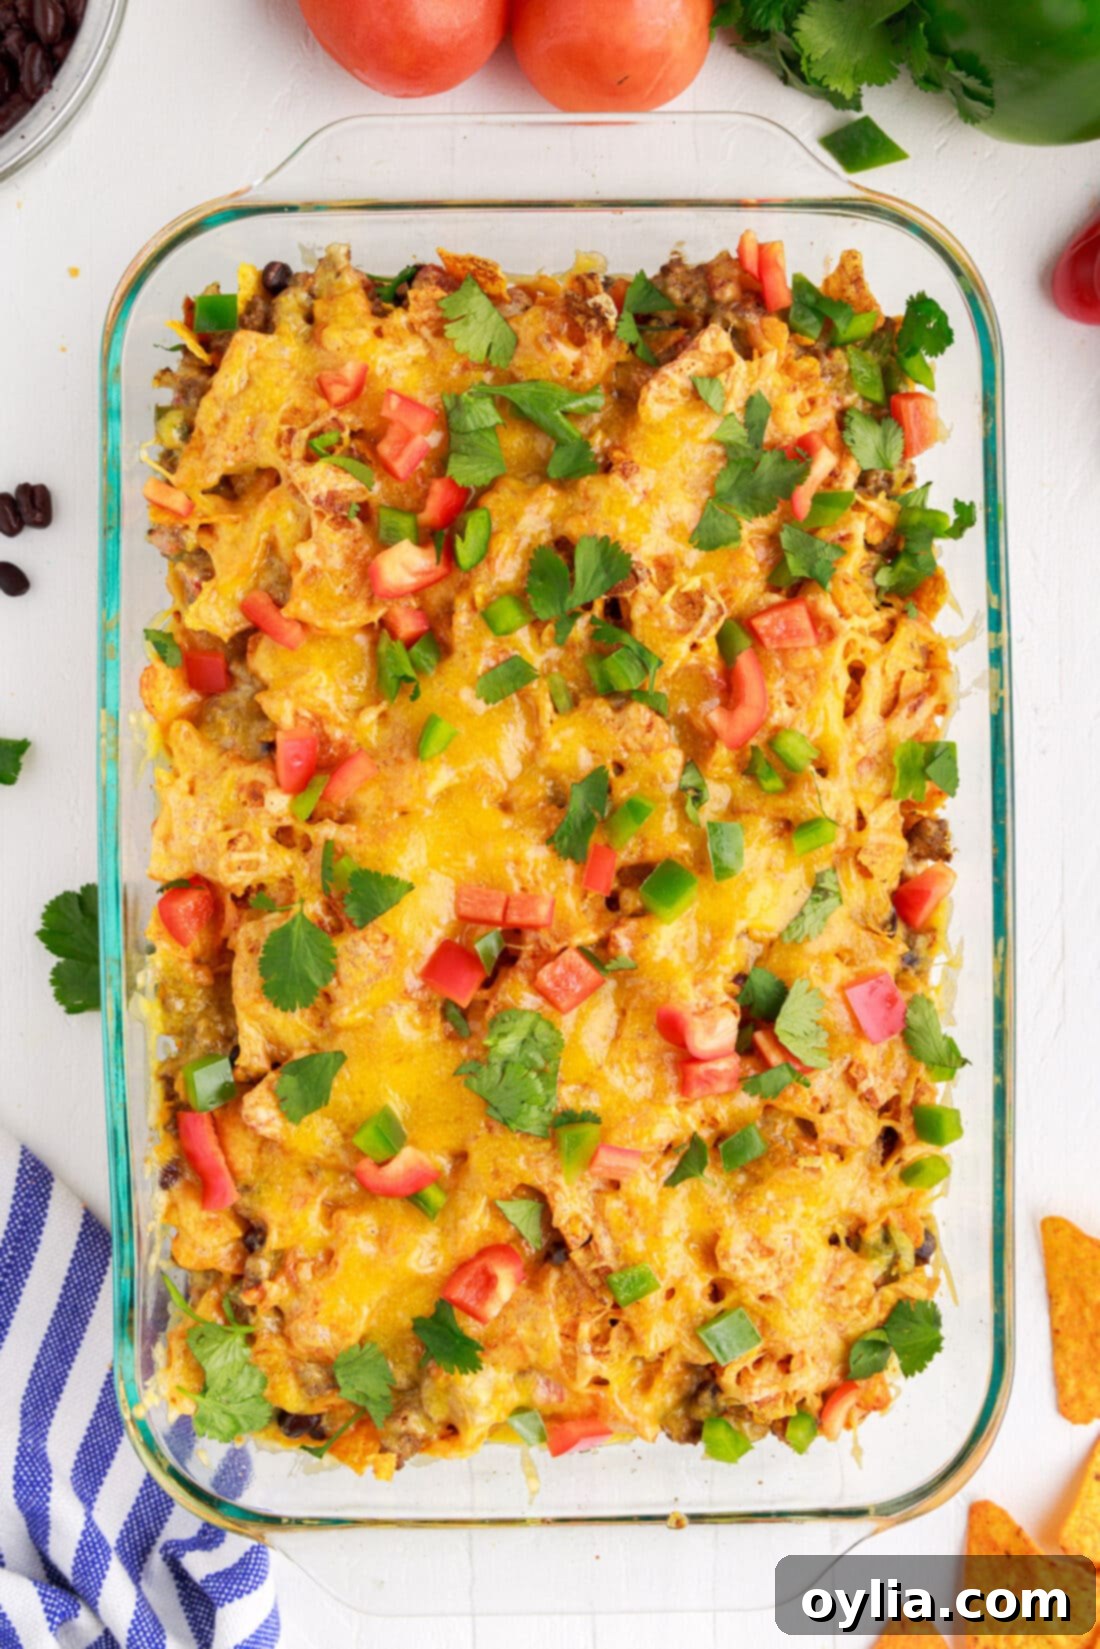
- Garnish and Serve: Once out of the oven, let it rest for a few minutes. Then, elevate your Dorito casserole with fresh garnishes like diced red bell peppers (for color and crunch), chopped cilantro, fresh diced tomatoes, or creamy avocado. Serve generous portions with an extra dollop of sour cream on the side for an ultimate weeknight treat!

Frequently Asked Questions & Expert Tips for Dorito Casserole
Get the most out of your Dorito casserole with these helpful tips and answers to common questions.
I haven’t personally tried freezing this recipe, and I’m not entirely sure how well it would hold up due to the layers of Dorito chips. The main concern is that the chips might become excessively soggy and lose their appealing texture after thawing and reheating. If you’re looking to meal prep, you could potentially prepare and freeze just the meat mixture separately, then assemble and bake the casserole fresh with chips when ready to serve. If you do experiment with freezing the whole casserole, please let us know your results in the comments below!
Store any leftover Dorito casserole in an airtight container in the refrigerator for up to 4 days. While it’s still delicious, keep in mind that the chips will gradually absorb moisture from the other ingredients and soften over time. For the best texture, I recommend enjoying leftovers sooner rather than later. To reheat, you can use the microwave for a quick warm-up, or for a slightly crispier result, reheat in the oven at 300°F (150°C) until heated through. Covering it with foil for the first part of reheating can help retain moisture, then remove for the last few minutes if you want to crisp up the top.
Yes, you can do some significant prep work in advance! The meat mixture can be cooked and assembled up to 2-3 days ahead of time and stored in the refrigerator. When you’re ready to bake, simply spread the chilled meat mixture into your casserole dish, then add the crushed Doritos and cheese layers just before baking. This helps maintain the crunch of the chips while making weeknight dinner assembly a breeze.
To kick up the heat, you can add a pinch of cayenne pepper to your taco seasoning, include finely diced jalapeños (with seeds for extra heat) with your bell peppers, or choose Pepper Jack cheese instead of cheddar. For a milder version, opt for a mild taco seasoning, use regular diced tomatoes instead of Rotel, and ensure you remove all seeds and membranes from any bell peppers.
Serving Suggestions for Your Dorito Casserole
This Dorito casserole is a complete and satisfying meal all on its own, packed with everything you need. However, for those who love to pile on the toppings and extras, here are some fantastic suggestions to make your meal even more amazing:
- Classic Toppings: Don’t forget extra sour cream, fresh shredded lettuce, diced tomatoes, creamy avocado or guacamole, and a spoonful of your favorite salsa or salsa verde.
- Extra Crunch: Keep some extra Doritos or plain tortilla chips on the side for dipping and scooping.
- A Side of Freshness: A simple green salad with a light vinaigrette can provide a refreshing contrast to the rich casserole.
- Spice It Up: A drizzle of hot sauce or a sprinkle of pickled jalapeños can add an extra kick.
No matter how you serve it, this cheesy Dorito bake is sure to be a hit!
More Delicious Casserole Recipes
If you loved this easy casserole, you’ll definitely want to explore these other comforting and flavorful bake recipes:
- Taco Casserole
- Southwest Ground Beef Casserole
- Mexican Chicken Casserole
- Chicken Enchilada Casserole
- Bacon Cheeseburger Casserole
- Frito Pie
- Reuben Casserole
I love to bake and cook and share my kitchen experience with all of you! Remembering to come back each day can be tough, that’s why I offer a convenient newsletter every time a new recipe posts. Simply subscribe and start receiving your free daily recipes!
Dorito Casserole
IMPORTANT – There are often Frequently Asked Questions within the blog post that you may find helpful. Simply scroll back up to read them!
Print It
Pin It
Rate It
Save ItSaved!
Ingredients
- 10 oz nacho cheese Doritos or regular tortilla chips
- 1 lb ground beef
- ½ medium yellow onion about 1 cup, diced
- 1 green bell pepper diced
- ¼ cup taco seasoning
- ½ cup water
- 10 oz can Rotel tomatoes drained
- 1 cup sour cream plus more for serving
- 1 cup black beans drained and rinsed
- 4 cups shredded medium cheddar cheese
- 1 red bell pepper diced
Things You’ll Need
-
13×9 baking dish
Before You Begin
- Other topping ideas include fresh cilantro, diced tomatoes, creamy diced avocado, rich guacamole, tangy salsa verde, your favorite hot sauce, and extra chips for dipping and scooping.
- You have flexibility with the amount of chips used in this recipe – I typically use about 10 oz. You can easily reduce the quantity of chips and still achieve a wonderfully balanced casserole that’s packed with flavor. If you’re a big fan of chips and want to increase the amount, I highly recommend adding more moisture to your meat mixture. This could be extra sour cream, a bit more salsa, or even a can of cream of chicken soup. The chips will naturally absorb some of the liquid from the meat, so planning for this will prevent your casserole from becoming dry.
- Covering the casserole with aluminum foil is a helpful trick to ensure it heats through evenly and to prevent the top layer of cheese and chips from drying out or burning too quickly. Since the cheese is resting on the chips in the top layer, it can brown and become crisp faster than the rest of the dish heats. If you prefer a crispier, slightly browned top once the casserole is hot and bubbly, simply remove the foil for the last 5 minutes or so of baking.
Instructions
-
Grease a 9×13 casserole dish with non-stick cooking spray. Preheat the oven to 350 degrees Fahrenheit.
-
Crush chips lightly and sprinkle approximately 1 cup across the bottom of the baking dish.
-
Cook ground beef in a large skillet over medium heat until mostly browned. Add diced onion and diced bell pepper and saute about 5 minutes longer, until vegetables begin to soften.
-
Add taco seasoning and water and stir to combine. Bring mixture to a simmer and cook for 5 minutes longer, stirring regularly.
-
Add the Rotel and sour cream to the meat mixture and stir to combine completely.
-
Gently mix the black beans into the skillet.
-
Spread half of the meat mixture over the crushed chips in the casserole dish.
-
Place another layer of crushed chips over the meat. Spread half of the cheese over the chips.
-
Repeat to layer the remaining meat, chips, and cheese.
-
Cover with aluminum foil and bake for approximately 20 minutes, until the cheese is melted and the casserole is hot and bubbly.
-
Garnish with diced bell peppers and/or chopped cilantro, tomatoes, avocado, etc. Serve with additional sour cream.
Nutrition
The recipes on this blog are tested with a conventional gas oven and gas stovetop. It’s important to note that some ovens, especially as they age, can cook and bake inconsistently. Using an inexpensive oven thermometer can assure you that your oven is truly heating to the proper temperature. If you use a toaster oven or countertop oven, please keep in mind that they may not distribute heat the same as a conventional full sized oven and you may need to adjust your cooking/baking times. In the case of recipes made with a pressure cooker, air fryer, slow cooker, or other appliance, a link to the appliances we use is listed within each respective recipe. For baking recipes where measurements are given by weight, please note that results may not be the same if cups are used instead, and we can’t guarantee success with that method.
