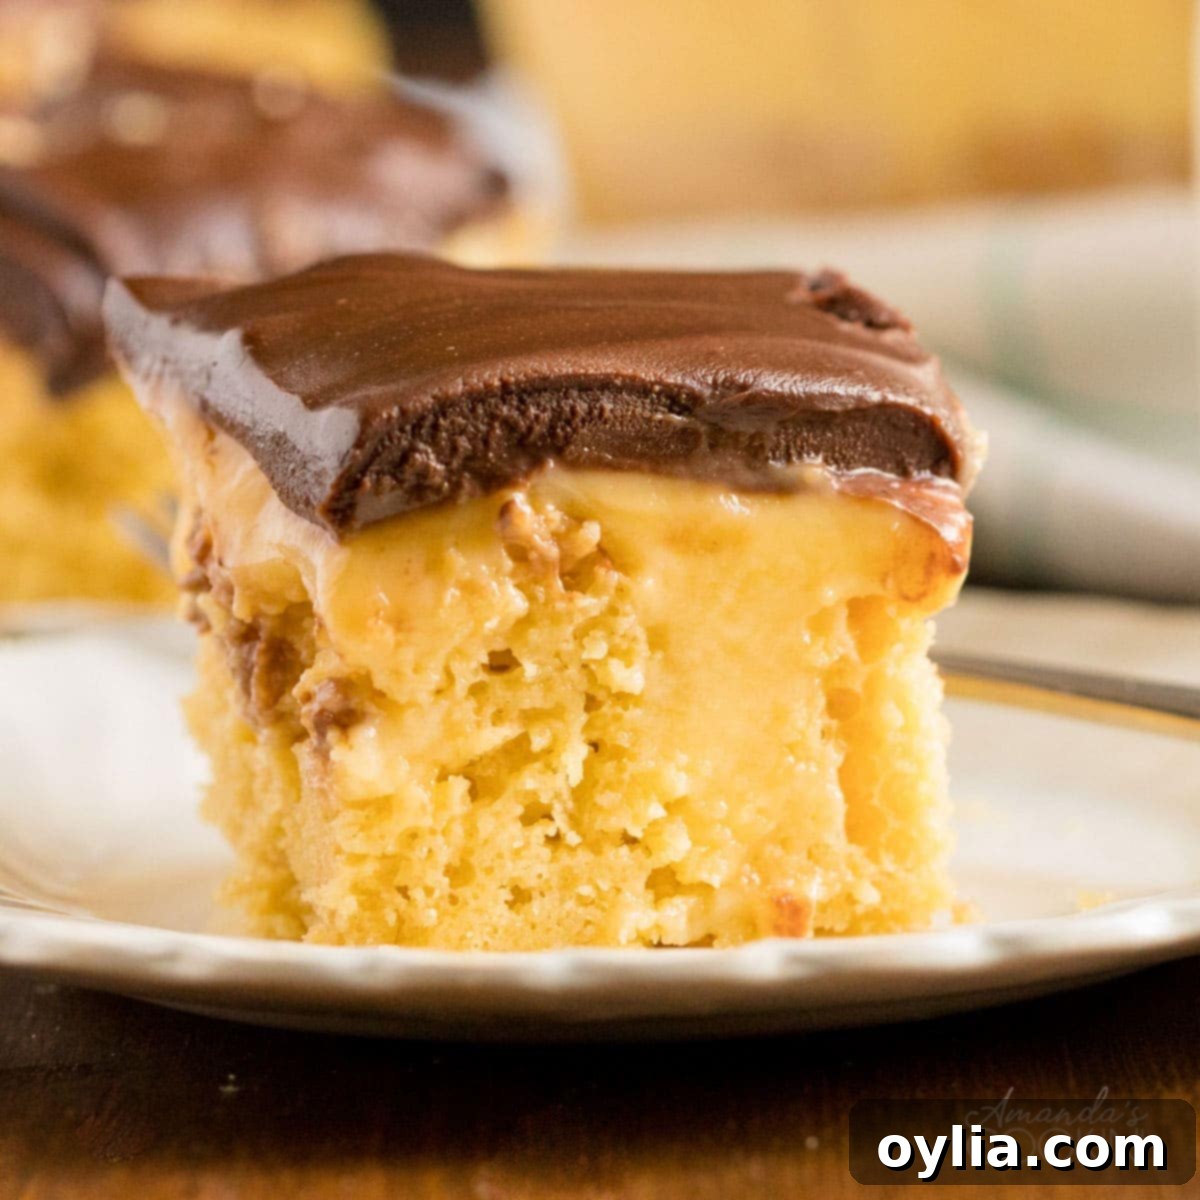
Indulge in the Easiest Boston Cream Poke Cake: A Delicious Dessert Recipe
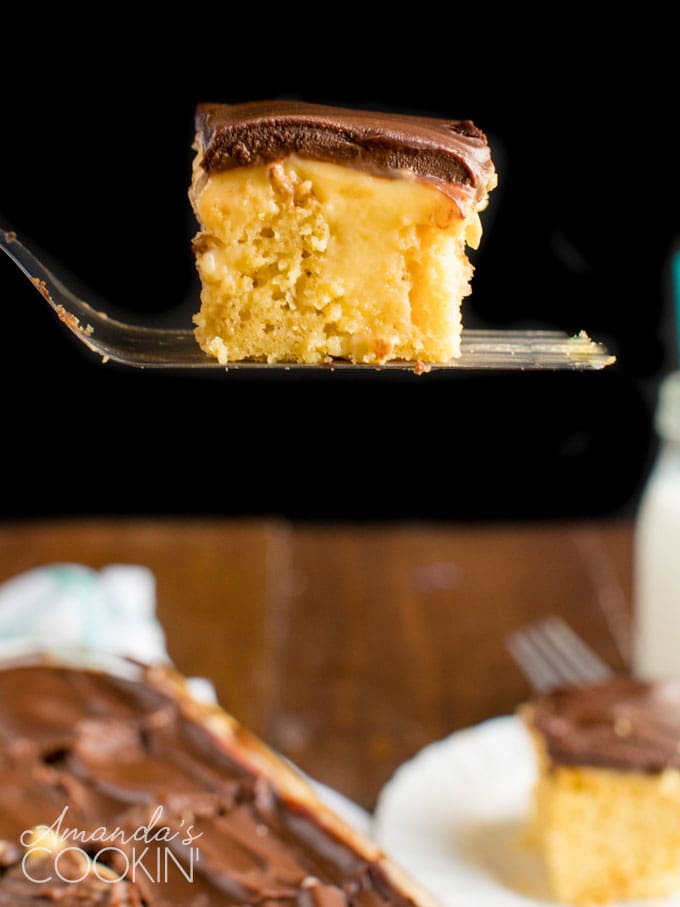
If you’re searching for a truly show-stopping dessert that promises both visual appeal and incredible taste, look no further than this delightful Boston Cream Poke Cake. It consistently earns rave reviews, captivating everyone with its irresistible layers of moist yellow cake, smooth vanilla pudding custard, and a luscious, shiny chocolate glaze. This recipe takes the beloved flavors of a classic Boston Cream Pie and transforms them into an incredibly easy-to-make, yet utterly impressive, poke cake format.
This one-pan dessert is perfect for any occasion – from casual family dinners to grand holiday gatherings and bustling potlucks. Its simplicity in preparation combined with its sophisticated flavor profile guarantees it will become a cherished crowd favorite, much like other adored recipes such as our ever-popular Chocolate Lasagna.
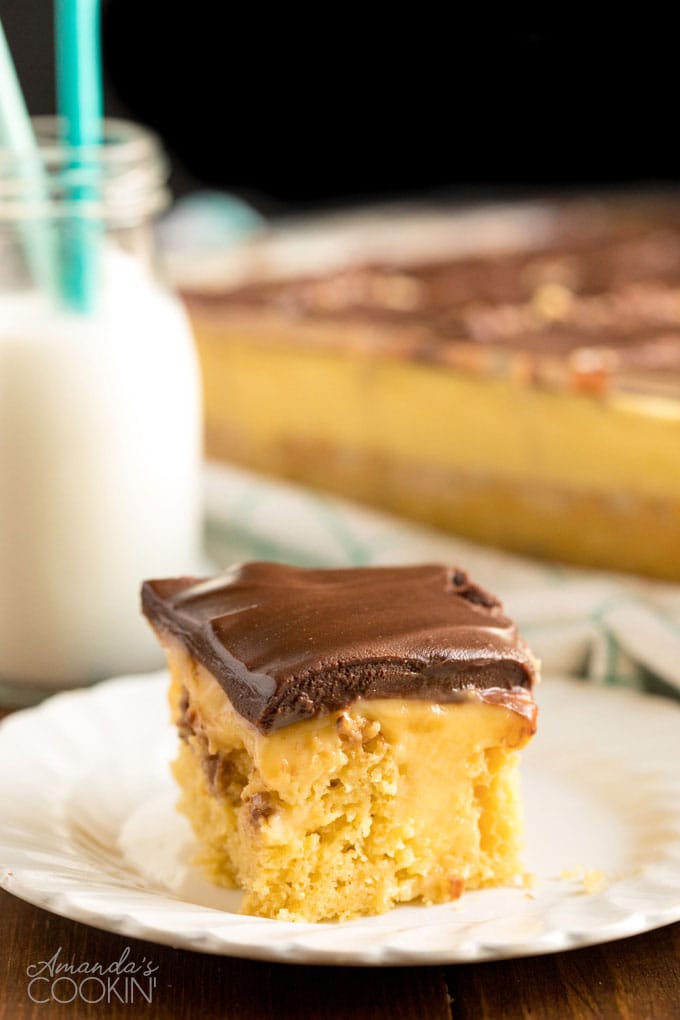
Why This Boston Cream Poke Cake is a Must-Try Dessert
My love affair with custard-filled desserts began early in childhood. There was something truly magical about the rich, creamy texture of custard, and Boston Cream Pie, in particular, always held a special fascination for me. It wasn’t a pie at all, but rather an elegant cake generously filled with velvety custard and topped with a glorious, glistening layer of chocolate. The combination was simply heavenly!
While I discovered my passion for baking at a young age, mastering delicate, egg-based sweets like traditional custards and intricate desserts such as Creamy Flan took years of practice and patience. Oh, if only I had known about this incredible Boston Cream Poke Cake back then! I could have satisfied my custard cravings anytime the mood struck, without the fuss of complicated techniques. It’s truly that simple to achieve a classic taste using a convenient boxed cake mix and effortless instant pudding.
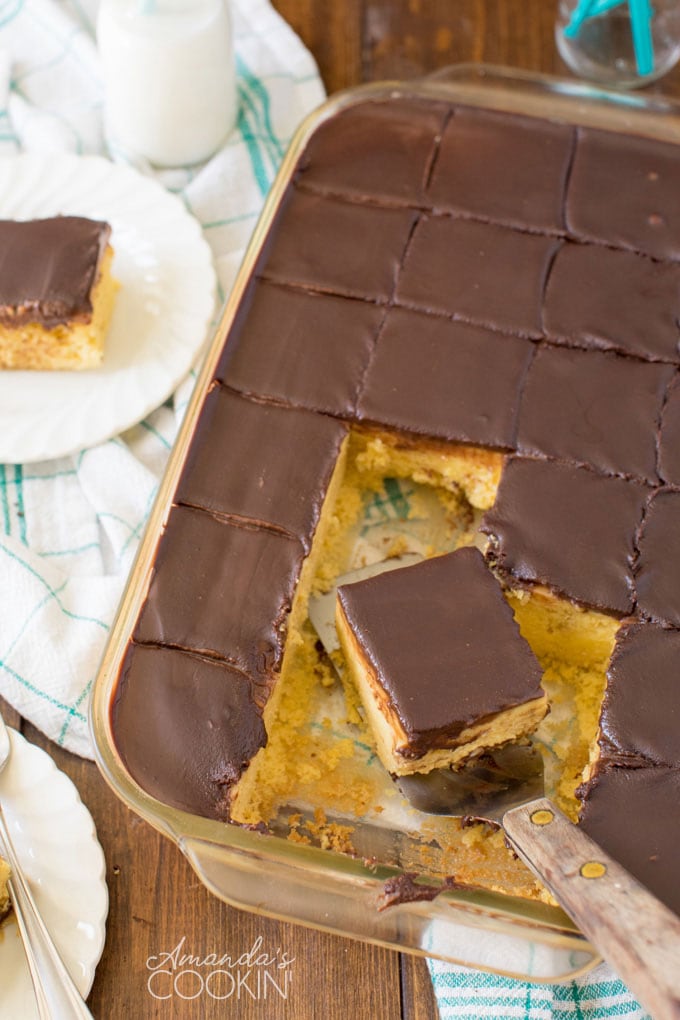
Even though I’ve grown into an avid baker who enjoys making things from scratch, I’m never one to shy away from smart boxed mixes and ingenious hacks. If a shortcut can make life easier and still deliver on deliciousness, I’m absolutely on board! For example, my adorable Lemon Sandwich Cookies, which always vanish from the plate in an instant, also start with a simple cake mix.
The secret to elevating a semi-homemade dessert lies in adding at least one component that’s completely from scratch. This personal touch infuses the entire dish with a wonderful, authentic homemade flavor. For those lemon cookies, it’s the rich cream cheese frosting that makes all the difference. With this philosophy in mind, I chose to make the chocolate glaze for this Boston Cream Poke Cake entirely from scratch. As a self-proclaimed chocoholic, I believe a homemade chocolate topping is non-negotiable for a truly exceptional dessert.
While you certainly could opt for convenience with canned chocolate frosting, chocolate buttercream frosting, or chocolate fudge frosting, I highly recommend our simple chocolate ganache recipe. It’s surprisingly easy to prepare, requiring little more than melting a few ingredients together. The effort is minimal, but the resulting glossy, rich glaze truly takes this poke cake to gourmet levels.
Essential Ingredients for Your Boston Cream Poke Cake
Gathering the right ingredients is the first step towards creating this magnificent Boston Cream Poke Cake. Most items are readily available at your local grocery store, ensuring a hassle-free baking experience.
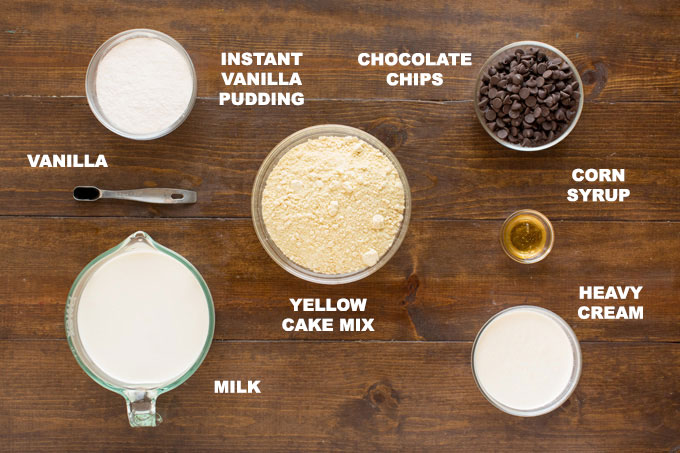
- You’ll start with a box of your favorite yellow cake mix. While the mix provides the base, remember to also have on hand all the additional ingredients listed on the back of the box (typically eggs, oil, and water) to prepare it correctly. A classic yellow cake provides the perfect tender crumb and buttery flavor that complements the custard beautifully.
- For the creamy filling, you absolutely must use instant vanilla pudding mix. Double-check the box to ensure it’s not the “cook and serve” variety, as instant pudding sets much faster and requires no stovetop cooking, making this dessert truly simple. You’ll need two standard 3.4 oz boxes for the right amount of custard.
- To mix up the instant pudding and achieve that dreamy custard consistency, you will need cold milk. Whole milk or 2% milk works best for a rich, creamy texture.
- A touch of vanilla extract is added to the pudding mixture to enhance its flavor, giving it that classic, comforting vanilla custard taste.
- To create the irresistible chocolate ganache, you’ll need high-quality semi-sweet chocolate chips. These provide a balanced chocolate flavor that isn’t overly bitter or sweet, perfect for topping the cake.
- Heavy cream is the foundation of a smooth, decadent ganache. Its high fat content ensures a rich, emulsified chocolate sauce.
- A small amount of corn syrup is included in the ganache recipe. This ingredient helps give the glaze its beautiful, glossy shine and prevents crystallization, ensuring a smooth finish. If you prefer not to use corn syrup, you can substitute it with an equal amount of butter for a similar rich consistency, though the shine might be slightly less pronounced.
Helpful Kitchen Tools for Easy Cake Preparation
Having the right tools on hand can make the baking process even more enjoyable and efficient. Here are a few essentials that will assist you in creating this stunning Boston Cream Poke Cake:
- A Hand mixer: Ideal for quickly preparing your cake mix and ensuring a smooth batter. It’s also handy for quickly whisking up the instant pudding.
- A 13×9 baking dish: The perfect size for this poke cake, allowing for generous servings and optimal custard distribution.
- A Whisk: Essential for thoroughly combining your pudding ingredients and achieving a lump-free custard.
- Mixing bowls: You’ll need a couple of good-sized bowls for preparing the cake batter, the pudding, and the chocolate glaze.
How to Make This Amazing Boston Cream Poke Cake
The beauty of this Boston Cream Poke Cake lies in its straightforward steps. You’ll be amazed at how quickly you can assemble such a show-stopping dessert. Follow these simple instructions for a perfectly layered and delicious result:
- **Bake the Cake Base:** Start by preparing your yellow cake mix according to the package directions, baking it in a 13×9-inch pan. Once baked, it’s crucial to let the cake cool completely. A warm cake would absorb the pudding too quickly or even cause it to curdle.
- **Poke Your Way to Flavor:** Once cooled, grab the handle of a wooden spoon (or a similar round-ended utensil) and systematically poke holes all over the surface of the cake. Ensure you poke all the way to the bottom of the pan. These holes are the magic tunnels that will allow the creamy vanilla pudding to seep into the cake, infusing every bite with delicious custard goodness.
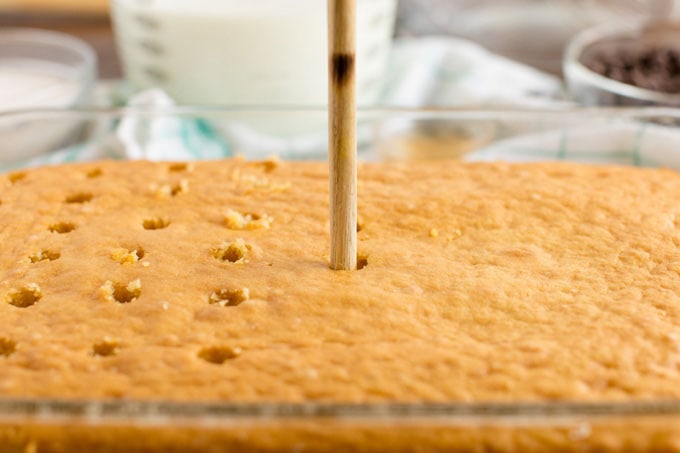
- **Infuse with Pudding Custard:** In a large bowl, whisk together the instant vanilla pudding mix, cold milk, and vanilla extract until just combined. The key here is to pour the pudding over the cake *before* it has a chance to fully thicken. This ensures the thinner liquid custard can easily drip down into all the poked holes, saturating the cake with flavor. If needed, gently nudge the pudding into the holes with a spoon or spatula to ensure even distribution.
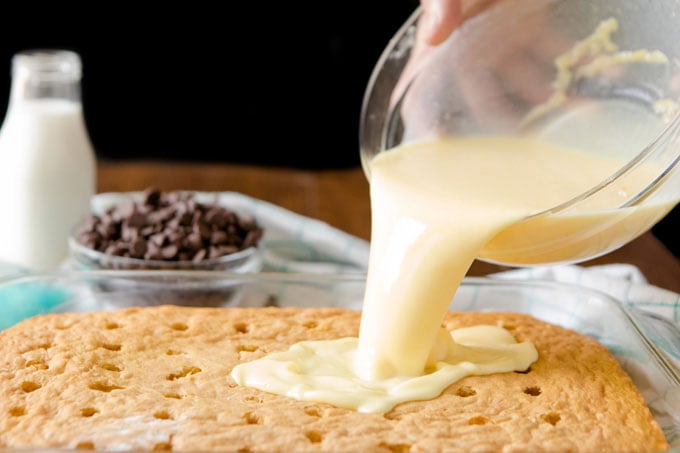
- **Chill for Setting:** Once the pudding is poured, refrigerate the cake for at least an hour. This crucial step allows the pudding to set properly within the cake’s holes and across its top layer, creating that distinct creamy texture that defines a Boston Cream dessert.
- **Prepare the Rich Chocolate Glaze:** While the cake is chilling, you can prepare the chocolate glaze. Combine semi-sweet chocolate chips and corn syrup in a heat-proof bowl. Gently warm the heavy cream in a small saucepan over low heat until it just simmers (or microwave until hot). Pour the hot cream over the chocolate chips and let it sit undisturbed for about 2 minutes to allow the chocolate to melt. Then, stir until the mixture is completely smooth and glossy.
- **Cool the Glaze (Crucial Step!):** This is a very important step – **let the chocolate glaze cool for at least 10 minutes** before pouring it over the chilled cake. Pouring hot glaze onto the pudding layer can cause it to melt and become messy. Allowing it to cool slightly will ensure a smooth, even, and beautiful chocolate topping.
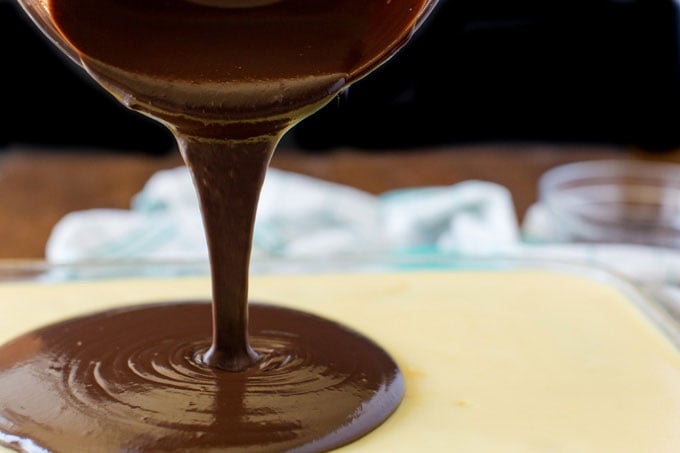
- **Final Chill for Perfection:** Pour the slightly cooled glaze over the cake and spread it evenly with a spatula. Return the cake to the refrigerator for a final chill of at least 4 hours, or ideally, overnight. Trust me on this: while it’s tempting to dig in immediately (I’m usually quite impatient!), allowing the cake to sit overnight truly allows all the flavors to meld together in an incredible way. The cake, creamy pudding, and rich chocolate glaze magically transform into a cohesive, moist, and utterly divine Boston Cream Pie experience!
Frequently Asked Questions (FAQs)
Here are some common questions about making and enjoying this delicious Boston Cream Poke Cake:
- **Can I make this cake ahead of time?** Absolutely! This cake actually tastes even better the next day, as the flavors have more time to meld. Prepare it the night before your event for optimal taste and texture.
- **How long does Boston Cream Poke Cake last?** Stored properly in an airtight container in the refrigerator, this cake will stay fresh and delicious for 3-4 days.
- **Can I use homemade cake or pudding?** While this recipe is designed for ease with boxed mixes, you can certainly substitute a homemade yellow cake and a cooked vanilla custard if you prefer. Just ensure the cake is completely cooled and the custard is slightly warm and pourable when you poke the holes.
- **What if my pudding doesn’t set?** Ensure you are using *instant* pudding mix and cold milk. The ratios are important, so avoid altering them. Also, allow sufficient chilling time for the pudding to firm up.
- **Can I freeze Boston Cream Poke Cake?** Freezing is generally not recommended for poke cakes with a pudding filling, as the texture of the pudding can become watery or grainy upon thawing. It’s best enjoyed fresh from the refrigerator.
- **What can I use instead of a wooden spoon handle for poking holes?** A chopstick, the back of a small skewer, or even a large fork can work, but the wooden spoon handle creates ideal, larger holes for maximum pudding absorption.
More Delicious One-Pan Desserts to Love
Don’t you just LOVE the convenience and deliciousness of one-pan desserts? They are always the perfect solution for potlucks, barbecues, holidays, or any gathering where you want to serve something special without a mountain of dishes. If you enjoyed this Boston Cream Poke Cake, you’ll definitely want to explore these other fantastic recipes:
- Strawberry Jello Pretzel Salad: A delightful sweet and salty combination that’s always a hit.
- Eclair Cake: Layers of graham crackers, rich pudding, and chocolate frosting make this a no-bake wonder.
- Chocolate Texas Sheet Cake: A classic sheet cake, perfect for feeding a crowd with its rich, fudgy flavor.
- Pineapple Dream Dessert: A light, fruity, and refreshing treat, especially wonderful in warmer weather.
- Strawberry Icebox Cake: Simple, cool, and creamy – a fantastic no-bake option bursting with strawberry flavor.
- No Bake Chocolate Eclair Cake: For when you want all the flavors of an eclair without turning on the oven.
- Lemon Lush: Layers of creamy lemon goodness that are light, tangy, and incredibly satisfying.
- Cookie Skillet: A giant, warm chocolate chip cookie baked and served in a skillet, perfect with a scoop of ice cream.
- Pistachio Cake: A unique and flavorful cake with a lovely green hue, often made with pudding mix for extra moistness.
- Pineapple Poke Cake: Another fantastic poke cake variation, tropical and bursting with pineapple flavor.
And for those who adore the classic Boston Cream flavors but prefer a different format, you certainly wouldn’t want to miss my Boston Cream Cupcakes!
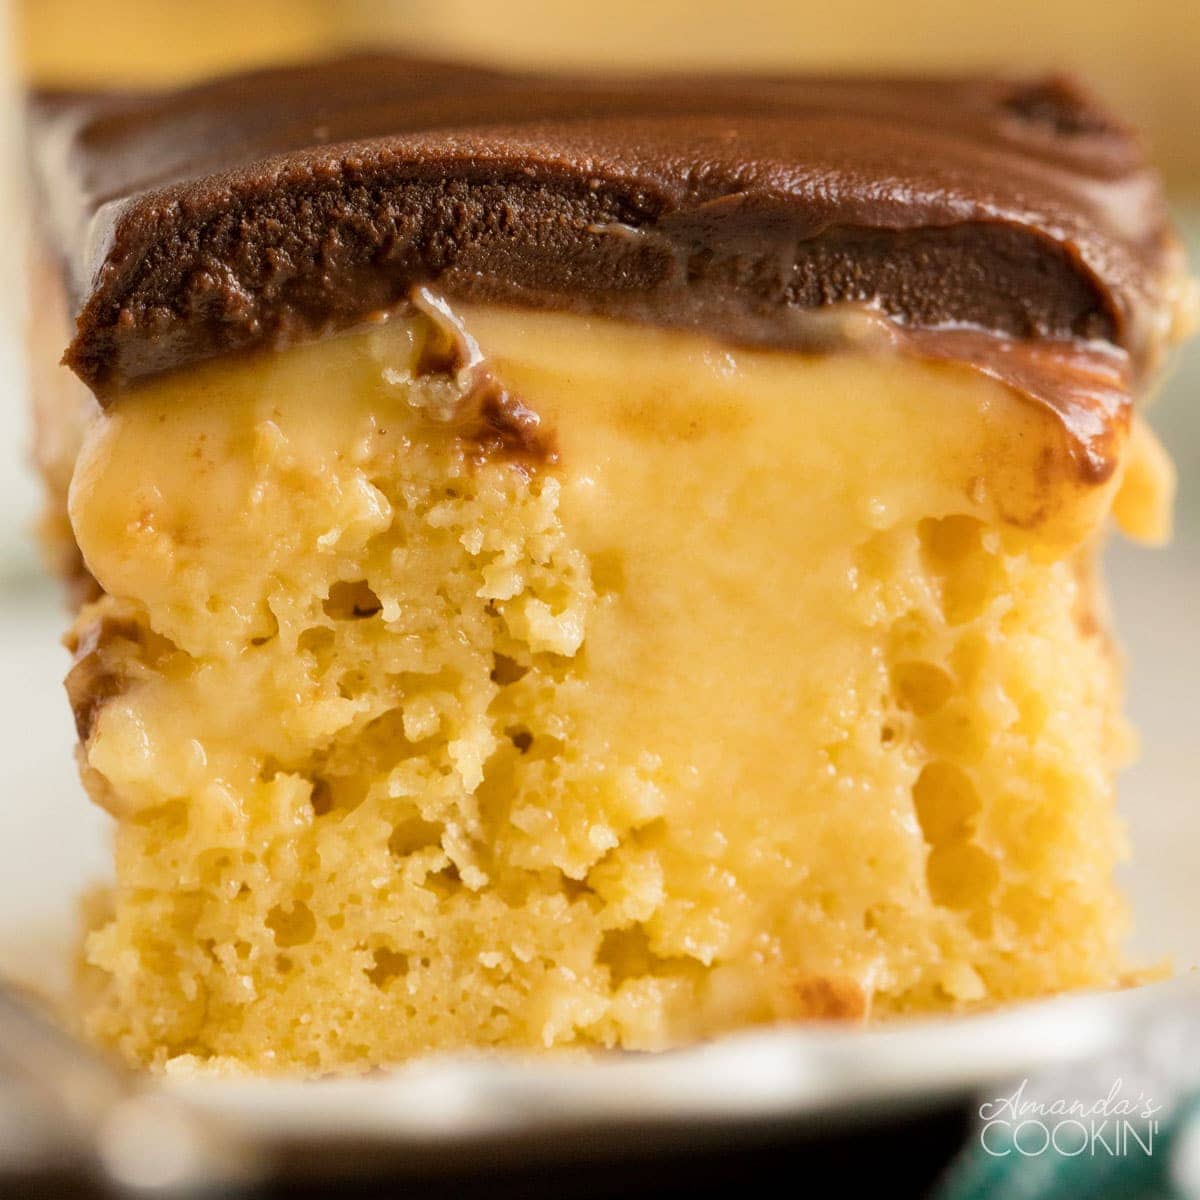
Boston Cream Poke Cake
IMPORTANT – There are often Frequently Asked Questions within the blog post that you may find helpful. Simply scroll back up to read them!
Print It
Pin It
Rate It
Save ItSaved!
Ingredients
- 16.25 ounce yellow cake mix plus ingredients to prepare
- 6.8 ounces instant vanilla pudding mix 2 (3.4oz) boxes
- 4 cups milk
- ½ teaspoon vanilla
- 8 ounces semi-sweet chocolate chips 1 1/4 cups
- 1 tablespoon corn syrup or butter if you prefer
- 1 cup heavy whipping cream
Things You’ll Need
-
Hand mixer
-
13×9 baking dish
-
Whisk
-
Mixing bowls
Before You Begin
- You’ll use a box of yellow cake mix, but you also need the ingredients on the back of the box to prepare it.
- Be sure you use instant vanilla pudding mix, not the cook and serve kind!
- The ganache calls for a small amount of corn syrup. It’s a very small amount, but if it bothers you, use an equal amount of butter.
Instructions
-
Prepare and bake the cake in a 13×9 pan according to the package instructions. Let cool completely before poking holes across the cake with the bottom of a wooden spoon. Be sure to poke all the way to the bottom of the pan.16.25 ounce yellow cake mix
-
In a large bowl, whisk together pudding, milk, and vanilla, but don’t let it thicken. Pour the thin pudding over cake in an even layer, poking down into the holes if necessary.6.8 ounces instant vanilla pudding mix, 4 cups milk, 1/2 teaspoon vanilla
-
Refrigerate the cake for one hour.
Chocolate Glaze
-
Place the chocolate chips and corn syrup in a heat-proof bowl.8 ounces semi-sweet chocolate chips, 1 tablespoon corn syrup
-
In a small saucepan over low heat, warm the cream until it simmers, stirring occasionally. Alternatively, you can microwave the cream until hot.1 cup heavy whipping cream
-
Pour hot cream over chocolate chips and let sit for 2 minutes to melt.
-
Stir until smooth. Let the glaze cool for 10 minutes. Letting the glaze cool is an important step, don’t skip this part!
-
Pour glaze over cake and smooth with a spatula. Chill cake for 4 hours or overnight before serving.
Nutrition
The recipes on this blog are tested with a conventional gas oven and gas stovetop. It’s important to note that some ovens, especially as they age, can cook and bake inconsistently. Using an inexpensive oven thermometer can assure you that your oven is truly heating to the proper temperature. If you use a toaster oven or countertop oven, please keep in mind that they may not distribute heat the same as a conventional full sized oven and you may need to adjust your cooking/baking times. In the case of recipes made with a pressure cooker, air fryer, slow cooker, or other appliance, a link to the appliances we use is listed within each respective recipe. For baking recipes where measurements are given by weight, please note that results may not be the same if cups are used instead, and we can’t guarantee success with that method.
This recipe was originally published on May 12, 2017 but has since been updated to include helpful tips and new photos.
