Delightful No-Bake Easter Dirt Cake: An Easy & Festive Dessert for Your Holiday Table
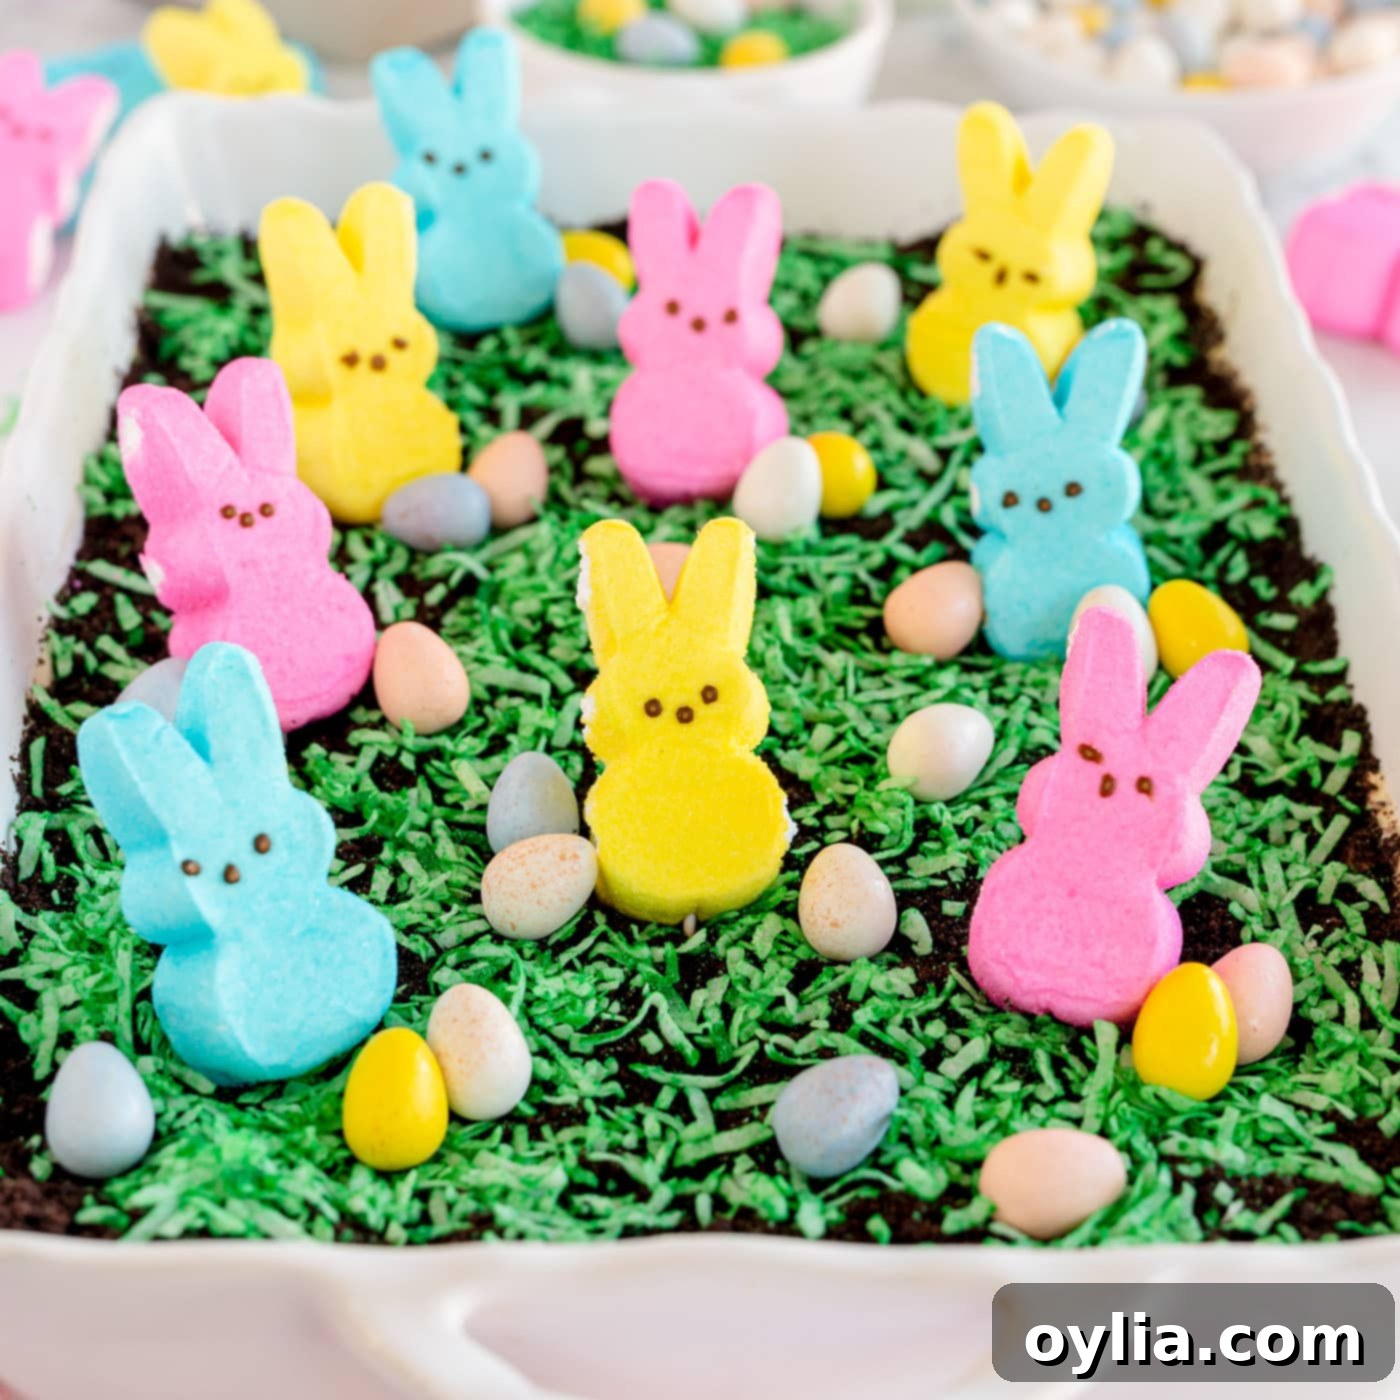
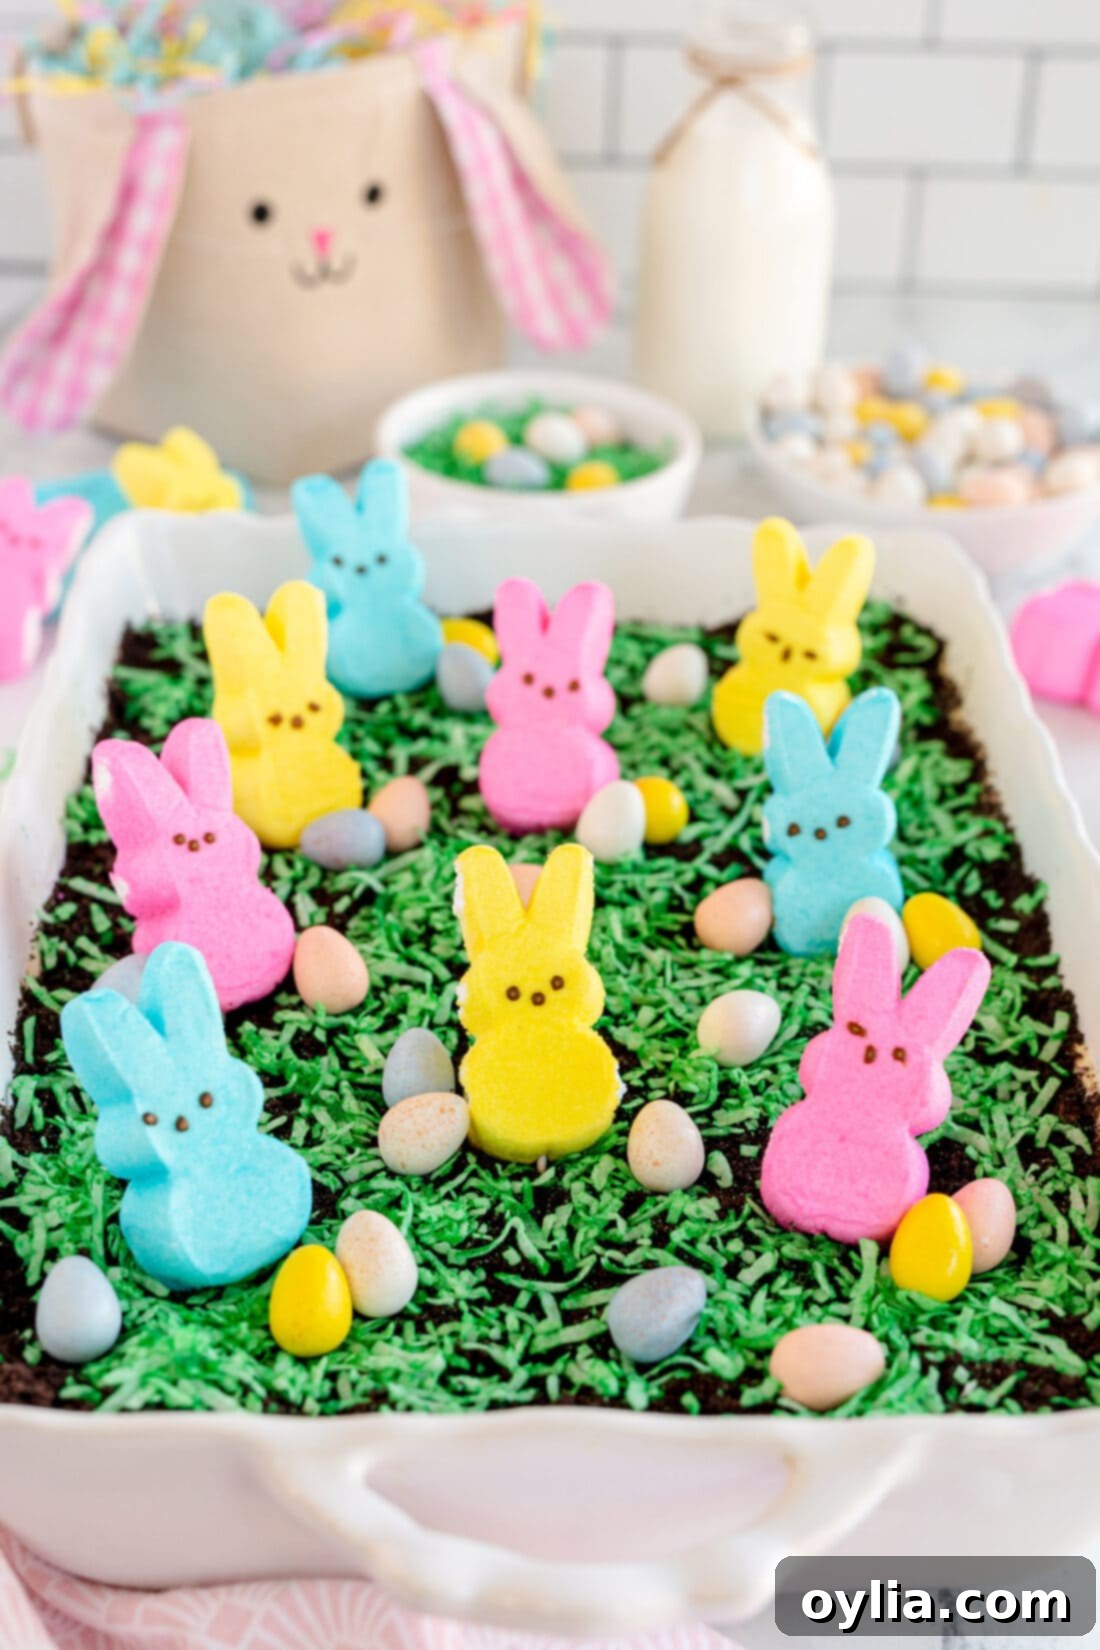
Prepare for the sweetest, most charming no-bake dessert imaginable! This Easter Dirt Cake transforms a beloved classic into a festive centerpiece, brimming with all the delights of spring. Picture this: a rich, decadent Oreo cookie base, layered with a creamy, dreamy pudding mixture, and then crowned with a vibrant “Easter garden” of adorable bunny Peeps, colorful chocolate candies, and bright green shredded coconut “grass.” It’s not just a dessert; it’s an experience that brings smiles and a touch of whimsical joy to any Easter celebration, proving that some of the best treats require absolutely no baking at all. This easy-to-make, no-fuss dessert is perfect for family gatherings, potlucks, or simply a fun holiday treat to enjoy at home, promising a delightful combination of textures and flavors in every spoonful.
Why This Recipe Works: The Ultimate No-Bake Easter Treat
This Easter Dirt Cake stands out as a truly exceptional dessert, and for good reason! It’s an ingenious, festive spin on the beloved classic dirt cake, perfectly tailored for your spring celebrations. What makes it so brilliant? Firstly, it’s a completely **no-bake dessert**. This means no oven time, no worrying about cake layers rising, and more precious time spent with family during the busy holiday season. Its simplicity also makes it an ideal project for all skill levels, from novice bakers to seasoned dessert enthusiasts, and it’s especially fun for kids to help decorate. The ease of preparation, combined with minimal cleanup, makes this a go-to recipe when you want maximum impact with minimal effort.
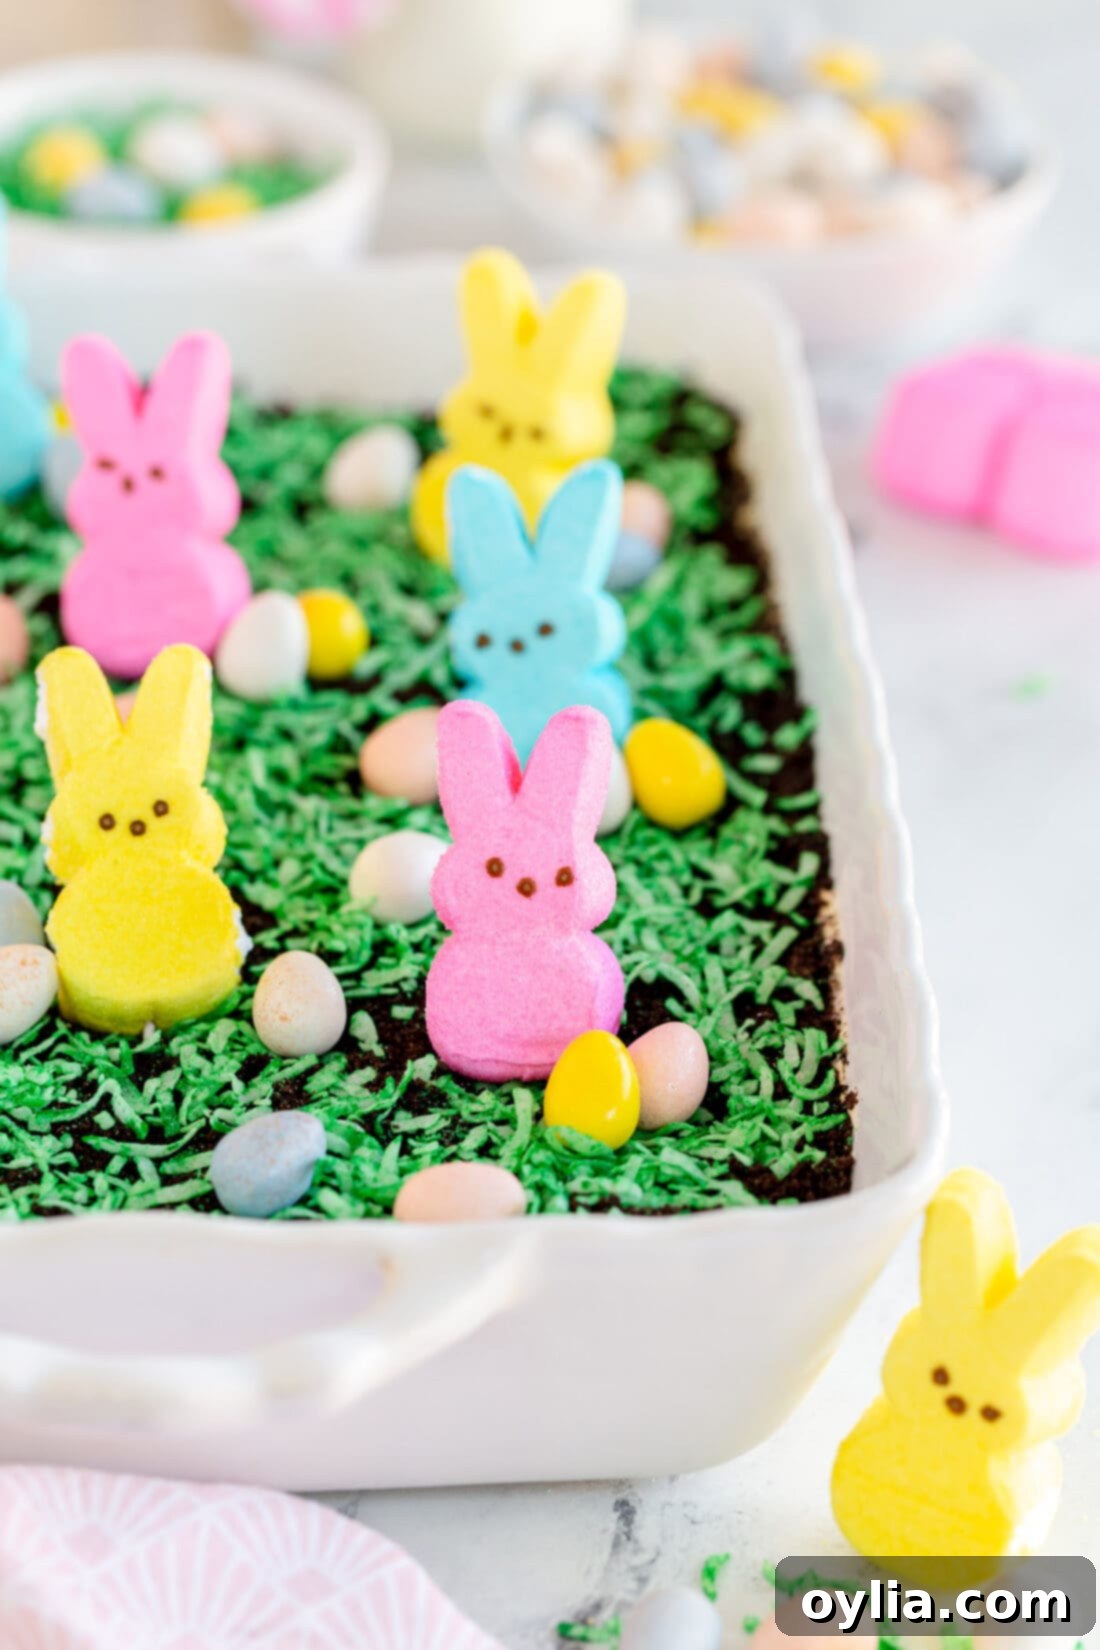
The layers of rich, crushed Oreo cookies create that iconic “dirt” look, providing a delightful textural contrast to the smooth, creamy vanilla pudding and cream cheese filling. But it’s the Easter-themed decorations that truly bring this cake to life. The playful bunny Peeps, vibrant egg-shaped chocolate candies, and bright green shredded coconut grass transform a simple dessert into an enchanting edible landscape. It’s incredibly eye-catching and guaranteed to be a conversation starter at any Easter brunch, dinner, or potluck. This dessert isn’t just easy; it’s a surefire way to add a touch of whimsy and deliciousness to your holiday spread, complementing other treats like Easter bunny cupcakes or delightful rice krispie nests with effortless charm. The blend of creamy and crunchy, sweet and slightly tangy, ensures every bite is a delightful experience.
Essential Ingredients for Your Easter Dirt Cake
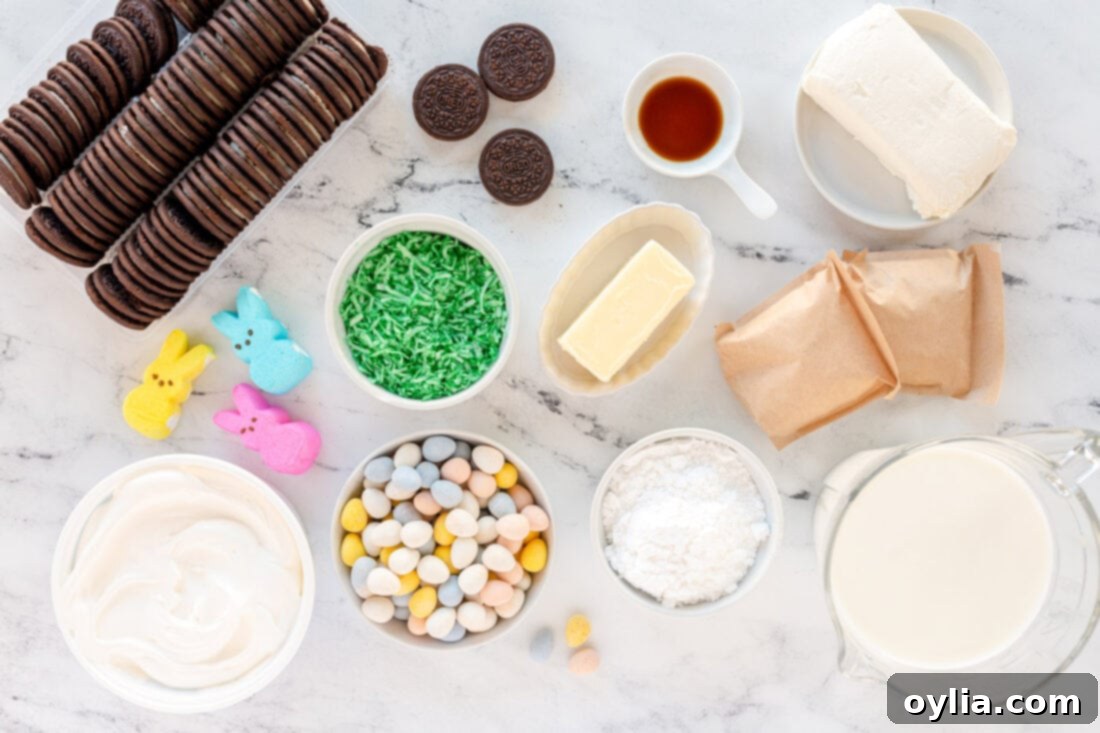
Crafting this festive no-bake dessert requires a few simple, accessible ingredients that come together to create a harmonious blend of textures and flavors. While you’ll find the precise measurements and detailed instructions in the printable recipe card at the end of this article, here’s a quick overview of the key components you’ll need to gather to bring this delightful Easter Dirt Cake to life. Each ingredient plays a vital role in achieving the perfect balance of sweetness, creaminess, and delightful crunch.
Ingredient Insights & Creative Substitution Ideas
Understanding each ingredient’s role and knowing how to make smart substitutions can elevate your Easter Dirt Cake from delicious to absolutely perfect. Here’s a deeper look into the components, along with tips for achieving the best results and how to customize this recipe to your liking:
OREOS: The Foundation of “Dirt”
For that authentic “dirt” texture and rich chocolate flavor, **Oreo cookies** are non-negotiable. Crush the entire cookies, including the creamy filling, to achieve a uniform mixture that forms both the sturdy base and the crumbly top layer of your cake. A food processor is your best friend here, quickly transforming cookies into fine, consistent crumbs. This method ensures a smooth texture that mimics soil perfectly. If you don’t have a food processor, a large zip-top bag and a rolling pin work just as well, albeit with a bit more elbow grease—and it can be a fun activity for kids! We highly recommend using **regular stuffed Oreos** over double stuffed varieties. Regular Oreos provide the perfect balance of cookie to cream, ensuring your crust and topping aren’t overly sweet or too dense, which can sometimes happen with double-stuffed versions. While Oreos are classic, if you’re looking for an alternative, other chocolate sandwich cookies, chocolate wafers, or even crushed chocolate graham crackers can work, but the distinct Oreo flavor is truly what makes this dirt cake special and gives it its signature taste.
CAKE Layers: Creamy Dreamy Pudding Perfection
The luscious, creamy layers of this no-bake cake are built upon **instant vanilla pudding**. The “instant” part is key, as it quickly sets without any cooking, making this recipe incredibly convenient. While vanilla is traditional and provides a wonderfully versatile base that pairs well with chocolate, don’t hesitate to get creative with your pudding flavors! Imagine the possibilities with **chocolate pudding** for an extra rich, deep chocolatey dessert, **white chocolate** for a subtle sweetness and creamy undertone, **cheesecake pudding** for an added tangy complexity that balances the richness, or even **butterscotch** for a uniquely warm, caramelized, and nutty twist. All of these instant pudding varieties blend beautifully with the cream cheese and whipped topping, allowing for endless customization. For those managing sugar intake, sugar-free instant pudding works perfectly and won’t compromise on texture or flavor. Using cold, full-fat milk for your pudding mixture will ensure the creamiest, most decadent results, providing a luxurious mouthfeel that perfectly complements the crunchy Oreo layers and the overall rich profile of the cake.
THE CREAM CHEESE MIXTURE: The Heart of the Cake’s Creaminess
Beyond the pudding, the heart of this cake’s irresistible creaminess lies in the simple yet magical combination of softened **cream cheese**, **salted butter**, **powdered sugar**, and a hint of **vanilla extract**. It’s crucial to ensure your cream cheese and butter are at room temperature. This allows them to cream together effortlessly, creating a smooth, lump-free base that forms the rich, velvety core of your dessert. This mixture provides a slight tanginess that beautifully cuts through the sweetness of the Oreos and pudding, creating a balanced flavor profile that prevents the cake from being overly cloying. Gently folding in **Cool Whip** adds an airy lightness, preventing the dessert from becoming too heavy and giving it that melt-in-your-mouth texture that everyone loves. If you prefer to use homemade whipped cream, ensure it’s stabilized for the best results in a no-bake cake, but Cool Whip is recommended for its reliability and ease.
TOPPING: The Enchanted Easter Garden
This is where the Easter magic truly happens! The toppings transform a classic dirt cake into a festive masterpiece, making it visually appealing and deliciously themed:
- Crushed Oreo Cookies: A final sprinkle of the reserved crushed Oreos mimics fresh garden soil, adding an extra layer of chocolatey crunch and reinforcing the “dirt” theme. This gives the top a lovely, textured finish.
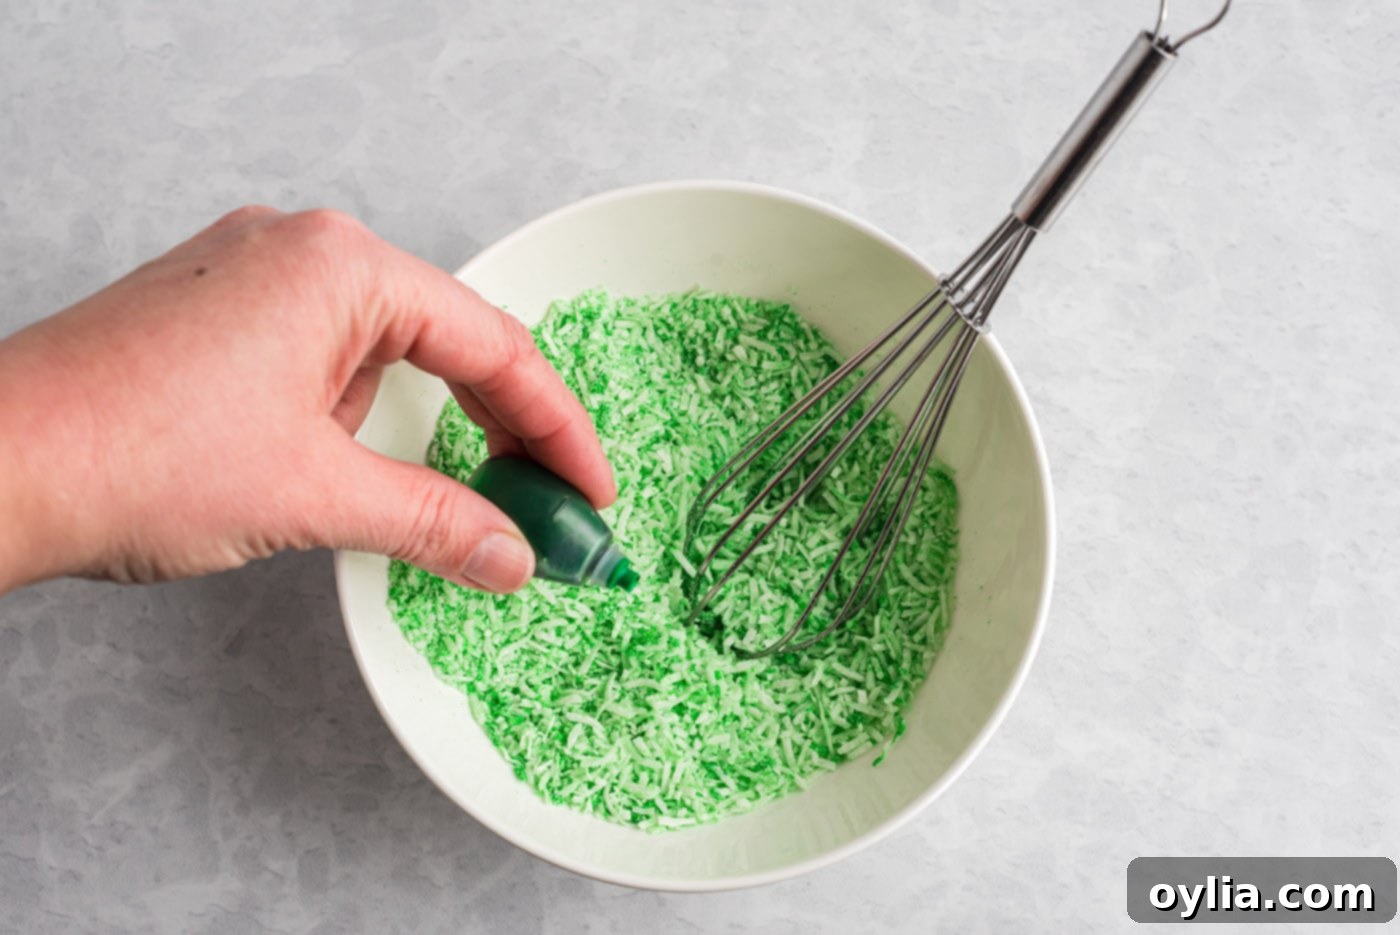
- Shredded Coconut “Grass”: To create vibrant green grass, simply mix shredded coconut with a few drops of green food coloring. Start with a small amount and gradually add more until you achieve your desired shade. This adds a fantastic texture and a pop of spring color, truly bringing the “garden” to life. For an alternative, green sprinkles or pre-made candy grass can also be used, offering different textures and shades of green.
- Bunny Peeps: These iconic marshmallow bunnies are the undeniable stars of the show! Their soft, chewy texture and adorable shape instantly bring an Easter theme to life, creating a whimsical scene. You can arrange them “hopping” across your dirt cake, or place them in cute little groups. If bunny Peeps are hard to find, chick-shaped Peeps or other small marshmallow candies (perhaps cut into bunny shapes) can work just as well, keeping the playful marshmallow element alive.
- Mini Candy Eggs: Colorful chocolate eggs, such as Cadbury Mini Eggs, M&M’s Easter Eggs, or Hershey’s Eggs, are perfect for scattering around your Peeps. They add a delightful crunch, a burst of chocolate, and beautifully resemble hidden Easter eggs in your edible garden. Feel free to use any small, festive Easter candies like jelly beans, robin’s egg candies, or even pastel-colored gumballs for added variety, color, and charm. Consider using a mix of different sizes and colors for an even more dynamic look.
The beauty of the topping lies in its versatility—feel free to let your creativity shine and personalize it with your favorite Easter treats, making each cake unique!
How to Create Your Delicious Easter Dirt Cake: Step-by-Step Guide
These step-by-step photos and detailed instructions are designed to help you visualize each stage of making this delightful Easter Dirt Cake. For a convenient printable version of this recipe, complete with precise measurements and full instructions, simply Jump to Recipe at the bottom of this post.
- Prepare the Oreo Crumbs: Begin by taking your entire package of regular-stuffed Oreos (filling included) and adding them to a food processor. Pulse until the cookies are finely crushed, resembling dark, rich soil. For the best “dirt” consistency, ensure the crumbs are fine and uniform. If you don’t have a food processor, place the Oreos in a large zip-top bag, seal it, and use a rolling pin or the bottom of a heavy pan to crush them into fine crumbs.
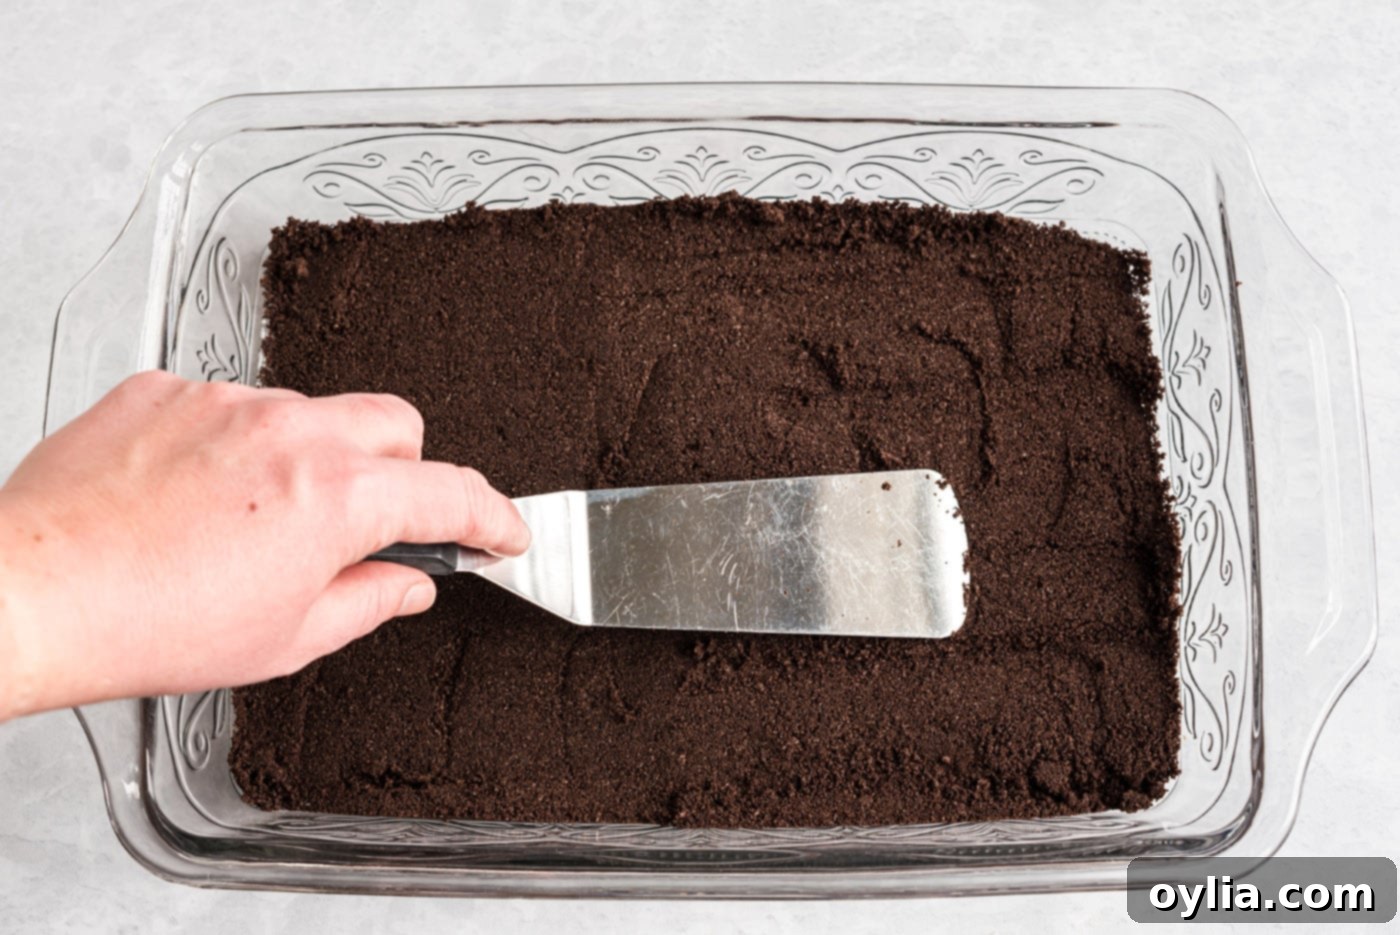
- Form the Crust: Set aside approximately one-third of the crushed Oreo mixture (this is roughly equivalent to 9-10 cookies’ worth) to use as the top layer later. Take the remaining two-thirds of the Oreo crumbs and press them firmly and evenly into the bottom of a 13×9 baking dish. You can use the back of a spoon or the bottom of a flat glass to ensure a compact and uniform crust. A solid, even base is crucial for structural integrity when serving, preventing the dessert from falling apart.

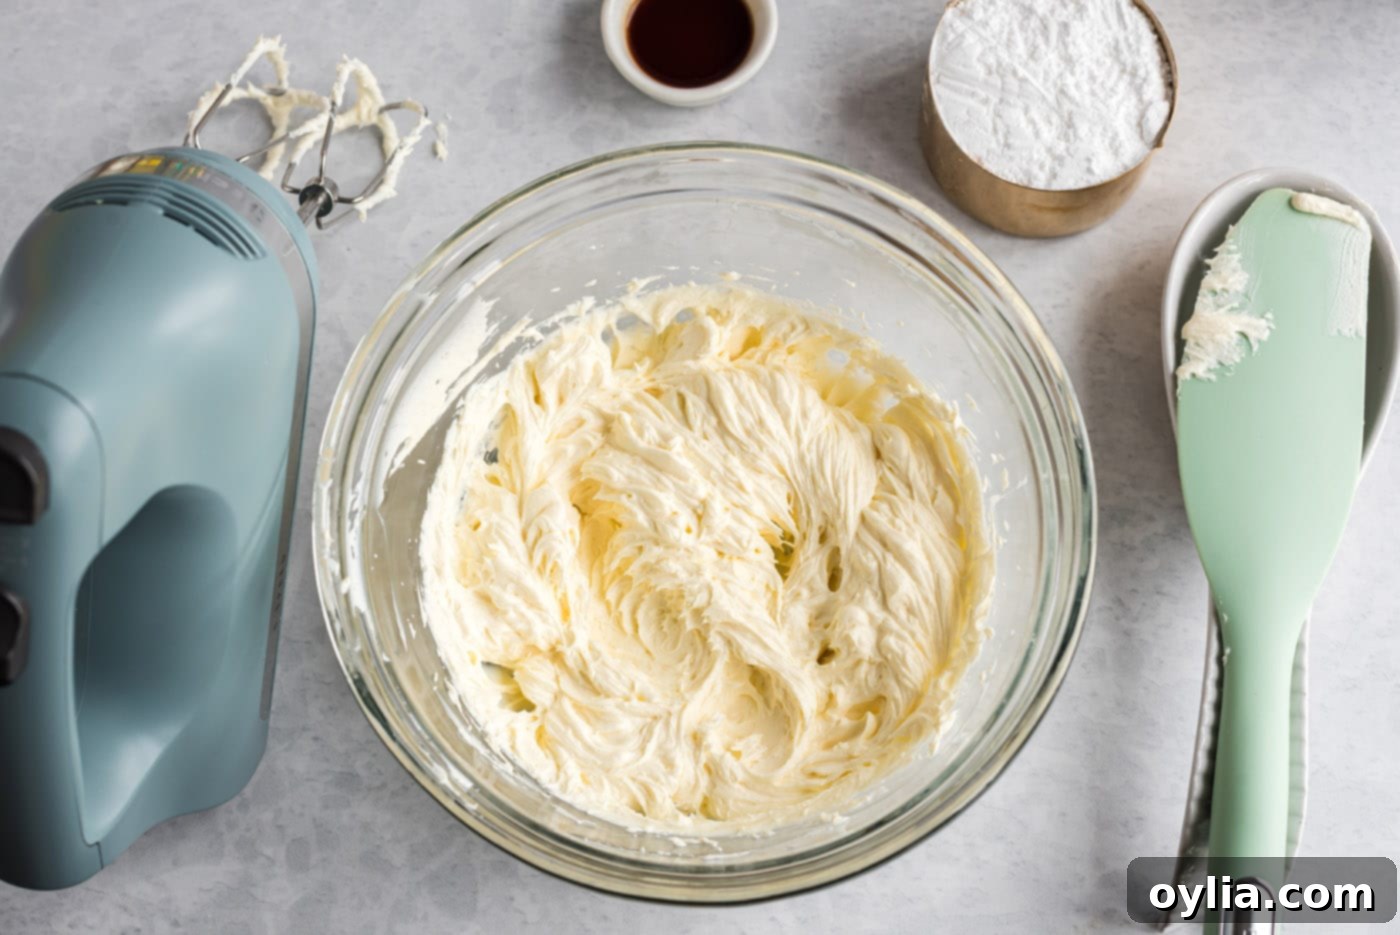
- Prepare the Cream Cheese Mixture: In a large mixing bowl, use a hand mixer to combine the softened butter and cream cheese. Beat them together on medium speed for about 25-45 seconds, or until the mixture is completely smooth, light, and creamy with no lumps. Ensuring your butter and cream cheese are at room temperature beforehand will make this step much easier and prevent a lumpy texture.

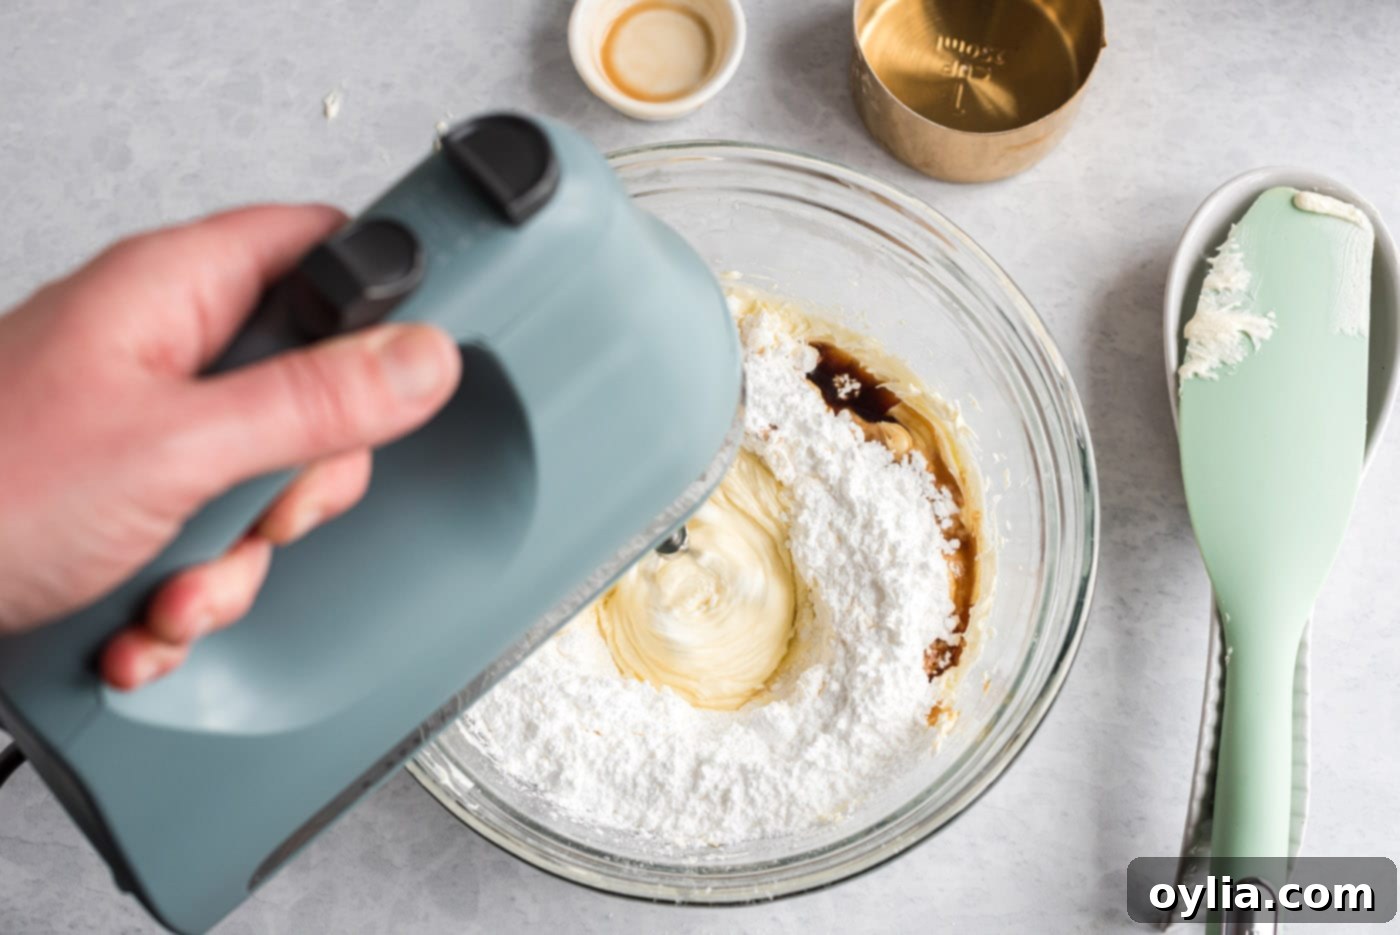
- Sweeten and Flavor: Add the powdered sugar and vanilla extract to the cream cheese and butter mixture. Mix on low speed until all ingredients are well combined and smooth. Be careful not to overmix, as this can incorporate too much air and affect the texture. Scrape down the sides of the bowl as needed to ensure everything is thoroughly incorporated into a velvety mixture.

- Fold in Cool Whip: Using a rubber spatula, gently fold the thawed Cool Whip into the cream cheese mixture. The key here is gentle folding to maintain the airy, light texture of the Cool Whip. Continue until no streaks of Cool Whip remain and the mixture is uniformly blended into a fluffy, smooth cream. This step is crucial for the cake’s light and irresistible consistency.

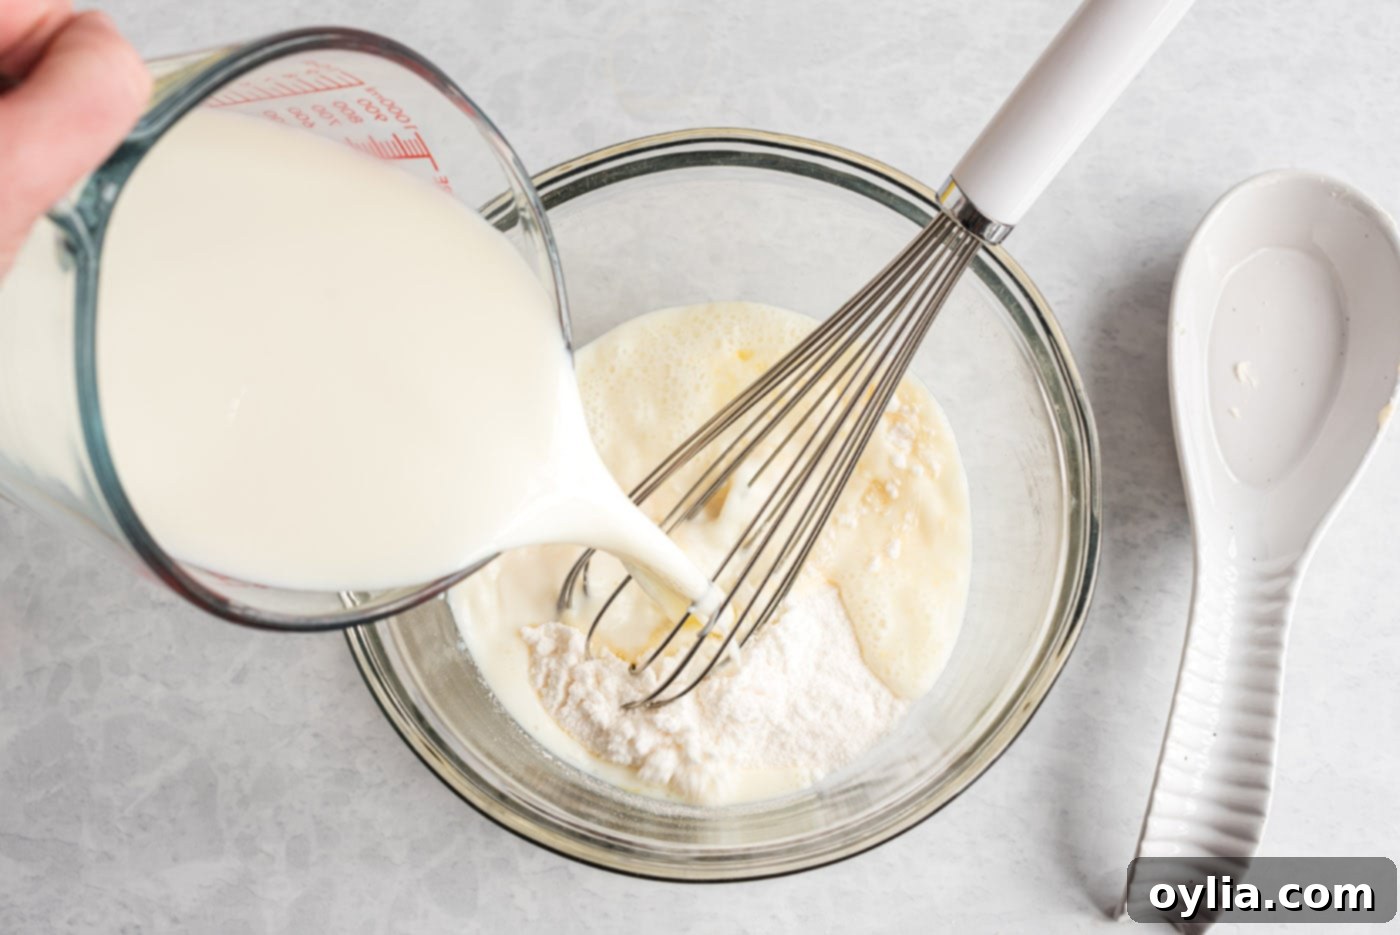
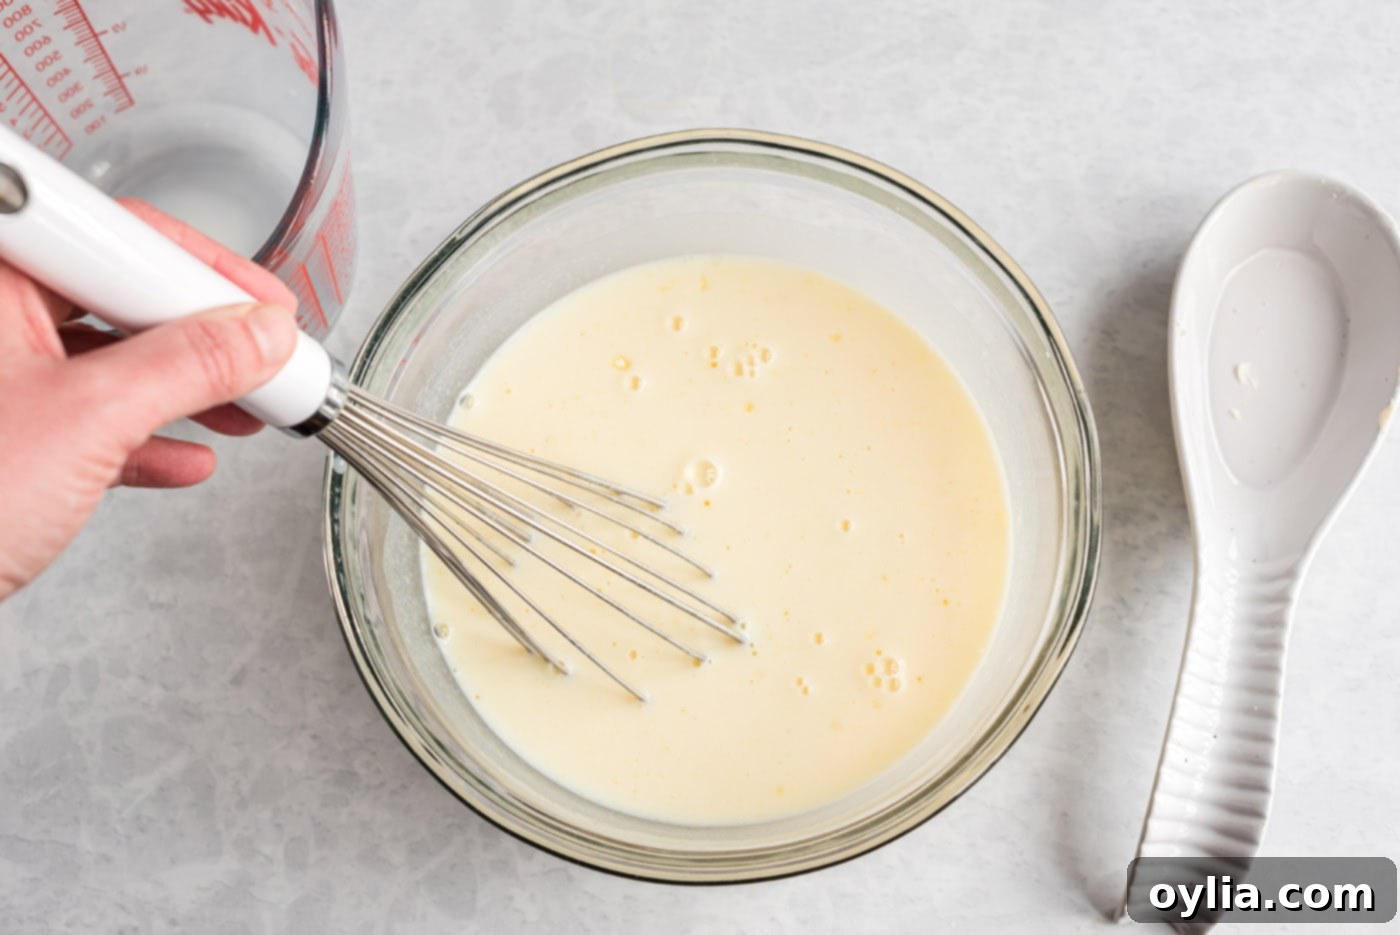
- Whisk the Pudding: In a separate, clean bowl, combine the cold milk and both boxes of instant vanilla pudding mix. Whisk vigorously for 1-2 minutes until the mixture is smooth and begins to thicken. It’s important to use cold milk as it helps the pudding set properly and quickly, yielding a firmer texture. Once mixed, let the pudding sit in the refrigerator for about 10 minutes to allow it to fully set and achieve its thick, gelatinous consistency.


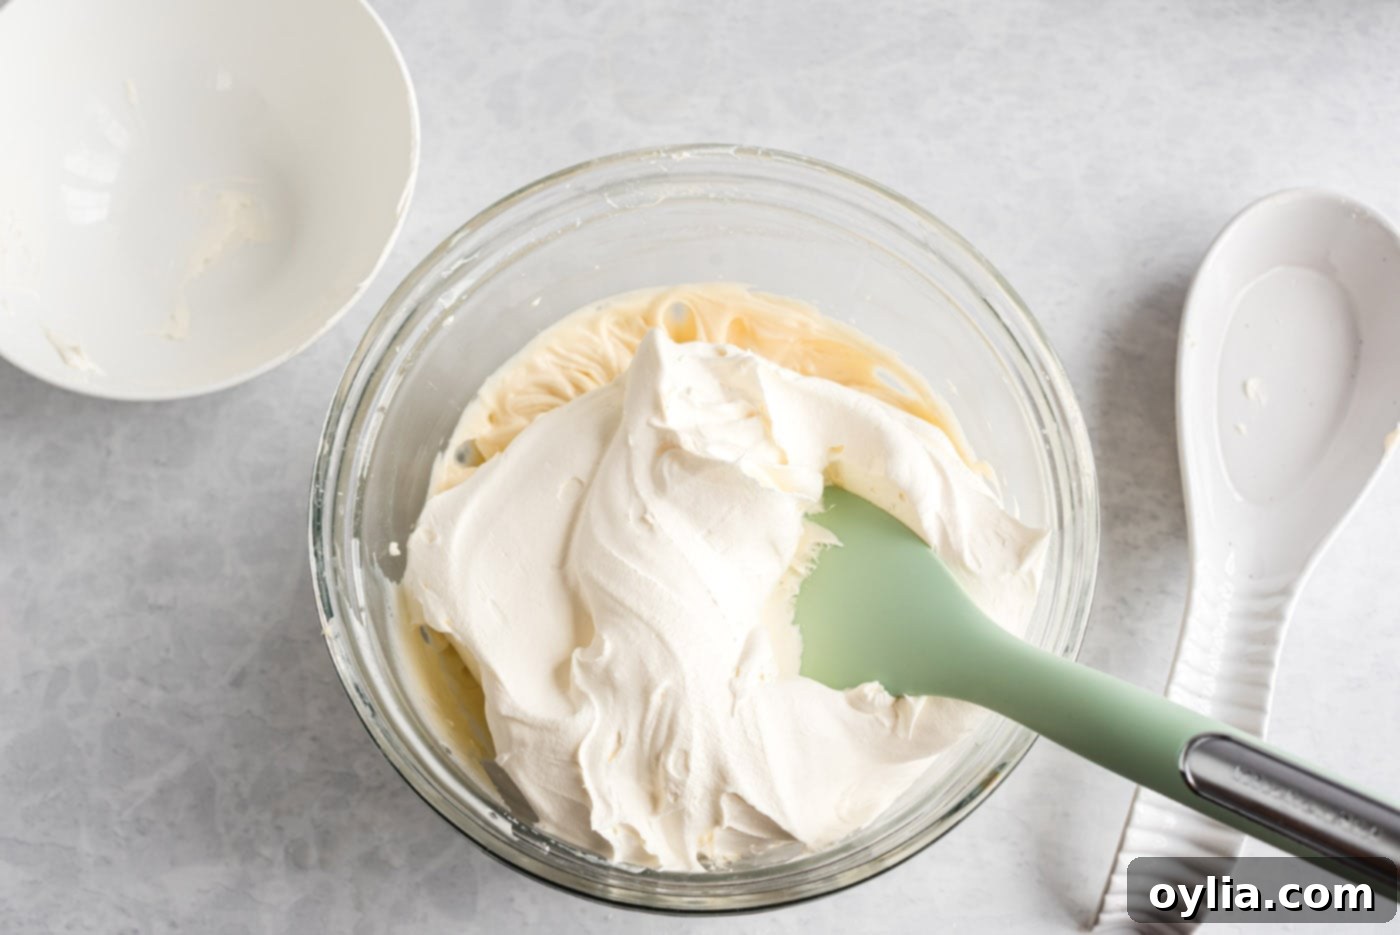
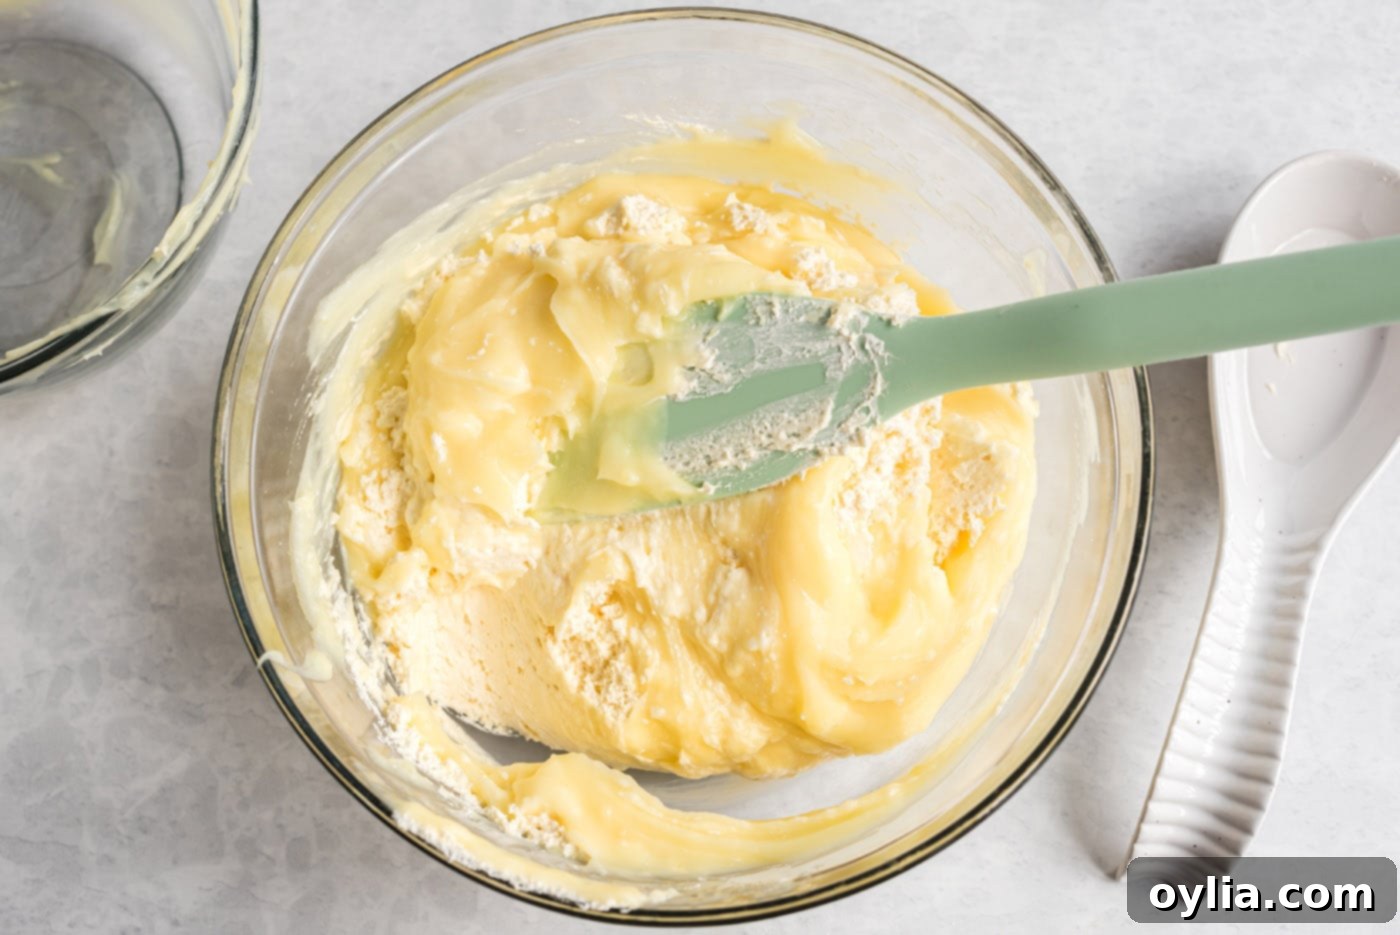
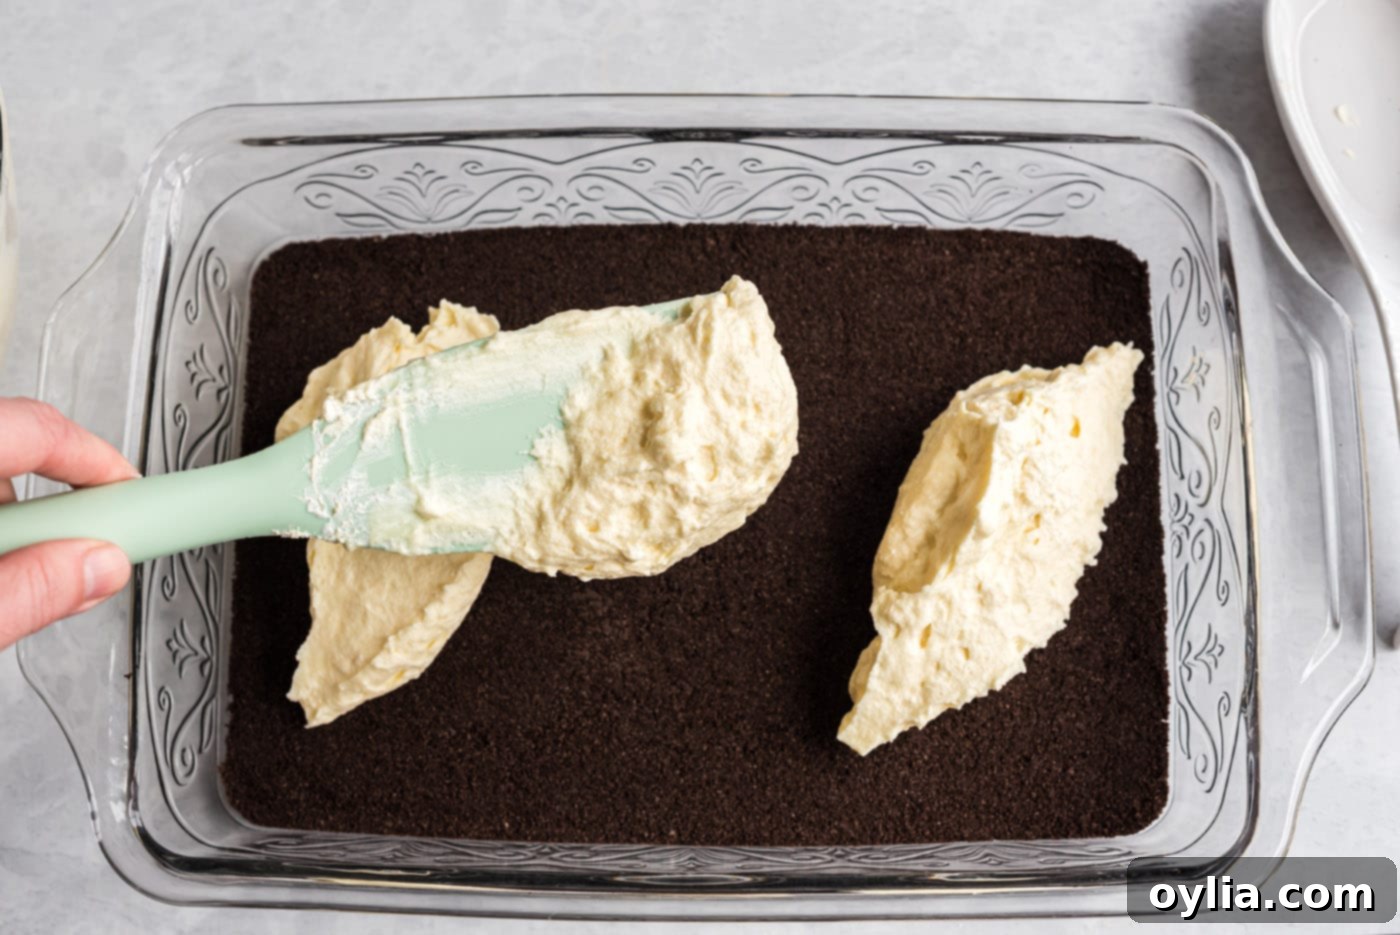
- Combine Creamy Layers: Once the pudding has slightly thickened, gently fold the cream cheese mixture into the pudding mixture using your rubber spatula. Work slowly and carefully to combine them without deflating the airiness of the Cool Whip. The goal is a light, homogeneous, and incredibly creamy filling that will be easy to spread.

- Layer the Filling: Pour the combined creamy mixture over the pressed Oreo crust in your baking dish. Gently spread it out using your spatula or the back of a spoon, ensuring it’s evenly distributed from edge to edge. Be careful not to disturb the Oreo crust below, maintaining distinct layers for a beautiful cross-section when served.

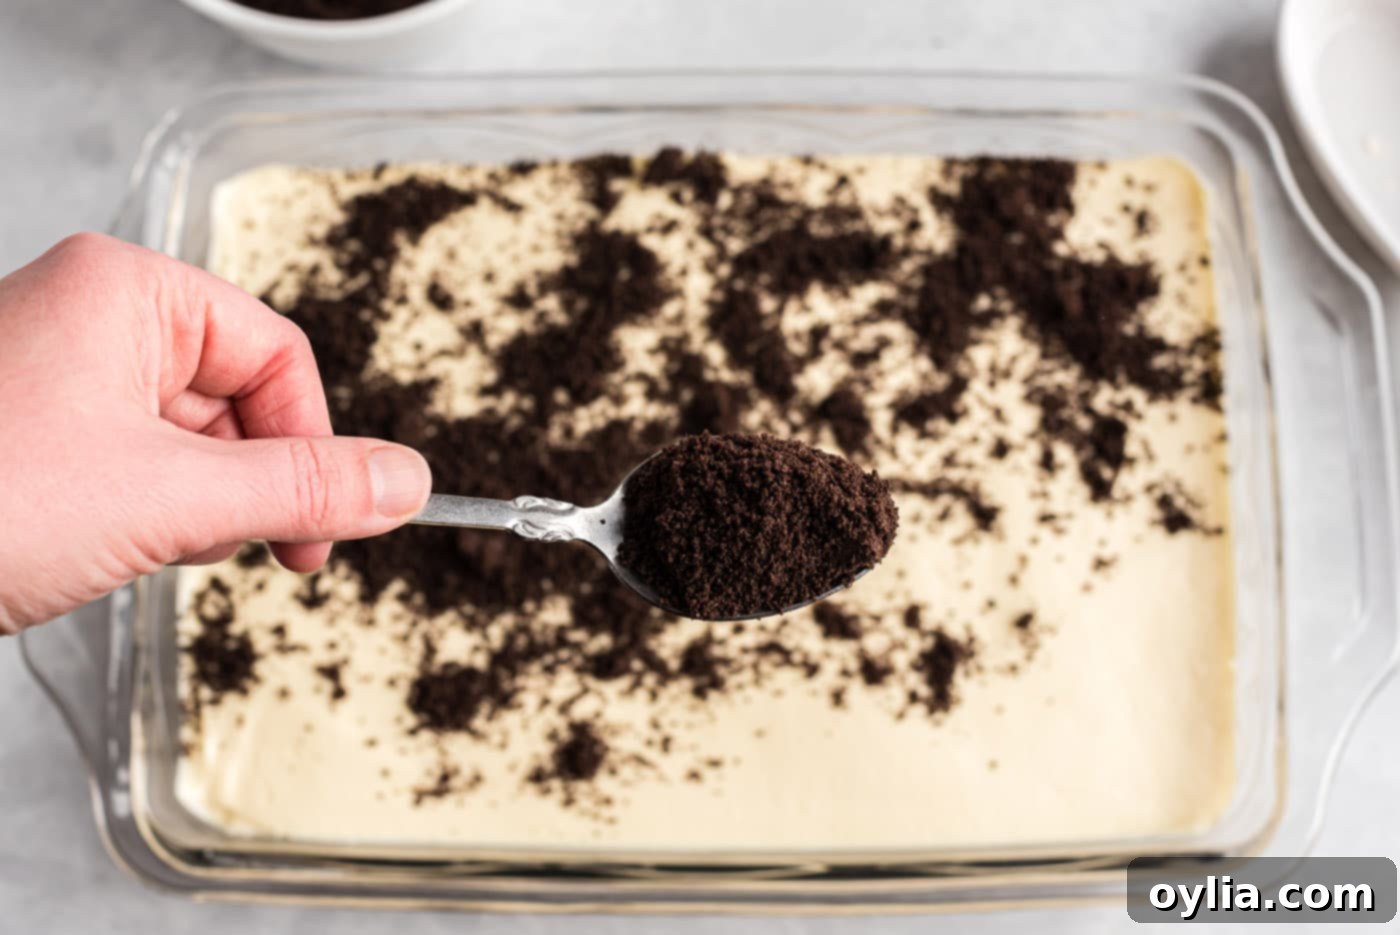
- Add the Top “Dirt” Layer: Now, take the remaining one-third of the crushed Oreo crumbs that you set aside earlier. Sprinkle these evenly over the creamy pudding layer. This creates the quintessential “dirt” appearance that makes this cake so fun and recognizable, adding a final touch of chocolatey crunch to the top.

- Chill for Perfection: Cover the baking dish tightly with plastic wrap or a lid. Transfer the cake to the refrigerator and allow it to chill for a minimum of 4 hours, or ideally, overnight. This crucial step allows the pudding to fully set, the flavors to meld beautifully, and the layers to become firm enough for clean slicing. Patience is key for the best texture and flavor development!
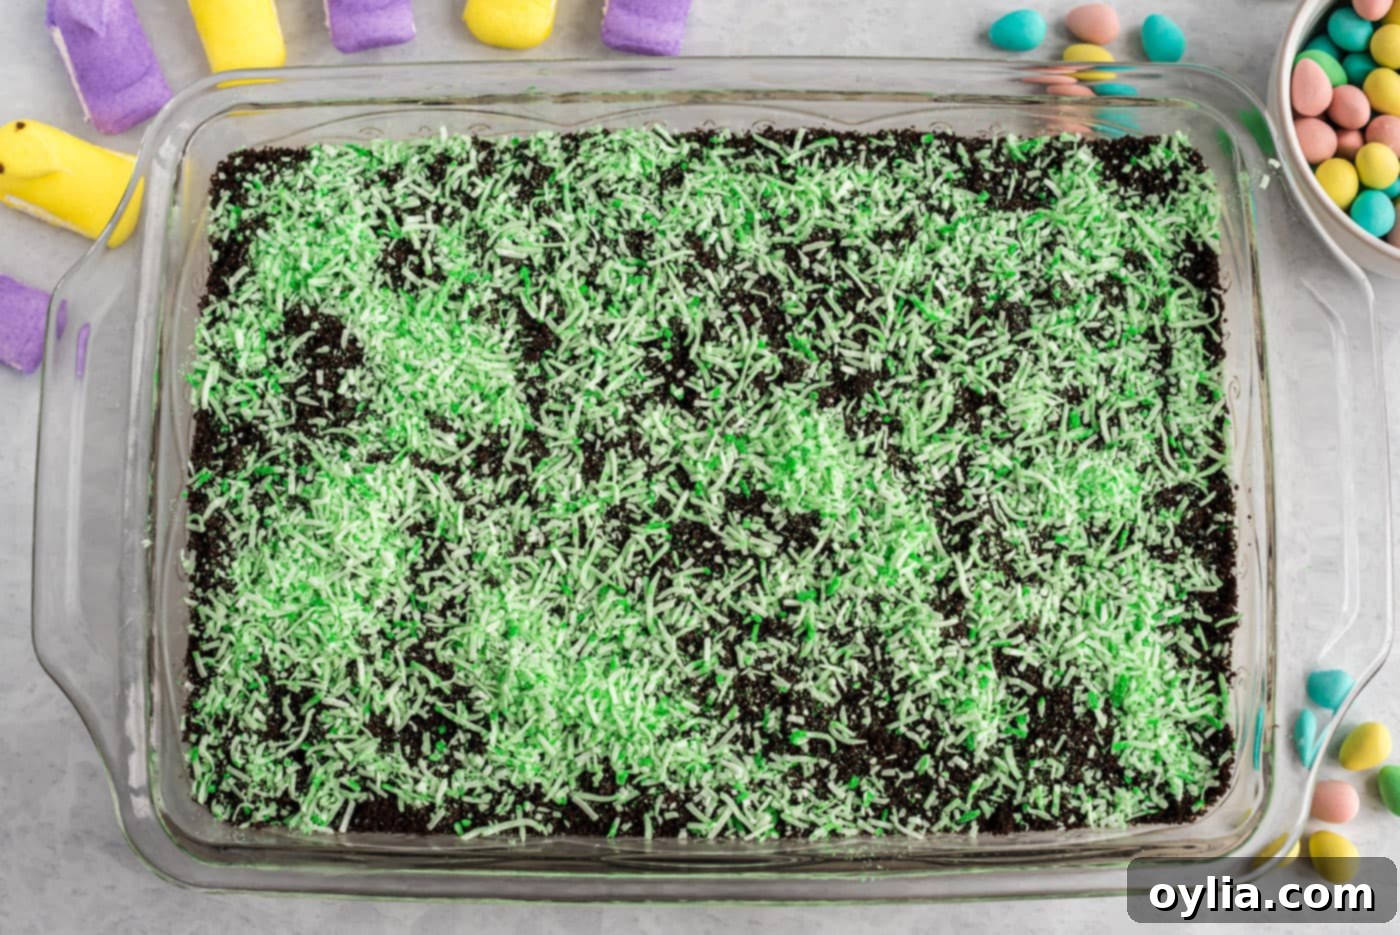
- Create Coconut Grass: Just before serving, prepare your edible “grass.” In a small bowl, combine the shredded coconut with a few drops of green food coloring. Mix well with a fork until the coconut is evenly colored and resembles vibrant green grass. Sprinkle this over the top of the chilled dirt cake, creating a lush, spring-like landscape that perfectly complements the Easter theme.


- Place the Peeps: Gently arrange your bunny (or chick) Peeps on top of the coconut grass. Press them down ever so slightly to ensure they stand upright and are secure, creating a charming scene of bunnies hopping in a field. Consider their placement to create a playful narrative across your edible garden.
- Scatter Easter Eggs: Finally, scatter the mini chocolate candy eggs artfully around the Peeps and throughout any open spaces on the cake. These colorful eggs add the perfect final touch, making your Easter Dirt Cake look like a beautiful, sweet Easter egg hunt scene. Distribute them randomly or in small clusters for a natural look.
Frequently Asked Questions & Expert Tips for Success
Can I freeze Easter Dirt Cake?
Absolutely! This dessert freezes wonderfully, making it a fantastic make-ahead option. If you plan to freeze it for later enjoyment, hold off on adding the delicate toppings – the Peeps, chocolate eggs, and shredded coconut. These elements are best added just before serving to maintain their freshness, texture, and vibrant appearance. To freeze, ensure the cake is tightly covered with an air-tight lid or wrapped first in plastic wrap, followed by aluminum foil, to prevent freezer burn and protect against odors. It can be stored in the freezer for up to 3 months. When you’re ready to serve, thaw the cake at room temperature for several hours or overnight in the refrigerator, then proceed with decorating as usual. This ensures the cake is perfectly soft and ready to enjoy.
Can I make this Easter Dirt Cake ahead of time?
Yes, this recipe is perfect for preparing in advance! You can assemble the entire cake base – including the Oreo crust, creamy pudding layer, and top Oreo crumbs – up to a day or two before your event. Store it tightly covered in the refrigerator. Using a baking dish with an air-tight lid is ideal, but covering it securely with plastic wrap also works perfectly. The key is to **not** add the Peeps, shredded coconut, or mini candy eggs until you are just about ready to serve. This prevents the chocolate from becoming too hard in the cold refrigerator, keeps the Peeps soft and fresh, and ensures the coconut “grass” maintains its vibrant color and texture. You can even pre-mix the shredded coconut with food coloring a day in advance and store it separately in an airtight container for quick assembly on serving day, saving you valuable time on the day of your celebration.
What kind of dish can I use for Easter Dirt Cake?
While a standard 13×9 inch baking dish is recommended for this recipe, you can certainly get creative with your presentation! For individual servings, consider layering the ingredients in clear glasses, mason jars, or small dessert cups. This makes for a charming presentation and easy portion control, perfect for a buffet. You could also use a large trifle bowl for a dramatic layered effect, showcasing all the delicious components and making it a grand centerpiece for a holiday table. Just remember to adjust the layering technique slightly if using a different shaped dish to ensure all elements are well-distributed and visually appealing.
Can I use homemade whipped cream instead of Cool Whip?
Yes, you absolutely can! While Cool Whip provides excellent stability and convenience, homemade whipped cream offers a fresher, richer flavor. If using homemade whipped cream, ensure it’s whipped to stiff peaks to provide the necessary structure for the cake, then gently folded into the cream cheese mixture. Be aware that homemade whipped cream might not hold its structure quite as long as Cool Whip, so it’s best to assemble the cake closer to serving time if opting for this substitution, or to add a stabilizer to your whipped cream.
How long does Easter Dirt Cake last?
When stored properly, covered tightly in the refrigerator, Easter Dirt Cake (without the Peeps, coconut, and candy eggs) can last for 3-4 days. Once the toppings are added, it’s best enjoyed within 1-2 days for optimal freshness and texture of the decorations. The Peeps can start to get a bit stale or sticky if left exposed in the fridge for too long.

Serving Suggestions for Your Picture-Perfect Easter Dirt Cake
To achieve those beautifully clean, defined slices that are so satisfying to serve, here’s a professional tip: pop your Easter Dirt Cake into the freezer for about an hour before you plan to slice and serve it. This brief chill time firms up the layers just enough to make for neat cuts, creating a stunning presentation. Once sliced, allow the individual servings to thaw at room temperature for about 15-20 minutes to restore their ideal creamy texture before enjoying. The slight chill will also enhance the refreshing quality of this no-bake treat.
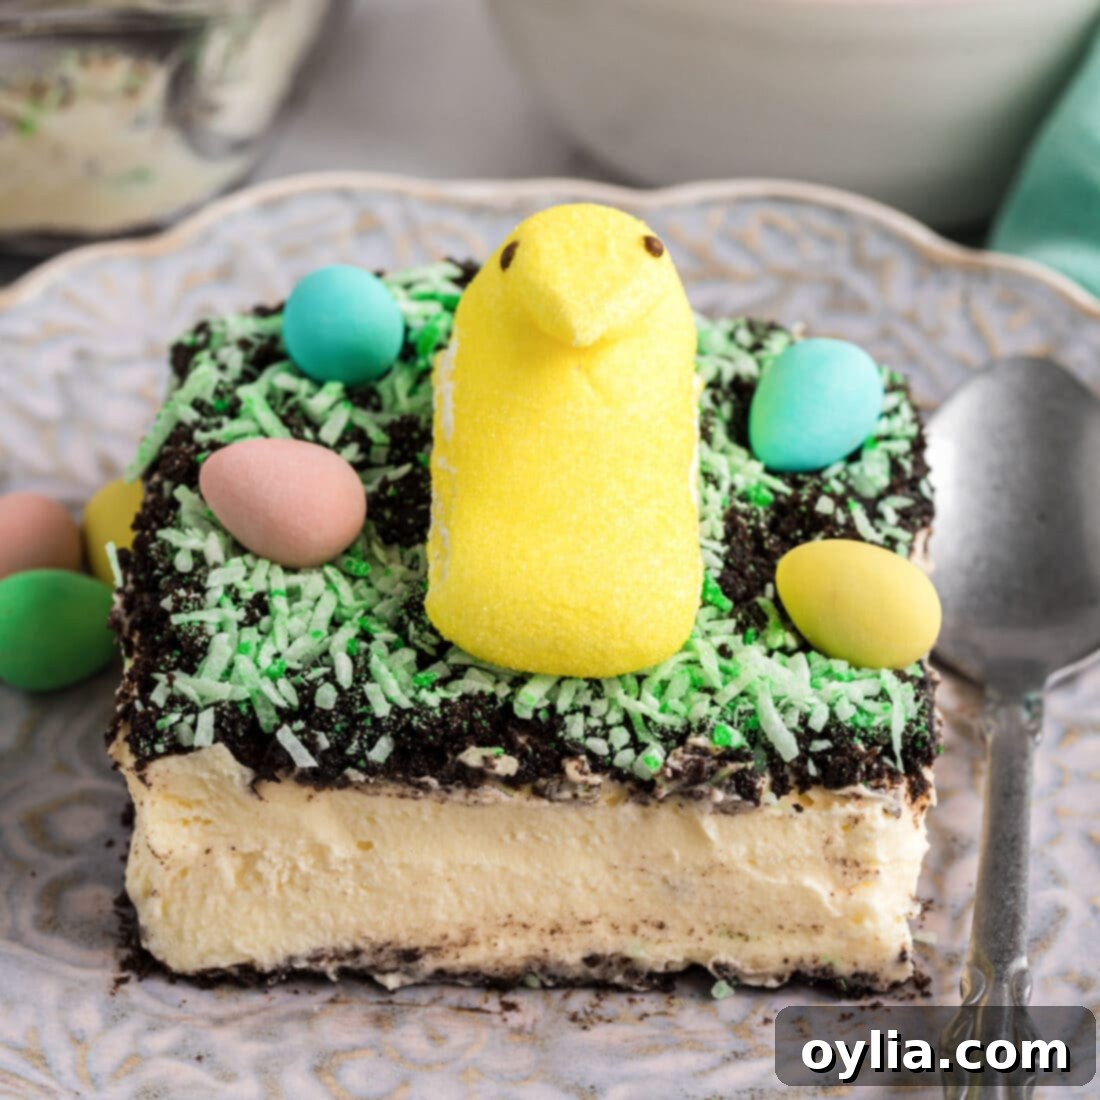
Feel free to unleash your creativity with the decorations! While bunny Peeps are undeniably adorable, don’t worry if you can only find regular Peeps (like the classic chick shape) near you; they work wonderfully too, as shown in the example above, adding a timeless Easter charm. Experiment with different types of green sprinkles for your grass, or add other Easter-themed candies like jelly beans, pastel M&M’s, small chocolate bunnies, or even tiny edible flowers for an extra touch of flair. This cake is not only a delight to eat but also a joy to present, offering a wonderful canvas for your personal festive touches. You can also serve individual portions in small clear cups or jars for a layered look that’s perfect for parties, allowing guests to easily grab their own delightful dessert.
More Irresistible Easter Dessert Recipes
Looking for more delightful treats to complete your Easter spread? Explore these other fantastic recipes that are sure to impress your guests and add even more sweetness and festive cheer to your holiday celebration. From elegant trifles to playful cupcakes, there’s something for everyone to enjoy!
- Carrot Cake Trifle – A stunning layered dessert that’s both elegant and bursting with classic carrot cake flavor, perfect for a sophisticated Easter.
- Easter Poke Cake – A moist and colorful cake infused with a sweet pudding, offering a delightful surprise in every bite and a festive look.
- Bird Nest Cookies – Adorable, easy-to-make no-bake cookies that perfectly resemble tiny birds’ nests, complete with candy eggs, a hit with kids!
- Bunny Butt Cupcakes – Playful and utterly charming cupcakes featuring a cute bunny behind sticking out, guaranteed to make everyone smile.
- Easter Muddy Buddies – A sweet and crunchy snack mix with festive pastel colors, perfect for sharing, gifting, or munching throughout the holiday.
- Bunny Butt Pancakes – A fun and creative breakfast idea to kick off your Easter morning with a touch of whimsy.
I love to bake and cook and share my kitchen experience with all of you! Remembering to come back each day can be tough, that’s why I offer a convenient newsletter every time a new recipe posts. Simply subscribe and start receiving your free daily recipes!

Easter Dirt Cake
This adorably festive dirt cake is perfect for your Easter holiday dessert spread!
Ingredients
- 19.1 oz Oreos (regular stuffed, crushed and divided)
- 8 oz cream cheese (softened)
- 8 Tbsp salted butter (softened)
- 1 cup powdered sugar (aka icing sugar or confectioners sugar)
- 1 tsp vanilla extract
- 8 oz Cool Whip (thawed)
- 6.8 oz instant vanilla pudding (2 – 3.4 oz boxes)
- 3 cups milk (cold)
Topping
- ½ cup shredded coconut
- 15 drops green food coloring (or to desired color)
- 9 Bunny Peeps (9-12 peeps)
- 20-25 mini candy eggs (Cadbury, M&M, or Hershey’s eggs)
Things You’ll Need
- 13×9 baking dish
- Hand mixer
- Food processor
Before You Begin
- For nice, clean slices, place the dessert into the freezer for about an hour before serving.
- Feel free to experiment with pudding flavors! Chocolate, white chocolate, cheesecake, or butterscotch instant pudding are all great alternatives. Sugar-free options also work well.
- The thickness of the Oreo crust and top layer is flexible. Aim for a slightly thicker crust for a sturdier base, but adjust to your preference. Both thin and thick layers are delicious!
Instructions
- Add Oreos (filling included) to a food processor and blend until they reach a fine crumb. You can also place them in a large zip-top bag and crush them with a rolling pin.
- Set aside 1/3 (around 9-10 cookies worth) of the Oreo mixture for the top of the cake. Press the remaining Oreo crumbs evenly into the bottom of a 13×9 pan.
- With a hand mixer, combine the butter and cream cheese, beating until smooth and creamy, about 25-45 seconds.
- Add the powdered sugar and vanilla extract, mixing to combine on low speed.
- Fold the cool whip into the cream cheese mixture with a rubber spatula.
- In a separate bowl, whisk together the milk and instant vanilla pudding until smooth and the mixture begins to slightly thicken. Allow the mixture to set in the refrigerator for about 10 minutes.
- Fold the cream cheese mixture into the pudding mixture.
- Pour over the Oreo crust, spreading gently to evenly distribute.
- Add the remaining Oreo crumbs evenly on top of the dessert.
- Cover and refrigerate for at minimum 4 hours or overnight.
- For the topping, mix the shredded coconut with green food coloring to create “grass”. Sprinkle on top of cake.
- Gently place the Peeps on top of the cake, pressing down slightly to make sure they stick up right.
- Scatter chocolate eggs near the peeps and throughout any empty spaces.
Nutrition Facts
The following nutritional information is an estimate per serving (based on 12 servings):
Calories: 549 cal
Carbohydrates: 73 g
Protein: 7 g
Fat: 27 g
Saturated Fat: 14 g
Polyunsaturated Fat: 2 g
Monounsaturated Fat: 8 g
Trans Fat: 1 g
Cholesterol: 50 mg
Sodium: 489 mg
Potassium: 243 mg
Fiber: 2 g
Sugar: 55 g
Vitamin A: 620 IU
Vitamin C: 1 mg
Calcium: 122 mg
Iron: 4 mg
Tried this Recipe? Pin it for Later!
If you loved this Easter Dirt Cake, don’t forget to save it for next year or share it with friends! Follow on Pinterest @AmandasCookin or tag #AmandasCookin when you share your delicious creations!
The recipes on this blog are tested with a conventional gas oven and gas stovetop. It’s important to note that some ovens, especially as they age, can cook and bake inconsistently. Using an inexpensive oven thermometer can assure you that your oven is truly heating to the proper temperature. If you use a toaster oven or countertop oven, please keep in mind that they may not distribute heat the same as a conventional full sized oven and you may need to adjust your cooking/baking times. In the case of recipes made with a pressure cooker, air fryer, slow cooker, or other appliance, a link to the appliances we use is listed within each respective recipe. For baking recipes where measurements are given by weight, please note that results may not be the same if cups are used instead, and we can’t guarantee success with that method.
