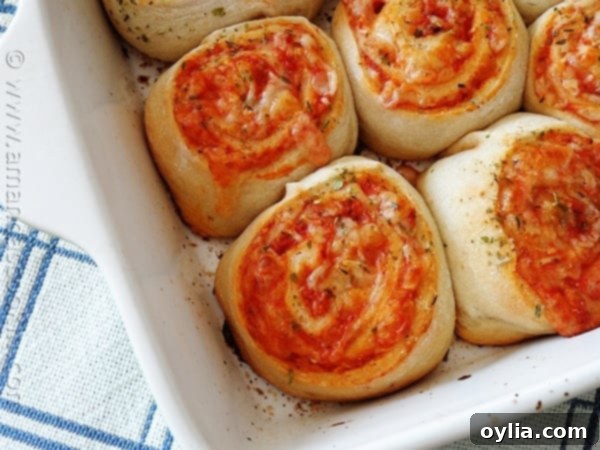
Irresistible Pizza Roll Ups: The Ultimate Easy Snack & Party Appetizer Recipe
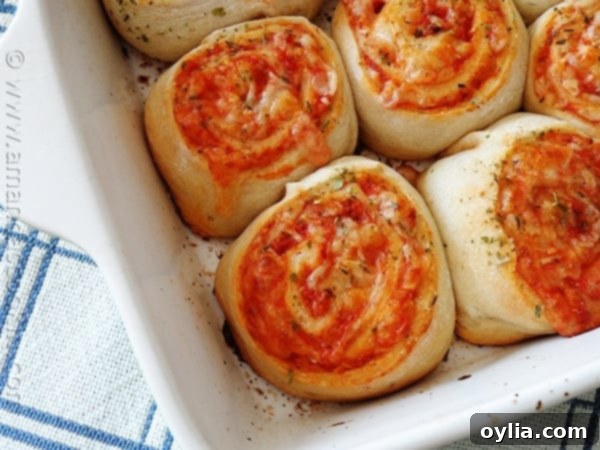
Is there a magical word that instantly captures the attention of hungry teenagers and brings a smile to any face? For many, that word is undoubtedly “pizza.” Whether it’s a casual weeknight dinner or a lively gathering with friends, pizza has an undeniable charm. But what if you could take that beloved pizza experience and transform it into an even more convenient, handheld, and utterly irresistible snack? Enter the marvelous world of **Pizza Roll Ups**!
As a parent of teenagers, I’m constantly on the lookout for innovative ways to keep those bottomless pits satisfied. After a bit of kitchen experimentation, I stumbled upon a recipe that was met with resounding success, earning rave reviews from even the pickiest of eaters. These aren’t just mini pizzas; they’re warm, savory, and incredibly fun to eat, making them a perfect solution for after-school hunger pangs, game day festivities, or simply a delicious treat to share. They are the ultimate easy pizza snack for any occasion!
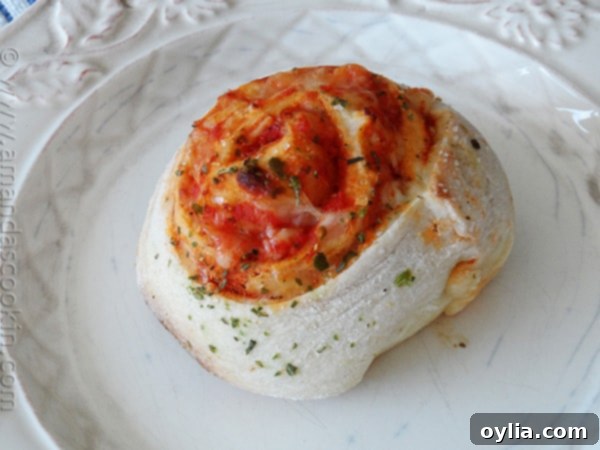
Why These Homemade Pizza Roll Ups Will Be Your New Favorite
These homemade pizza roll ups are more than just a snack; they’re a versatile culinary delight that will quickly become a staple in your recipe rotation. Here’s why they’re a guaranteed hit with everyone, from busy parents to hungry kids:
- Effortlessly Easy: Utilizing refrigerated pizza dough dramatically cuts down on prep time. This recipe is straightforward, requiring minimal ingredients and basic cooking skills, making it accessible even for beginner cooks or for involving the kids in the kitchen.
- Kid-Friendly & Customizable: Children and teenagers adore these! The simple act of rolling up the dough and adding their favorite fillings makes it an engaging activity. Plus, the ability to customize with various toppings ensures everyone gets exactly what they want.
- Perfect for Any Occasion: Whether you need a quick after-school snack, an easy appetizer for game day, a fun addition to a party spread, or a simple weeknight side dish, these pizza roll ups fit the bill perfectly. Their handheld nature makes them ideal for casual eating.
- Deliciously Handheld: Forget the plates and forks! These compact, spiral-shaped treats are designed for easy grabbing and munching. They’re a less messy way to enjoy pizza flavor, making them great for on-the-go or entertaining.
- Make-Ahead & Freezer Friendly: Busy schedules are no match for these roll ups. Prepare them in advance and store them in the refrigerator or freezer. They’re ready to pop into the oven whenever hunger strikes, offering incredible convenience for busy households and effortless meal prep.
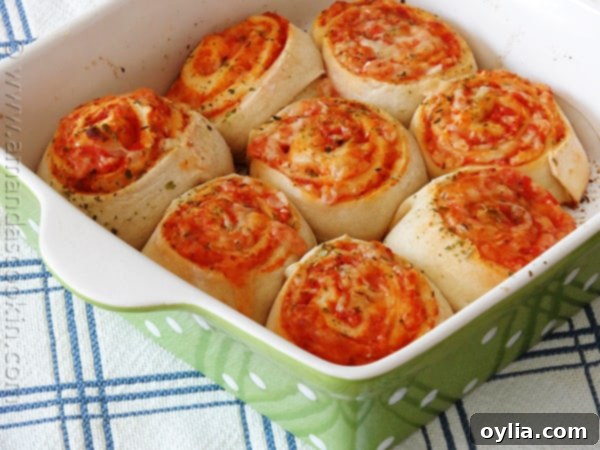
Elevate the Experience with Dipping Sauce (or Enjoy Them Plain!)
While these pizza roll ups are undeniably delicious on their own – a warm, handheld burst of cheesy, savory flavor – a dipping sauce truly takes them to the next level. Think of it as the perfect companion, enhancing every bite and adding an extra layer of enjoyment. My personal preference leans towards a classic marinara or a zesty homemade pizza sauce. If you’re feeling ambitious and have a little extra time, making your own pizza sauce (you can find my homemade pizza sauce recipe here) offers unparalleled freshness and flavor. Having a batch of homemade sauce on hand means you’ll always have extra for dipping without any fuss, making for an even more satisfying treat.
However, if time is of the essence, a good quality store-bought jarred pizza or marinara sauce works beautifully. These rolls only require about 1/2 cup of sauce for the filling, leaving plenty of room for a side of your favorite dip. Beyond marinara, consider a variety of options to suit different tastes: creamy ranch dressing, a rich garlic-herb dipping oil, a tangy blue cheese dressing, or even a spicy sriracha mayo for those who enjoy a little kick. Don’t be afraid to experiment! The right dipping sauce can transform these already amazing roll ups into an unforgettable snack or appetizer.
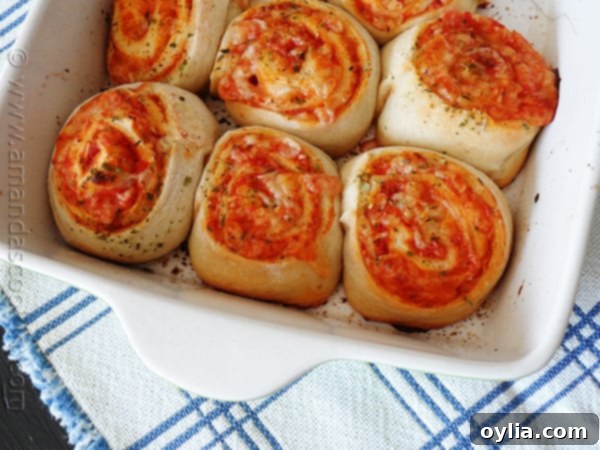
Customizing Your Pizza Roll Ups: Endless Topping Possibilities
For my initial test run, I kept things wonderfully simple with a classic cheese-only filling, and it was a resounding success. The combination of gooey mozzarella and savory Parmesan cheese baked into a golden, flaky crust is incredibly satisfying and hard to beat. However, the true beauty of these pizza roll ups lies in their incredible versatility. They are essentially a blank canvas, eagerly awaiting your favorite pizza toppings!
Want to infuse some hearty protein into your roll ups? Chopped pepperoni, cooked and crumbled sausage, crispy bacon bits, or even finely diced ham would make fantastic additions. For those who love their vegetables, finely chopped bell peppers (any color works!), onions, mushrooms, black olives, or even a sprinkle of fresh spinach can elevate the flavor profile and add a healthy boost. The key is to chop any larger toppings into small, manageable pieces so they roll up easily within the dough and cook evenly. This also prevents them from tearing the dough during the rolling process.
You can also get creative with your cheese blends. While mozzarella is absolutely essential for that perfect stretch and melt, try incorporating a touch of provolone for a sharper taste, a sprinkle of sharp cheddar, or even some smoked gouda for a unique and sophisticated flavor profile. Don’t be afraid to experiment with different herbs and spices in the filling too, such as a pinch of oregano, basil, or a dash of red pepper flakes for a subtle heat. Tailor these homemade pizza rolls to your specific cravings, dietary preferences, or simply whatever delicious ingredients you happen to have on hand in your fridge and pantry!
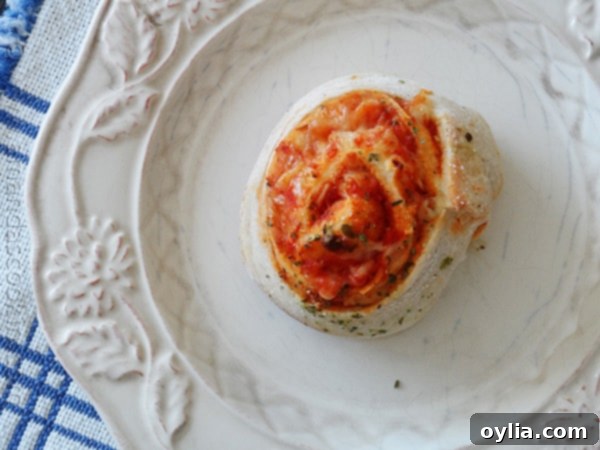
Perfect for Any Occasion: From Quick Snacks to Effortless Party Food
The adaptability and sheer deliciousness of these pizza roll ups make them suitable for an incredibly wide array of occasions. Need a satisfying and quick snack for the kids when they burst through the door after a long day at school? These are simple to reheat and are guaranteed to bring smiles all around. Hosting a lively game night, a casual get-together with friends, or looking for an easy appetizer for a holiday party? They make an excellent, fuss-free option that guests can easily grab and enjoy while mingling, without the need for utensils or complicated serving. Planning a cozy movie marathon or a relaxing night in? Pile them high on a platter for the ultimate comfort food experience that everyone will love.
Beyond their mouth-watering flavor, their convenience factor is a huge bonus for busy households. This recipe is so simple that you can easily involve your children in the preparation process, teaching them basic cooking skills in a fun and engaging way. They’ll love helping to spread the sauce and sprinkle the cheese, making it a wonderful family activity. Or, if you’re a fan of getting ahead and making life easier, simply prepare a batch (or even a double batch!) in advance. They can be stored unbaked in the refrigerator, ready to be baked on demand, or frozen for longer-term storage. Imagine the joy of having homemade, warm, and cheesy pizza treats ready to go with minimal effort on even the busiest of days – it’s a true game-changer for quick meals and stress-free entertaining!
Step-by-Step Guide to Crafting Your Perfect Pizza Roll Ups
Making these delightful treats is surprisingly simple and enjoyable. Here’s a more detailed breakdown of each step, complete with helpful tips to ensure you achieve perfect, golden-brown pizza roll ups every single time.
1. Prepare Your Dough and Lay the Foundation
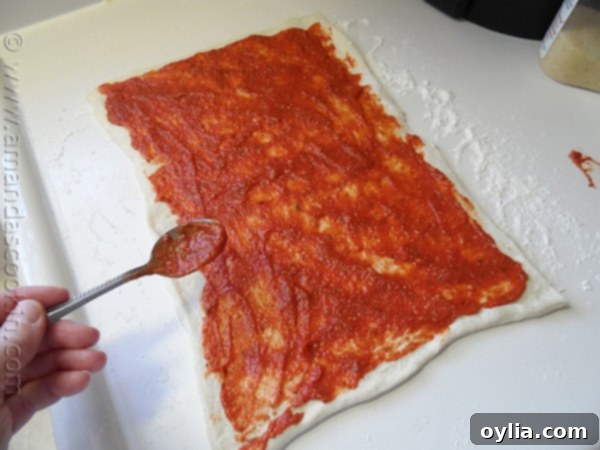
Begin by preheating your oven to a precise 400 degrees F (200 degrees C). While the oven heats, prepare your baking vessel: lightly spray a 9×9 inch square baking pan with cooking spray, or for easier cleanup, line it with parchment paper. Next, on a clean, lightly floured work surface, carefully unroll your can of refrigerated pizza dough. Gently stretch it out into a neat, even rectangular shape. Aim for uniform thickness, as this promotes consistent baking. Once your dough rectangle is ready, spread a thin, even layer of your favorite pizza sauce over the entire surface, making sure to leave a small, clean border (about half an inch) around all the edges. This border will be essential for helping to seal the roll tightly.
2. Layer the Cheesy Goodness and Your Favorite Toppings
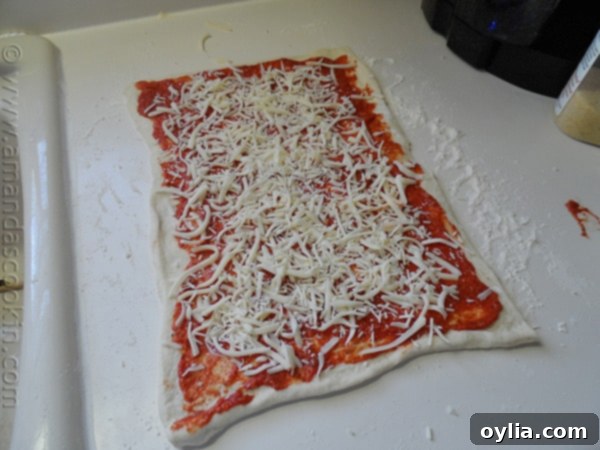
Now comes the star of the show: the cheese! Generously sprinkle 1 cup of shredded mozzarella cheese evenly over the sauced dough. Mozzarella is crucial for that classic, irresistible gooey pizza stretch and melty texture. Follow this with a lighter dusting of 1 tablespoon of grated Parmesan cheese. Parmesan adds a wonderful salty, sharp, and umami depth that beautifully complements the milder mozzarella. If you’re incorporating other toppings like finely chopped pepperoni, cooked sausage, or diced vegetables, sprinkle them evenly over the cheese at this stage. Ensure all additions are spread out to avoid creating bulky spots that could make rolling difficult.
3. The Crucial Roll and Chill Step
Starting from one of the long ends of your dough rectangle, carefully begin to roll the dough tightly. The goal is a snug, compact roll to prevent any gaps in the filling and ensure the ingredients stay secure within. Once you’ve formed a neat log, wrap it tightly in parchment paper. This next step is very important and should not be skipped: place the wrapped dough log in the freezer for approximately 15 minutes. Chilling the dough makes it much firmer and significantly easier to slice cleanly and evenly, resulting in perfectly formed, attractive roll ups that hold their shape beautifully during baking.
4. Slice, Arrange, and Season for Flavor
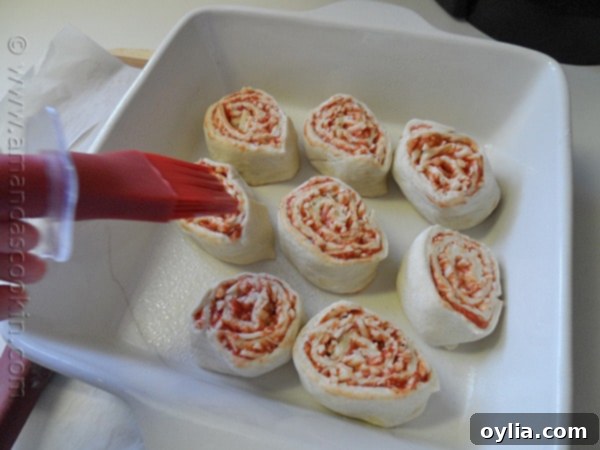
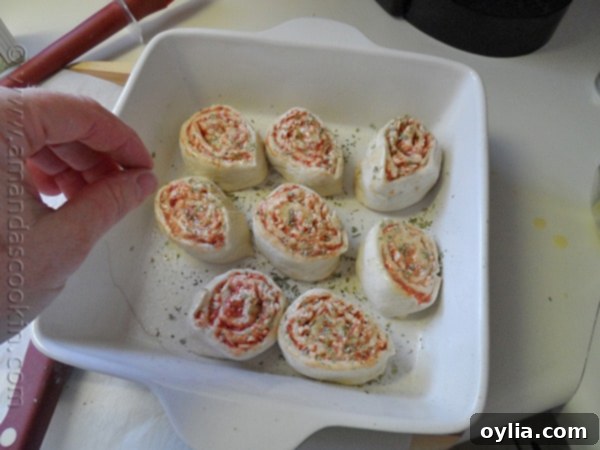
While your dough is chilling, melt 1 teaspoon of butter in a small, microwave-safe bowl. Once the dough log is firm and adequately chilled, remove it from the freezer and unwrap it. Using a very sharp knife, carefully slice the log into approximately 1 to 1 1/2-inch thick discs. Aim for consistency in thickness for even baking. Arrange these sliced roll ups, cut-side up, in your prepared baking pan. Make sure to leave a little space between each roll up – about half an inch – to allow for even air circulation and proper baking on all sides. Now, generously brush the tops of each roll up with the melted butter. This butter bath is key to achieving that beautiful golden-brown crust and imparts a rich, savory flavor. Finally, lightly season the buttered tops with garlic salt and a sprinkle of dried Italian seasoning for an extra aromatic and authentic pizza kick.
5. Bake to Golden Perfection
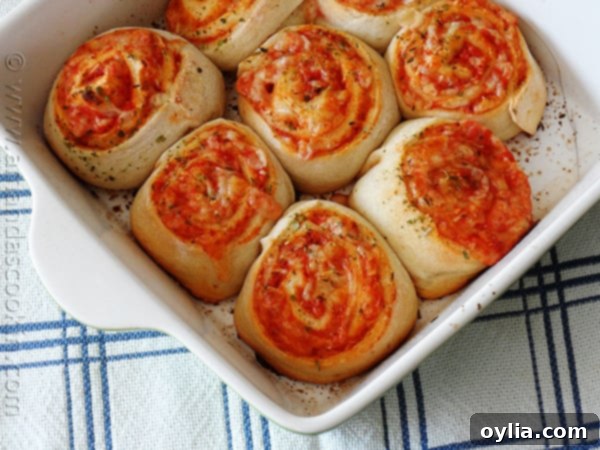
Place the baking pan containing your prepared pizza roll ups into your preheated oven. Bake for approximately 22-27 minutes. Keep in mind that baking times can vary slightly depending on the nuances of your specific oven, so it’s always a good idea to keep a watchful eye on them, especially towards the end of the baking cycle. You’ll know they’re perfectly done when the crust is beautifully golden brown, the mozzarella cheese is fully melted and bubbling invitingly, and the sauce is gently simmering. Once baked to perfection, carefully remove them from the oven and let them cool in the pan for a few minutes before serving. This brief cooling period allows the cheese and filling to set slightly, preventing any delicious spills when you pick them up. Serve warm with your favorite dipping sauce and enjoy!
Tips for Success and Frequently Asked Questions (FAQ)
Can I use different types of dough for Pizza Roll Ups?
Absolutely! While refrigerated pizza dough is incredibly convenient and recommended for its ease of use, you can certainly experiment with other doughs. Crescent roll dough can create a flakier, buttery crust, similar to a savory pastry. Puff pastry will give you a more elegant, delicate texture. If you’re using a different dough type, just be mindful that baking times and temperatures might need slight adjustments, so keep an eye on your roll ups to prevent over or under-baking.
How do I make these Pizza Roll Ups ahead of time for easy meal prep?
These pizza roll ups are fantastic for meal prepping! You have a few convenient options:
- Refrigerate (Unbaked): Prepare the dough log, slice it, and arrange the slices in your baking pan. Cover the pan tightly with plastic wrap and refrigerate for up to 24 hours. When you’re ready to bake, simply remove them from the fridge, brush with melted butter, season as directed, and bake. You might need to add a few extra minutes to the baking time since they’re starting cold.
- Freeze (Unbaked): Follow all steps up to slicing the dough log. Instead of placing them directly into a baking pan, arrange the sliced roll ups on a baking sheet lined with parchment paper, ensuring they don’t touch each other. Freeze until they are solid (this usually takes about 1-2 hours). Once frozen, transfer the solid roll ups to an airtight freezer bag or container. They can be frozen for up to 1-2 months. When you’re ready to bake, there’s no need to thaw! Just arrange the frozen roll ups in a prepared pan, brush with butter and seasoning, and bake at 400°F (200°C) for approximately 30-35 minutes, or until they are golden brown and cooked through.
- Freeze (Baked): Bake the roll ups as directed and let them cool completely. Once cooled, flash freeze them on a baking sheet, then transfer them to a freezer bag or container. Reheat baked frozen roll ups in the oven at 350°F (175°C) until warmed through, or for a quicker option, in a microwave (though the crust may not be as crispy).
What if my Pizza Roll Ups turn out soggy?
Sogginess can occur for a couple of reasons. Firstly, if too much pizza sauce is used, the excess moisture can make the dough soft. Ensure you spread a thin, even layer of sauce, just enough to cover the dough. Secondly, if the dough isn’t rolled tightly enough, the filling can create pockets that trap steam, leading to a soggy texture. Make sure your oven is fully preheated to the correct temperature, as a hotter oven helps the dough crisp up faster. If your roll ups are still a bit soft after the recommended baking time, try baking them for a few extra minutes until the crust is golden and firm.
Can I make these Pizza Roll Ups gluten-free?
Yes, you certainly can! The key to making these gluten-free is to substitute the regular refrigerated pizza dough with a high-quality gluten-free pizza dough. Most major grocery stores now carry a variety of gluten-free dough options. Additionally, always ensure that all your other ingredients, such as the pizza sauce, cheeses, and seasonings, are certified gluten-free to accommodate any dietary needs properly.
How should I store leftover Pizza Roll Ups?
Leftover pizza roll ups can be stored in an airtight container in the refrigerator for up to 3-4 days. For the best texture when reheating, it’s recommended to warm them up in a toaster oven or a conventional oven until heated through and crispy. If you’re in a hurry, a microwave will work for a quick reheat, but the crust might lose some of its crispness.
More Delicious Pizza-Inspired Recipes to Love
If you’re a fan of the flavors of pizza and looking for more creative ways to enjoy them, check out these other fantastic recipes:
- Irresistible Pizza Dip: The ultimate party appetizer!
- Delicious Pizza Sliders: Mini sandwiches bursting with pizza flavor.
- Quick Air Fryer Pizza: Fast and crispy individual pizzas.
- Classic French Bread Pizza: A nostalgic favorite made easy.
- Healthy Zucchini Pizza Bites: A lighter, veggie-packed option.
- Easy Pizza Bites: Perfect bite-sized snacks for any time.
Classic Cheesy Pizza Roll Ups
These delightful pizza roll ups are a family favorite, perfect for snacks, appetizers, or a quick meal. Easy to make with refrigerated pizza dough, gooey mozzarella, and savory Parmesan, they’re baked to golden perfection.
IMPORTANT – There are often Frequently Asked Questions within the blog post that you may find helpful. Simply scroll back up to read them!
Print It
Pin It
Rate It
Save ItSaved!
Ingredients
- 1 can (8 oz) refrigerated pizza dough
- ½ cup pizza sauce
- 1 cup shredded Mozzarella cheese
- 1 tablespoon shredded Parmesan cheese
- 1 teaspoon melted butter
- 1 teaspoon dried Italian seasonings
- garlic salt (to taste)
Instructions
-
Preheat oven to 400 degrees F (200°C). Spray a 9×9 square baking pan with cooking spray or line with parchment paper.
-
Lightly flour your work surface and unroll the pizza dough from the can. Gently stretch it into a rectangle of even thickness. Spread the pizza sauce evenly over the dough, leaving a small border around the edges. Sprinkle with shredded Mozzarella cheese and then with Parmesan cheese. (Add any desired additional toppings at this stage.)
-
Starting from one of the long ends, carefully roll up the dough tightly into a log. Wrap the log tightly in parchment paper and place it in the freezer for 15 minutes to chill and firm up. This step makes slicing much easier.
-
Meanwhile, melt the butter in a small, microwave-safe bowl.
-
Remove the chilled dough log from the freezer and unwrap it. Using a sharp knife, slice the log into approximately 1 to 1 1/2-inch thick discs. Arrange these slices, cut-side up, in your prepared baking pan, leaving a small space between each. Brush the tops with the melted butter, then season lightly with garlic salt and sprinkle with Italian seasoning.
-
Place in the preheated oven and bake for 22-27 minutes, or until the crust is lightly browned and the cheese and sauce are bubbly. Let cool slightly before serving.
The recipes on this blog are tested with a conventional gas oven and gas stovetop. It’s important to note that some ovens, especially as they age, can cook and bake inconsistently. Using an inexpensive oven thermometer can assure you that your oven is truly heating to the proper temperature. If you use a toaster oven or countertop oven, please keep in mind that they may not distribute heat the same as a conventional full sized oven and you may need to adjust your cooking/baking times. In the case of recipes made with a pressure cooker, air fryer, slow cooker, or other appliance, a link to the appliances we use is listed within each respective recipe. For baking recipes where measurements are given by weight, please note that results may not be the same if cups are used instead, and we can’t guarantee success with that method.
