The Ultimate No-Bake Oreo Icebox Cake: A 4-Ingredient Summer Dream!
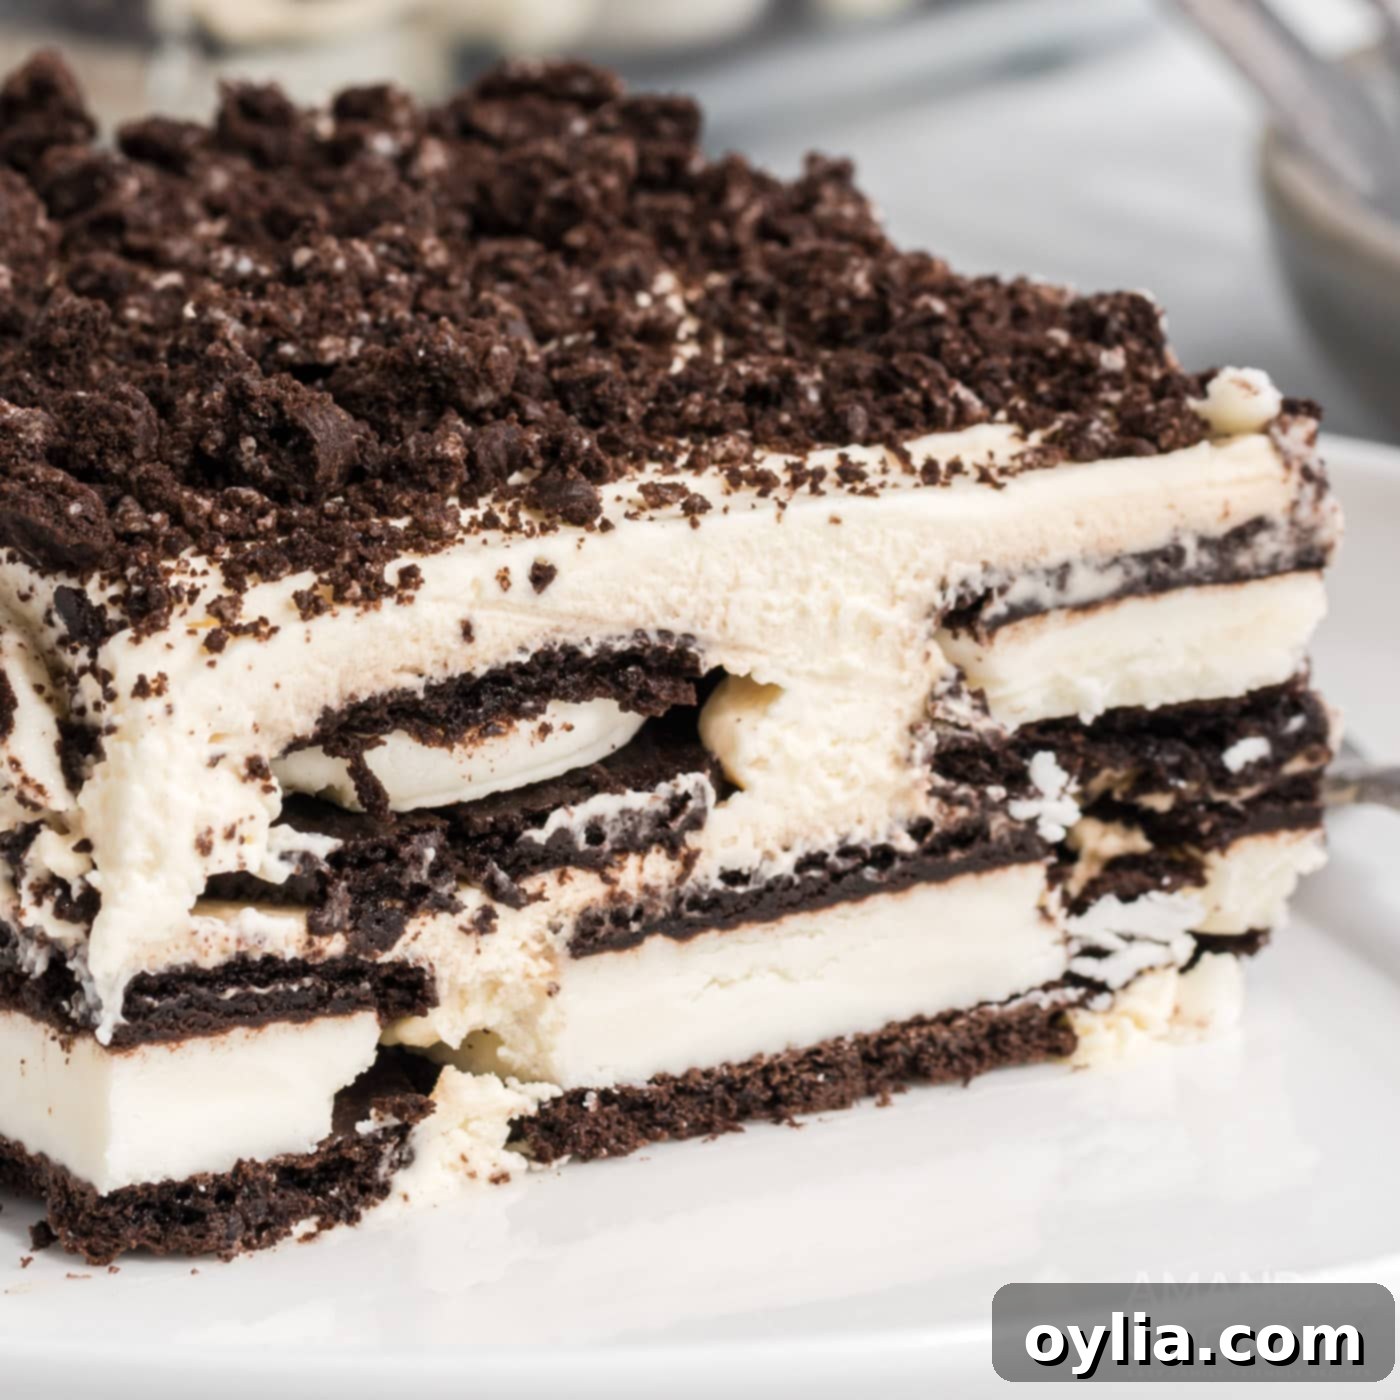
Ready to effortlessly conquer summer dessert season? This no-bake Oreo icebox cake is your new secret weapon! It’s the perfect treat to keep you cool and satisfy any sweet tooth without ever turning on your oven. Imagine rich, chocolatey Oreo cookies transforming into tender, cake-like layers, all enrobed in a luscious, homemade sweetened whipped cream. This delightful cookies and cream dessert comes together with just four simple ingredients, making it an absolute breeze for your next potluck, family gathering, or a quiet evening indulgence. Prepare to be amazed by how something so simple can taste so incredibly good!
Why This No-Bake Oreo Icebox Cake Will Be Your New Favorite
If you’re a devoted fan of cookies and cream, then this easy Oreo icebox cake is about to become your ultimate obsession. This recipe isn’t just delicious; it’s ingeniously simple and perfectly designed for hassle-free enjoyment, especially during warmer months. Here’s why it stands out:
- Effortless & No-Bake: The biggest draw is that there’s absolutely no baking involved! This means you can whip up a stunning dessert without heating your kitchen, making it ideal for scorching summer days. It’s a true set-it-and-forget-it kind of recipe, requiring only assembly and chilling time.
- Minimal Ingredients: With only four core ingredients – double stuffed Oreo cookies, heavy whipping cream, powdered sugar, and vanilla extract – this cake proves that you don’t need a long grocery list to create something extraordinary. Simple ingredients often yield the most comforting and satisfying results.
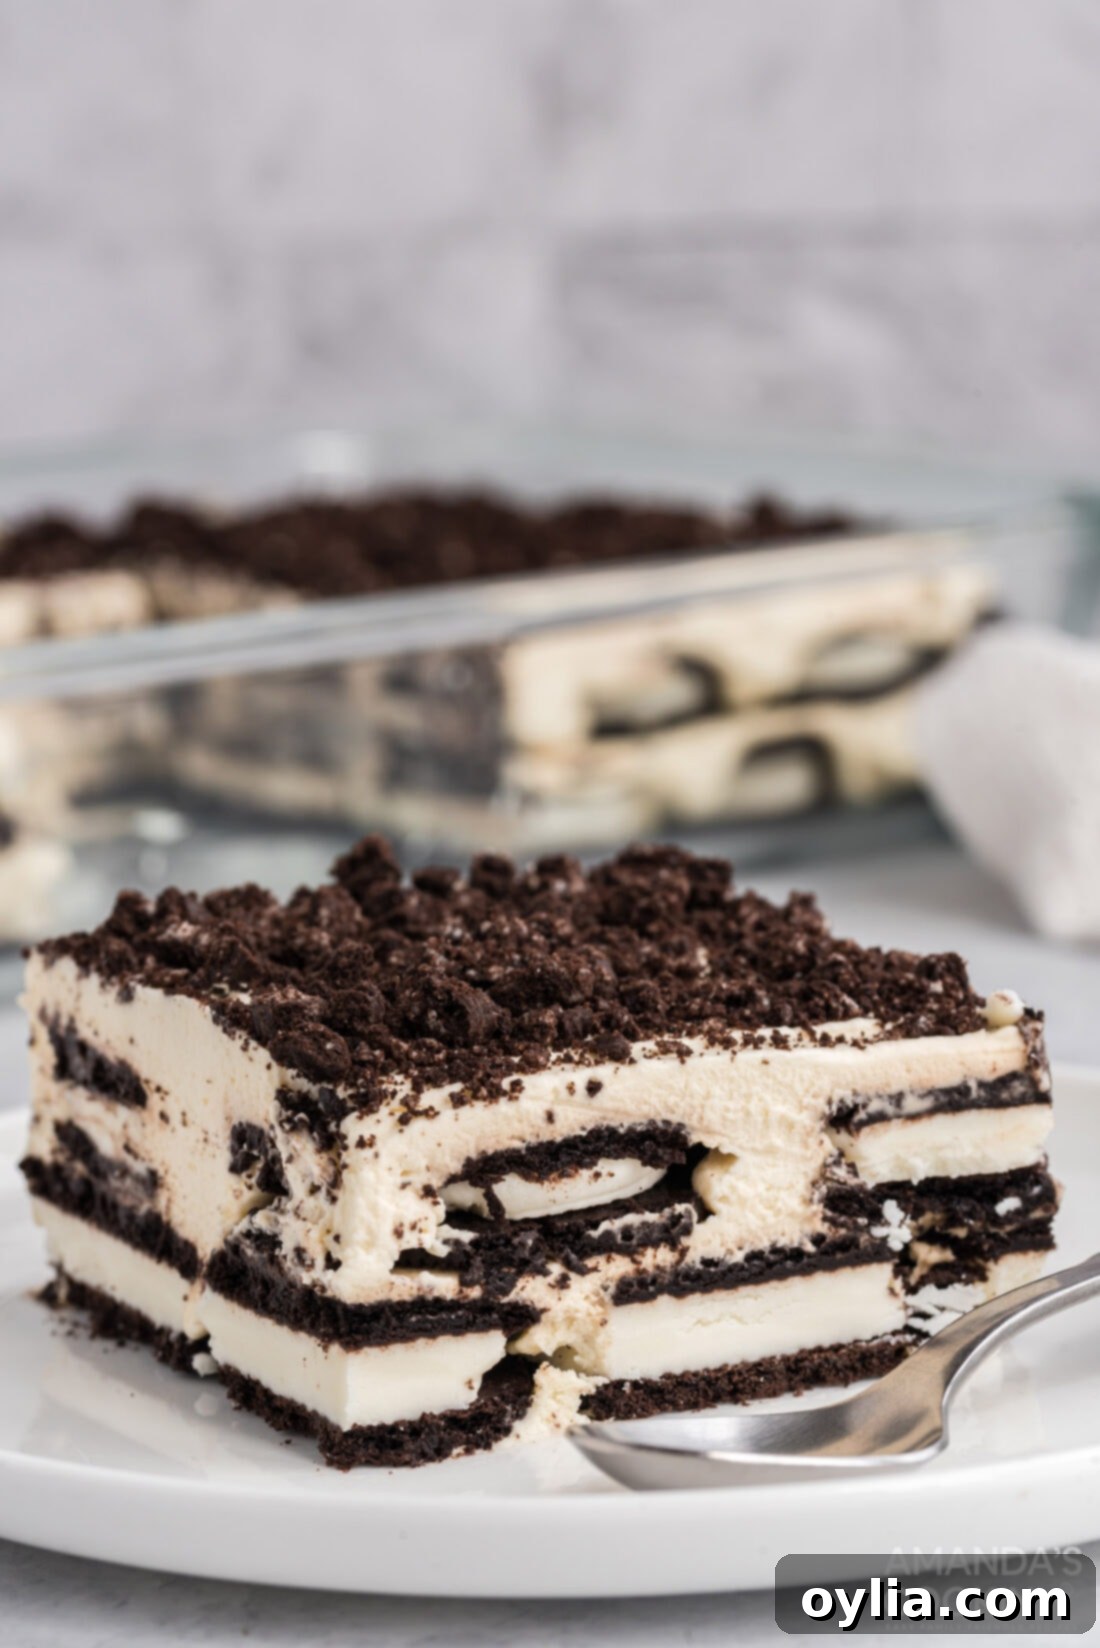
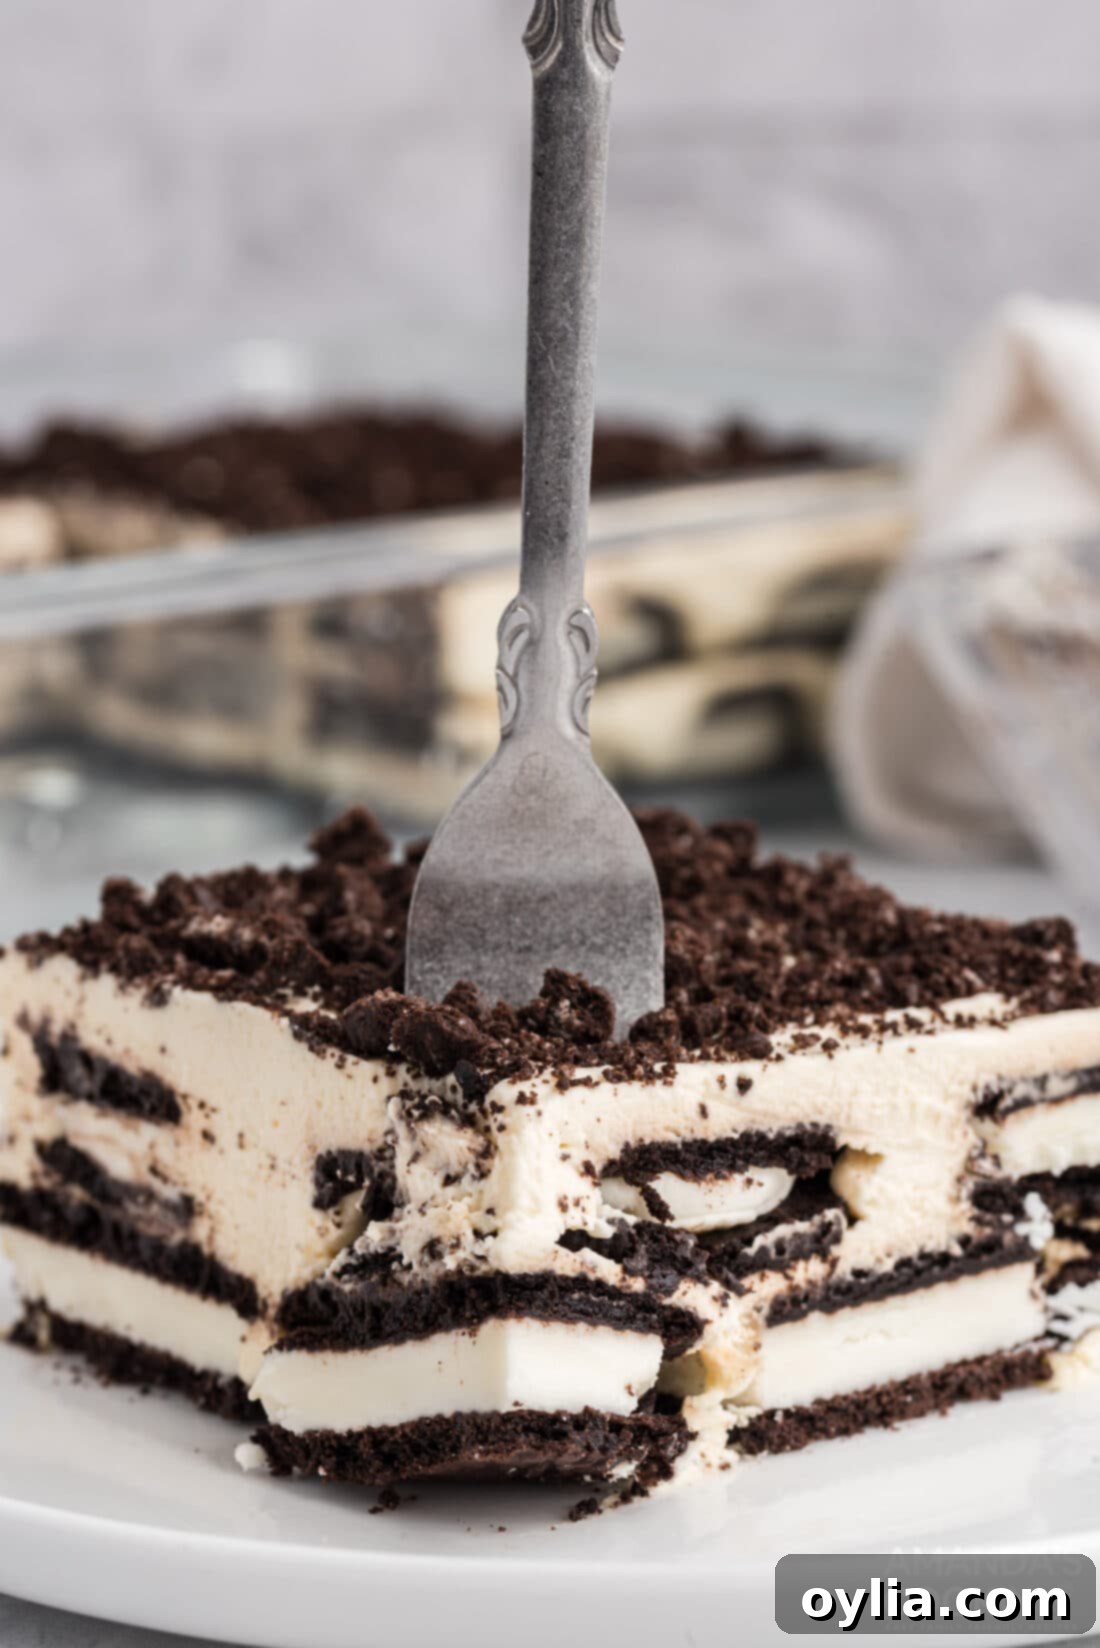
- Magical Transformation: The real magic happens in the refrigerator. As the cake chills, the layers of Oreo cookies soak up the rich, sweet whipped cream. This process softens the cookies, transforming their crisp texture into moist, tender, sponge-cake-like layers that truly mimic a baked cake. Each bite offers a delightful melt-in-your-mouth experience.
- Perfect for Any Occasion: Whether it’s a casual backyard BBQ, a festive potluck, a birthday celebration, or just a spontaneous craving for something sweet, this icebox cake fits right in. It’s universally loved and always a crowd-pleaser.
Looking for more refreshing no-bake options beyond chocolate? Explore our delightful lemon icebox cake or the vibrant strawberry icebox cake for equally simple and delicious variations!
Essential Ingredients for Your Oreo Icebox Cake
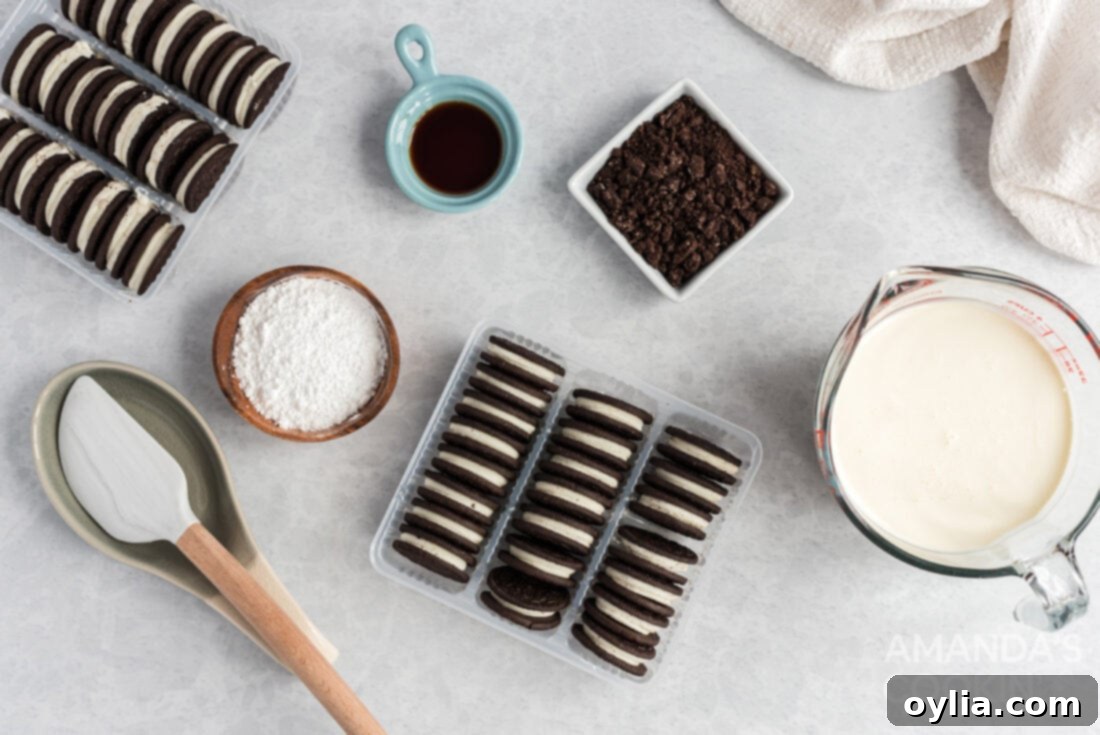
Making this incredible no-bake dessert requires just a few key components. Here’s a closer look at what you’ll need and why each ingredient plays a vital role in achieving the perfect cookies and cream experience.
Homemade Whipped Cream (The Heart of the Cake)
While you might be tempted by the convenience of pre-made whipped topping like Cool Whip, we highly recommend making your own sweetened whipped cream for this dessert. The difference in flavor and texture is truly incomparable. Homemade whipped cream is lighter, richer, and allows the natural dairy flavor to shine through, perfectly complementing the chocolate Oreos.
- Heavy Whipping Cream: Look for heavy cream or heavy whipping cream with at least 36% milk fat. This high-fat content is crucial for achieving stable, stiff peaks.
- Powdered Sugar: Also known as confectioners’ sugar, this fine sugar dissolves easily into the cream, ensuring a smooth texture without any grainy bits. It also helps stabilize the whipped cream.
- Vanilla Extract: A touch of pure vanilla extract enhances the overall sweetness and adds a beautiful aromatic depth to your cream.
Making homemade whipped cream takes mere minutes, especially if you use a stand mixer (my KitchenAid Mixer makes this a dream!) or a handheld electric mixer. A good old-fashioned whisk will work too if you’re looking for an arm workout!
Oreo Cookies (The Star of the Show)
The choice of cookies is critical for the success and deliciousness of your icebox cake.
- Double Stuffed Oreos: We strongly advocate for using Double Stuffed Oreos. The extra cream filling not only contributes to a richer, creamier flavor but also provides better structure and stability to the layers as they soften. This helps prevent the cake from becoming too soggy and ensures each slice holds its shape beautifully.
- Regular Oreos: While regular Oreos can certainly be used, you might find the layers a bit less substantial and the overall cake slightly less decadent due to less cream. If using regular, consider adding a thin layer of extra cream cheese frosting or a chocolate ganache to one of your layers to compensate for the reduced creaminess.
You’ll need approximately two and a half packages of 15 oz Double Stuffed Oreos for the cake layers, reserving the remaining half package for a delicious crushed cookie topping!
How to Make This Dreamy Oreo Icebox Cake
These step-by-step photos and instructions are here to help you visualize how to make this incredibly easy recipe. For the full printable version with exact measurements and detailed instructions, please Jump to Recipe at the bottom of this post.
-
Prepare the Homemade Whipped Cream:
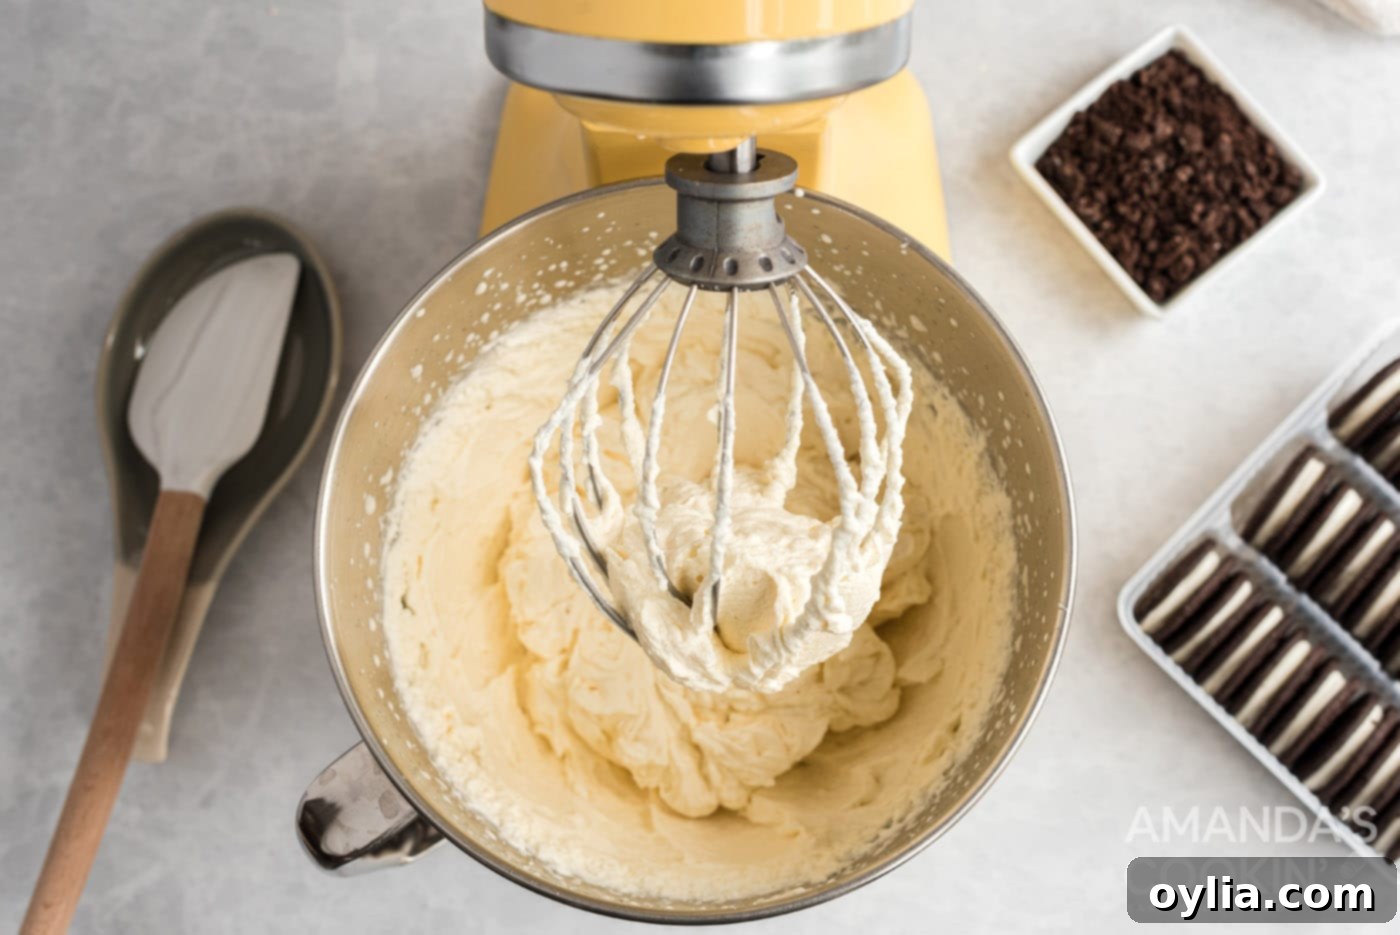
In a large, chilled mixing bowl (preferably a metal one, as it stays colder), combine the heavy whipping cream, powdered sugar, and vanilla extract. Using a stand mixer fitted with a whisk attachment or a hand mixer, beat the mixture on medium-high speed. Continue beating until stiff peaks form. This usually takes about 7-9 minutes, depending on your mixer’s power and the temperature of your cream. Stiff peaks mean that when you lift the whisk, the cream holds its shape firmly without collapsing. Be careful not to overmix, or you risk turning your beautiful whipped cream into butter!

-
Assemble the Layers:
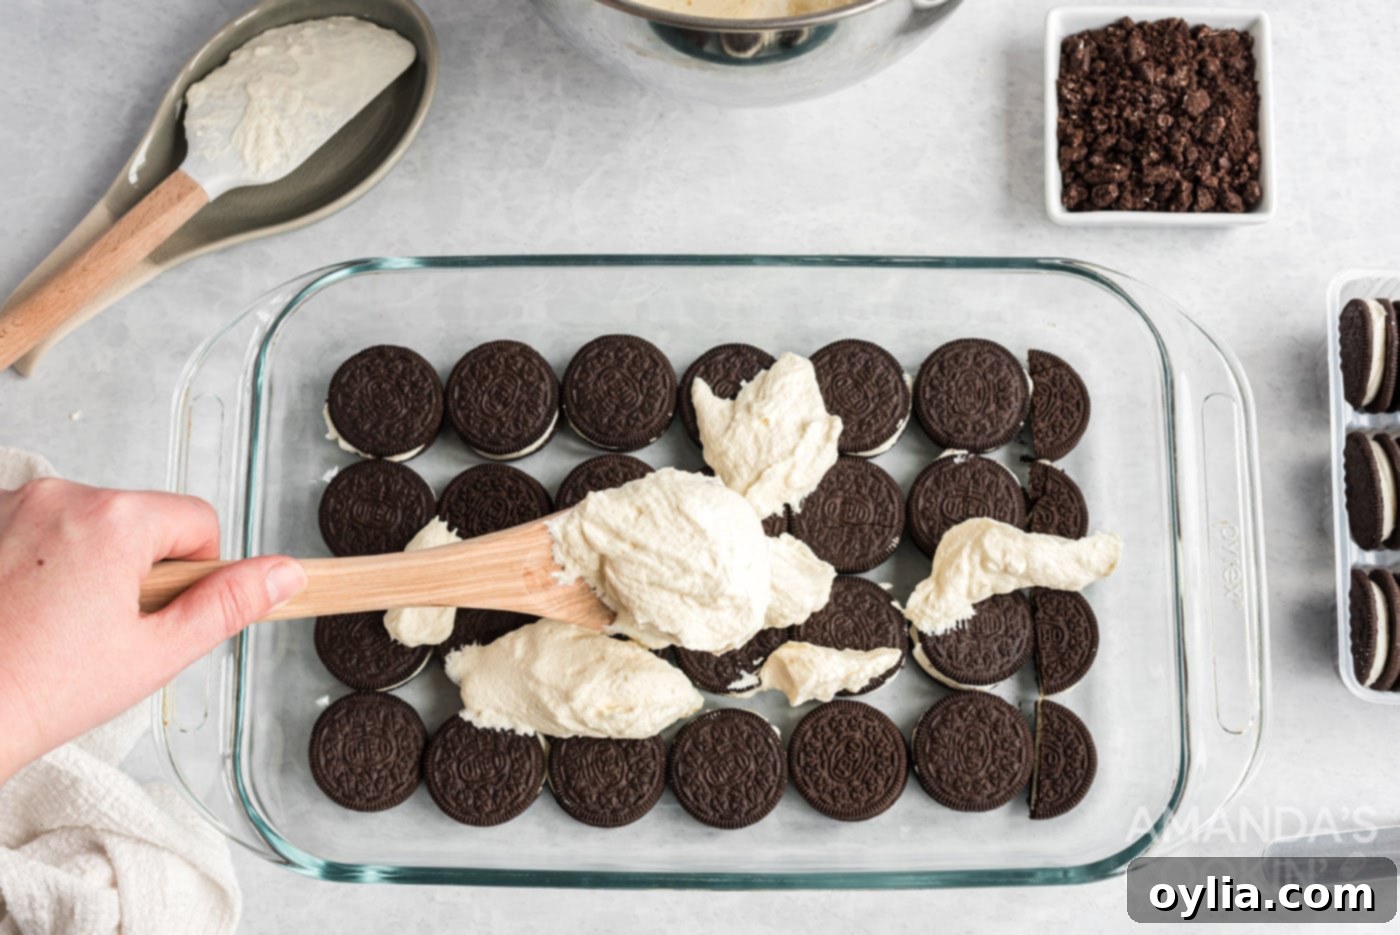
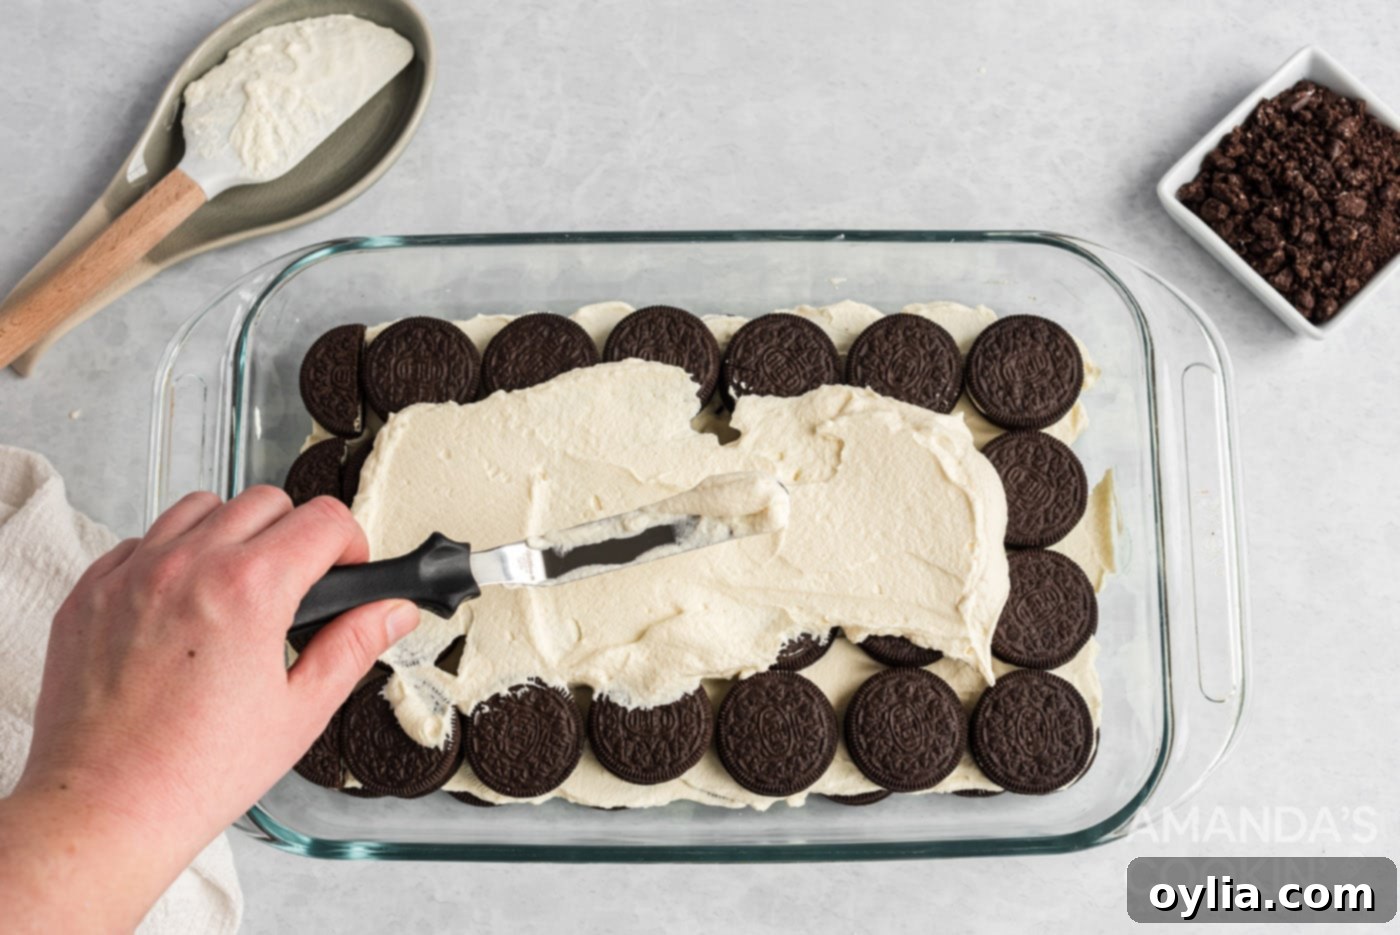
Grab a 13×9 inch baking pan or any 3-quart dish. Begin by arranging a single, even layer of Double Stuffed Oreos at the bottom of the dish. Don’t worry if they don’t fit perfectly; you may need to break some cookies in half or into smaller pieces to fill any gaps along the edges. The goal is a relatively solid cookie base. Once your first cookie layer is complete, gently spread approximately half of your freshly whipped cream evenly over the top of the Oreos. Use an offset spatula or the back of a spoon to ensure a smooth, consistent layer of cream.


-
Repeat and Chill:
Continue layering! Add another single layer of Oreos on top of the whipped cream, followed by the remaining half of your whipped cream. Depending on the depth of your dish, you might get two or three cookie layers. Aim to finish with a smooth layer of whipped cream on top. Once assembled, cover the dish tightly with plastic wrap and refrigerate for at least 6 hours. For the absolute best results and a truly “cake-like” texture where the cookies are perfectly softened, we highly recommend chilling it overnight.
-
Serve and Garnish:
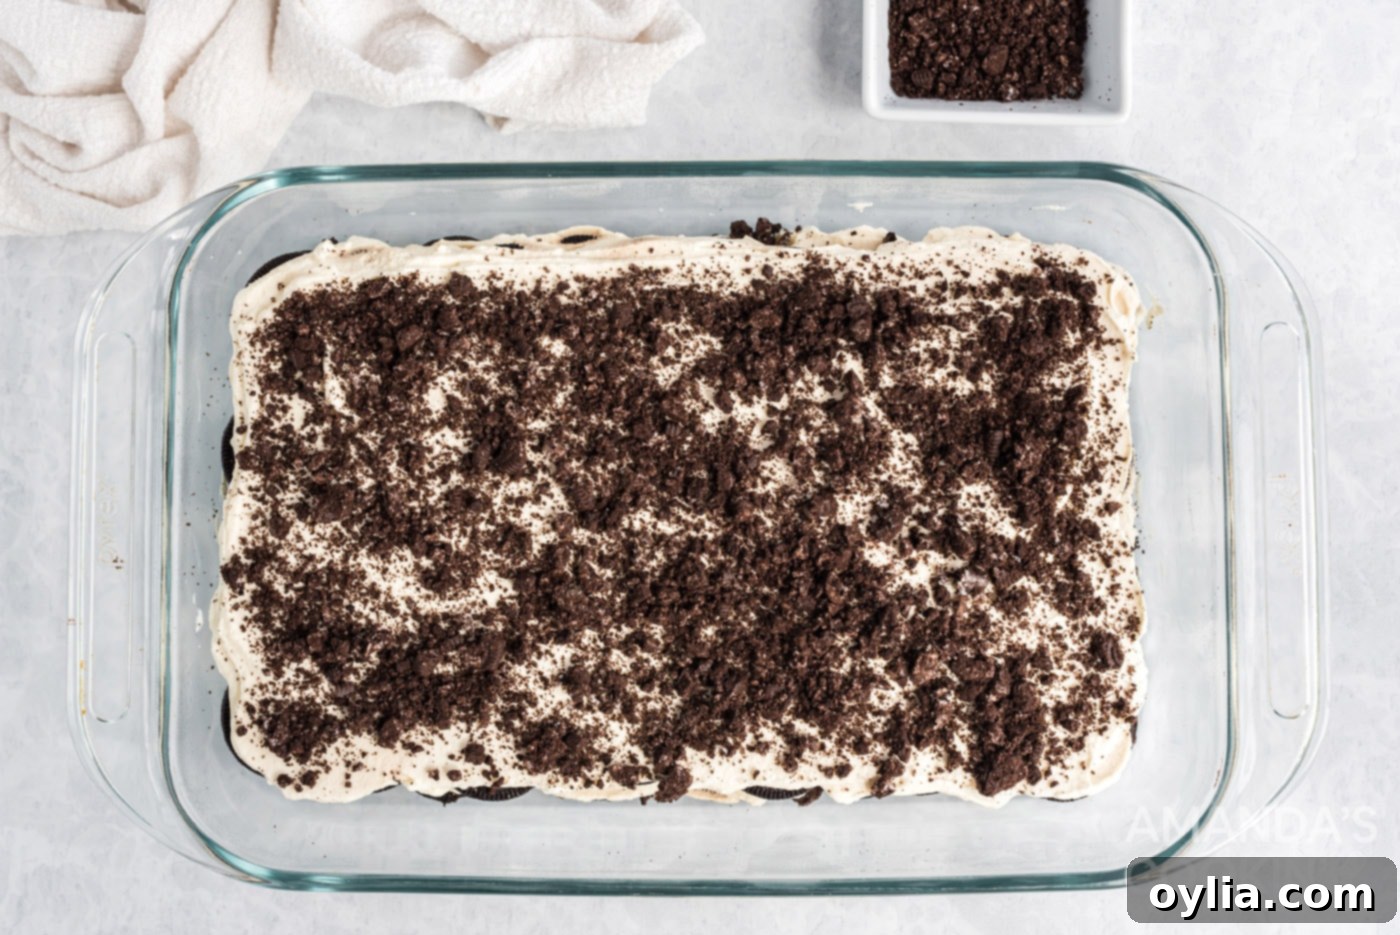
When you’re ready to serve your masterpiece, remove it from the refrigerator. For an extra touch of deliciousness and a slight textural contrast, sprinkle the top with crushed Oreo cookies (use the reserved half package!). Other fantastic topping options include chocolate chips, a drizzle of caramel sauce, or a scattering of your favorite chopped nuts. Slice and serve! For the cleanest, most picture-perfect slices, pop the entire cake into the freezer for about 30 minutes before cutting.

Expert Tips for a Perfectly Delicious Oreo Icebox Cake
- Chill Your Equipment: For the best, most stable homemade whipped cream, place your metal mixing bowl and whisk attachment (or beaters) in the freezer for 15 minutes before you start whipping. Cold equipment helps the cream whip up faster and hold its stiff peaks longer.
- Don’t Overmix Whipped Cream: Keep a close eye on your cream! Once stiff peaks form, stop mixing immediately. Overmixing can quickly turn your airy whipped cream into a grainy, separated mess, or even butter.
- Even Layers are Key: Try to distribute the Oreo cookies and whipped cream as evenly as possible in each layer. This ensures that every bite has a consistent texture and flavor.
- The Magic of Chilling: The refrigeration time is non-negotiable. It allows the cookies to fully absorb the moisture from the whipped cream, transforming them into a tender, moist cake-like consistency. Patience is a virtue here!
- Quick-Softening Hack: If you’re short on time and can’t wait for the overnight chill, you can briefly dip each Oreo cookie in milk (about 1-2 seconds per side) before layering them with the whipped cream. This will significantly speed up the softening process, allowing the cake to be ready in as little as 3-4 hours.
- Clean Slices: For presentation-perfect slices, put the assembled icebox cake into the freezer for about 30 minutes before you plan to cut and serve it. A slightly firmed-up cake will slice much more neatly. You can also run your knife under hot water and wipe it clean between each slice.
Delicious Variations and Topping Ideas
This Oreo icebox cake is fantastic as is, but it’s also a wonderful canvas for creative variations!
Cookie Variations:
- Mint Oreo Icebox Cake: Use mint-flavored Oreos for a refreshing twist, perfect for holidays or a cool summer treat.
- Peanut Butter Oreo Icebox Cake: Swap in peanut butter flavored Oreos for a rich, nutty profile. You could even swirl a little melted peanut butter into your whipped cream!
- Golden Oreo Vanilla Dream: For a vanilla-centric dessert, use Golden Oreos and consider adding a touch of almond extract to your whipped cream.
- Flavor Combinations: Mix and match! Use a layer of regular Oreos and a layer of Golden Oreos for an interesting contrast.
Whipped Cream Enhancements:
- Chocolate Whipped Cream: Sift a tablespoon or two of unsweetened cocoa powder into your powdered sugar before whipping the cream for a deeper chocolate flavor.
- Coffee Whipped Cream: Dissolve a teaspoon of instant espresso powder or strong instant coffee into a tablespoon of the heavy cream before adding it to the rest of the mixture for a mocha kick.
- Cream Cheese Whipped Cream: For a slightly tangier, richer cream, gently fold in 4-6 oz of softened cream cheese (beaten smooth first) into your finished whipped cream.
Creative Toppings:
Beyond the classic crushed Oreos, here are more ideas to elevate your dessert:
- Chocolate Lovers: Drizzle with chocolate syrup or ganache, sprinkle with chocolate shavings or mini chocolate chips.
- Caramel Delight: A generous swirl of caramel sauce adds a buttery, sweet dimension.
- Nutty Crunch: Chopped toasted pecans, walnuts, or almonds provide a lovely textural contrast.
- Fresh Fruit: While not traditional for Oreo, a scattering of fresh raspberries or sliced strawberries can add a pop of color and tartness, especially if using a lighter cookie base.
- Sprinkles: For a festive touch, colorful sprinkles are always a hit, especially for kids’ parties.
Frequently Asked Questions About Oreo Icebox Cake
Yes, you absolutely can use store-bought whipped topping like Cool Whip as a convenient substitute for homemade whipped cream. If you choose this shortcut, you’ll need approximately 24 ounces (two standard 12-ounce tubs) of pre-made whipped topping to replace the homemade version. It’s important to note that Cool Whip is generally sweeter than homemade whipped cream and has a slightly different, more artificial flavor. Keep this in mind, as it will make this already sweet dessert even sweeter. If using Cool Whip, make sure it’s thawed in the refrigerator before use.
The possibilities for topping your Oreo Icebox Cake are endless and can be tailored to your taste! For a classic and satisfying crunch, I love to simply top it with crushed Oreos right before serving, using the leftover cookies from the packages. If you’re feeling a bit more adventurous or fancy, consider drizzling caramel sauce, chocolate syrup, or a rich chocolate ganache over the top. Chocolate chips (mini or regular), chocolate shavings, or even a variety of chopped nuts like pecans or walnuts make excellent additions. For a burst of color and a hint of tartness, fresh berries like raspberries or sliced strawberries can also be a delightful contrast to the rich chocolate and cream.
Absolutely, and in fact, this dessert is *best* when made ahead of time! Planning allows the flavors to meld beautifully and, most importantly, gives the Oreo cookies ample time to soak up the luscious whipped cream. This is the crucial step that transforms them from crisp cookies into tender, moist, cake-like layers. We recommend refrigerating the cake for at least 6 hours, but for the most superior texture and flavor, chilling it overnight is highly recommended. This makes it an ideal dessert for entertaining, as you can prepare it the day before your event, freeing up your time on the day of. If you’re really in a rush and need it ready sooner, you can dunk each cookie briefly in milk as you assemble your layers; this will accelerate the softening process significantly.
When properly covered with plastic wrap or stored in an airtight container, your Oreo Icebox Cake will stay fresh and delicious in the refrigerator for up to 3-4 days. After a few days, the cookies might become too soft, losing some of their desired cake-like consistency.
Yes, this cake freezes wonderfully! For longer storage, wrap the entire cake (or individual slices) tightly in plastic wrap, then an additional layer of aluminum foil. It can be stored in the freezer for up to 1-2 months. To serve, simply thaw in the refrigerator for several hours or overnight until it reaches your desired consistency. You can also enjoy it semi-frozen for a delightful ice cream cake-like experience!
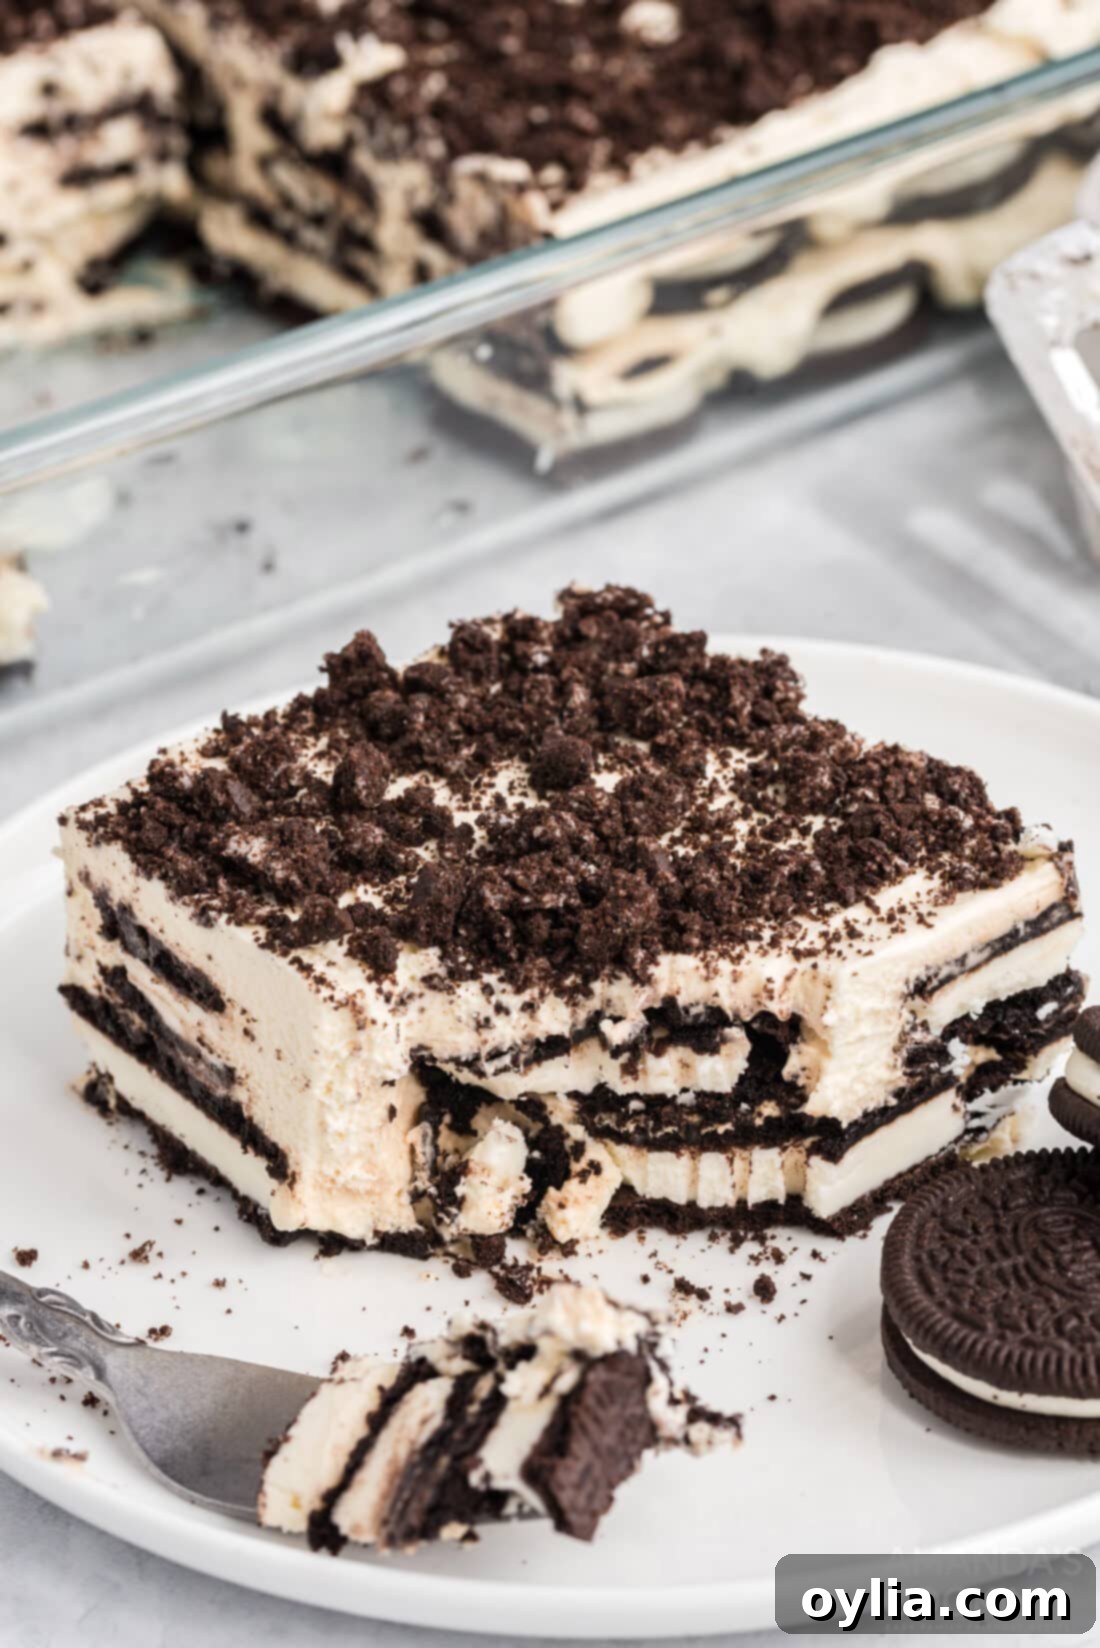
Ultimately, this no-bake Oreo icebox cake delivers a fluffy cloud of cookies and cream deliciousness with minimal effort and maximum satisfaction. It’s the quintessential easy summer dessert, perfect for any occasion that calls for a cool, rich, and utterly irresistible treat. Dive into a slice today!
More Irresistible Dessert Recipes to Explore
- Fried Oreos: For a different kind of Oreo indulgence!
- Lemon Blueberry Icebox Cake: A bright and fruity no-bake option.
- No-Bake Oreo Cake: Another fantastic no-bake cake featuring Oreos.
- Chocolate Lasagna: A rich, layered chocolate dessert that’s also no-bake.
- Chocolate Icebox Cake: For the ultimate chocolate lover.
- Oreo Cupcakes: Baked individual portions for easy serving.
- Oreo Cheesecake: A creamy, dreamy baked cheesecake with an Oreo twist.
I love to bake and cook and share my kitchen experience with all of you! Remembering to come back each day can be tough, that’s why I offer a convenient newsletter every time a new recipe posts. Simply subscribe and start receiving your free daily recipes!
Oreo Icebox Cake
IMPORTANT – There are often Frequently Asked Questions within the blog post that you may find helpful. Simply scroll back up to read them!
Print It
Pin It
Rate It
Save ItSaved!
Ingredients
- 3 packages Double stuff Oreo cookies 15 oz each. You will only use 2 1/2 packages. The rest can be used for the crushed cookie topping
- 3 cups heavy whipping cream
- 3 tablespoons powdered sugar
- 2 teaspoons vanilla extract
- Crushed cookies chocolate chips, caramel or nuts for topping (optional)
Things You’ll Need
-
13×9 baking dish (or 3-quart dish)
-
Stand mixer or hand mixer
-
Large mixing bowl (preferably chilled)
Before You Begin & Recipe Notes
- Whipped Topping Alternative: Homemade whipped cream can be substituted with 24 ounces (two 12-oz tubs) of thawed store-bought whipped topping if you prefer a shortcut. Note it will be sweeter.
- Faster Softening Method: To soften cookies faster, quickly dip each one in milk (about 1-2 seconds per side) before placing them in the dish to form layers. This allows the cake to be ready in 3-4 hours instead of overnight.
- Perfect Whipped Cream Tips: For the best whipped cream, chill your metal bowl and whisk/beaters in the freezer for 15 minutes before whipping. Beat the heavy cream until medium to medium-stiff peaks form. You’ll know they’re stiff when you pull out the whisk, and the cream stands without curling over. Stop immediately to avoid overmixing into butter.
- Assembly Guidance: To assemble, layer the cookies in a single, even layer. Top with about half of the prepared whipped cream and spread it evenly. Repeat this process for another layer of cookies and the remaining whipped cream. The exact number of layers depends on your dish’s depth. This recipe works well in a 13×9 pan or any 3-quart dish. For a beautiful presentation, consider using a clear trifle bowl.
- Serving Suggestion: For the neatest slices, chill the cake in the freezer for about 30 minutes before cutting.
Instructions
-
In a large, chilled mixing bowl, beat the heavy cream, powdered sugar, and vanilla extract until stiff peaks form. This typically takes about 7-9 minutes using an electric mixer. Be careful not to overmix.
-
Arrange a single layer of Double Stuffed Oreos in the bottom of a 13×9 inch pan or 3-quart dish. Break cookies as needed to fill gaps. Spread approximately half of the whipped cream evenly over the cookies.
-
Repeat the layering: add another layer of Oreos, followed by the remaining whipped cream. Finish with a smooth layer of cream on top. Cover the dish tightly with plastic wrap.
-
Refrigerate for at least 6 hours, or preferably overnight, to allow the cookies to soften and the flavors to meld. (See notes for a quicker version).
-
Before serving, top with crushed Oreos, chocolate chips, caramel drizzle, or chopped nuts as desired. For cleaner slices, chill the cake in the freezer for 30 minutes before cutting.
Nutrition Information
Calories: 497cal |
Carbohydrates: 56g |
Protein: 5g |
Fat: 30g |
Saturated Fat: 14g |
Trans Fat: 1g |
Cholesterol: 54mg |
Sodium: 362mg |
Potassium: 193mg |
Fiber: 2g |
Sugar: 32g |
Vitamin A: 585IU |
Vitamin C: 1mg |
Calcium: 42mg |
Iron: 7mg
Tried this Recipe? Pin it for Later!Follow on Pinterest @AmandasCookin or tag #AmandasCookin!
The recipes on this blog are tested with a conventional gas oven and gas stovetop. It’s important to note that some ovens, especially as they age, can cook and bake inconsistently. Using an inexpensive oven thermometer can assure you that your oven is truly heating to the proper temperature. If you use a toaster oven or countertop oven, please keep in mind that they may not distribute heat the same as a conventional full sized oven and you may need to adjust your cooking/baking times. In the case of recipes made with a pressure cooker, air fryer, slow cooker, or other appliance, a link to the appliances we use is listed within each respective recipe. For baking recipes where measurements are given by weight, please note that results may not be the same if cups are used instead, and we can’t guarantee success with that method.
This post originally appeared here on May 1, 2018 and has since been updated with new photos and expert tips to provide the most comprehensive guide to your new favorite no-bake dessert!
