Spooktacular Halloween Oreo Truffles: 3 Easy & Delicious Ways
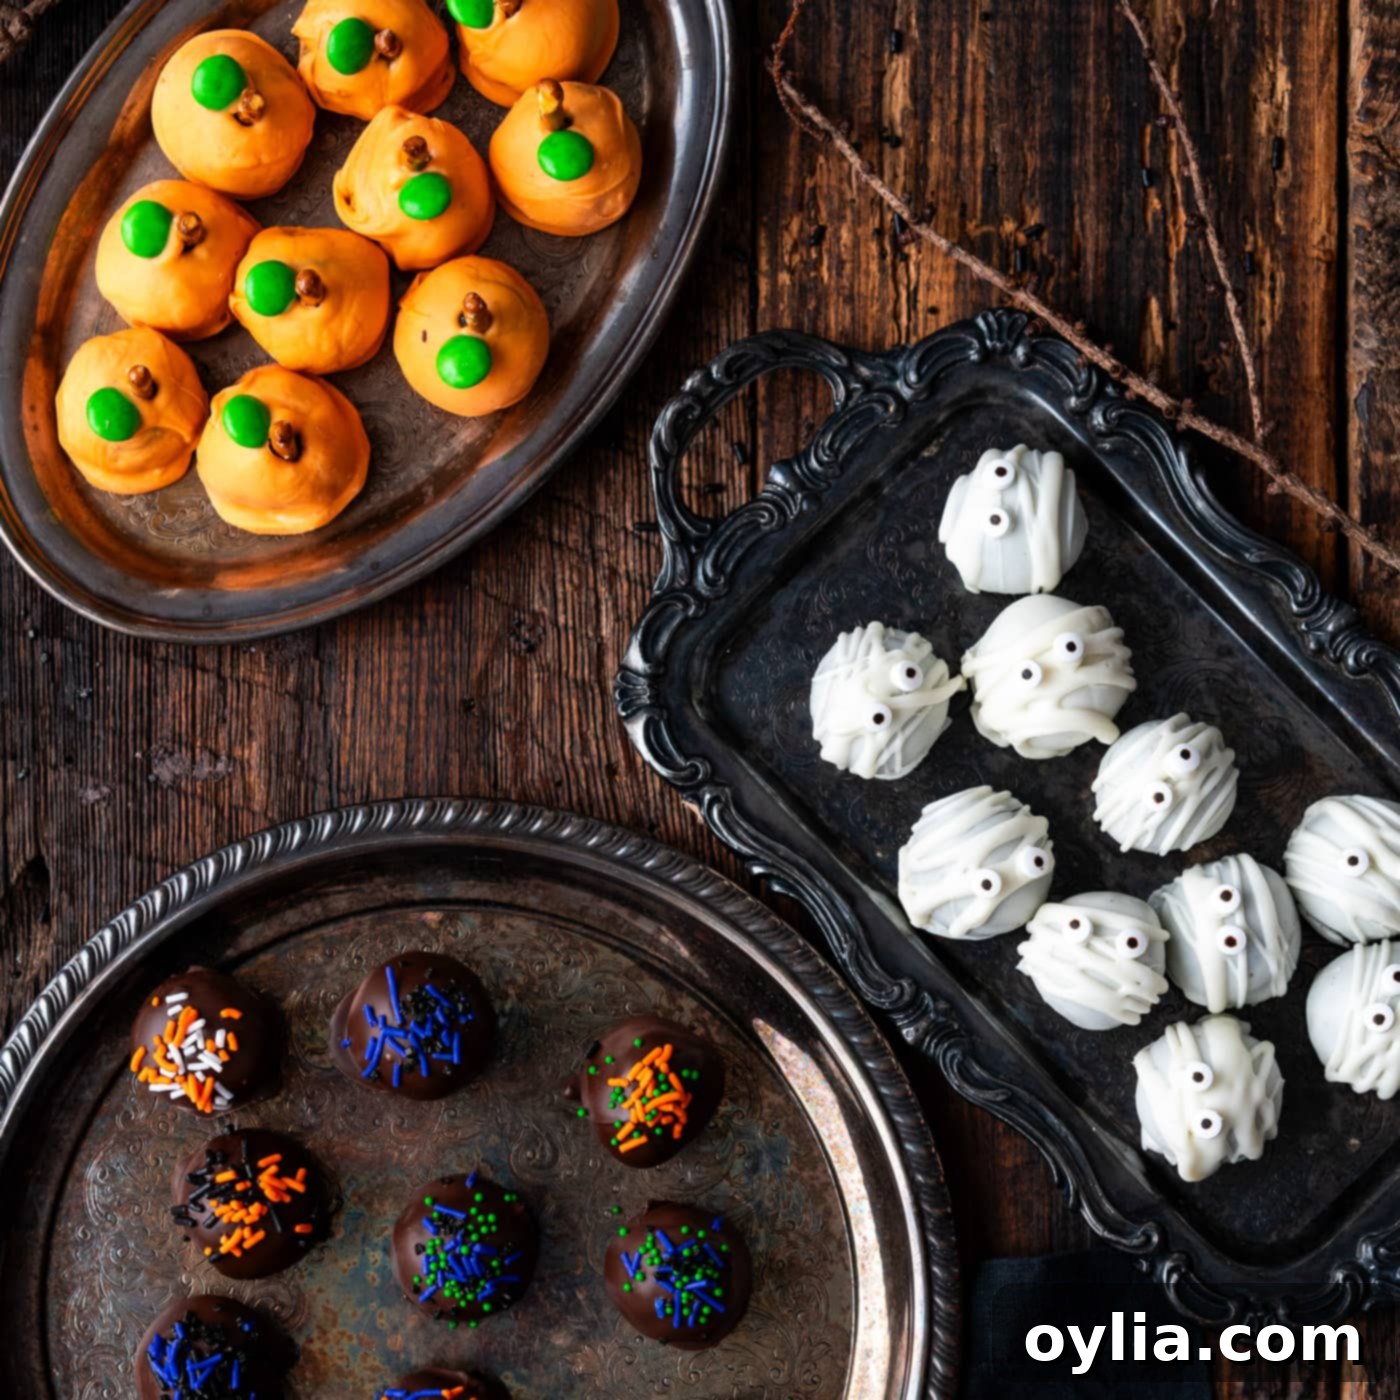
Prepare to delight your taste buds and impress your guests with these incredibly easy Halloween Oreo truffles! Whether you’re hosting a grand Halloween bash or simply enjoying a cozy night in, these festive treats are perfectly designed for the spooky season. We’re showing you how to dunk, decorate, and devour these delectable no-bake delights in three distinct and enchanting ways: creepy mummies, charming pumpkins, and classic Halloween sprinkle-garnished truffles. Get ready to add a touch of magic (and a whole lot of deliciousness) to your Halloween festivities!
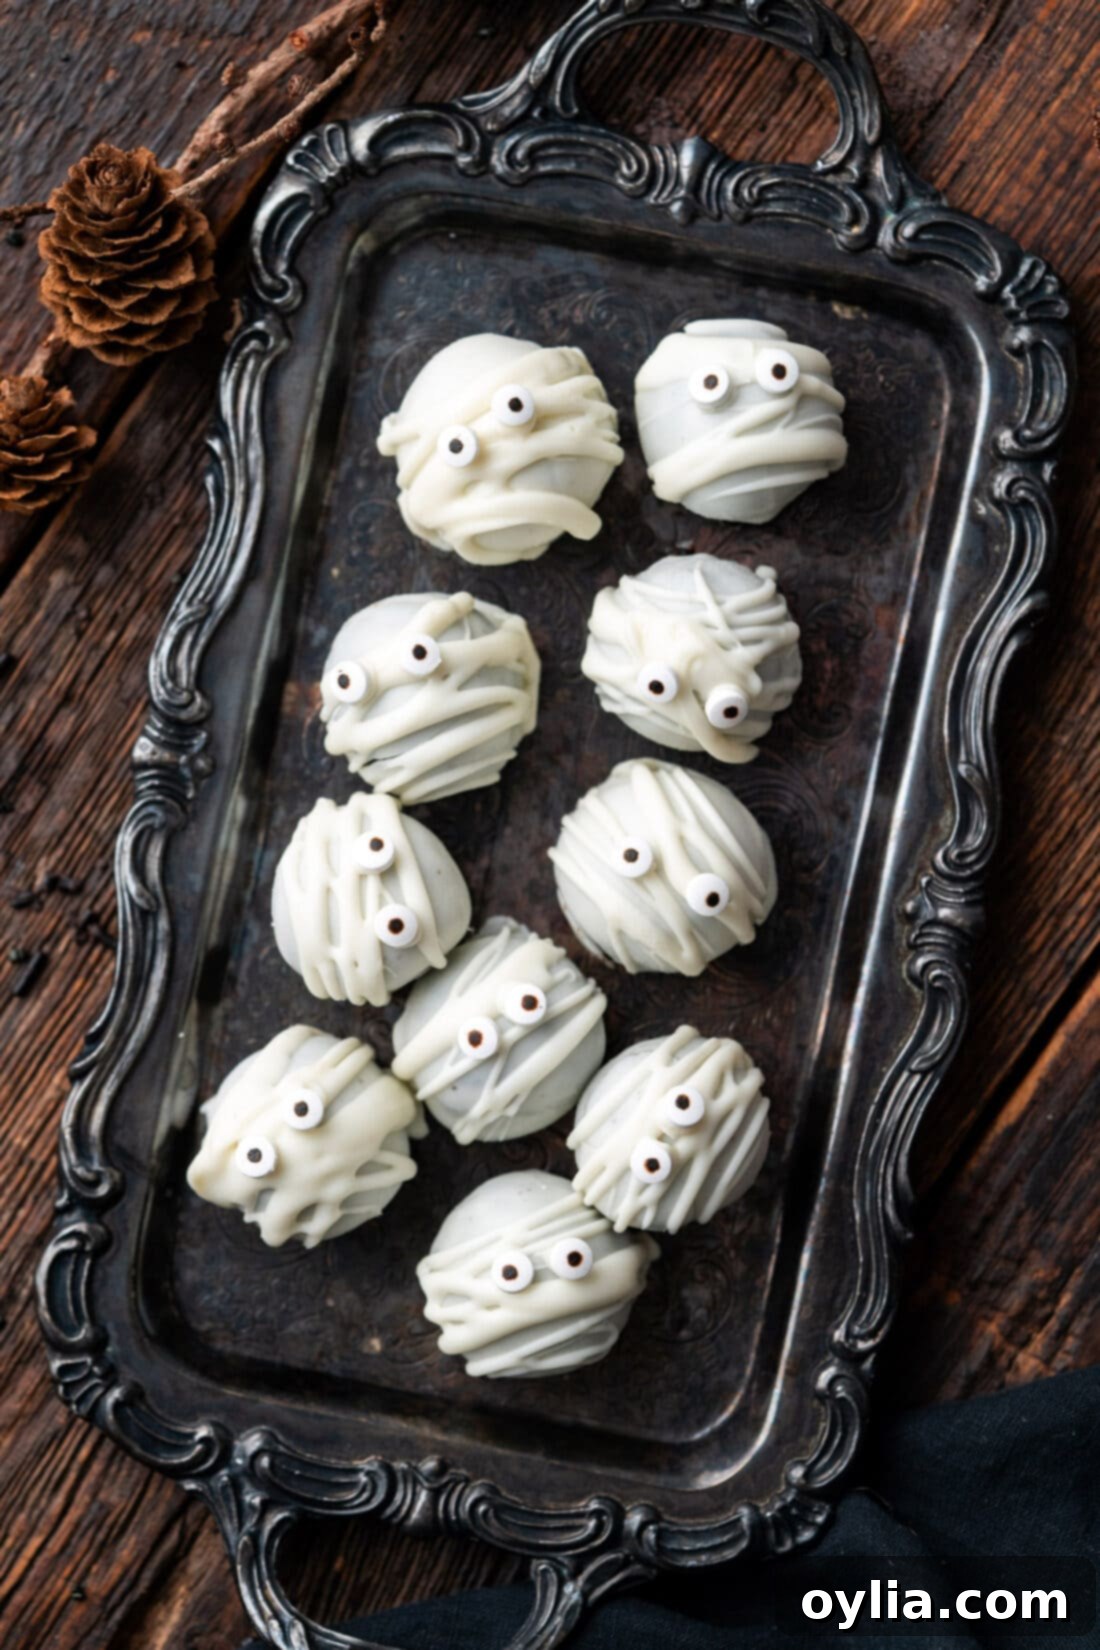
Why These Easy Halloween Oreo Truffles are a Must-Make
These Halloween Oreo truffles are not just delicious; they are incredibly simple to make, highly customizable, and a guaranteed crowd-pleaser for all ages. We’ve crafted three distinct designs—creepy mummies, cute pumpkins, and vibrant sprinkle-decorated truffles—so you can pick your favorite or create an entire assortment for a truly show-stopping display. These spooky yet utterly adorable little bites will undoubtedly become the star of your Halloween party spread. The best part? They require absolutely no baking, making them a stress-free option for busy October days.
Oreo truffles are a perennial favorite, celebrated for their simplicity and versatility. They are among the best desserts to prepare for any holiday, special occasion, or even for matching color themes for sports teams or birthday parties. The basic recipe calls for just three core ingredients: cream cheese, Oreo cookies, and melted chocolate. This simple foundation allows for endless creative possibilities when it comes to decoration, making them a perfect canvas for Halloween fun. Their no-bake nature means less time in the kitchen and more time enjoying the festivities!
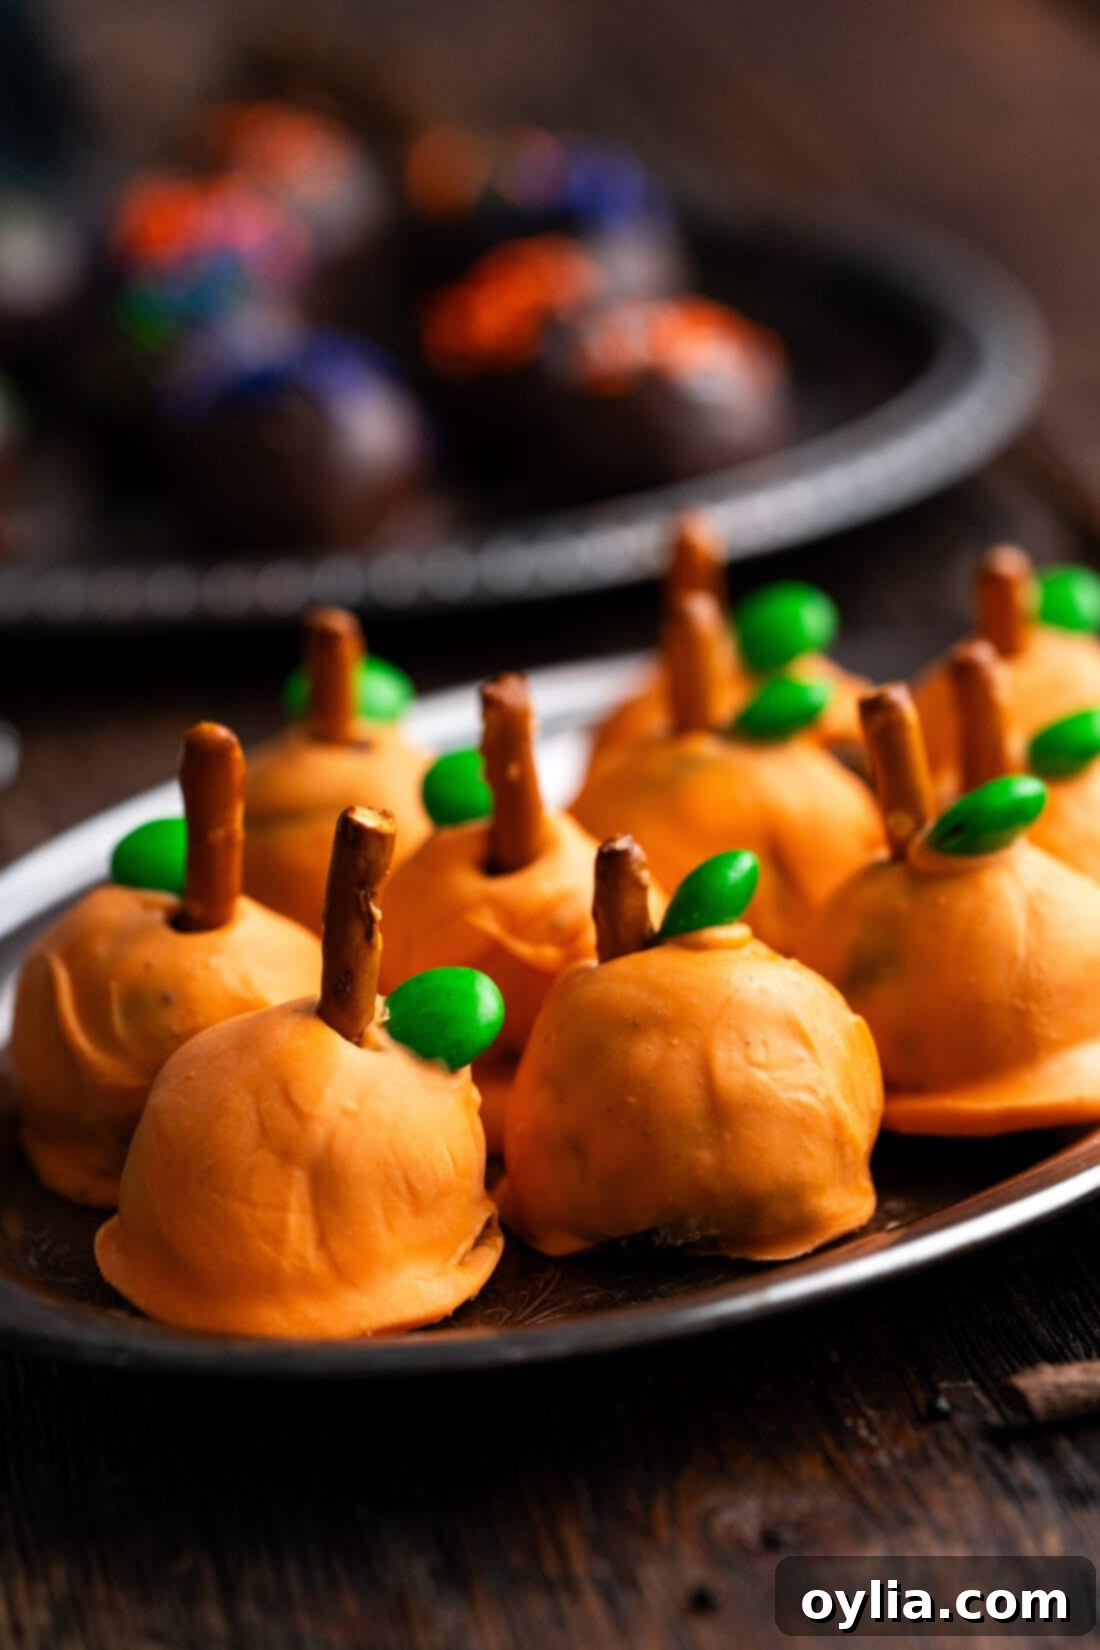
Key Ingredients for Spooky Oreo Truffles
To get started on these enchanting Halloween treats, you’ll need just a few simple ingredients. Find all precise measurements and detailed instructions in the printable recipe card at the conclusion of this post. For now, let’s dive into the essential components that make these Oreo truffles so irresistible.
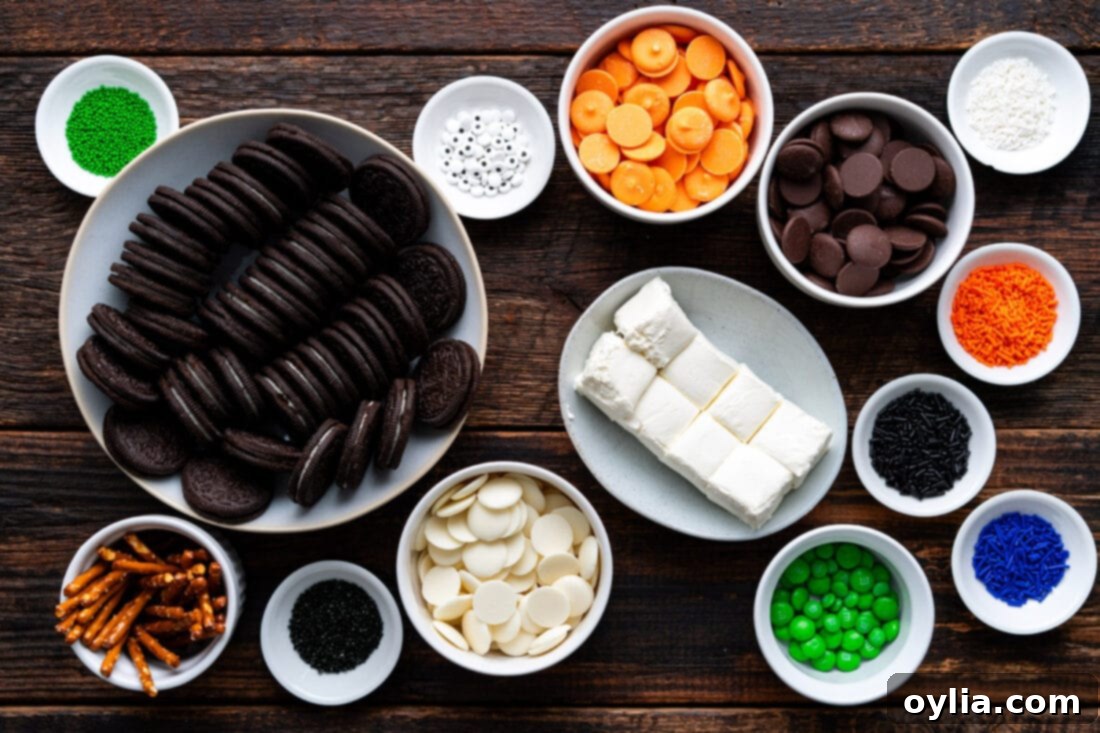
Ingredient Spotlight & Expert Substitution Tips
Understanding each ingredient’s role and knowing possible substitutions will ensure your Halloween Oreo truffles turn out perfectly every time. Here’s a closer look:
OREOS: You will need 36 regular Oreo sandwich cookies, and yes, the creamy white filling is essential! The filling adds crucial moisture to the truffle mixture, helping it bind together into a smooth, delectable “dough.” While classic Oreos provide that signature dark chocolate flavor, feel free to experiment! Golden Oreos can create a different base flavor, or you could try seasonal varieties like pumpkin spice Oreos for an extra festive touch. Just make sure they are regular, not double-stuffed, as the ratio of filling to cookie crumb is important for consistency.
CREAM CHEESE: This is the magical binder that transforms crushed Oreos into a rich, truffle-like consistency, while also contributing a delightful tang that balances the sweetness of the cookies and chocolate. For the best results, always start with room temperature cream cheese. Cold cream cheese will not blend smoothly, leading to lumps in your mixture. To properly soften it, simply cut the block of cream cheese into cubes and let it rest on your countertop for about 30-45 minutes. This ensures it incorporates seamlessly with the Oreo crumbs.
CHOCOLATE (Melting Wafers & Coatings): For a smooth, easy-to-work-with coating that sets beautifully, we highly recommend Ghirardelli semi-sweet or white chocolate melting wafers. These are specifically designed for melting and coating, providing a glossy finish without tempering. If melting wafers aren’t available, you can use high-quality baking chocolate bars, chopped finely. While chocolate chips will work in a pinch, be aware that they contain stabilizers that can prevent them from melting as smoothly as wafers or baking bars, especially white chocolate chips, which are prone to seizing when heated. For the vibrant orange pumpkins, orange melting wafers are ideal. They can sometimes be a bit thicker and harder to work with than white or standard chocolate wafers. If your orange coating feels too thick, simply add a small amount of shortening or coconut oil (about 1 teaspoon per 8 ounces of melting wafers) to thin it out to the desired consistency. Alternatively, you can tint melted white chocolate with a few drops of orange gel food coloring for a similar effect, avoiding liquid food coloring as it can cause the chocolate to seize.
Step-by-Step Guide: Crafting Your Halloween Oreo Truffles
These step-by-step photos and detailed instructions are designed to help you visualize each stage of the recipe. For the complete printable version, including all measurements and instructions, you can Jump to the Recipe Card at the bottom of this post.
Preparing the Oreo Truffle Base
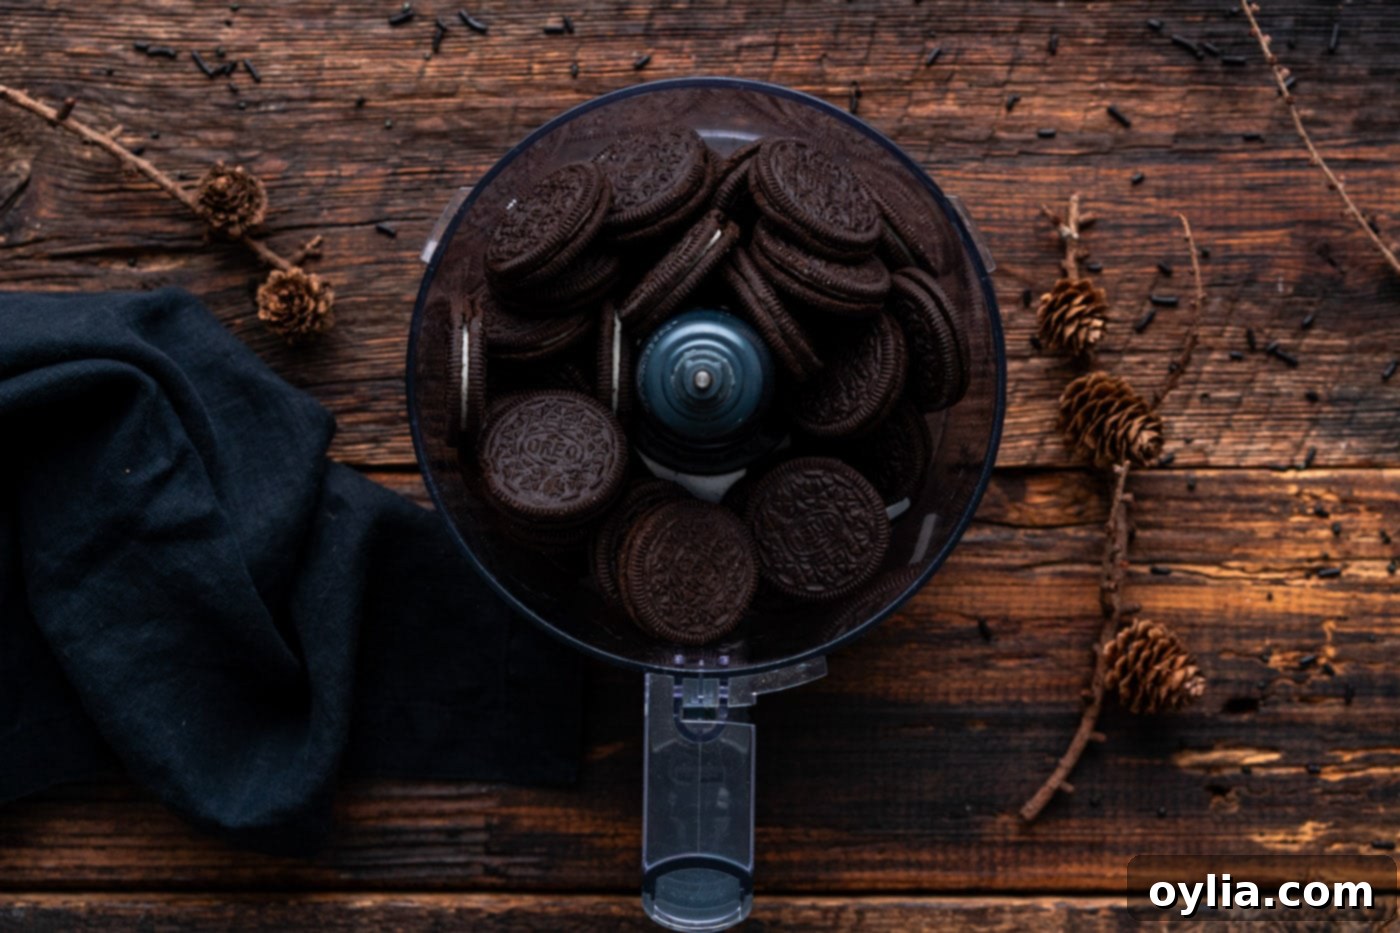
- **Crush the Oreos:** Place all 36 Oreo cookies (filling included) into the bowl of a food processor. Pulse until the cookies are finely pulverized into small, even crumbs. This is key for a smooth truffle texture.

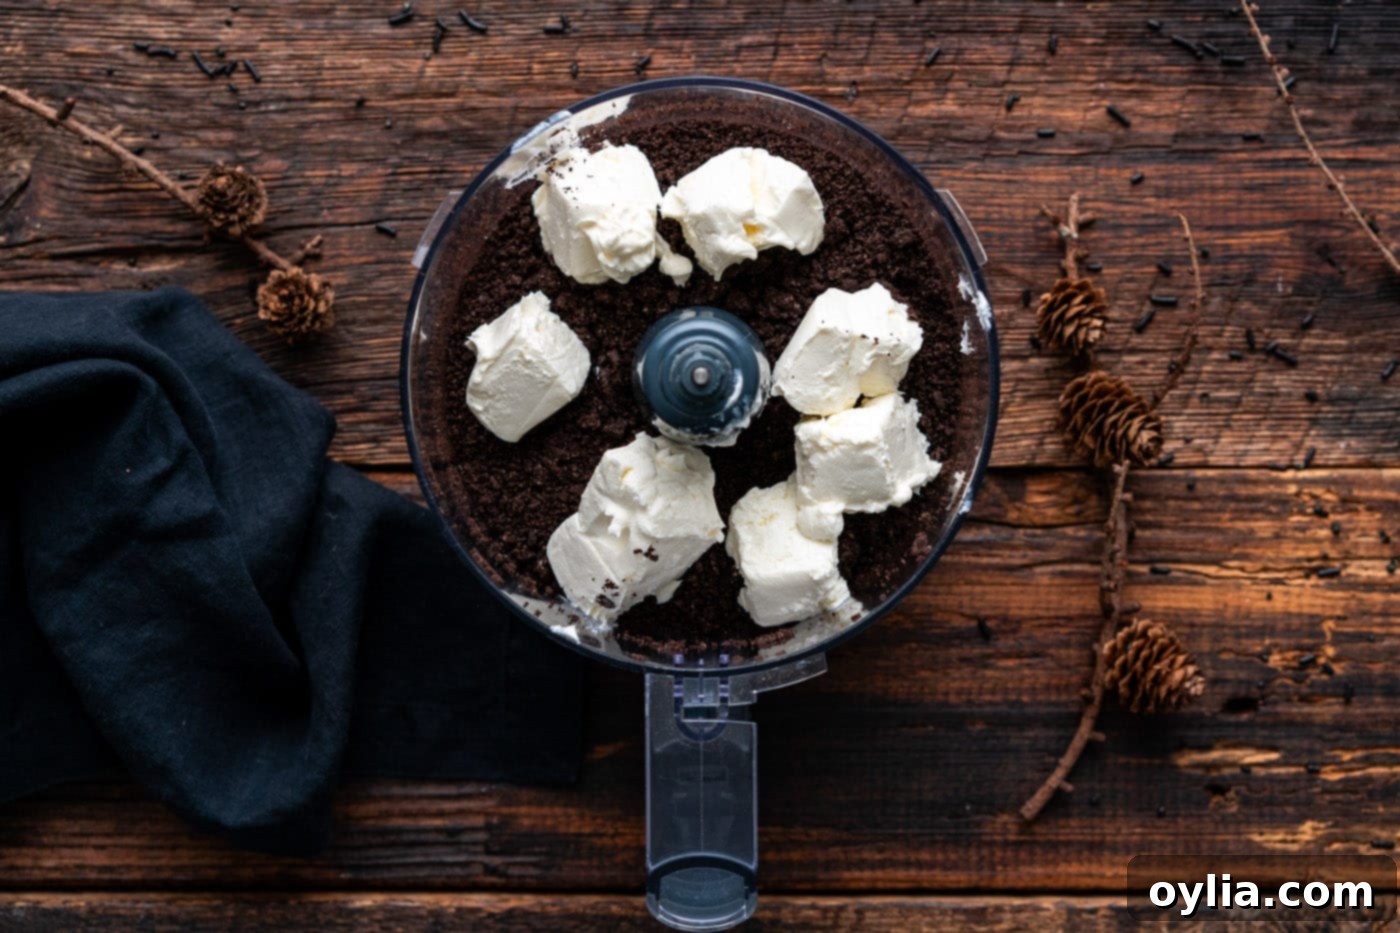
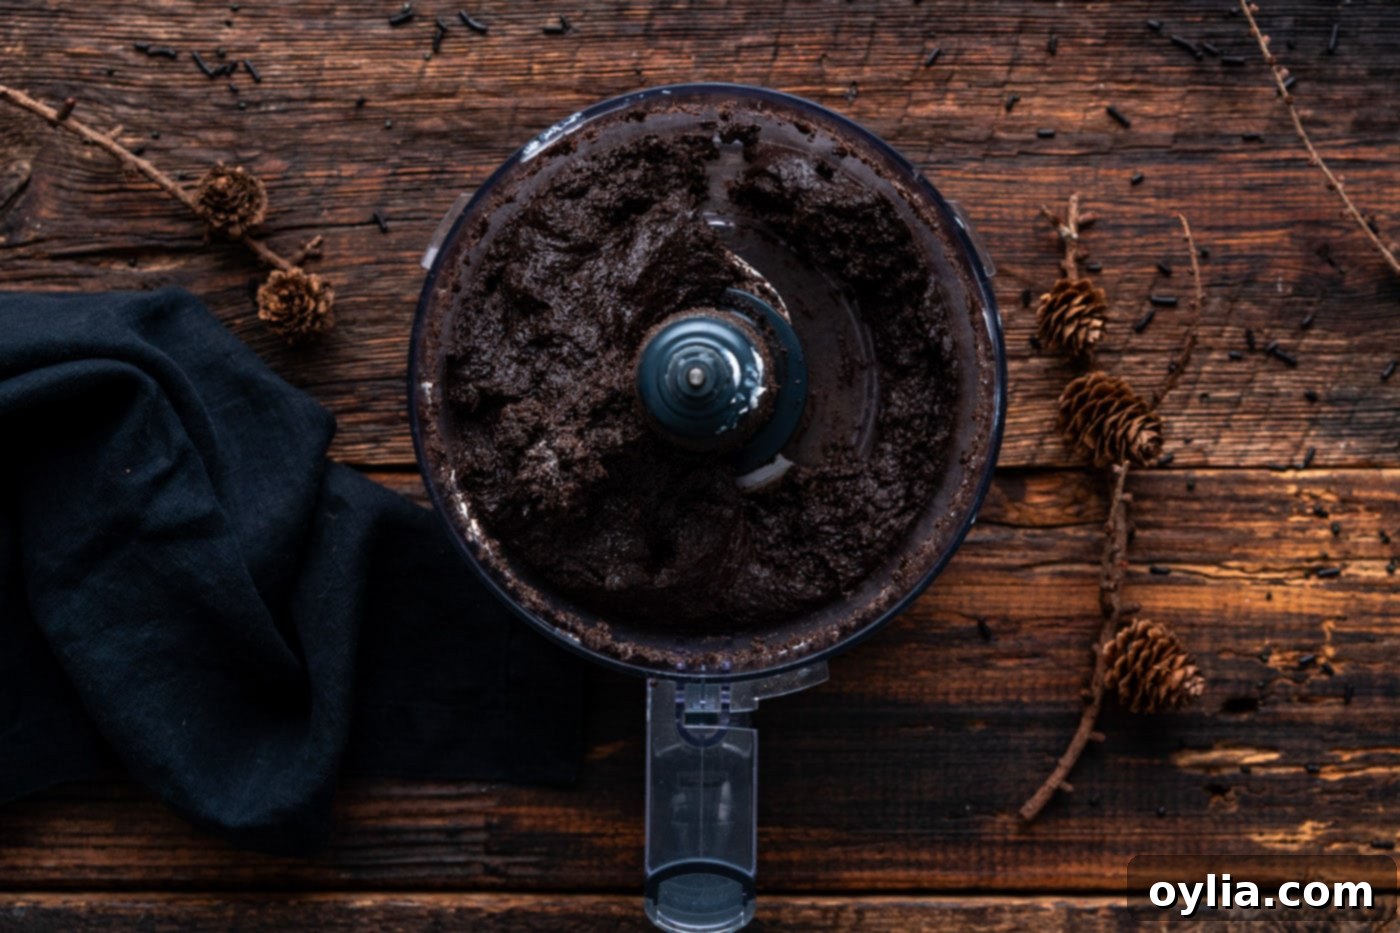
Finely crushed Oreos, ready for the next step. - **Combine with Cream Cheese:** Add the softened, room temperature cream cheese to the food processor with the Oreo crumbs. Process again until the mixture is thoroughly combined, resembling a thick, cohesive “dough” that clumps together. There should be no visible cream cheese streaks.

Adding the cream cheese to the crushed Oreos. 
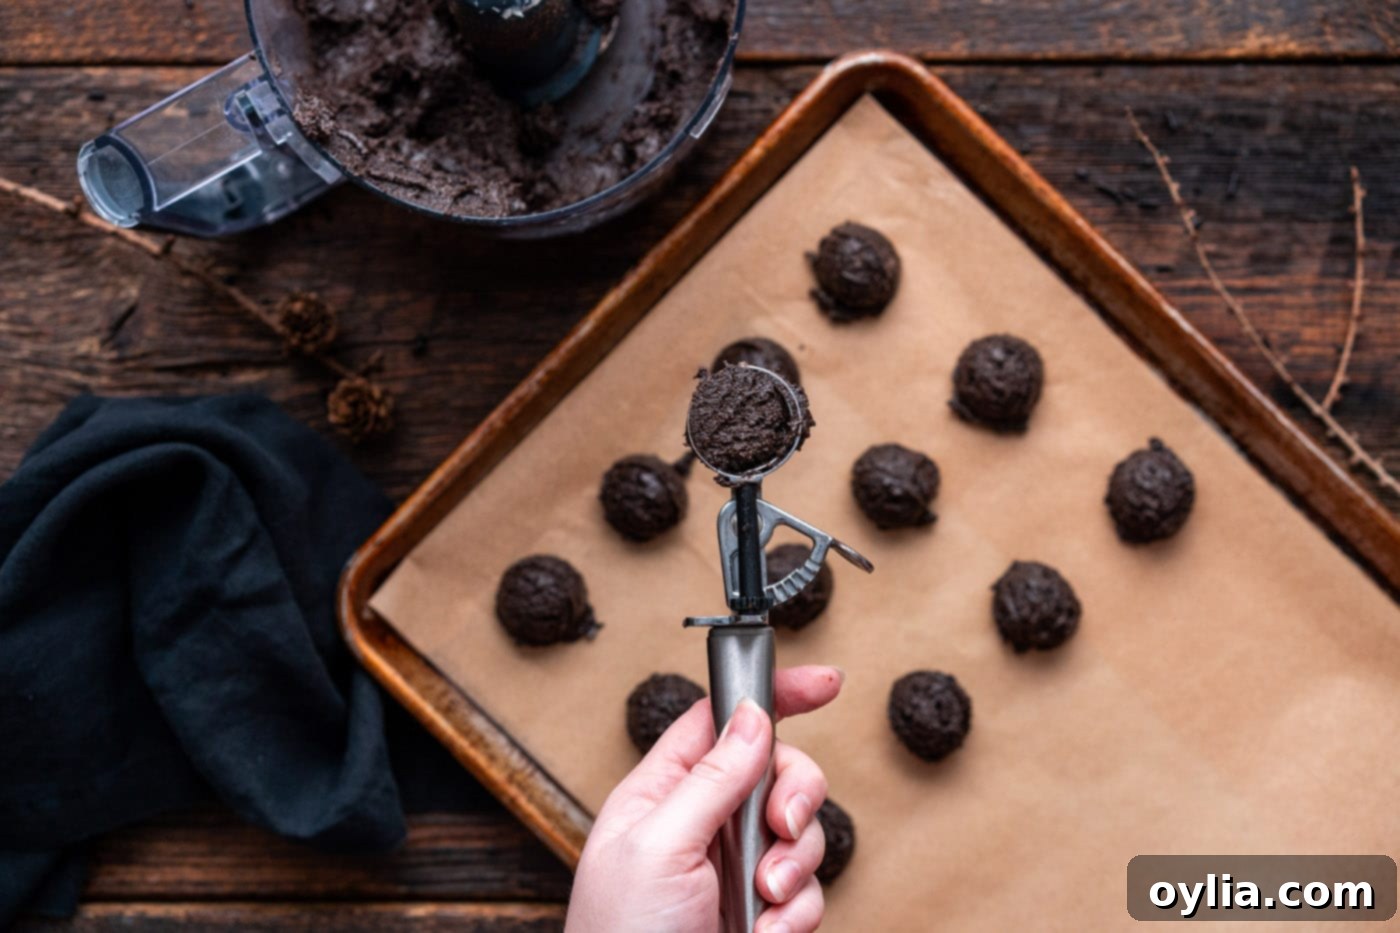
The perfectly combined Oreo truffle dough. - **Scoop the Balls:** Using a 1-tablespoon sized scoop, portion out uniform balls of the mixture. Place each scooped ball onto a baking sheet lined with parchment paper. This ensures they won’t stick and makes for easier handling.

Scooping the truffle mixture for even portions. - **Initial Chill:** Transfer the baking sheet with the scooped truffle balls to the freezer for a quick chill of about 10 minutes. This helps to firm up the dough slightly, making it easier to roll and shape.
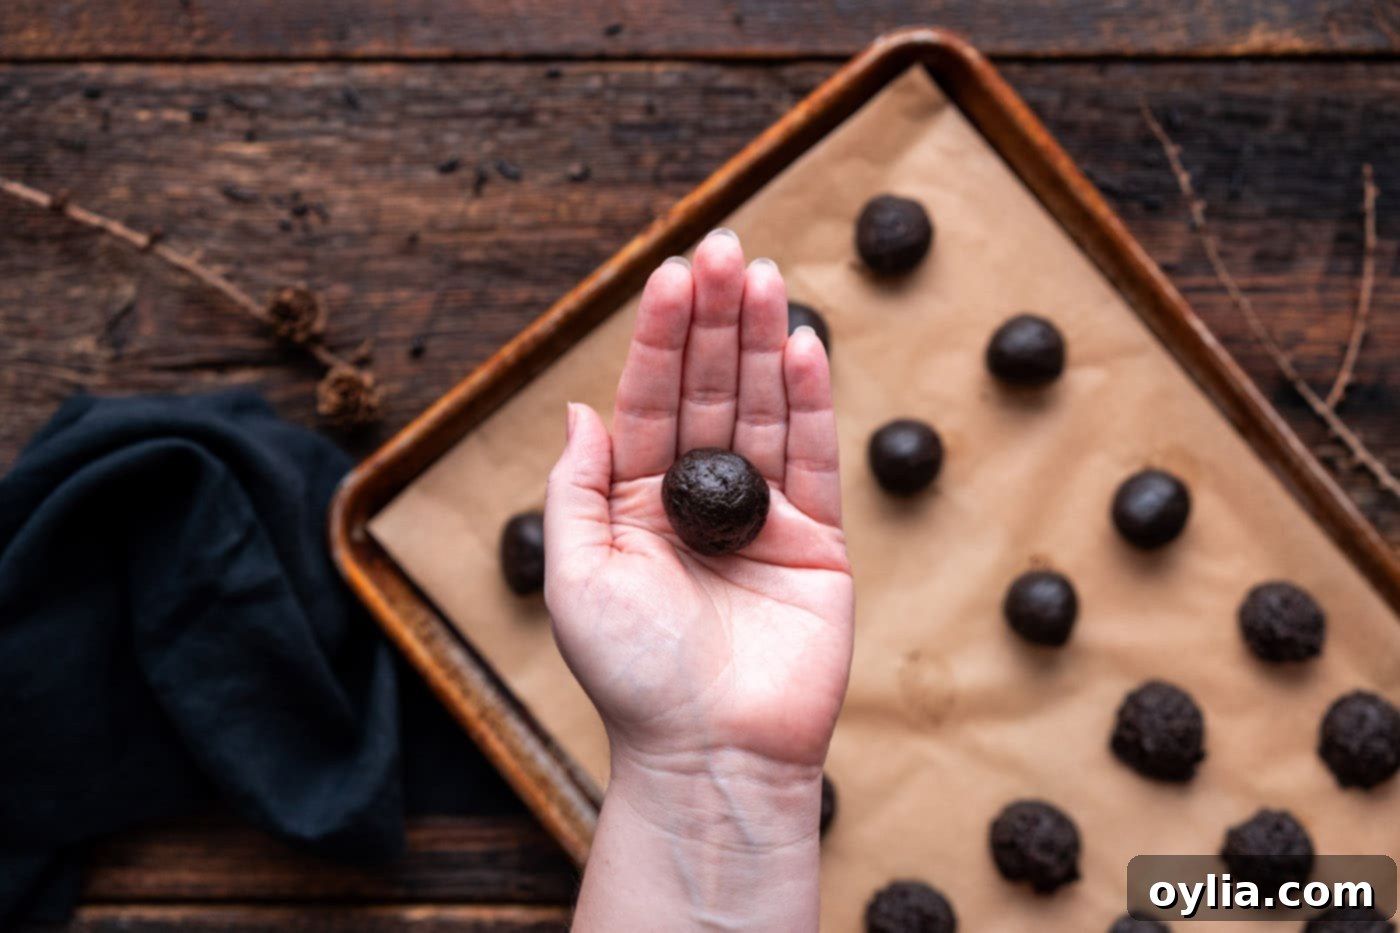
- **Roll and Chill Again:** Once slightly firm, roll each ball between the palms of your hands to form perfectly smooth, round spheres. This step creates a beautiful, professional finish. Return the tray to the freezer for an additional 10 to 15 minutes, or place them in the refrigerator for about 30 minutes, until they are firm enough for dipping. This firming process is crucial for preventing them from falling apart in the warm chocolate.

Rolling the truffle balls into smooth spheres.
Crafting Spooky Mummy Oreo Truffles
These adorable mummy truffles are surprisingly simple to create and bring a delightful, eerie charm to your Halloween spread. They feature a crisp white chocolate coating, adorned with whimsical white chocolate “bandages” and expressive candy eyes.
- **Melt White Chocolate (First Batch):** Place 8 ounces of white melting wafers into a microwave-safe bowl. Heat in 30-second intervals, stirring thoroughly after each burst, until the wafers are completely melted and perfectly smooth. Avoid overheating to prevent seizing.
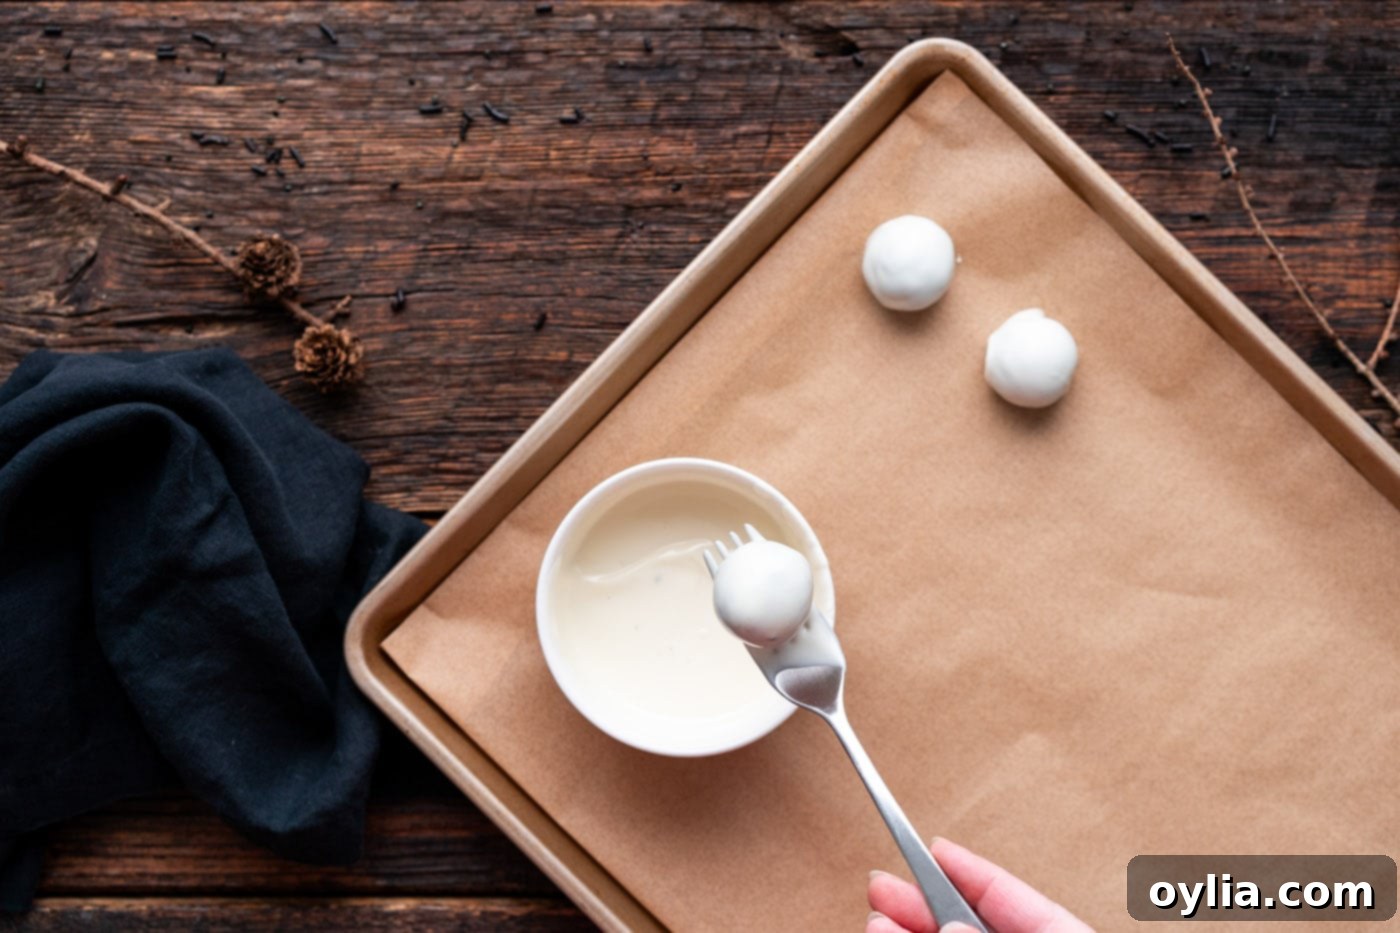
- **Dip the Truffles:** Working with one chilled Oreo ball at a time, gently dip it into the melted white candy. Turn it carefully to ensure it’s completely coated. Use a fork to lift the truffle out, tapping gently against the side of the bowl to remove any excess coating. Immediately place the coated truffle onto a clean parchment paper-lined baking sheet. Continue this process until all the truffles designated for mummies are coated.

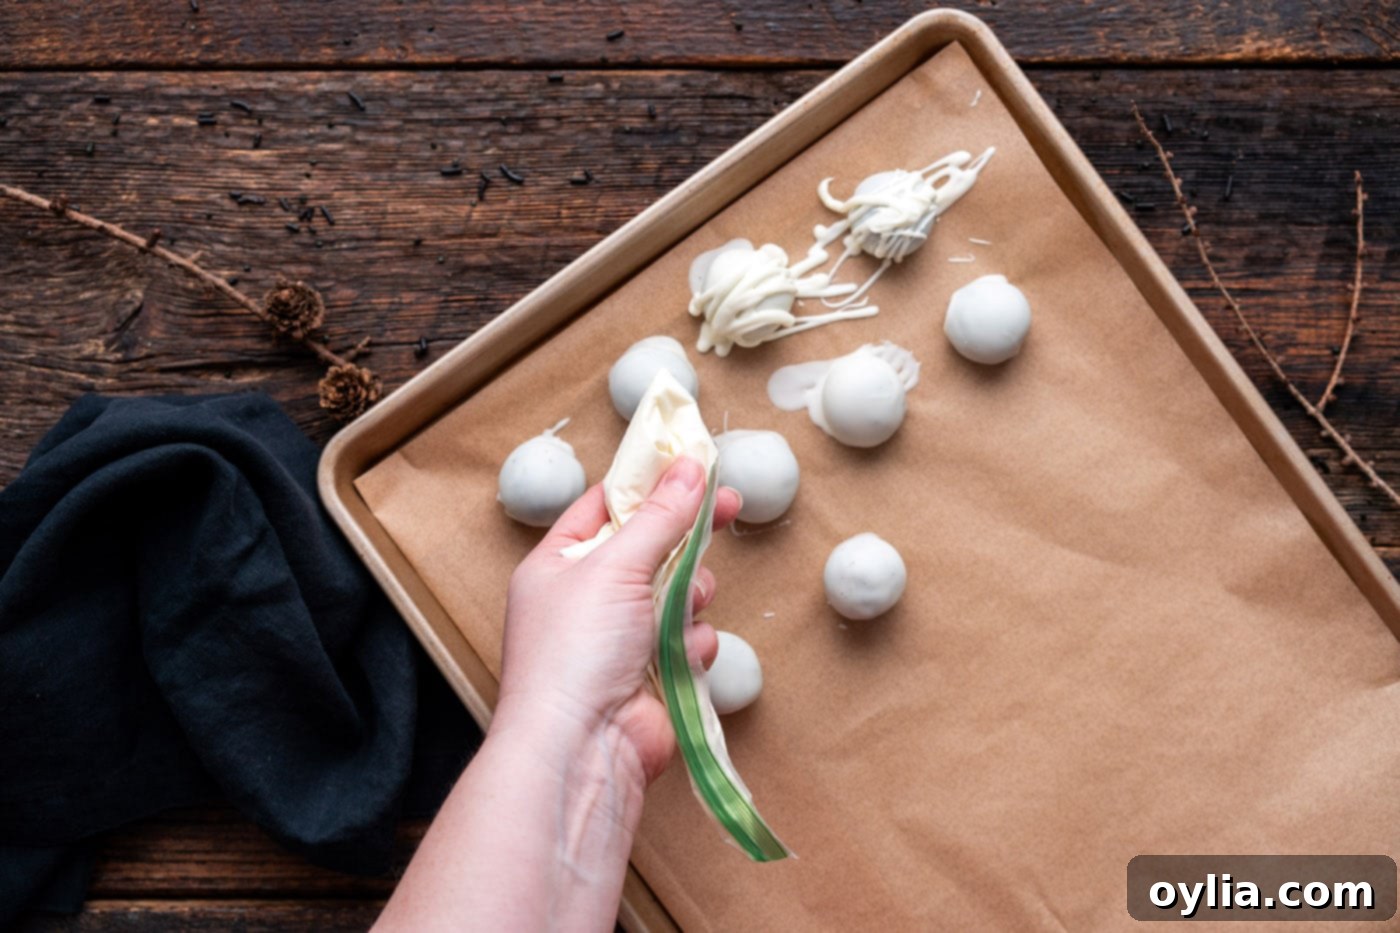
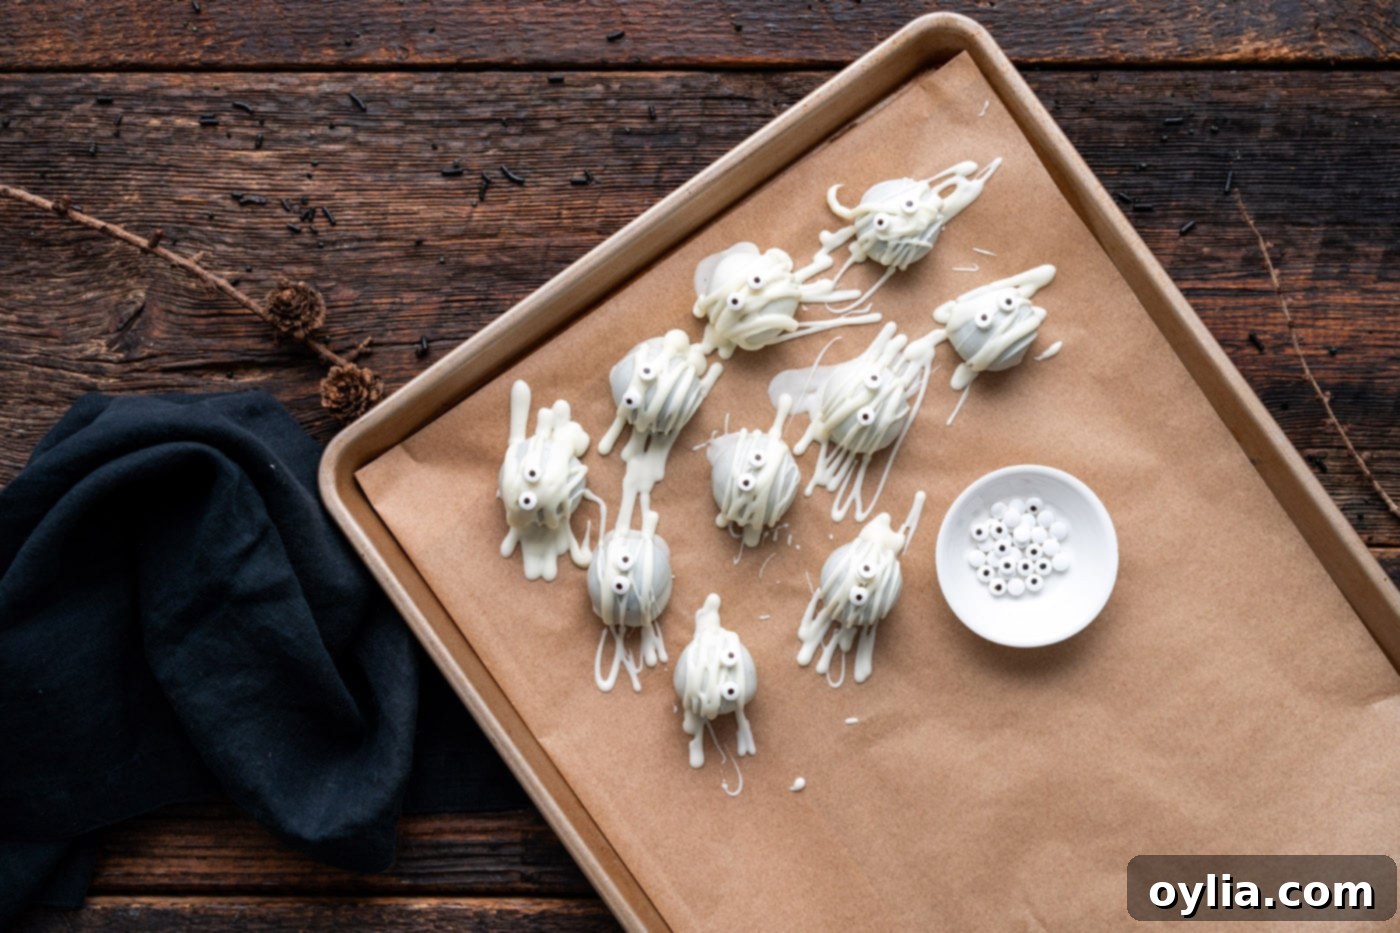
Dipping the truffle base into white melting wafers. - **Add Mummy Bandages & Eyes:** Melt the remaining 2 ounces of white melting wafers using the same microwave method. Transfer this melted candy to a small zip-top bag and snip off a tiny corner. Working quickly with one mummy truffle at a time, drizzle the melted white candy back and forth across the truffle in a zig-zag pattern to create the look of mummy bandages. Immediately place 2 small candy eyes onto the truffle while the “bandages” are still wet, so they adhere properly.

Drizzling white chocolate for the mummy effect. 
Finished Mummy Truffles, ready to stare at your guests! - **Repeat:** Continue this delightful process until all your mummy truffles are complete. Allow them to set completely before serving or storing.
Creating Adorable Pumpkin Oreo Truffles
These festive pumpkin truffles are bursting with autumnal charm, featuring a vibrant orange coating, a pretzel stick “stem,” and a cute green M&M “leaf.” They’re a perfect homage to the season’s most iconic symbol!
- **Melt Orange Chocolate:** Place the orange melting wafers in a microwave-safe bowl. Heat them in 30-second increments, stirring diligently after each interval, until the wafers are fully melted and smooth. Remember our tip about adding a touch of shortening or coconut oil if the orange melts are too thick.
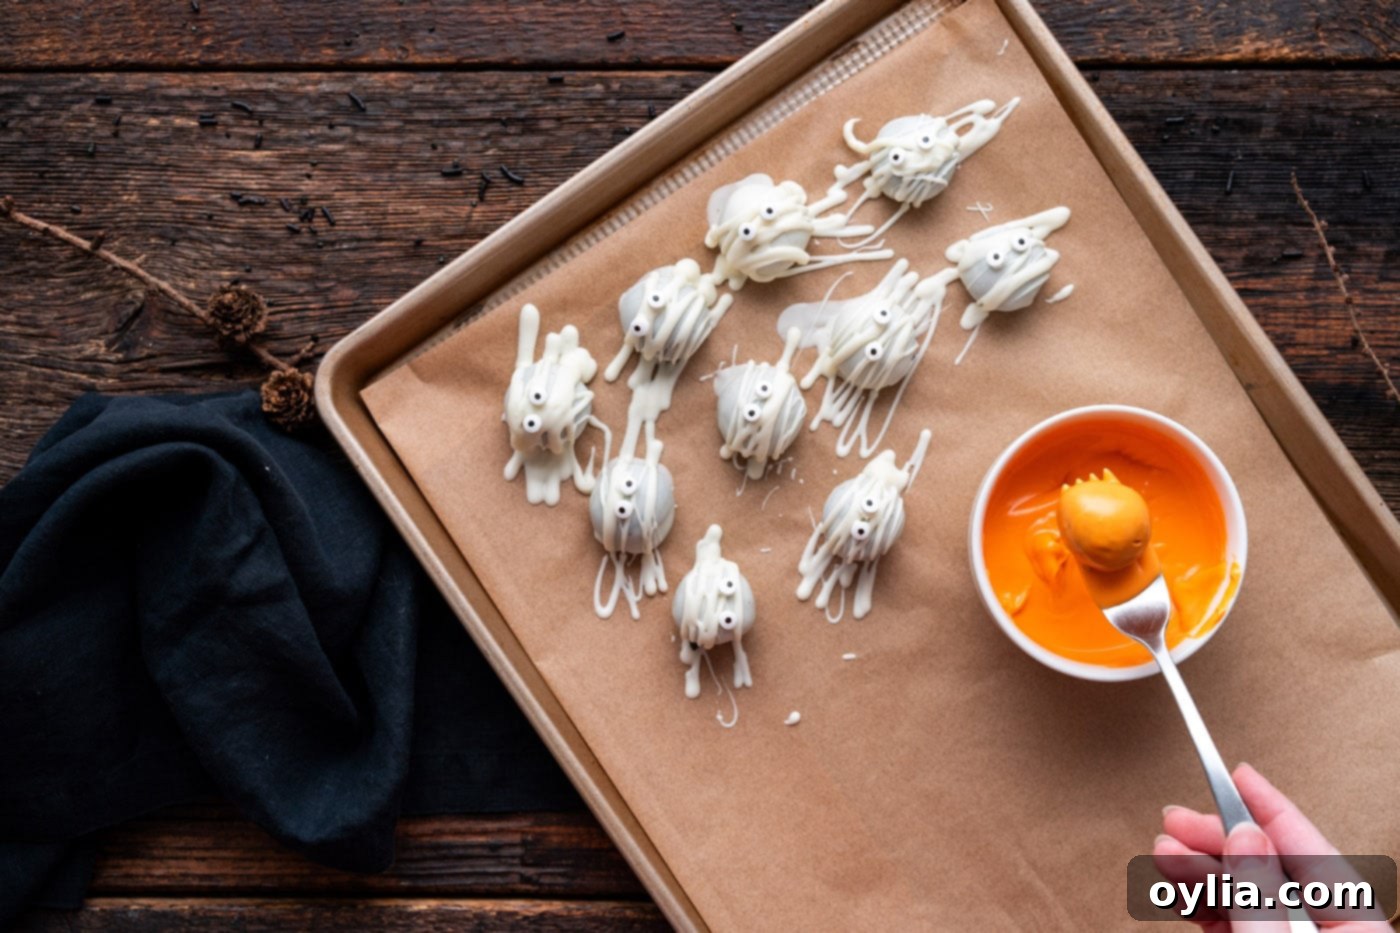
- **Dip and Decorate Instantly:** Working with one chilled Oreo ball at a time, dip the ball into the melted orange wafer, turning gently to ensure a complete and even coating. Lift it out with a fork, tapping off any excess. Immediately place the coated ball onto a parchment paper-lined baking sheet.

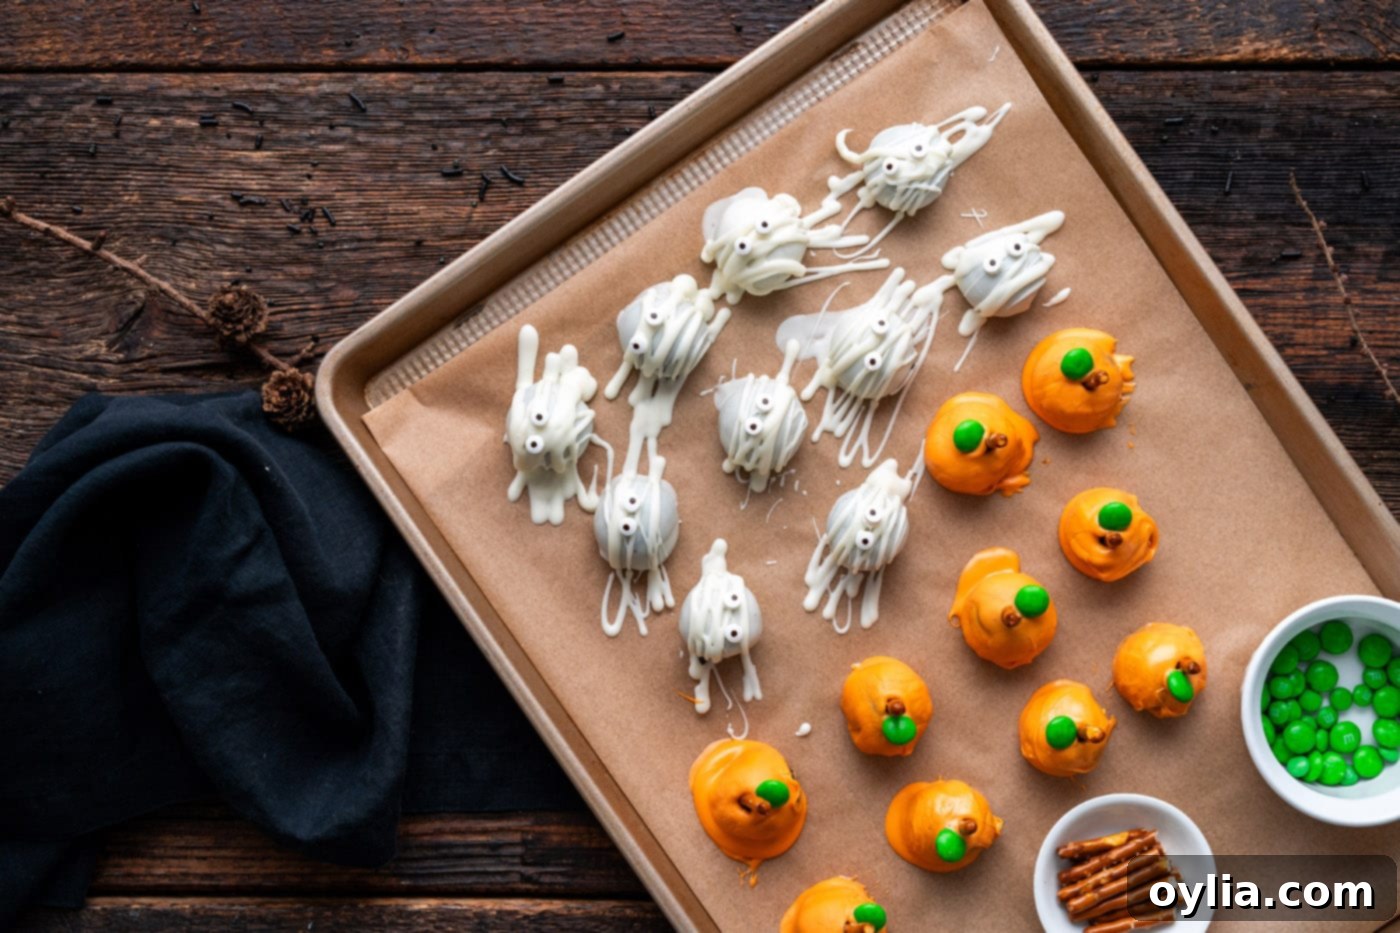
Dipping the truffle base into bright orange candy melts. - **Add Stem and Leaf:** As soon as the truffle is dipped and placed on the parchment paper (before the orange coating sets!), immediately insert half a small pretzel stick into the center of the truffle. Ensure a small portion of the pretzel sticks out, resembling a pumpkin stem. Right next to the pretzel stem, carefully place a green M&M to serve as a charming little leaf.
- **Finish the Batch:** Continue this quick dipping and decorating method until all your pumpkin truffles are complete. The quick setting time of the candy melts requires you to work efficiently for the best results.

A delightful array of both Pumpkin and Mummy Truffles.
Classic Halloween Sprinkle Truffles
For a simpler yet equally festive approach, these sprinkle-covered Halloween Oreo truffles are a fantastic choice. They offer a delightful crunch and a burst of color, making them perfect for any spooky celebration.
- **Melt Chocolate Coating:** Place 8 ounces of chocolate melting wafers into a microwave-safe bowl. Heat in 30-second increments, stirring well after each one, until the wafers are completely melted and smooth.
- **Dip and Sprinkle:** Working with one chilled truffle ball at a time, dip it into the melted chocolate, turning gently to coat entirely. Lift it out with a fork, tapping off any excess chocolate. Place the coated ball on a parchment paper-lined baking sheet.

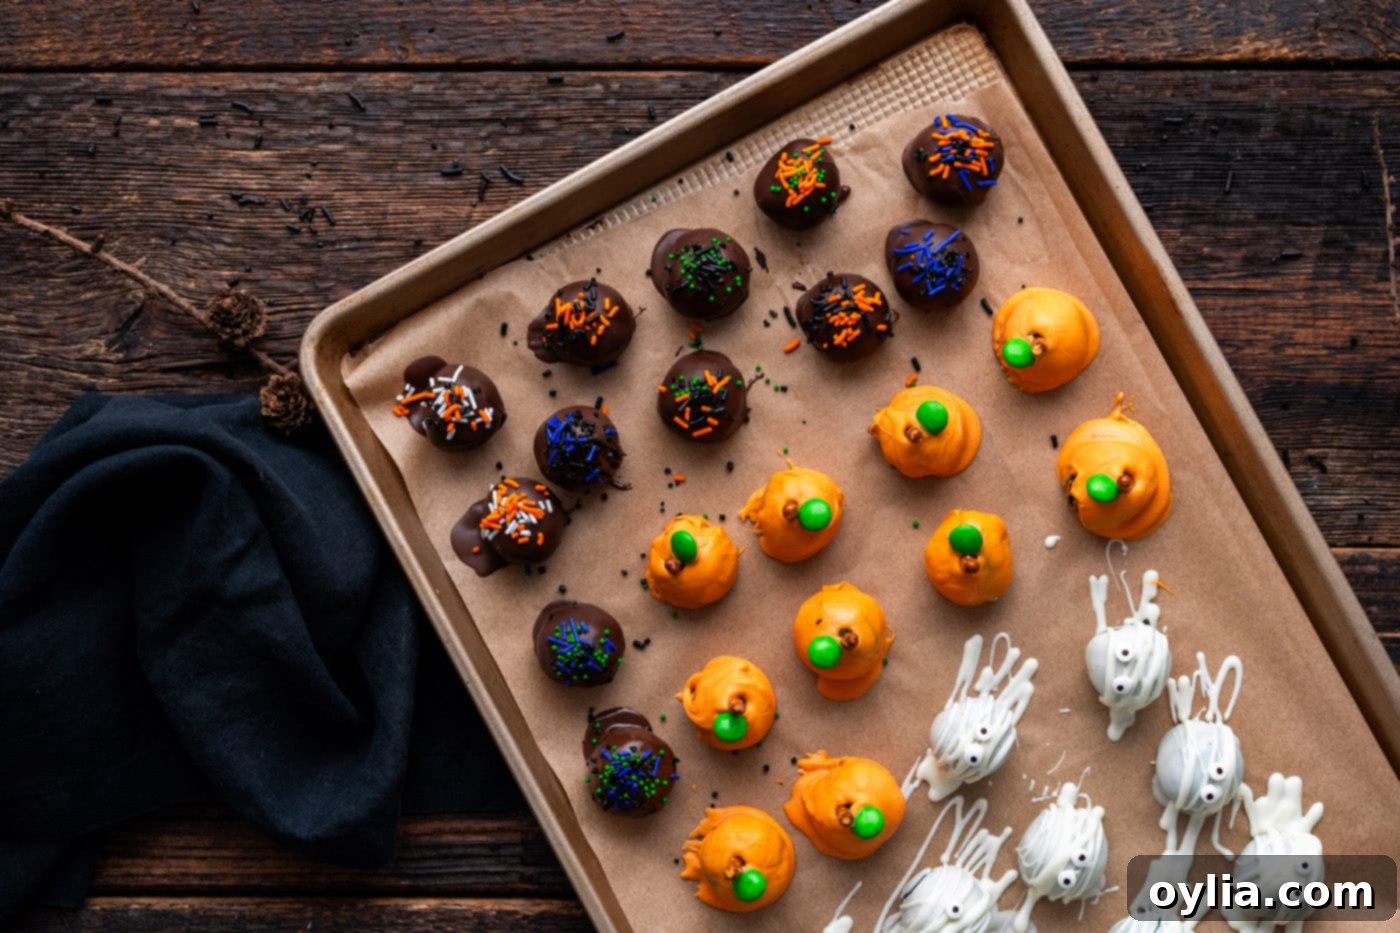
Dipping the truffle base into dark chocolate. - **Add Sprinkles Immediately:** Once coated, and before the chocolate sets, immediately top the truffle generously with your assorted Halloween sprinkles. This ensures the sprinkles adhere perfectly to the still-wet chocolate.

Generously applying Halloween sprinkles to the chocolate-coated truffles. - **Complete the Batch:** Continue this process until all the Halloween sprinkle truffles are made. Allow them to set completely before arranging on a platter.
Frequently Asked Questions & Expert Tips for Perfect Truffles
Due to the cream cheese content, these Halloween Oreo truffles must be refrigerated. Store them in an airtight container, preferably layered between pieces of parchment paper to prevent sticking and preserve their delicate decorations. When properly stored in the refrigerator, they will remain fresh and delicious for up to 2 weeks. It’s important to note that when removed from the fridge, they may develop some condensation on their surface. This is completely normal and will not affect the taste or texture of the truffles themselves; simply allow them to come closer to room temperature before serving if desired.
Absolutely, Oreo truffles are excellent for freezing, offering a convenient make-ahead option! You have two primary methods for freezing them: either without the chocolate coating or with the coating fully applied.
For freezing **without the coating**: Place the undecorated Oreo balls on a baking sheet and flash-freeze them until they are solid. This prevents them from sticking together. Once solid, transfer them to a large, freezer-safe zip-top bag or an airtight container, and they can be frozen for up to 3 months. When you’re ready to use them, thaw in the refrigerator and then proceed with dipping and decorating as instructed.
For freezing **with the chocolate coating**: Ensure the chocolate coating is completely set and hardened before carefully transferring the decorated truffles to a large zip-top bag or an airtight freezer-safe container. Freeze for up to 3 months. Be mindful when packing them to avoid damaging any delicate decorations like candy eyes or sprinkles. Thaw them slowly in the refrigerator before serving to minimize condensation and preserve their appearance.
Yes, these Halloween Oreo truffles are a fantastic make-ahead dessert! You can easily prepare them a day or two in advance. Once fully made and decorated, store them in an airtight container in the refrigerator until you are ready to serve. This allows you to tackle your party prep in stages and enjoy a stress-free celebration.
Seized chocolate often happens when even a tiny drop of water gets into the melted chocolate, or if it’s overheated. Unfortunately, once chocolate has seized (become grainy and thick), it’s very difficult to fully salvage for a smooth coating. To prevent this, ensure all your tools and bowls are completely dry, and melt gently in short intervals. If your candy melts are simply too thick (especially common with colored melts like orange), you can thin them out with 1 teaspoon of shortening or coconut oil per 8 ounces of wafers. Add it gradually, stirring well, until you reach your desired dipping consistency.
Using a 1-tablespoon cookie scoop is your best friend for uniform portions. After scooping, the initial chill helps to firm the mixture. When you roll them between your palms, apply gentle, even pressure and cup your hands to guide the mixture into a perfect sphere. Working quickly keeps the mixture from warming too much from your hands. If your hands get too warm, give them a quick rinse in cold water and dry thoroughly, or take a short break.
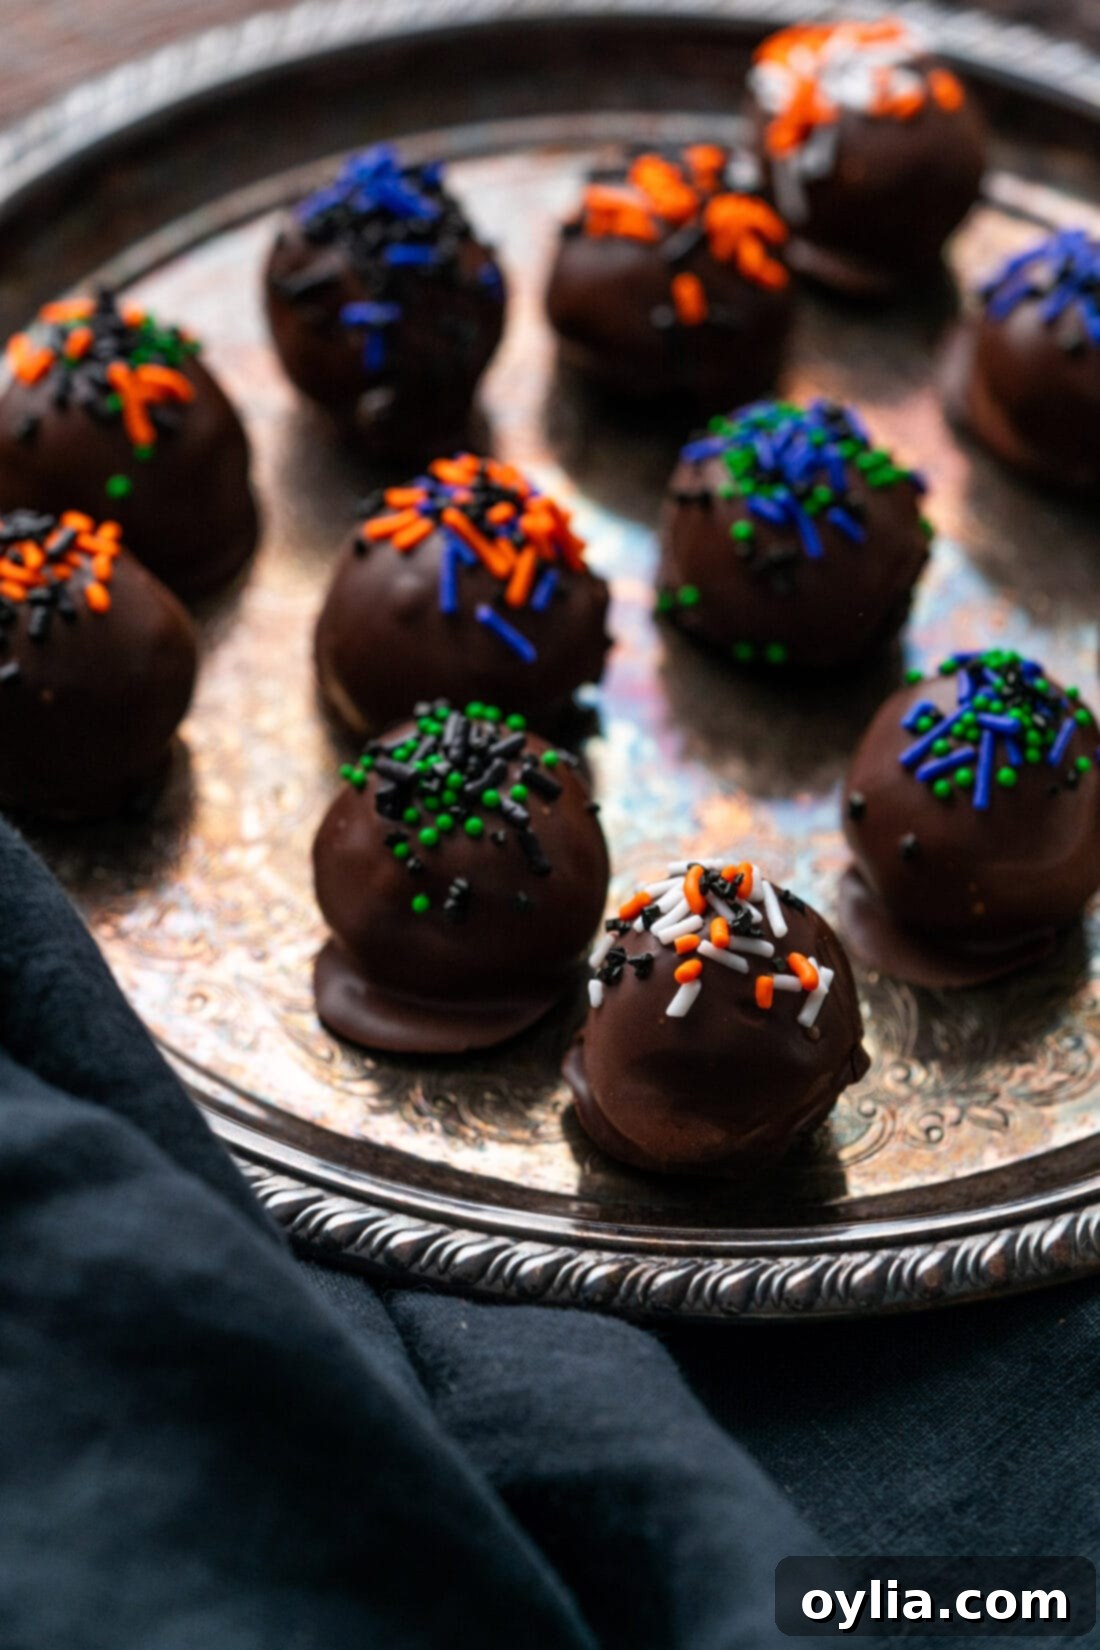
Creative Serving & Decorating Ideas
These Halloween Oreo truffles are an absolute joy to customize, allowing your creativity to shine! Beyond our three featured designs, there are countless ways to decorate them. Consider using various sizes of candy eyeballs for different expressions, or explore a wider range of Halloween-themed sprinkles like nonpareils, jimmies, or shaped candies. Drizzling purple, orange, or green melted candy wafers over plain truffles (or even over the chocolate-coated ones) can add another layer of festive color and design. You could even use edible markers for intricate details on white chocolate truffles!
A crucial tip for decorating: candy melting wafer coating hardens quite quickly. For the best adherence of sprinkles, eyes, or other adornments, I highly recommend decorating the truffles as you dip them. This ensures the decorations stick firmly to the still-wet coating. However, if you find that you’ve waited too long to add the mummy eyes, don’t despair! You can always dab a tiny bit of freshly melted candy onto the back of each eyeball (like edible “glue”) and then gently place them onto the set truffles.
For serving, arrange your masterpiece on a festive platter or showcase them on a tiered tray for an elegant presentation at Halloween parties. These truffles aren’t just for adult gatherings; they’d also be a wonderfully fun and engaging recipe to make with kids, friends, and family, creating lasting memories along with delicious treats!
More Spooky & Sweet Halloween Recipes to Try
Looking for more hauntingly good treats to complement your Oreo truffles? Here are some of our favorite Halloween recipes that are sure to add more fun and flavor to your celebrations:
- Monster Cupcakes – Adorable and easy to decorate!
- Halloween Dirt Cups – A classic kid-friendly dessert with a spooky twist.
- Witch Finger Cookies – Creepy, crunchy, and delicious.
- Halloween Candy Apples – A festive fall favorite for a reason.
- Cheese and Pretzel Broomsticks – A savory snack that’s both cute and clever.
- Mini Candy Corn Cheesecakes – Small, sweet, and perfectly themed.
I genuinely love to bake and cook, and my greatest pleasure is sharing my kitchen experiences and delicious recipes with all of you! Remembering to come back each day for new ideas can be tough, which is why I offer a convenient newsletter every time a new recipe is posted. Simply subscribe here and start receiving your free daily recipes directly in your inbox!

Halloween Oreo Truffles
IMPORTANT – There are often Frequently Asked Questions within the blog post that you may find helpful. Simply scroll back up to read them!
Print It
Pin It
Rate It
Save ItSaved!
Ingredients
- 36 Oreo cookies regular stuffed, filling included
- 8 ounces cream cheese softened at room temp
For Pumpkin Truffles
- 8 ounces orange melting wafers
- 5 small pretzel sticks each halved for a total of 10 sticks
- 10 green M&M’s
For Mummy Truffles
- 10 ounces white melting wafers divided into 8 ounces and 2 ounces
- 20 small candy eyeballs
For Halloween Sprinkle Truffles
- 8 ounces chocolate melting wafers
- assorted Halloween sprinkles in orange, green, purple, and white
Things You’ll Need
-
Food processor
-
Mixing bowls
-
1-tablespoon sized scoop
-
Parchment paper
Before You Begin & Expert Tips
- You will need 36 regular (not double stuffed) Oreo sandwich cookies, filling included. The filling lends essential moisture to the mixture. Feel free to substitute with golden Oreos or other flavors as you wish, ensuring they are regular-stuffed for consistency.
- Work in batches for coatings: If you melt all the melting wafers at the same time, they will likely harden before you’re done making the first type of truffles. To avoid this, focus on completing one type of truffle (e.g., all pumpkin truffles) before moving on to melting the next color of wafers.
- Decorate immediately: Candy melting wafer coating hardens quite quickly. For the best adherence of sprinkles, candy eyes, pretzel sticks, or M&Ms, I recommend decorating the truffles as you go, immediately after dipping.
- Mummy eye fix: If you do happen to wait too long to add the mummy eyes and the white coating has set, don’t worry! You can always add a tiny dot of freshly melted white candy on the back of each eyeball (acting as “glue”) and then gently place them on the truffles.
- Thinning orange candy melts: The orange candy melts can sometimes be a bit harder to work with than white or chocolate melting wafers, as they don’t always melt quite as smoothly. If your orange coating feels too thick, you can add a little bit of shortening or coconut oil (about 1 teaspoon per 8 ounces of melting wafers) to help thin it out to a dippable consistency.
- STORING: Store the Halloween Oreo truffles in an airtight container, layered between pieces of parchment paper to prevent sticking. They must be refrigerated due to the cream cheese content and will last for up to 2 weeks. Please note that condensation may form when truffles are removed from the refrigerator, but this will not affect their quality.
- Make-ahead friendly: You can absolutely prepare these truffles a day or two in advance. Store the finished, decorated truffles in the refrigerator in an airtight container until you are ready to serve them.
Instructions
Making the Truffle Base
-
Place the Oreos in the bowl of a food processor and pulverize into small, fine crumbs.
-
Add the softened cream cheese into the food processor, and process until the mixture is fully combined and clumps into a cohesive “dough.”
-
Use a 1-tablespoon sized scoop to make uniform balls of the mixture, and place each ball on a parchment paper-lined baking sheet.
-
Chill in the freezer for 10 minutes to firm the dough slightly.
-
Roll each ball between the palms of your hands to form a smooth sphere. Place the tray back into the freezer for an additional 10 to 15 minutes, or in the refrigerator for about 30 minutes, until firm.
To Make the Pumpkin Truffles
-
Put the orange melting wafers in a microwave-safe bowl and heat in 30-second increments, stirring between each interval, until the wafers are melted and smooth. (See tips for thinning if needed).
-
Working with one firm ball at a time, dip it into the melted orange wafer candy, turning gently to coat completely. Use a fork to lift it out, tap off the excess coating, and place the coated ball on a baking sheet lined with clean parchment paper.
-
Immediately insert half a small pretzel stick into the center of the truffle (for the pumpkin stem), ensuring a small part sticks out. Immediately place a green M&M next to the pretzel (for a leaf).
-
Continue this way until all the pumpkin truffles are made. Let them set completely.
To Make the Mummy Truffles
-
Put 8 ounces of white melting wafers in a microwave-safe bowl and heat in 30-second increments, stirring between each interval, until the wafers are melted and smooth.
-
Working with one firm ball at a time, place it into the melted white wafer candy, turning gently to coat completely. Use a fork to lift it out, tap off the excess coating, and place the coated ball on a baking sheet lined with clean parchment paper. Continue until all mummy truffles are coated.
-
Melt the remaining 2 ounces of white melting wafers the same way. Transfer the melted candy to a small zip-top bag and snip off one tiny corner. Working with one mummy truffle at a time, drizzle the white melted candy across the truffle to look like mummy bandages, and immediately put on 2 candy eyes.
-
Continue this way until all the mummy truffles are made. Allow them to set.
To Make the Halloween Sprinkle Truffles
-
Put 8 ounces of chocolate melting wafers in a microwave-safe bowl and heat in 30-second increments, stirring between each interval, until the wafers are melted and smooth.
-
Working with one firm ball at a time, dip it into the melted chocolate wafer candy, turning gently to coat completely. Use a fork to lift it out, tap off the excess coating, and place the coated ball on a baking sheet lined with clean parchment paper.
-
Once coated, immediately top generously with assorted Halloween sprinkles.
-
Continue this way until all the Halloween truffles are made. Let them set completely.
Nutrition Information
Calories: 231cal |
Carbohydrates: 27g |
Protein: 2g |
Fat: 13g |
Saturated Fat: 8g |
Polyunsaturated Fat: 1g |
Monounsaturated Fat: 3g |
Trans Fat: 0.01g |
Cholesterol: 10mg |
Sodium: 92mg |
Potassium: 71mg |
Fiber: 0.4g |
Sugar: 23g |
Vitamin A: 105IU |
Vitamin C: 0.05mg |
Calcium: 29mg |
Iron: 2mg
The recipes on this blog are tested with a conventional gas oven and gas stovetop. It’s important to note that some ovens, especially as they age, can cook and bake inconsistently. Using an inexpensive oven thermometer can assure you that your oven is truly heating to the proper temperature. If you use a toaster oven or countertop oven, please keep in mind that they may not distribute heat the same as a conventional full sized oven and you may need to adjust your cooking/baking times. In the case of recipes made with a pressure cooker, air fryer, slow cooker, or other appliance, a link to the appliances we use is listed within each respective recipe. For baking recipes where measurements are given by weight, please note that results may not be the same if cups are used instead, and we can’t guarantee success with that method.
