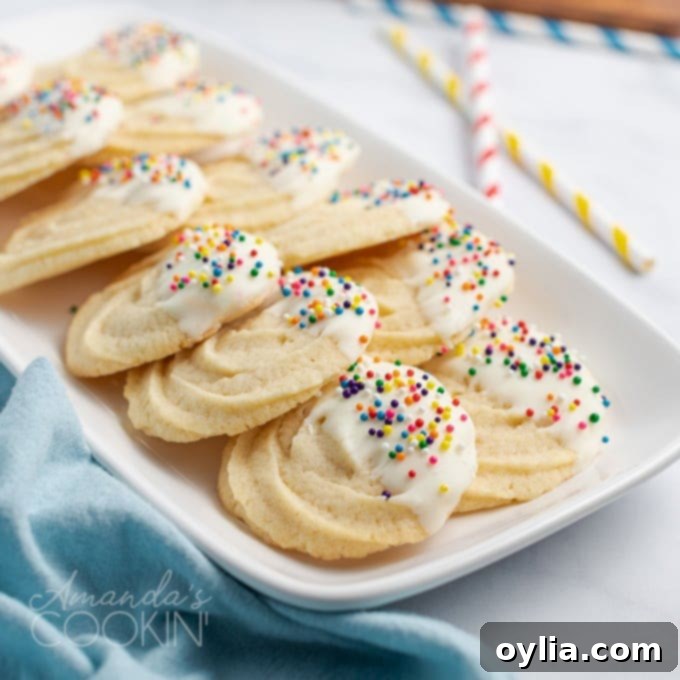
The Ultimate Guide to Delicious Homemade Butter Cookies: Easy Recipe & Expert Tips
There’s something truly magical about a classic butter cookie. Simple yet profoundly satisfying, these delectable treats are a staple for any cookie lover, gracing holiday platters, tea parties, and everyday snack times with their rich, buttery flavor and melt-in-your-mouth texture. The beauty of homemade butter cookies lies in their versatility and the sheer joy they bring to both bakers and eaters. Whether you’re a seasoned pro or just starting your baking journey, this comprehensive guide will walk you through crafting the perfect batch of buttery delights. We’ll share our trusted recipe, essential baking tips, and creative decorating ideas to ensure your butter cookies are nothing short of extraordinary.
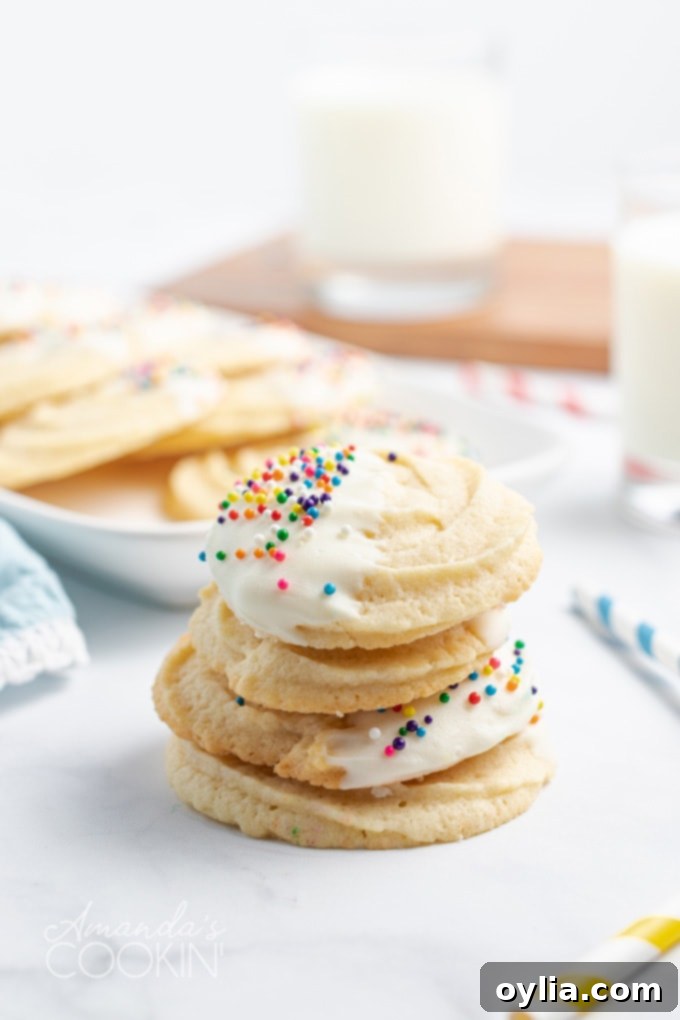
The Secret to Unforgettable Butter Cookies: It’s All in the Butter
As the name suggests, butter is the star ingredient in these cookies, and its quality directly impacts the final flavor and texture. Think of butter as the canvas for your culinary masterpiece. Using a high-quality, unsalted butter will yield a superior cookie that is rich, tender, and truly melts in your mouth. Avoid generic or inexpensive butter if you want to achieve that authentic, indulgent taste. Premium butter often has a higher fat content and lower water content, contributing to a flakier, more delicate crumb that cheap butter simply cannot replicate. This subtle difference is what elevates a good butter cookie to an exceptional one, making it worthy of special occasions and thoughtful gift-giving.
Many bakers, including myself, love to prepare these classic butter cookies alongside our favorite sugar cookies to fill festive platters for holiday parties and gatherings. Their simple elegance and comforting taste make them universally loved.
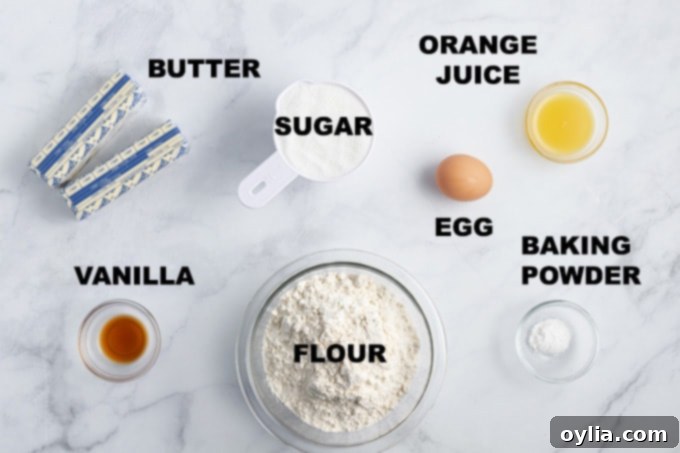
Essential Ingredients for Your Butter Cookie Recipe
Crafting perfect butter cookies doesn’t require a long list of exotic ingredients. In fact, their charm lies in their simplicity. Here’s what you’ll need, along with a few notes on why each component is important for the ultimate butter cookie experience:
- Dry ingredients:
- All-purpose flour: The structural backbone of your cookies. It’s important not to overmix once the flour is added, as this can lead to tough cookies.
- Baking powder: Provides a slight lift and contributes to the cookie’s delicate texture.
- Wet ingredients:
- Unsalted butter: As discussed, choose the best quality you can find. Unsalted allows you to control the total salt content in your recipe.
- Granulated sugar: Sweetens the cookies and helps create that wonderful crisp-tender bite.
- Egg: Acts as a binder, adding richness and helping to hold the dough together.
- Orange juice: A secret ingredient for many! It adds a subtle, bright citrus note that beautifully complements the butter flavor without being overpowering. You can substitute with lemon juice for a different citrus twist, or even milk if you prefer to omit the citrus entirely.
- Vanilla extract: Essential for depth of flavor. Pure vanilla extract is always recommended over imitation for the best taste.
- Optional Decorations: These are where you can let your creativity shine!
- Dipping chocolate: Milk, dark, or white chocolate can be melted for dipping.
- Non-pareils, sprinkles, decorator sugar: Add color, texture, and festive flair to your decorated cookies.
Helpful Baking Tools for Butter Cookies
Having the right tools can make your butter cookie baking experience even smoother and more enjoyable:
- Mixer: A stand mixer or hand mixer is invaluable for creaming butter and sugar until light and fluffy, ensuring a smooth, evenly blended dough.
- Measuring cups and spoons: Accuracy in baking is key, so precise measuring tools are a must.
- Wooden spoon: Great for incorporating dry ingredients into the wet mixture without overmixing.
- Insulated baking sheets: These help prevent the bottom of your cookies from browning too quickly, ensuring even baking.
- Piping bag: Essential if you plan to pipe decorative shapes for a professional look.
- Star piping tip (Wilton 1M): A popular choice for creating beautiful rosettes and other intricate designs.
- Parchment paper or silicone baking mats: Prevents sticking and makes for easy cleanup.
- Rolling pin: Necessary for rolling out dough if you choose to use cookie cutters.
- Cookie cutters: For creating fun shapes, especially great for holiday baking!
Expert Baking Tips for Perfect Butter Cookies
Achieving the perfect butter cookie involves more than just following the steps; a few pro tips can make all the difference in taste and presentation. Here are some insights to help you bake your best batch yet:
- Chill your piped cookies for firmer designs: Butter cookies tend to spread a bit in the oven. If you desire crisper, more defined piped shapes, pipe the dough (at room temperature) onto a parchment-lined serving platter or a large dish. Then, chill these unbaked piped cookies in the refrigerator for at least an hour, or even longer, until firm. Once chilled, carefully transfer them to a room-temperature baking sheet before baking. This cold-to-hot transition helps the cookies hold their shape better before the butter fully melts.
- Versatile shaping methods: Don’t limit yourself to just piping! You can also roll out the dough to a consistent thickness and use your favorite cookie cutters for festive shapes. Alternatively, form the dough into a log (a “tube”) and chill it thoroughly, then slice and bake for perfectly round, uniform cookies. This method is incredibly easy and yields beautiful results.
- Achieving “softened” butter: Softened butter does not mean melted or greasy. It should be pliable enough to leave an indentation when gently pressed, but still hold its shape. Take your butter out of the fridge about 20-30 minutes before you plan to use it. If it’s too soft, your cookies might spread excessively. If you forget to take it out, you can cut it into small pieces and let it sit for a few minutes, or gently microwave it on very low power in short bursts, being careful not to melt it.
- The critical role of good quality butter: We can’t stress this enough! The flavor of your butter cookies is paramount, and it stems almost entirely from the butter itself. Invest in a good quality, unsalted butter. European-style butters, with their higher fat content, often lead to richer flavors and a more tender crumb. You will genuinely taste the difference.
- Choosing the right chocolate for dipping: If you’re decorating with chocolate, opt for a high-quality chocolate specifically designed for melting and dipping, such as baking chocolate bars, chocolate wafers, or couverture chocolate. These types of chocolate melt smoothly and harden with a beautiful sheen, without becoming grainy or dull. Brands like Ghirardelli or Callebaut are excellent choices. Avoid chocolate chips if possible, as they contain stabilizers that prevent smooth melting.
- Don’t overmix the dough: Once you add the flour, mix just until combined. Overmixing develops the gluten in the flour, which can lead to tough, chewy cookies instead of the desired tender, crumbly texture.
- Consistent oven temperature: Baking cookies relies heavily on consistent heat. Consider using an inexpensive oven thermometer to verify that your oven is truly heating to the temperature you set. Older ovens can be inconsistent, and this simple tool can prevent many baking mishaps.
How to Make Butter Cookies: Step-by-Step
Let’s get baking! Follow these detailed instructions to create your delightful batch of butter cookies:
- Prepare your workspace: While there’s a chilling step involved, you can preheat your oven to 375 degrees F towards the end of your preparation. Line a couple of insulated baking sheets with parchment paper or silicone baking mats. This will prevent sticking and ensure even baking.
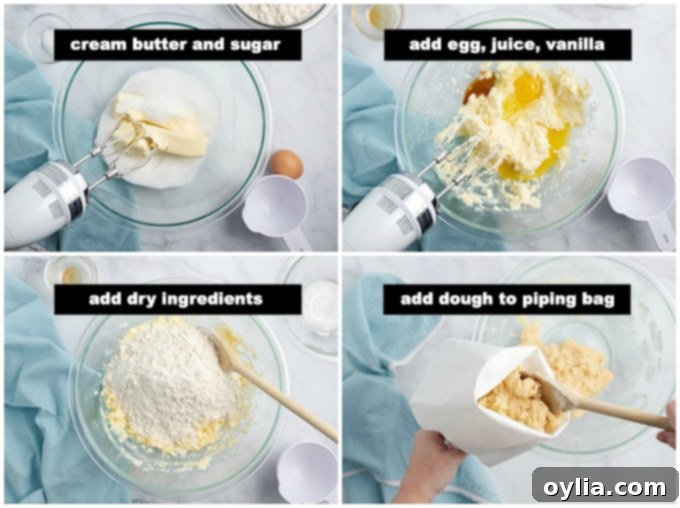
- Cream butter and sugar: In a large mixing bowl, using either a stand mixer with a paddle attachment or a hand mixer, cream together the softened unsalted butter and granulated sugar on medium speed. Beat until the mixture is light, fluffy, and pale in color, typically 2-3 minutes. This process incorporates air, which contributes to the cookies’ light texture.
- Add wet ingredients: Beat in the large egg until fully incorporated. Then, add the orange juice and vanilla extract, mixing until just combined. Scrape down the sides of the bowl as needed to ensure all ingredients are well blended.
- Incorporate dry ingredients: Gradually add the all-purpose flour and baking powder to the wet mixture. Stir on low speed or by hand with a wooden spoon until just combined. Be careful not to overmix the dough at this stage; overmixing can lead to tough cookies. The dough should come together but still be soft.
Shaping Your Butter Cookies: Three Ways
Here’s where you choose your adventure! Butter cookies are incredibly versatile for shaping:
To make piped cookies:
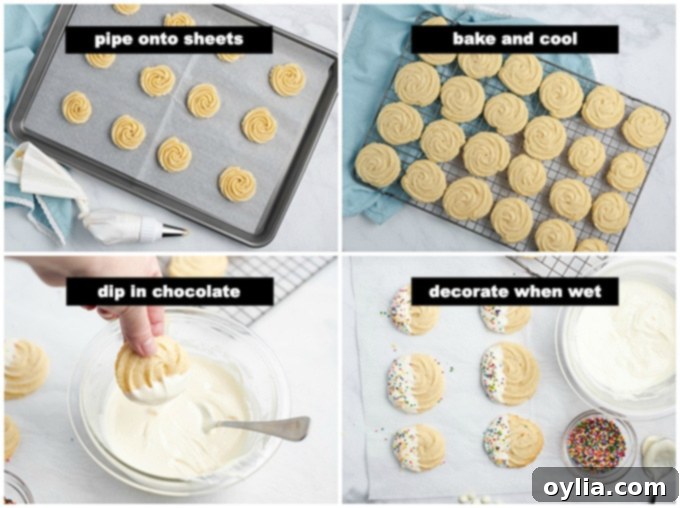
For elegant, decorative cookies, fill a 16-inch piping bag fitted with a large open star piping tip (like a Wilton 1M) with the dough. Pipe dough into desired shapes – rosettes, S-shapes, or rounds – onto your prepared baking sheets. For best results and to prevent spreading, as mentioned in our tips, you can chill the piped cookies on their baking sheets in the refrigerator for at least an hour before baking.
For slice and bake cookies:
For simple, uniform rounds, roll the dough into a log (about 1.5 to 2 inches in diameter) on a lightly floured surface or between two sheets of parchment paper. Wrap the log tightly in plastic wrap and chill it in the refrigerator for 2-3 hours, or until very firm. Once chilled, use a sharp knife to slice the log into 1/2-inch thick rounds and place them on your prepared baking sheets.
For cookie cutter shapes:
If you prefer fun shapes, cover the dough with plastic wrap and refrigerate it for 2-3 hours until firm and easy to handle. On a lightly floured surface, roll out the chilled dough to an even 1/2-inch thickness. Use your favorite cookie cutters to cut out shapes and carefully transfer them to the prepared baking sheets.
Baking Your Butter Cookies
Once shaped, it’s time for them to hit the oven:
Bake the cookies in your preheated 375°F (190°C) oven for approximately 8-12 minutes, or until the edges are lightly golden brown. The baking time can vary depending on your oven and the size/thickness of your cookies, so keep a close eye on them. You want them just barely golden for that classic butter cookie tenderness. Remove from the oven and let them cool on the baking sheet for a few minutes before transferring them to a wire rack to cool completely. It’s crucial that they are fully cooled before any decorating.
Decorating Your Beautiful Butter Cookies
Once cooled, your butter cookies are a blank canvas for decoration. Here’s how to create stunning finishes, similar to the photos:
- Melt the chocolate: Place 10-12 oz of chopped melting chocolate or chocolate melts (Ghirardelli offers great options in both chocolate and white chocolate) in a microwave-safe bowl. Microwave on 50% power in 20-second intervals, stirring well after each interval, until the chocolate is completely melted and smooth. Alternatively, you can use a double boiler method for a more controlled melt.
- Dip and sprinkle: Dip half of each cooled cookie into the melted chocolate, allowing any excess chocolate to drip off. Immediately place the dipped cookies on parchment-lined sheets. While the chocolate is still wet, liberally sprinkle with nonpareils, colored sugar, or your favorite sprinkles.
- Allow to set: Let the decorated cookies sit at room temperature until the chocolate has fully set, or place them in the refrigerator for a quicker set.
Beyond chocolate dipping, you can also decorate your butter cookies with a simple powdered sugar glaze, royal icing for intricate designs, or simply a dusting of powdered sugar for an elegant finish. The possibilities are endless!
Serving and Storing Your Homemade Butter Cookies
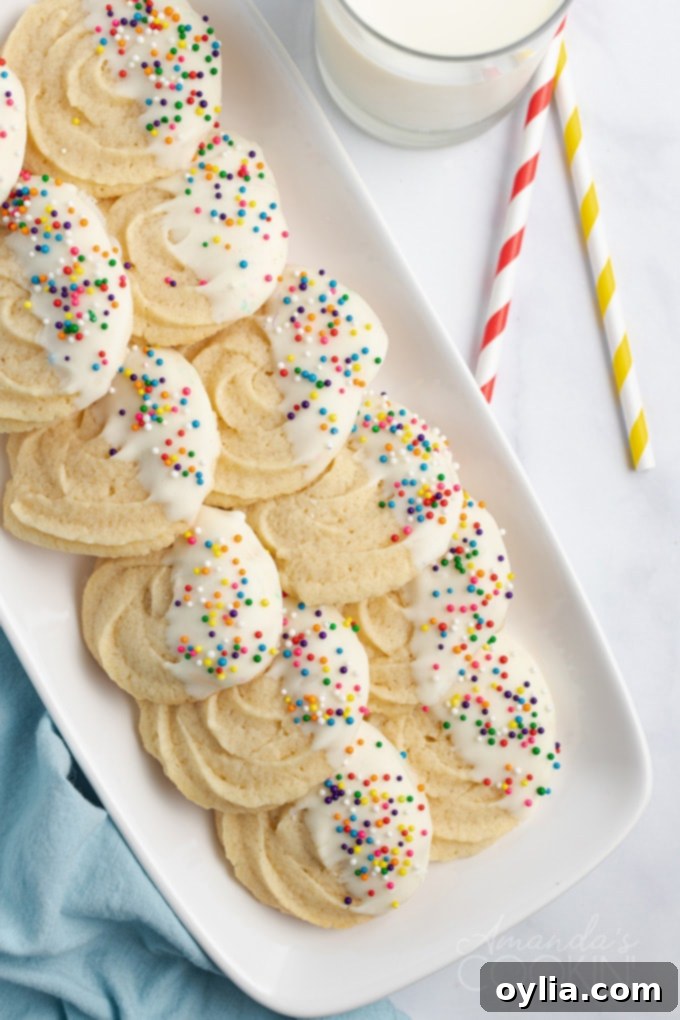
Once decorated and set, your butter cookies are ready to be enjoyed! They make a fantastic addition to any dessert spread, are perfect with a cup of coffee or tea, and are always a welcome homemade gift. To keep your butter cookies fresh and delicious:
- Room Temperature: Store plain or chocolate-dipped butter cookies in an airtight container at room temperature for up to 5-7 days. If they are decorated with a fresh glaze or buttercream, they may need refrigeration.
- Refrigeration: While not typically necessary for plain butter cookies, if your kitchen is very warm or your decorations require it, they can be stored in the refrigerator in an airtight container for up to 2 weeks. Allow them to come to room temperature before serving for the best texture.
- Freezing Dough: You can prepare the dough in advance and freeze it. Wrap the dough logs or discs tightly in plastic wrap, then place them in a freezer-safe bag or container. It will keep for up to 3 months. Thaw in the refrigerator overnight before slicing or rolling and baking.
- Freezing Baked Cookies: Baked and undecorated butter cookies freeze exceptionally well. Once completely cooled, place them in a single layer on a baking sheet and freeze until solid. Then, transfer them to a freezer-safe airtight container or bag, separating layers with parchment paper. They can be frozen for up to 2-3 months. Thaw at room temperature before decorating or serving.
Frequently Asked Questions About Butter Cookies
Here are some common questions bakers have when making butter cookies:
- Q: Can I use salted butter instead of unsalted?
A: While unsalted butter is generally recommended for baking to control the salt content, you can use salted butter. If you do, omit any added salt in the recipe and be aware that the flavor might be slightly different. - Q: Why did my butter cookies spread too much?
A: Several factors can cause cookies to spread:- Butter that is too soft or melted.
- Not chilling the dough adequately (this is crucial for butter cookies, especially piped ones).
- Incorrect flour measurement (too little flour).
- Oven temperature being too low.
Ensure your butter is properly softened (cool, pliable, but not greasy), chill your dough thoroughly, and measure your flour accurately.
- Q: Can I make the cookie dough ahead of time?
A: Absolutely! Butter cookie dough is excellent for making ahead. You can prepare the dough, wrap it tightly in plastic, and refrigerate it for up to 3-4 days. You can also form it into logs or flatten it into discs for cutting, then freeze it for up to 3 months. Thaw in the refrigerator before using. - Q: What’s the difference between butter cookies and shortbread cookies?
A: Both are buttery delights! Shortbread typically contains just three ingredients: butter, sugar, and flour, in a specific ratio (often 1 part sugar, 2 parts butter, 3 parts flour by weight). Butter cookies, while also rich in butter, often include eggs, a leavening agent (like baking powder), and flavorings like vanilla or citrus, resulting in a slightly lighter, sometimes crispier, and more varied texture than dense shortbread. - Q: Can I substitute the orange juice for another flavor?
A: Yes, you can! Lemon juice works wonderfully for a different citrus note. If you prefer no citrus, you can use milk (whole milk is best for richness) or even a different extract like almond extract for a distinct flavor profile. - Q: My cookies are hard, what went wrong?
A: Hard cookies are usually a sign of overmixing the dough once the flour is added. Overmixing develops gluten, making the cookies tough. Ensure you mix just until the ingredients are combined. Also, overbaking can lead to hard cookies, so watch them closely and remove them from the oven when they’re just lightly golden.
More Irresistible Cookie Recipes
If you’ve enjoyed making these classic butter cookies, you might want to explore other delightful cookie recipes. Here are some of our favorites to inspire your next baking adventure:
- Thumbprint Cookies: Sweet, buttery cookies with a fruity jam center.
- Homemade Gingersnaps: Spicy, chewy, and perfectly festive.
- Orange Crinkle Cookies: Bright citrus flavor with a beautiful cracked sugar coating.
- Peanut Butter Cookies: A soft and chewy classic that’s always a hit.
- Neapolitan Cookies: A trio of chocolate, vanilla, and strawberry in one delightful cookie.
- Cherry Wink Cookies: Unique, nutty, and featuring glace cherries.
- Coconut Macaroons: Chewy on the inside, crispy on the outside, and intensely coconutty.

Butter Cookies
IMPORTANT – There are often Frequently Asked Questions within the blog post that you may find helpful. Simply scroll back up to read them!
Print It
Rate It
Save ItSaved!
Ingredients
- 1 cup unsalted butter softened
- 1 cup granulated sugar
- 1 large egg
- 2 tablespoons orange juice
- 1 tablespoon vanilla extract
- 2 ½ cups all-purpose flour
- 1 teaspoon baking powder
- 12 ounces melting chocolate optional
- nonpareils, sprinkles, or decorator sugar optional
Things You’ll Need
-
Hand mixer
-
Measuring cups and spoons
-
Wooden spoon
-
Insulated baking sheets
-
Piping bag
-
Star piping tip (Wilton 1M)
Before You Begin
- These cookies spread a bit, so if you want the designs a bit firmer, pipe the cookies with the dough at room temp onto a parchment lined serving platter or large dish/plate. Chill in the refrigerator for an hour or so before baking. Then remove the cold cookies to a room temperature cookie sheet and bake.
- Alternatively, you can roll out the dough and use cookie cutters, or chill it into a tube and then slice and bake.
- Softened butter means you should take it out of the fridge about 20 minutes before using it. You don’t want it too soft.
- Use GOOD quality better for the best tasting cookies.
- Use a good quality chocolate or one made specifically for melting and dipping.
Instructions
-
You’ll bake in a preheated oven at 375 degrees F, but there’s chill time so no need to turn it on right away. Line a couple of insulated baking sheets with parchment paper or a silicone baking mat.
-
In a large bowl, cream the butter and sugar. Add the egg, orange juice, and vanilla, beat well.
-
Add the flour and baking powder and stir to blend.
To make piped cookies:
-
Fill a 16-inch piping bag fitted with a large open star piping tip – we used a Wilton 1M. Pipe dough into rounds on prepared baking sheets.
For slice and bake:
-
Roll the dough into a tube and chill in the fridge for 2-3 hours. Slice tube into rounds and bake.
For cookie cutter shapes:
-
Cover the dough with plastic wrap and put it into the refrigerator to chill for 2-3 hours or until firm. Roll out dough to 1/2-inch thick and cut with cookie cutters.
To bake:
-
Bake 8 minutes, or until lightly browned. Cool completely before frosting.
To decorate per photos:
-
Melt 10-12 oz chopped chocolate or chocolate melts (Ghirardelli makes them in both chocolate and white chocolate) in a microwave safe bowl on 50% power in 20 second intervals until melted and smooth.
-
Dip half the cookie in the melted chocolate allowing the excess to drip off. Place on parchment lined sheets and sprinkle with nonpareils, colored sugar, or sprinkles.
Nutrition
The recipes on this blog are tested with a conventional gas oven and gas stovetop. It’s important to note that some ovens, especially as they age, can cook and bake inconsistently. Using an inexpensive oven thermometer can assure you that your oven is truly heating to the proper temperature. If you use a toaster oven or countertop oven, please keep in mind that they may not distribute heat the same as a conventional full sized oven and you may need to adjust your cooking/baking times. In the case of recipes made with a pressure cooker, air fryer, slow cooker, or other appliance, a link to the appliances we use is listed within each respective recipe. For baking recipes where measurements are given by weight, please note that results may not be the same if cups are used instead, and we can’t guarantee success with that method.
This post originally appeared here on Dec 14, 2008.
Cookie recipe inspiration and testing from Amanda’s Cookin’, decorating inspiration from Cooking Classy.
