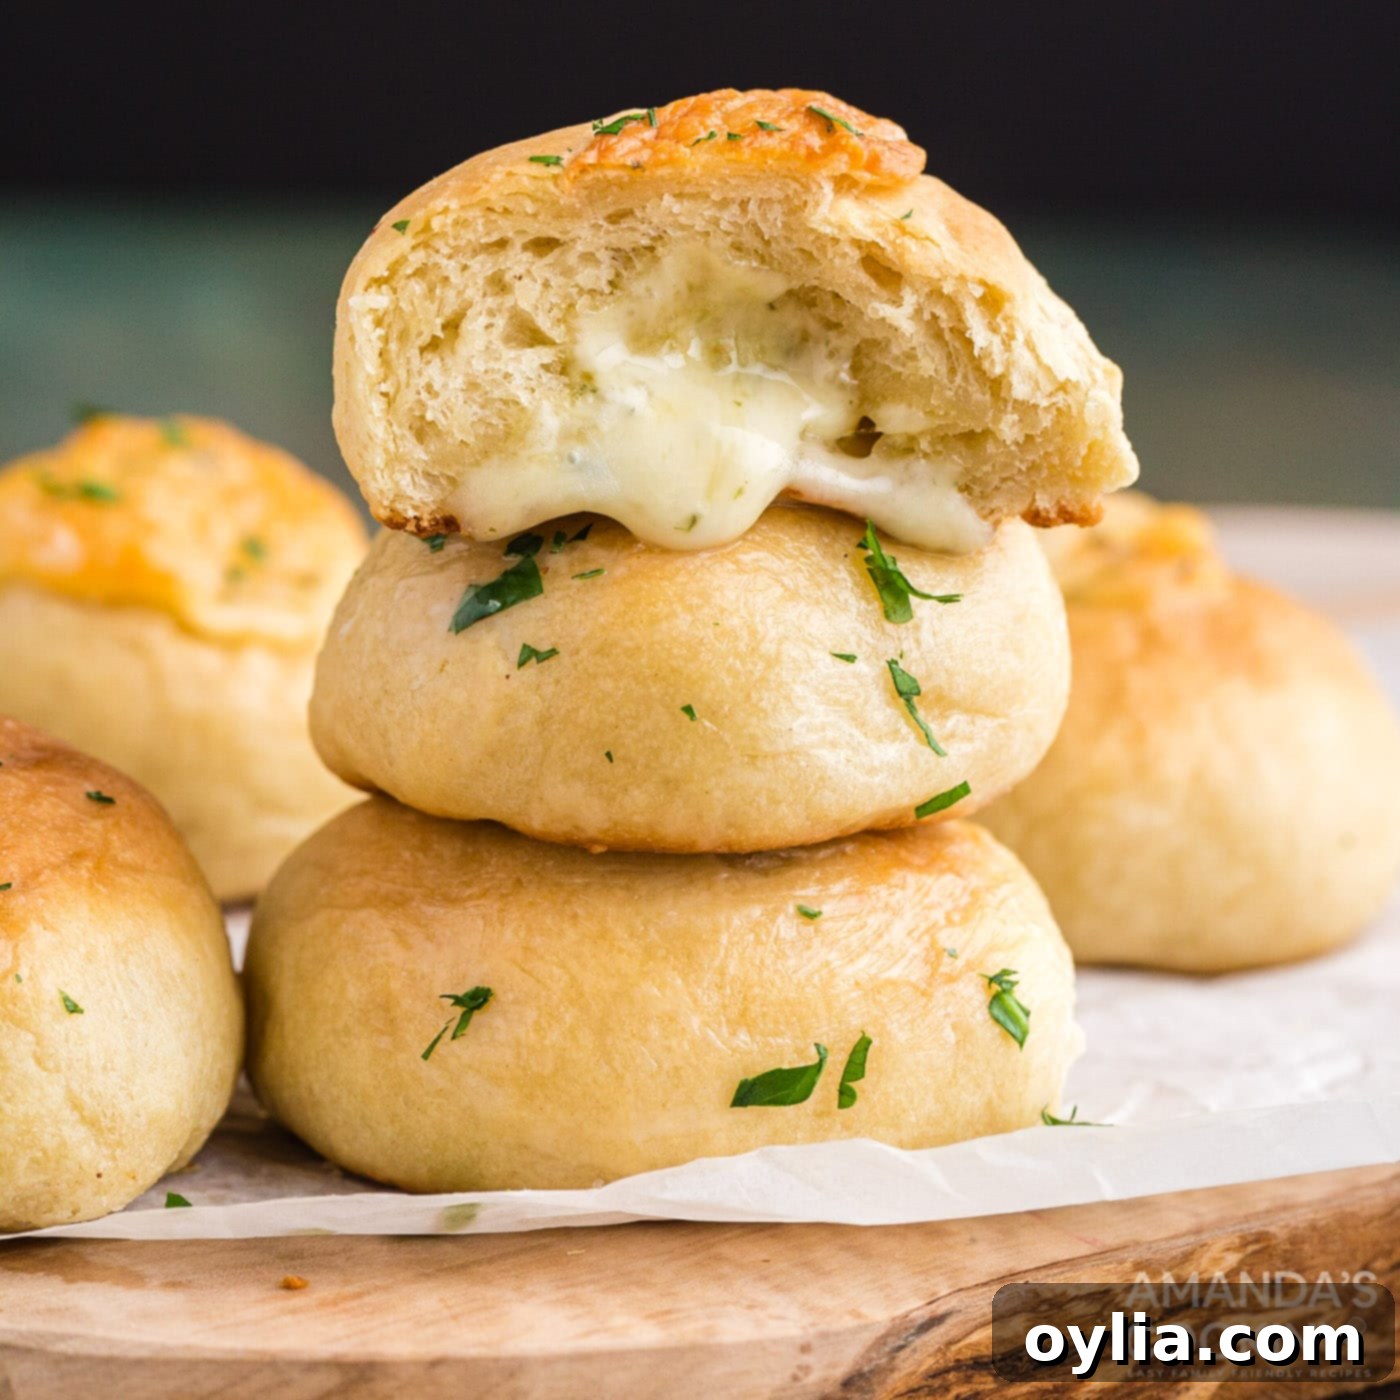
Irresistible Homemade Garlic Cheese Rolls: A Cheesy, Aromatic Delight
Prepare to fall in love with these incredibly delicious Garlic Cheese Rolls! Crafted from an easy-to-make homemade dough, each roll is generously stuffed with a flavorful garlic cheese blend, then baked to golden perfection and brushed with rich melted butter. These rolls are more than just a side dish; they’re a comforting, pull-apart experience that promises a burst of garlicky, cheesy goodness in every bite. Perfect for family dinners, gatherings, or simply as a satisfying snack, these rolls are sure to become a staple in your recipe collection.
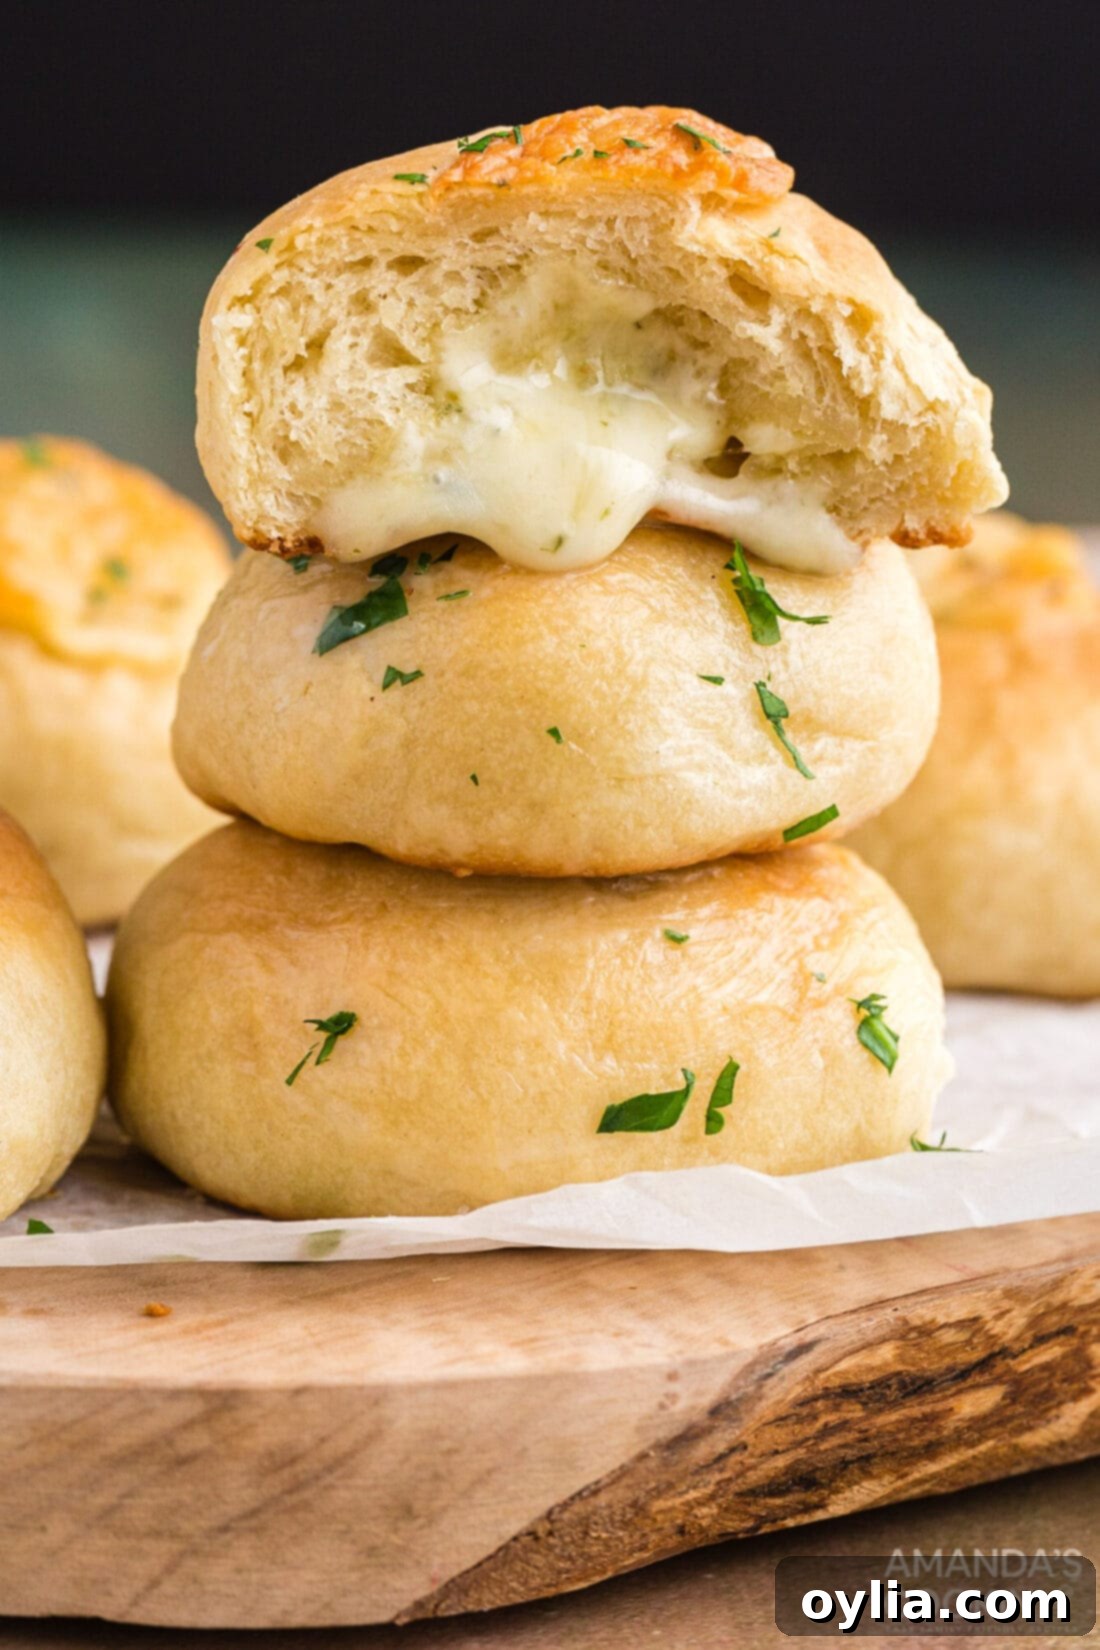
Why This Garlic Cheese Rolls Recipe Is a Must-Try
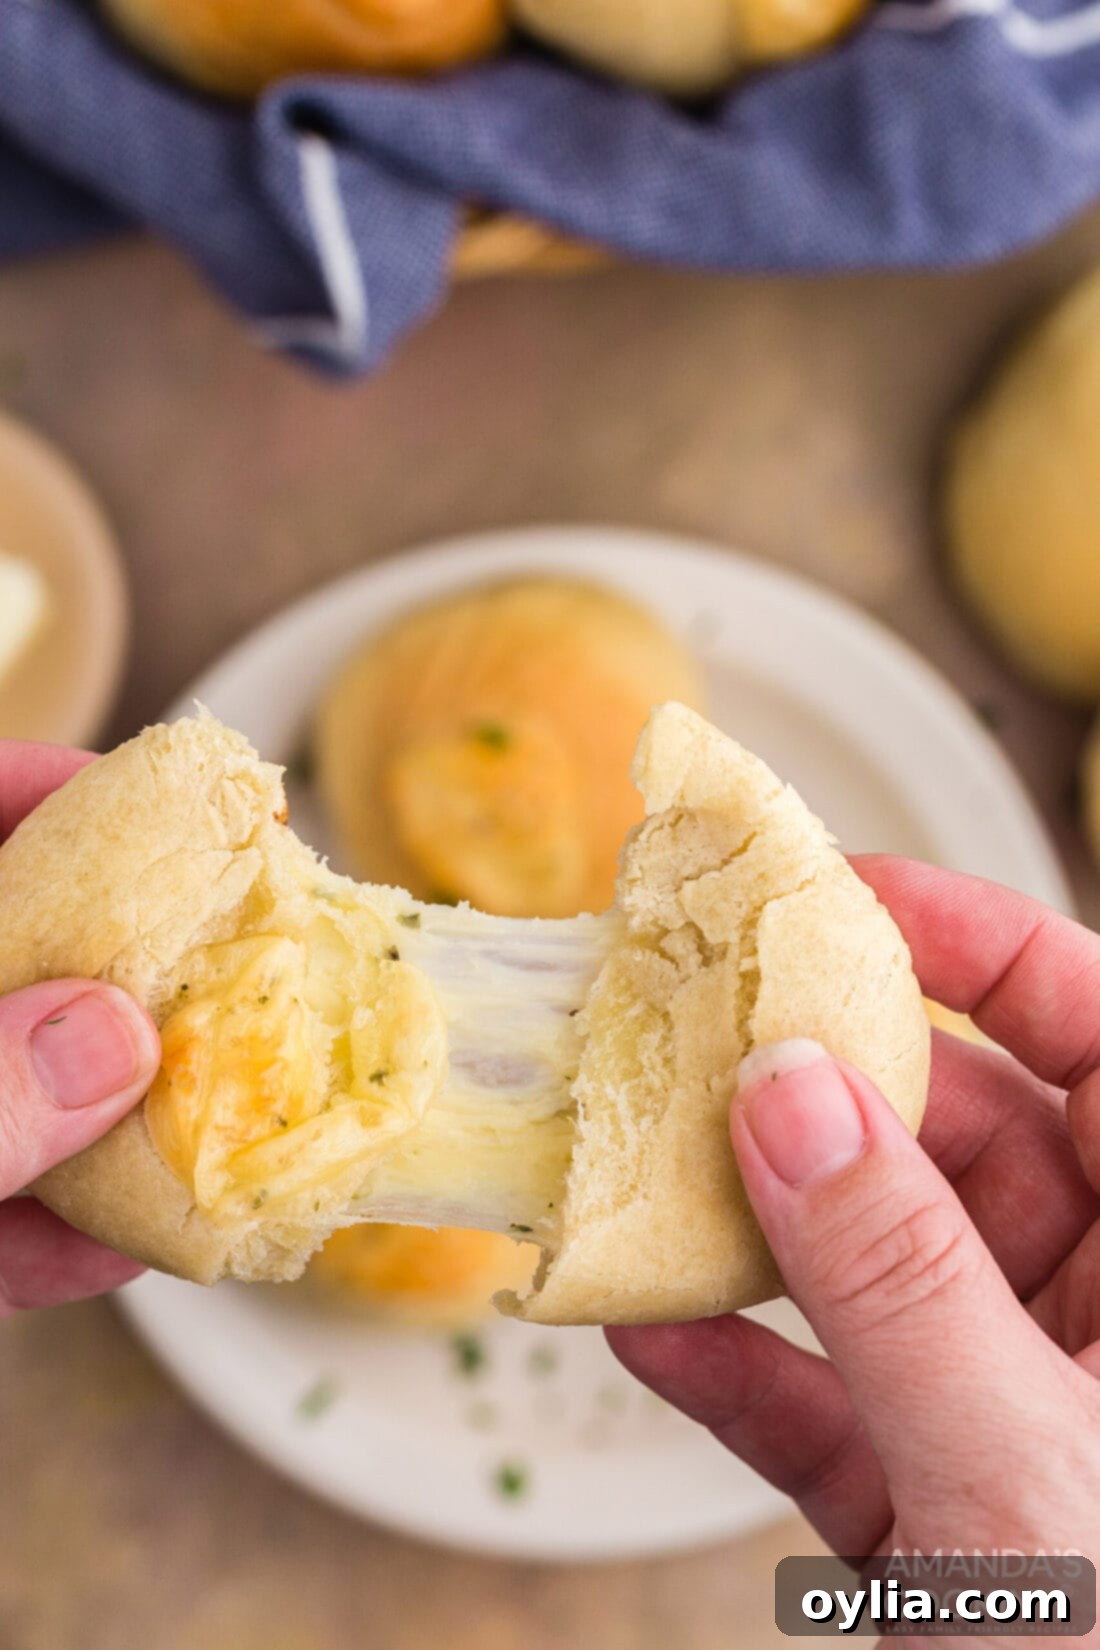
There’s a reason why bread, cheese, and garlic are three of the most beloved ingredients in cuisine worldwide. When you bring them together, the result is nothing short of magical. These homemade garlic cheese rolls are designed to be served warm and fresh from the oven, allowing you to experience the ultimate joy of their pull-apart cheesiness in all its gooey, fragrant glory. Imagine tearing into a soft, golden roll, steam rising as the melted cheese stretches, infused with the savory aroma of garlic – it’s an experience that truly elevates any meal.
Beyond their incredible taste, these cheesy garlic rolls are incredibly versatile. They make the perfect side for just about any dinner, complementing a wide array of main courses. While our personal favorites include pairing them alongside a hearty crockpot roast beef or a comforting hamburger stew, their versatility shines. Think about serving them with pasta dishes, alongside a crisp salad, or even as a flavorful accompaniment to grilled chicken or steak. They add a touch of homemade warmth and indulgence that store-bought rolls simply can’t match. This recipe works because it combines simple ingredients into an extraordinary dish, proving that the best flavors often come from the most classic combinations.
Key Ingredients for Your Homemade Garlic Cheese Rolls
Crafting these irresistible rolls requires a few basic ingredients, most of which you likely already have in your pantry. For precise measurements and detailed instructions, remember to check the printable recipe card at the end of this post. Here’s a closer look at the components that make these rolls so special:
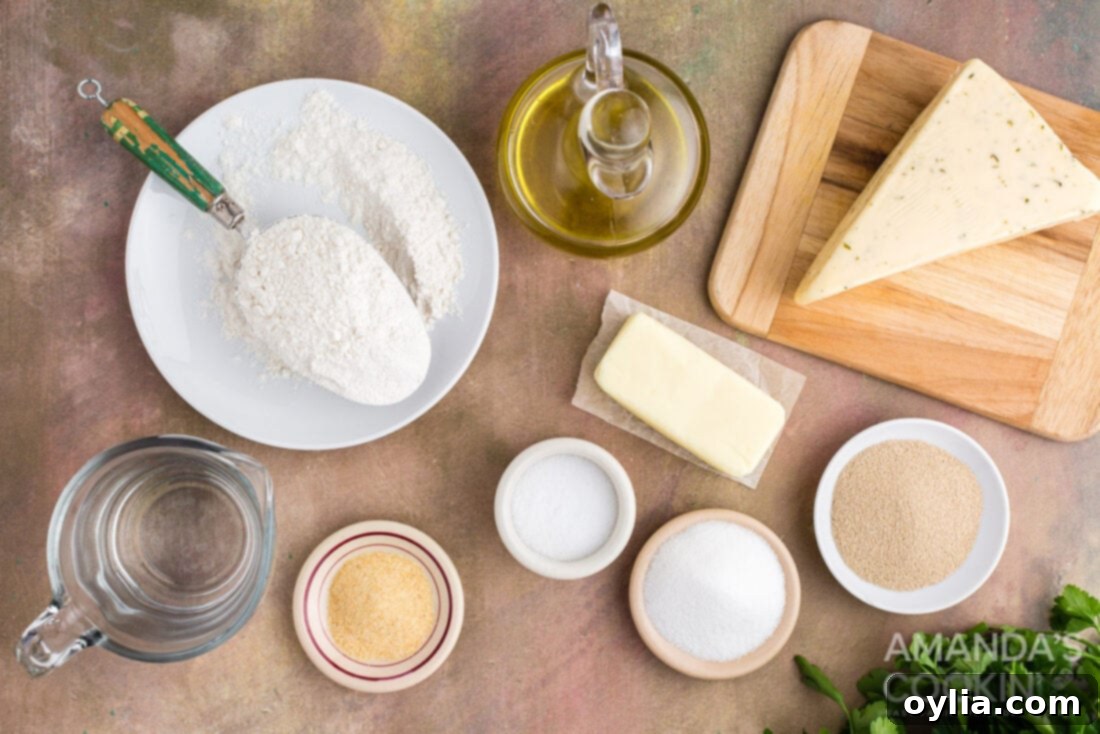
- CHEESE: We opt for our favorite garlic cheese to truly amplify the flavor profile of these rolls. The infused garlic in the cheese ensures every bite is packed with aromatic depth. However, don’t feel limited! You can certainly substitute it with any cheese you prefer. Classic choices like mozzarella offer incredible meltiness, while cheddar provides a sharper, more robust flavor. A blend of cheeses can also work wonderfully, as long as they are good melting cheeses. Experiment with provolone, Monterey Jack, or even a spicy pepper jack for a kick!
- DRY INGREDIENTS: This recipe primarily relies on regular all-purpose flour, which provides a light and fluffy texture ideal for rolls. If you’re looking to incorporate whole grains, you can experiment with whole wheat flour. However, for the best results and to prevent your rolls from becoming too dense, we recommend replacing only half of the all-purpose flour with whole wheat flour. This maintains a desirable texture while adding a nutritional boost. The recipe also calls for instant yeast, which is incredibly convenient as it doesn’t require separate proofing. Sugar acts as food for the yeast, helping the dough rise beautifully, while salt balances the flavors and strengthens the gluten structure. Garlic powder in the dough itself ensures that garlicky goodness permeates every fiber of the roll, not just the cheese filling.
- FATS: Our recipe utilizes a combination of butter and olive oil. Unsalted butter is preferred as it gives you more control over the overall salt content of the dish. If you only have salted butter on hand, simply reduce the amount of added salt in the recipe by half a teaspoon to avoid over-salting. Olive oil, a Mediterranean staple, adds a subtle depth of flavor and moisture to the dough, contributing to its tender crumb. If olive oil isn’t available or preferred, you can easily substitute it with other neutral-flavored oils like vegetable oil or canola oil. The melted butter used for brushing after baking adds a final layer of richness and a beautiful sheen to the golden crust.
- WATER: Warm water is critical for activating the yeast. Ensure the water is at approximately 115°F (46°C). Water that is too cold won’t activate the yeast, and water that is too hot will kill it, preventing your dough from rising. A kitchen thermometer is a handy tool here.
Step-by-Step: How to Make Irresistible Garlic Cheese Rolls
These step-by-step photos and instructions are here to help you visualize how to make this recipe. For a quick reference, you can Jump to Recipe to get the printable version of this recipe, complete with precise measurements and detailed instructions at the bottom of this post.
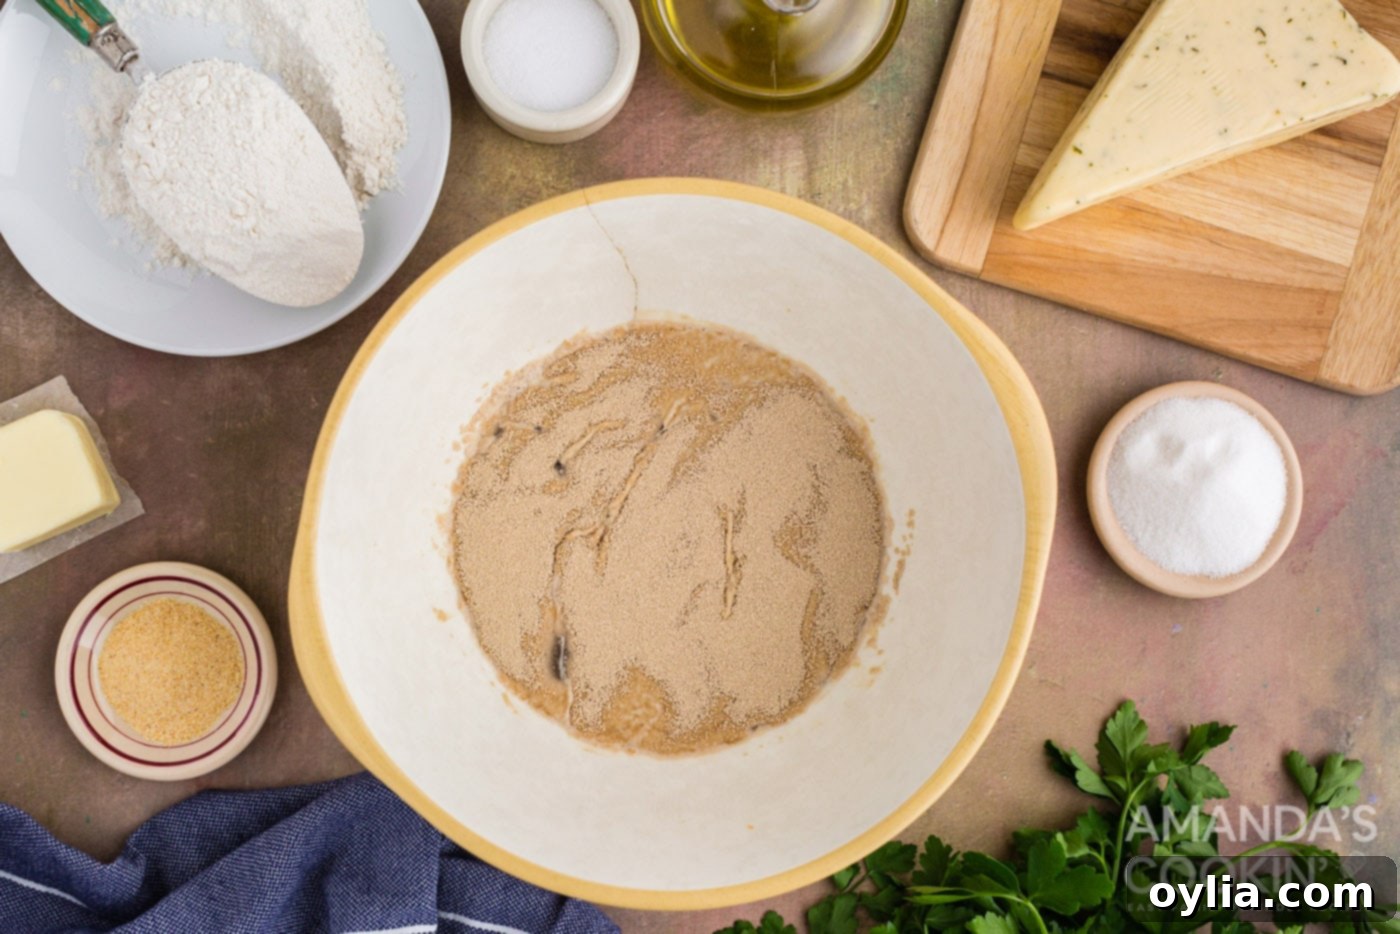
- Activate the Yeast: Begin by sprinkling the instant yeast over the warm water (around 115°F or 46°C) in a large bowl. Let it sit for a few minutes. You’ll know the yeast is active and healthy when it starts to foam and bubble, indicating that it’s alive and ready to work its magic on your dough. This initial step is crucial for achieving light and airy rolls.
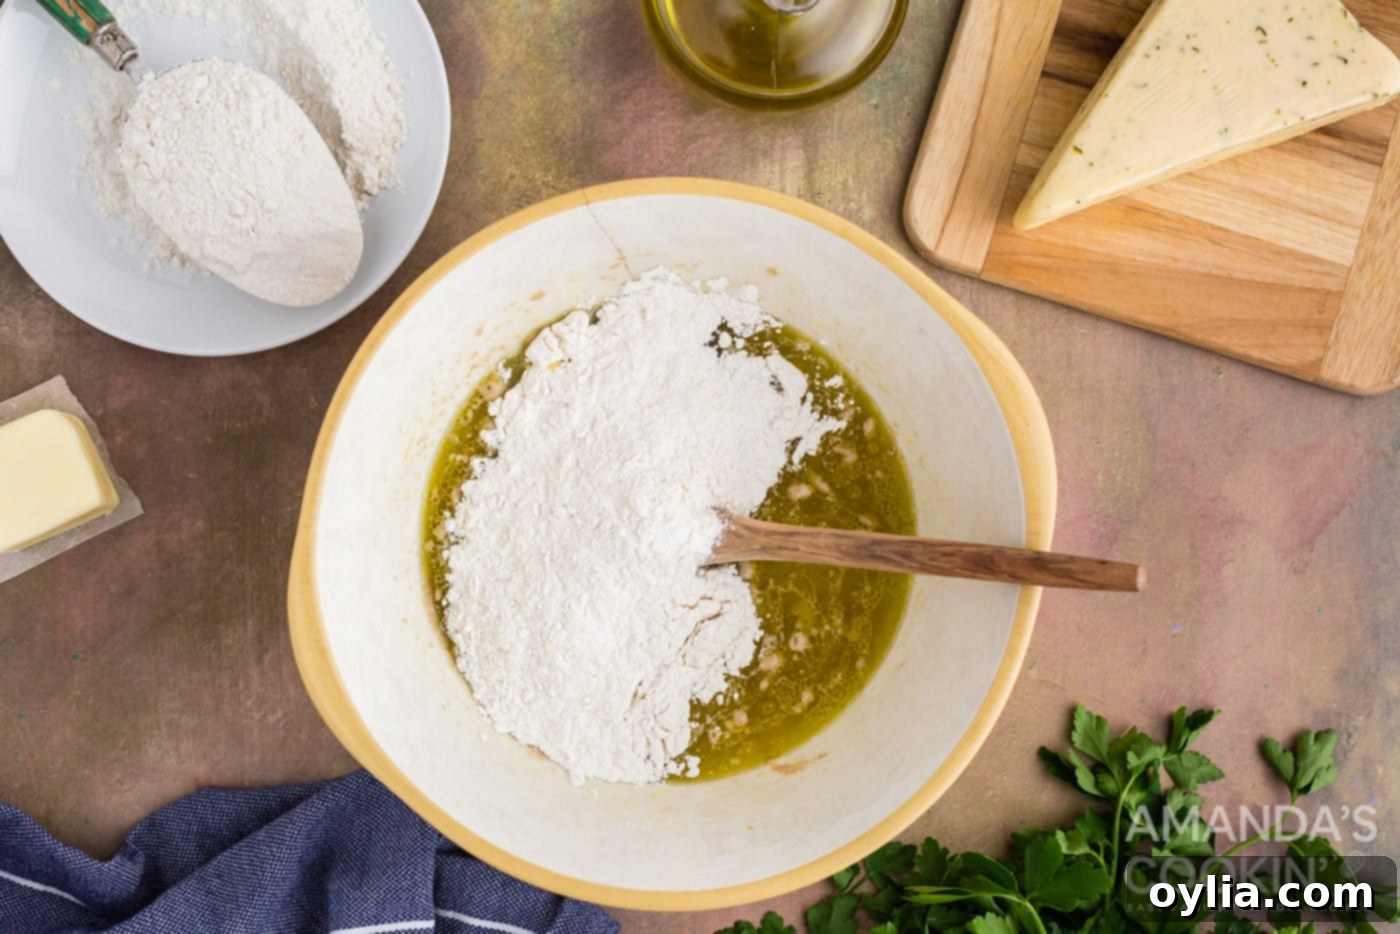
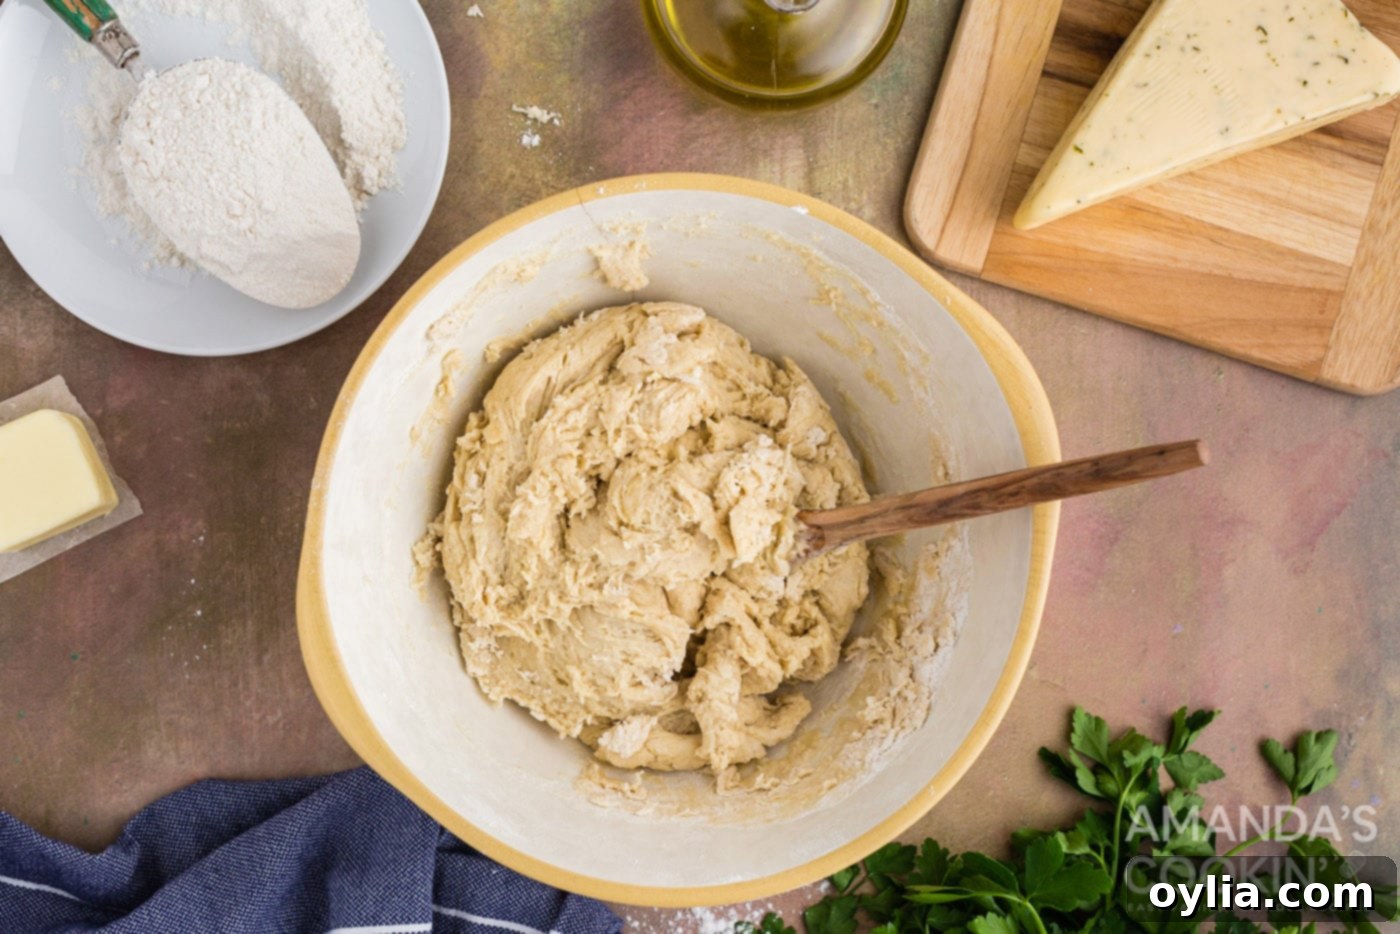
- Combine Wet and Dry Ingredients: Once the yeast has foamed, add the sugar, garlic powder, melted butter, olive oil, and salt to the bowl. Mix these wet ingredients thoroughly. Gradually begin adding the all-purpose flour, mixing it in stages. You can use a stand mixer fitted with a dough hook, which makes the kneading process much easier, or you can mix and knead by hand. Continue mixing until a shaggy dough forms, then turn it out onto a lightly floured surface or continue kneading in the mixer. Knead the dough for approximately 10 minutes until it becomes smooth, elastic, and no longer sticky. This develops the gluten, which is essential for a soft and chewy roll.
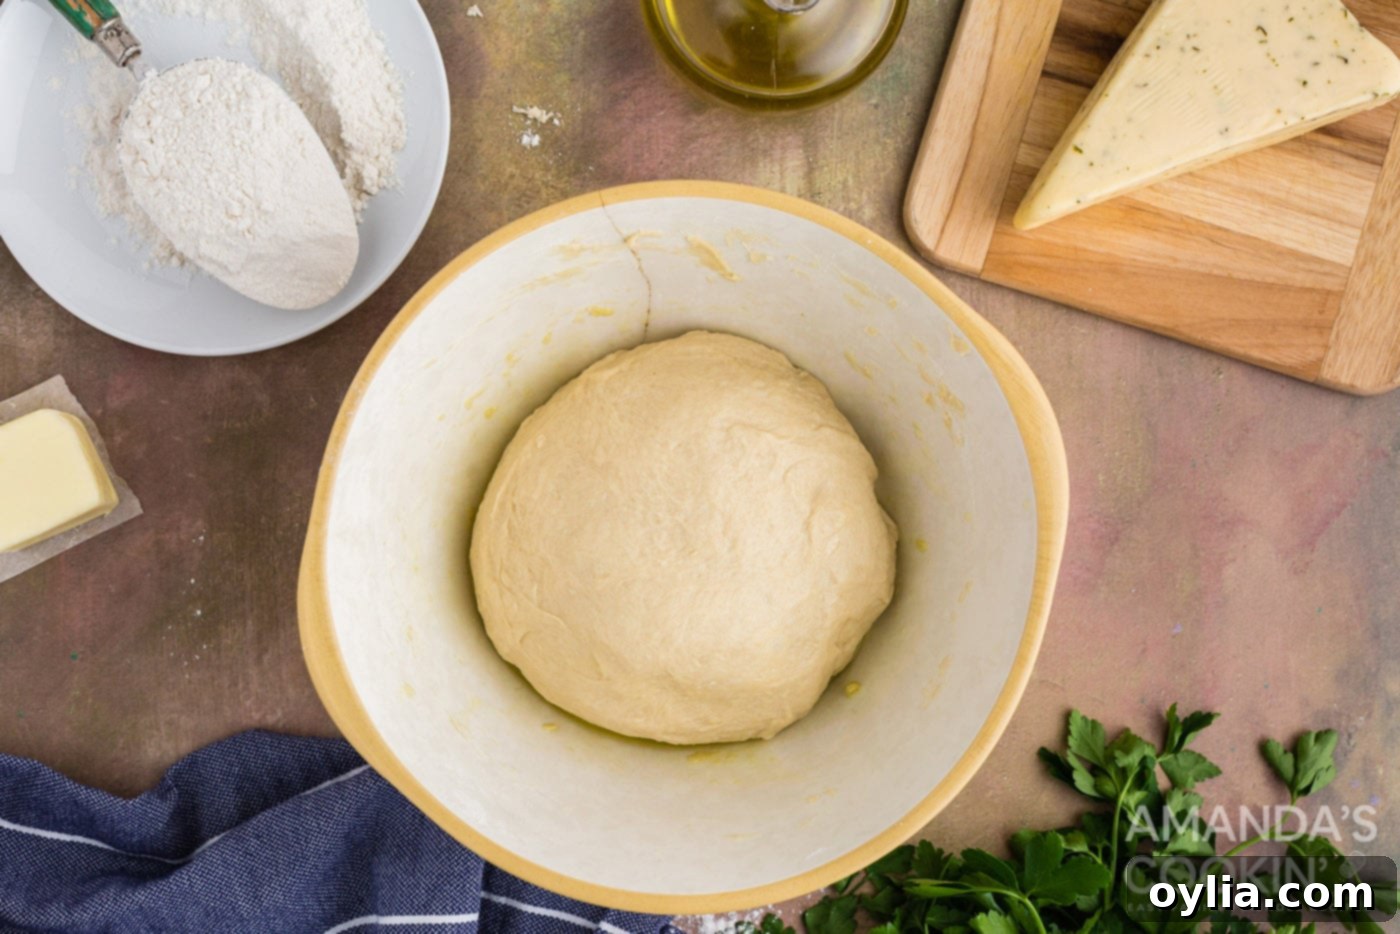
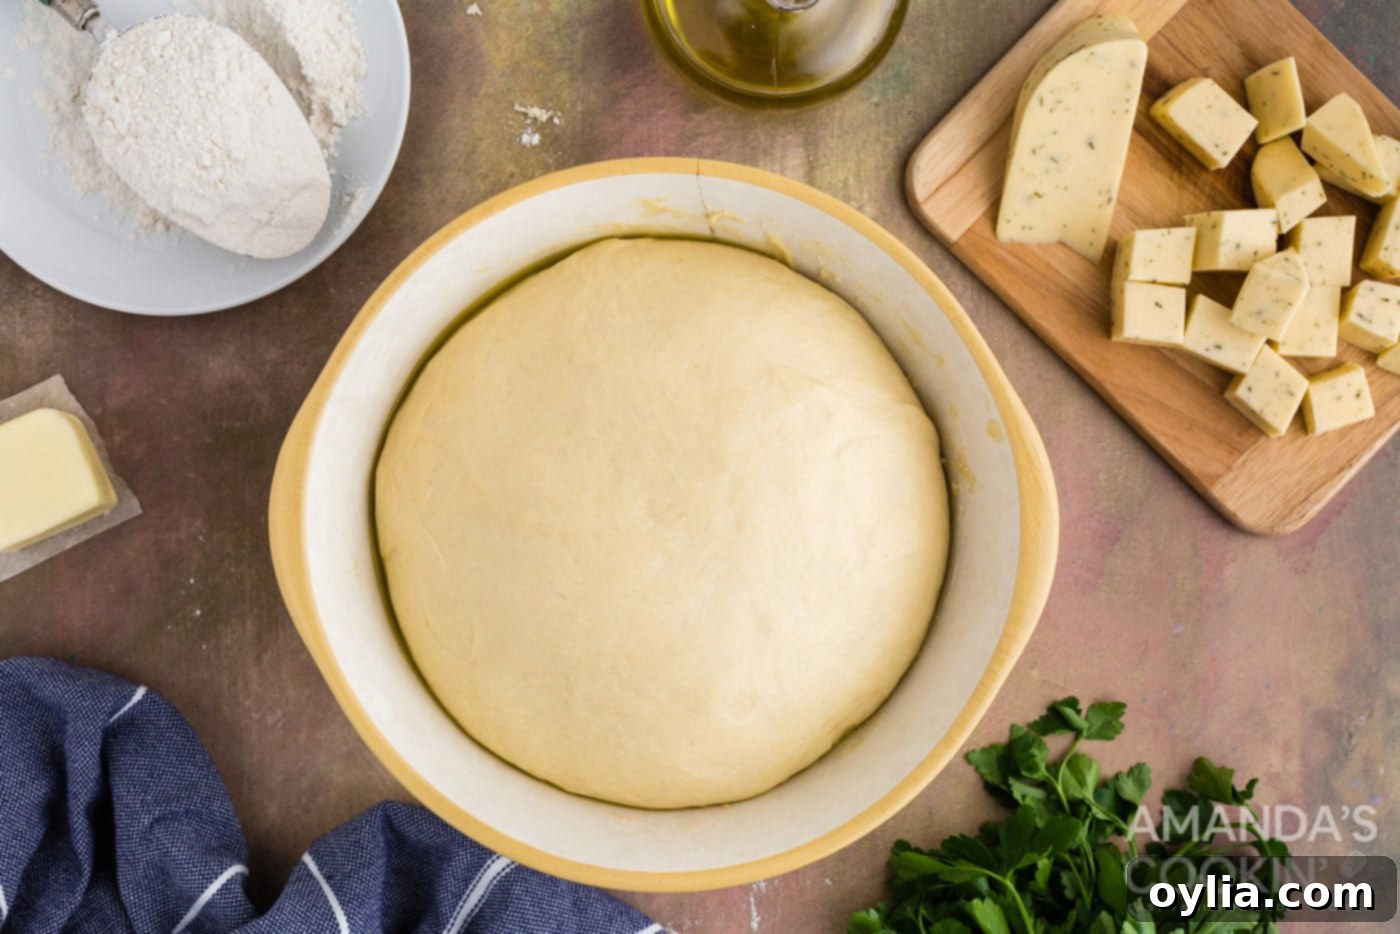
- First Rise: Lightly oil a clean bowl and transfer the kneaded dough to it, turning the dough once to coat it evenly with oil. This prevents the dough from drying out. Cover the bowl with a soft cloth or plastic wrap and place it in a warm, draft-free spot. Let the dough rise for about 30 minutes, or until it has doubled significantly in size. The rising time can vary depending on the warmth of your kitchen, so observe the dough’s volume as your primary indicator.
- Prepare for Baking: While your dough is rising, preheat your oven to 375°F (190°C). Line an insulated baking sheet with parchment paper. This helps prevent the bottoms of the rolls from burning and ensures even baking.
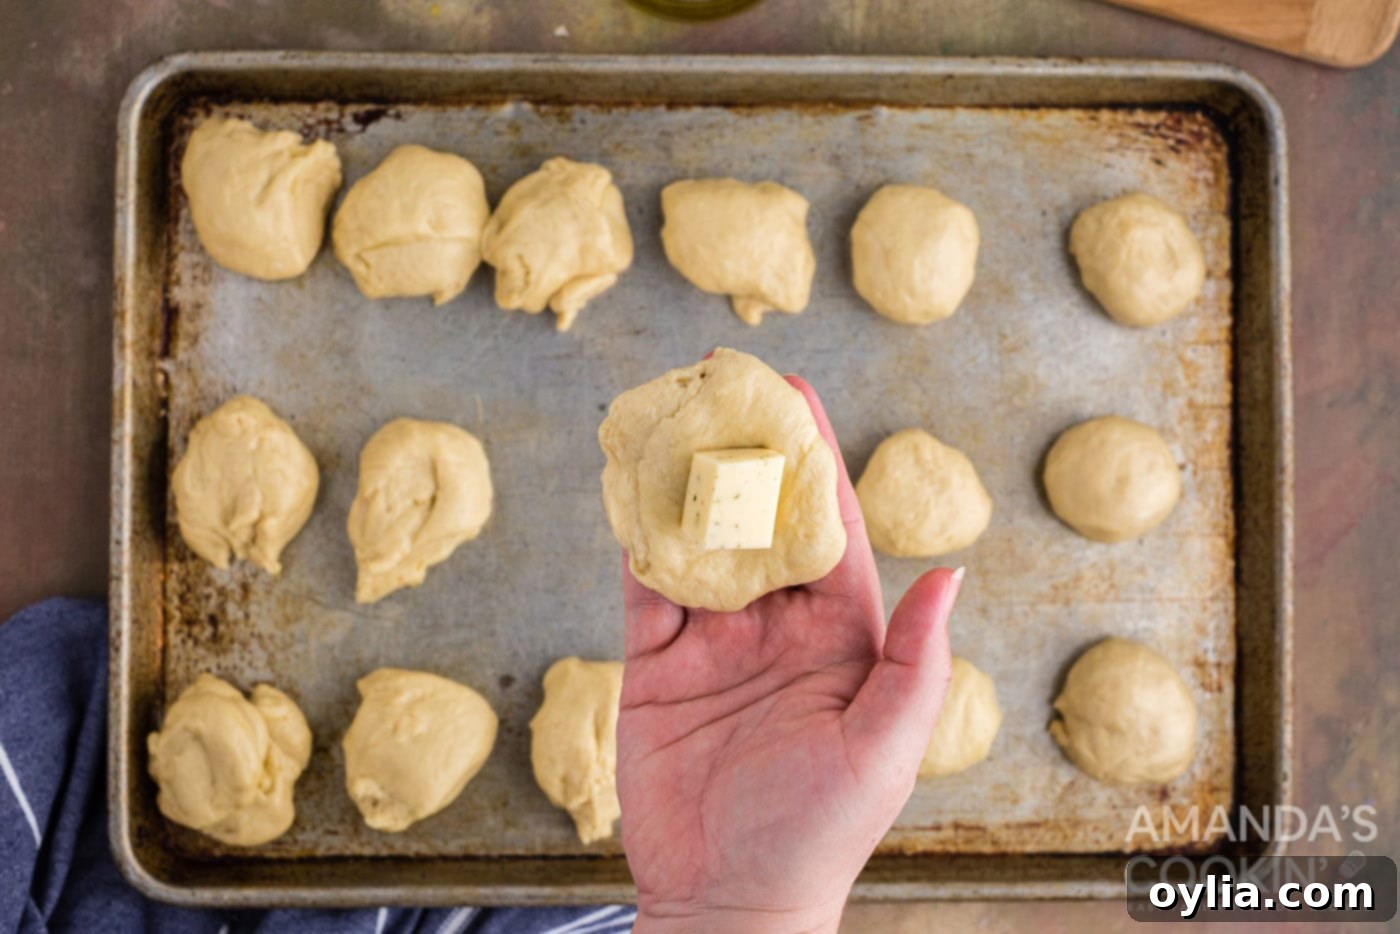
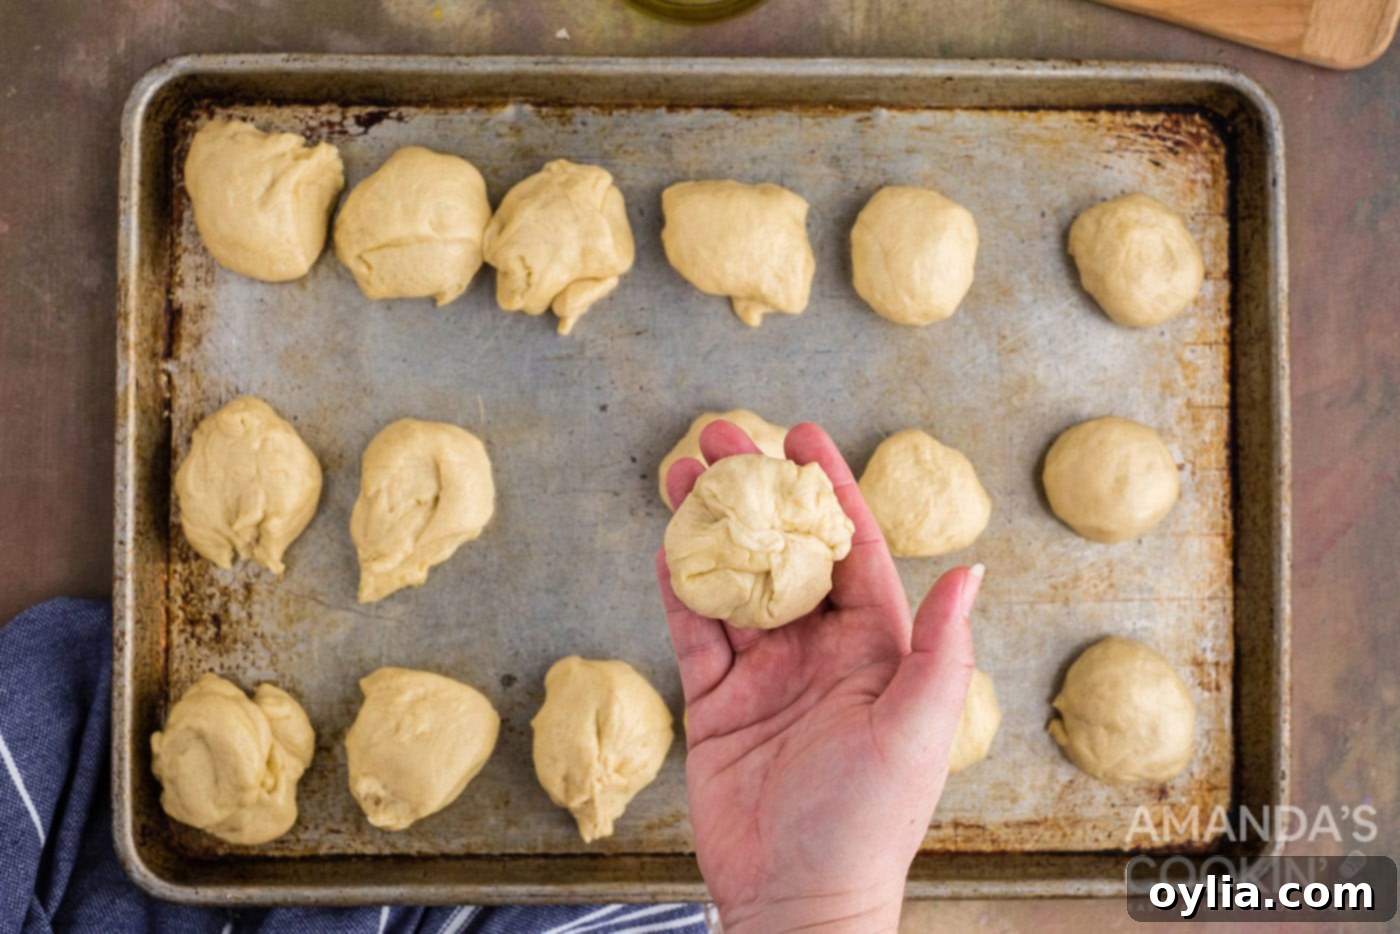
- Stuff and Shape the Rolls: Once your dough has risen, gently deflate it and divide it into 18 equal pieces. For consistent sizing and baking, we highly recommend using a kitchen scale to weigh out the dough balls. Take each piece of dough, flatten it slightly, and place about a ¾-inch chunk of your chosen garlic cheese (or other melty cheese) into the center. Carefully bring all the edges of the dough together, pinching them tightly to completely enclose the cheese. This is crucial to prevent the cheese from oozing out during baking. Place the pinched side down on your prepared baking sheet.
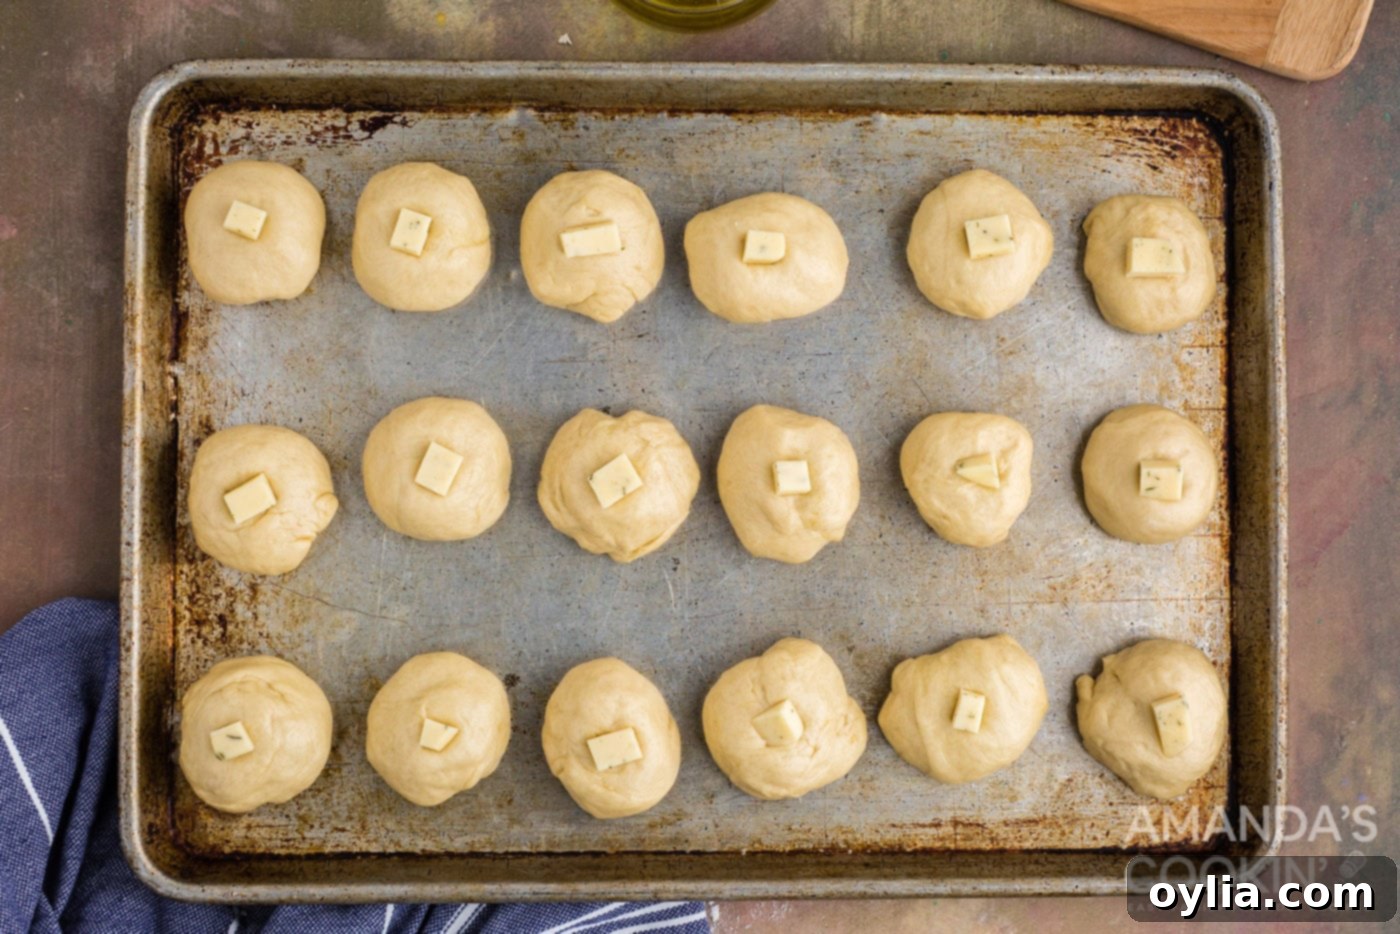
- Final Touches Before Baking: For extra cheesy appeal, cut small slices or shreds from any remaining cheese and place them on top of the formed dough balls. This cheese will melt and brown beautifully, adding an extra layer of flavor and texture to the crust.
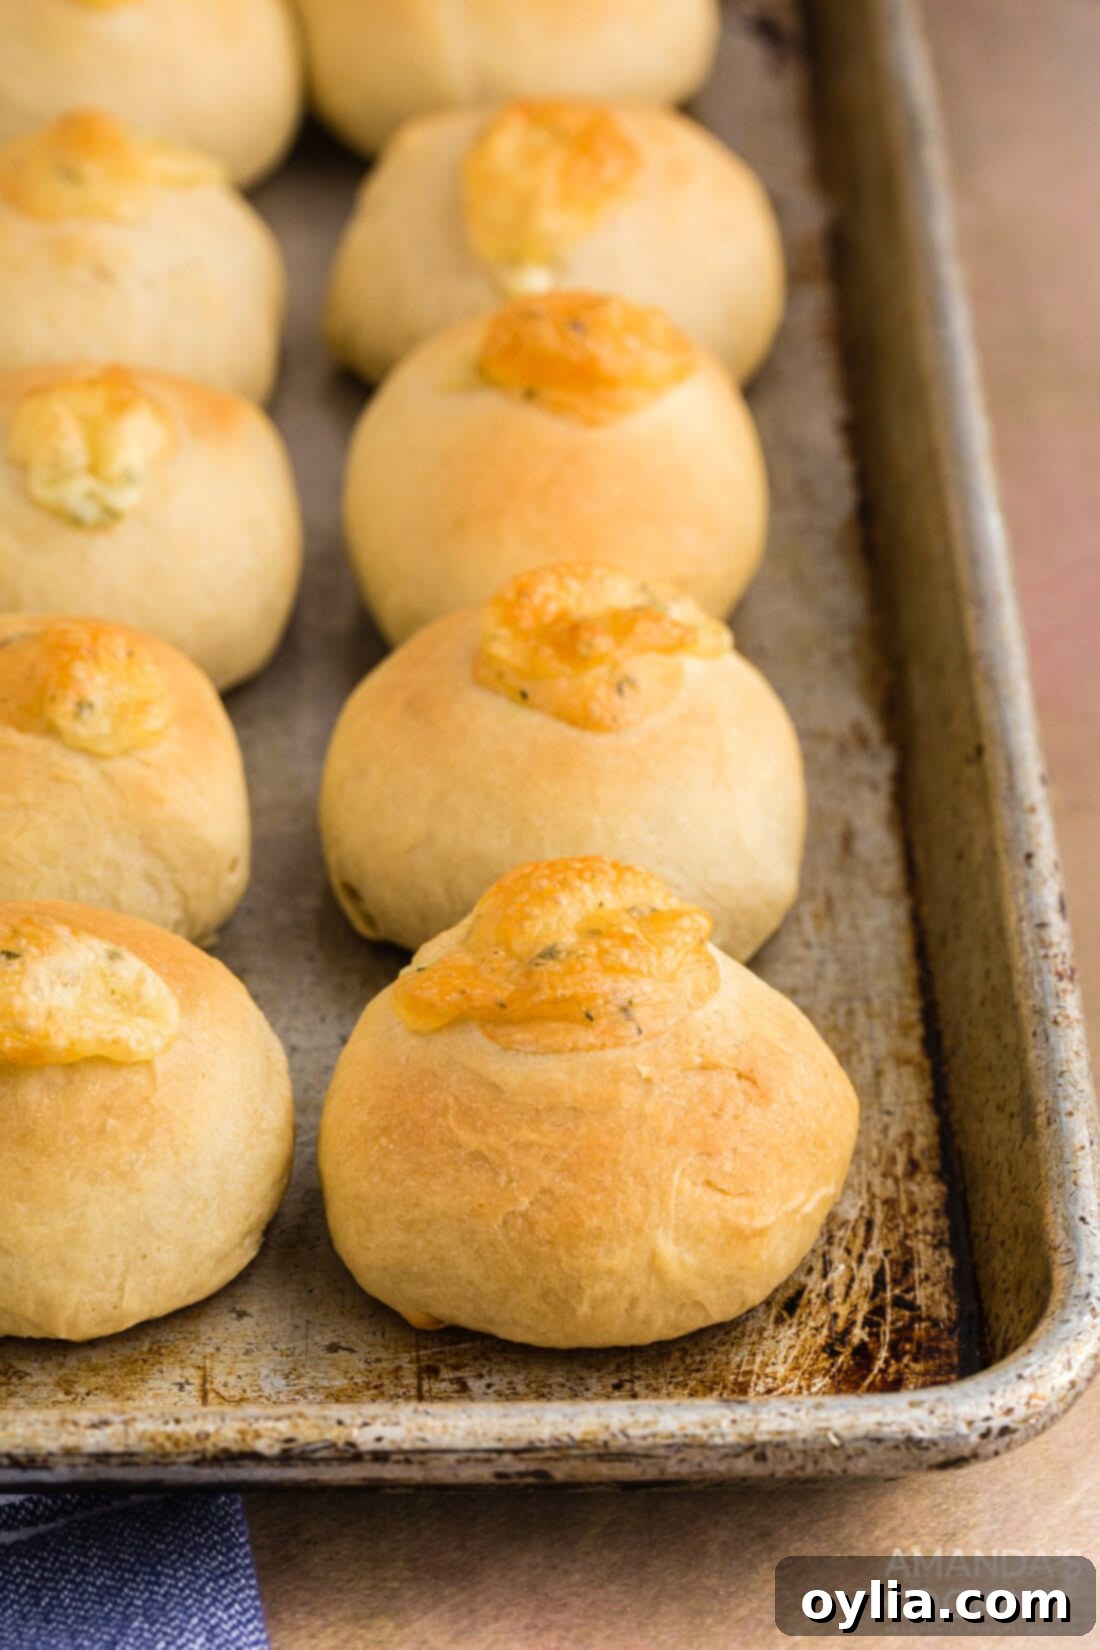
- Bake to Perfection: Transfer the baking sheet to your preheated oven and bake for 11-15 minutes. Keep an eye on them; the rolls are done when the bread is beautifully golden brown on top and the cheese filling is visibly bubbly and melted. Immediately after removing them from the oven, brush the tops generously with additional melted butter. This adds an extra layer of richness and a beautiful glossy finish. Serve these delectable garlic cheese rolls warm and savor every bite!
Expert Tips for Perfect Garlic Cheese Rolls
- Don’t Rush the Rise: While instant yeast is fast, ensure your dough truly doubles in size during the first rise. A proper rise contributes significantly to the rolls’ soft, airy texture. If your kitchen is cool, place the bowl in a slightly warm oven (turned off, or warmed briefly to about 100°F/38°C and then turned off) or near a sunny window.
- Sealing the Cheese: This is arguably the most critical step to prevent cheese leakage. After placing the cheese in the dough, gather the edges firmly and pinch them together securely. Roll the dough gently between your palms to ensure a smooth, sealed ball. The “pinched side down” placement on the baking sheet further minimizes the risk of cheese escaping.
- Even Baking is Key: Using a kitchen scale to divide the dough ensures all your rolls are the same size, which means they’ll bake evenly. An insulated baking sheet is also recommended to prevent the bottoms from browning too quickly before the centers are cooked through and the cheese is perfectly melted.
- Customize Your Cheese: While garlic cheese is fantastic, feel free to use your favorite melty cheese. A mix of cheeses can also be exciting. Consider a sharp cheddar with a mild mozzarella for flavor and stretch, or a smoked gouda for a unique twist.
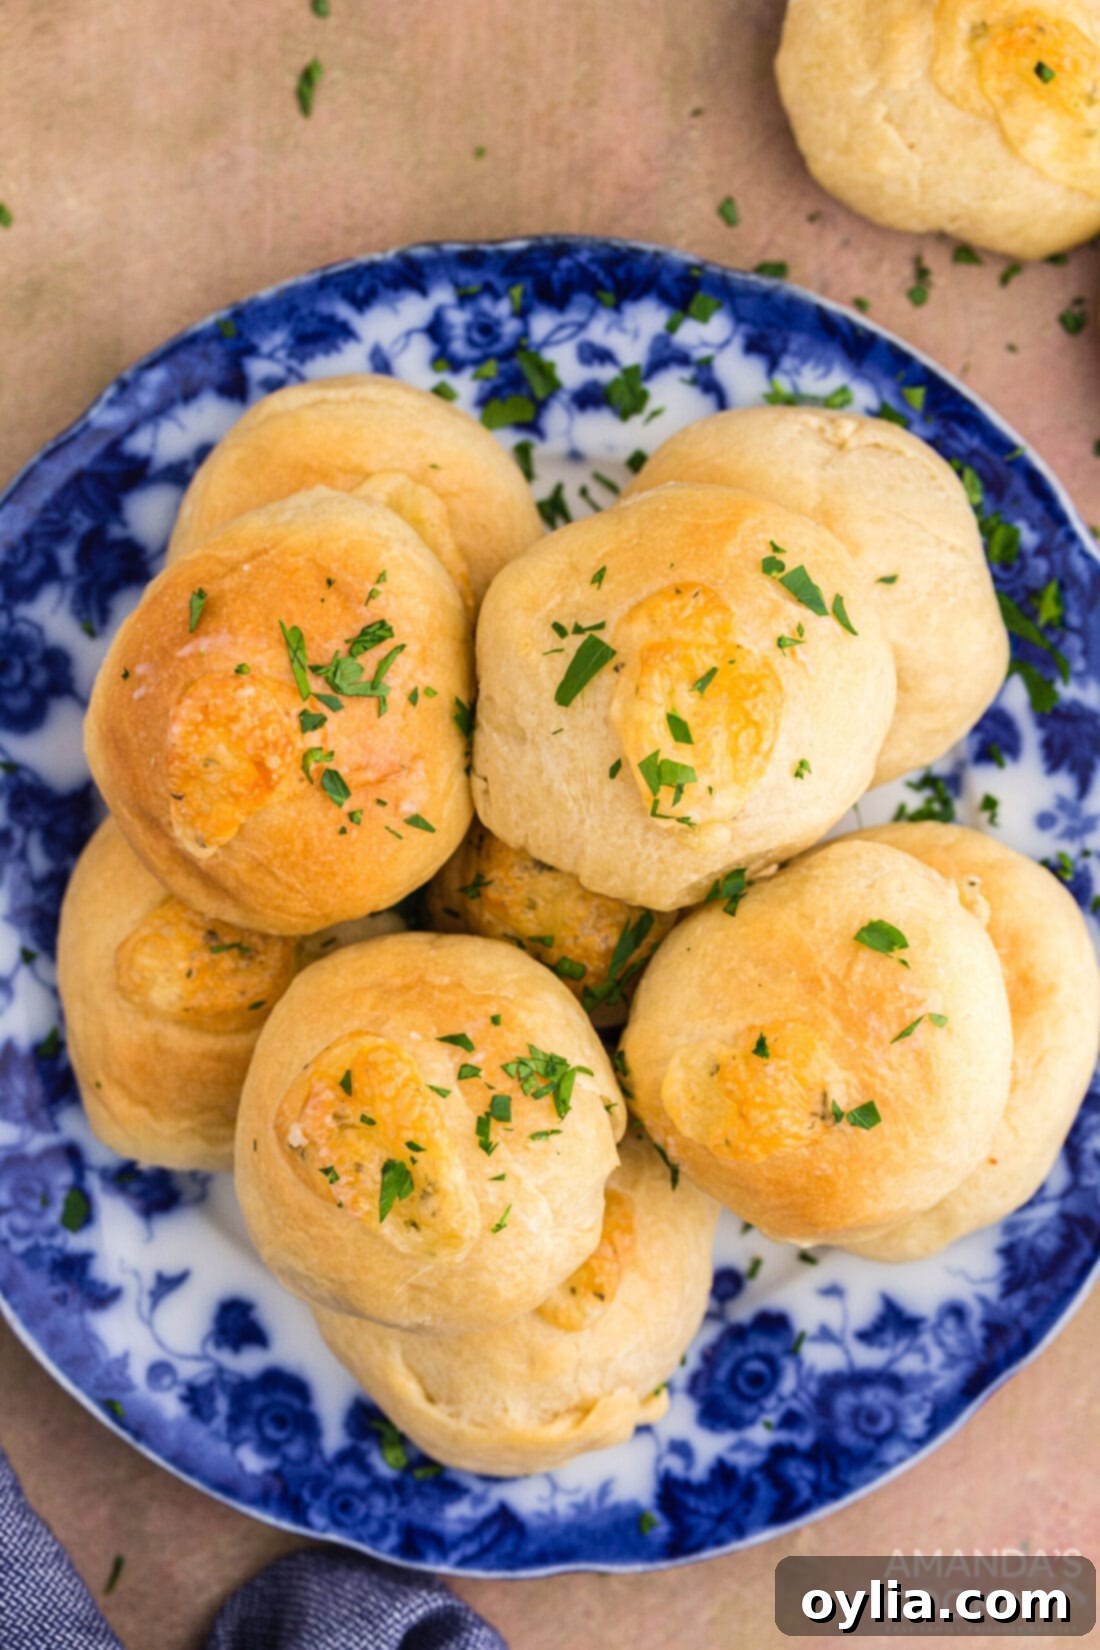
- Fresh Herbs for Garnish: For an extra touch of freshness and flavor, consider sprinkling freshly chopped parsley or chives over the melted butter after the rolls come out of the oven. This adds color and a lovely herbaceous note.
Frequently Asked Questions About Garlic Cheese Rolls
These cheese rolls are undoubtedly best served warm and fresh from the oven, when the bread is soft and the cheese is wonderfully gooey. However, leftovers can be stored for up to 4 days. Make sure to keep them sealed in an airtight container at room temperature to maintain their freshness and prevent them from drying out.
Yes, you absolutely can use bread flour. Bread flour has a higher protein content, which can result in a chewier crust and a slightly more robust texture, which some people prefer for rolls. Simply substitute an equal amount of bread flour for the all-purpose flour specified in the recipe. The kneading time might slightly increase to fully develop the stronger gluten.
Yes, you can certainly use active dry yeast. The main difference is that active dry yeast typically needs to be “proofed” first. To do this, sprinkle the active dry yeast over the warm water (105-115°F or 40-46°C) along with a pinch of sugar, and let it sit for about 5-10 minutes until it becomes foamy. This confirms the yeast is active. Then, proceed with the recipe as instructed, adding this yeast mixture to your other ingredients.
Yes, you can! After the first rise, you can punch down the dough, form the rolls with the cheese, and place them on the baking sheet. Cover loosely with plastic wrap and refrigerate for up to 24 hours. When you’re ready to bake, remove them from the fridge and let them come to room temperature and rise for about 30-60 minutes (or until puffy) before baking as directed.
To bring them back to their fresh-baked glory, reheating is best done in an oven or air fryer. Wrap the rolls in foil and bake at 300°F (150°C) for about 10-15 minutes, or until warmed through and the cheese is soft again. In an air fryer, heat at 300°F (150°C) for 5-7 minutes. Microwaving is an option for quick reheating, but it can sometimes make the rolls a bit chewy, though the cheese will still be melty and delicious.
A soft, warm, garlic cheese roll is truly the ultimate dinner side that everyone at your table will adore. The combination of fluffy homemade bread, rich, melted garlic cheese, and that final brush of melted butter (perhaps even sprinkled with fresh chopped parsley!) creates a sensory delight. These rolls are more than just bread; they are an experience, a perfect blend of comfort and flavor that transforms any meal into something special.
Explore More Delicious Roll Recipes
If you loved making these garlic cheese rolls, you might be interested in expanding your repertoire of homemade bread. From savory to sweet, there’s a roll for every occasion and palate. Here are some more fantastic roll recipes to inspire your next baking adventure:
- Bretzel Rolls (Pretzel Sandwich Rolls): A unique take on rolls with a delightful pretzel crust.
- Parmesan Garlic Rolls: Another garlicky favorite, elevated with the sharp taste of Parmesan.
- Homemade Hawaiian Rolls: Sweet, fluffy, and perfect for sliders or a touch of aloha.
- Easy Homemade Dinner Rolls: A classic, foolproof recipe for everyday meals.
- Homemade Pull Apart Dinner Rolls: Fun to make and even more fun to eat, these are great for sharing.
- Bunny Rolls: A charming and whimsical option, perfect for holiday tables or special occasions.
This delightful recipe for garlic cheese rolls was originally discovered on Pinterest, leading to Yammie’s Noshery. It was inspired by their fantastic Peeta’s Stuffed Cheese Buns, a creative nod to the Hunger Games. It’s wonderful how culinary inspiration travels and transforms!
I am passionate about baking and cooking, and I love sharing my kitchen adventures and recipes with all of you! To make sure you never miss a new recipe, I offer a convenient newsletter. Simply subscribe today and start receiving your free daily recipes directly to your inbox!
Garlic Cheese Rolls
IMPORTANT – There are often Frequently Asked Questions within the blog post that you may find helpful. Simply scroll back up to read them!
Print It
Pin It
Rate It
Save It
Saved!
Prevent your screen from going dark
Course:
Breads
Cuisine:
American
18
rolls
1 hour
10 minutes
195
Amanda Davis
Ingredients
-
1
cup
warm water
approximately 115 F -
2
tablespoons
SAF instant yeast -
2
tablespoons
sugar -
2
teaspoons
garlic powder -
¼
cup
unsalted butter
melted -
¼
cup
olive oil -
3
cups
unbleached all-purpose flour -
2
teaspoons
salt -
8
oz.
garlic cheese -
2
tablespoons
unsalted butter
melted
Things You’ll Need
-
Stand mixer with dough hook -
Insulated baking sheets -
Kitchen scale
Before You Begin
- We’re using our favorite garlic cheese for this recipe to really ramp up the flavor, but you can certainly substitute it with any cheese you’d like. Mozzarella, cheddar, or really any melty cheese will work.
- This recipe uses regular all-purpose flour. If you would like to try substituting for whole wheat flour, do NOT replace all of the all-purpose flour with whole wheat, instead, use half regular and half wheat. Using whole wheat flour can cause your rolls to be too dense.
- We use unsalted butter in this recipe, if you substitute with salted butter instead, reduce the amount of salt in the recipe by half a teaspoon. We love the flavor that olive oil adds to baked goods, but you can use vegetable oil or canola oil instead.
Instructions
-
Sprinkle yeast over the warm water and let it sit for a few minutes. Once the yeast begins to foam, you can add the sugar, garlic powder, melted butter, oil and salt. Mix together then gradually add the flour, mixing in your stand mixer with a dough hook or by hand. Knead for 10 minutes then place in an oiled bowl and cover with a soft cloth.
-
Let the dough rise for about 30 minutes, or until the dough doubles in size.
-
Preheat the oven to 375 F. Line insulated baking sheet with parchment paper.
-
Divide the dough into 18 equal pieces. Put about a 3/4-inch chunk of cheese in each one and make sure you pinch all the edges back up tightly. Put the pinched side down on the baking sheet. Cut small slices from remaining cheese and place on top of buns.
-
Bake for 11-15 minutes until the bread is golden brown and the cheese is bubbly. Brush with the melted butter and serve warm.
Nutrition
Serving:
1
roll
|
Calories:
195
cal
|
Carbohydrates:
18
g
|
Protein:
6
g
|
Fat:
11
g
|
Saturated Fat:
6
g
|
Cholesterol:
23
mg
|
Sodium:
339
mg
|
Potassium:
43
mg
|
Fiber:
1
g
|
Sugar:
1
g
|
Vitamin A:
245
IU
|
Calcium:
95
mg
|
Iron:
1.1
mg
Tried this Recipe? Pin it for Later!
Follow on Pinterest @AmandasCookin or tag #AmandasCookin!
The recipes on this blog are tested with a conventional gas oven and gas stovetop. It’s important to note that some ovens, especially as they age, can cook and bake inconsistently. Using an inexpensive oven thermometer can assure you that your oven is truly heating to the proper temperature. If you use a toaster oven or countertop oven, please keep in mind that they may not distribute heat the same as a conventional full sized oven and you may need to adjust your cooking/baking times. In the case of recipes made with a pressure cooker, air fryer, slow cooker, or other appliance, a link to the appliances we use is listed within each respective recipe. For baking recipes where measurements are given by weight, please note that results may not be the same if cups are used instead, and we can’t guarantee success with that method.
This post originally appeared here on Apr 29, 2013, and has since been updated with new photos, expanded content, and expert tips to enhance your baking experience.
