Decadent Golden Oreo Truffles: Your Easy No-Bake Dessert Guide
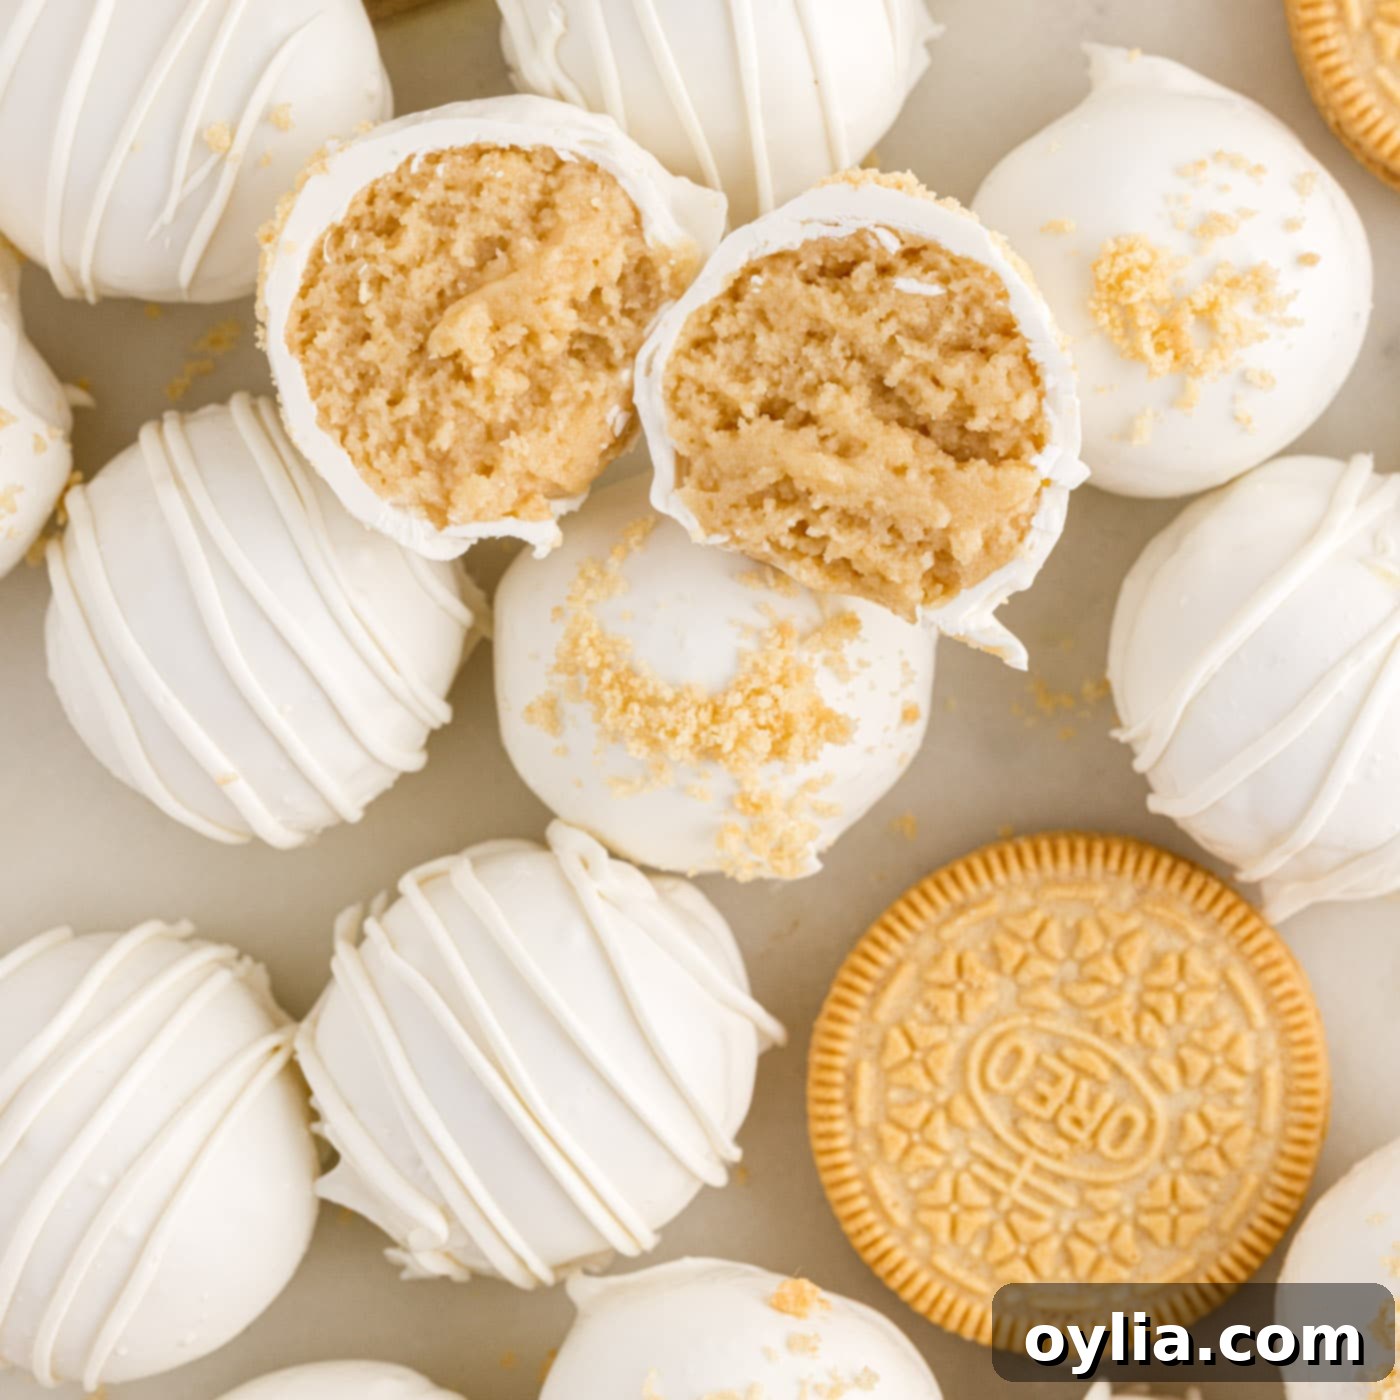
Imagine a bite-sized piece of heaven, creamy and sweet, coated in luscious white chocolate, and bursting with the familiar, comforting flavor of Golden Oreos. That’s exactly what you get with these incredible Golden Oreo Truffles! Requiring just three simple ingredients – Golden Oreo cookies, smooth cream cheese, and rich white chocolate melting wafers – these decadent little morsels are a breeze to make and are guaranteed to be a showstopper at any gathering. Whether you’re hosting a sophisticated dinner party, celebrating a casual family event, or simply craving a sweet treat, these poppable delights are the perfect choice. They’re not just easy; they’re an experience in pure, golden deliciousness, ready to be enjoyed in one delightful bite.
Why You’ll Love These Easy Golden Oreo Truffles
If you’re searching for a dessert that delivers maximum flavor with minimal effort, look no further. This recipe for Golden Oreo Truffles is a true winner, and here’s why it deserves a spot in your go-to dessert collection:
- Effortlessly Simple: With just three core ingredients and a straightforward process, even beginner bakers can achieve professional-looking and tasting results. No complicated techniques, no extensive clean-up. This makes them perfect for a quick sweet fix or a last-minute party contribution.
- No Baking Required: That’s right – keep your oven off! These delightful truffles are entirely no-bake, making them perfect for hot summer days, busy holidays, or when you just don’t feel like heating up the kitchen. The lack of baking also simplifies the process and reduces the chances of errors.
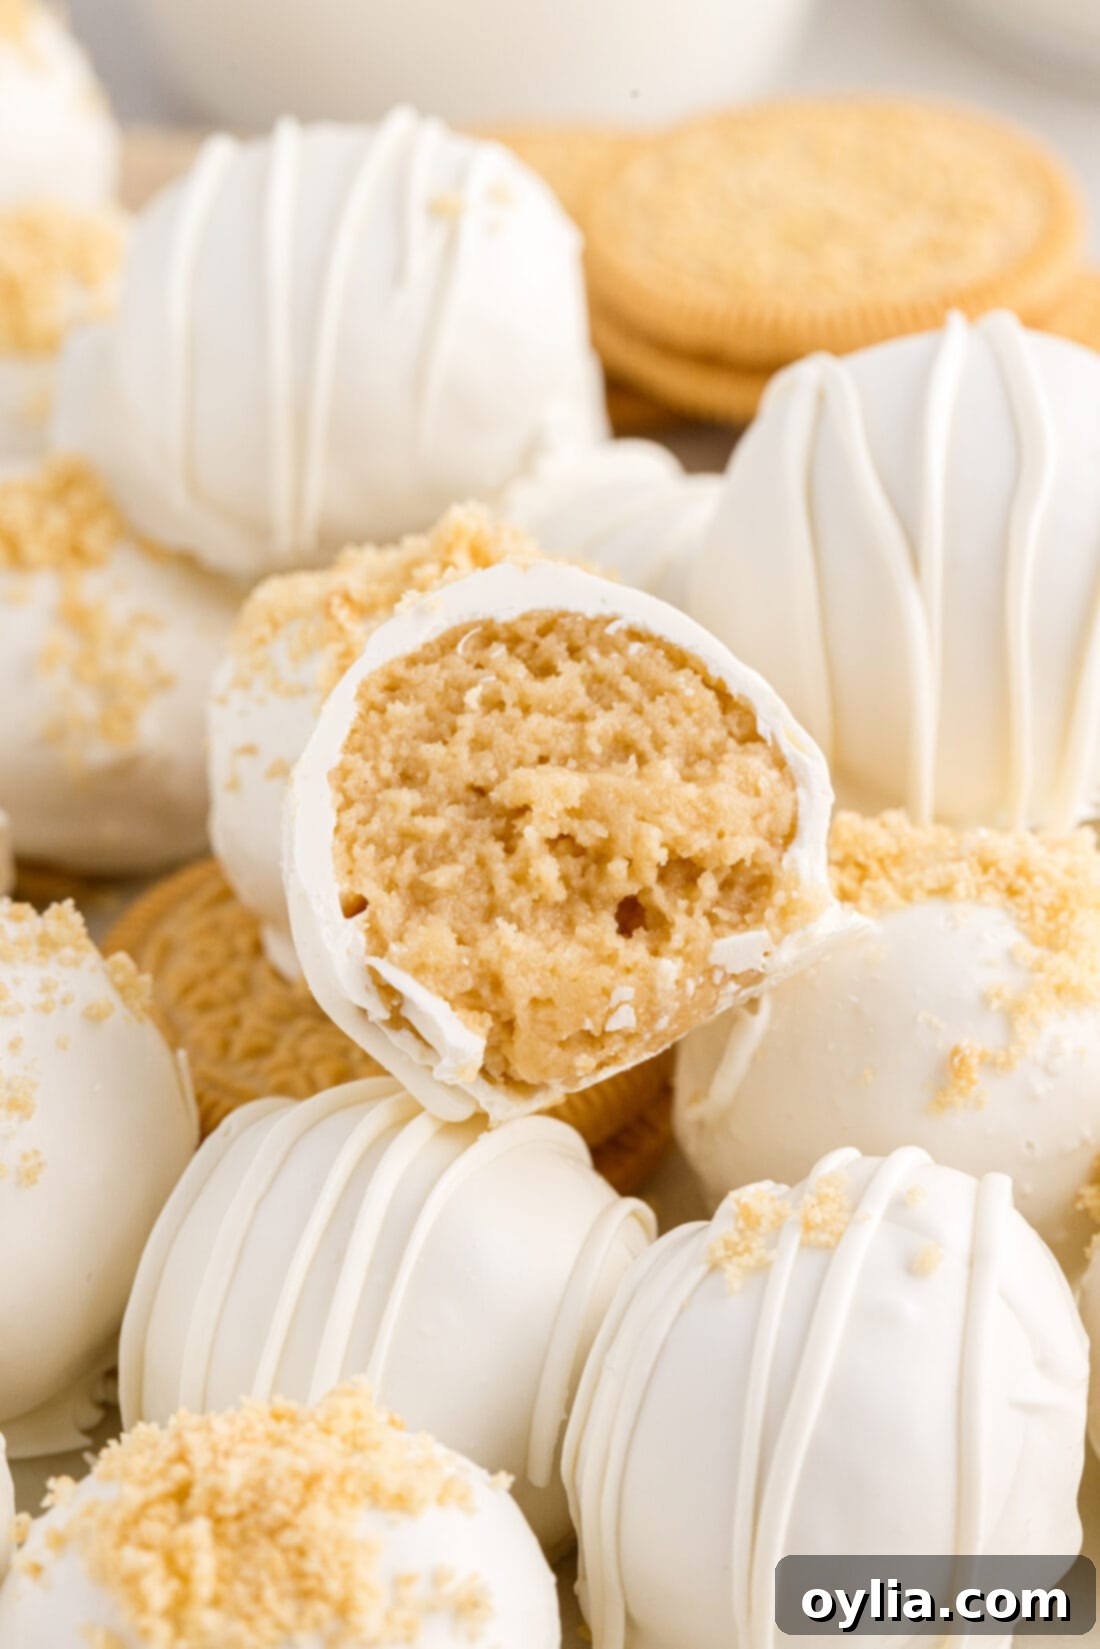
- Perfectly Poppable Texture: The combination of finely crushed vanilla Oreo cookies and creamy cheese creates a soft, sweet, and irresistible filling. When chilled, these balls hold their shape beautifully, offering a delightful texture contrast with the crisp chocolate coating. Each bite is a harmonious blend of creamy, crunchy, and smooth.
- Incredible Versatility: The beauty of Oreo truffles lies in their adaptability. While we focus on the sunny golden variety here, the method is easily transferable. You can experiment with different Oreo flavors, various chocolate coatings (dark, milk, colored), and endless decorating possibilities. We’ve previously created red, white, and blue Oreo truffles for patriotic celebrations and heart Oreo truffles for Valentine’s Day. The creative potential is truly boundless, allowing you to customize them for any holiday, party theme, or special occasion, making them a personal and thoughtful treat.
- Excellent for Meal Prepping & Gifting: These truffles are fantastic for making ahead of time. Their stable nature and ability to be stored in the refrigerator or even freezer make them ideal for preparing in advance for parties or as thoughtful homemade gifts. Imagine having a batch ready to go for unexpected guests or a spontaneous craving!
Each Golden Oreo truffle is a golden morsel of sweet delight, designed to go down in one perfect, poppable bite. They truly are suitable for every occasion, bringing a touch of elegance and a burst of flavor that everyone will adore. Get ready to impress with minimal effort and maximum deliciousness!
Essential Ingredients for Golden Oreo Truffles
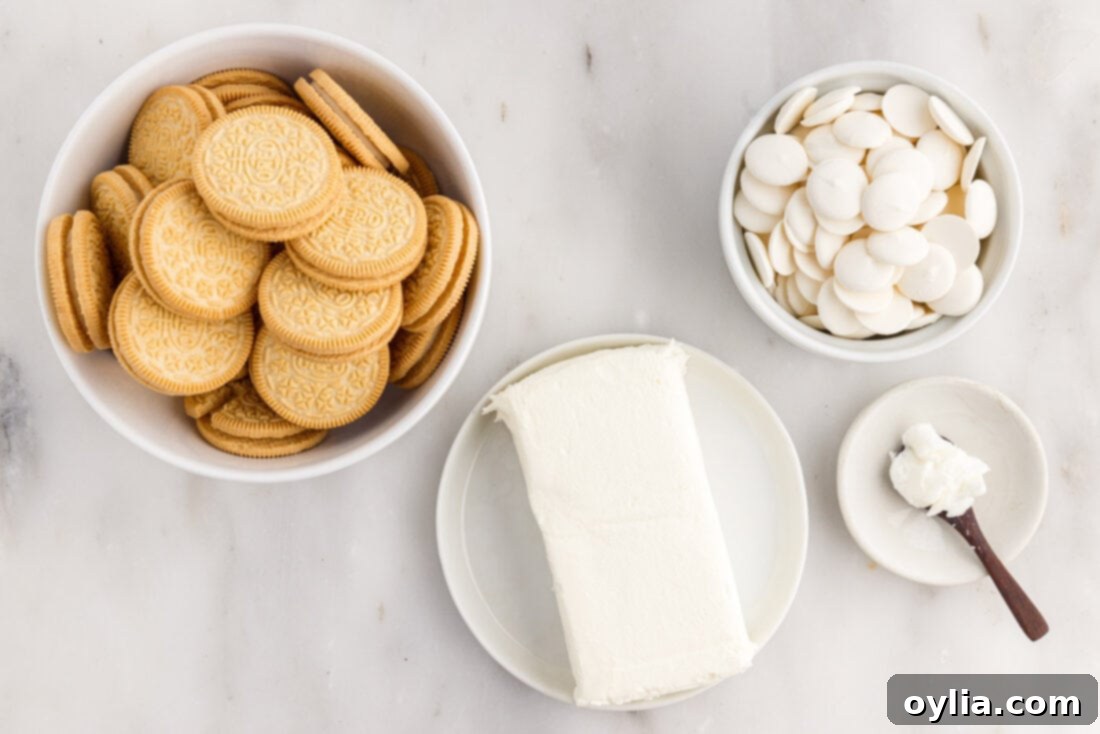
Crafting these delicious Golden Oreo Truffles requires just a handful of readily available ingredients. Simplicity is key, allowing the natural flavors to shine through and making the preparation process enjoyable. Before you begin, gather all your ingredients to ensure a smooth and efficient truffle-making experience. You’ll find all precise measurements, along with detailed instructions, in the convenient printable recipe card located at the very end of this blog post.
Ingredient Spotlight & Expert Substitution Tips
Let’s dive a little deeper into the role each ingredient plays and discuss some helpful tips for achieving the best possible Golden Oreo Truffles, along with smart substitution suggestions. Understanding your ingredients is key to successful no-bake treats.
- Golden OREOS: The star of our show! This recipe specifically calls for whole Golden Oreo cookies. There’s no need to separate the golden cookie from its creamy vanilla filling, as the filling is crucial. It not only adds to the distinct vanilla flavor profile but also contributes essential moisture and acts as a binding agent, creating that perfect truffle consistency when combined with cream cheese. Using the whole cookie and cream ensures the truffle mixture is rich, flavorful, and easy to work with. While Golden Oreos provide a unique, bright vanilla flavor and a beautiful golden hue, if you prefer the classic, feel free to substitute with regular chocolate Oreos for a different, but equally delicious, experience. Just remember that the final color and taste will vary significantly. For the authentic light color and signature vanilla taste of these truffles, stick with the specified Golden Oreos.
- Cream Cheese: For the most luxurious and smooth truffle filling, opt for full-fat cream cheese. Its rich, tangy profile perfectly balances the sweetness of the Oreos. It’s imperative that your cream cheese is softened at room temperature before you start. Cold cream cheese will be difficult to blend smoothly with the cookie crumbs, leading to a lumpy, inconsistent texture. Softened cream cheese ensures a silky, homogenous truffle base that’s easy to roll. Avoid using low-fat or whipped cream cheese as their consistency and moisture content differ, which can drastically affect the final texture and stability of your truffles.
- White Chocolate Melting Wafers: These are ideal for coating your truffles due to their smooth melting properties and ability to set up nicely with a glossy finish. We highly recommend using candy melting wafers (sometimes labeled as candy melts or confectionery coating) for the best results. They are specifically designed to melt easily and harden quickly without needing tempering, giving your truffles a beautiful, professional-looking exterior. However, if you don’t have melting wafers on hand, you can certainly use good quality vanilla almond bark or a premium bar of white baking chocolate. Just ensure it’s a type that melts smoothly and sets firm. Avoid using standard white chocolate chips as they contain stabilizers that can make them harder to melt smoothly and may result in a duller finish.
- Shortening (Optional): A small amount of shortening, like Crisco, is an optional but highly recommended addition when melting your white chocolate. It works wonders by helping the chocolate melt more smoothly, thinning it out just a tiny bit to create a more even and less clumpy coating, and can help prevent it from seizing. If you don’t have shortening available, you can skip it, but be mindful that your chocolate might be a bit thicker and slightly harder to work with, potentially resulting in a thicker coat on your truffles. Alternatively, a teaspoon of neutral-flavored coconut oil (refined, to avoid coconut taste) can also be used as a substitute for shortening to achieve a similar smooth consistency.
Step-by-Step Guide: Crafting Your Golden Oreo Truffles
Making these Golden Oreo Truffles is a fun and rewarding process that requires no specialized skills, just a few simple steps. Follow this visual guide with step-by-step photos and detailed instructions to create your perfect batch. If you prefer to jump directly to the complete printable version of this recipe, including all precise measurements and a full ingredient list, simply Jump to Recipe below.
These step by step photos and instructions are here to help you visualize how to make this recipe. You can Jump to Recipe to get the printable version of this recipe, complete with measurements and instructions at the bottom.
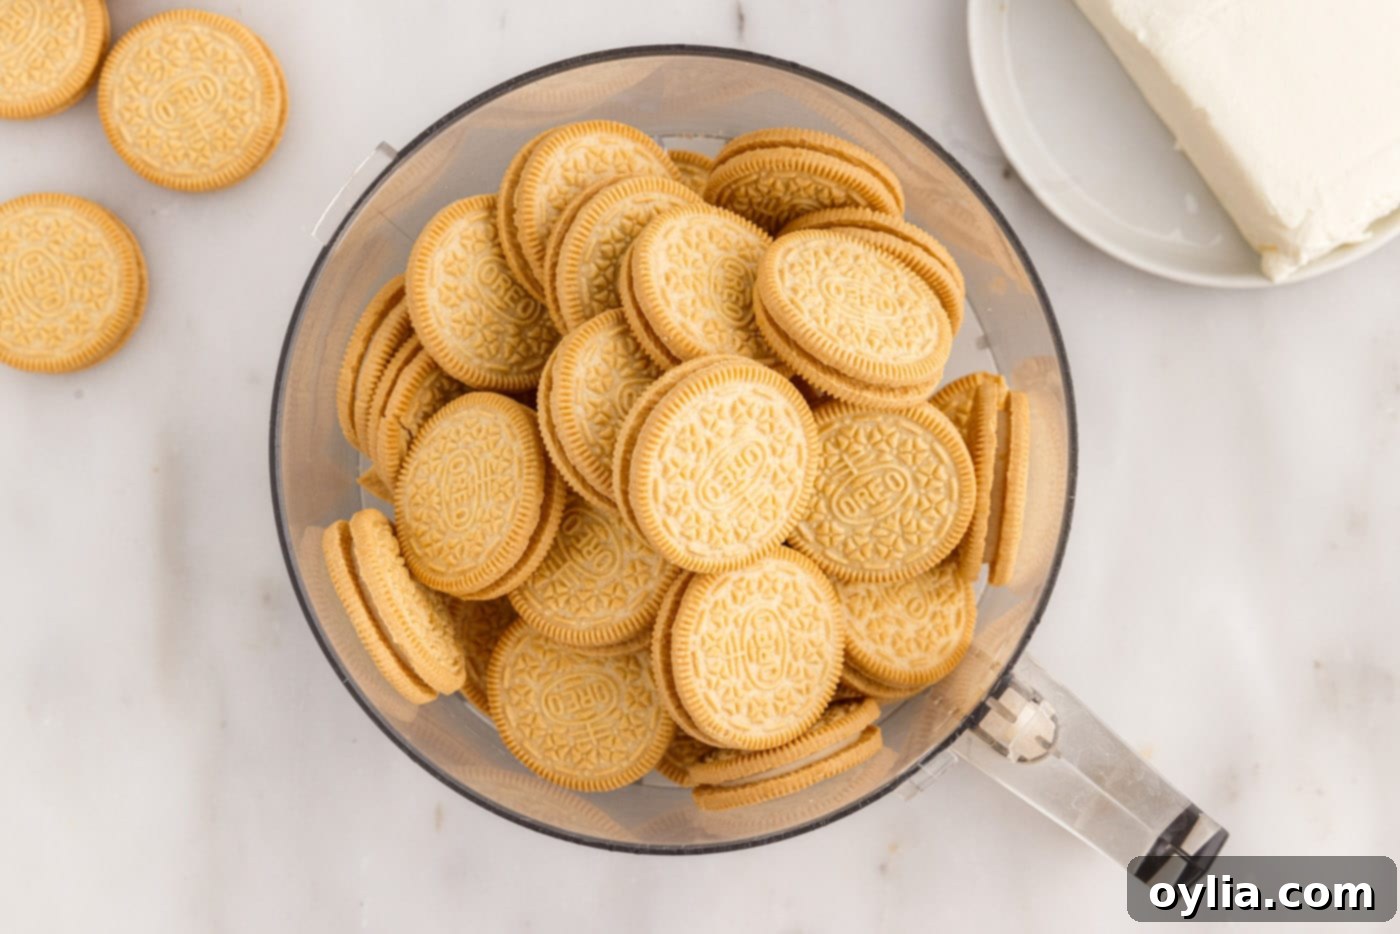
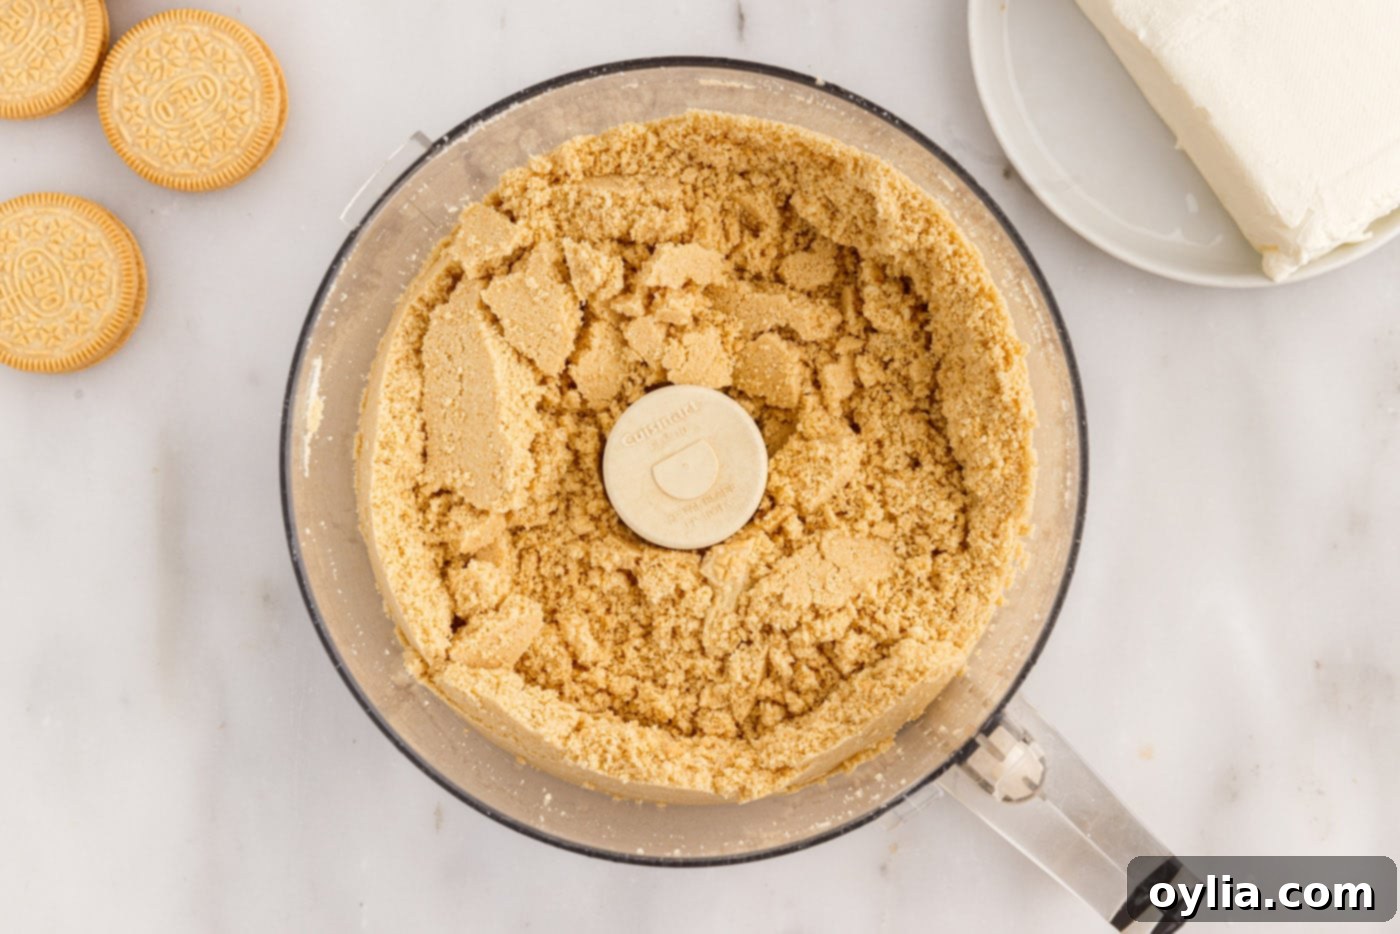
- Pulverize the Cookies: Begin by placing all your whole Golden Oreo cookies (remember, no need to separate the cream!) into the bowl of a food processor. Pulse the cookies until they are transformed into very fine, even crumbs. You want a texture similar to fine sand, ensuring no large chunks remain, as this will result in a smooth truffle base. Process until uniform, but avoid over-processing, which can turn them into a paste.


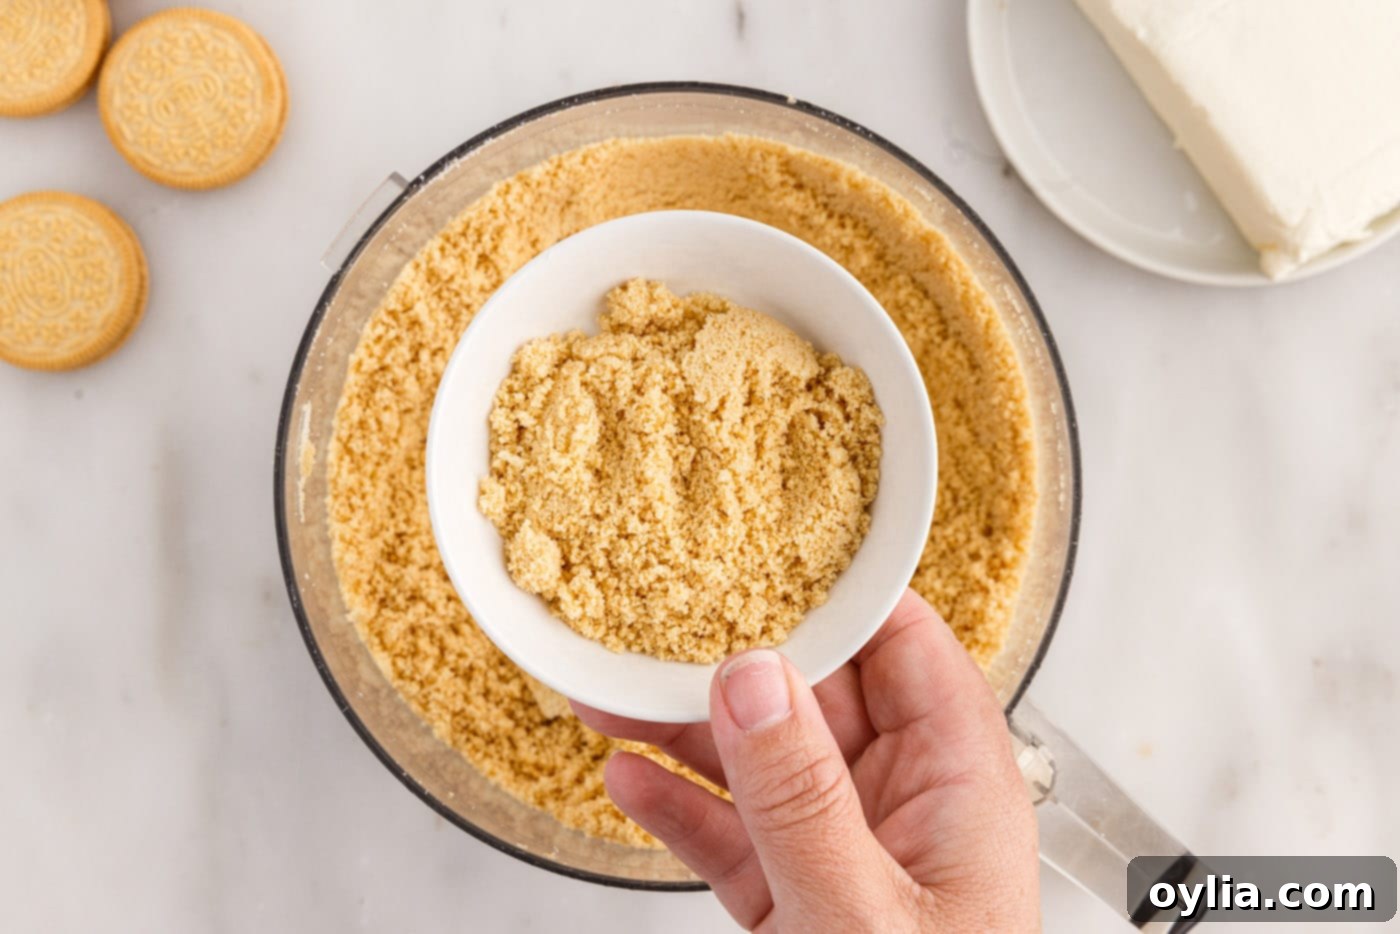
- Reserve Crumbs for Decoration: If you plan to garnish your finished truffles with a sprinkle of cookie crumbs (highly recommended for both visual appeal and a touch of extra texture!), set aside about 2 tablespoons of the pulverized crumbs in a small bowl. This ensures you have perfectly fine crumbs ready for sprinkling without the risk of contaminating your melted chocolate.

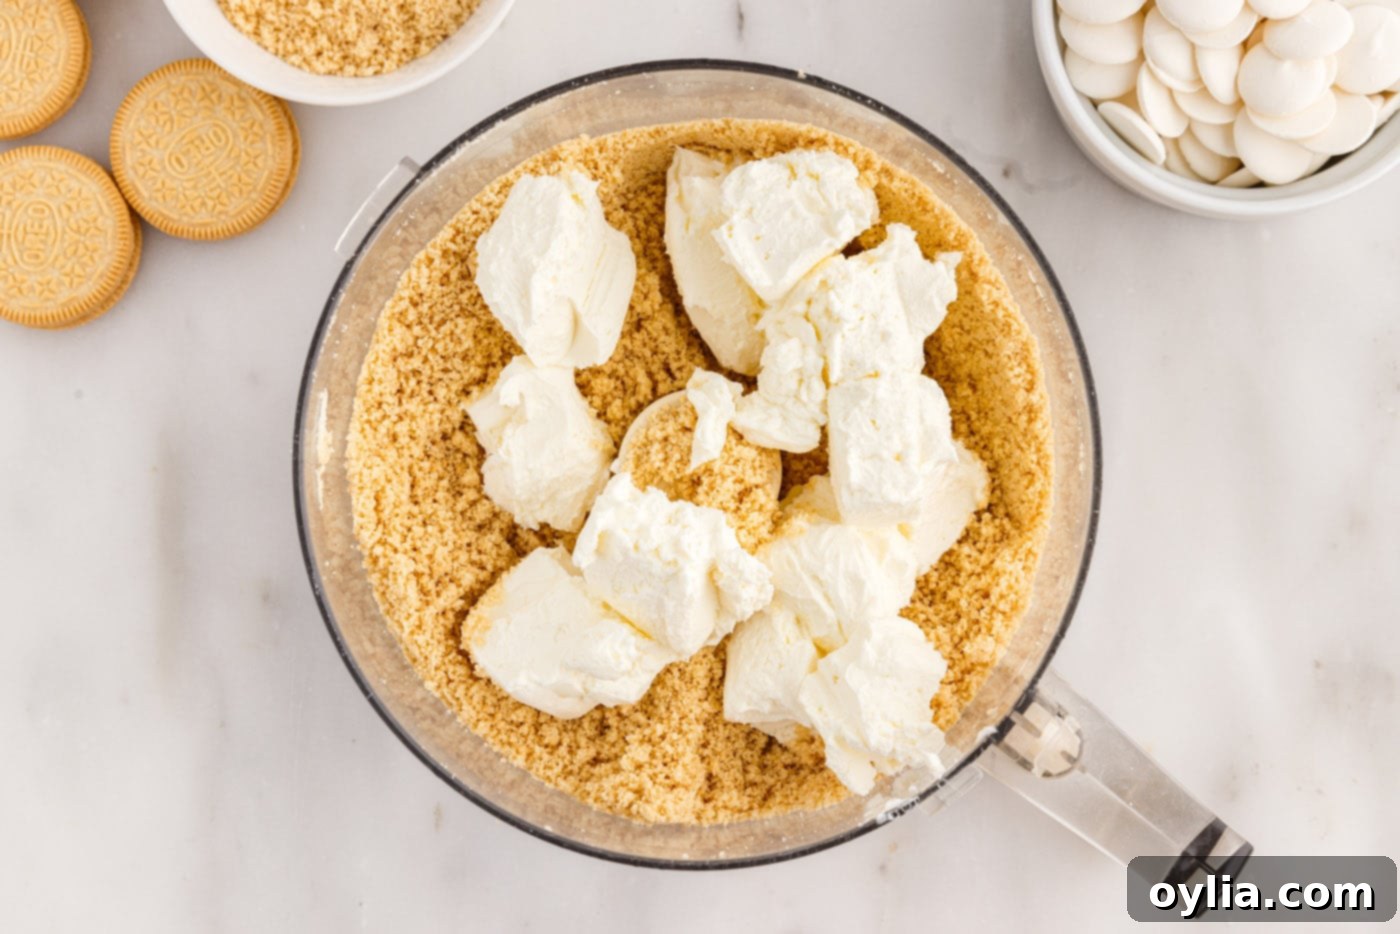
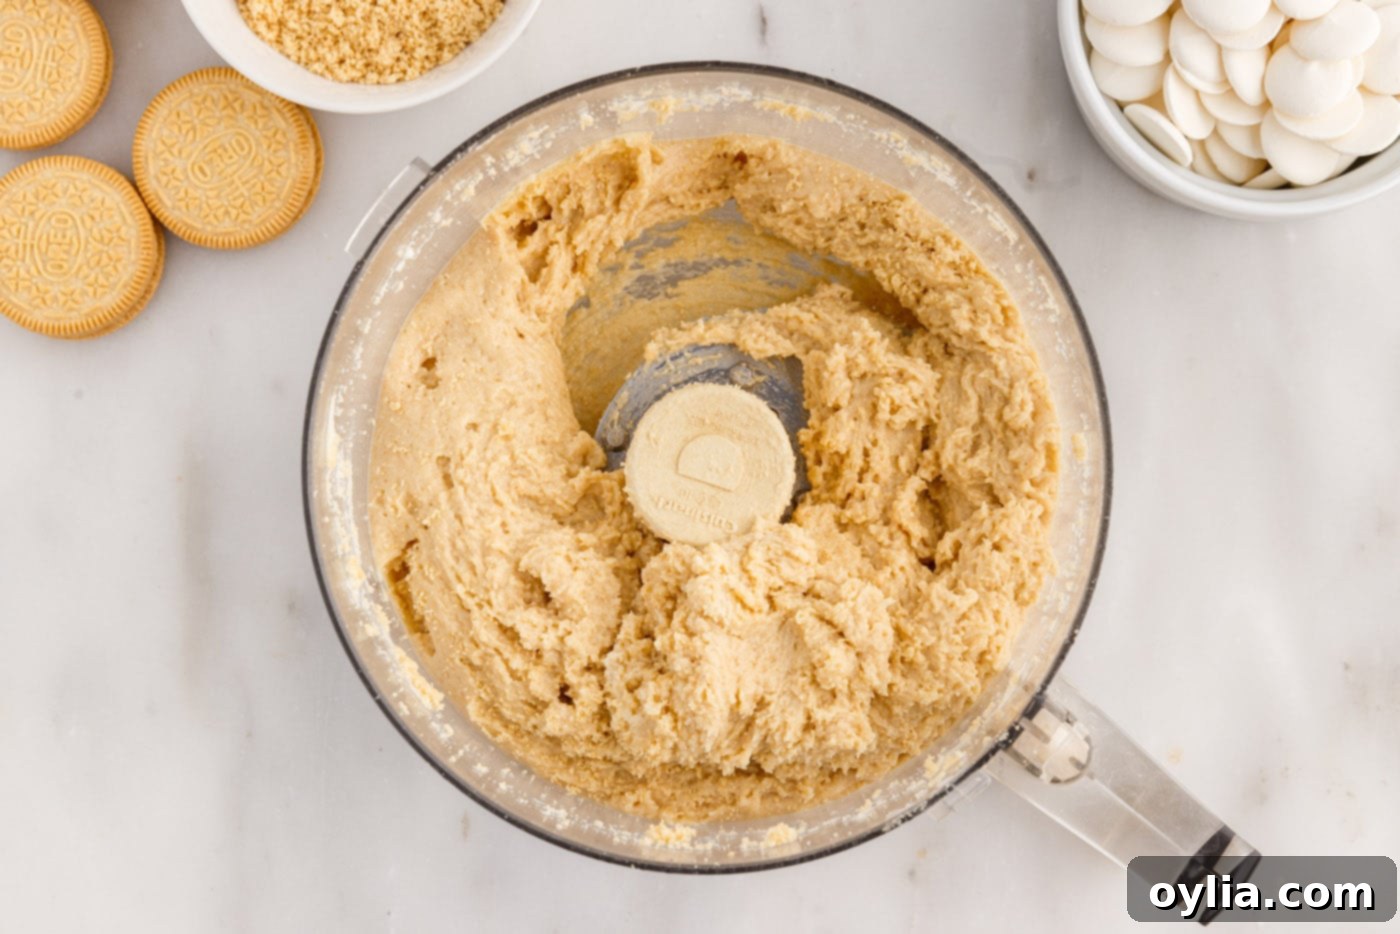
- Form the Truffle Base: Add the softened cream cheese (cut into pieces to facilitate blending) directly into the food processor with the remaining cookie crumbs. Process the mixture until it is completely combined and forms a cohesive “dough.” It should pull away from the sides of the bowl and easily clump together when pressed. Scrape down the sides of the food processor as needed to ensure everything is thoroughly mixed. This step is crucial for the truffle’s signature soft and uniform texture, so take your time to ensure it’s well combined.


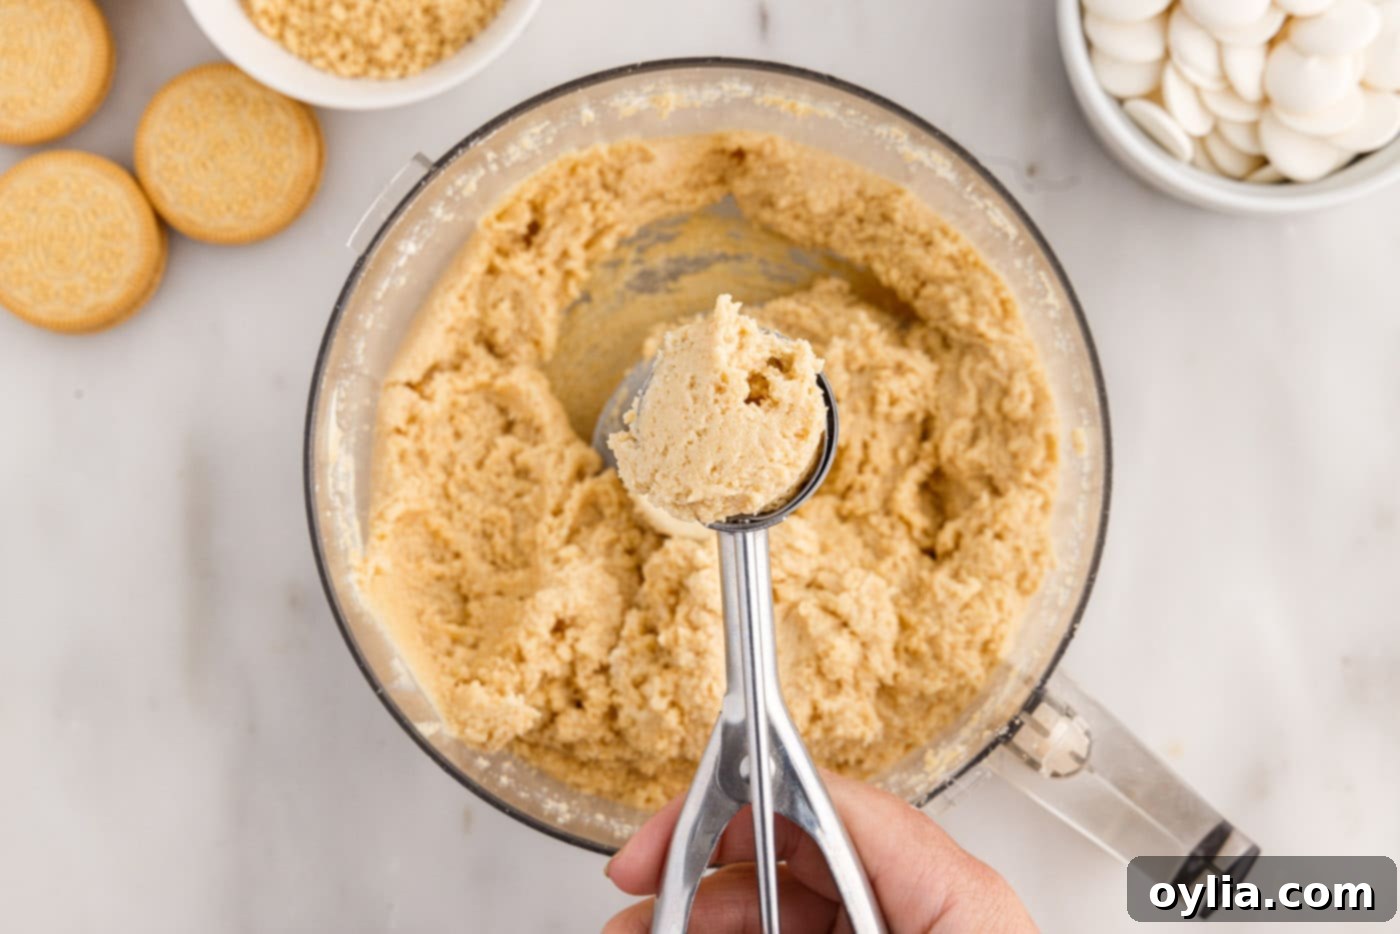
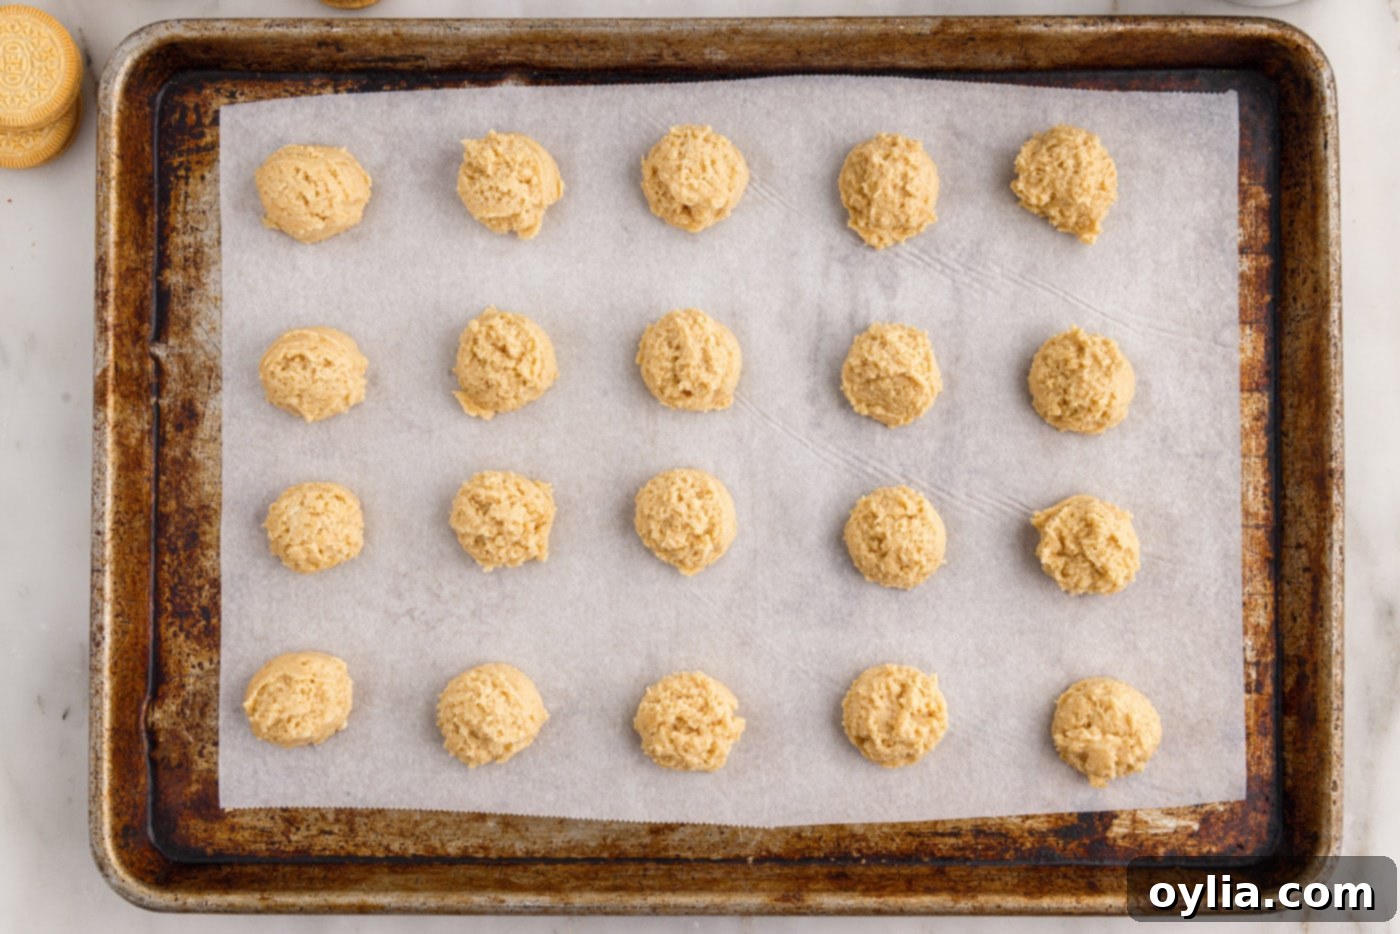
- Scoop and Chill: Using a tablespoon or a small cookie dough scoop for consistent sizing, portion out the mixture and roll each portion into a rough ball. Place these balls onto a baking sheet that you’ve lined with parchment paper. This non-stick surface is essential to prevent them from sticking. Once all the truffle balls are formed, place the entire tray into the freezer for 5-10 minutes. This initial chill helps them firm up just enough to be easily rolled into perfectly smooth spheres.


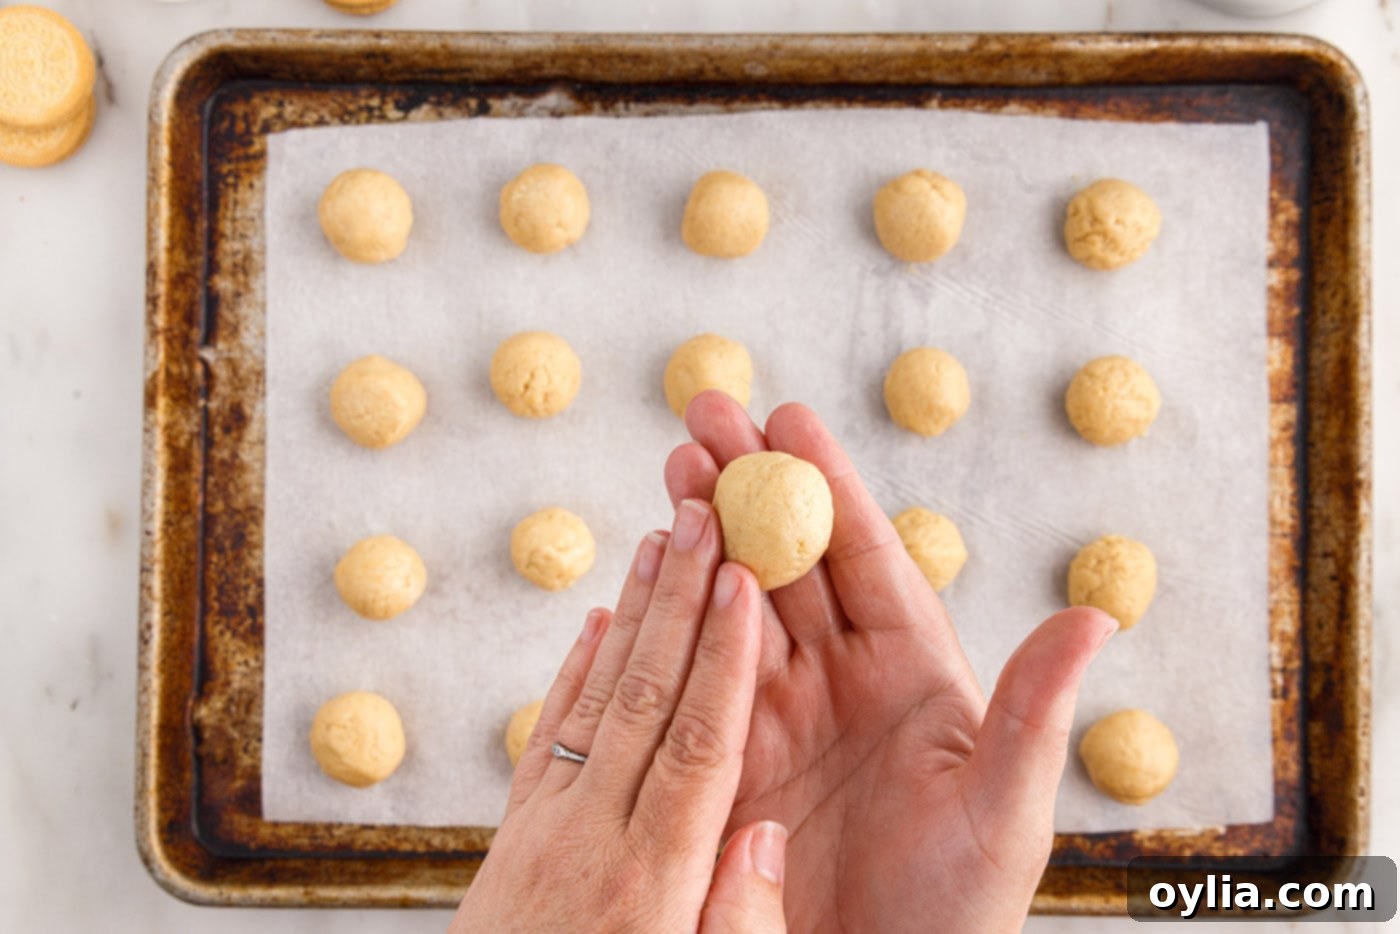
- Refine and Re-Chill: After the initial chill, remove the tray from the freezer. Take each ball and roll it gently between the palms of your hands to create a perfectly smooth, round shape. The slight chill makes them much easier to handle and prevents them from becoming too sticky. Once re-rolled, place the tray back into the freezer for an additional 10-15 minutes. This second chill is crucial for firming the truffles completely, which is essential for successful dipping, helping them retain their shape and preventing the chocolate from cracking. For best results, ensure they are firm but not frozen solid throughout.

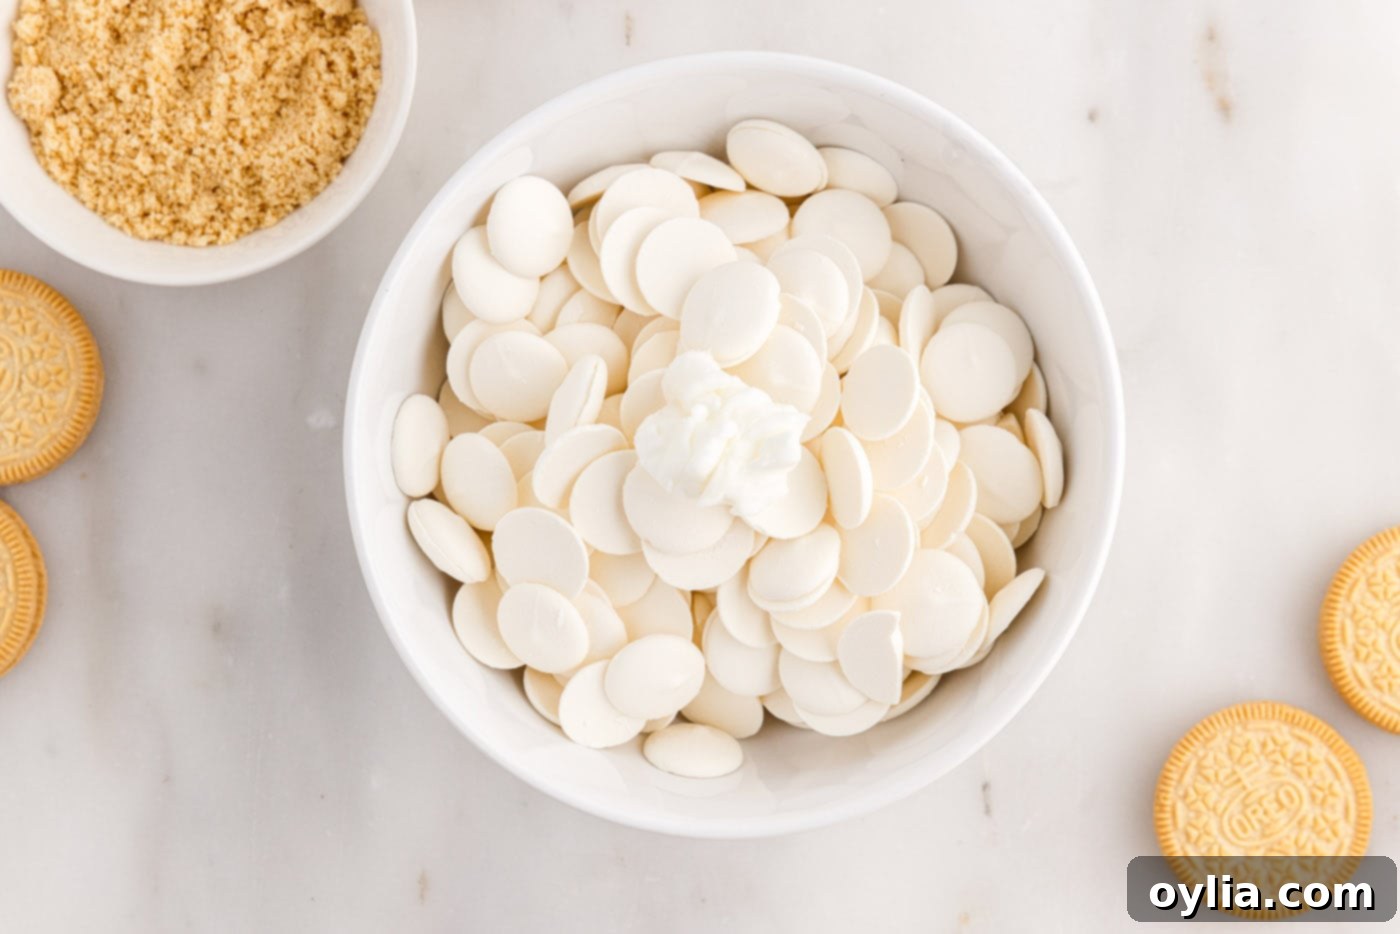
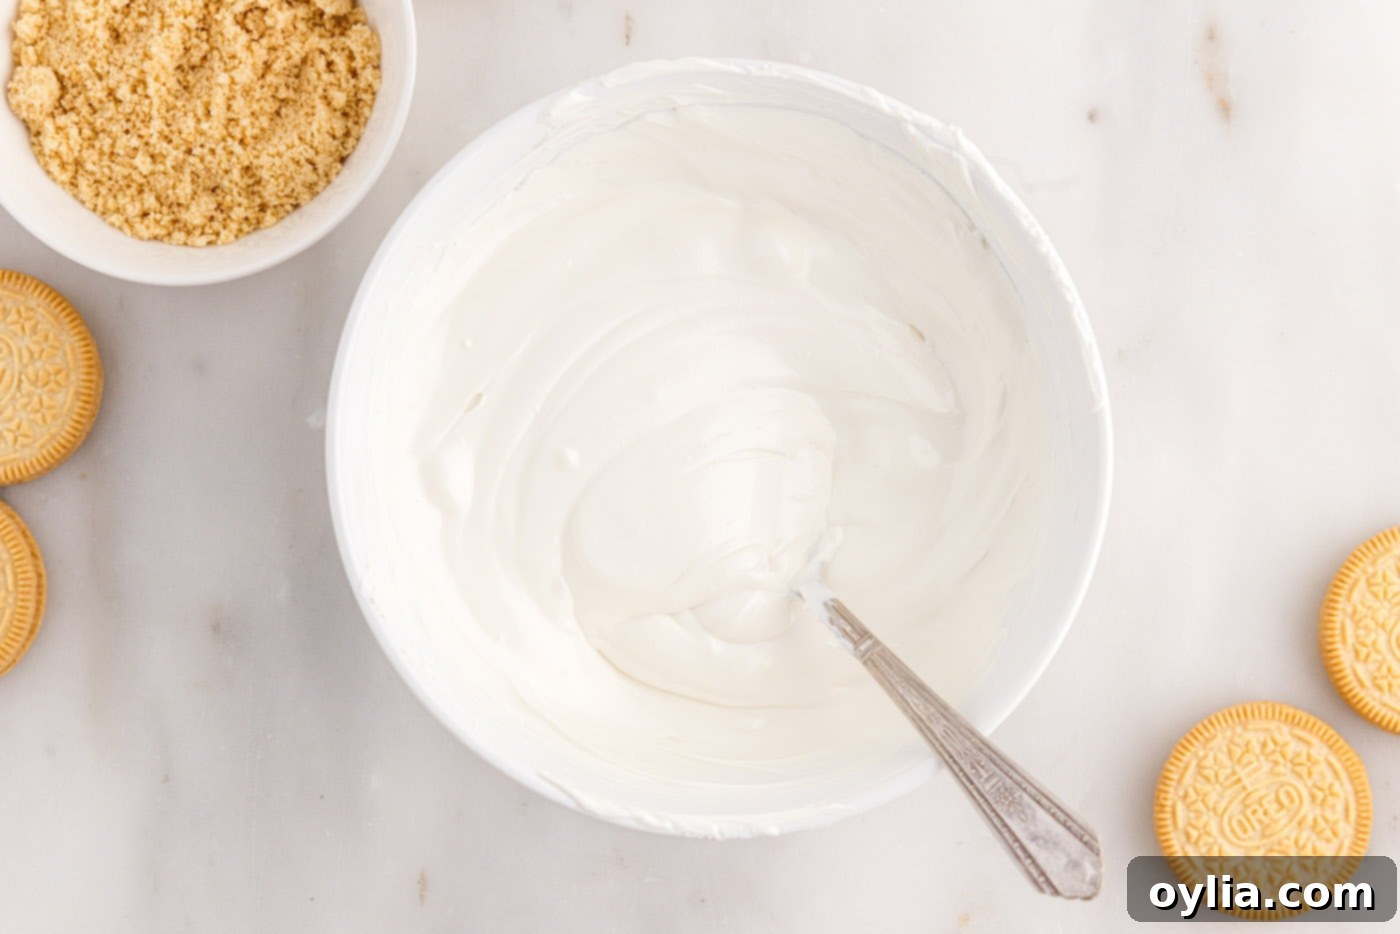
- Melt the White Chocolate: In a microwave-safe bowl, combine your white chocolate melting wafers and the optional shortening (if you’re using it to aid in smoothness). Heat the mixture in 30-second increments, stirring thoroughly after each interval. Continue this process until the wafers are completely melted and the chocolate is wonderfully smooth and free of lumps. Be careful not to overheat the chocolate, as this can cause it to seize or burn. Gentle, gradual heating is key. Alternatively, you can melt it over a double boiler for more controlled heat.


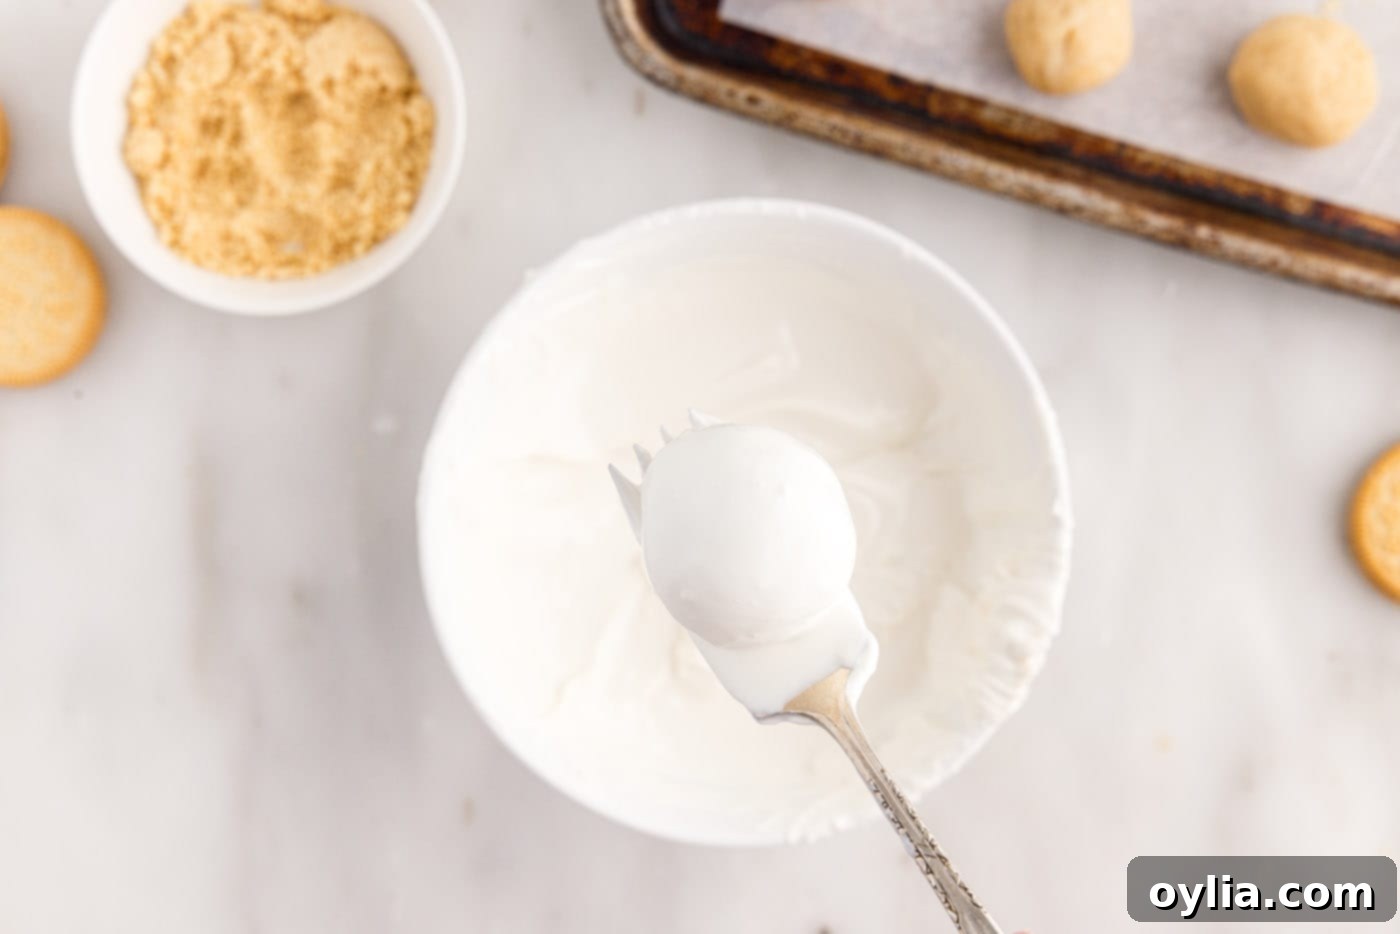
- Dip the Truffles: This is where the magic happens! Working with one firm truffle ball at a time, carefully drop it into the melted white chocolate. Use a fork or a dedicated dipping tool to gently toss and roll the ball, ensuring it’s completely coated. Lift the truffle from the chocolate, tapping off any excess chocolate against the side of the bowl. This helps create a thin, even coating and prevents a thick, clunky shell. Immediately transfer the dipped truffle onto a fresh sheet of parchment paper to set. Continue this process, taking care to keep your workspace clean.

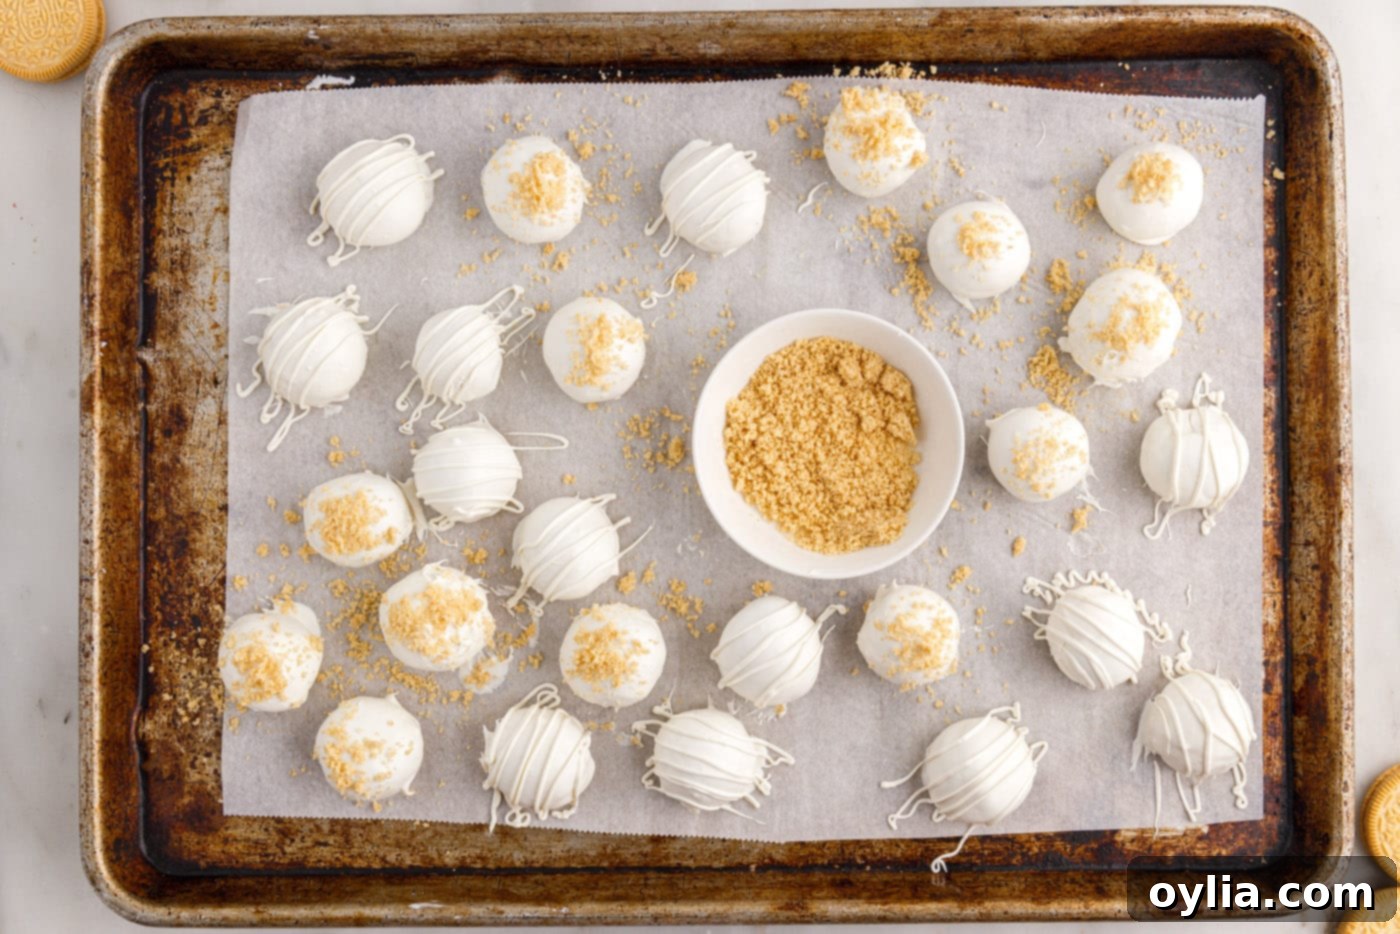
- Garnish with Crumbs (Optional): If you chose to reserve cookie crumbs for decoration, now is the time to use them. While the chocolate coating is still wet and soft, gently sprinkle a pinch of the reserved Golden Oreo crumbs over the top of each dipped truffle. This adds a beautiful textural element and clearly signals the delicious flavor inside. Work quickly, as the chocolate sets fast! For a clean look, try sprinkling the crumbs over a separate sheet of paper, then carefully place the truffle on.

- Complete Dipping: Continue dipping all the remaining truffles, ensuring each one is beautifully coated.
- Drizzle for Extra Flair (Optional): For an extra touch of elegance, you can use any leftover melted white chocolate. Simply transfer it into a small plastic bag, snip a tiny corner, and artfully drizzle it over the tops of your truffles. This creates a lovely decorative pattern and can be done after the initial coating has set slightly.
- Allow to Set and Enjoy: Once all your Golden Oreo Truffles are dipped and decorated, allow the chocolate coating to fully set and harden. You can speed this process up by placing the tray back into the refrigerator for 10-15 minutes. Once set, your glorious truffles are ready to be savored!
Frequently Asked Questions & Expert Tips for Perfect Truffles
Here are some common questions and invaluable tips to ensure your Golden Oreo Truffles turn out perfectly every time and stay fresh for longer.
Due to the cream cheese in the filling, these delectable Golden Oreo truffles require refrigeration. Store them in an air-tight container, ideally with layers of parchment paper between them to prevent sticking. When stored this way, they will remain fresh and delicious in the refrigerator for up to 2 weeks. It’s important to note that when you remove them from the fridge, they might develop a slight condensation on their surface, especially in humid environments. Rest assured, this is completely normal and will not affect the taste or quality of the truffles themselves. Just let them sit at room temperature for a few minutes before serving to let the condensation dissipate.
Absolutely! Oreo truffles freeze beautifully, making them a fantastic make-ahead treat for future indulgence. You have a couple of excellent options for freezing them. Option 1: Freeze the balls without the chocolate coating. Arrange the un-dipped truffle balls on a baking sheet and flash-freeze them until they are solid. This prevents them from sticking together. Once solid, transfer them to a large freezer-safe ziptop bag or air-tight container, ensuring as much air is removed as possible. They can be frozen for up to 3 months. When ready to use, thaw them in the refrigerator, then proceed with dipping in melted chocolate as per the recipe. This is a great way to have fresh-dipped truffles anytime! Option 2: Freeze them with the chocolate coating. Allow the chocolate coating to fully set and harden at room temperature or in the refrigerator. Once completely set, transfer the finished truffles to a freezer-safe ziptop bag or air-tight container, again ensuring layers of parchment paper if stacking to prevent sticking. These can also be frozen for up to 3 months. Thaw them in the refrigerator before serving for the best texture.
Yes, absolutely! These truffles are a dream for advance preparation, making your entertaining much easier. You can easily prepare them a day or even several days in advance. Simply follow the recipe through the dipping and decorating steps, then store the finished truffles in an air-tight container in the refrigerator until you are ready to serve them. This makes them an ideal dessert for parties, holiday gatherings, or even just personal treats throughout the week, significantly reducing stress on the day of the event.
Chocolate seizing (becoming thick, clumpy, and grainy) often happens when it comes into contact with even a tiny amount of water or is overheated. To prevent this, ensure all your utensils and bowls (especially the bowl used for melting the chocolate) are completely dry. When melting chocolate, especially in the microwave, use short intervals (30 seconds at a time) and stir thoroughly between each. The residual heat will continue to melt the chocolate after it’s removed from the microwave. If it does seize, sometimes adding a teaspoon of vegetable oil or shortening can help smooth it out slightly, but it’s best to avoid it in the first place by being meticulous about dryness and heat.
If your truffles are cracking after you dip them, it’s typically because the truffle balls were too cold when introduced to the warm chocolate. The sudden temperature difference causes the chocolate to set too quickly and crack. While chilling is important for firming the balls, aim for them to be cold but not frozen solid when dipping. About 10-15 minutes in the freezer after rolling should be perfect, ensuring they are firm enough to handle but not excessively cold. If they have been in the freezer for a very long time, let them sit at room temperature for a few minutes to slightly temper before dipping.
Expert Tips for Success:
- Organize Your Workspace: When dipping truffles, efficiency is key. Always have a small bowl for reserved cookie crumbs (if using) and a clean sheet of parchment paper ready. Consider setting your cookie crumbs to one side, the tray of truffles in the middle, and the melted chocolate to the other side. This organized setup helps prevent dripping cookie crumbs into your beautiful, smooth chocolate coating and ensures a cleaner, quicker process.
- Maintain Chocolate Consistency: If your melted chocolate starts to harden or become too thick as you’re dipping (which can happen, especially if your kitchen is cool), simply return it to the microwave for brief 10-15 second increments, stirring well after each, until it regains its smooth, dippable consistency. A slightly thinner chocolate coats more evenly.
- Achieve Perfectly Smooth Balls: The initial freezing of the dough balls for a short period (around 5-10 minutes) makes them firm enough to easily roll into perfectly smooth spheres between your palms without sticking. The second chill (another 10-15 minutes) ensures they’re robust and cold enough for dipping, which helps the chocolate set quickly and smoothly. The goal is firm but not rock-solid frozen.
- Master Dipping Tools: A fork is an excellent tool for lifting truffles from the chocolate and gently tapping off excess. For a seamless transfer from the fork to the parchment paper, use a toothpick to gently push the truffle off, preventing any flat spots or messy bases. Keep a paper towel nearby to wipe off your fork and/or toothpick frequently to avoid chocolate buildup and ensure clean dipping.
- Customize Your Presentation: Don’t limit yourself to just cookie crumbs! These Golden Oreo Truffles are a blank canvas. Consider using colorful sugar sprinkles, a contrasting drizzle of dark or milk chocolate, edible glitter for a festive touch, or even finely chopped nuts like pistachios or pecans for different textures and appearances.
Elevate Your Golden Oreo Truffles: Serving Suggestions & Decoration Ideas
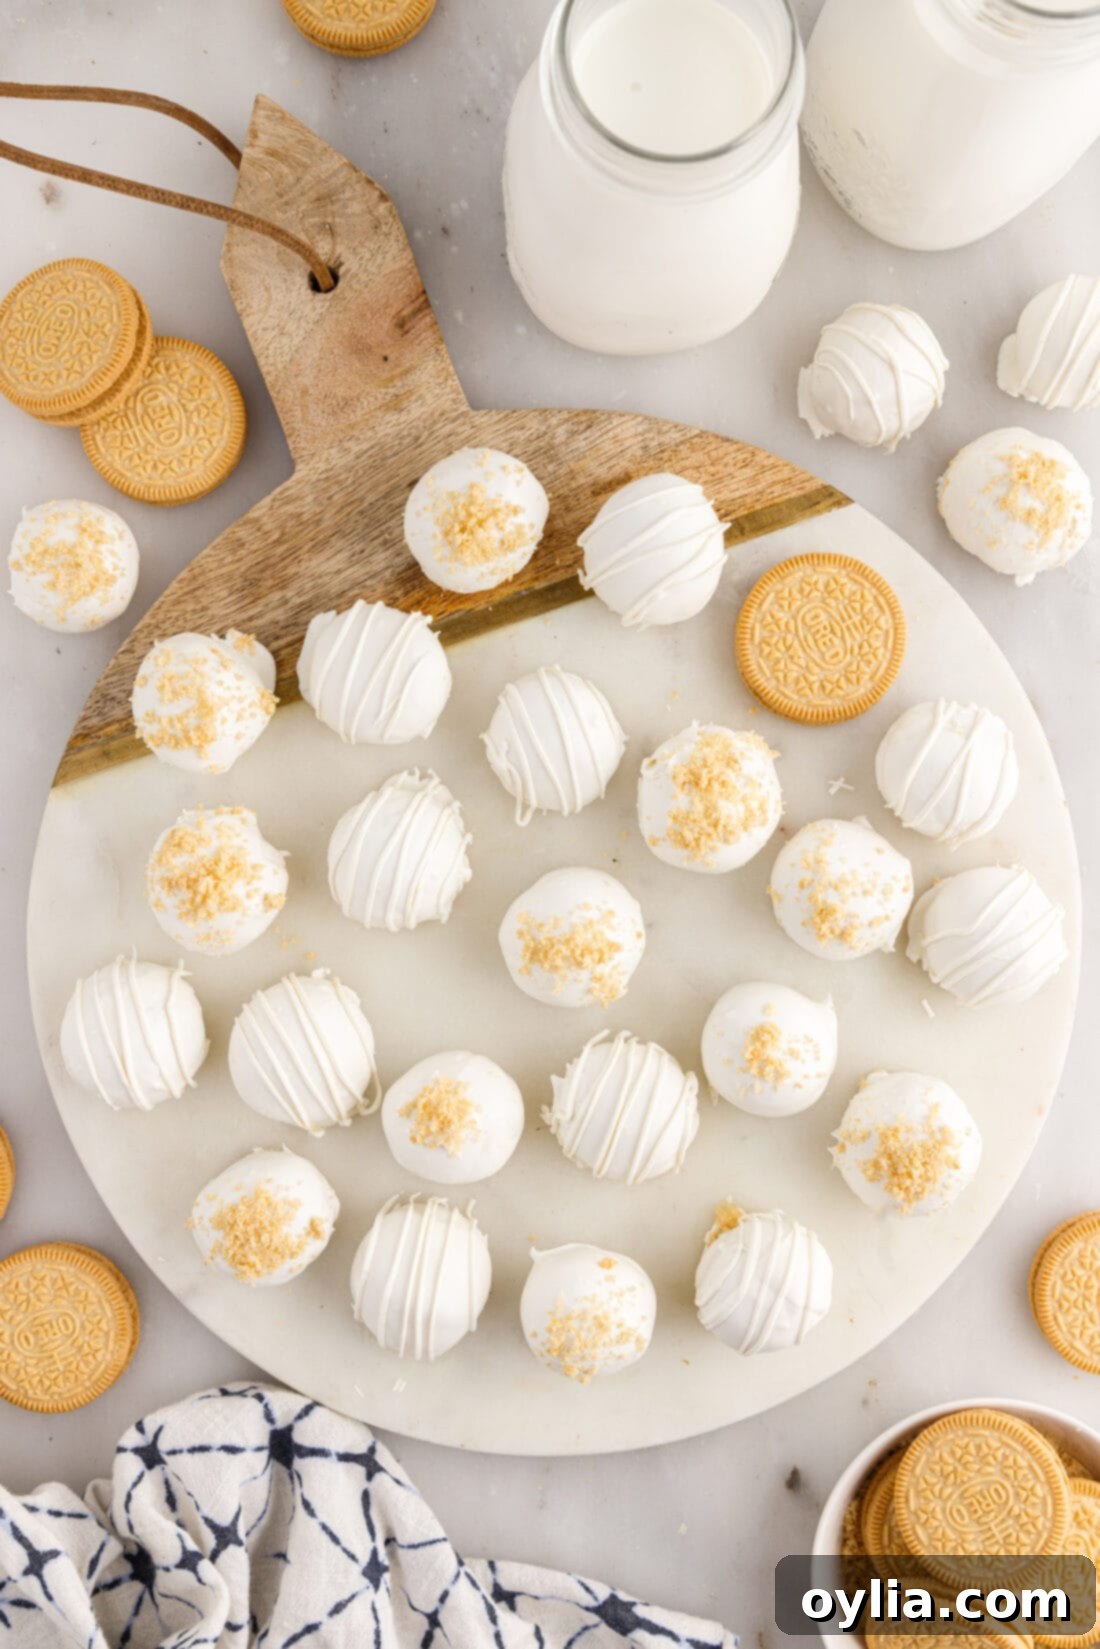
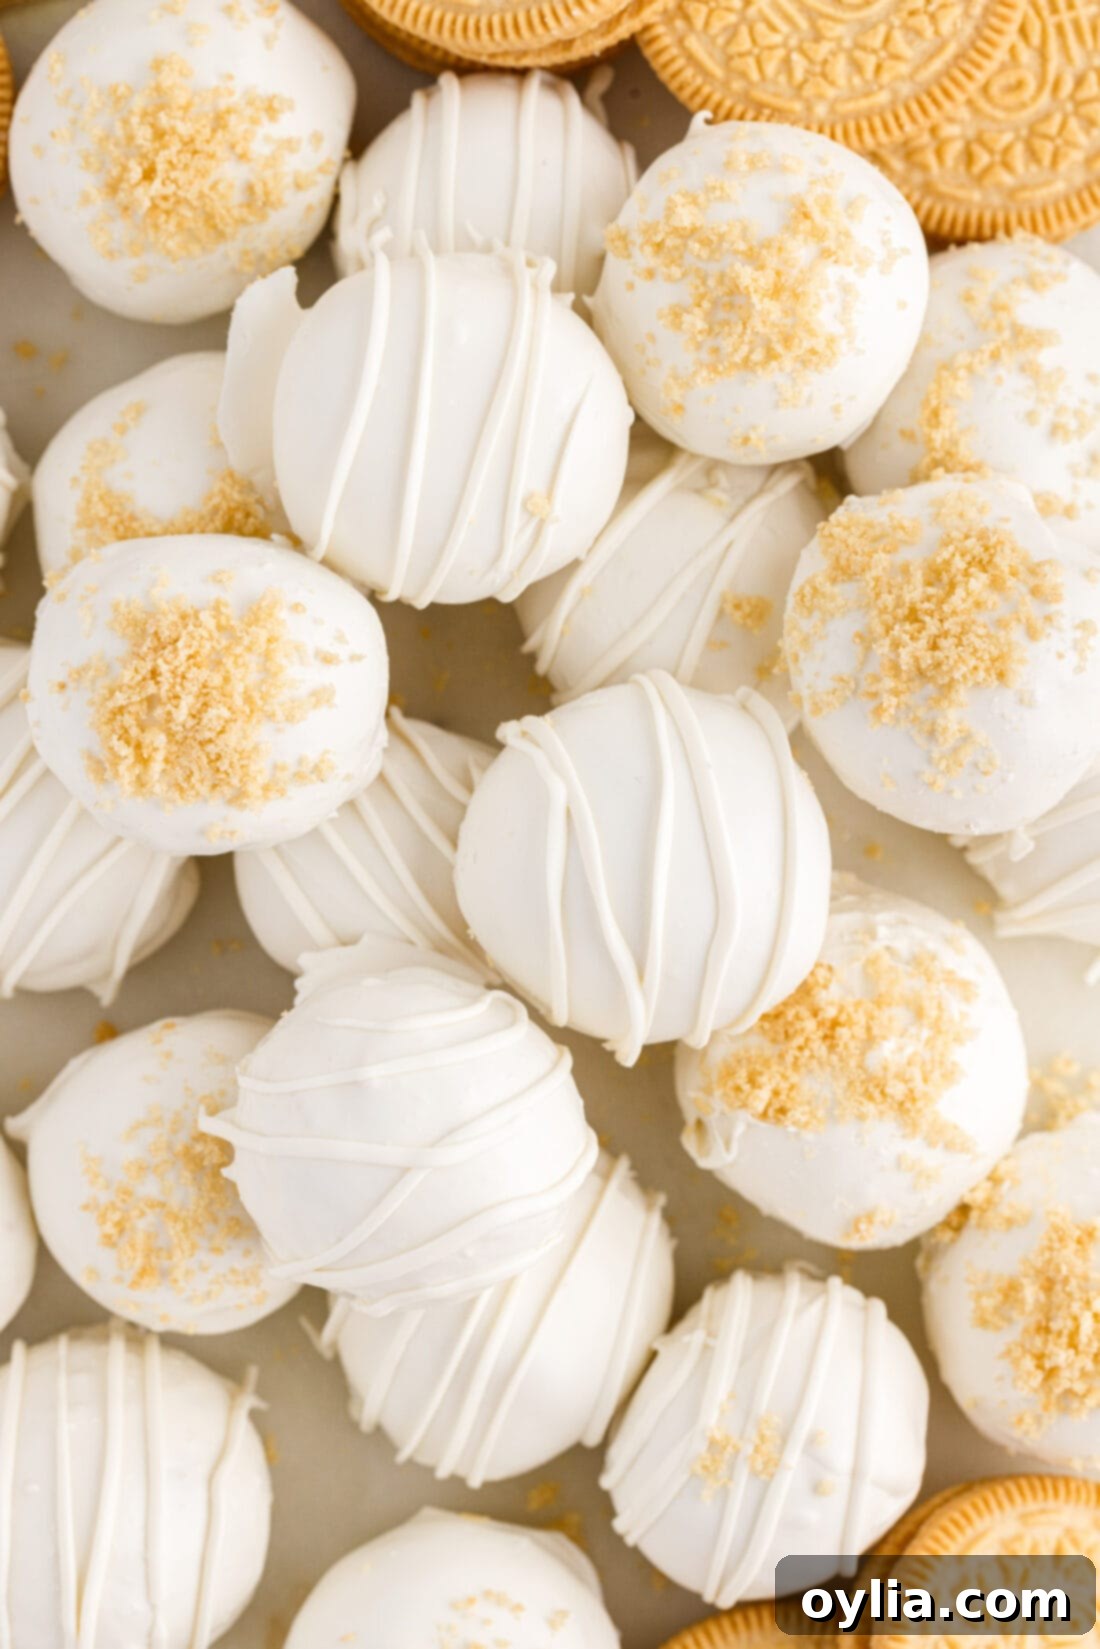
While a simple drizzle of extra white chocolate and a sprinkle of crushed Golden Oreo crumbs makes for an elegant and pretty presentation, don’t be afraid to get creative with your Golden Oreo Truffles! These treats are incredibly versatile when it comes to decoration, allowing you to tailor them to any event or personal preference. Their charming size and delightful flavor make them perfect for a variety of occasions.
- Classic & Elegant: The reserved Golden Oreo crumbs sprinkled on top before the chocolate sets provide a perfect, classic finish that subtly hints at the truffle’s core ingredient. A delicate zigzag drizzle of melted white chocolate adds a touch of sophistication and visual appeal.
- Festive & Fun: For holidays or themed parties, consider using colorful sugar sprinkles, nonpareils, or edible glitter. Think vibrant reds and greens for Christmas, cheerful pastels for Easter or baby showers, or school colors for graduation parties. You can also tint your white chocolate coating with food-grade oil-based food coloring (water-based colors will seize the chocolate!) to match any specific color scheme, making them truly custom.
- Textural Contrast: Experiment with different toppings for varied and exciting textures. Finely chopped nuts (such as pecans, almonds, or walnuts), toasted coconut flakes, mini chocolate chips (white, milk, or dark), or even a dash of sea salt for a sweet and salty twist can add an exciting crunch and flavor dimension.
- Dipped & Drizzled: Beyond white chocolate, you can also use melted milk or dark chocolate for drizzling. A contrasting drizzle creates an eye-catching design and can add another layer of flavor complexity, appealing to a wider range of palates.
- Thoughtful Gifting: Arrange your finished truffles on a beautiful platter for serving, in decorative cupcake liners for individual portions, or neatly placed in small candy boxes or cellophane bags tied with a ribbon for a delightful homemade gift. Their golden hue makes them naturally appealing and perfect for sharing.
These Golden Oreo Truffles are not just a dessert; they are a canvas for your creativity, guaranteed to impress with both their irresistible taste and beautiful presentation. Enjoy customizing and sharing these delightful, no-bake treats!
Explore More Delicious Oreo Recipes
If you love the versatility and deliciousness of Oreo cookies as much as we do, you’re in for a treat! We have a wide array of other fantastic Oreo-inspired recipes that are perfect for any occasion. From crispy fried delights to creamy layered desserts, there’s an Oreo creation for everyone. Dive into our collection and discover your next favorite treat:
- Fried Oreos: A carnival classic you can make at home!
- Oreo Cupcakes: Fluffy cupcakes topped with a rich Oreo frosting.
- Oreo Icebox Cake: A simple, no-bake layered cake that’s incredibly refreshing.
- Red White and Blue Oreo Truffles: Festive truffles perfect for patriotic celebrations.
I love to bake and cook and share my kitchen experience with all of you! Remembering to come back each day can be tough, that’s why I offer a convenient newsletter every time a new recipe posts. Simply subscribe and start receiving your free daily recipes!
Golden Oreo Truffles
IMPORTANT – There are often Frequently Asked Questions within the blog post that you may find helpful. Simply scroll back up to read them!
Print It
Pin It
Rate It
Save ItSaved!
Ingredients
- 36 whole golden Oreo cookies
- 8 ounces cream cheese cut into pieces and softened at room temperature
- 12 ounces white chocolate melting wafers
- 1 teaspoon shortening optional
Things You’ll Need
-
Food processor
-
Baking sheet
-
Parchment paper
Before You Begin
- If the chocolate starts to harden or become too thick while dipping, place it back into the microwave in 15 second increments and stir until smooth.
- The shortening added to the chocolate just helps it melt a little more smoothly and thins it out a tiny bit. You can skip the shortening if you don’t have it available.
- Consider setting your cookie crumbs to the side with the tray of truffles in the middle and the melted chocolate to the other side so that when you sprinkle the top of a finished truffle, you don’t end up dripping cookie crumbs into the nice, smooth chocolate.
- Freezing the dough balls for a short period of the time is really helpful to get them firm enough to hold their shape for dipping, but if they are overly cold, the white chocolate coating may crack. About 15 minutes in the freezer should be a good balance between cold enough and not too cold. If you have them out of the freezer for a long time after the initial 5ish minutes while you roll them into smooth balls, you may need to freeze a bit longer to compensate.
- Keep a paper towel nearby to wipe off fork and/or toothpick while dipping. I like to use a fork to lift the truffle and tap off excess chocolate and then use a toothpick to help scooch the truffle from the fork on to the parchment paper.
Instructions
-
Place cookies in the bowl of a food processor and pulverize into small crumbs.
-
Remove 2 tablespoons of the cookie crumbs to decorate the top of the truffles, if desired.
-
Add the cream cheese into the food processor and process until the mixture is fully combined and clumps into a “dough.”
-
Use a tablespoon or a cookie dough scoop to make balls of the mixture and place each ball on a baking sheet lined with parchment paper.
-
Chill in the freezer for 5-10 minutes to firm the dough a bit.
-
Roll each ball between the palms of your hands to form a smooth ball. Place the tray back into the freezer for an additional 10-15 minutes.
-
Place the melting wafers and shortening (if using) in a microwave-safe bowl and heat in 30 second increments, stirring between each interval, until the wafers are melted through and are smooth.
-
Working on one ball at a time, dip the solid ball into the melted chocolate, tossing it to coat completely. Lift from the chocolate using a fork or dipping tool. Tap off excess chocolate and place the ball on a clean sheet of parchment paper.
-
If desired, sprinkle a pinch of reserved cookie crumbs over the top of the truffle before the chocolate sets and hardens.
-
Continue dipping all of the truffles.
-
Place the remaining melted chocolate in a small plastic bag and snip off the corner. Drizzle a bit over the top of the truffles for decoration.
-
Once the chocolate has set, the truffles are ready to eat!
Nutrition
The recipes on this blog are tested with a conventional gas oven and gas stovetop. It’s important to note that some ovens, especially as they age, can cook and bake inconsistently. Using an inexpensive oven thermometer can assure you that your oven is truly heating to the proper temperature. If you use a toaster oven or countertop oven, please keep in mind that they may not distribute heat the same as a conventional full sized oven and you may need to adjust your cooking/baking times. In the case of recipes made with a pressure cooker, air fryer, slow cooker, or other appliance, a link to the appliances we use is listed within each respective recipe. For baking recipes where measurements are given by weight, please note that results may not be the same if cups are used instead, and we can’t guarantee success with that method.
