Delicious Greek Delights: Baking Milopita and Christopsomos for a Special Celebration
This past Sunday, we celebrated the birthday of our dear friend, Pete, a wonderful individual with deep Greek roots. Our families connected about two decades ago, shortly after Pete and his lovely family moved here from Athens. They quickly became some of the kindest people we know, or as my husband affectionately puts it, “Pete is good people” (grammatically incorrect, but perfectly heartfelt!).
Whenever we’re invited to their home, I always love to bring something homemade. The timing for Pete’s birthday was exceptionally serendipitous, aligning perfectly with my ongoing BBA Challenge. My next recipe to tackle from The Bread Baker’s Apprentice was Artos, widely known as Greek Celebration Bread. I opted for the Christmas version, Christopsomos, a beautifully sweet bread infused with the warm spices of cinnamon, cloves, and nutmeg, and studded with raisins, walnuts, and dried cranberries. It’s finished with a delightful honey and orange extract glaze and sprinkled with sesame seeds.
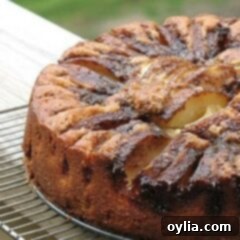
Uncertain if I’d have ample time to perfect the Christopsomos, I decided to prepare a second Greek treat: Milopita, a traditional Greek Apple Pastry. A fellow food blogger and Twitter friend who specializes in Greek cuisine, Sam (@greekfood), generously shared his exquisite recipe with me. While my first attempt at Milopita didn’t quite achieve the visual perfection of Sam’s, it was an undeniable hit in terms of flavor. The taste was so marvelous that I’m determined to bake it again and again until I master its stunning presentation!
Let’s dive into the details of these delicious Greek creations.
Milopita: A Beloved Greek Apple Pastry
My journey with Milopita began with a slight culinary adventure. The first time I prepared this recipe, I used a standard pie plate. Thankfully, I’ve developed the habit of placing my baking pans on a cookie sheet, a practice that saved me from a messy oven disaster! The batter expanded enthusiastically, overflowing the pie plate and creating delicious, albeit unpresentable, puddles on the cookie sheet. While the taste was absolutely phenomenal – my daughter nearly devoured the entire ‘flop’ by herself – it certainly wasn’t fit for Pete’s birthday celebration.
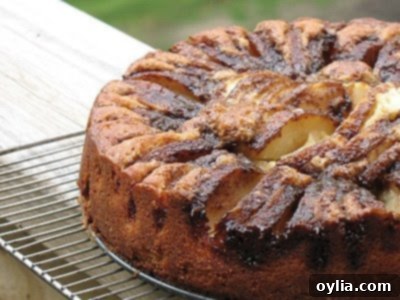
So, I kept that delightful overflow for our family’s enjoyment and immediately embarked on a second attempt. This time, I switched to a 9-inch springform pan, a decision that proved much more successful. It’s worth noting that while the recipe technically calls for a pie plate, Sam, the creator of this wonderful recipe, clarified that he uses a 9-inch DEEP DISH pie plate. So, if you’re trying this at home, ensure you use a deep-dish pan to avoid a similar delightful, yet chaotic, overflow!
This dessert truly bakes into a delicious and visually appealing cake. It’s absolutely marvelous when served warm, especially with a scoop of vanilla ice cream!
Milopita: Greek Apple Pastry Recipe
For metric conversions and more details, you can visit Sam’s blog.
Oh, and just for fun, here’s the photo of the ‘flop’ that my daughter so happily devoured:

Greek Apple Pastry & Christopsomos (Artos) for BBA
IMPORTANT – There are often Frequently Asked Questions within the blog post that you may find helpful. Simply scroll back up to read them!
Course: Desserts
Cuisine: Greek
Author: Amanda Davis
Ingredients
- 3 medium sized Granny Smith apples
- 1 ½ cups of self-rising flour (regular flour with 1 ½ teaspoons of baking powder will do in a pinch)
- 2 eggs (separated)
- 1 cup of white sugar
- ¾ cup of unsalted butter
- ⅓ cup of milk
- ¼ cup of brown sugar
- 1 tablespoon grated lemon rind
- 1 tablespoon vanilla extract
- 1 teaspoon ground cinnamon
- Pinch of salt
Instructions
- Carefully peel and core the apples, then slice them thinly, ideally into sixteenths, to ensure they soften beautifully during baking. Place them in a bowl of water with a squeeze of lemon juice to prevent browning. (I actually cut mine even thinner as my apples were a bit on the large side).
- Sift the self-rising flour with the salt. If using regular flour, sift it with the salt and baking powder.
- Using an electric mixer, cream ½ cup of the unsalted butter and the 1 cup of white sugar together until the mixture is light, fluffy, and smooth.
- While the mixer is running on a low speed, add the egg yolks one at a time. Alternate each yolk with a tablespoonful of the sifted flour mixture. Continue mixing until you achieve a smooth and creamy consistency.
- Gradually add the remaining flour mixture in stages, alternating with the milk. Mix until just combined. Then, stir in the vanilla extract and grated lemon rind until the batter is smooth.
- In a separate, clean mixing bowl, whip the egg whites until they form stiff peaks. Using a spatula, carefully and gently fold the whipped egg whites into the prepared batter until fully incorporated, taking care not to deflate the whites.
- Generously butter the sides of your chosen baking dish (a 9-inch deep-dish pie plate or a 9-inch springform pan is recommended). Carefully pour the finished batter into the prepared dish.
- Arrange the sliced apples in a decorative, perpendicular fashion over the top of the batter. Create an outer ring with apple slices, then fill the center of this ring with any remaining slices, ensuring even distribution.
- In a small saucepan, melt the remaining ¼ cup of butter along with the ¼ cup of brown sugar over low heat. Stir in the ground cinnamon until well combined. Slowly pour this warm mixture over the arranged apple slices in a circular pattern, aiming for an even, steady stream to distribute the topping uniformly.
- Place the baking dish in an oven pre-heated to 350° F (175° C). Bake for approximately 60 minutes, or until a toothpick inserted into the center comes out clean. (Mine took about 50-55 minutes). Allow the Milopita to cool completely for at least a couple of hours before slicing and serving to ensure it sets properly.
Tried this Recipe? Pin it for Later!
Follow on Pinterest @AmandasCookin or tag #AmandasCookin!
The recipes on this blog are tested with a conventional gas oven and gas stovetop. It’s important to note that some ovens, especially as they age, can cook and bake inconsistently. Using an inexpensive oven thermometer can assure you that your oven is truly heating to the proper temperature. If you use a toaster oven or countertop oven, please keep in mind that they may not distribute heat the same as a conventional full sized oven and you may need to adjust your cooking/baking times. In the case of recipes made with a pressure cooker, air fryer, slow cooker, or other appliance, a link to the appliances we use is listed within each respective recipe. For baking recipes where measurements are given by weight, please note that results may not be the same if cups are used instead, and we can’t guarantee success with that method.
Christopsomos: A Greek Celebration Bread for the BBA Challenge
Next up, the BBA Challenge recipe: Artos. This traditional Greek celebration bread holds special significance, and the version I chose, Christopsomos, is typically served during Christmas. Its captivating blend of flavors and rich additions were what truly drew me to this magnificent sweet bread. The reception at Pete’s house was nothing short of spectacular; he loved it so much that he insisted I leave it with him, a testament to its deliciousness.
And the ultimate compliment? Pete and his family once owned a bakery for many years, so his approval meant the world! But it didn’t stop there. His sister-in-law’s mother, visiting from Greece, was also present. She spoke no English, so her daughter kindly translated for us. The mother kept turning the bread plate around, pointing at various sections, eagerly asking about the ingredients, how the glaze was prepared, and then, to my absolute delight, requested the recipe! How could a baker be any happier? She had made similar Artos breads in the past but was utterly enchanted by this version and expressed a keen desire to try it herself. It was an absolute success!
Navigating the Baking Process: Blunders and Triumphs
This bread recipe begins with a poolish – essentially a bread starter made from water, flour, and yeast, which rests in the refrigerator overnight to develop deep flavor. My baking journey with Christopsomos was not without its moments of doubt, as I encountered a few blunders that made me question if it would turn out at all. Despite these minor setbacks, the end result was truly magnificent, proving that even with a few missteps, dedication in the kitchen pays off!
My blunders included:
- Forgetting to warm the milk, leading to a colder-than-ideal dough.
- Missing the opportune moment to add the raisins, dried cranberries, and walnuts.
- Forgetting to set aside a portion of the dough specifically for the decorative elements on top.
Despite these small mistakes, everything ultimately came together beautifully. I am convinced that the intoxicating aroma that filled my kitchen yesterday morning is precisely what Heaven must smell like. I didn’t have enough golden raisins on hand, so I improvised by adding a couple of chopped orange essence prunes, which added an extra layer of deliciousness. I regret that I only managed to snap one picture of the sliced bread, as I had initially thought I would be bringing it back home. However, Pete emphatically declared that it had to stay, a testament to how much he adored it! My husband is already requesting another loaf, and next time, I think I’ll try the braided version for us. Yum!
The Artos Baking Process: Step-by-Step
The journey begins by measuring out one cup of your prepared poolish and allowing it to come to room temperature for about an hour. Once ready, combine it in a large mixing bowl with flour, salt, yeast, cinnamon, nutmeg, allspice, cloves, orange extract, eggs, honey, oil, and warmed milk. (As mentioned, I accidentally used cold milk, but it still worked out surprisingly well, showing the resilience of this recipe!)
Mix all the ingredients together until they are well incorporated.
Once mixed, turn the dough out onto a lightly floured surface. Begin kneading, adding just enough flour to achieve a dough that is tacky but no longer sticky. Knead diligently for ten minutes to develop the gluten and create a smooth, elastic texture.
During the last two minutes of kneading, incorporate the raisins, dried cranberries, and walnuts. This ensures they are evenly distributed without tearing the gluten structure. Transfer the dough to an oiled bowl, turning it once to coat, then cover and let it rise for 90 minutes, or until it has doubled in size. Another small oversight on my part: I realized I had forgotten to add the fruits and nuts well after the first rise, almost an hour and a half later than I should have! After a few curses and a mumbled desire for more coffee, I kneaded them in, and thankfully, it all turned out just fine.
Next, divide the risen dough into two pieces: one approximately 1/3 of the total, and the other 2/3. Place the smaller 1/3 piece into a plastic bag and chill it in the refrigerator. Form the larger 2/3 piece into a tight boule (a round ball), carefully pinching the ends underneath to ensure it maintains its shape and doesn’t spread too much during baking. Place this boule on a parchment-lined cookie sheet, cover it loosely with plastic wrap, and allow it to rise again for another 60-90 minutes.
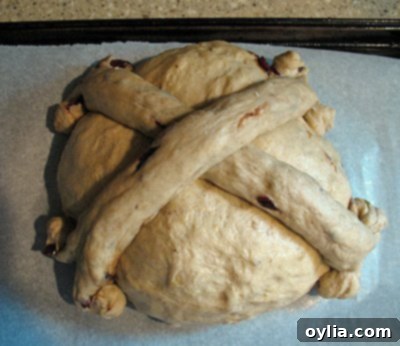
When the main dough boule is ready for baking, retrieve the chilled dough from the refrigerator and divide it into two equal pieces. Roll each piece into a 10-inch rope. These ropes will be used for decoration. Carefully criss-cross them across the top of the risen dough ball. Cut the ends of the ropes and curl them up decoratively to create an elegant finish.

Once the Christopsomos is baked to a golden perfection, immediately brush it with a prepared glaze made from boiled sugar and water, enhanced with honey and orange extract. While the glaze is still wet, generously sprinkle sesame seeds over the entire loaf. Allow the bread to cool completely for at least an hour before slicing to ensure the glaze sets and the flavors meld beautifully.
Happy Birthday Pete!
NEW! Be sure to subscribe to my newsletter, Foodie in the Craftroom, to receive updates and tips from both Amanda’s Cookin’ and Crafts by Amanda! Visit https://amandascookin.com/p/subscribe-to-newsletter.html
