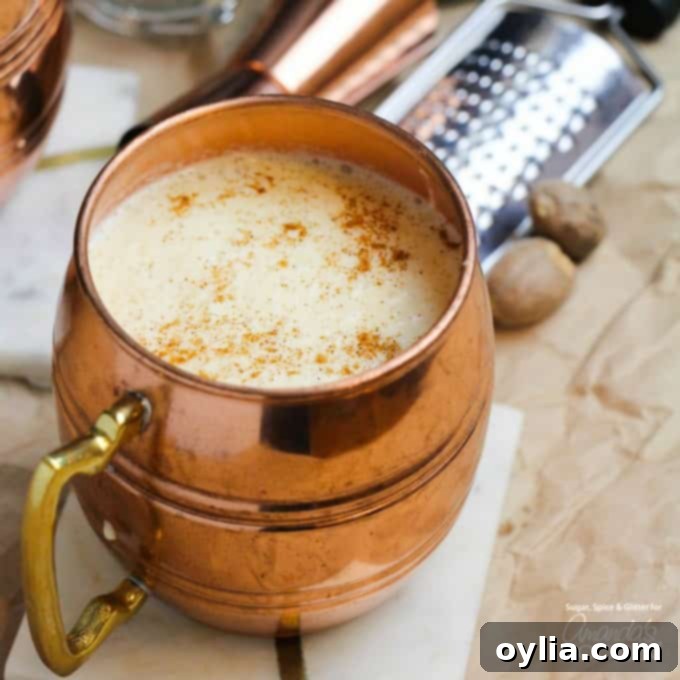
Creamy Homemade Eggnog Cocktail Recipe: Your Ultimate Holiday Drink Guide
Step into the joyous embrace of the holiday season with a glass of truly exceptional homemade eggnog. Bid farewell to the thin, often overly sweet, and less flavorful carton varieties from the store. This easy homemade eggnog cocktail recipe delivers a luxuriously thick, wonderfully rich, and intensely flavorful beverage – embodying everything a perfect eggnog should be! While we certainly love to usher in the New Year with a lighter, effervescent option like our festive Cranberry Prosecco Punch, this classic, boozy eggnog drink undoubtedly reigns supreme as our most cherished favorite for Christmas celebrations, cozy winter evenings, and any occasion that calls for a touch of festive warmth. It’s more than just a drink; it’s a cherished holiday tradition, a sip of pure comfort, and a celebration of togetherness in every mug.
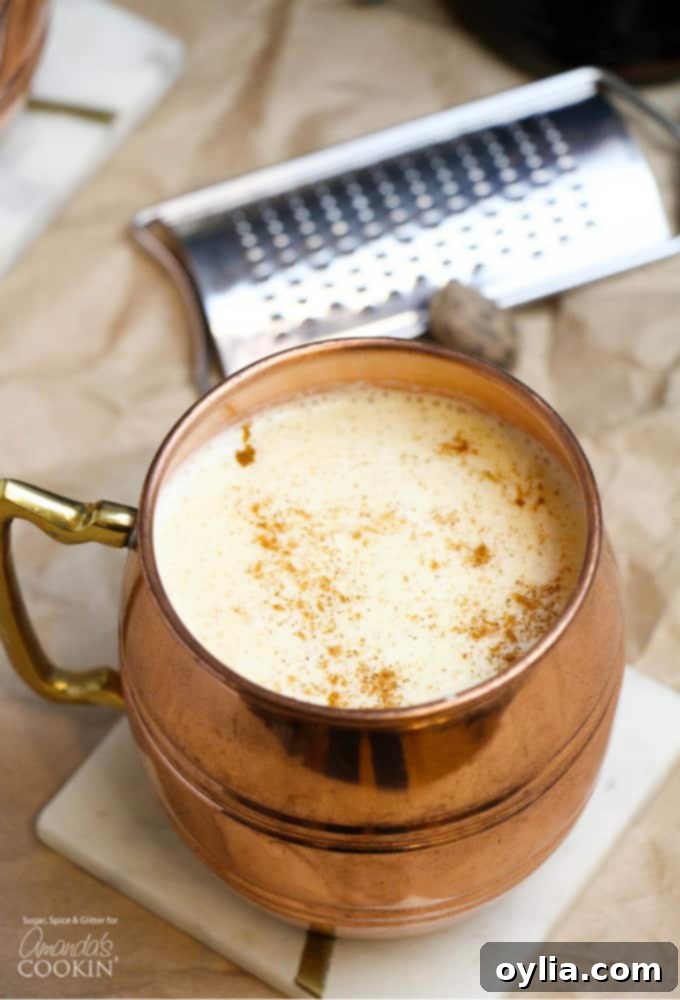
Why Homemade Eggnog Truly Transforms Your Holiday Experience
There is a profound and undeniable difference between the thin, often artificial taste of a store-bought carton of eggnog and a freshly prepared batch made from scratch. Once you’ve experienced the luxurious, velvety texture and the perfectly balanced flavors of homemade eggnog, you’ll instantly understand why it becomes an indispensable part of your festive season. Our homemade eggnog cocktail isn’t merely a beverage; it’s an immersive experience designed to delight your senses. It’s about savoring the harmonious blend of rich dairy, fresh eggs, and aromatic spices, all perfectly complemented by a thoughtfully chosen, good quality rum or other spirit. This delightful concoction is equally perfect for a lively holiday gathering with cherished friends or for a serene, quiet moment spent curled up in front of a crackling fireplace, perhaps with warm, cozy socks and a soft blanket draped over your lap.
The beauty of making eggnog at home lies in the complete control it offers over every single ingredient. This ensures unparalleled freshness and allows you to precisely customize its sweetness, spice level, and alcoholic kick to your exact preference. You can select premium spirits, use organic, farm-fresh eggs, and, most importantly, grate fresh nutmeg for an unparalleled aroma and depth of flavor that simply cannot be replicated by mass-produced alternatives. This meticulous level of quality and customization is a significant part of what makes homemade eggnog so superior. Beyond the taste, the very act of preparing this festive drink contributes immensely to the holiday spirit, filling your kitchen with wonderful, inviting aromas and building eager anticipation for that first, unforgettable, delightful sip.
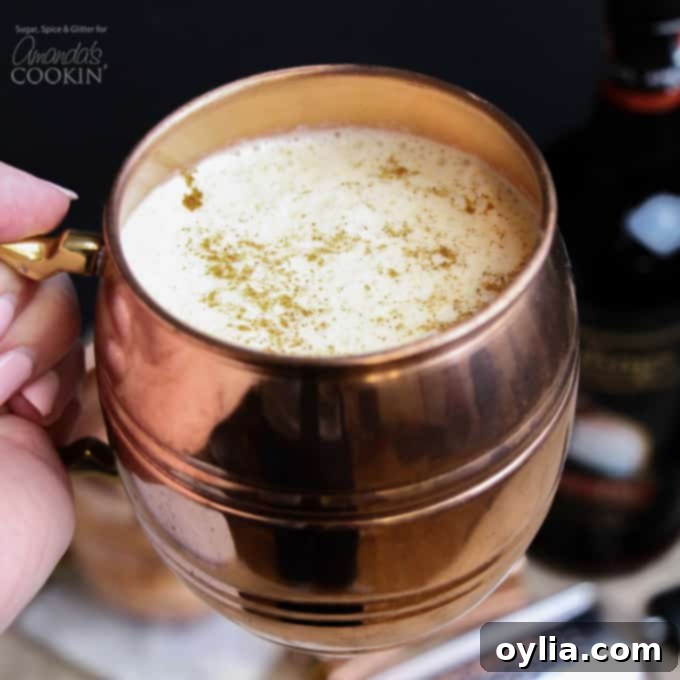
Mastering Your Homemade Eggnog Cocktail: Essential Tips and Tricks for Perfection
Crafting the perfect eggnog from scratch can initially seem like a complex endeavor, especially with common concerns about raw eggs. However, this recipe is meticulously designed to be both straightforward and incredibly safe, ensuring a consistently delicious outcome every single time. Here are some essential tips and expert tricks to guide you through the process and help you achieve eggnog cocktail perfection:
- Addressing Raw Egg Concerns with Confidence: For those who are understandably cautious about the use of raw eggs, you can rest assured that this is a fully cooked eggnog recipe. The egg yolks and the dairy cream mixture are thoroughly heated to an internal temperature of 165°F (74°C). This crucial step effectively pasteurizes the yolks, completely eliminating any potential risks associated with raw eggs. While the egg whites are incorporated later in their fluffy, cold state, their inclusion is absolutely vital for achieving the classic frothy texture and a perfectly balanced flavor profile that makes eggnog so distinctive. You could theoretically choose to omit the whites, but doing so would result in a noticeably thicker, denser consistency and a more pronounced, less nuanced egg taste.
- Prioritizing Egg Safety Best Practices: To further enhance safety and peace of mind, always opt for pasteurized eggs if they are readily available in your local grocery store. When you are separating the eggs, exercise meticulous care to ensure that the egg whites do not come into any direct contact with the outer shell, as this is typically where bacteria are most likely to reside. Furthermore, working with clean hands and utilizing separate, clean bowls for both the yolks and the whites are highly recommended practices.
- Why Egg Substitutes Won’t Work for This Recipe: For this specific, traditional eggnog recipe, commercial egg substitutes are simply not suitable. The unique protein structure and natural emulsifying properties of fresh, whole eggs are absolutely essential for achieving the desired rich, velvety texture and the stable emulsion that makes authentic homemade eggnog so delightful and consistent.
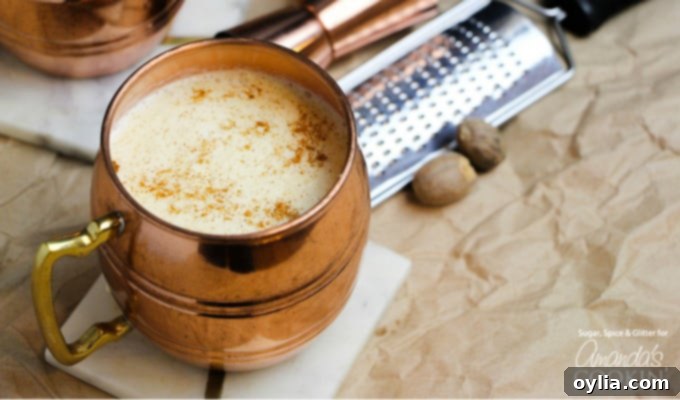
- The Unrivaled Importance of Fresh Nutmeg: While pre-ground nutmeg can certainly be used in a pinch, freshly grated nutmeg will elevate the flavor profile of your eggnog dramatically. The aroma alone is infinitely more vibrant and complex. Investing in a small nutmeg grater and whole nutmegs is a worthwhile endeavor for any serious home cocktail enthusiast; it adds an incredible depth of warm, spicy, and inviting aroma that transforms the drink.
- Optimal Chilling Time is Paramount: Allow ample time – ideally several hours or even overnight – for your cooked eggnog base mixture to chill thoroughly in the refrigerator before you proceed with whipping in the egg whites. Proper chilling ensures a beautifully integrated, refreshingly cold drink, and also contributes to the stability of the whipped whites.
- Customizing Sweetness and Spice to Your Palate: One of the greatest advantages of making eggnog from scratch is the freedom to customize. Feel empowered to adjust the amount of sugar and nutmeg to perfectly suit your personal preference. Some individuals prefer a sweeter, more dessert-like eggnog, while others enjoy a bolder, more pronounced spice profile. Experiment to find your ideal balance!
- Choosing the Right Dairy: For the ultimate rich and creamy texture, always opt for full-fat whole milk and heavy cream (specifically 35% or whipping cream). Using lower-fat alternatives will unfortunately result in a less luxurious, thinner, and less satisfying eggnog.
Choosing Your Spirits: The Delicious Heart of a Boozy Eggnog
While this recipe traditionally calls for rum, the true beauty and versatility of a homemade eggnog cocktail lie in your ability to customize its boozy kick. The type of spirit you select can significantly influence the final flavor profile, allowing you to tailor the drink precisely to your palate or that of your discerning guests. A good quality rum remains a classic and highly recommended choice, offering a comforting warmth and a subtle, rich sweetness that perfectly complements the creamy base and the aromatic nutmeg. Dark rum, with its complex notes of caramel, vanilla, and oak, is a particularly popular choice for a deeper, more sophisticated flavor in your eggnog.
However, we wholeheartedly encourage you to venture beyond rum and experiment with other spirits! Brandy, with its sophisticated, fruit-forward warmth and subtle grape notes, is another traditional and highly regarded addition that brings an elegant complexity to eggnog. For those who appreciate a drier, more robust, and perhaps slightly smoky character, bourbon or a well-aged whiskey can introduce intriguing layers of vanilla, spice, and caramel. If you’re aiming for a truly decadent and multi-layered cocktail experience that will undoubtedly impress even the most seasoned connoisseurs, consider using a thoughtful combination of spirits, such as a blend of rum and brandy. The key is to always choose spirits that you genuinely enjoy sipping on their own, as their inherent quality and flavor will directly translate into the exceptional quality of your finished homemade eggnog cocktail.
Ingredients to Make an Eggnog Cocktail
To craft a magnificent homemade eggnog cocktail, gathering fresh, high-quality ingredients is your crucial first step:
- 4 large eggs, separated (fresh and preferably pasteurized for peace of mind)
- 1/3 cup granulated sugar plus 1 Tablespoon (for sweetness and texture)
- 2 cups whole milk (essential for a rich, full-bodied base)
- 1 cup heavy cream (35% or whipping cream for optimal luxurious creaminess)
- 1 teaspoon freshly grated nutmeg (or high-quality ground nutmeg, but fresh is superior)
- 4-6 oz quality rum (such as dark rum or spiced rum), to taste (or your preferred spirit like brandy or bourbon)
Kitchen Tools You May Find Helpful:
Having the right tools on hand will make the eggnog-making process much smoother and more enjoyable:
- Stand mixer (or a powerful hand mixer, indispensable for whipping eggs)
- Measuring cups and spoons (for precise ingredient measurements)
- Saucepan (a medium to large heavy-bottomed saucepan is ideal for cooking the base)
- Whisk (a sturdy balloon whisk is perfect for tempering eggs and ensuring smoothness)
- Liquid measure (for accurately measuring milk and cream)
- Candy thermometer (absolutely essential for safely cooking the eggnog base to the correct temperature)
How to Make the Best Homemade Eggnog Cocktail: A Detailed Step-by-Step Guide
Crafting this rich, creamy, and wonderfully spiced boozy eggnog is a surprisingly straightforward and rewarding process, making it a truly delicious and impressive addition to any adult holiday gathering. You have the delightful flexibility to serve these exquisite cocktails either warm or refreshingly cold, depending entirely on your preference and the festive ambiance you wish to create!
- Step 1: Prepare the Eggs Meticulously. Begin by carefully separating the eggs. Place the yolks into one large, clean mixing bowl and the egg whites into another equally large, impeccably clean bowl. It is crucial to ensure that absolutely no egg yolk whatsoever contaminates the whites, as even a tiny speck of fat can prevent the egg whites from whipping properly later on. Once separated, set the bowl of egg whites aside in the refrigerator.
- Step 2: Combine Dairy & Aromatic Spice. In a medium to large, heavy-bottomed saucepan, combine the whole milk, luxurious heavy cream, and your freshly grated nutmeg. Place this mixture over medium-high heat. Bring it to a gentle boil, stirring occasionally with a whisk or wooden spoon to prevent the dairy from scorching at the bottom of the pan. Keep a close eye on it to ensure it doesn’t boil over.
- Step 3: Beat Egg Yolks to Perfection. While your dairy and spice mixture is gradually heating on the stovetop, begin to beat the egg yolks in their designated bowl. Utilize a stand mixer fitted with a whisk attachment, or a powerful hand mixer, on medium-high speed. Beat the yolks until they significantly lighten in color and become thick, creamy, and noticeably frothy. This usually takes approximately 2 to 3 minutes of consistent beating.
- Step 4: Sweeten and Aerate the Yolks. Gradually, in a steady stream, add the 1/3 cup of granulated sugar to the beaten egg yolks. Continue to beat the mixture for at least 3 more minutes. This extended beating process not only helps to fully dissolve the sugar but also further aerates the yolks, which is a critical step in contributing to the eggnog’s luscious, smooth, and full-bodied texture.
- Step 5: The Art of Tempering the Eggs. Once the milk and cream mixture reaches a gentle boil, immediately remove the saucepan from the heat. This next step is perhaps the most crucial for preventing the eggs from scrambling. Slowly, in a thin, continuous stream, drizzle about half of the hot cream mixture into the beaten egg yolk mixture. As you drizzle, whisk the egg yolks constantly and vigorously. This gradual addition, a technique known as “tempering,” gently and slowly raises the temperature of the egg yolks without cooking them too quickly, ensuring a smooth, custard-like consistency. Continue this slow drizzling and brisk whisking until the hot cream and egg yolk mixtures are completely combined and homogenous.
- Step 6: Cook the Eggnog Base Safely. Pour the newly tempered egg yolk and cream mixture back into the same saucepan. Return the saucepan to medium-low heat. Cook the mixture, stirring constantly and patiently with a whisk or a wooden spoon, until it visibly thickens slightly and, most importantly, reaches an internal temperature of 165°F (74°C) on your candy thermometer. This precise cooking temperature is essential for ensuring that the eggs are fully pasteurized and safe for consumption. Do not allow the mixture to come to a full boil during this stage.
- Step 7: Chill the Eggnog Base Thoroughly. Remove the cooked eggnog mixture from the heat immediately. Transfer it to a clean bowl, pitcher, or container. Allow it to cool slightly at room temperature for about 20-30 minutes, then cover it and place it into the refrigerator to chill thoroughly. For the best flavor development and optimal thickness, we highly recommend chilling for at least 2 to 3 hours, or even preferably overnight. The longer it chills, the more the flavors meld and deepen, resulting in an even more delicious eggnog.
- Step 8: Whip the Egg Whites to Soft Peaks. While the eggnog base is chilling (or once it’s completely cold and ready for the final touches), retrieve the reserved egg whites from the refrigerator. Add the remaining 1 tablespoon of sugar to them. Using a clean stand mixer or a hand mixer, beat the egg whites on high speed until beautiful soft peaks form. This process typically takes approximately 4 to 6 minutes, creating a light, airy, and stable foam that will contribute significantly to your eggnog’s signature frothy top and lighter texture.
- Step 9: Gently Combine All Elements. Once the main eggnog mixture is perfectly chilled, gently whisk or fold the whipped egg whites into it. Continue to fold them in until they are evenly incorporated throughout the mixture. This step adds to the overall richness, creating a lighter, more ethereal, and wonderfully frothy consistency.
- Step 10: Add the Rum (or Preferred Spirit) to Taste. To ensure an even distribution of the alcohol and, more importantly, to allow each guest to customize their drink’s strength, we highly recommend adding approximately 1 ounce (30ml) of rum (or your chosen spirit) directly into each individual mug or glass just before serving. Give it a decent stir to combine. You can always adjust the amount of rum to your personal preference – add more for a stronger kick, or less for a milder taste.
- Step 11: Serve and Savor! Your magnificent homemade eggnog cocktail is now complete and ready to be enjoyed! Serve it immediately, either warm (if you gently reheat the base before adding the whites and rum) or refreshingly cold, garnished with an extra, generous sprinkle of fresh nutmeg. Cheers to the holidays!
Perfect Pairings for Your Exquisite Homemade Eggnog Cocktail
This homemade eggnog cocktail truly stands unparalleled and holds a profoundly special place among all holiday beverages. Its creamy richness, comforting warmth, and perfectly balanced spices make it an incredibly versatile drink that pairs wonderfully with a diverse array of festive treats, decadent desserts, and even savory bites. Whether you’re hosting a grand holiday party, enjoying a festive brunch, or simply savoring a quiet, cozy evening at home, our homemade eggnog will complement your spread beautifully and elevate the entire experience.
- Classic Christmas Cookies: There’s perhaps no more iconic holiday pairing than eggnog and freshly baked cookies. Serve up some of this delicious eggnog with any of our cherished Christmas cookie recipes. Our all-time favorites include Grandma’s classic, melt-in-your-mouth sugar cookies, the timeless comfort of soft and chewy peanut butter cookies, and these delightfully spiced, chewy Snickerdoodles.
- More Festive Cookie Creations: Beyond the classics, explore other seasonal delights that sing alongside eggnog, such as our rich and fudgy Chocolate Crinkles, charming thumbprint cookies with their vibrant fruity centers, and our traditional Italian anisette cookies, offering a subtle, intriguing anise flavor that beautifully contrasts the creamy eggnog.
- Decadent Holiday Candies: For a truly irresistible classic holiday candy pairing, we highly recommend our incredibly easy and addictive Saltine Toffee – a perfect blend of sweet, buttery caramel and salty crunch. My personal favorite Peanut Brittle, with its buttery, nutty goodness and satisfying snap, is another fantastic match for the creamy drink.
- Savory Appetizers for Perfect Balance: But dessert isn’t the only thing that finds its ideal companion in your eggnog cocktail. To perfectly balance the sweetness and richness, we offer tons of great savory appetizers that are ideal for holiday entertaining. Consider sophisticated and flavorful deviled eggs, the undeniably crowd-pleasing bacon-wrapped Lil’ Smokies, and the elegant indulgence of warm, gooey baked brie.
- Breakfast and Brunch Delights: As Jennifer notes below, the comforting flavors of eggnog can even inspire delightful breakfast dishes! While a boozy eggnog cocktail isn’t typically a breakfast item, consider making a non-alcoholic batch or serving it alongside festive brunch items like Eggnog Pancakes, for a truly themed holiday meal.
- Explore More Festive Recipes: For an abundance of additional culinary inspiration, be sure to explore all of our delicious cookie, brownie, and bar recipes, as well as our delightful array of appetizer recipes. And for another unique and vibrantly themed holiday cocktail, don’t miss our fun and colorful Grinch Cocktail, a delightful mix of sweet melon Midori, white rum, and refreshing lemon-lime soda.
A Personal Reflection on the Unforgettable Joy of Homemade Eggnog
Jennifer shares her insightful journey and transformation:
“Prior to this year, I had honestly never truly experienced what ‘real’ eggnog tasted like. You know, the kind that is meticulously made from scratch, genuinely homemade, and authentically traditional – not the thinned-out, often artificial-tasting versions you typically find in a carton. I’ll readily admit, I used to enjoy store-bought eggnog. In fact, I’ve even creatively incorporated it into several of my beloved recipes, such as my wonderfully light and fluffy Fluffy Eggnog Cake with Eggnog Buttercream or my quick and festive 10-minute Eggnog Pancakes. But let me emphasize this: homemade eggnog exists in a league entirely its own. It’s an altogether different, superior category of culinary delight. Sipping on this homemade version is akin to enjoying a perfectly crafted, old-fashioned egg cream, or perhaps a luxuriously smooth custard milkshake, but with that exquisite, soul-warming, and perfectly balanced dose of holiday spice. The profound depth of flavor, the velvety, comforting texture – it’s something truly special that transcends a simple drink, transforming it into a truly memorable and utterly cherished highlight of the festive season.”
Homemade Eggnog Cocktail
IMPORTANT – There are often Frequently Asked Questions within the blog post that you may find helpful. Simply scroll back up to read them!
Print It
Rate It
Save ItSaved!
Ingredients
- 4 large eggs separated
- ⅓ cup granulated sugar plus 1 Tablespoon
- 2 cups whole milk
- 1 cup heavy whipping cream 35%
- 1 teaspoon freshly grated nutmeg
- 5-6 oz quality rum to taste, or other preferred spirit
Things You’ll Need
-
Stand mixer
-
Measuring cups and spoons
-
Saucepan
-
Whisk
-
Liquid measure
-
Candy thermometer
Important Notes & Before You Begin
- For those concerned about raw eggs, this is a cooked eggnog. The yolks and cream are cooked through to 165°F (74°C), ensuring safety. The whites are incorporated while fluffy and cold later, contributing to the airy texture. While you could potentially leave out the whites, the texture will be thicker and the taste will be less balanced with a stronger, denser egg flavor.
- Using pasteurized eggs is highly recommended for added safety. Additionally, ensure that the egg whites don’t come into direct contact with the outer shell during separation, as this is where bacteria are most commonly found. Cleanliness is key.
- Egg substitutes are not suitable for this particular recipe. The unique properties of fresh egg yolks and whites are essential for achieving the classic rich and frothy consistency of homemade eggnog.
- For the best flavor, use whole milk and heavy cream (35% or whipping cream). Lower-fat alternatives will result in a less rich and thinner eggnog.
Instructions
-
Separate Eggs: Carefully separate the eggs, placing the yolks in one large bowl and the whites in another. Set the egg whites aside in the fridge.
-
Heat Dairy: In a large saucepan, combine the milk, heavy cream, and nutmeg. Bring this mixture to a boil over medium-high heat, stirring occasionally to prevent scorching.
-
Beat Yolks: While the dairy mixture is heating, beat the egg yolks in their bowl until they are light in color and thickened, about 2-3 minutes with a stand or hand mixer.
-
Sweeten Yolks: Add 1/3 cup of sugar to the beaten yolks and continue to beat for another 3 minutes until well combined and fluffy.
-
Temper Eggs: Once the cream mixture comes to a boil, immediately remove it from the heat. Slowly drizzle about half of the hot cream mixture into the egg yolk mixture, whisking constantly and briskly. This process, known as “tempering,” prevents the eggs from scrambling. Continue until well combined.
-
Cook Eggnog Base: Pour the tempered mixture back into the saucepan. Return to medium-low heat and cook, stirring continuously, until the mixture thickens slightly and reaches an internal temperature of 165°F (74°C) on a candy thermometer. Do not boil.
-
Chill Base: Remove the eggnog mixture from heat and transfer it to a clean bowl. Place it in the fridge, uncovered, to cool completely. Ideally, chill for at least 2-3 hours, or overnight, for best flavor and thickness.
-
Whip Egg Whites: When the eggnog base is well chilled, take the reserved egg whites. Add the remaining 1 tablespoon of sugar. Beat with a stand or hand mixer until soft peaks form, approximately 4-6 minutes.
-
Combine: Gently whisk the whipped egg whites into the chilled eggnog mixture until fully incorporated.
-
Add Rum (to taste): To ensure even distribution and allow for customization, add approximately 1 ounce (30ml) of rum directly to each mug or glass. Stir well. Adjust the amount of rum to your personal preference.
-
Serve: Serve your delicious homemade eggnog cocktail warm or cold, garnished with an extra sprinkle of fresh nutmeg. Enjoy!
Nutrition Information
Storage and Make-Ahead Tips for Your Homemade Eggnog
One of the most appealing aspects of homemade eggnog is the convenience of preparing it in advance. This thoughtful planning allows you significantly more time to fully immerse yourself in and enjoy your holiday festivities without last-minute stress. Once you have successfully completed Step 7 of the recipe (which involves chilling the cooked eggnog base), the base itself can be confidently stored in an airtight container within your refrigerator for up to 3 to 4 days. In fact, many connoisseurs argue that the flavors of the eggnog base actually deepen and meld more harmoniously as it sits and chills over time!
When you’re finally ready to serve your festive creation, simply retrieve the chilled eggnog base from the refrigerator. Then, proceed with whipping and gently incorporating the egg whites (Steps 8 & 9 of the recipe). It is highly recommended to add the rum (or your chosen spirit) directly into individual servings just before pouring and enjoying (Step 10). We advise against adding the whipped egg whites or the alcohol to the entire batch too far in advance, as the delicate whipped whites can begin to deflate over time, and the alcohol can subtly alter and thin the overall consistency of the mixture. Always ensure any leftover eggnog (without the added rum or whipped whites) is stored properly in the refrigerator in a tightly sealed container and consumed within 3-4 days for optimal freshness and safety.
Troubleshooting Common Eggnog Issues: Solutions for a Perfect Batch
Even the most seasoned home cooks can occasionally encounter small hiccups when preparing a complex, yet rewarding, drink like homemade eggnog. Here are some common problems you might face and straightforward solutions to ensure your eggnog turns out perfectly every time:
- My Eggnog is Too Thin: If your finished eggnog lacks that desirable luscious thickness, first ensure that you cooked the base to the full internal temperature of 165°F (74°C) as instructed in Step 6. This specific temperature is absolutely crucial not only for food safety but also for the eggs to properly thicken the mixture. If it’s still too thin after it has thoroughly chilled, the most likely culprit is using lower-fat dairy products. Always opt for full-fat whole milk and rich heavy cream (35% or whipping cream) for the most decadent and thickest results. While not ideal, a last resort could be very gently whisking in a small amount of cornstarch slurry (1 teaspoon of cornstarch mixed with 2 teaspoons of cold milk) and very slowly reheating the mixture until it thickens, but this should ideally be unnecessary if the original cooking steps are followed correctly.
- I Accidentally Scrambled the Eggs in My Eggnog! This is a common fear, but thankfully, it’s easily preventable! The “tempering” step (Step 5) is your ultimate safeguard against scrambled eggs. Always, and we mean always, add the hot cream mixture to the egg yolks very slowly, in a thin, controlled stream, while simultaneously whisking the yolks vigorously and continuously. Never, under any circumstances, pour the hot liquid directly into the yolks all at once. If you did accidentally end up with a few small scrambled bits, you can attempt to strain the mixture through a very fine-mesh sieve, but prevention through proper tempering is always the best and most effective strategy.
- My Eggnog Isn’t Frothy Enough: The delightful frothiness and light, airy texture of homemade eggnog are primarily attributed to the perfectly whipped egg whites. To ensure optimal frothiness, make certain your egg whites are beaten to soft peaks as instructed (Step 8) and then gently and thoroughly folded into the well-chilled eggnog base (Step 9). Incorporating whipped whites into a warm or even slightly warm eggnog base will cause them to deflate quickly, resulting in a flat drink. Additionally, always ensure that the bowl and whisk you use for whipping the egg whites are absolutely spotless and completely free of any grease or fat residue, as even a tiny amount can prevent the egg whites from whipping up properly.
The recipes on this blog are tested with a conventional gas oven and gas stovetop. It’s important to note that some ovens, especially as they age, can cook and bake inconsistently. Using an inexpensive oven thermometer can assure you that your oven is truly heating to the proper temperature. If you use a toaster oven or countertop oven, please keep in mind that they may not distribute heat the same as a conventional full sized oven and you may need to adjust your cooking/baking times. In the case of recipes made with a pressure cooker, air fryer, slow cooker, or other appliance, a link to the appliances we use is listed within each respective recipe. For baking recipes where measurements are given by weight, please note that results may not be the same if cups are used instead, and we can’t guarantee success with that method.
