Delicious & Easy Christmas Chocolate Covered Strawberries: Your Ultimate Holiday Treat Guide
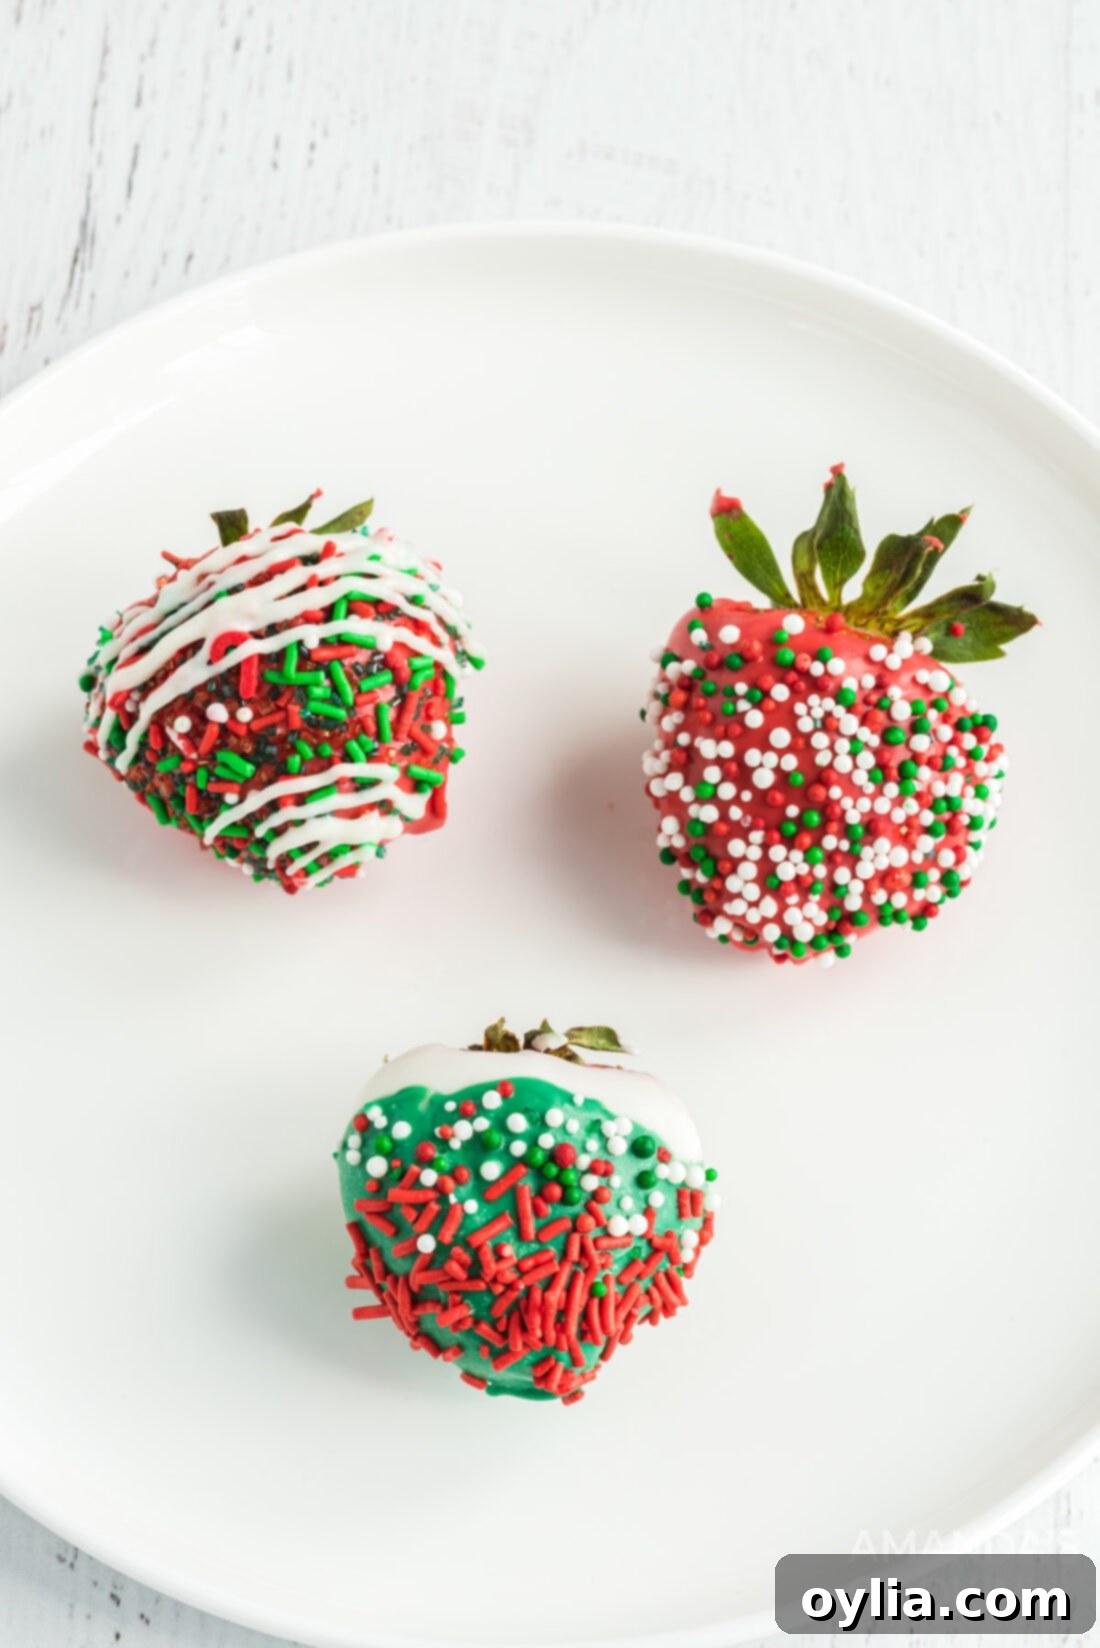
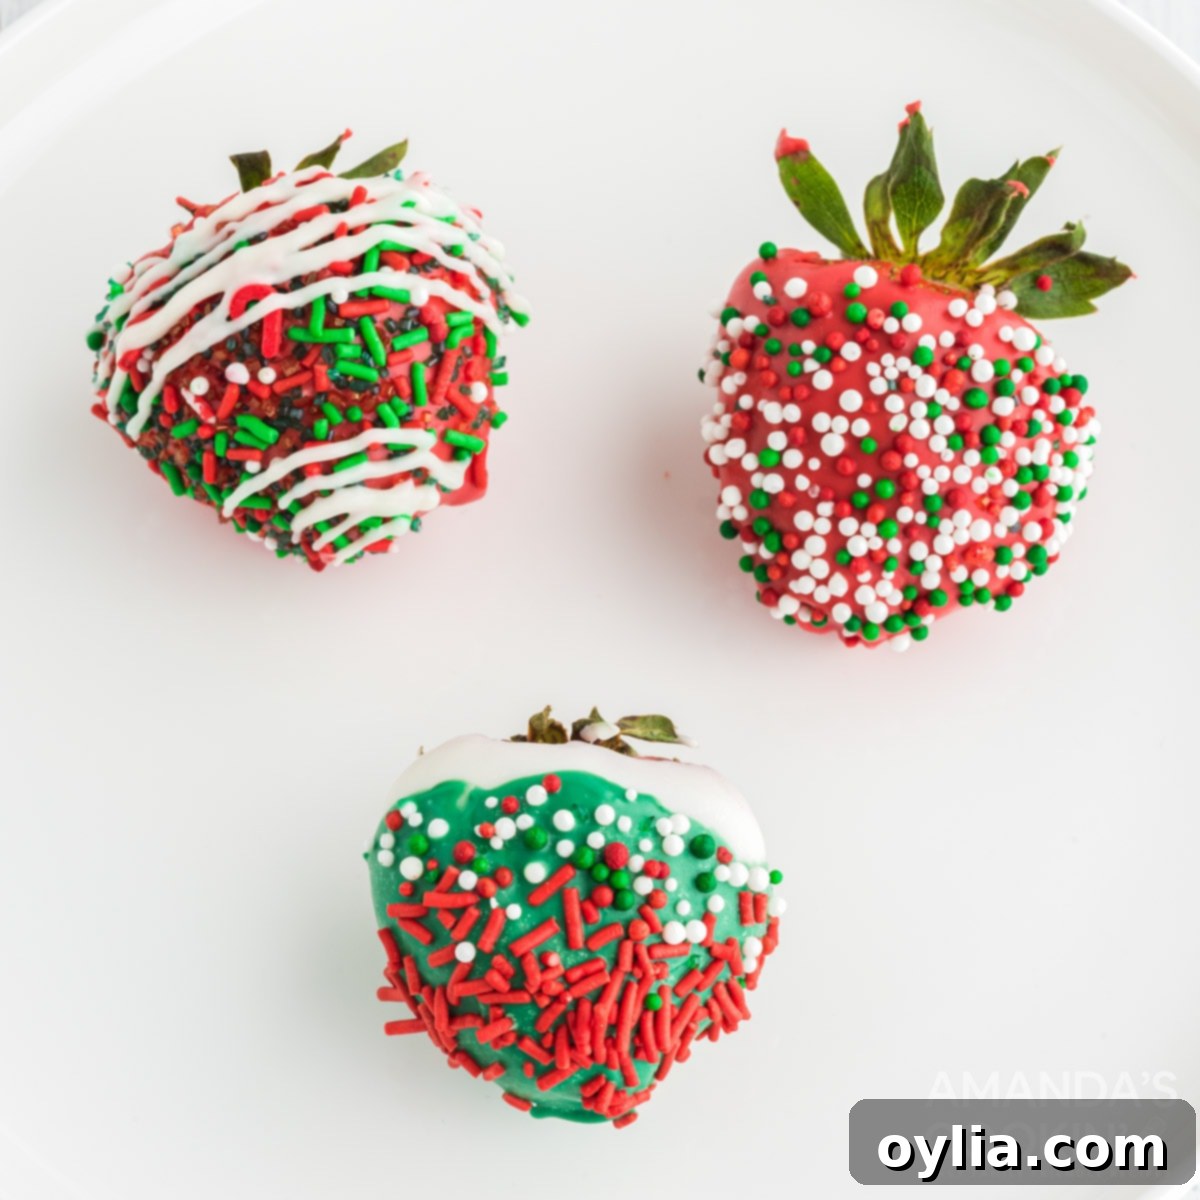
Embrace the festive spirit with a sweet and simple treat: **Christmas chocolate covered strawberries**! These delightful morsels are not just easy to make, but they also bring a vibrant splash of holiday color to any appetizer spread or dessert table. Who can resist the luscious combination of fresh, juicy strawberries enveloped in smooth, rich chocolate?
Beyond being a fantastic addition to your holiday feast, these customizable treats are perfect for every festive occasion. Whether you’re planning a Christmas party, looking for charming homemade gifts, or simply want a fun kitchen activity to enjoy with the kids, chocolate covered strawberries are always a hit. Their adaptability makes them a beloved dessert, easily transformed to match any holiday theme with a quick switch of colors and decorations.

Why This Recipe for Festive Chocolate Strawberries is a Must-Try
This recipe for chocolate covered strawberries is incredibly simple and effective, making it a go-to for quick and impressive holiday treats. The magic lies in how easily a classic dessert can be transformed into a Christmas-themed delight just by switching up your chocolate colors and decorations.
- **Effortless Elegance:** Despite their gourmet appearance, these strawberries require minimal effort, making them perfect for busy holiday schedules.
- **Highly Adaptable:** While we’re focusing on Christmas, this method can be adapted for any celebration—think pink for Valentine’s Day, pastels for Easter, or school colors for graduation!
- **Kid-Friendly Fun:** Decorating these treats is a fantastic activity for children. They’ll love dipping, sprinkling, and creating their own edible masterpieces.
- **Perfect for Gifting:** Hand-dipped chocolate strawberries make beautiful and thoughtful homemade gifts for neighbors, teachers, or hosts.
- **Crowd-Pleaser:** Everyone loves fresh strawberries and chocolate. This combination is universally adored and always disappears quickly at parties.
We highly recommend using a double boiler for melting your chocolate. This gentle heating method ensures smooth, lump-free chocolate and significantly reduces the risk of scorching or overcooking, which can ruin the texture and flavor of your delicious coating.
Mastering Christmas Chocolate Covered Strawberries: A Step-by-Step Guide
Crafting these festive treats is a simple process, and with a few key tips, you’ll achieve professional-looking results every time. Below, you’ll find a detailed walkthrough to ensure your Christmas chocolate covered strawberries are picture-perfect.
For those who appreciate visual guidance, the full recipe with step-by-step photos is available on my original recipe for Chocolate Covered Strawberries. This page provides all the written details and printable recipe card, but if you prefer visual aids for each step, please visit the original post.
Ingredients You’ll Need
- **Fresh Strawberries:** The star of the show! Choose ripe, firm, and blemish-free strawberries. For a beautiful presentation, try to select berries that are roughly the same size.
- **White Chocolate:** High-quality white chocolate or white candy melts are essential for creating vibrant colored coatings. Candy melts are often easier to work with for beginners as they require no tempering.
- **Colored Candy Melts:** Red and green candy melts are perfect for the Christmas theme. You can also use food coloring designed for chocolate to tint white chocolate, but be careful as water-based food coloring can seize chocolate.
- **Optional Decorations:** This is where you can get really creative! Think coarse sugar (white, red, or green), decorator gel, various decorative sprinkles, Christmas sprinkle mixes, nonpareils, or jimmies.
Essential Equipment
- **Double Boiler or Two Saucepans & Glass Bowl:** This setup is crucial for melting chocolate gently and evenly.
- **Sheet Pan:** For placing your dipped strawberries.
- **Waxed or Parchment Paper:** To line the sheet pan, preventing the chocolate from sticking.
- **Wooden Skewers:** These make dipping the strawberries much easier and keep your fingers clean.
Detailed Instructions for Perfect Dipping
- **Prepare Your Workspace:** First, line a sheet pan with waxed or parchment paper. Pop it into the freezer to chill while you prepare your ingredients. This cold surface will help the chocolate set faster when you place the dipped strawberries on it.
- **Strawberry Prep:** Gently wash your strawberries and dry them thoroughly. This step is critical! Any moisture on the strawberries can cause the chocolate to seize or not adhere properly. Insert a wooden skewer into the stem end of each strawberry, creating a convenient handle for dipping.
- **Melt the Chocolate:** Place your white chocolate and separate colored candy melts into individual glass or heat-proof bowls. Fill two saucepans with about 2 inches of water and bring them to a gentle simmer over medium heat. Once simmering, turn off the heat. Carefully place the bowls of chocolate over the saucepans (ensure the bottom of the bowl does not touch the water). Stir the chocolate melts continuously until they are completely smooth and melted. The residual heat from the water will melt the chocolate without burning.
- **Dipping the Strawberries:** Remove the chilled sheet pan from the freezer. Holding a strawberry by its skewer, dip it into the melted white chocolate, twirling it to ensure full coverage. Lift the strawberry and gently turn it, allowing any excess chocolate to drip back into the bowl. This prevents puddles of chocolate around the base of your berries.
- **Decorate Immediately:** As soon as you’ve dipped a strawberry, gently place it onto the chilled, lined sheet pan. This is your window for decorating! While the chocolate is still wet, sprinkle it with your chosen festive decorations like red and green sprinkles, coarse sugar, or nonpareils. You can also drizzle contrasting colored chocolate over it at this stage.
- **Repeat and Chill:** Continue the dipping and decorating process with the remaining strawberries. Once all your strawberries are dipped and decorated, place the sheet pan back into the refrigerator for about 15 minutes to allow the chocolate to fully set.
- **Serving and Storage:** Remove the strawberries from the refrigerator after 15 minutes. This prevents the chocolate from “sweating” (developing a cloudy, dull appearance) if left in the cold for too long. They are now ready to be served or stored for later enjoyment!
Expert Tips for Gorgeous Holiday Strawberries
Achieving perfectly coated and beautifully decorated chocolate strawberries for Christmas is easier than you think with these expert tips:
- **Dryness is Key:** This cannot be stressed enough – thoroughly dry your strawberries after washing. Water is chocolate’s enemy and will cause it to seize, becoming thick and lumpy. Pat them dry with paper towels and even let them air dry for a few minutes before dipping.
- **Quality Matters:** Use good quality chocolate or candy melts. Higher quality chocolate melts more smoothly and tastes better. Candy melts are formulated to melt easily and set quickly, often being the best choice for vibrant colors and intricate designs without the need for tempering.
- **Melting Chocolate Properly:**
- **Double Boiler Method (Recommended):** This gentle method ensures even melting. The steam provides indirect heat, preventing scorching.
- **Microwave Method (with Caution):** If using a microwave, use a microwave-safe bowl. Heat in 30-second intervals (not 1 minute as suggested in the original snippet, to be safer for small quantities or less powerful microwaves), stirring well after each interval. Stirring distributes heat and prevents hot spots. Stop heating when there are still a few small lumps, and continue stirring until they melt completely from residual heat. This prevents overheating.
- **Maintain Chocolate Temperature:** Keep your melted chocolate warm (but not hot!) over the double boiler if you’re dipping a large batch. If it cools too much, it will become too thick to dip smoothly.
- **Dipping Technique:** Hold the strawberry by its stem or skewer, dip it deep into the chocolate, then lift and twist gently to let excess chocolate drip off. You want a thin, even coating, not a thick blob.
- **Immediate Decoration:** Sprinkles and other decorations must be applied while the chocolate is still wet to adhere. Have everything ready before you start dipping.
- **Setting Time:** Chilling in the refrigerator for about 15 minutes is usually sufficient for the chocolate to set. Over-chilling can cause condensation (sweating) when the strawberries return to room temperature, which can affect their appearance.
- **Storage:** Store chocolate covered strawberries in a single layer in an airtight container in the refrigerator for up to 1-2 days. Bring them to room temperature for about 15-20 minutes before serving for the best flavor and texture.
Creative Christmas Decorating Options
The beauty of Christmas chocolate covered strawberries lies in their versatility. Here are some enchanting ways to decorate them:
- **Classic Drizzle:** After dipping in white chocolate, use red or green melted candy melts (or even regular dark chocolate) to drizzle fine lines across the strawberries with a fork or a piping bag with a very small hole.
- **Half-Dip Delight:** Dip one half of a white-chocolate-covered strawberry into a contrasting color like red or green candy melt for a two-toned look.
- **Festive Sprinkles:** Immediately after dipping, roll the strawberry in a shallow dish of colorful Christmas sprinkles, nonpareils, or decorator sugar. A mix of red, green, and white sprinkles looks particularly festive.
- **Edible Glitter:** For a touch of sparkle, lightly dust edible glitter (gold or silver) over the still-wet chocolate.
- **Candy Cane Crush:** Crush some candy canes and press them onto the wet chocolate for a minty, crunchy texture and vibrant red and white stripes.
- **Cookie Crumble:** Finely crush some festive cookies (like gingerbread or shortbread) and coat the bottom half of the strawberry for an extra layer of flavor and texture.
More Festive Christmas Recipes to Explore
If you’re loving the holiday spirit and eager to create more delightful treats, check out these other fantastic Christmas-themed recipes. They’re perfect for expanding your holiday menu or for more fun baking activities:
- Strawberry Christmas Trees
- Christmas Tree Brownies
- Christmas Tree Rice Krispie Treats
- Christmas Tree Cheese Platter
- Christmas Tree Pull Apart Bread
- Cornflake Christmas Wreaths
I genuinely love to bake and cook, sharing my kitchen experiences and delicious creations with all of you! Remembering to come back each day for new recipes can be tough, which is why I offer a convenient newsletter every time a new recipe posts. Simply subscribe and start receiving your free daily recipes directly in your inbox!

Christmas Chocolate Covered Strawberries
IMPORTANT – There are often Frequently Asked Questions within the blog post that you may find helpful. Simply scroll back up to read them!
Print It
Pin It
Rate It
Save ItSaved!
Ingredients
- 2 pounds strawberries 18-20 evenly sized strawberries
- 12 oz white chocolate
- 12 oz orange green and red melts
Optional Decorations
- Coarse sugar
- Decorator gel
- Decorative sprinkles
- Christmas sprinkle mix
- Nonpareils
- Jimmies
Things You’ll Need
-
Double boiler
-
Saucepan
-
Sheet pan
-
Wooden skewers
Before You Begin
- In order to prevent clumping and possible overcooking, I melt my chocolate in a homemade double boiler. That is to say in a glass bowl that has been placed over a saucepan of simmered water.
- Microwaves will do the job, but the chocolate will continue to cook after you take it out. Therefore if you melt it in the microwave until it is completely melted, you run the risk of scorching it. If you are microwaving your chocolate, start with one minute on high, then stir. Then continue cooking in 20 second intervals on MEDIUM POWER until almost melted. Remove and stir, stir, stir until all the pieces have melted.
- The chilled sheet pan will help the chocolate begin to harden and set as soon as you place the strawberry onto it.
Instructions
-
First, line a sheet pan with waxed or parchment paper and place it in the freezer to chill. Insert a skewer into the stem end of each strawberry.
-
Place the chocolate and candy melts into separate glass or heat proof bowls.
-
Put about 2 inches of water into two saucepans and bring to a simmer over medium heat. Turn off the heat and set the bowls of chocolate over the water to melt. Stir chocolate until smooth.
-
Remove the sheet pan from the freezer.
-
Using the skewer as a handle, dip the fruit into the chocolate. Lift and turn, allowing excess chocolate to drip back into the bowl. Place dipped berries onto the chilled lined sheet pan.
-
Repeat with remaining strawberries.
Decorating Options
-
Dip a fork into melted chocolate/candy melts and drizzle over the dipped strawberries.
-
Dip one half of the chocolate covered strawberry into fall colored candy melt.
-
Roll dipped strawberries into colorful sprinkles or decorator sugar.
-
Sprinkle freshly dipped strawberries with sprinkles or nonpareils.
Chill
-
Place in the refrigerator to set for 15 minutes. Remove from the refrigerator after that so that the chocolate doesn’t sweat.
The recipes on this blog are tested with a conventional gas oven and gas stovetop. It’s important to note that some ovens, especially as they age, can cook and bake inconsistently. Using an inexpensive oven thermometer can assure you that your oven is truly heating to the proper temperature. If you use a toaster oven or countertop oven, please keep in mind that they may not distribute heat the same as a conventional full sized oven and you may need to adjust your cooking/baking times. In the case of recipes made with a pressure cooker, air fryer, slow cooker, or other appliance, a link to the appliances we use is listed within each respective recipe. For baking recipes where measurements are given by weight, please note that results may not be the same if cups are used instead, and we can’t guarantee success with that method.
Frequently Asked Questions (FAQ)
How long do Christmas chocolate covered strawberries last?
For the best taste and appearance, chocolate covered strawberries are best enjoyed within 1-2 days of making them. The strawberries can start to “sweat” or release moisture over time, which can affect the chocolate coating.
Can I use regular chocolate instead of candy melts?
Yes, you can! However, regular chocolate (like chocolate chips or baking bars) requires tempering to achieve a smooth, shiny finish and a firm snap at room temperature. If not tempered correctly, it can result in dull, streaky, or sticky chocolate. Candy melts are designed to be much easier to work with, setting smoothly without tempering, which is why they are often recommended for beginner-friendly projects like this.
Why is my chocolate clumping or seizing?
Chocolate seizing is usually caused by even a tiny amount of water or steam coming into contact with the melting chocolate. Ensure your bowls and utensils are completely dry, and when using a double boiler, make sure the water is simmering gently and not boiling vigorously, which could create too much steam. Overheating chocolate in the microwave can also cause it to seize or burn.
What is the best way to store Christmas chocolate covered strawberries?
Store your finished strawberries in a single layer in an airtight container in the refrigerator. Placing parchment paper between layers can help prevent them from sticking. Remove them from the fridge about 15-20 minutes before serving to allow them to come closer to room temperature for optimal flavor and texture.
Can I make these for other holidays?
Absolutely! This recipe is incredibly versatile. Simply swap out the red and green candy melts and sprinkles for colors appropriate to the occasion. Think pink and red for Valentine’s Day, pastels for Easter, orange and black for Halloween, or blue and white for Hanukkah. The possibilities are endless!
Concluding the Holiday Delight: Your Perfect Christmas Treat
Creating these **Christmas chocolate covered strawberries** is more than just making a dessert; it’s an experience that brings joy, color, and deliciousness to your holiday season. With their vibrant festive hues and irresistible combination of fresh fruit and smooth chocolate, they are guaranteed to be a hit with family and friends. Whether you’re a seasoned baker or a kitchen novice, this recipe offers a simple path to a show-stopping treat.
So gather your ingredients, enlist your little helpers, and dive into the sweet magic of the holidays. These easy-to-make, beautifully decorated strawberries are perfect for sharing, gifting, or simply indulging in a moment of festive bliss. Happy dipping, and merry Christmas!
