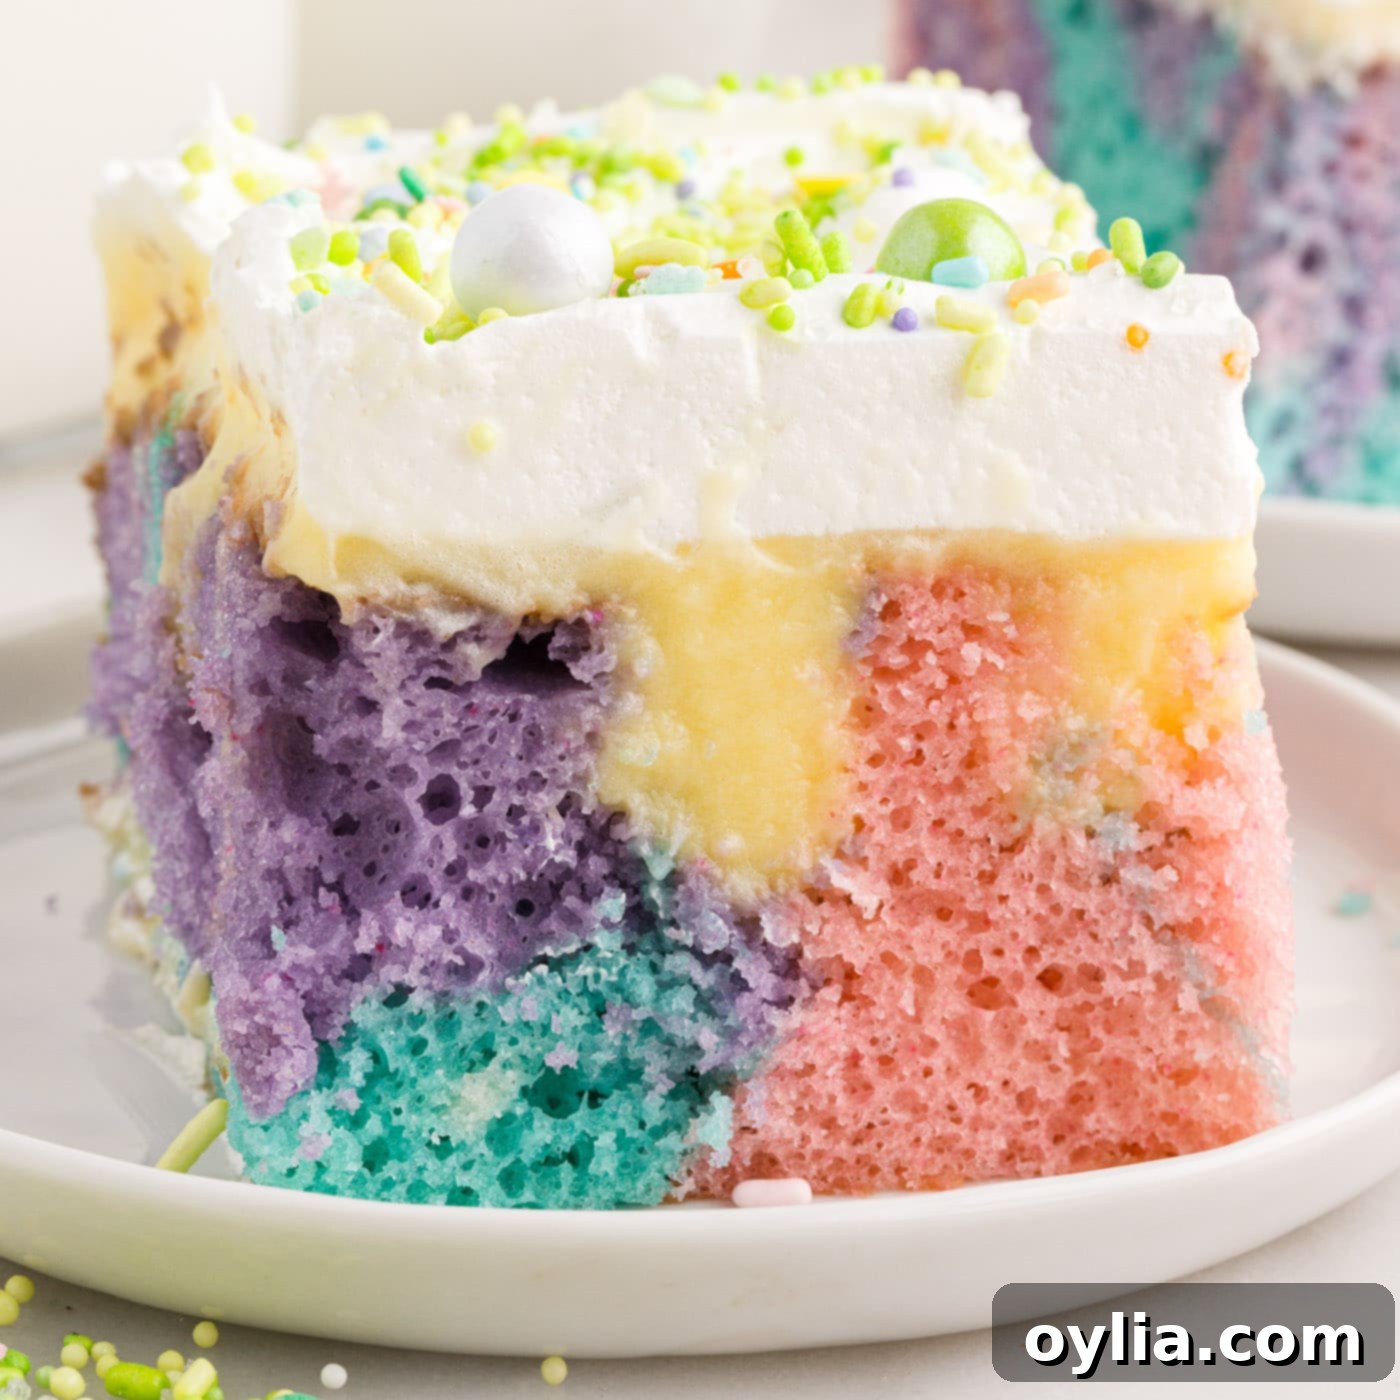
Easy Pastel Easter Poke Cake: Your Ultimate Guide to a Festive Holiday Dessert!
There’s an undeniable charm that a pastel-colored Easter poke cake brings to any holiday gathering. This vibrant and utterly delicious dessert is not just a treat for the taste buds, but also a feast for the eyes, perfectly encapsulating the light and joyous spirit of springtime. What makes this recipe truly special is its incredible simplicity. Starting with a basic white cake mix, enhanced with creamy instant vanilla pudding and crowned with a luscious, silky Cool Whip topping, it promises a show-stopping dessert without the fuss typically associated with elaborate baking. Imagine the smiles when you present this beautifully layered cake, adorned with cheerful Easter sprinkles, making your holiday dessert table the talk of the season.
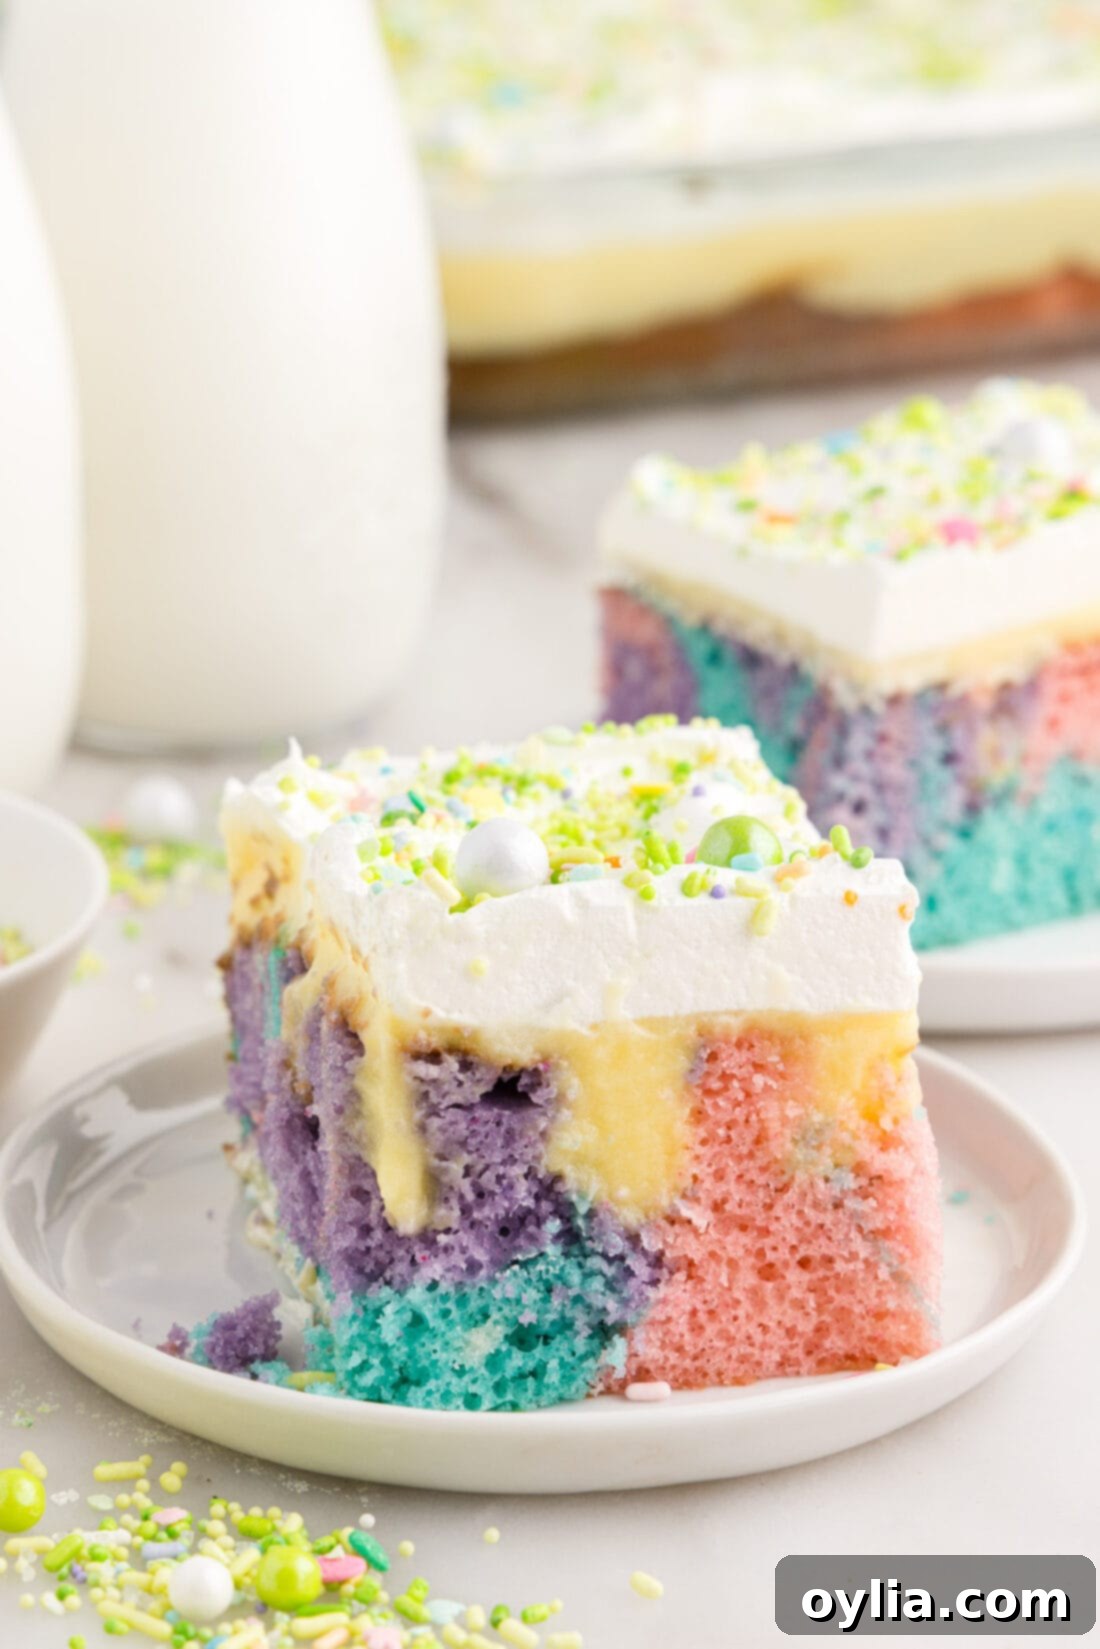
Why This Easter Poke Cake Recipe Works Wonders
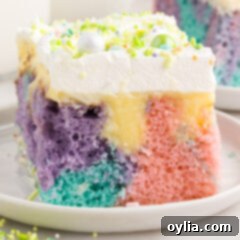
This Easter poke cake truly shines, bursting with a delightful palette of pastel purples, pinks, and blues swirled elegantly throughout the cake, complemented by a gentle touch of yellow from the vanilla pudding infused within. The ethereal Cool Whip frosting acts as the perfect canvas, ready to be adorned with colorful sprinkles, transforming this simple dessert into an edible work of art. It’s a dessert that’s as delightful to behold as it is effortless to prepare, making it an ideal choice for busy holiday hosts who want to create something special without spending hours in the kitchen.
Easter holds a special place in our hearts, inspiring us to create playful recipes that feature the iconic pastel hues, alongside beloved symbols like bunnies, chicks, and vibrant tie-dye eggs. We fondly recall last year’s Easter dirt cake, which was an instant favorite among both children and adults. We have no doubt that this poke cake will follow suit, creating new cherished memories around your festive table. Its inherent appeal lies in its ability to combine visual splendor with an approachable baking process, allowing you to focus more on celebration and less on complex culinary techniques. The contrasting textures of the moist cake, creamy pudding, and light whipped topping create a harmonious symphony of flavor and sensation with every single bite.
What is a Poke Cake? An Easy Dessert Revelation
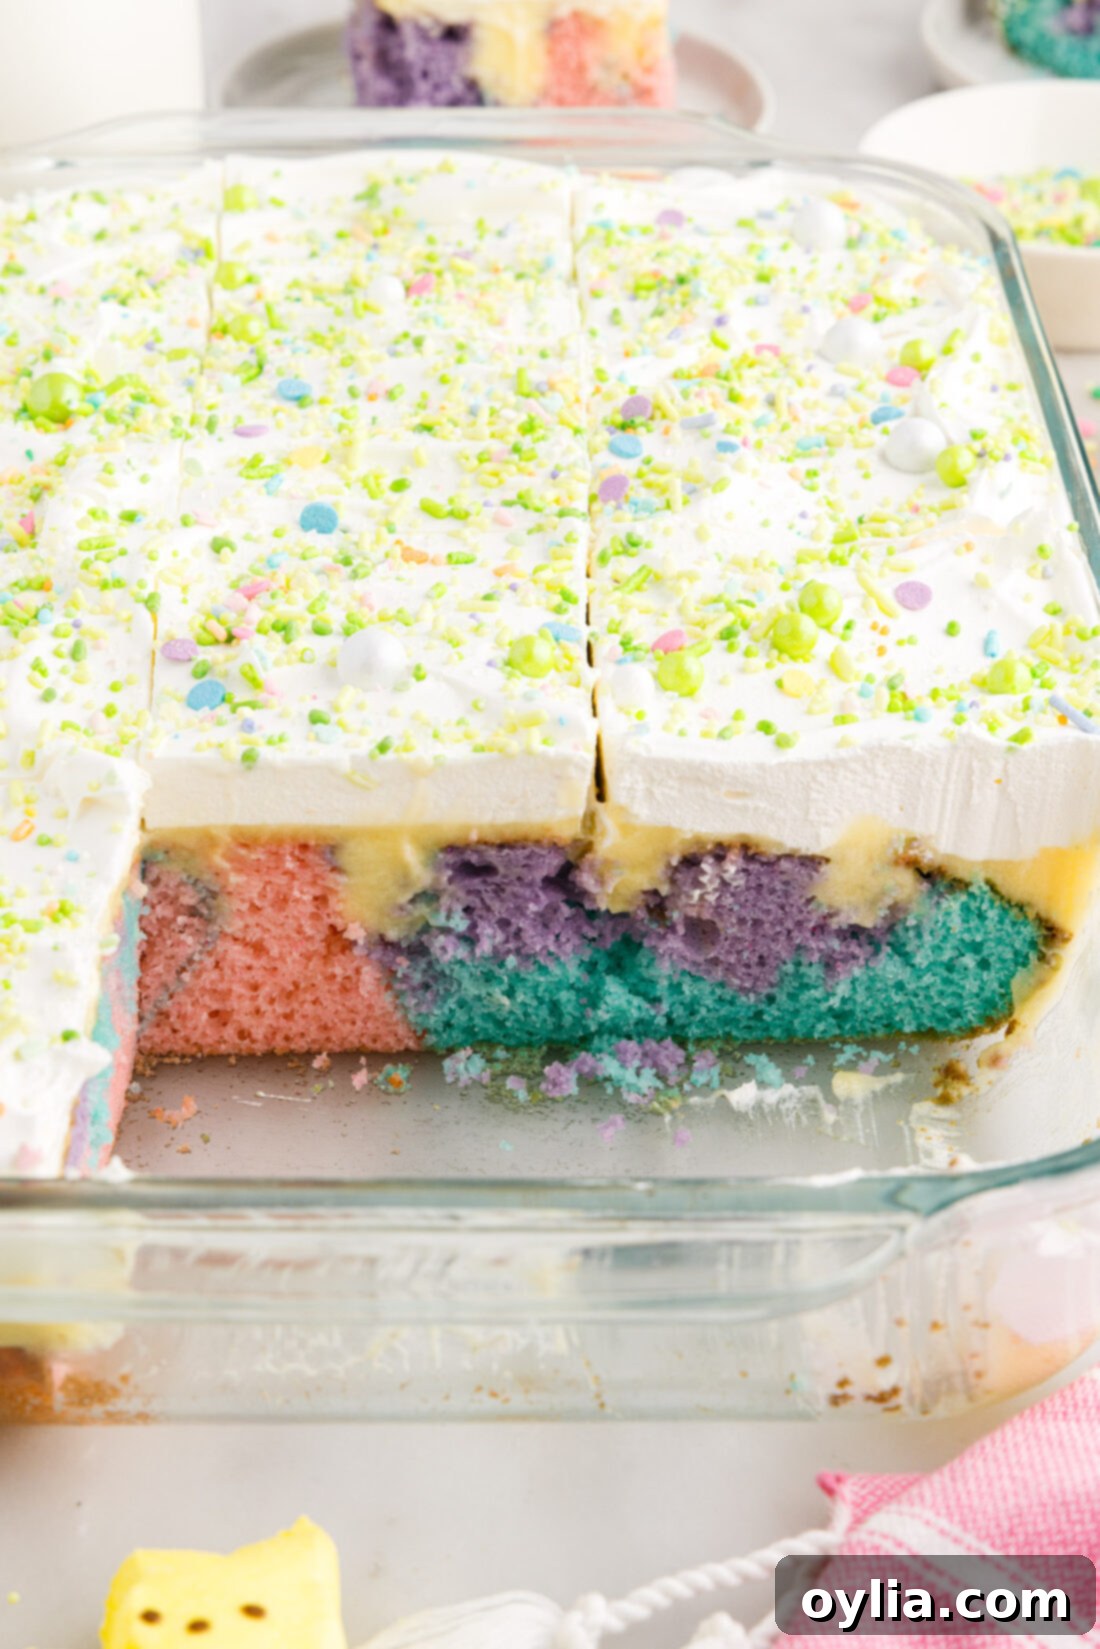
For those new to the concept, a poke cake is a dessert that involves baking a cake, then using the handle of a wooden spoon or a similar tool to meticulously poke holes all over its surface. These holes are then generously filled with a liquid or semi-liquid ingredient, such as pudding, Jell-O, or condensed milk, which soaks deeply into the cake. This ingenious technique transforms an ordinary cake into something incredibly moist, tender, and intensely flavorful, adding a delightful surprise in every forkful. The concept behind a poke cake is pure genius: it takes a simple boxed cake mix and elevates it to something extraordinary with minimal effort.
The infused filling not only adds an extra layer of moisture but also a burst of flavor that permeates the entire cake, creating a delightful and unexpected experience. Historically, poke cakes gained popularity for their remarkable ease of preparation and their ability to impress guests with their unique appearance and wonderfully tender texture. This particular Easter version masterfully leverages the beloved “poke” technique to introduce vibrant pastel colors and creamy vanilla goodness into every nook and cranny of the cake. The result is a dessert that is truly a masterpiece of both taste and visual appeal, making it an unforgettable centerpiece for your holiday spread.
Essential Ingredients You Will Need
To embark on your journey to creating this magnificent Easter poke cake, you’ll need a selection of readily available ingredients, most of which you might already have in your pantry. You’ll find a complete list of all precise measurements, specific ingredients, and detailed instructions in the printable recipe card located at the very end of this comprehensive guide. However, let’s delve a bit deeper into some of the key components that make this cake truly special and offer some helpful insights for each.
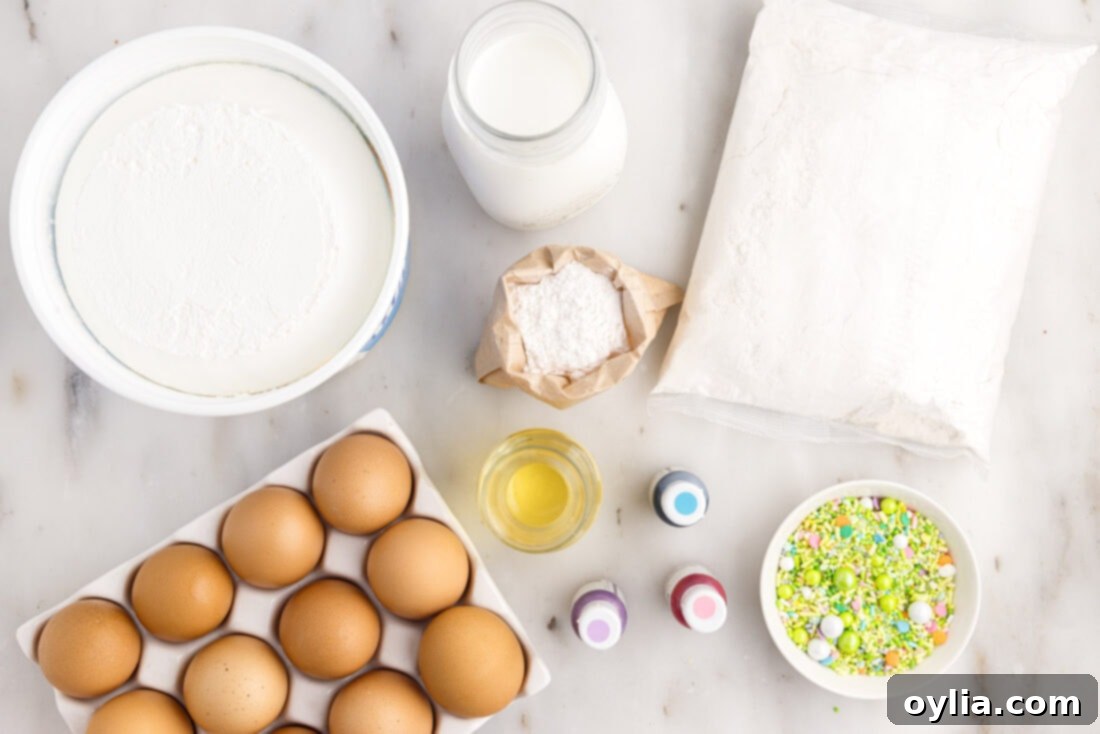
Ingredient Information and Smart Substitution Suggestions
Cake Base
CAKE MIX – We used a standard 15.25 ounce package of white cake mix as our convenient and consistent base. The beauty of starting with a cake mix is the reliable results it provides, making this recipe practically foolproof. You can also experiment with a French vanilla or yellow cake mix if you don’t mind a slightly creamier undertone to your pastel colors. Always ensure your cake mix is fresh for the best rise and texture.
EGGS – Our recipe calls for 3 large eggs. While we used whole eggs, which may impart a very slight yellow tint to the batter, for an absolutely pristine white cake that truly allows the pastel food coloring to pop with maximum vibrancy, consider using only egg whites. This minor adjustment ensures that your vibrant purples, pinks, and blues remain as true as possible without any underlying yellow interference. Regardless of your egg choice, the cake’s rise, texture, and delightful taste will remain consistently excellent, making it a flexible component for your baking preferences.
OIL & MILK – Vegetable oil and milk (we recommend whole milk for richness) are essential for achieving a moist and tender cake. They contribute to the cake’s structure and keep it from drying out during baking. Ensure your milk is at room temperature for better incorporation into the batter.
Pudding & Topping
PUDDING – Instant vanilla pudding (3.4 ounces) is a star ingredient here, not only for its creamy texture and sweet flavor but also for its subtle pale yellow hue, which naturally introduces a fourth lovely pastel color into the sliced cake. This unexpected touch of yellow adds another layer of visual interest to your beautiful creation. However, if your chosen cake batter colors already include yellow, or if you prefer a starker contrast and a truly ‘white’ filling, we highly recommend opting for a white chocolate instant pudding mix. This will provide a pure white filling that will stand out beautifully against the colored cake layers, offering a distinct visual and flavor experience. Be sure to use instant pudding, not the cook-and-serve variety, for proper setting.
COOL WHIP – The final flourish, an 8-ounce container of Cool Whip or any thawed frozen whipped topping, provides a light, airy, and wonderfully sweet frosting that ties all the elements together. Its smooth consistency makes it incredibly easy to spread, creating a pristine white top perfect for garnishing. For those who prefer a homemade touch, a lightly sweetened whipped cream can be a delightful substitute, though Cool Whip offers unmatched convenience and stability, especially for a make-ahead dessert or one that needs to sit out for a short period.
Color & Garnish
GEL FOOD COLORING – Using gel food coloring is absolutely crucial for achieving vibrant, concentrated pastel shades without adding too much liquid to your cake batter. Unlike liquid food coloring, gels provide intense color with just a drop or two, allowing for precise control over your desired hues. We specifically chose pink, purple, and blue to create a classic Easter palette, but feel free to experiment with other soft spring shades like mint green, light orange, or even a soft lavender. Remember, a little goes a long way, so add colors incrementally until you reach your ideal pastel vibrancy. You’ll need at least 3-4 colors for the full effect.
SPRINKLES & EASTER CANDY – No Easter cake is complete without a generous shower of festive sprinkles! These small, colorful adornments instantly elevate the cake’s appearance, making it even more appealing and celebratory for the holiday. Opt for pastel Easter-themed sprinkles, or mix and match your favorites to create a unique and personalized look. Beyond sprinkles, consider other charming Easter candies like mini chocolate eggs, pastel M&Ms, marshmallow chicks (Peeps), or edible glitter for an extra touch of sparkle and whimsy. These garnishes provide not just visual appeal but also a delightful textural contrast.
How to Make This Festive Easter Poke Cake
These step by step photos and instructions are here to help you visualize how to make this recipe. You can Jump to Recipe to get the printable version of this recipe, complete with measurements and instructions at the bottom.
- Preheat oven to 350°F (175°C). Begin by preparing your baking vessel: thoroughly spray a 9×13 inch glass baking dish with a nonstick baking spray, ensuring every corner and side is coated to prevent any sticking. Set this prepared dish aside, ready for your colorful cake batter.
- In a large mixing bowl, combine the white cake mix, 3 large eggs (or egg whites if you’re aiming for a truer white cake), ½ cup of vegetable oil, and 1 cup of milk. Using an electric hand mixer or a stand mixer, beat these ingredients together until they are fully combined and the batter is smooth and free of lumps. This typically takes about 1-2 minutes on medium speed.
- Once your cake batter is perfectly mixed, carefully divide it as evenly as possible into three separate medium-sized bowls. This is where the magic of color truly begins!
- Now, it’s time to tint your batter. Into each of the three bowls, add just a drop or two of gel food coloring at a time. We recommend starting with a single drop and gradually adding more, stirring gently after each addition, until you achieve your desired vibrant pastel shades of pink, purple, and blue. Gel food colorings are ideal as they provide intense hues without thinning the batter. Remember to mix each color thoroughly but gently to ensure an even shade throughout.
- With your beautifully colored batters ready, it’s time to assemble the cake. Using a large spoon or an ice cream scoop (an excellent expert tip for easy and mess-free dispensing!), drop alternating large spoonfuls of each colored batter throughout the prepared 9×13 inch baking dish. The goal is to create distinct blobs of color that will eventually swirl together. If you opt for smaller scoops of batter, you might not even need to swirl the batter in the next step, as the multitude of small color pockets will create a wonderful variety on its own. Ensure good spacing between the colors for maximum visual impact in the final slice.
- Once all the batter is in the dish, take a knife (or even a thin wooden skewer) and gently swirl the colors together. Be cautious not to over-swirl, as this can lead to the colors becoming muddy and blending into a single, less appealing shade. A few gentle passes are all you need to create a beautiful marbled effect that will be delightfully revealed when the cake is sliced.
- Carefully place the baking dish into your preheated oven. Bake the cake for approximately 25-30 minutes, or until the center is set. You can test for doneness by inserting a toothpick into the center; if it comes out with just a few moist crumbs attached, your cake is ready. Avoid overbaking, as this can lead to a dry cake.
- Once baked, remove the cake from the oven and place it on a wire rack. Allow it to cool completely or at least mostly cool. This step is crucial before adding the pudding, as a hot cake will simply absorb the pudding too quickly or cause it to thin out, rather than allowing it to set properly within the holes.
- When the cake has cooled sufficiently, grab the round handle of a wooden spoon or a wooden dowel. Gently poke holes all over the surface of the cake, aiming for about two-thirds of the way down into the cake’s depth. Space the holes approximately ¾ to 1 inch apart. These holes are the conduits for the delicious pudding filling, ensuring every bite is incredibly moist and flavorful.
- Now, prepare your luscious pudding mixture. In a separate bowl, whisk together the instant vanilla pudding mix with the remaining 2 cups of milk. Continue whisking for 1-2 minutes until the mixture is fully combined and just begins to visibly thicken. Don’t worry if it’s not super thick yet; it will continue to set and firm up once chilled in the refrigerator.
- Generously pour the prepared pudding mixture directly over the cooled, poked cake. Using an offset spatula or the back of a spoon, carefully spread the pudding evenly across the top, gently pressing it down slightly while spreading to ensure it fills all those wonderful holes you’ve created. This step is key to achieving that signature ‘poke cake’ moistness and flavor in every single piece.
- Once the pudding is spread, transfer the cake to the refrigerator. Allow it to chill for at least 30 minutes. This chilling time is essential for the pudding to fully thicken and set properly within the cake’s holes, preparing it perfectly for the final topping.
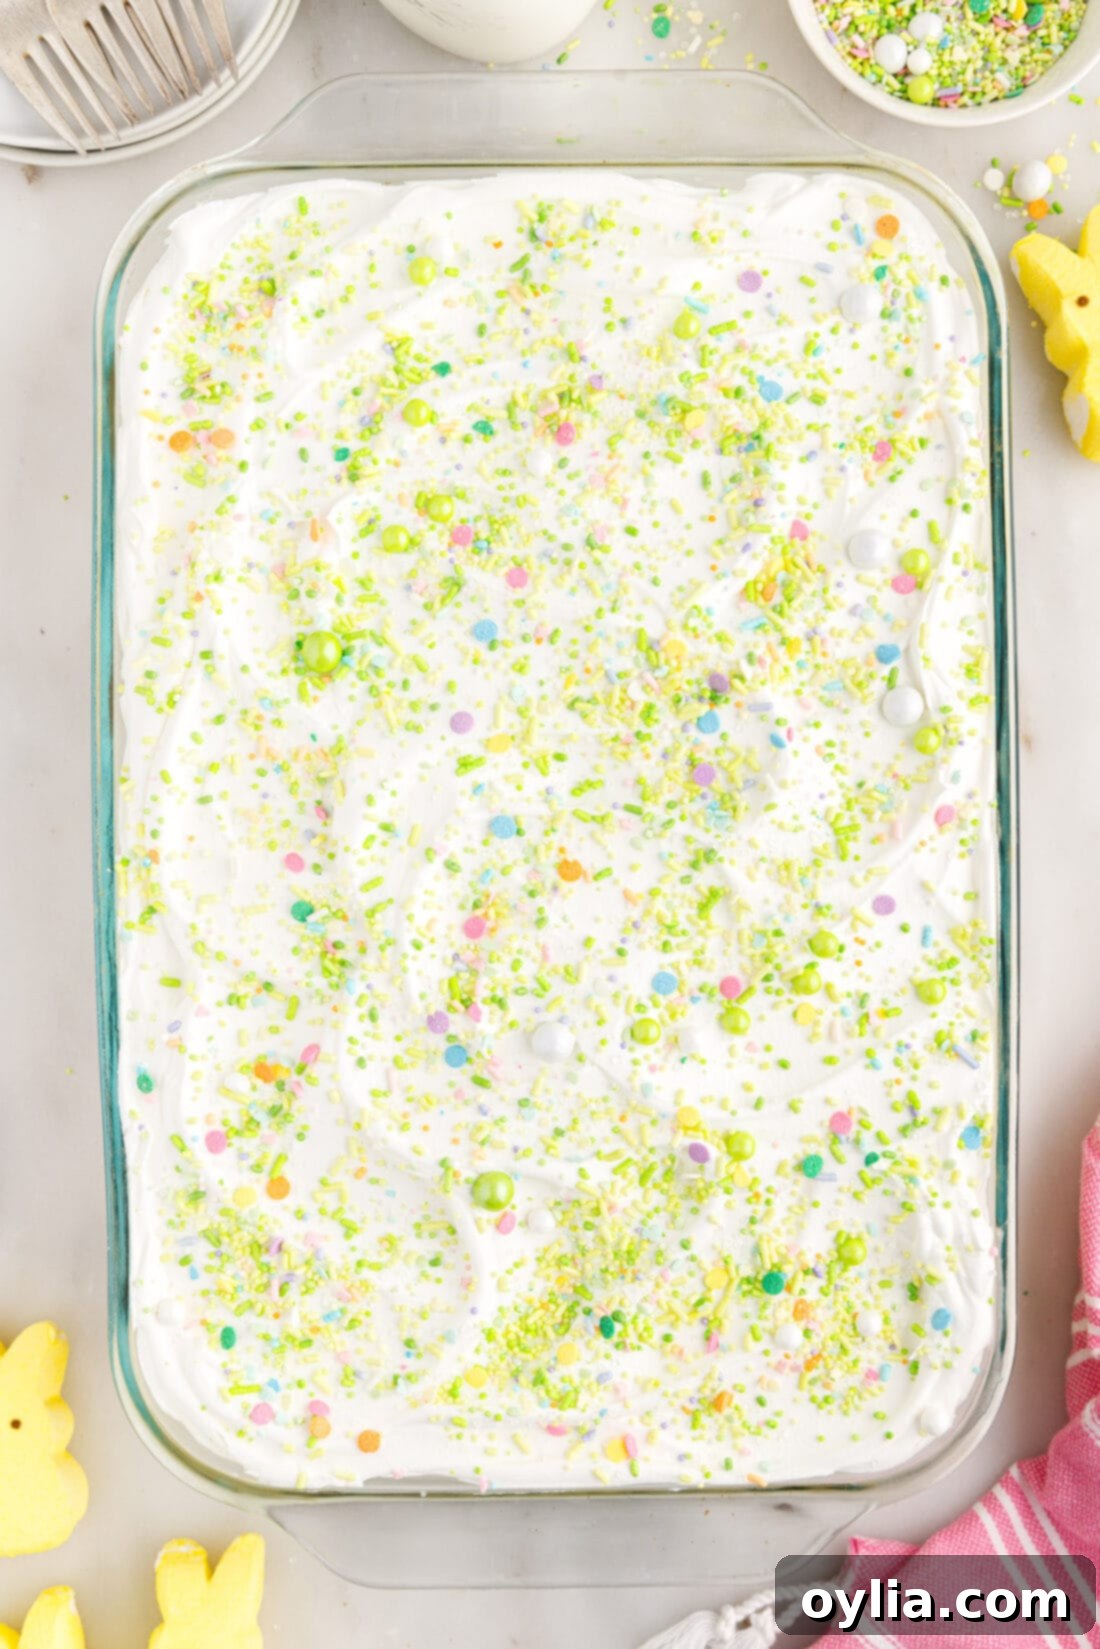
- Finally, retrieve your thoroughly chilled cake. Evenly spread the thawed Cool Whip over the top, creating a smooth, inviting white layer. This provides a beautiful and clean contrast to the vibrant pastel colors hiding within. Now comes the fun part: decorate your Easter Poke Cake with a generous scattering of colorful sprinkles, or any festive Easter candy you desire. Slice, serve, and enjoy your stunning creation!
Frequently Asked Questions & Expert Tips for Success
To ensure your Easter Poke Cake is an absolute triumph and to answer any lingering questions, we’ve gathered some frequently asked questions and expert tips to guide you through the process and help you troubleshoot any queries you might have.
To maintain its freshness and deliciousness, store this delightful poke cake, fully covered with plastic wrap or in an airtight container, in the refrigerator for up to 5 days. The pudding and Cool Whip topping need to be kept chilled. For longer preservation, this cake is freezer-friendly and can be kept frozen for up to 3 months. When freezing, we highly recommend waiting to add the Cool Whip frosting until just before you’re ready to serve. This approach makes wrapping the cake much easier and prevents any damage or mess to the delicate topping during storage and thawing. Simply thaw the cake in the refrigerator overnight, then frost and garnish as desired before serving.
Absolutely, yes! This recipe is a fantastic choice for preparing ahead of time, which is perfect for busy holiday schedules. You can prepare the entire cake, including the Cool Whip topping and garnishes, a day or even two days in advance. Simply store it well-covered in the refrigerator until you are ready to present and serve it to your guests. In fact, many people find that the flavors actually meld and deepen slightly over time, making it even more delicious on the second day.
While gel food coloring provides the best vibrant results with minimal liquid, you can use liquid food coloring as a substitute. However, be mindful that you might need to use a bit more to achieve the desired intensity of pastel colors, and adding too much liquid can slightly alter the cake batter’s consistency. Add sparingly, drop by drop, and mix well after each addition until you reach your desired shade.
Certainly! While vanilla provides a classic, gentle yellow pastel and a universally loved flavor, feel free to experiment with other instant pudding flavors to customize your Easter poke cake. White chocolate pudding is an excellent choice for a truly white filling, which can create a beautiful contrast with the colored cake layers. Strawberry or banana pudding could also introduce different pastel hues and flavor profiles, making your cake even more unique and appealing to specific tastes. Just ensure it’s an instant pudding mix for proper setting.
The most common reason for colors getting muddy when swirling is over-mixing or over-swirling the batter. The goal is to create a gentle marble effect, not a fully blended mixture. Think of it more like a quick figure-eight or zig-zag motion with your knife or skewer, rather than a thorough stir. A few light passes are usually sufficient to create the beautiful swirled effect without losing the distinct pastel shades. Next time, try fewer, lighter swirls and trust the process!
Yes, you absolutely can use homemade whipped cream if you prefer a fresh, less processed topping. To make it, simply beat heavy cream with a little powdered sugar and vanilla extract until stiff peaks form. However, be aware that homemade whipped cream is generally less stable than Cool Whip and may begin to weep or lose its shape if left out for extended periods or if stored for too long. For best results with homemade whipped cream, it’s ideal to add it closer to serving time or ensure the cake remains refrigerated until immediately before serving.
Creative Serving and Decoration Suggestions
The presentation of your Easter Poke Cake offers a fantastic opportunity to unleash your creativity, especially with the abundant array of adorable Easter candies available during the season. You can stick with classic Easter-themed sprinkles for a simple yet festive look, or elevate your cake with pastel-colored chocolate eggs, mini marshmallow Peeps, or even edible sugar decorations shaped like bunnies and chicks. For a truly enchanting display, consider arranging a few larger candies on top as a focal point, or creating a “nest” of shredded coconut (tinted green!) with candy eggs inside. This cake is wonderfully versatile and can be enjoyed chilled straight from the refrigerator, offering a refreshing bite, or at room temperature for a softer, more indulgent experience.
Beyond Easter, this vibrantly colored cake possesses a magical quality that makes it easily adaptable for other joyous occasions. With a simple swap of sprinkles and garnishes, this delightful creation can effortlessly transform into a whimsical Unicorn cake, perfect for a themed birthday party or any celebration that calls for a touch of fantasy. Imagine adorning it with iridescent unicorn sprinkles, edible glitter, and perhaps a delicate sugar horn. Its stunning internal colors are sure to captivate and delight guests of all ages, no matter the theme. It also makes a wonderful dessert for spring brunches, baby showers, or any event where a pop of color and deliciousness is desired.
More Festive Easter Recipes to Try
If you loved making and devouring this Easter Poke Cake, be sure to explore more of our delightful holiday recipes. We have a variety of treats that are perfect for your Easter celebrations or any spring gathering:
- Easy Easter Toffee
- Fun Easter Dirt Cake
- Simple Rice Krispie Nests
- Adorable Easter Nest Cupcakes
- Whimsical Bunny Butt Cupcakes
- Classic Easter Bunny Cupcakes
I love to bake and cook and share my kitchen experience with all of you! Remembering to come back each day can be tough, that’s why I offer a convenient newsletter every time a new recipe posts. Simply subscribe and start receiving your free daily recipes!
Easter Poke Cake
IMPORTANT – There are often Frequently Asked Questions within the blog post that you may find helpful. Simply scroll back up to read them!
Print It
Pin It
Rate It
Save It
Saved!
Prevent your screen from going dark
Course:
Dessert
Cuisine:
American
24
servings
1 hour
10 minutes
164
Amanda Davis
Ingredients
- 15.25 ounce package of white cake mix
- 3 large eggs or egg whites, see notes below
- ½ cup vegetable oil
- 3 cups milk divided
- gel food coloring in 3-4 colors. We used pink, purple, and blue
- 3.4 ounces instant vanilla pudding mix
- 8 ounces Cool Whip or frozen whipped topping, thawed
- sprinkles or Easter candy for garnish
Things You’ll Need
-
13×9 baking dish
-
Mixing bowls
-
Wooden spoon or dowel for poking the holes
-
Offset icing spatula
Before You Begin
- For a true white cake, use only egg whites instead of the whole eggs. The cake will rise, bake, and taste essentially the same. The slight yellow tint of the egg yolks in the batter may interfere with the colors when you are tinting the batter for the cake. However, we used whole eggs in our cake batter.
- Vanilla pudding has a pale yellow tint, which makes a nice fourth pastel color in the sliced cake. If you use yellow as one of your cake batter colors, I would recommend using white chocolate pudding mix for a truer white contrast.
- Store this poke cake, covered, in the refrigerator for up to 5 days. This cake can be frozen for up to 3 months, be sure to wrap it well. If freezing, I would recommend waiting to add the Cool Whip frosting until you are ready to serve, as it will be easier to wrap the cake without messing up the topping this way.
- You can prepare the cake including the topping a day or two in advance and store it in the refrigerator until you are ready to serve.
Instructions
-
Preheat oven to 350°F. Spray a 9×13 glass baking dish with nonstick baking spray and set aside.
-
Beat together cake mix, eggs (or just egg whites if using), oil, and 1 cup of milk until fully combined.
-
Divide the cake batter evenly into three bowls.
-
Tint each bowl of cake batter, adding just a drop or two of food coloring at a time and then adding more to control the color of the cake batter.
-
Drop large spoonfuls of the cake batter throughout the prepared baking dish, rotating the colors.
TIP – I like to use an ice cream scoop or large cookie dough scoop to drop the batter into the baking dish. It makes it easy to dispense the batter from the spoon. If you drop smaller scoops of batter, don’t swirl the batter together. The smaller scoops will create enough color variety as is.
-
Use a knife to swirl the colors slightly – do not over swirl or the colors will become muddy and mixed.
-
Bake the cake for 25-30 minutes, until the center is set and a toothpick comes out with just a few crumbs when poked in the center of the cake.
-
Allow the cake to cool.
-
When the cake has cooled most of the way, use the round handle of a wooden spoon or a wooden dowel to poke holes all over the cake. Poke the holes about 2⁄3 of the way down into the cake, spacing 3⁄4”-1: apart.
-
Prepare the pudding mixture. Whisk together the instant pudding mix with the remaining 2 cups of milk. Whisk for 1-2 minutes until the mixture is fully combined and just beginning to thicken.
-
Pour the pudding mixture over the cake and spread over the top, pressing the pudding down slightly while spreading so that it fills the holes.
-
Place the cake in the refrigerator for 30 minutes to allow the pudding to thicken.
-
Top the cake with Cool Whip and decorate with sprinkles or however you wish.
Nutrition
Tried this Recipe? Pin it for Later!Follow on Pinterest @AmandasCookin or tag #AmandasCookin!
The recipes on this blog are tested with a conventional gas oven and gas stovetop. It’s important to note that some ovens, especially as they age, can cook and bake inconsistently. Using an inexpensive oven thermometer can assure you that your oven is truly heating to the proper temperature. If you use a toaster oven or countertop oven, please keep in mind that they may not distribute heat the same as a conventional full sized oven and you may need to adjust your cooking/baking times. In the case of recipes made with a pressure cooker, air fryer, slow cooker, or other appliance, a link to the appliances we use is listed within each respective recipe. For baking recipes where measurements are given by weight, please note that results may not be the same if cups are used instead, and we can’t guarantee success with that method.
