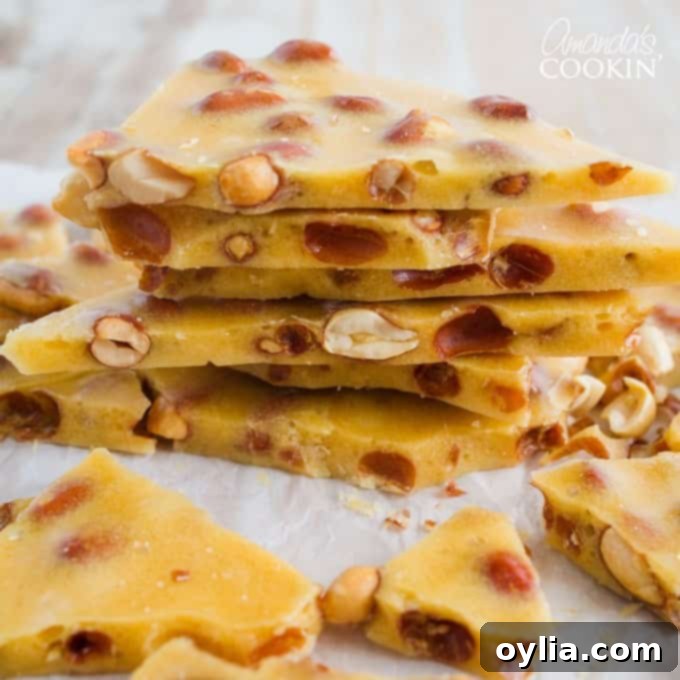
Perfect Homemade Peanut Brittle: A Timeless Candy Recipe
For over two decades, the sweet, crunchy delight of homemade peanut brittle has been a staple in my kitchen, especially during the festive holiday season. My journey into candy making began as a curious teenager, experimenting with recipes from my dad’s trusty cookbook. That first ambitious attempt at peanut brittle marked my very first experience using a candy thermometer – a tool that would become indispensable in my culinary adventures.
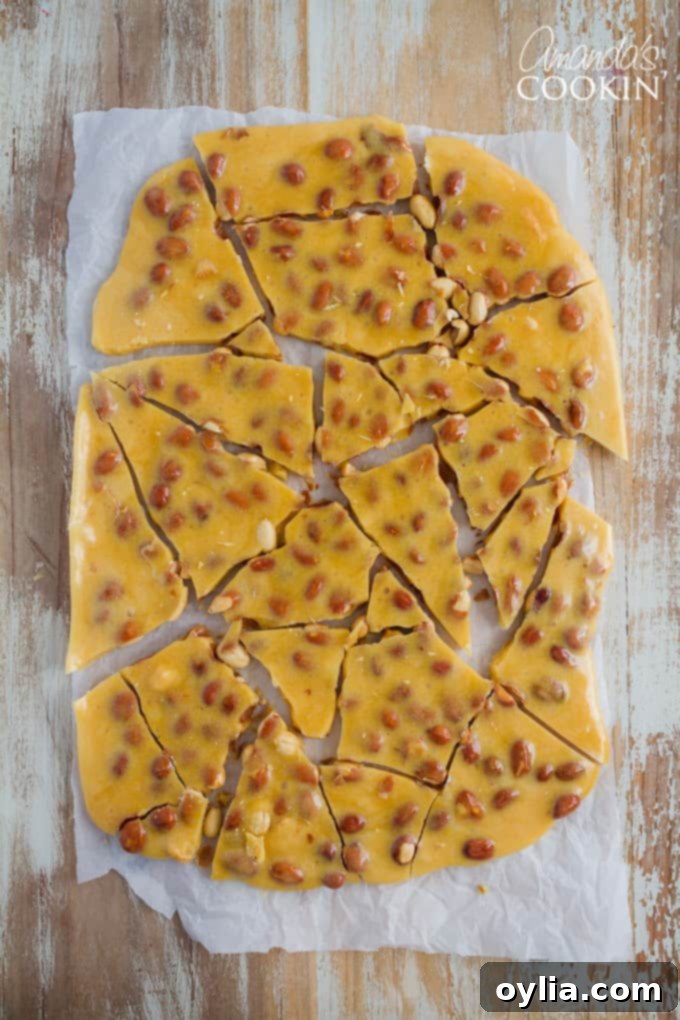
My Sweet Journey: Mastering the Art of Peanut Brittle
As a young, eager, but inexperienced cook, my initial foray into making homemade peanut brittle wasn’t without its challenges. The first batch? A total disaster – completely burned. But with the resilience of a true aspiring baker, I revisited the instructions with renewed focus and a touch more caution. My second attempt was a resounding triumph! At seventeen years old, I had successfully produced my first proper batch of Christmas candy, a moment of pure culinary exhilaration.
This early success instilled in me a deep love for candy making and a profound respect for precision in the kitchen. Over the years, this peanut brittle recipe has become more than just instructions on a page; it’s a nostalgic trip back to those formative kitchen moments, a reminder of how patience and attention to detail can transform simple ingredients into something truly magical. The crispy, buttery, nutty perfection of each piece of brittle is a testament to perseverance and a delicious tradition I’ve happily continued for over two decades.
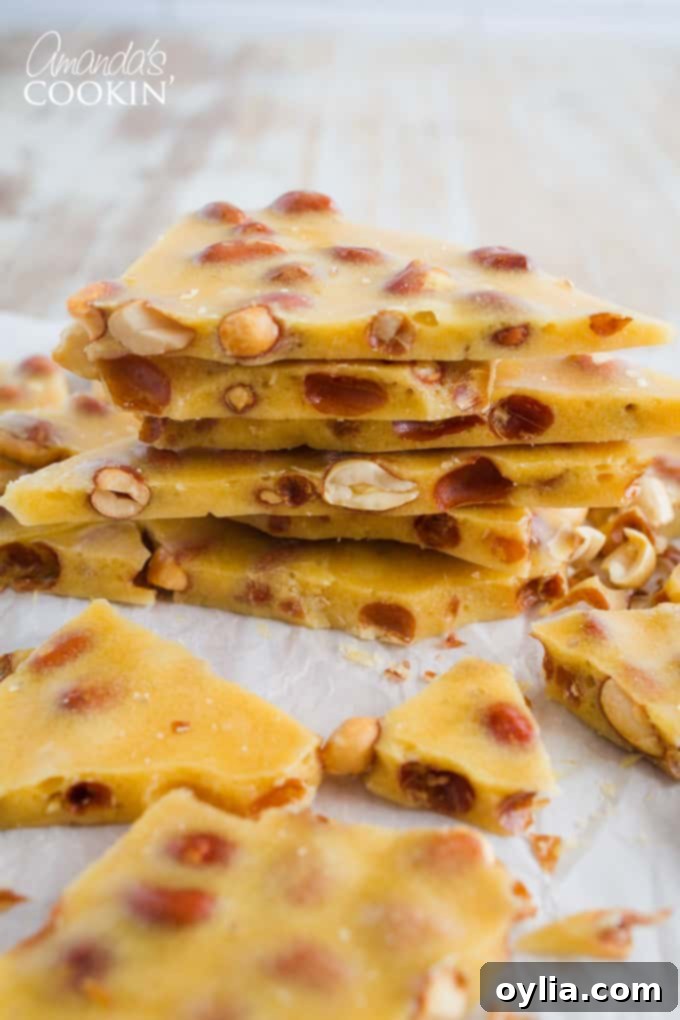
The Secret Source: My Beloved Cookbook
The original recipe for this incredible peanut brittle comes from The Good Housekeeping Illustrated Cookbook. While there are several editions of this culinary treasure, the one I currently own and have used diligently for over 20 years is linked here. I believe the version I first used as a teenager was an earlier edition, likely this one, as its cover instantly brings back fond memories.
Regardless of the specific edition, either of these cookbooks serves as an extraordinary reference for anyone passionate about cooking or baking. They are particularly wonderful for beginners, offering a comprehensive guide to a vast array of dishes and techniques. What makes this cookbook truly stand out is its commitment to visual learning: every single recipe is accompanied by a photo, and many include clear, step-by-step illustrations. The instructions are consistently easy to understand, demystifying even complex processes.
Beyond the recipes themselves, the book is packed with invaluable references, charts, and guides covering everything from ingredient substitutions to cooking temperatures. It’s truly a foundational resource for any home cook. Without hesitation, I wholeheartedly recommend it to anyone looking to expand their culinary skills or simply find reliable, delicious recipes. It is, without a doubt, the most cherished cookbook in my entire collection, a true cornerstone of my kitchen.
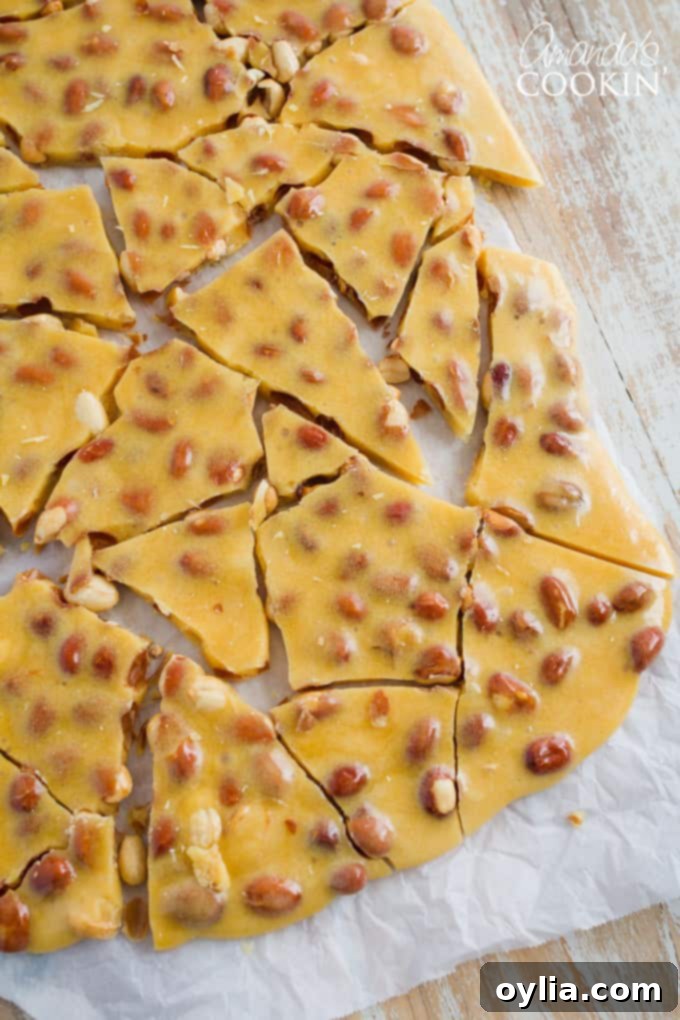
Essential Ingredients and Equipment for Your Peanut Brittle
Making fantastic peanut brittle is all about having the right components and tools at hand. Here’s what you’ll need to gather before you start this exciting candy-making adventure. The quality of your ingredients and the readiness of your equipment will significantly impact your final result, ensuring that perfectly crisp, sweet, and nutty brittle.
Ingredients You’ll Need for Classic Peanut Brittle:
- 1 cup granulated sugar
- 1/2 cup light corn syrup (essential for preventing crystallization)
- 1/4 teaspoon salt (balances the sweetness and enhances flavor)
- 1/4 cup water
- 1 cup salted Spanish peanuts (their skins add a lovely texture and flavor)
- 2 tablespoons unsalted butter, softened (adds richness and helps prevent sticking)
- 1 teaspoon baking soda (creates the signature airy, crisp texture)
- Extra butter for greasing the pan (don’t skip this critical step!)
Specialized Equipment to Make Brittle Making a Breeze:
- Candy thermometer (your most important tool for precision!)
- Rimmed baking sheet (to contain the brittle as it cools)
- Medium-heavy bottom saucepan (prevents scorching and ensures even heating)
- Measuring cups and spoons
- Rubber spatula (for spreading the hot brittle safely)
Crafting Your Homemade Peanut Brittle: Step-by-Step
Before You Begin: The Golden Rule of Candy Making
This is arguably the most critical tip for any candy recipe: **measure out all your ingredients first (mise en place).** Candy making is a fast-paced process once the sugar mixture reaches high temperatures. You simply will not have time to measure ingredients as you go, and any delay can ruin your batch. Having everything ready and within arm’s reach ensures a smooth and successful operation. This proactive preparation is the cornerstone of making perfect brittle.
The Brittle Making Process:
- **Prepare Your Surface:** Generously grease a cookie sheet with butter. Don’t be shy; a well-greased surface is key for easy removal later. Set it aside, ready for action.
- **Combine Wet & Dry:** In your medium-heavy bottom saucepan, combine the granulated sugar, light corn syrup, salt, and water. Stir these ingredients together over MEDIUM heat. Continue stirring consistently until all the sugar has completely dissolved, which typically takes about 10 minutes. This step is crucial for preventing a grainy texture in your final brittle.
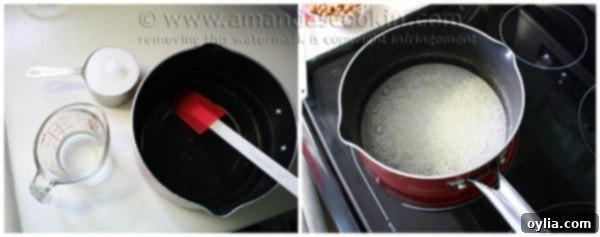
- **Introduce the Peanuts:** Once the sugar has dissolved and the mixture is boiling, stir in the salted Spanish peanuts.
- **Reach Hard-Crack Stage:** Continue cooking the mixture, stirring frequently. It’s important to keep the peanuts moving so they don’t settle at the bottom and scorch. Watch your candy thermometer closely. Cook until the temperature precisely reaches 300 degrees Fahrenheit (149°C). This is known as the “hard-crack stage,” where a drop of the syrup will form hard, brittle threads in cold water. Precision here is paramount for the brittle’s texture.

- **Final Additions & Spread:** Immediately remove the saucepan from the heat. Quickly stir in the softened butter until it’s fully incorporated. Then, add the baking soda and stir vigorously. You’ll notice the mixture becoming light and foamy – this is the baking soda reacting and creating the brittle’s characteristic airy texture.
- **Pour and Spread:** Without delay, pour the hot candy mixture onto your prepared cookie sheet. Use a rubber spatula to quickly spread it into a thin, even layer. Work swiftly, as the candy will begin to set very quickly.
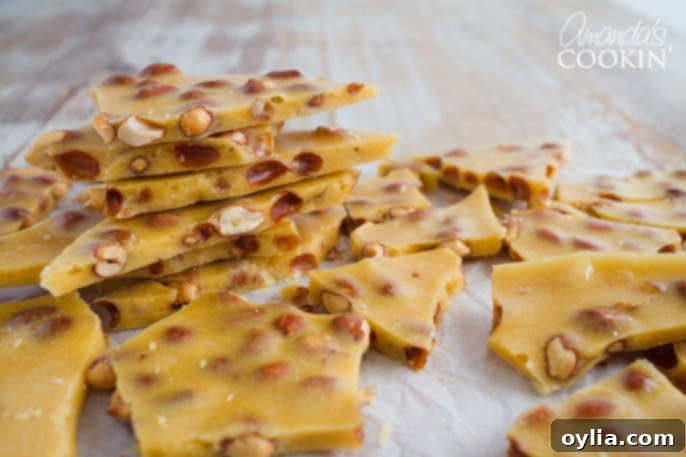
- **Cool & Break:** Allow the peanut brittle to cool completely at room temperature. This can take an hour or two. Once it’s firm and completely hardened, simply break it into irregular, delicious pieces.
Tips for Flawless Peanut Brittle Every Time
Achieving that perfect, crispy, golden peanut brittle requires a little care and attention to detail. Here are some extra tips to ensure your homemade treat is a showstopper:
- **Invest in a Reliable Candy Thermometer:** This is non-negotiable for candy making. An accurate thermometer is your best friend. Calibrate it occasionally by checking its reading in boiling water (it should read 212°F or 100°C at sea level).
- **Don’t Rush the Heat:** While the process becomes quick at the end, don’t be tempted to crank up the heat during the initial sugar dissolving phase. Medium heat ensures even heating and prevents scorching the sugar, which can lead to a bitter taste.
- **Keep Stirring:** Especially after adding the peanuts, frequent stirring helps to distribute heat evenly and prevents the peanuts at the bottom from burning.
- **Work Quickly at the End:** Once the brittle reaches 300°F and you’ve added the butter and baking soda, every second counts. Have your greased pan ready and pour and spread immediately. The candy cools and hardens very rapidly.
- **Humidity Matters:** Candy making can be tricky on humid days. Excess moisture in the air can prevent your brittle from setting properly, resulting in a sticky texture. If possible, choose a dry day for your brittle-making endeavors.
- **Proper Storage:** Once cooled and broken, store your peanut brittle in an airtight container at room temperature. Layer pieces with parchment paper to prevent them from sticking together. Stored correctly, it will last for several weeks, though it rarely lasts that long in my house!
- **Gifting Ideas:** Homemade peanut brittle makes a wonderful gift! Package it in decorative tins or cellophane bags tied with festive ribbons for a thoughtful, edible present during the holidays.
More Holiday Treats to Delight Your Guests
If you’re looking to expand your holiday baking repertoire, here are some other fantastic recipes that are sure to impress your friends and family:
- White Chocolate Candy Cane Crescents
- Thumbprint Cookies
- Italian Anisette Cookies
- Adorable Snow Globe Cookies – Princess Pinky Girl
- Christmas Crack Chex Mix – Princess Pinky Girl
- Candied Pecans
- Potato Candy
- Saltine Toffee
This post was originally published on this blog on Dec 3, 2014, and has been updated with more tips and detailed instructions for an even better brittle-making experience.
Homemade Peanut Brittle Recipe Card
Homemade peanut brittle is a nostalgic treat at the holidays! It’s fun to make and even better to eat. Get ready for a delicious, crispy, and nutty indulgence!
IMPORTANT – There are often Frequently Asked Questions and detailed tips within the blog post that you may find helpful. Simply scroll back up to read them!
Print It |
Rate It |
Save It
Cook Mode: Prevent your screen from going dark
Course: Desserts
Cuisine: American
Servings: 48 pieces
Total Time: 1 hr
Calories: 47 cal
Author: Amanda Davis
Ingredients
- 1 cup sugar
- ½ cup light corn syrup
- ¼ teaspoon salt
- ¼ cup water
- 1 cup salted Spanish peanuts
- 2 tablespoons unsalted butter, softened
- 1 teaspoon baking soda
- Butter for greasing the pan
Things You’ll Need
- Candy thermometer
- Baking sheets
- Large saucepan
- Measuring cups and spoons
Before You Begin
Measure out all the ingredients first. This is crucial as you won’t have time to measure things as you go along. This recipe requires that you work quickly when the candy is ready.
Instructions
- Grease a cookie sheet with butter and set aside.
- In a heavy saucepan, combine sugar, corn syrup, salt and water. Bring to a boil over MEDIUM heat, stirring until sugar has dissolved, about 10 minutes.
- Stir in peanuts. Continue cooking, stirring frequently so the peanuts move around (they can brown too much if they sit at the bottom of the pan), until temperature on the candy thermometer reaches 300 degrees (hard-crack stage).
- Remove from heat and stir in the butter. Add baking soda and stir, then immediately pour onto prepared cookie sheet. Spread with rubber spatula.
- Allow candy to cool completely then break into pieces.
Homemade Peanut Brittle Video Tutorial
Watch this helpful video to see each step of the peanut brittle making process:
[Video Player Placeholder: Homemade Peanut Brittle. Description: Homemade peanut brittle is a nostalgic treat at the holidays! It’s fun to make and even better to eat.]
Nutrition
Serving: 2 pieces
Calories: 47 cal
Carbohydrates: 7 g
Fat: 1 g
Cholesterol: 1 mg
Sodium: 50 mg
Potassium: 23 mg
Sugar: 6 g
Vitamin A: 15 IU
Calcium: 4 mg
Iron: 0.1 mg
Tried this Recipe? Pin it for Later!
Follow on Pinterest @AmandasCookin or tag #AmandasCookin!
The recipes on this blog are tested with a conventional gas oven and gas stovetop. It’s important to note that some ovens, especially as they age, can cook and bake inconsistently. Using an inexpensive oven thermometer can assure you that your oven is truly heating to the proper temperature. If you use a toaster oven or countertop oven, please keep in mind that they may not distribute heat the same as a conventional full sized oven and you may need to adjust your cooking/baking times. In the case of recipes made with a pressure cooker, air fryer, slow cooker, or other appliance, a link to the appliances we use is listed within each respective recipe. For baking recipes where measurements are given by weight, please note that results may not be the same if cups are used instead, and we can’t guarantee success with that method.
