Ultimate Fudgy Peanut Butter Brownie Skillet: The Best Chocolate & Peanut Butter Dessert!
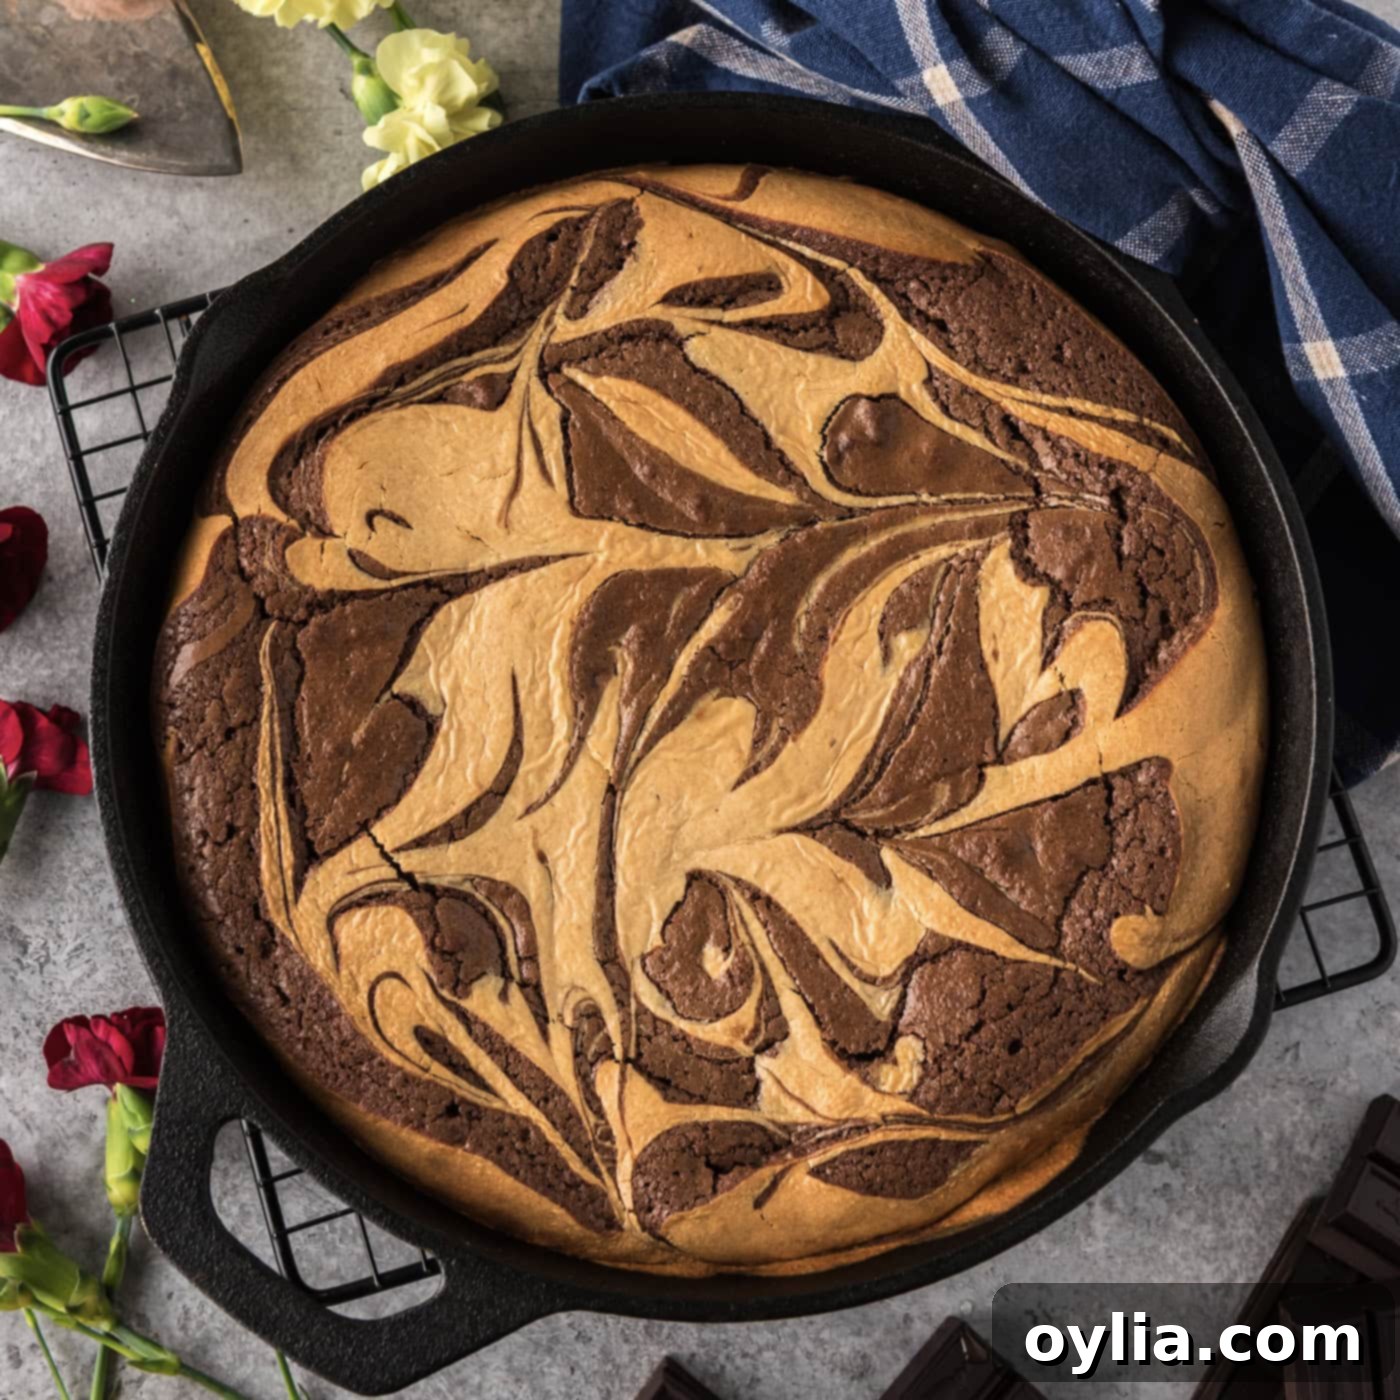
Prepare yourself for an extraordinary dessert experience with our **Peanut Butter Brownie Skillet**! This incredible recipe masterfully combines the classic comforts of fudgy, intensely chocolatey brownies with a rich, creamy peanut butter cheesecake mixture, all baked to perfection in a single cast iron skillet. It’s truly a match made in heaven for anyone who adores the timeless combination of chocolate and peanut butter, offering a delightful twist on traditional brownies that’s perfect for sharing, or simply indulging yourself!
Why This Peanut Butter Brownie Skillet Recipe is a Must-Try
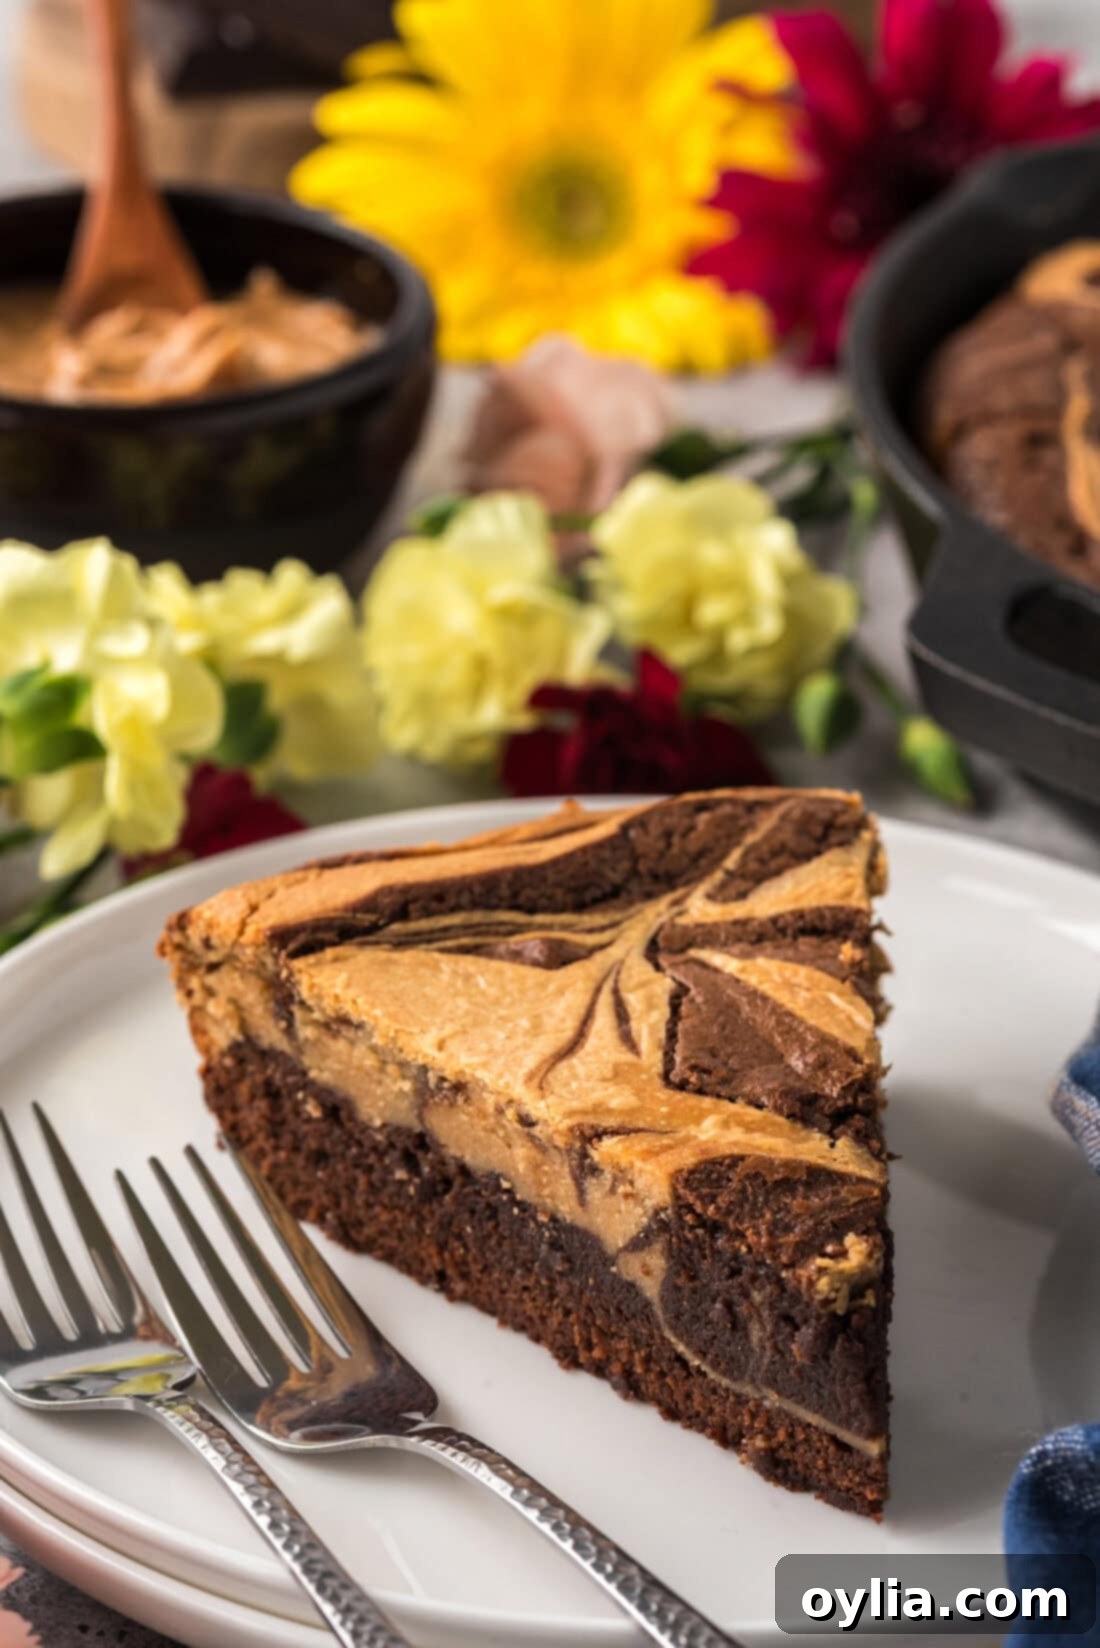
This isn’t just another brownie recipe; it’s a culinary masterpiece that hits all the right notes for an unforgettable dessert experience. Our **Peanut Butter Brownie Skillet** consistently delivers those coveted chewy-crisp edges that brownie aficionados adore, while maintaining a gloriously soft, moist, and fudgy center. But what truly elevates it is the ingenious addition of a smooth, tangy peanut butter cheesecake swirl. This thoughtful combination means every single bite offers a harmonious blend of intense chocolate and creamy peanut butter, perfectly balanced to satisfy your deepest cravings. You no longer have to choose between a middle piece or an edge piece – you get the best of both worlds in every generous, marbled slice!
The inspiration for this decadent skillet dessert dates back over a decade to 2011. It evolved from a beloved classic: our tried-and-true recipe for brownies in a cast iron skillet. We took that foundational recipe and elevated it by introducing a luscious mixture of softened cream cheese, rich peanut butter, granulated sugar, and fresh eggs. This creamy blend is then artfully swirled into the brownie batter before baking, creating a stunning marbled effect that is as beautiful to behold as it is delicious to eat. The result isn’t merely brownies with a hint of peanut butter; it’s more akin to a rich, chocolatey brownie pie generously infused with delightful ripples of a peanut butter-flavored cheesecake. It’s an irresistible, shareable dessert that will undoubtedly become a new family favorite and a showstopper for any occasion!
Gather Your Ingredients: What You’ll Need
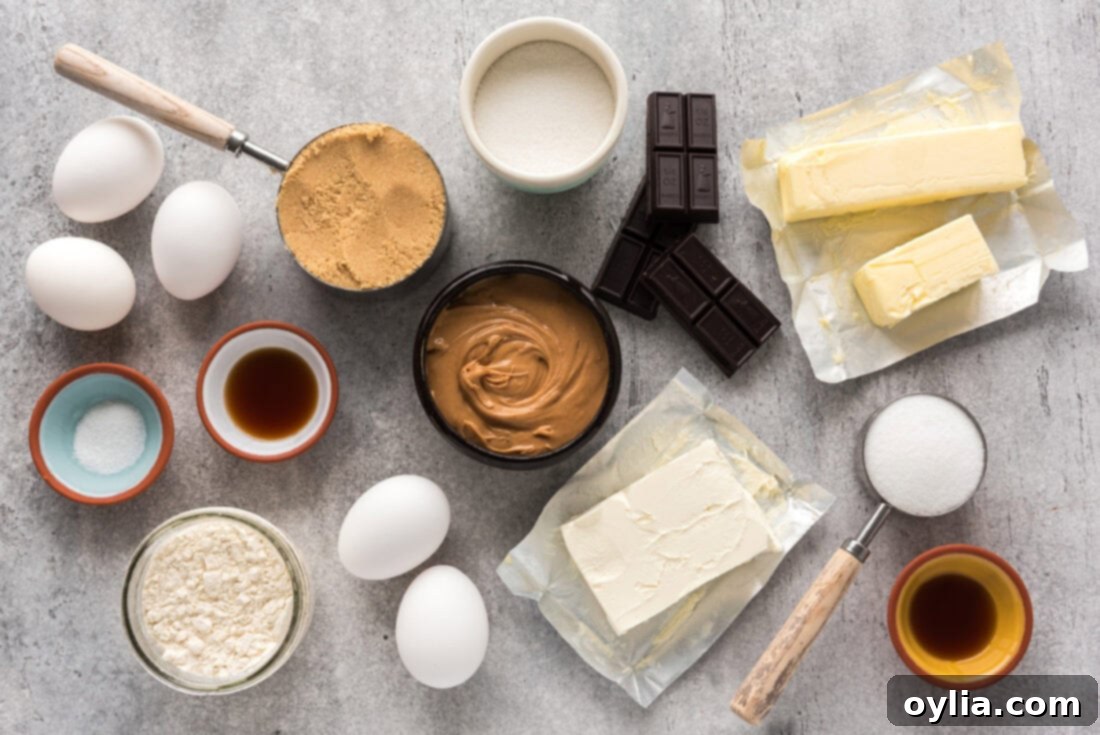
To embark on this delicious baking adventure, you’ll need a selection of pantry staples and fresh ingredients. Each component plays a vital role in creating the distinct layers and textures of this skillet dessert. For a complete list of exact measurements and the convenient printable version of this recipe, please refer to the detailed recipe card at the very end of this post. For now, here’s a quick visual overview of the key components you’ll be working with:
Ingredient Spotlight & Smart Substitutions
Understanding your ingredients is paramount to achieving the perfect texture and flavor in this **Peanut Butter Brownie Skillet**. Here’s a closer look at some crucial components, along with best practices and smart substitution ideas:
CHOCOLATE – For truly rich, deep, and complex chocolate flavor in your brownies, using an actual bar of **unsweetened baking chocolate** is highly recommended over cocoa powder. Unsweetened chocolate provides a robust, intense chocolate base that you can perfectly balance with the sugars in the recipe. This allows for a more controlled sweetness and a richer cocoa profile. If unsweetened chocolate is unavailable, or if you prefer a slightly less intense and milder profile, you can substitute it with a good quality bar of **bittersweet baking chocolate**. Just ensure it’s coarsely chopped to facilitate even melting into the butter. The quality of your chocolate directly impacts the final taste, so choose wisely!
PEANUT BUTTER MIXTURE – The secret to a perfectly smooth, stable, and deliciously creamy peanut butter cheesecake swirl lies in your choice of peanut butter. We strongly recommend using **creamy, conventional peanut butter brands** like Jif or Skippy for this recipe. These varieties are highly emulsified and offer a consistent, thick texture that is absolutely crucial for the cheesecake layer to set properly and maintain its structure. Natural peanut butters, while fantastic in other applications, tend to separate oil and solids, which can significantly affect the overall texture and stability of the finished peanut butter mixture, potentially making it grainy, oily, or too runny. For optimal results and that signature cheesecake-like texture, stick to conventional creamy peanut butter.
CREAM CHEESE – Always use **full-fat cream cheese**, ensuring it’s softened to room temperature before you begin. This is a non-negotiable step for achieving a perfectly smooth, lump-free peanut butter cheesecake layer that incorporates beautifully. Cold cream cheese will be difficult to blend and will result in a lumpy mixture. While tempting, using low-fat or fat-free cream cheese can significantly alter the texture of your cheesecake layer, making it more watery or less rich, and it might not set as well during baking.
BUTTER & EGGS – We specify **unsalted butter** for the brownie layer, which allows you precise control over the overall salt content in your recipe. If you only have salted butter, you can use it but omit the ¼ teaspoon of salt from the brownie layer. For both the peanut butter layer and the brownie layer, it’s best to ensure your **eggs are at room temperature**. Room temperature eggs emulsify more easily and smoothly into batters, which contributes to a more uniform texture and helps prevent curdling, resulting in a more tender and consistent crumb in your brownies and a smoother cheesecake layer.
Step-by-Step: How to Make This Irresistible Skillet Brownie
These step-by-step photos and detailed instructions are here to guide you visually through the process of making this incredible dessert. For a convenient printable version of this recipe, complete with all exact measurements and concise instructions, simply Jump to Recipe at the very bottom of this post.
- **Prepare Your Skillet and Oven**: Begin by preheating your oven to 325°F (160°C). Accurate oven temperature is crucial for even baking. While your oven heats, lightly grease the bottom and sides of your 10-inch cast iron skillet. A thin layer of butter or cooking spray will prevent sticking and help create those desirable crispy, caramelized edges.
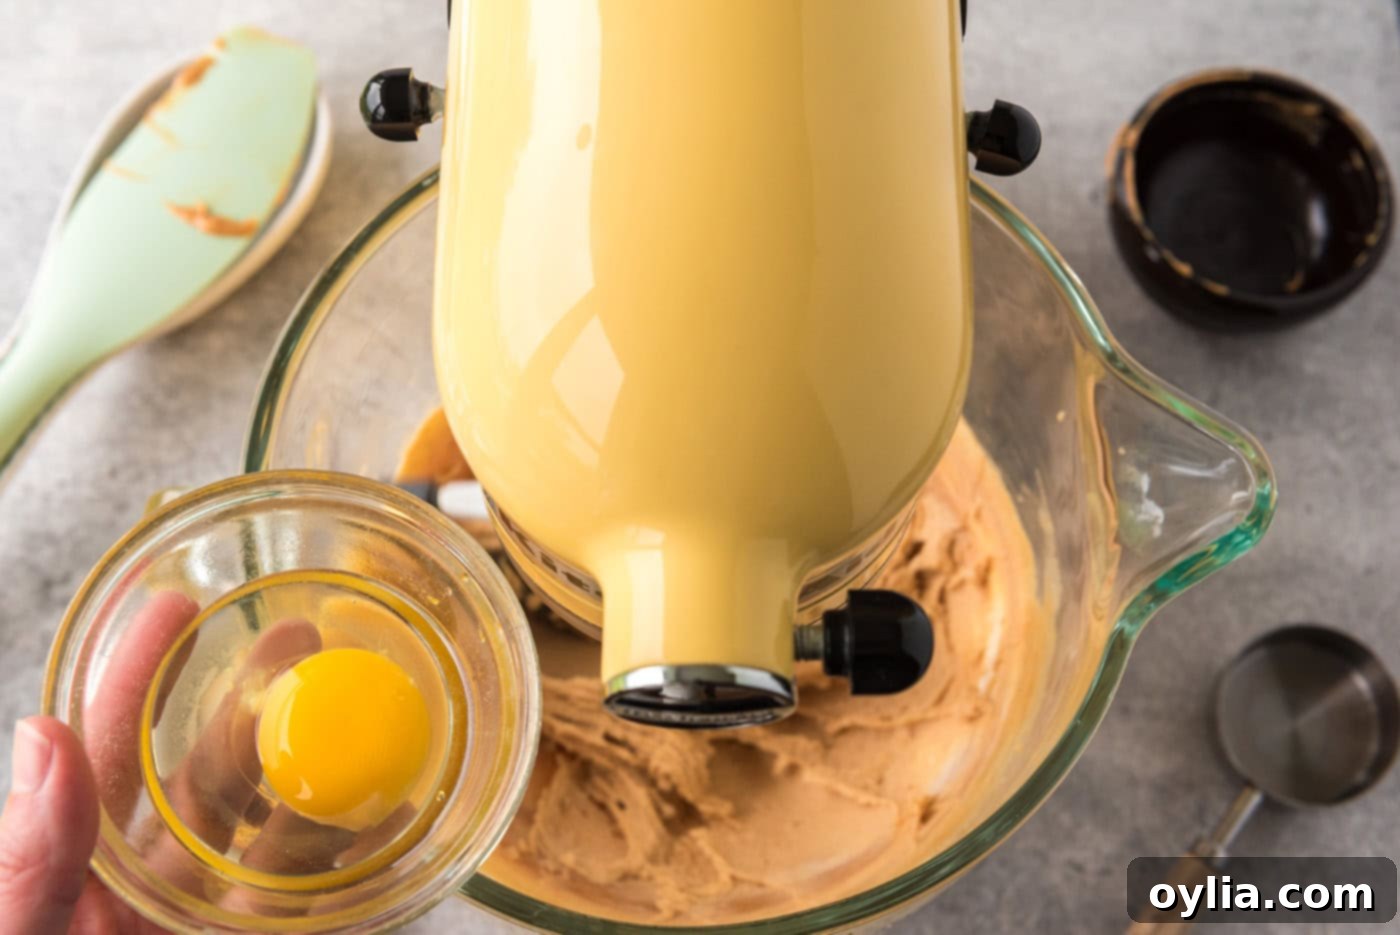
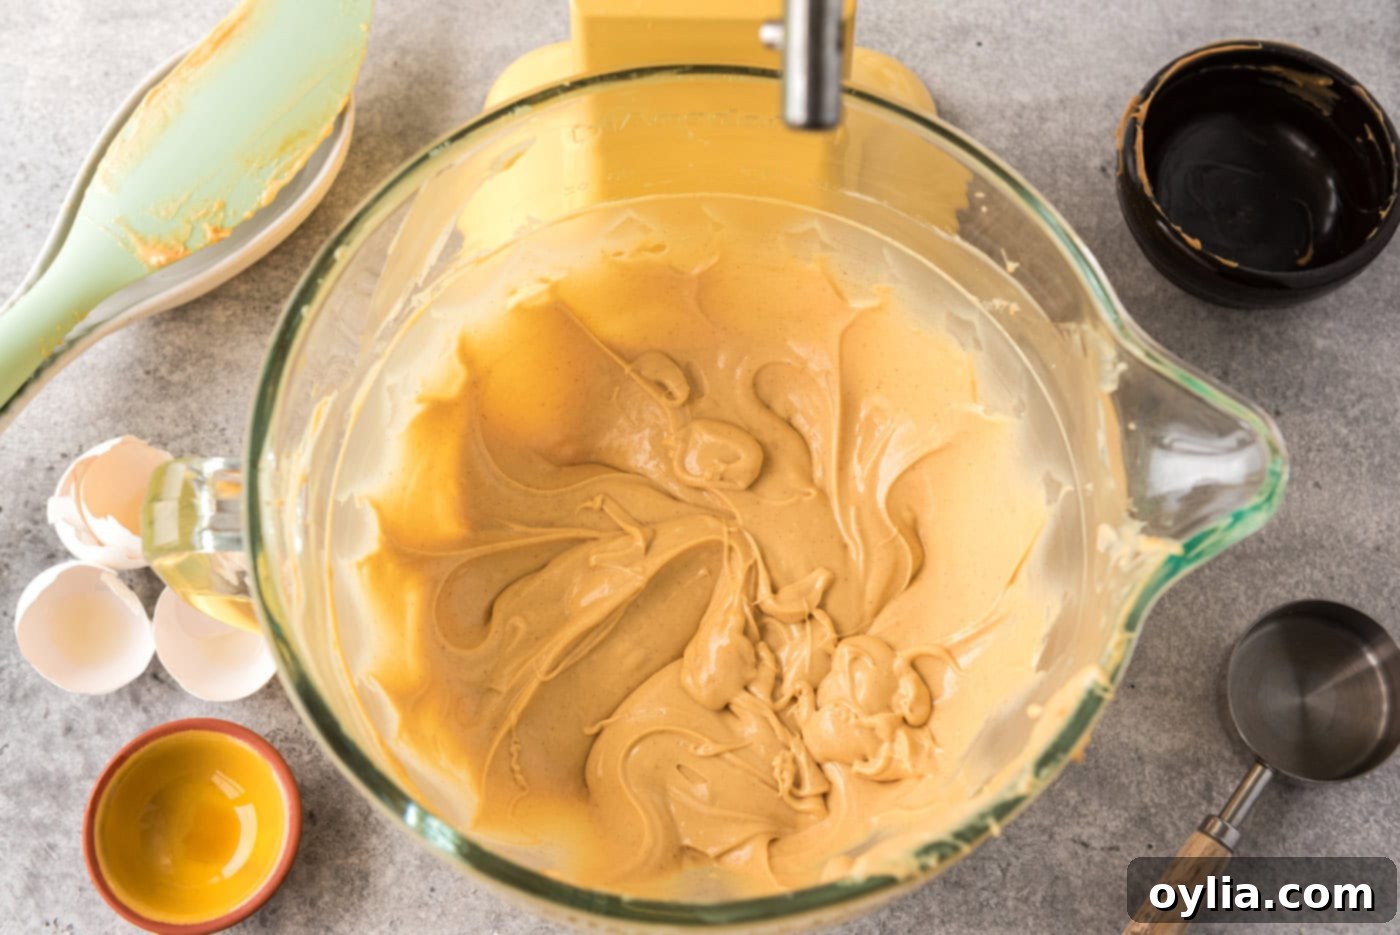
- **Craft the Creamy Peanut Butter Layer**: In a mixer (either a stand mixer with a paddle attachment or a hand mixer) set to medium speed, combine the softened cream cheese, creamy peanut butter, and granulated sugar. Beat this mixture thoroughly for about 2 minutes until it becomes wonderfully light, fluffy, and completely smooth. This creaming process incorporates air and ensures a luxurious, lump-free texture. Next, add the eggs one at a time, beating well after each addition to ensure full incorporation and prevent the mixture from separating. Finish by beating in the pure vanilla extract. Once smooth and creamy, cover the bowl and set this luscious peanut butter mixture aside while you prepare the brownie batter.


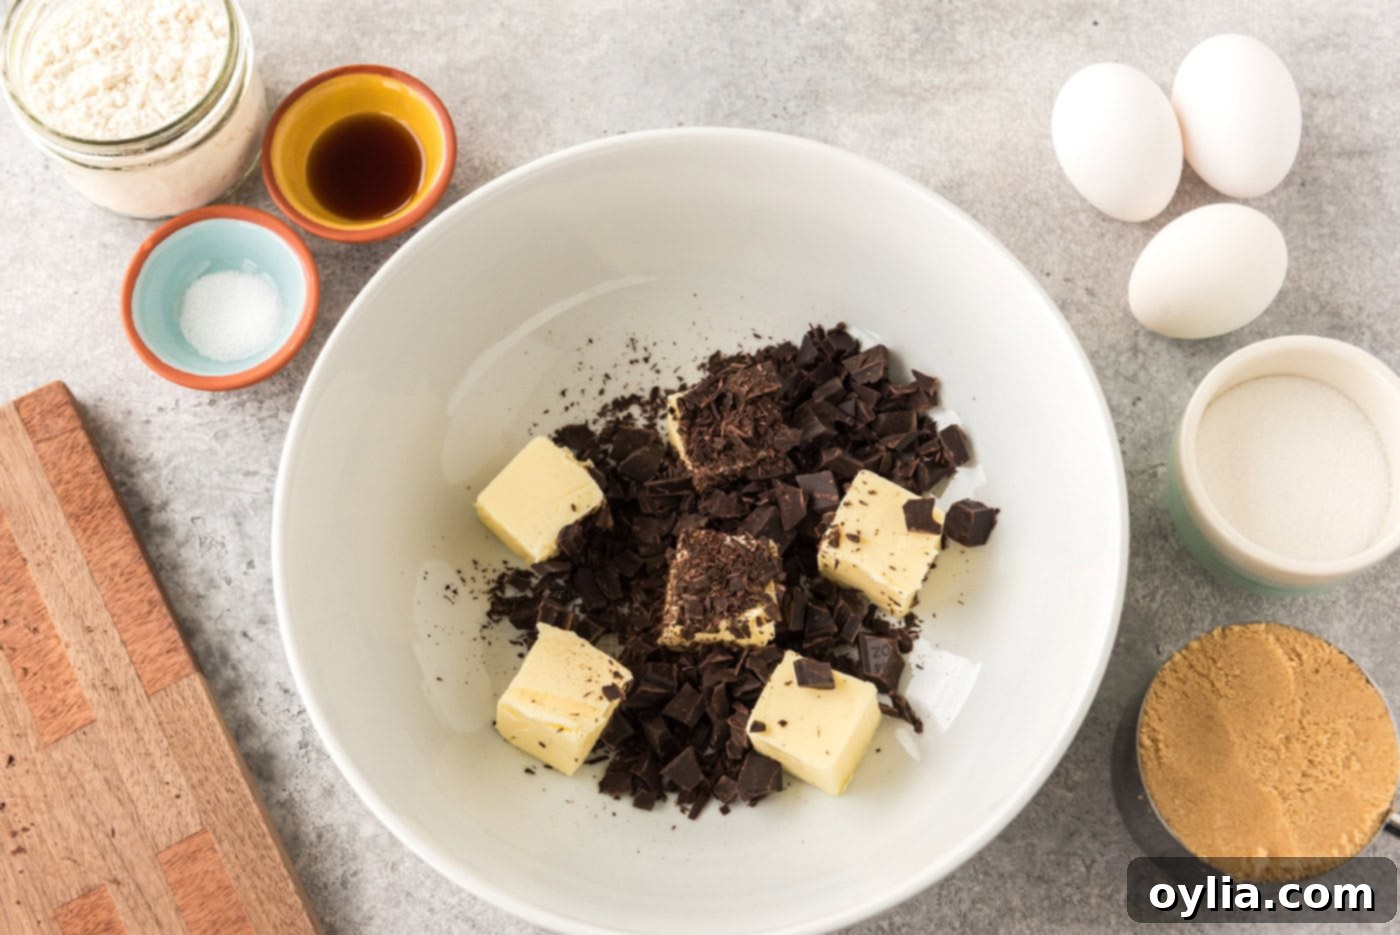
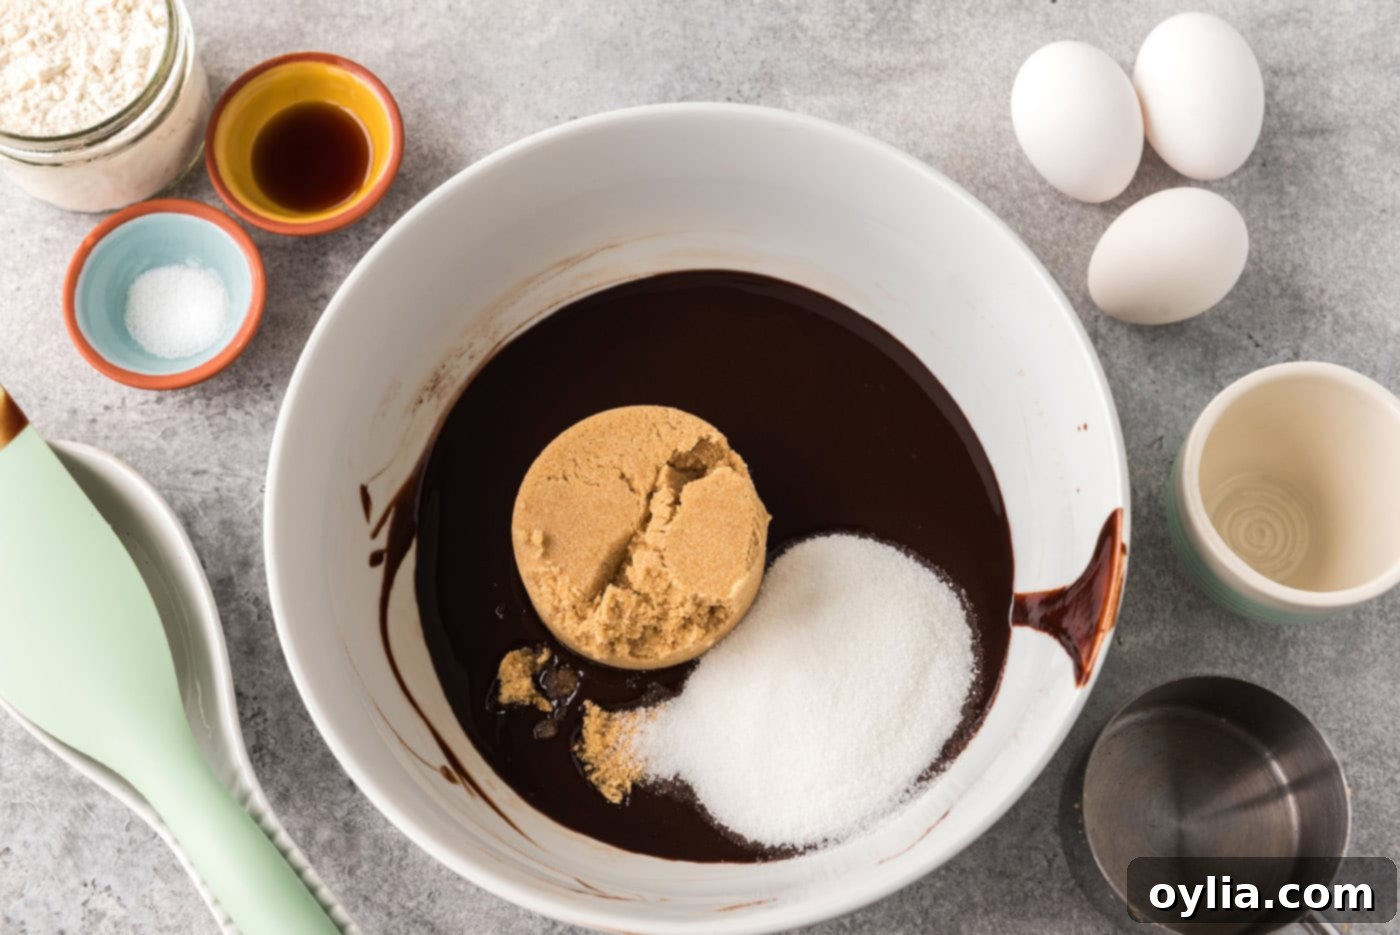
- **Melt Chocolate and Butter for Brownie Base**: For the brownie layer, begin by cutting the unsalted butter into 6 small chunks; this helps it melt more quickly and evenly. Place the butter and the coarsely chopped unsweetened baking chocolate into a microwave-safe bowl. Heat in the microwave in short 30-second intervals, stirring thoroughly after each, until the mixture is completely melted and smooth. Immediately stir in both the light brown sugar (which contributes to moisture and a chewy texture) and granulated sugar (for structure and balanced sweetness) into the warm melted chocolate. Continue stirring vigorously until the sugars are fully dissolved and thoroughly combined with the chocolate, creating a glossy base.


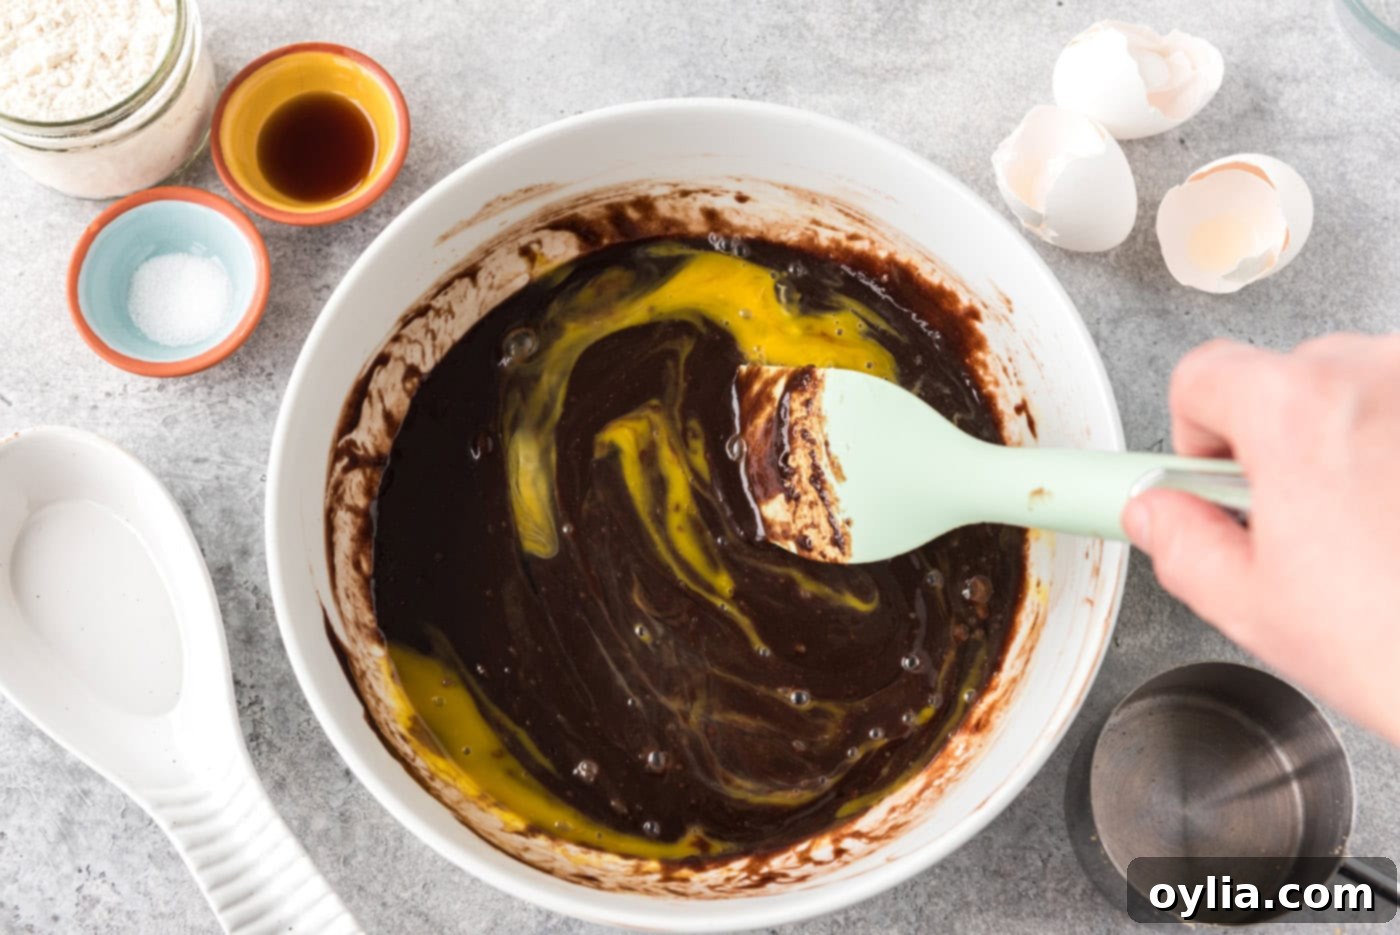
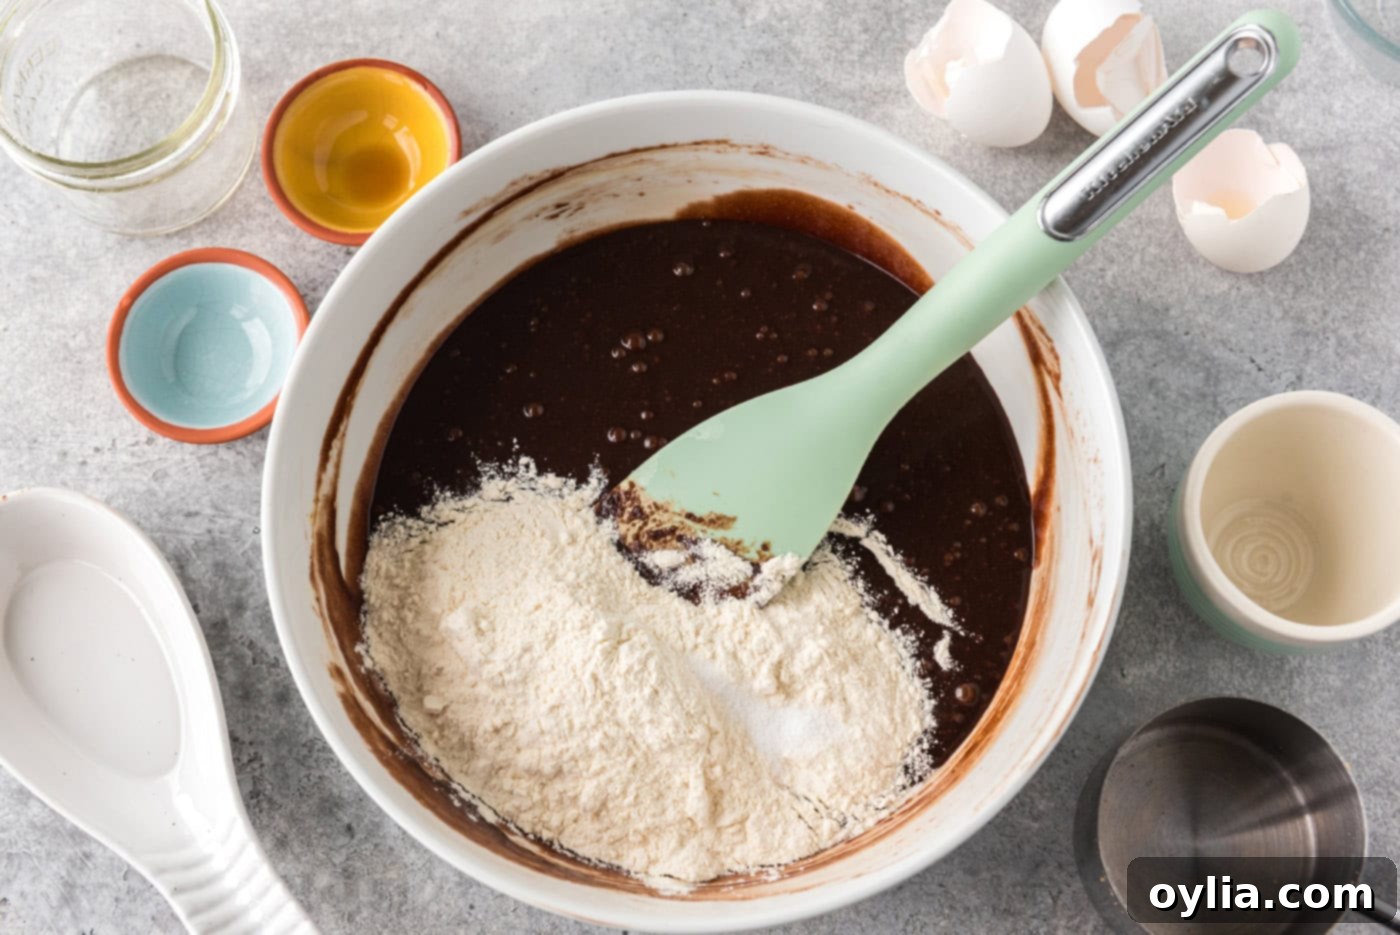
- **Form the Fudgy Brownie Batter**: Add the eggs to the chocolate-sugar mixture one at a time, stirring vigorously with a spatula or whisk after each addition until fully incorporated. This helps to emulsify the mixture and creates a smooth, glossy batter. Incorporate the pure vanilla extract, stirring it in completely. Finally, gently fold in the unbleached all-purpose flour and salt. Mix just until there are no visible traces of dry flour left. Be careful not to overmix the batter once the flour is added, as overworking the gluten can lead to tough, dense brownies rather than the desired fudgy texture.


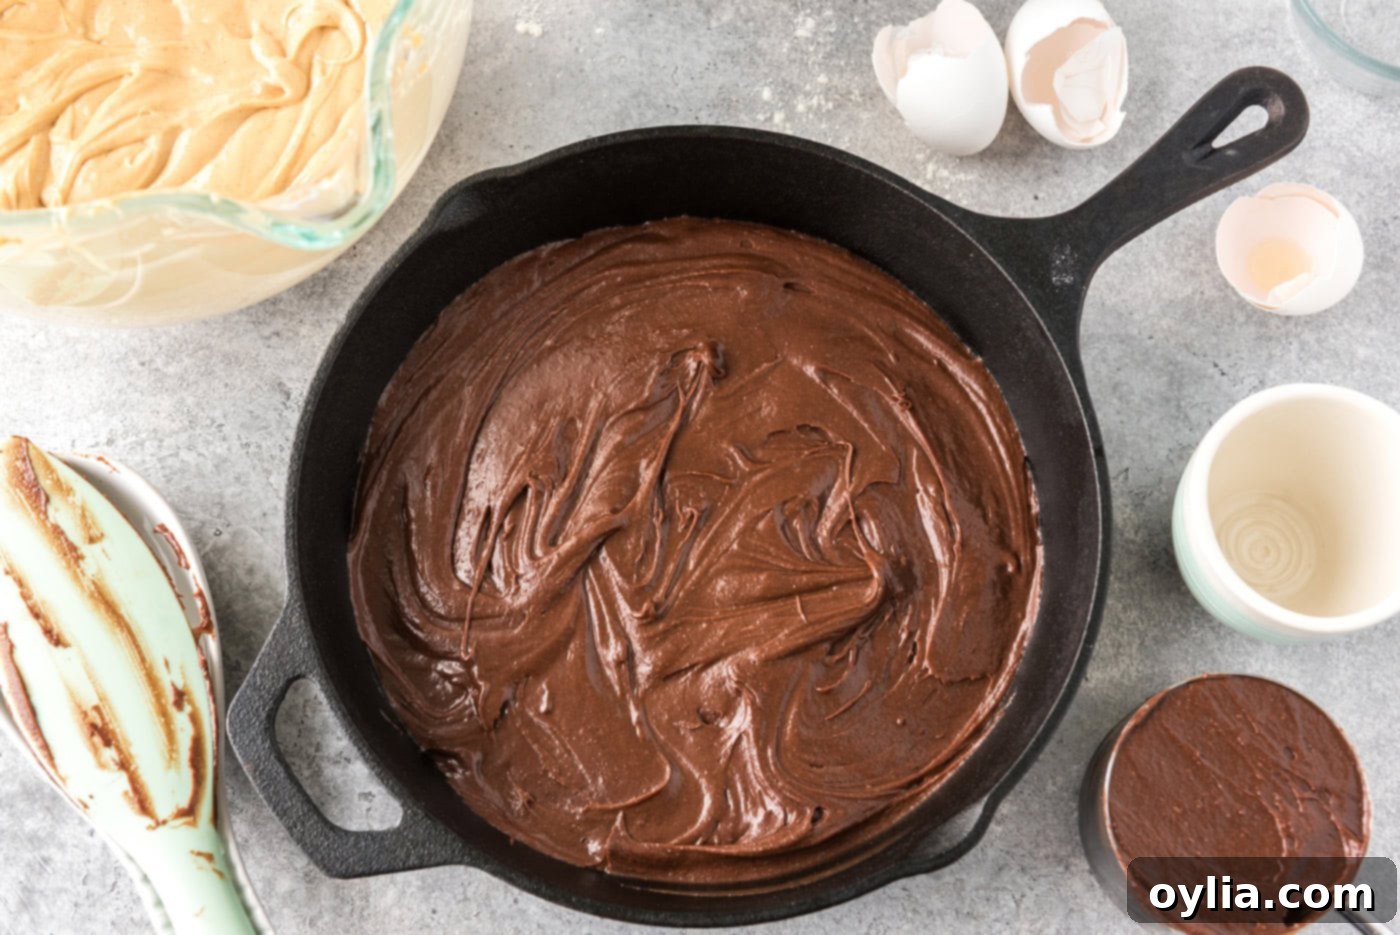
- **Layer the Brownie Base**: Measure out and reserve exactly one cup of the prepared brownie batter; this portion will be used later for the decorative and delicious top swirl. Pour the remaining brownie batter into your prepared 10-inch cast iron skillet, spreading it evenly across the entire bottom to form a solid, rich, and fudgy base. Ensure an even layer for consistent baking.

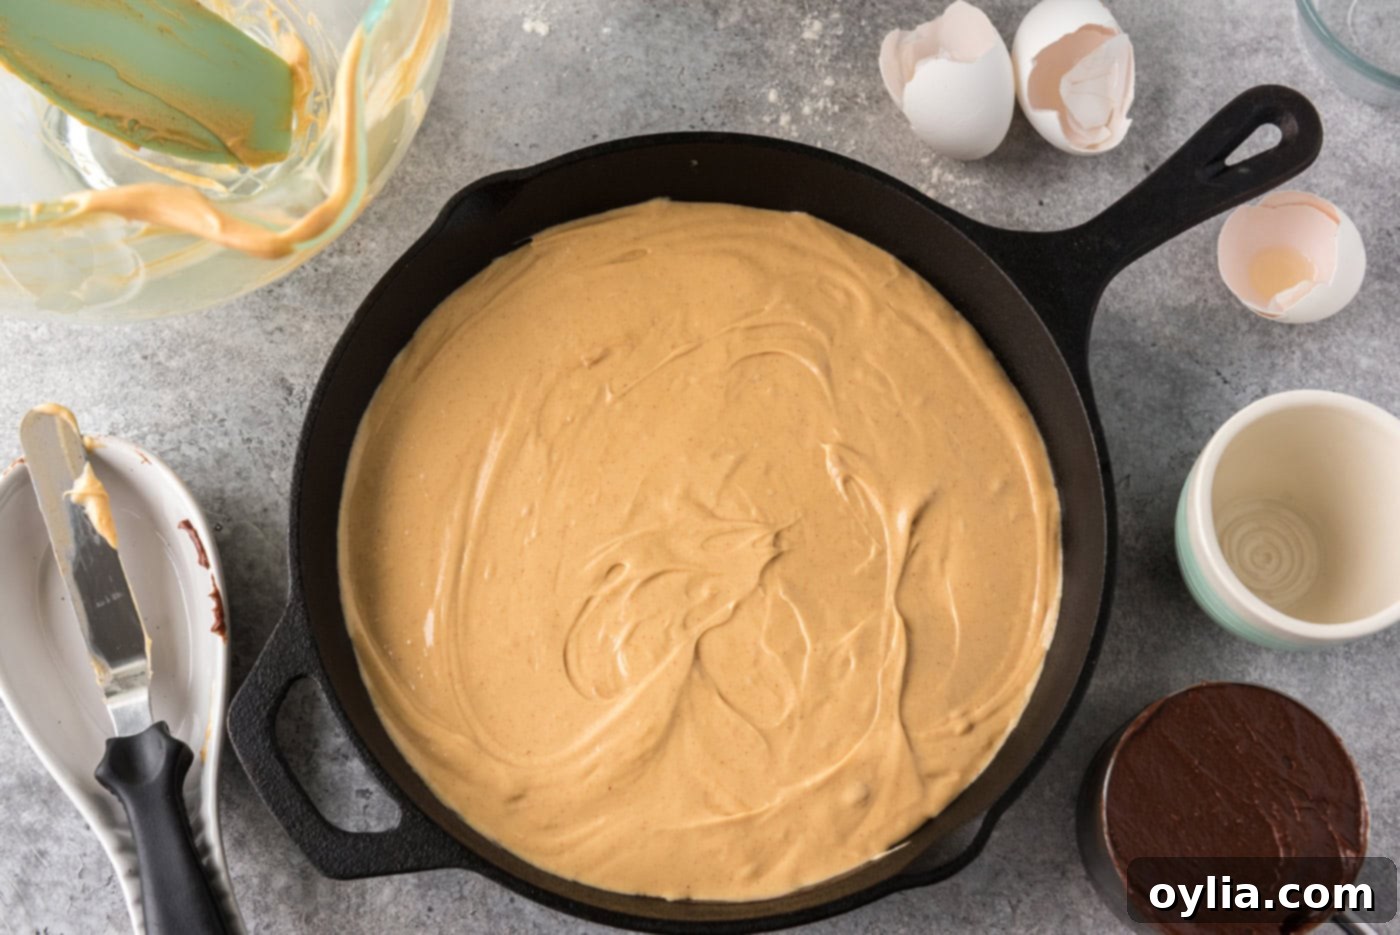
- **Add the Peanut Butter Cheesecake Layer**: With care, spread the previously prepared peanut butter cream cheese mixture evenly over the brownie batter in the skillet. Use an offset spatula or the back of a spoon to gently smooth it out into a uniform layer. This creamy, tangy layer will create a beautiful contrast of both color and flavor with the rich chocolate.

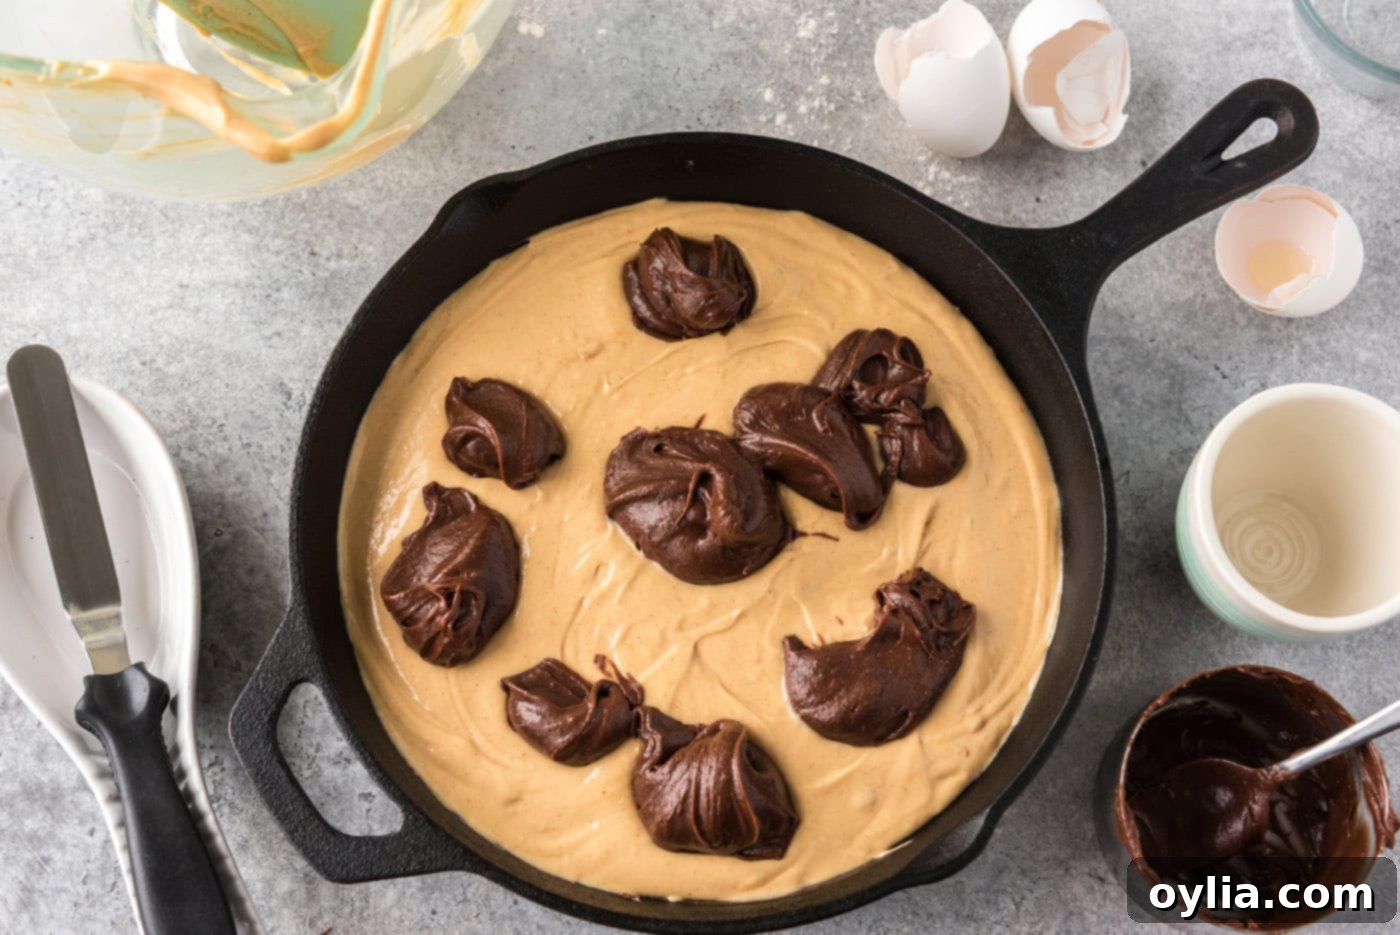
- **Create the Top Swirl**: Now, take the reserved one cup of brownie batter and, using a spoon, carefully drop it in dollops (small, strategic spoonfuls) onto the top of the peanut butter mixture. Try to distribute these dollops somewhat evenly over the entire surface, leaving some gaps to enhance the marbled effect.

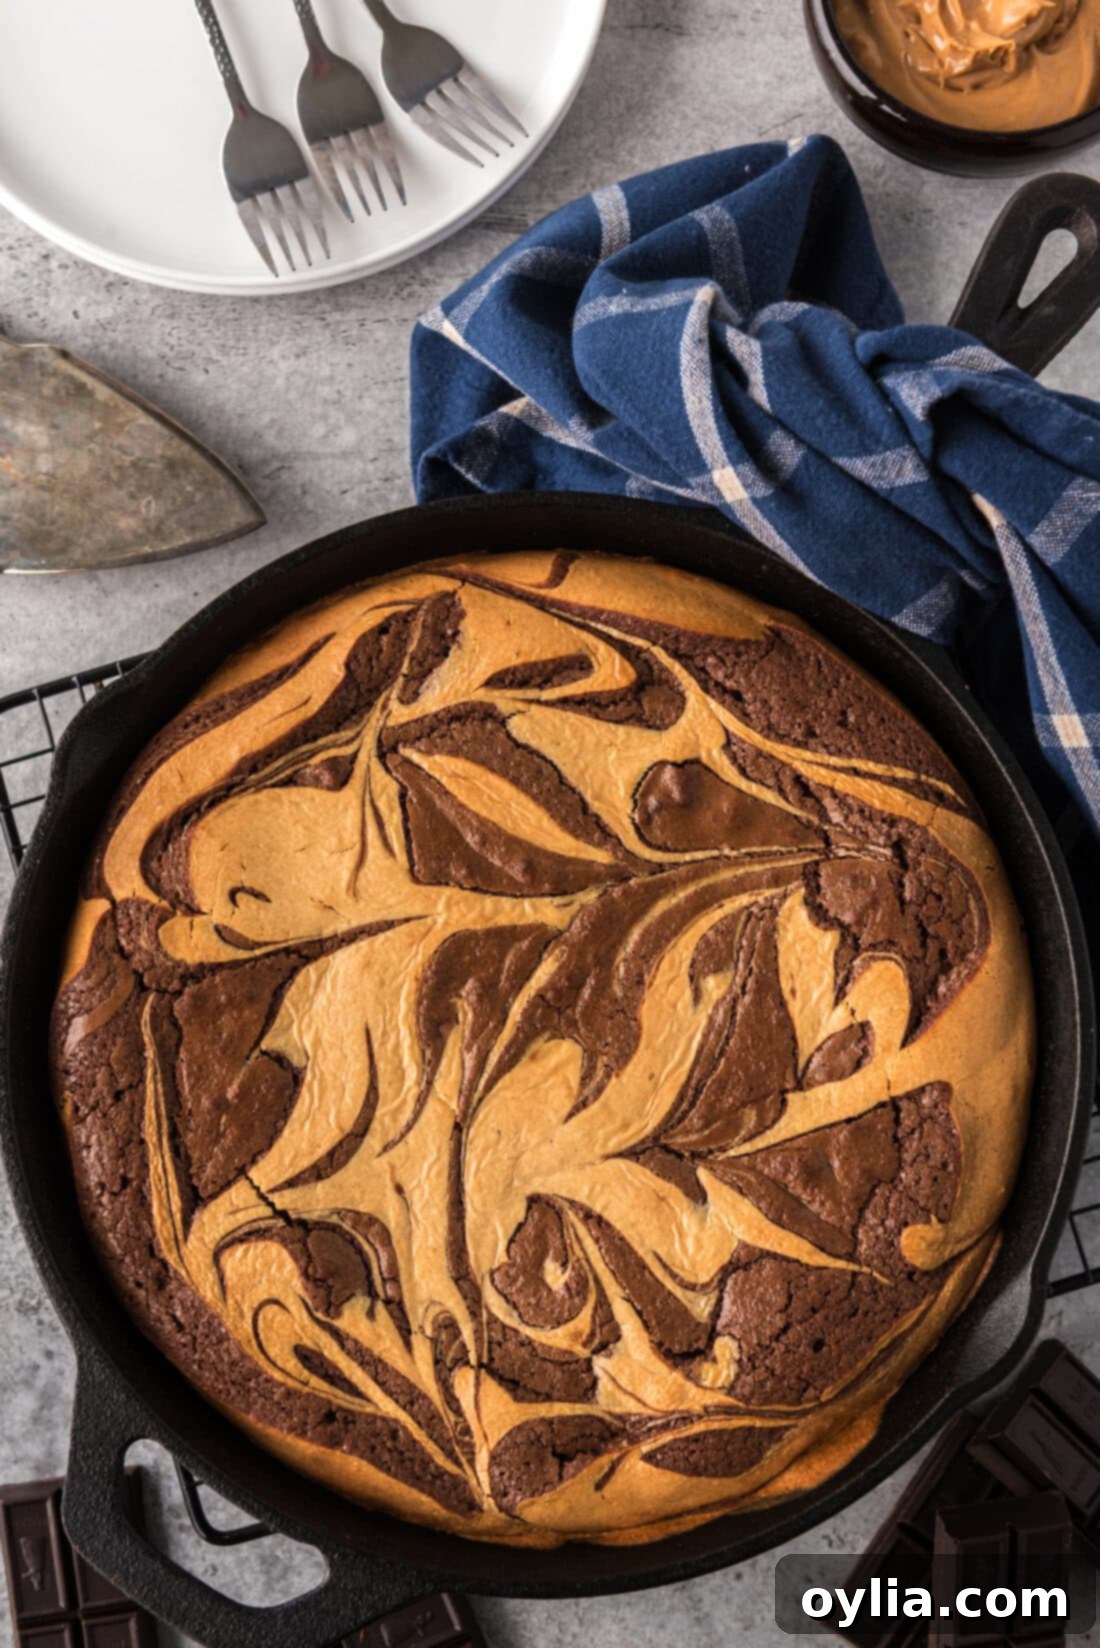
- **The Perfect Marble Effect**: Gently insert an icing spatula or a simple butter knife into the batter, ensuring it goes through both the peanut butter and brownie layers. With the spatula held straight up and down, make just 2-3 slow, deliberate S-shaped or figure-eight motions across the skillet. The absolute key here is to avoid overdoing it; a few confident swirls from one side of the skillet to the other are all you need to create a beautiful, distinct marble effect. Over-swirling will muddy the distinct layers, making them less visually appealing.
- **Bake to Perfection & Cool**: Carefully place the skillet in your preheated oven and bake for 55-65 minutes. Keep in mind that baking times can vary slightly depending on the calibration of your specific oven, but for our tests, it typically took around 63 minutes. You’ll know it’s ready when the center has puffed up slightly, and the edges begin to pull away distinctly from the sides of the pan. A wooden skewer or toothpick inserted into the center of the brownie portion (try to avoid hitting large pockets of the peanut butter layer too much) should come out with moist crumbs, not wet batter. Once baked, remove the skillet from the oven and allow it to cool completely on a wire rack. This crucial cooling step is vital; it allows the brownies to set fully and develop their ideal fudgy, dense texture, and ensures the cheesecake layer is perfectly firm. Patience is a true virtue here!
Frequently Asked Questions & Expert Tips for Success
Here are some common questions and essential tips to ensure your Peanut Butter Brownie Skillet turns out perfectly every time, along with advice on storage and variations.
This recipe is specifically designed for a 10-inch cast iron skillet, which yields wonderfully thick, decadent brownies that hold their shape beautifully. If you only have a larger skillet on hand, such as a 12-inch, you can certainly use it. However, be aware that the brownie layer will be thinner, and it will likely require less baking time. Start checking for doneness around 45-50 minutes. Conversely, if using a slightly smaller skillet, the brownies will be even thicker and may require a few extra minutes of baking time. Always rely on the visual cues mentioned in the instructions and the trusty toothpick test for doneness: a toothpick inserted into the center of the brownie portion (avoiding the peanut butter swirls) should come out with moist crumbs, not wet batter.
Once your Peanut Butter Brownie Skillet has cooled completely to room temperature, storing leftovers is simple. You can either cover the entire skillet tightly with aluminum foil or plastic wrap, or transfer individual slices (or the entire dessert) to an airtight container. This skillet brownie keeps wonderfully at room temperature for 3-4 days. For extended freshness, especially in warmer climates, or if you prefer a firmer cheesecake layer, you can refrigerate it for up to a week. To enjoy it warm again, simply reheat individual slices in the microwave for 15-30 seconds, or warm the whole skillet in a low oven (around 250°F / 120°C) for 10-15 minutes until just heated through.
The key to achieving beautiful, distinct swirls without overmixing and muddying the colors is a gentle touch and minimal movement. After carefully spooning the dollops of reserved brownie batter onto the peanut butter layer, use an icing spatula or a thin butter knife. Insert it vertically into the batter, making sure it penetrates both the peanut butter and brownie layers. Then, execute just 2-3 slow, deliberate S-shaped or figure-eight motions across the skillet. The goal is to create an elegant marbled pattern, not to fully combine the two batters. Remember, less is definitely more when it comes to swirling for that perfect visual appeal and textural variety.
While a cast iron skillet is highly recommended for this recipe due to its exceptional heat retention properties (which contribute to those signature crispy edges and an evenly baked, deeply golden crust), you do have alternatives. You can use a 9×13 inch metal baking dish if you prefer thinner brownies, or a 9×9 inch square metal baking pan for a similar thickness to the skillet version. If using a different pan, ensure it is oven-safe and thoroughly greased. Keep in mind that baking times may vary: metal baking pans typically conduct heat faster, potentially reducing bake time, while ceramic or glass pans might require a slightly longer bake. Always monitor your brownies closely and use the toothpick test for reliable doneness.
Serving Suggestions for Your Decadent Skillet Brownie
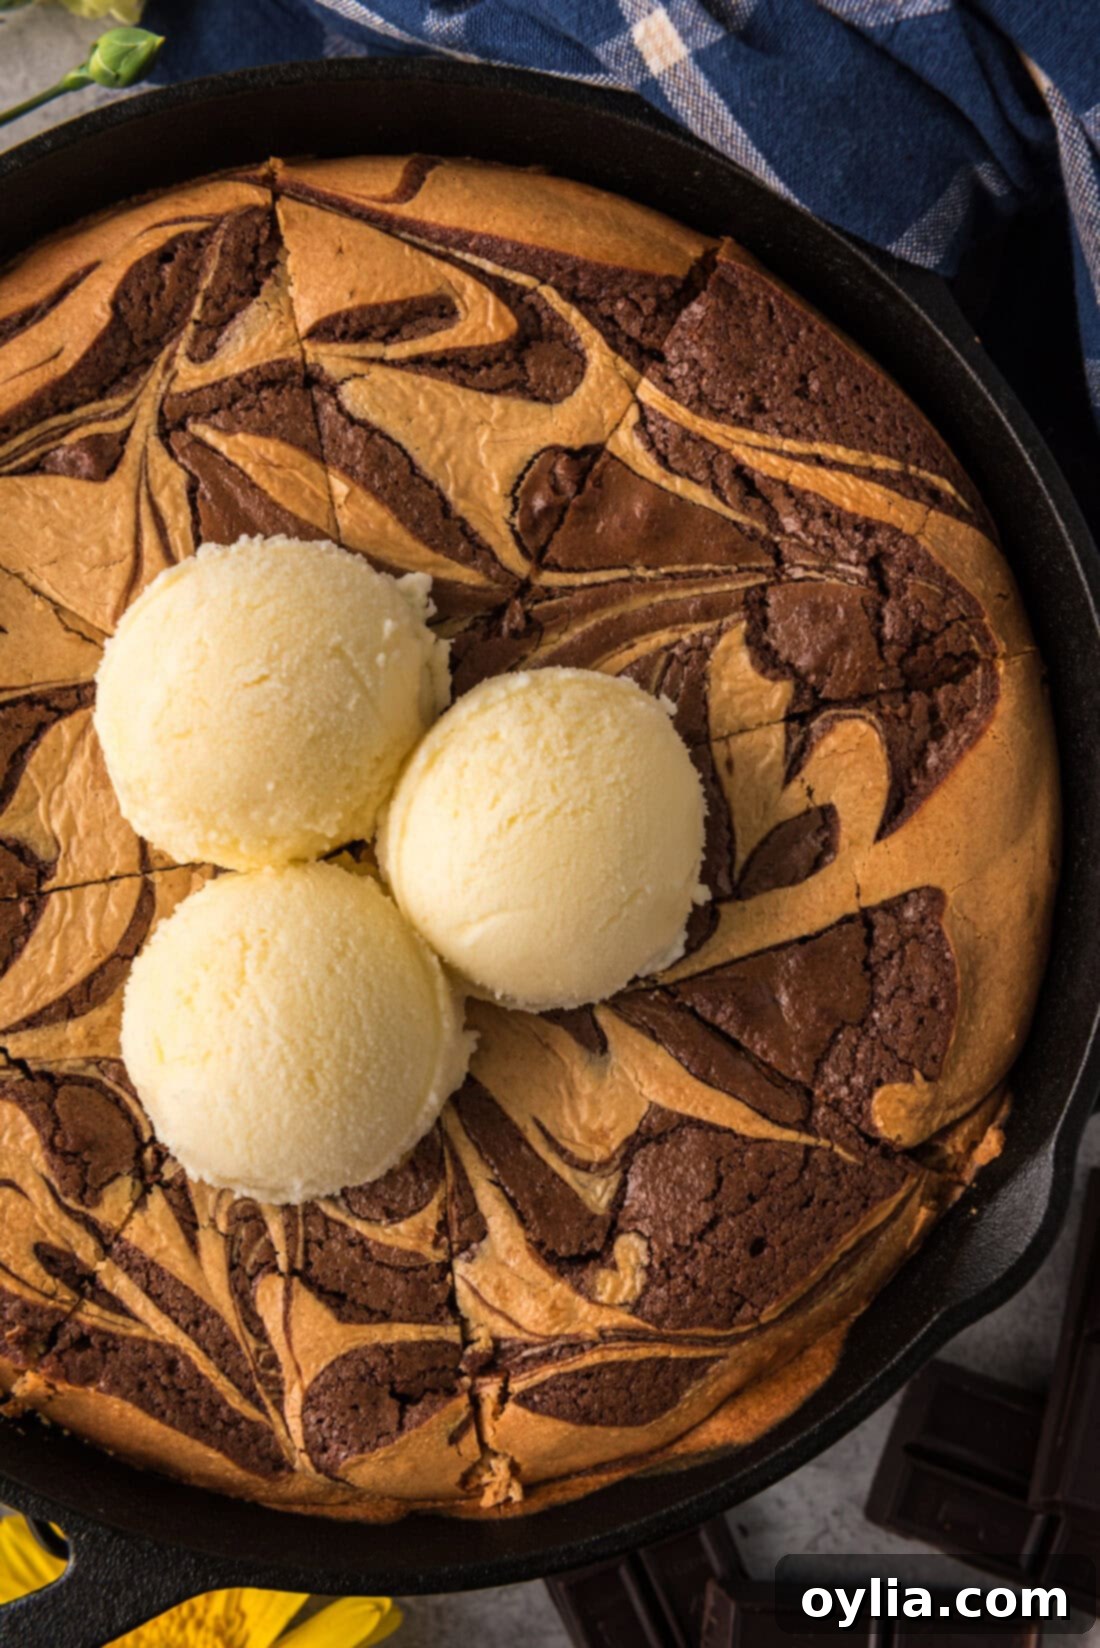
This **Peanut Butter Brownie Skillet** is undeniably divine when enjoyed on its own, but a few simple additions can easily transform it into an even more luxurious and indulgent dessert. We wholeheartedly recommend serving it slightly warm with a generous scoop of creamy vanilla ice cream. The delightful contrast between the warm, deeply fudgy brownie and the cold, slowly melting ice cream is a sensory experience that’s simply irresistible. For an extra touch of decadence and gourmet flair, consider adding a drizzle of warm chocolate syrup, a spoonful of warmed, smooth peanut butter, or even a delicate sprinkle of flaky sea salt to beautifully enhance and intensify both the chocolate and peanut butter flavors. Chopped roasted peanuts or a dollop of whipped cream also make excellent additions.
While freshly baked and warm from the oven, many enthusiasts find this skillet brownie to be even more spectacular the following day! As it rests overnight, the rich flavors have ample time to meld and deepen, and the texture settles into an even more perfectly fudgy and cohesive state. So, if you’re planning for a special gathering or simply want to treat yourself to a wonderful dessert throughout the week, don’t hesitate to make it ahead of time. It’s a wonderfully versatile treat that’s perfect for any occasion, from a cozy, intimate night in to a lively dinner party with friends and family.
More Irresistible Chocolate & Peanut Butter Recipes
If you’re a true fan of the classic and unbeatable chocolate and peanut butter combination, you’ll love exploring these other delightful and equally addictive recipes from our collection:
- Peanut Butter Brownies: For a more straightforward, yet incredibly satisfying, brownie experience with a delightful peanut butter twist.
- Chocolate Peanut Butter Pie: A dreamy, no-bake, creamy indulgence that’s perfectly refreshing, especially for warmer weather.
- Chocolate Peanut Butter Cookies: These chewy, soft, and richly flavored cookies pack an explosion of chocolate and peanut butter in every single bite.
- Fudge Brownies with Peanut Butter Frosting: Prepare for double the chocolate and double the peanut butter in this recipe, offering an unparalleled level of decadent delight!
I love to bake and cook and share my kitchen experience with all of you! Remembering to come back each day can be tough, that’s why I offer a convenient newsletter every time a new recipe posts. Simply subscribe and start receiving your free daily recipes!
Peanut Butter Brownie Skillet
IMPORTANT – There are often Frequently Asked Questions within the blog post that you may find helpful. Simply scroll back up to read them!
Print It
Pin It
Rate It
Save ItSaved!
Ingredients
Peanut Butter Layer
- 6 ounces cream cheese softened, full-fat recommended (168g)
- ⅔ cup creamy peanut butter (Jif or Skippy recommended, 178g)
- ⅓ cup granulated sugar (73g)
- 2 large eggs at room temperature
- ½ teaspoon pure vanilla extract
Brownie Layer
- ¾ cup unsalted butter (1.5 sticks or 169g)
- 3 ounces unsweetened baking chocolate coarsely chopped (86g)
- 1 cup light brown sugar firmly packed (217g)
- ½ cup granulated sugar (109g)
- 3 large eggs at room temperature
- 1 teaspoon pure vanilla extract
- ¾ cup unbleached all purpose flour (119g)
- ¼ teaspoon salt
- vanilla ice cream optional for topping
Equipment You’ll Need
-
10 inch cast iron skillet (for optimal heat distribution and crispy edges)
-
Hand mixer or stand mixer (for creamy, lump-free batter)
-
Rubber spatula (for folding ingredients gently)
-
Icing spatula or butter knife (for creating those beautiful swirls)
-
Wire cooling rack (essential for proper cooling and setting)
Recipe Notes & Tips for Perfect Results
- **Chocolate Choice**: For the richest, most intense brownie flavor, opt for unsweetened baking chocolate. This allows you to control the sweetness perfectly. Bittersweet baking chocolate can be used as a substitute if preferred, but adjust sugar slightly if you find it too sweet.
- **Peanut Butter Matters**: Creamy, conventional peanut butters like Jif or Skippy are crucial for the stable and smooth texture of the peanut butter cheesecake swirl. Natural peanut butters tend to separate and can yield a runny or oily cheesecake layer.
- **Skillet Size Impact**: This recipe is optimized for a 10-inch cast iron skillet for thick brownies. If using a larger skillet (e.g., 12-inch), your brownies will be thinner and likely bake faster. For smaller skillets, brownies will be thicker and may need more time. Always test for doneness with a toothpick.
- **Room Temperature Ingredients**: Ensure cream cheese and eggs are at room temperature. This significantly aids in achieving a smooth, lump-free batter for both layers, leading to better overall texture.
- **Don’t Overmix**: When adding flour to the brownie batter, mix only until just combined. Overmixing develops gluten, which can result in tough, dry brownies instead of fudgy ones.
- **Patience is Key for Swirling**: To create beautiful, distinct marbled swirls, use gentle, minimal motions with an icing spatula or knife. Avoid over-swirling, which can blend the layers too much.
- **Cool Completely**: Allow the skillet brownie to cool entirely on a wire rack before slicing. This allows the brownie and cheesecake layers to set properly, ensuring a clean cut and ideal fudgy texture.
Instructions
-
Preheat oven to 325 F (160°C). Lightly grease the bottom and sides of a 10″ cast iron skillet.
-
In a mixer at medium speed, cream together cream cheese, peanut butter, and sugar for 2 minutes until light and fluffy. Add eggs one at a time, beating well after each. Beat in vanilla. Cover and set aside.6 ounces cream cheese, 2/3 cup creamy peanut butter, 1/3 cup granulated sugar, 2 large eggs, 1/2 teaspoon pure vanilla extract
-
For the brownie layer, cut butter into 6 chunks. Place butter and chopped chocolate into a bowl and melt
