Ultimate No-Bake Strawberry Cheesecake Bars: Your Refreshing Dessert for Any Occasion
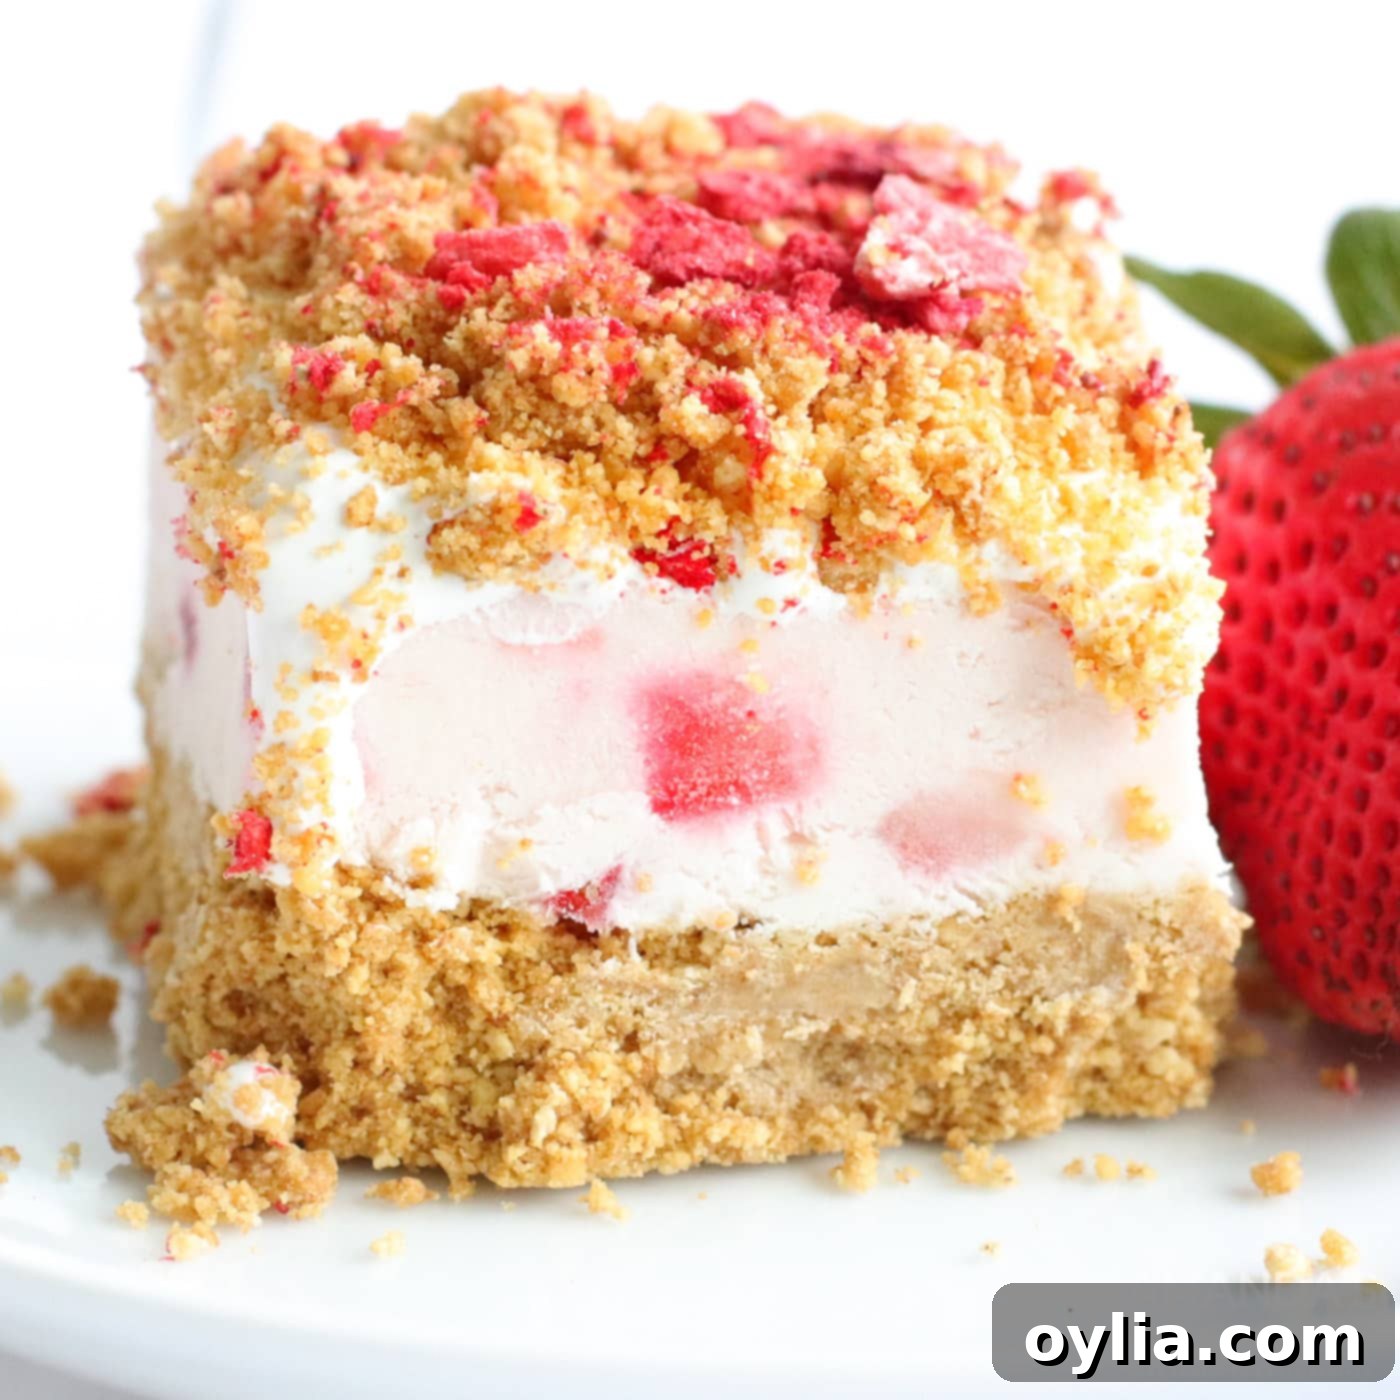
Imagine a dessert that’s bursting with the fresh, vibrant flavor of strawberries, incredibly creamy, and requires absolutely no oven. Our No-Bake Strawberry Cheesecake Bars are precisely that – a dream come true for anyone craving a decadent treat without the heat. These bars are packed with rich, strawberry goodness and topped with a delightful crumble of graham crackers, along with a whisper of whipped topping and a sprinkle of freeze-dried strawberries for an ultimate indulgence that truly satisfies.
Why These No-Bake Strawberry Cheesecake Bars Are a Must-Try
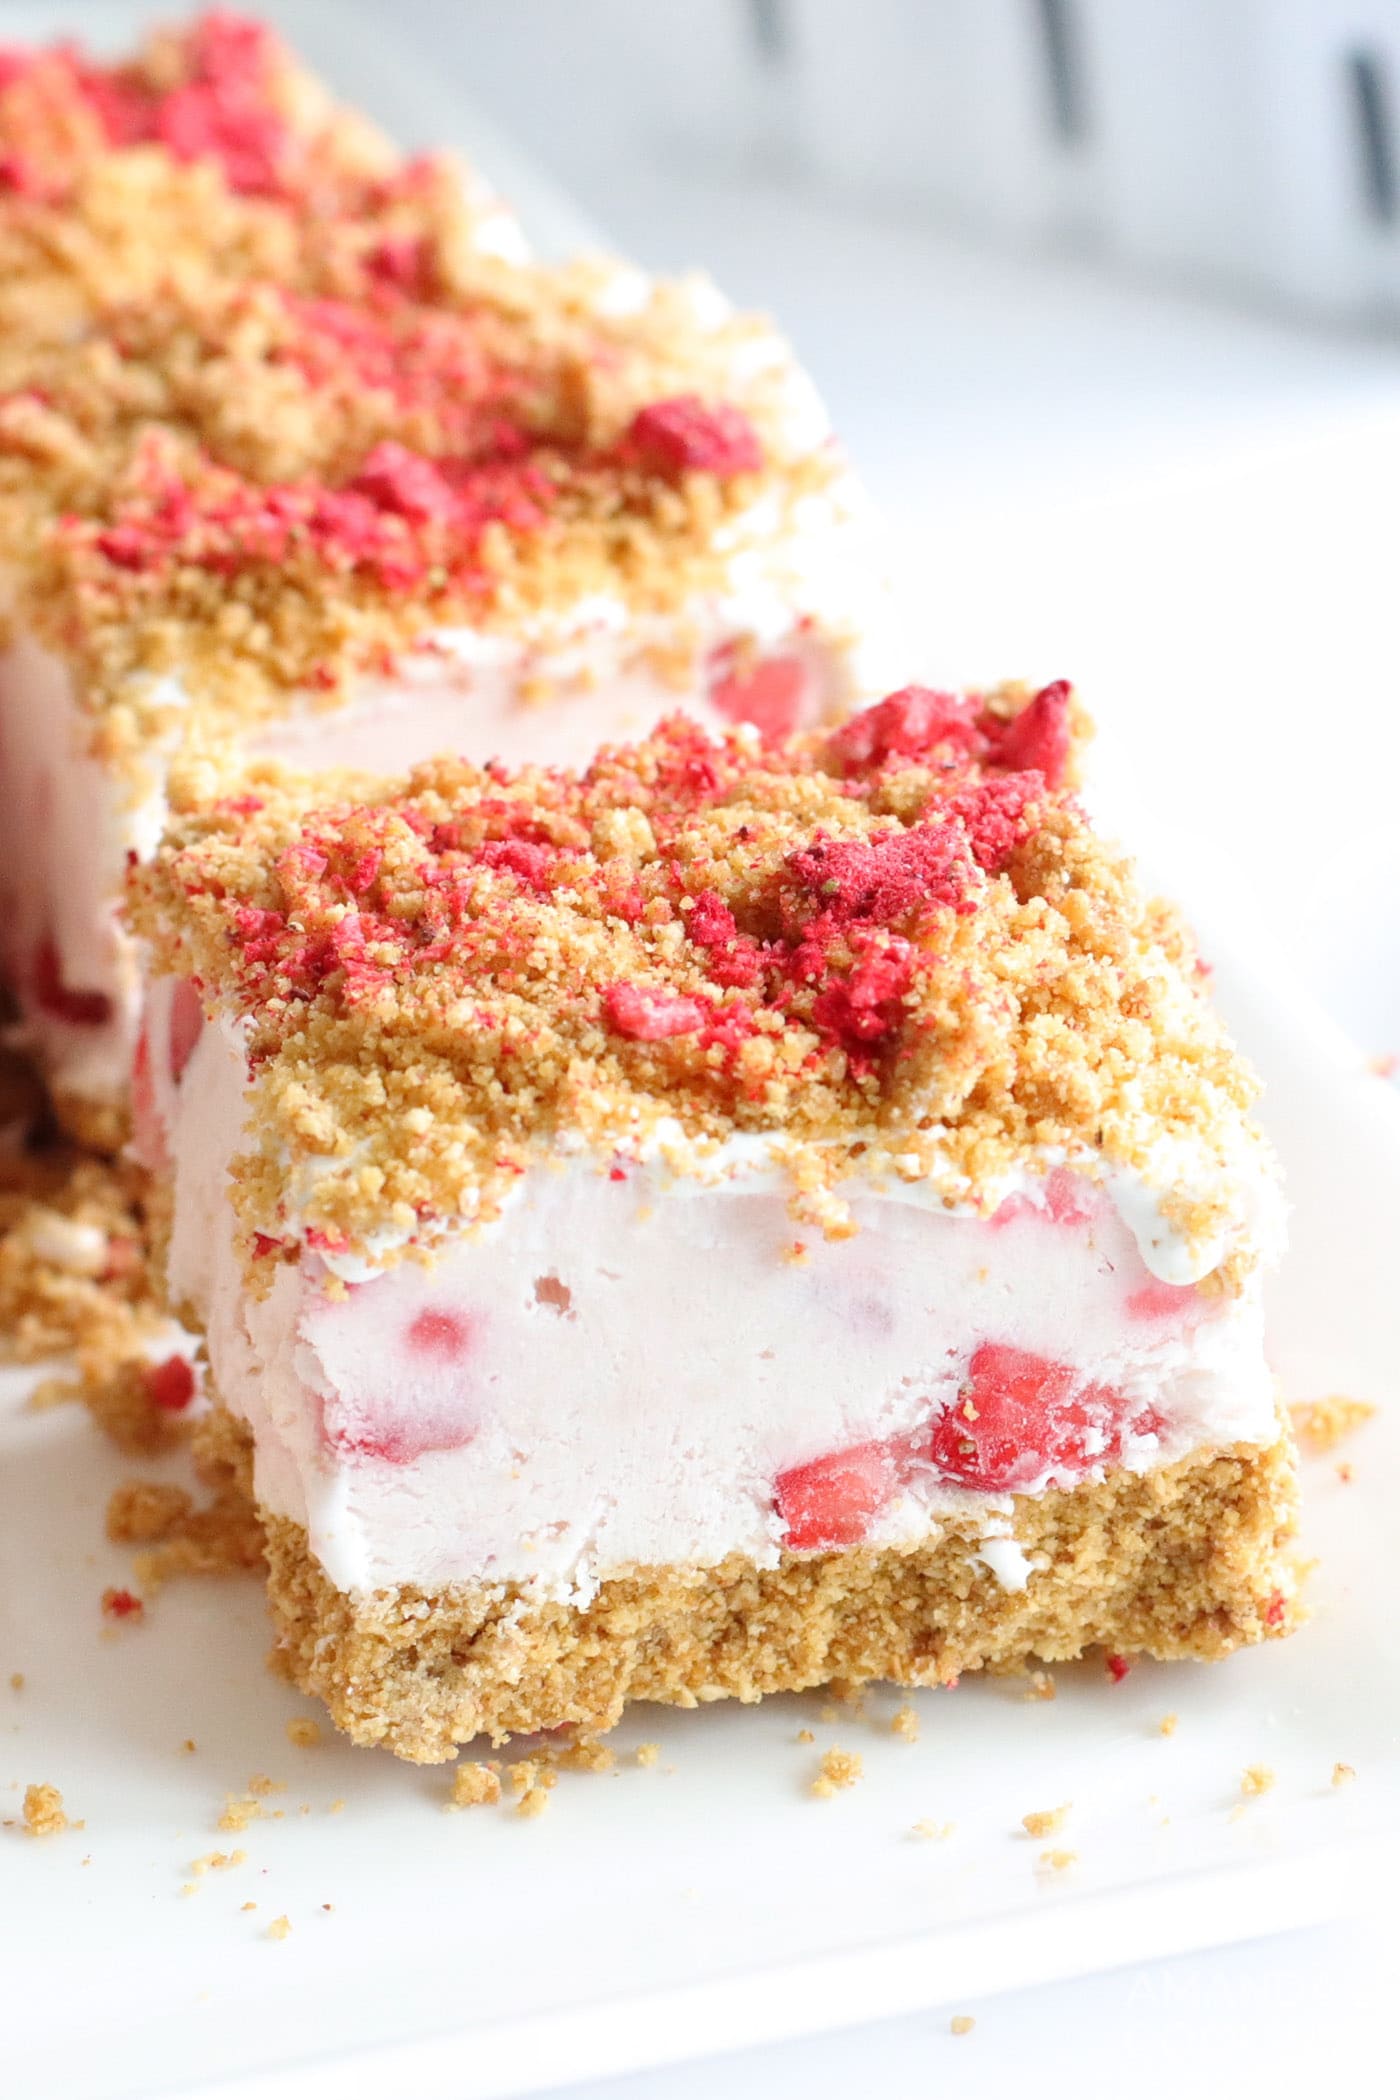
This recipe isn’t just easy; it’s ingeniously designed for maximum flavor and minimal effort. At its heart lies a lusciously creamy cheesecake filling, generously studded with fresh, ripe strawberries. This delightful core rests upon a perfectly crumbly graham cracker base and is crowned with additional graham cracker crumbs, light and airy whipped topping, and a sprinkling of vibrant freeze-dried strawberries. The result is a multi-textured masterpiece that delivers a symphony of sweet and tangy notes with every bite.
These strawberry cheesecake bars are a truly tempting dessert, making them ideal for all sorts of gatherings, especially during the warm months when the thought of turning on your oven is less than appealing. Forget complex baking schedules or fussy techniques; this no-bake wonder comes together quickly, allowing you more time to enjoy your company and the beautiful weather. It’s a guaranteed crowd-pleaser that brings a burst of summer joy to any table, from backyard barbecues to elegant potlucks or even a simple weeknight treat.
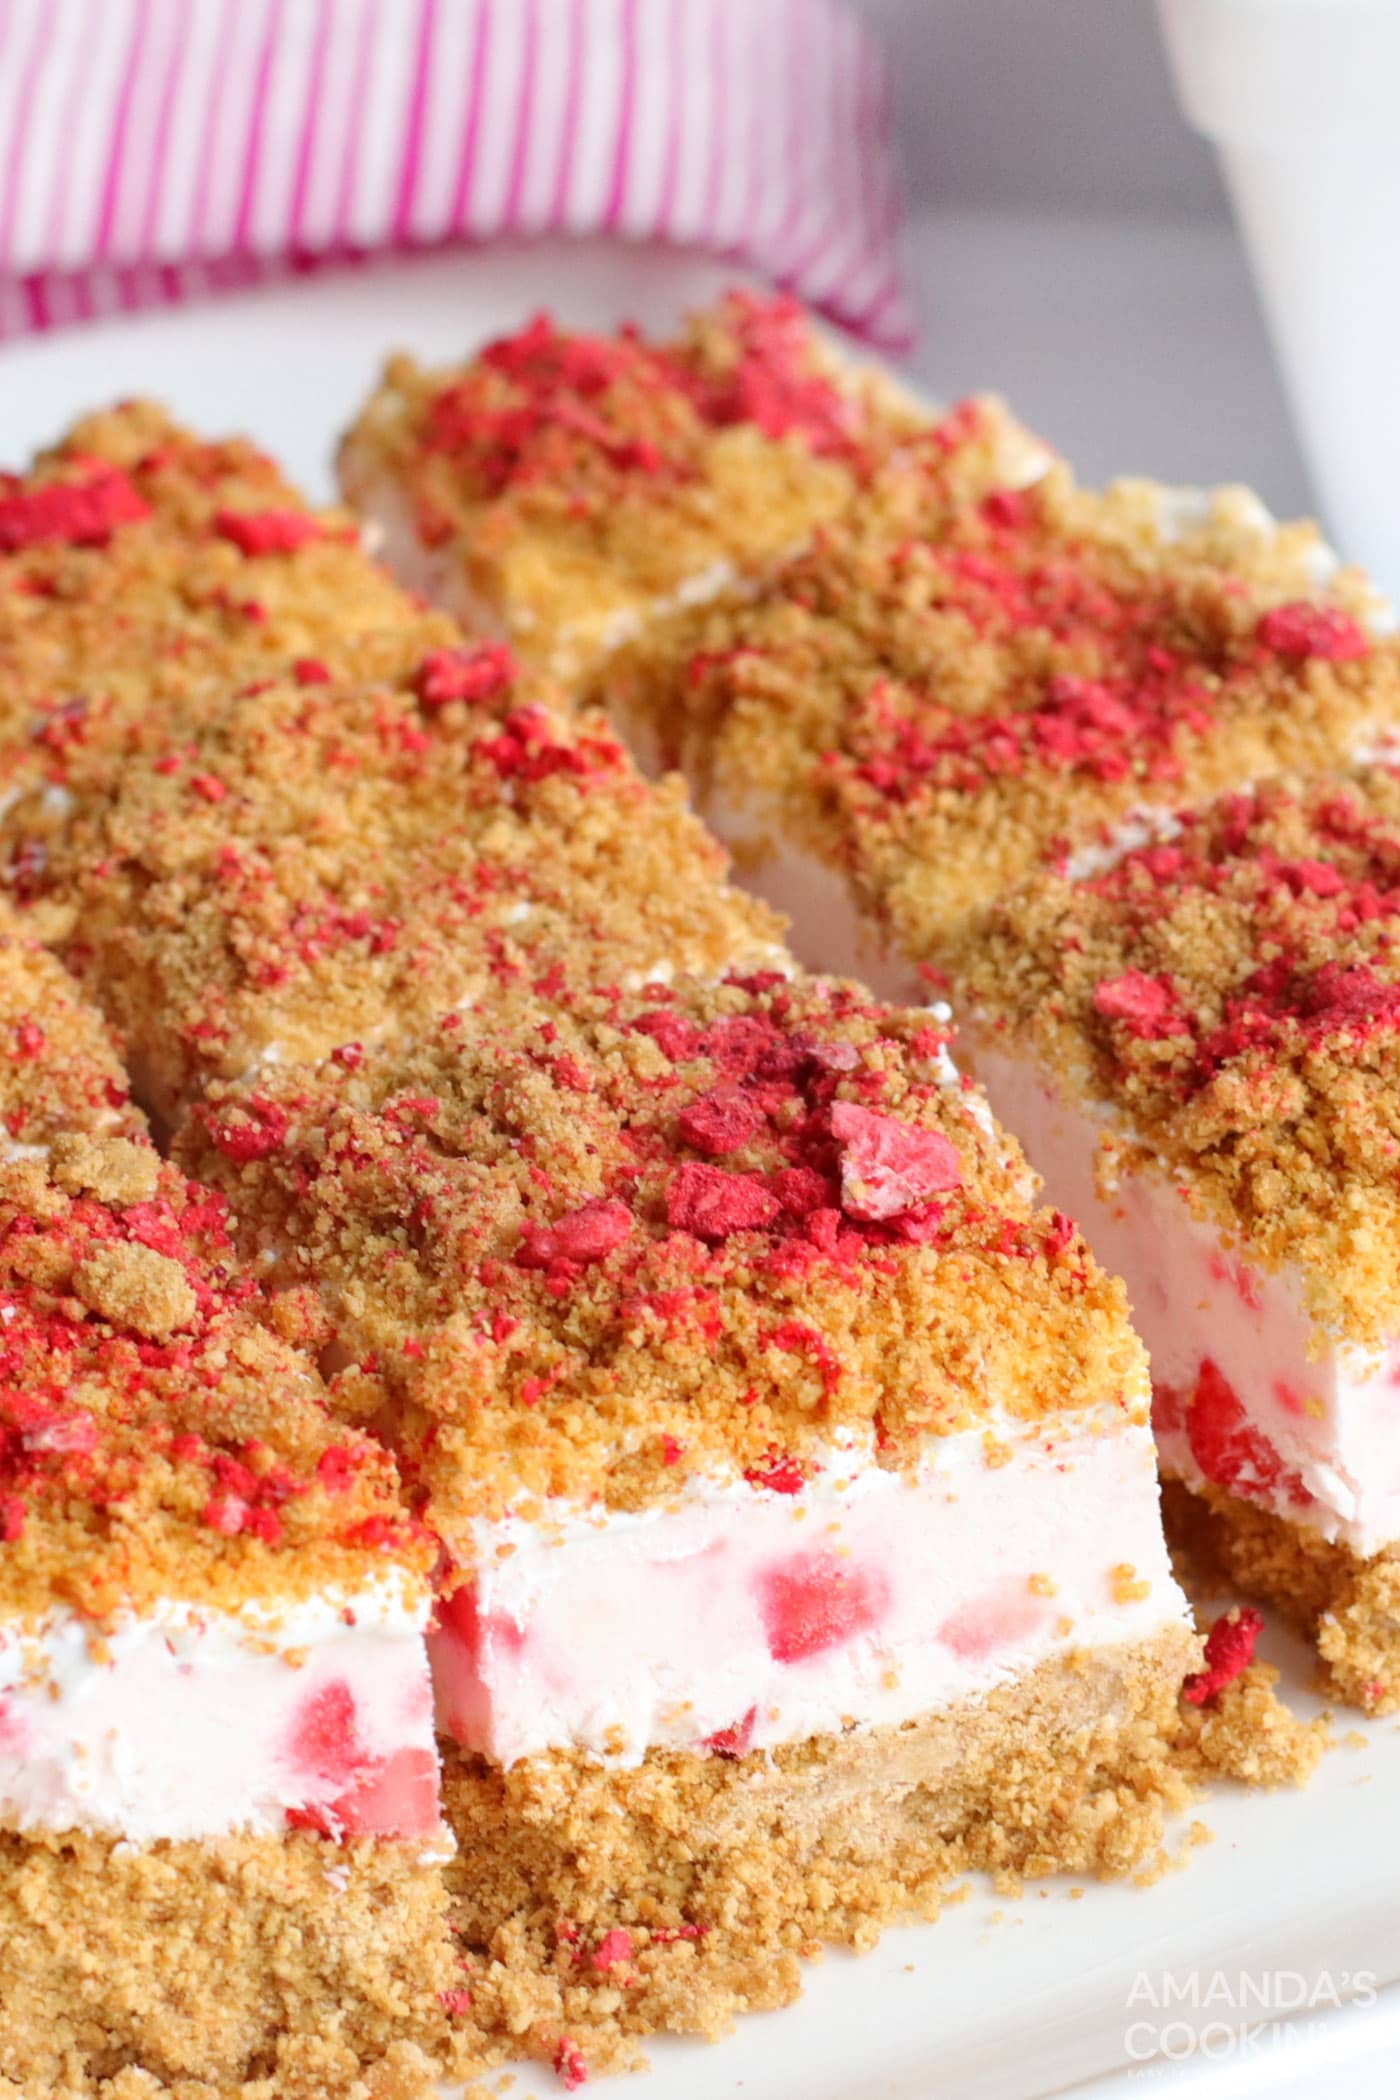
Gather Your Ingredients for These Easy Cheesecake Bars
Crafting these delectable no-bake treats requires a simple list of ingredients, most of which you likely already have on hand or can easily find at your local grocery store. For all precise measurements, a detailed ingredient list, and step-by-step instructions, please refer to the printable recipe card located towards the end of this post. For now, let’s dive into some specifics about the key components that make these strawberry cheesecake bars so irresistible.
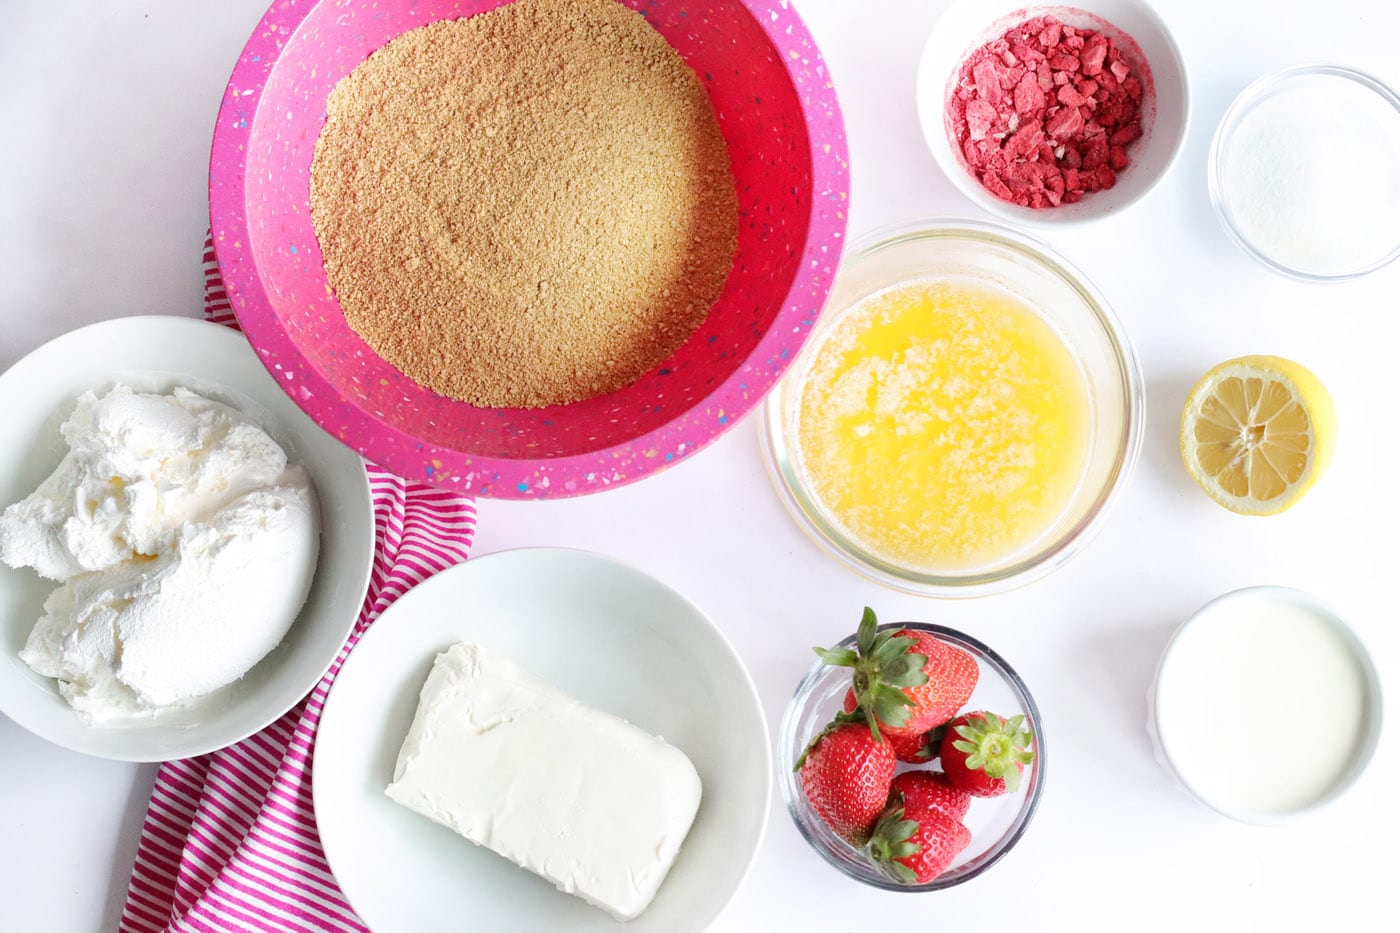
Ingredient Insight & Clever Substitutions
Understanding each ingredient’s role can elevate your dessert from good to absolutely unforgettable. Here’s what you need to know about the key players in our No-Bake Strawberry Cheesecake Bars:
CRUST & TOPPING – The foundation of any great bar dessert is a sturdy and flavorful crust. While pre-made graham cracker crumbs are readily available at most grocery stores, making your own is incredibly simple and often yields a fresher flavor. To achieve approximately 2.5 cups of crumbs, you’ll need about 16 full graham cracker rectangles. Simply place them into a food processor and pulse until they form fine, even crumbs. For a delightful twist or to cater to different preferences, don’t hesitate to substitute the graham cracker crumbs. Vanilla wafers offer a sweeter, more delicate base, while crushed pretzels can introduce a fantastic salty-sweet dynamic. Even crushed Oreo cookies can create a rich, chocolatey foundation, though this would obviously change the flavor profile significantly. The key is a finely crushed, firm base that holds up to the creamy filling.
CREAM CHEESE – This is the heart of your creamy cheesecake filling, and its temperature is paramount for a silky-smooth texture. Your cream cheese must be thoroughly softened at room temperature. This crucial step ensures that it blends seamlessly with the other ingredients, preventing lumps and creating that desirable melt-in-your-mouth consistency. To soften effectively, slice the cream cheese into smaller cubes and allow it to rest on your kitchen counter for 30-45 minutes. Resist the urge to microwave it, as this can alter its texture, making it greasy or lumpy and difficult to work with. Patience here truly pays off for the perfect no-bake cheesecake filling.
STRAWBERRIES – This recipe celebrates the luscious flavor of strawberries in two distinct forms. You’ll need fresh strawberries for both the filling and a potential fresh topping. For an extra burst of concentrated strawberry flavor and a beautiful visual appeal, freeze-dried strawberries are used in the topping. These can typically be found in the snack aisle of most major grocery stores or conveniently ordered online through platforms like Amazon. To crush them, you can either place them in a Ziploc bag and gently crush them by hand or use a food processor for a finer powder. If freeze-dried strawberries aren’t available or you simply prefer a fresher look, you can absolutely skip them for the topping and use extra fresh, chopped strawberries instead, similar to how we garnish our strawberry dream dessert. If opting for fresh strawberries as a top garnish, remember to add them just before serving to maintain their vibrant appearance and texture.
HEAVY WHIPPING CREAM & SUGAR – These two ingredients combine to form the light and airy whipped cream that gives the cheesecake its fluffy texture. Ensure your heavy whipping cream is very cold to achieve the best peaks. Granulated sugar sweetens the cream cheese mixture and balances the tanginess of the strawberries and lemon. You can adjust the sugar slightly to your taste, adding a little more if your strawberries are tart.
LEMON JUICE – A small but mighty ingredient, fresh lemon juice is essential. It brightens the overall flavor profile of the cheesecake, enhancing the natural sweetness and tang of the strawberries and preventing the dessert from being overly rich. Just a touch makes a big difference in balancing the flavors.
Crafting Your No-Bake Strawberry Cheesecake Bars: Step-by-Step
These step-by-step photos and detailed instructions are provided to help you visualize each stage of making this delightful recipe. For your convenience, you can Jump to Recipe at any time to find the printable version, complete with precise measurements and instructions, located at the very bottom of this post.
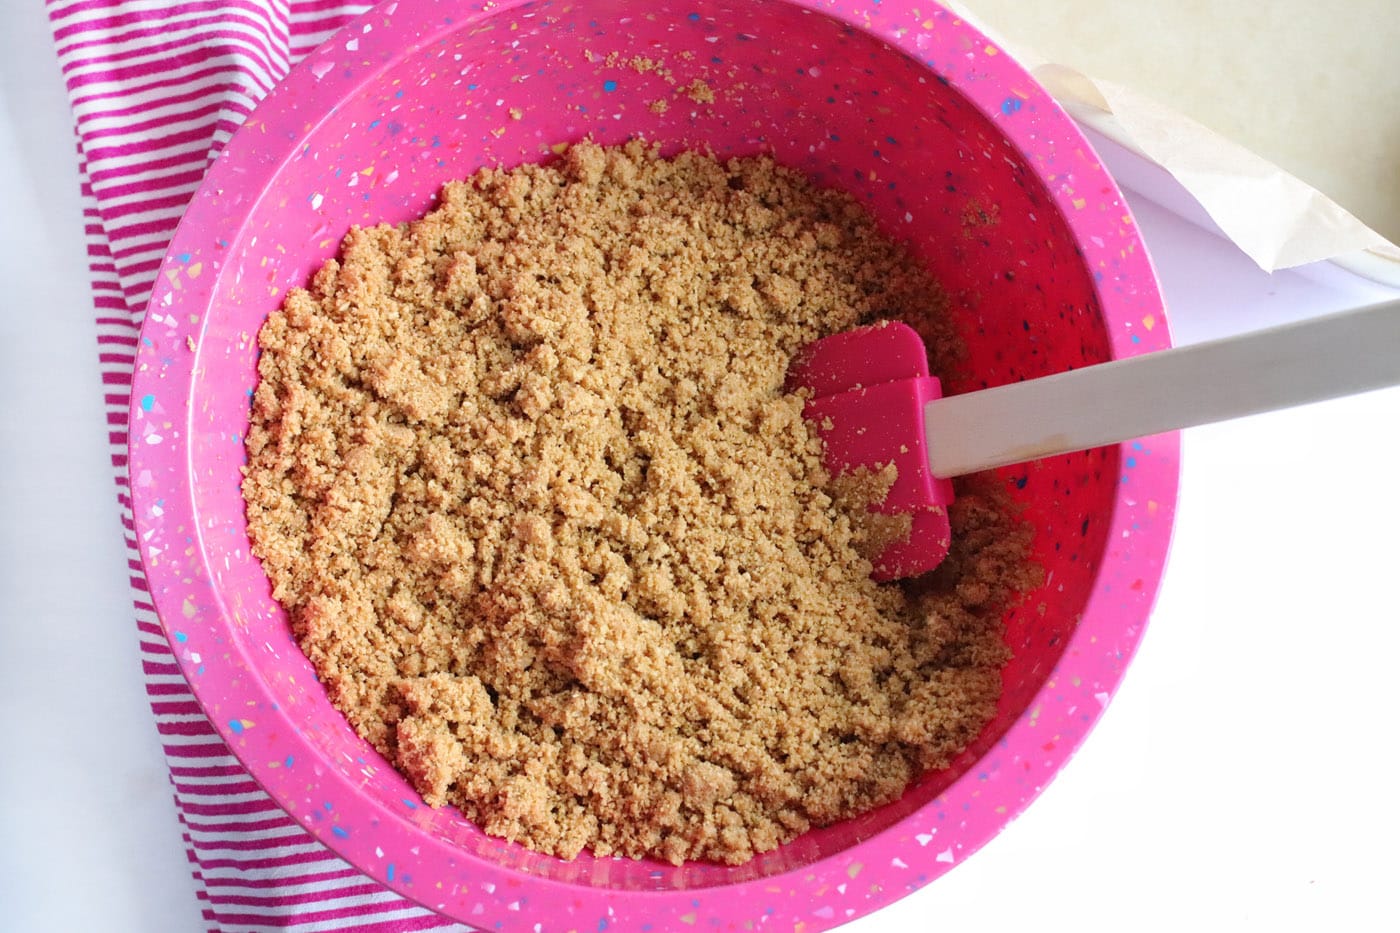
- Prepare the Crust Base: In a large mixing bowl, combine the graham cracker crumbs, melted butter, and lukewarm water. Mix these ingredients thoroughly until the crumbs are evenly moistened and resemble wet sand. This ensures a cohesive crust.

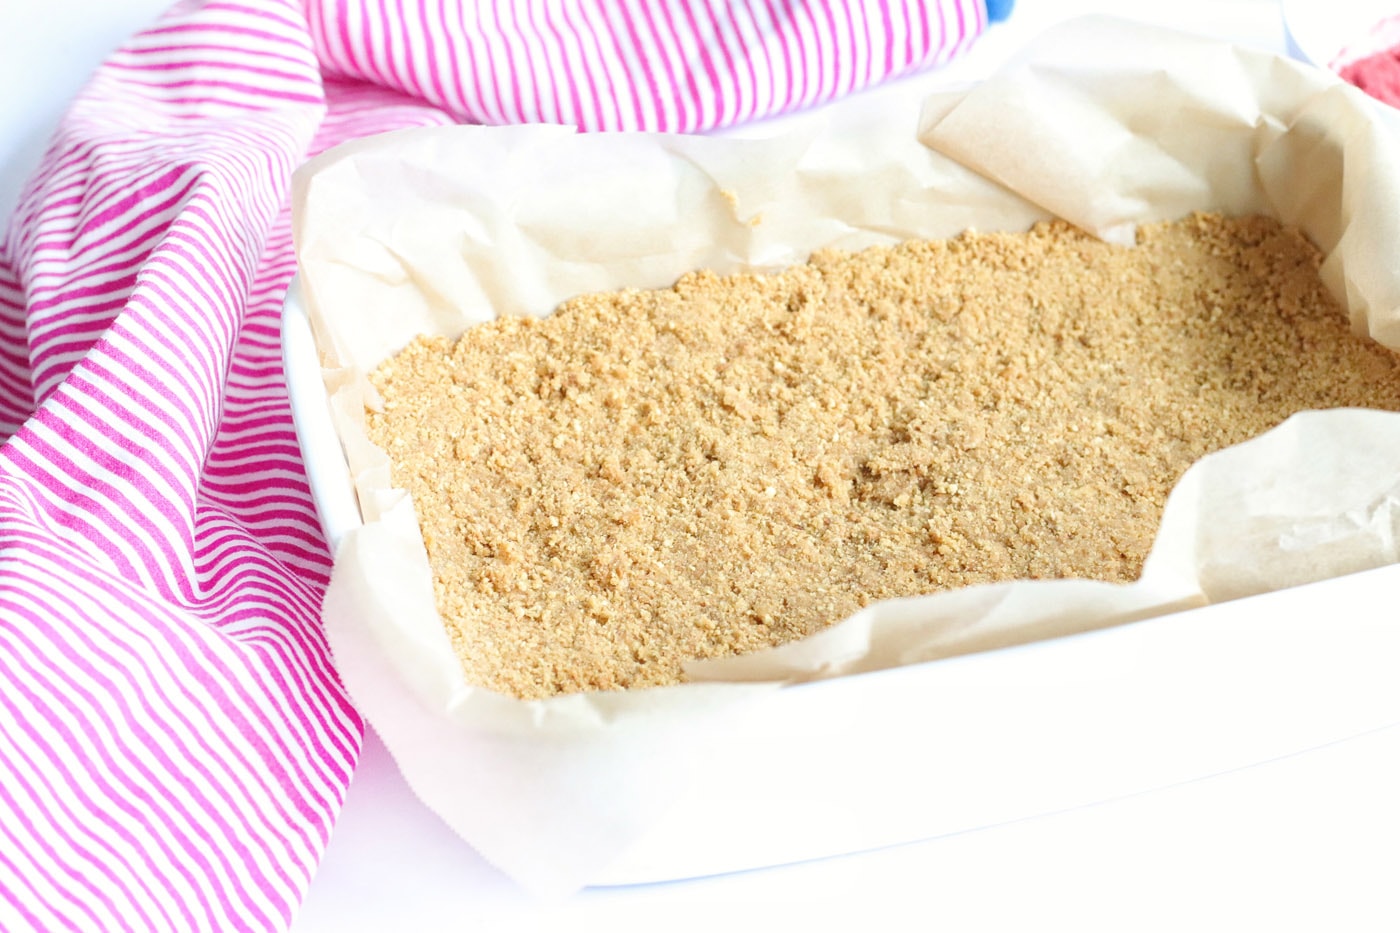
- Line Your Baking Dish: Line an 11×9 inch baking dish with parchment paper, allowing some overhang on the sides. This creates “handles” that will make lifting the set bars out much easier. While a 13×9 dish can be used, be aware that your cheesecake bars will be slightly thinner.
- Reserve Topping Crumbs: Carefully scoop out about 1 cup of the prepared graham cracker mixture and set it aside in a small bowl. This reserved portion will be used later as part of the delicious topping for your bars.
- Form the Crust: Take the remaining graham cracker mixture and press it firmly and evenly into the bottom of the parchment-lined baking dish. Use the back of a spoon or your knuckles to ensure it’s compact and well-formed. A firm crust is crucial for holding the layers together.

- Chill the Crust: Place the dish with the pressed crust into the freezer while you prepare the creamy filling. This brief chilling period helps the crust set, preventing it from crumbling when the filling is added.
- Whip the Heavy Cream: To create the light and airy texture of the filling, you’ll need to whip heavy cream. Use either a hand mixer or a stand mixer with a whisk attachment. In a clean, cold bowl, beat the heavy whipping cream until medium peaks form. Set this aside gently.
- Prepare the Cheesecake Base: In a separate, larger bowl, beat the softened cream cheese with the granulated sugar until the mixture is smooth, creamy, and free of any lumps. Then, gently fold in the previously whipped heavy cream using a spatula. Be careful not to deflate the whipped cream, as this contributes to the cheesecake’s fluffy texture.
- Incorporate Strawberries and Lemon: Add 1 cup of the fresh, sliced strawberries to the cream cheese mixture and mix well. Finally, stir in the fresh lemon juice. The lemon juice brightens the strawberry flavor and adds a wonderful subtle tang that balances the sweetness.
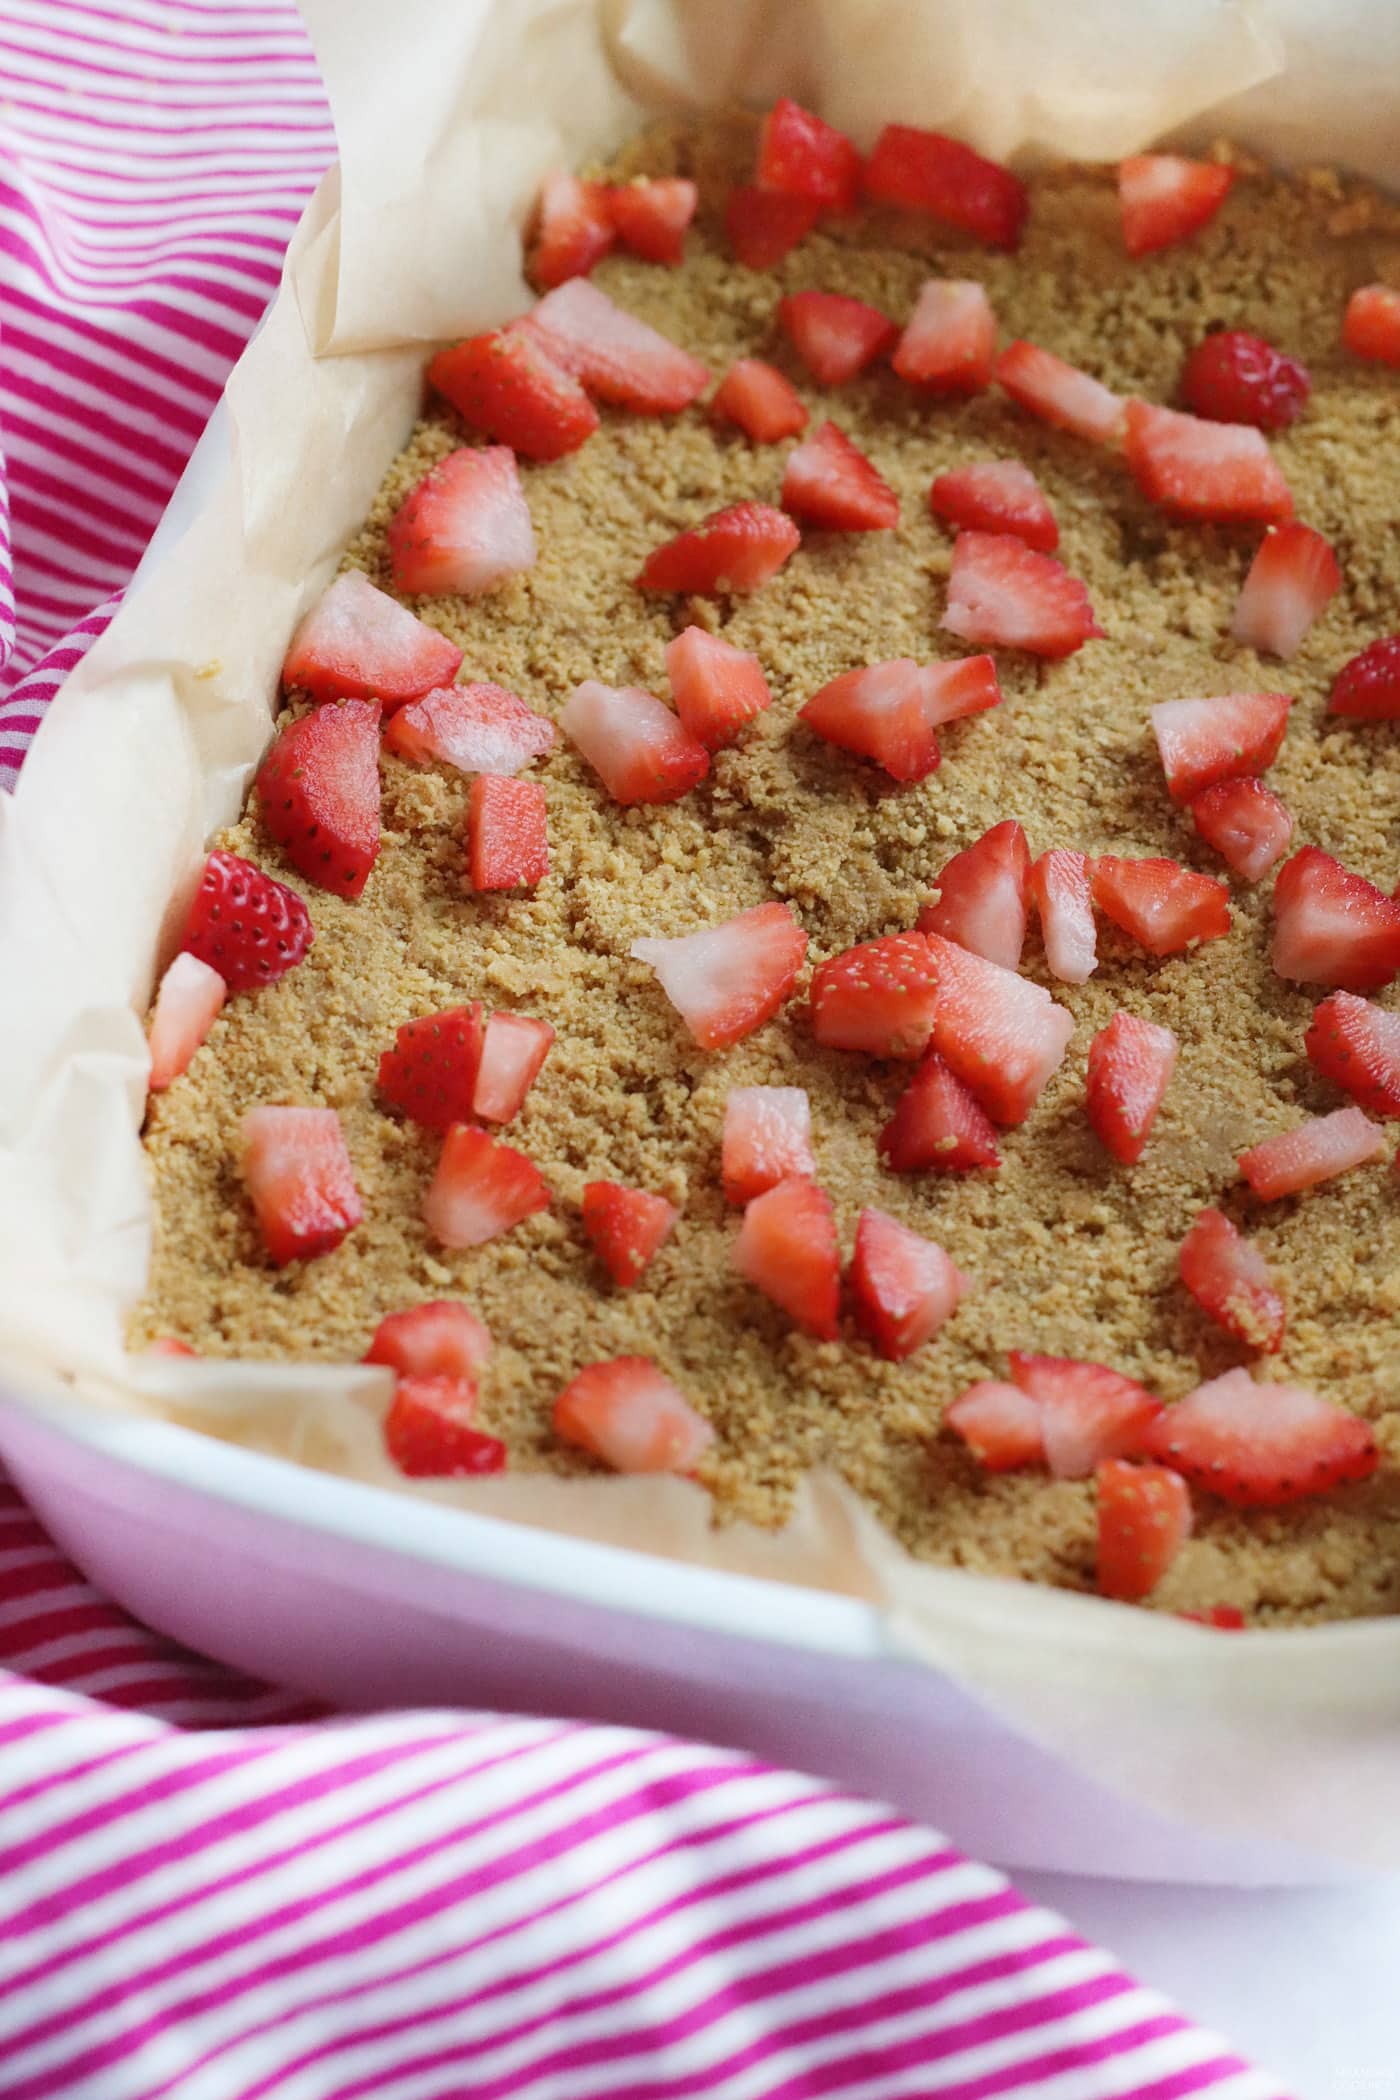
- Layer Fresh Strawberries: Retrieve your chilled crust from the freezer. Arrange the remaining sliced fresh strawberries in an even layer over the graham cracker crust. This creates a beautiful visual and an extra layer of juicy strawberry flavor within the bars.

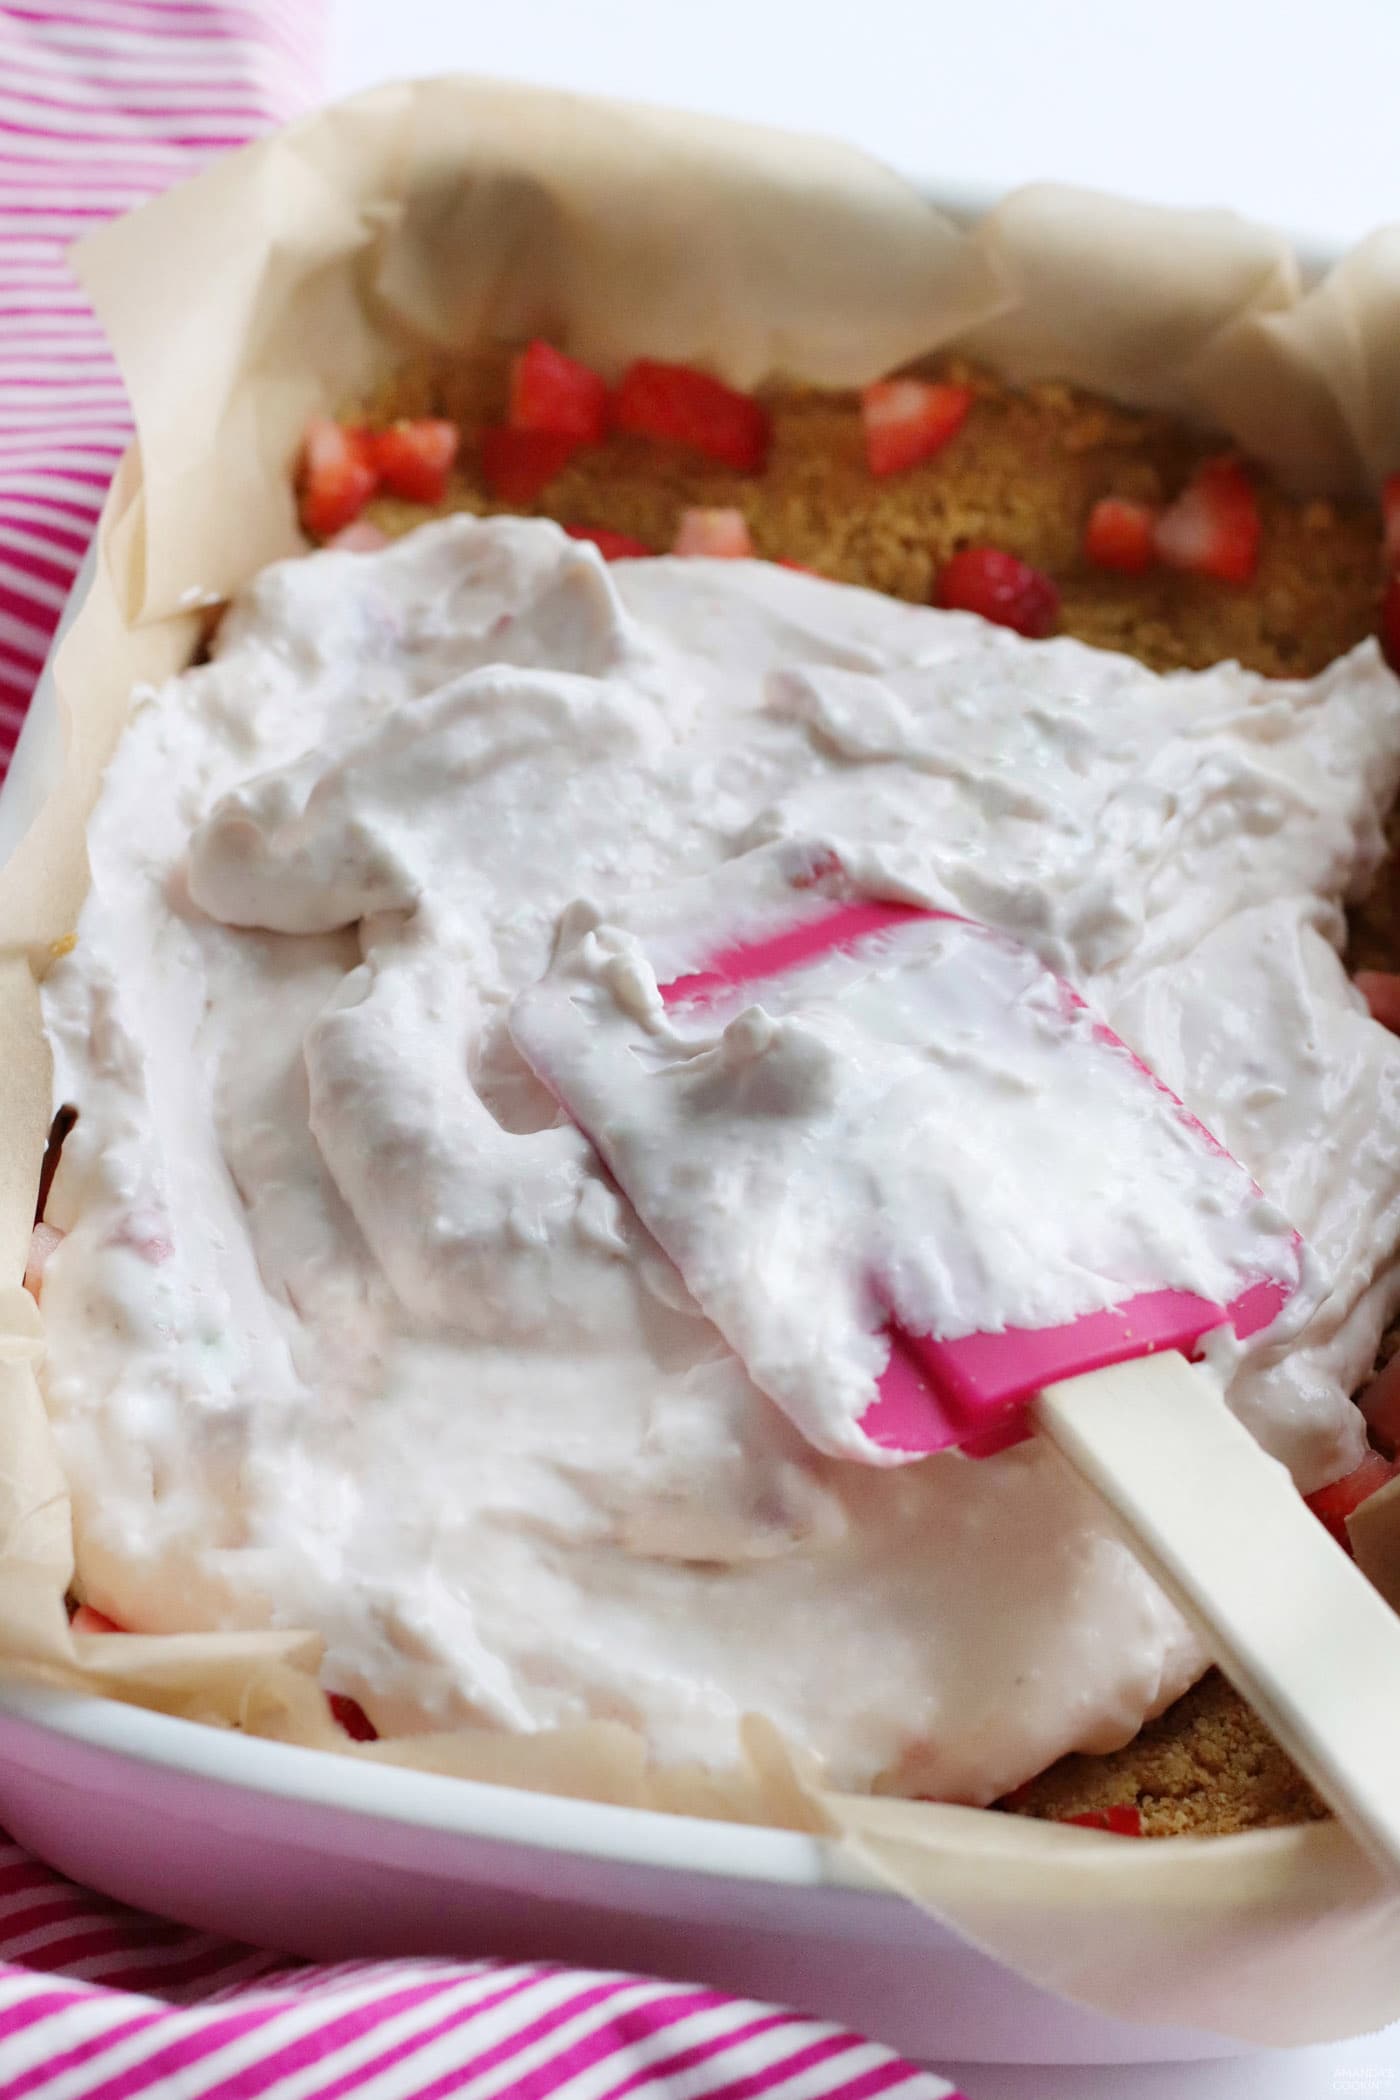
- Add the Cheesecake Filling: Using a rubber spatula, gently pour the prepared strawberry cheesecake filling directly over the layer of fresh strawberries. Carefully and evenly spread the filling across the entire surface of the pan, ensuring it’s smooth and consistent.

- Chill Again and Top with Whipped Cream: Place the dish back into the freezer for approximately 8 minutes. This quick chill helps firm up the cheesecake layer. Remove it and gently spread the cool whip (or homemade whipped topping) evenly over the cheesecake. Handle it carefully to avoid disturbing the layers underneath.
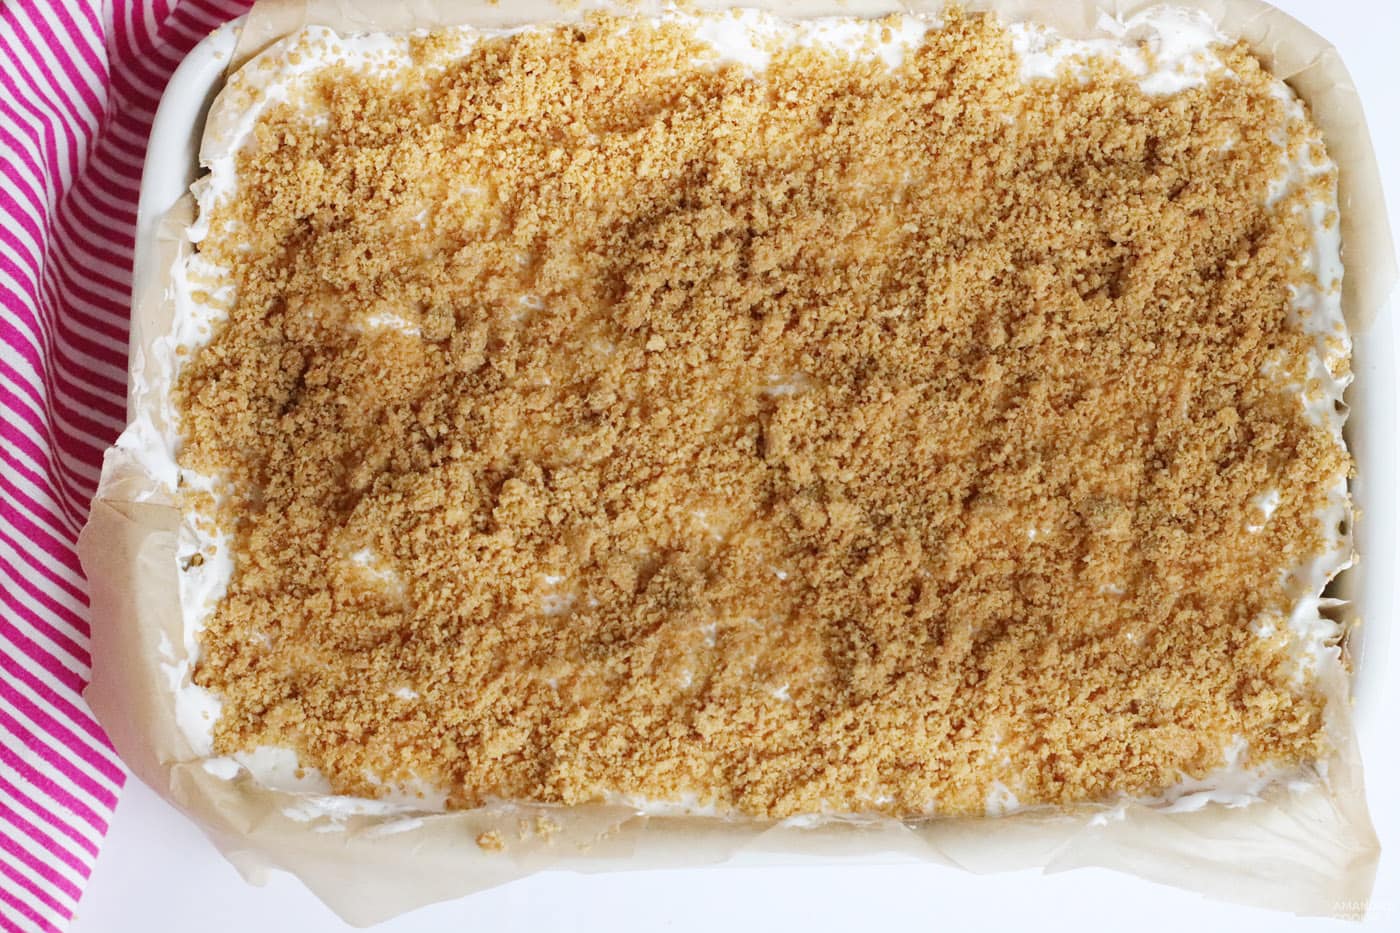
- Add Graham Cracker Topping: Now, evenly sprinkle the reserved graham cracker crumbs on top of the whipped cream layer. This adds a lovely texture contrast and a familiar flavor.

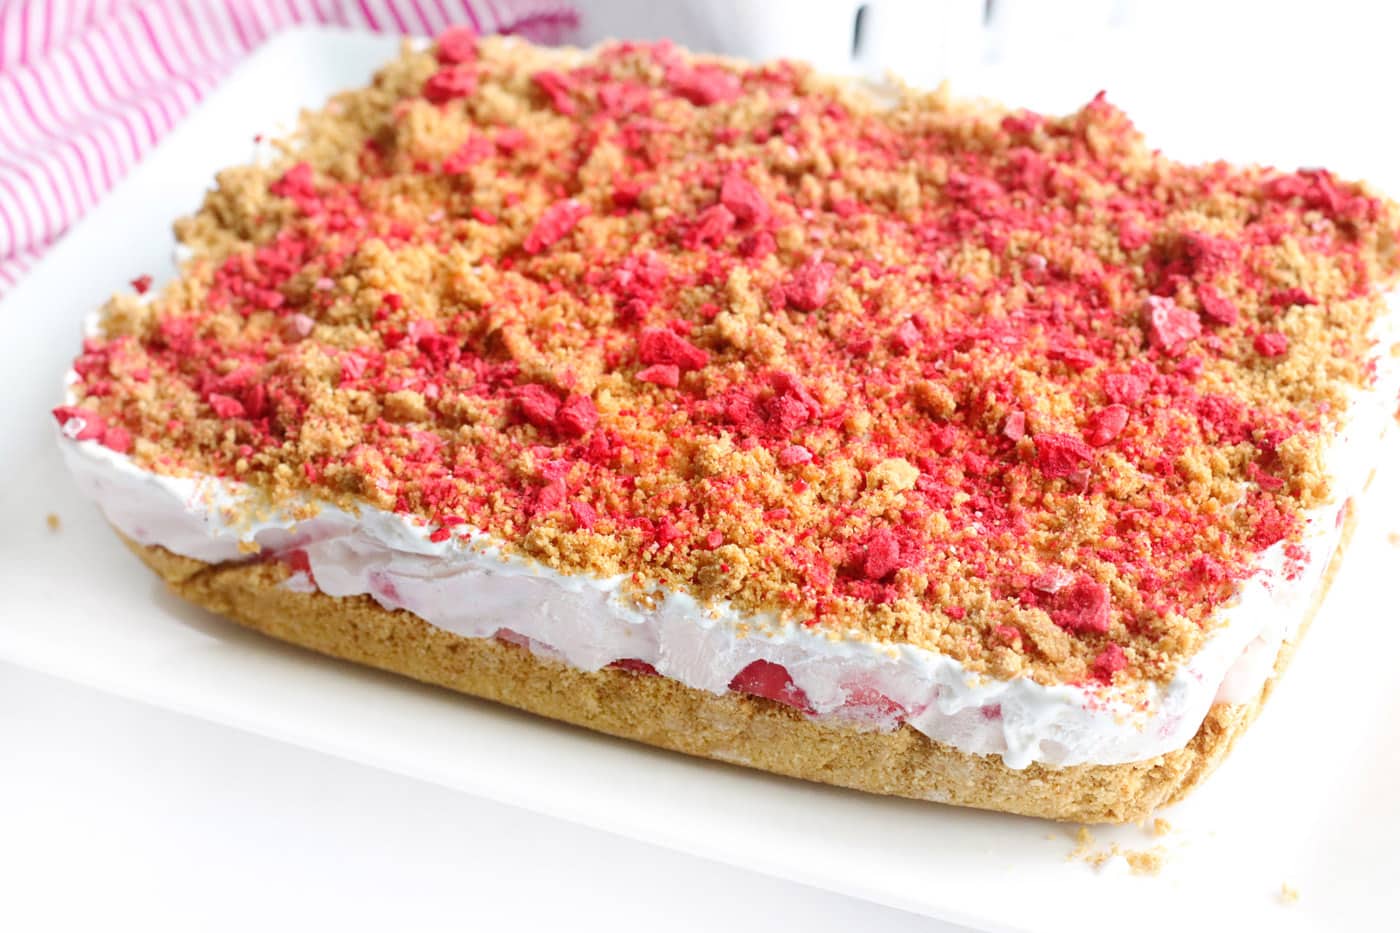
- Final Strawberry Touch: Crush the freeze-dried strawberries using your hands for a rustic look or a food processor for a finer powder. Sprinkle these crushed berries over the graham cracker crumbs for a vibrant color and intense strawberry flavor.

- Serve or Chill: Your no-bake strawberry cheesecake bars are now ready! Serve them immediately for a slightly softer texture, or place them back in the freezer or refrigerator to chill further until you’re ready to enjoy them. Chilling enhances their firmness and makes for cleaner slices.
Frequently Asked Questions & Expert Tips for Perfection
Storing your no-bake strawberry cheesecake bars properly is key to enjoying them for longer. Any leftover bars can be placed in an airtight container and kept in the refrigerator for up to 3-4 days. For extended enjoyment, they can also be stored in the freezer for 2-3 weeks. This makes them an excellent make-ahead dessert, perfect for parties or when you simply want to have a delightful treat on hand.
While fresh strawberries are highly recommended for their texture and vibrant flavor, you can use frozen strawberries for the filling if fresh are out of season. Ensure they are thawed and well-drained before mixing them into the cheesecake base to prevent excess moisture, which could make your filling watery. For the fresh sliced layer on the crust and the garnish, however, fresh berries are still preferred for their superior appearance and firmness.
For best results, these strawberry cheesecake bars need a minimum of 4 hours to chill in the refrigerator to properly set. If you’re in a hurry, 1-2 hours in the freezer can help them firm up quicker. We often recommend keeping them in the freezer until about 8-10 minutes before serving. This allows them to thaw just enough to be easily sliced, resulting in clean, beautiful bars that have a wonderful, slightly chilled, almost ice cream-like consistency.
To make these bars dairy-free, you can substitute dairy cream cheese with a plant-based cream cheese alternative and heavy whipping cream with a dairy-free whipping cream (like coconut cream, chilled well). For a gluten-free version, simply use gluten-free graham cracker crumbs or a suitable gluten-free cookie for the crust. Always check labels to ensure all ingredients meet your dietary requirements.
For perfectly clean slices, ensure your bars are well-chilled or even slightly frozen. Run a sharp knife under hot water, wipe it dry, and then make a clean cut. Wipe the knife clean and repeat for each slice. This technique prevents the creamy filling from sticking to the blade and creates beautiful, presentable bars.
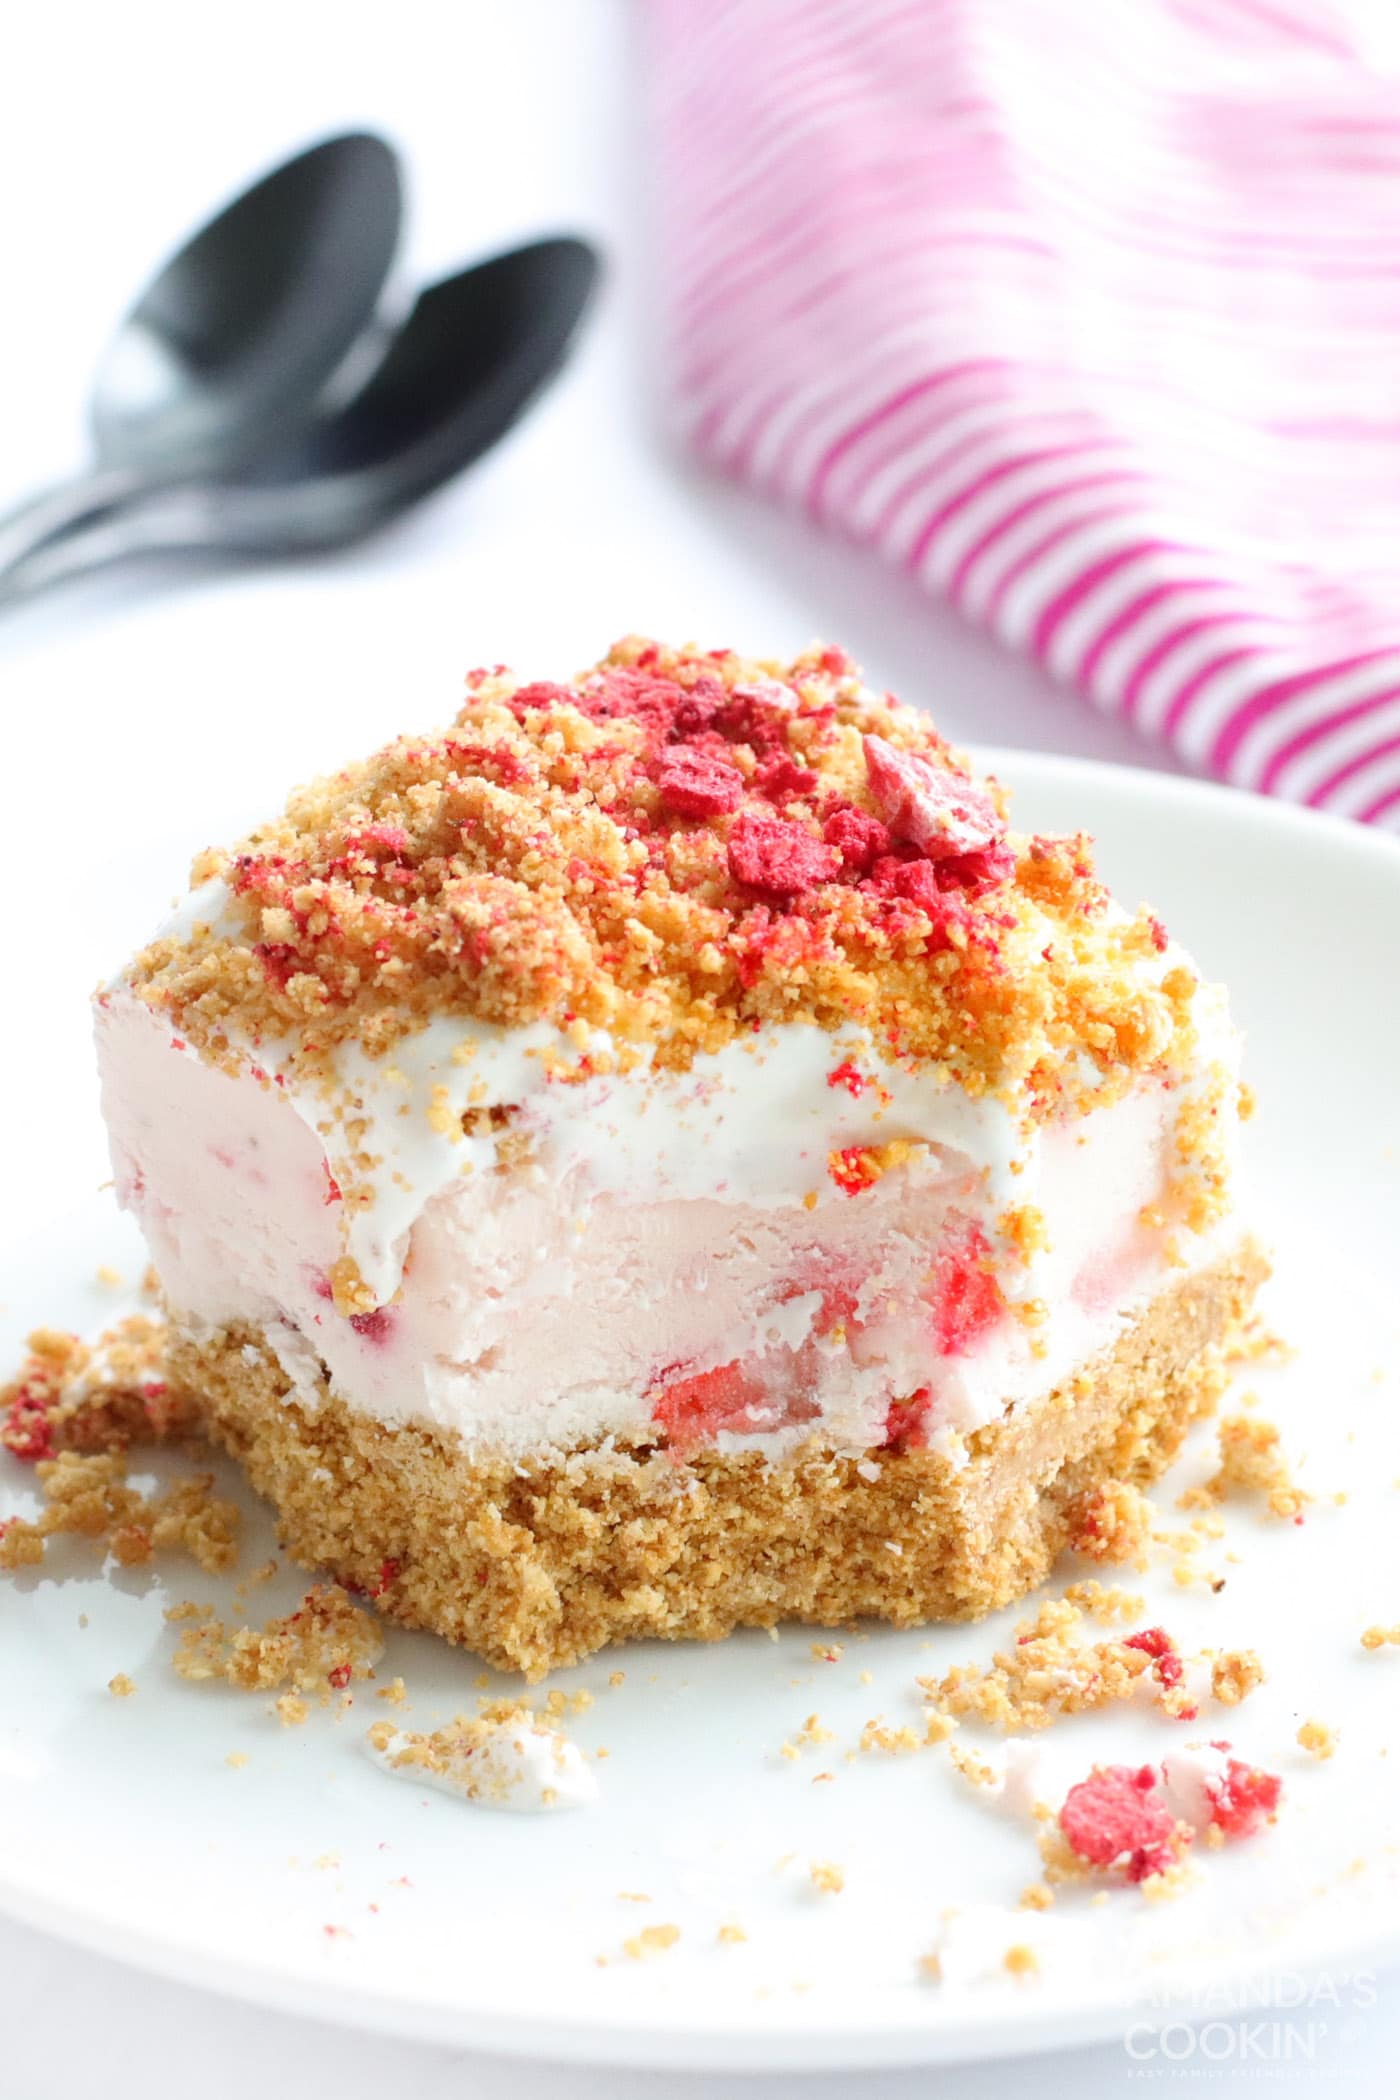
Elegant Serving Suggestions for Your Strawberry Cheesecake Bars
These versatile no-bake strawberry cheesecake bars are perfect for a multitude of occasions. We love to cut them into neat squares for elegant serving, making them easy for guests to grab and enjoy. While they are absolutely divine when chilled in the refrigerator, they also offer a unique and delightful experience when served slightly frozen, akin to a refreshing ice cream bar. This makes them particularly appealing on a hot summer day.
For an extra touch of freshness and vibrant color, consider topping the bars with a generous scattering of additional fresh strawberry slices or a few whole berries just before serving, especially if you opted out of the freeze-dried topping. A drizzle of strawberry sauce or a light dusting of powdered sugar can also elevate their presentation. These strawberry cheesecake bars are truly a treat that shines at any event – be it festive summer get-togethers, casual backyard parties, potlucks where you want to impress, or even as a special, romantic dessert for Valentine’s Day due to their beautiful red hue. Their simplicity in preparation combined with their impressive flavor makes them an ideal choice for any celebration.
Craving More No-Bake Delights? Explore These Recipes!
If you’ve fallen in love with the ease and deliciousness of our no-bake strawberry cheesecake bars, you’re in for a treat! The world of no-bake desserts is vast and wonderful, offering incredible flavor with minimal fuss. Here are some more fantastic no-bake recipes to add to your repertoire:
- Chocolate Eclair Cake
- Lemon Icebox Cake
- Strawberry Lasagna
- Pineapple Dream Dessert
- No Bake Peanut Butter Bars
- Lemon Cream Cheese Pudding Dessert
- No Bake Cheesecake Bars
- Cheesecake Stuffed Strawberries
I absolutely adore sharing my passion for baking and cooking, along with my kitchen adventures, with all of you! It can be a challenge to remember to check back every day for new delights, which is why I offer a convenient newsletter delivered right to your inbox every time a fresh recipe is posted. Simply subscribe here and start receiving your free daily recipes, ensuring you never miss out on another delicious creation!
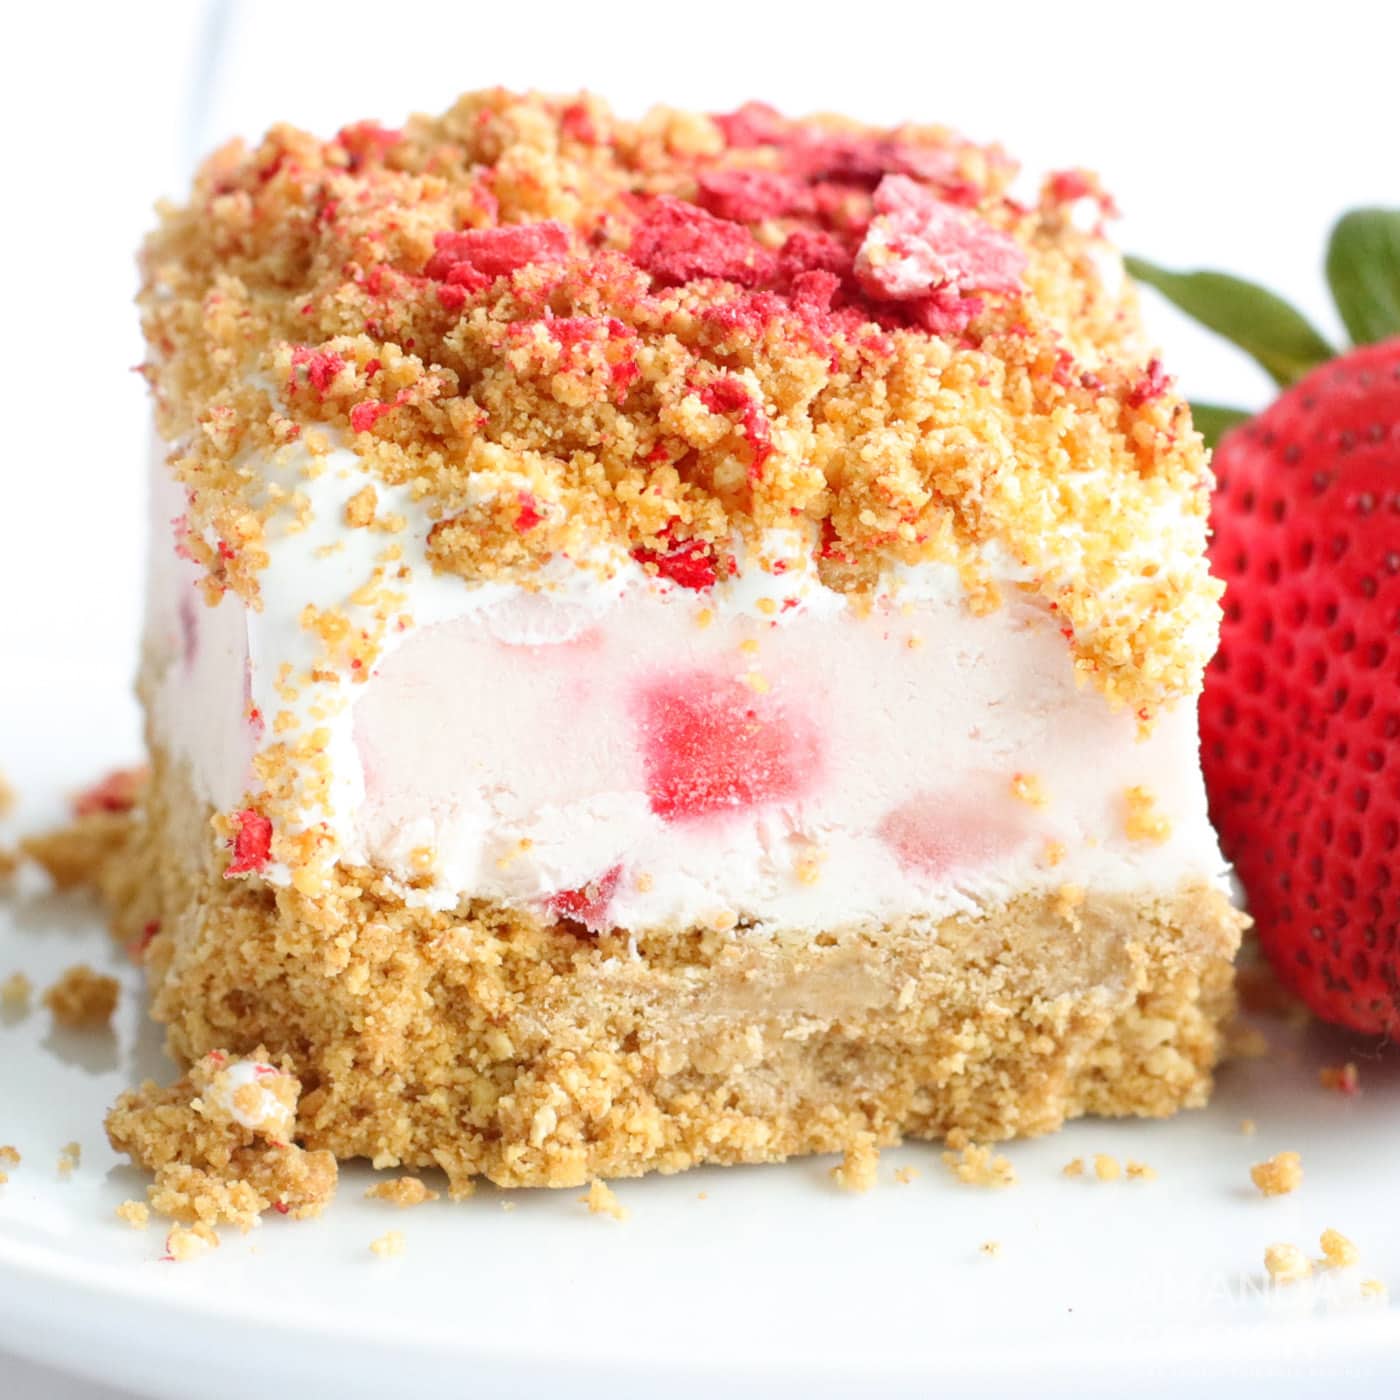
No Bake Strawberry Cheesecake Bars
IMPORTANT – There are often Frequently Asked Questions and detailed tips within the blog post that you may find incredibly helpful. Simply scroll back up to read them for additional guidance!
Print It
Pin It
Rate It
Save ItSaved!
Course: Dessert
Cuisine: American
Ingredients
- 2.5 cups graham cracker crumbs
- 8 Tbsp unsalted butter 1 stick, melted
- 3 Tbsp water lukewarm
- 8 oz cream cheese well softened, at room temperature
- ⅓ cup granulated sugar
- 1 ½ cup heavy whipping cream
- 1 ½ Tbsp lemon juice
- 1 ½ cups strawberries sliced, divided
- 8 oz Cool Whip or homemade whipped topping
- 1 cup freeze dried strawberries
Equipment You’ll Need
-
Food processor (optional, for making crumbs)
-
11×9 baking dish
-
Rubber spatula
-
Hand mixer (or stand mixer)
Before You Begin: Important Notes & Tips
- Using a 13×9 inch baking dish will result in thinner bars compared to an 11×9 inch dish. Adjust expectations accordingly for thickness.
- Ensure your cream cheese is thoroughly softened to room temperature. This is critical for achieving a smooth, lump-free cheesecake filling that blends beautifully. To soften, slice it into cubes and leave it on the counter for 30-45 minutes. Avoid using a microwave, which can negatively affect its texture.
- Whipped topping, especially Cool Whip, softens very quickly. For the best presentation and ease of slicing, we highly recommend keeping the bars in the freezer until approximately 8 minutes before you plan to serve them. They will thaw just enough to allow a knife and fork/spoon to cut through easily, providing a refreshing, firm dessert experience.
- For perfectly clean slices, dip your knife in hot water and wipe it clean between each cut. This technique helps prevent the layers from smudging and creates professional-looking bars.
Instructions
-
In a large bowl, combine graham cracker crumbs, melted butter, and lukewarm water. Mix well until the crumbs are evenly moistened.
-
Line an 11×9 inch baking dish with parchment paper, leaving an overhang on the sides.
-
Scoop about 1 cup of the graham cracker mixture out and set it aside in a bowl for topping the bars later.
-
Press the remaining graham cracker mixture firmly and evenly into the lined dish to form the crust.
-
Place the dish with the crust into the freezer while you prepare the filling.
-
To make the filling, use a hand mixer or stand mixer. In a clean bowl, beat the heavy whipping cream until medium peaks form, then set aside.
-
In a separate bowl, whip the softened cream cheese and granulated sugar until smooth. Gently fold in the whipped cream.
-
Add 1 cup of the sliced strawberries to the cream cheese mixture and mix well. Then stir in the lemon juice.
-
Remove the crust from the freezer. Arrange the remaining sliced strawberries evenly on top of the crust.
-
Pour the cheesecake filling over the strawberries and gently spread it out into an even layer using a rubber spatula.
-
Place the dish back in the freezer for about 8 minutes. Remove it, then carefully spread the Cool Whip (or homemade whipped topping) evenly over the cheesecake layer.
-
Evenly sprinkle the reserved graham cracker crumbs on top of the whipped topping.
-
Crush the freeze-dried strawberries by hand or in a food processor, and sprinkle them over the graham cracker crumbs for a final touch.
-
Serve your delightful No-Bake Strawberry Cheesecake Bars immediately, or place them in the freezer or refrigerator until ready to serve for a firmer set.
Additional Expert Tips & FAQs
- Any leftover bars can be kept in an airtight container in the refrigerator for 3-4 days or frozen for up to 2-3 weeks, making them a fantastic make-ahead dessert option.
- For easier removal and cleaner slices, use parchment paper with an overhang. When ready to serve, simply lift the parchment paper to remove the entire dessert from the pan.
- Always use a very sharp knife for slicing, warming it slightly under hot water and wiping it clean between cuts. This helps achieve those perfect, neat squares.
- Don’t skip the lemon juice! It’s a small amount but makes a big difference in brightening the flavors and cutting through the richness of the cheesecake.
Nutrition Information (Estimated Per Serving)
Tried this Recipe? Pin it for Later!Follow on Pinterest @AmandasCookin or tag #AmandasCookin!
The recipes on this blog are tested with a conventional gas oven and gas stovetop. It’s important to note that some ovens, especially as they age, can cook and bake inconsistently. Using an inexpensive oven thermometer can assure you that your oven is truly heating to the proper temperature. If you use a toaster oven or countertop oven, please keep in mind that they may not distribute heat the same as a conventional full-sized oven and you may need to adjust your cooking/baking times. In the case of recipes made with a pressure cooker, air fryer, slow cooker, or other appliance, a link to the appliances we use is listed within each respective recipe. For baking recipes where measurements are given by weight, please note that results may not be the same if cups are used instead, and we can’t guarantee success with that method. This recipe, being no-bake, is less affected by oven variations but still benefits from careful chilling.
