Crispy & Cheesy Chicken Chimichangas: Your Ultimate Deep-Fried Mexican Delight
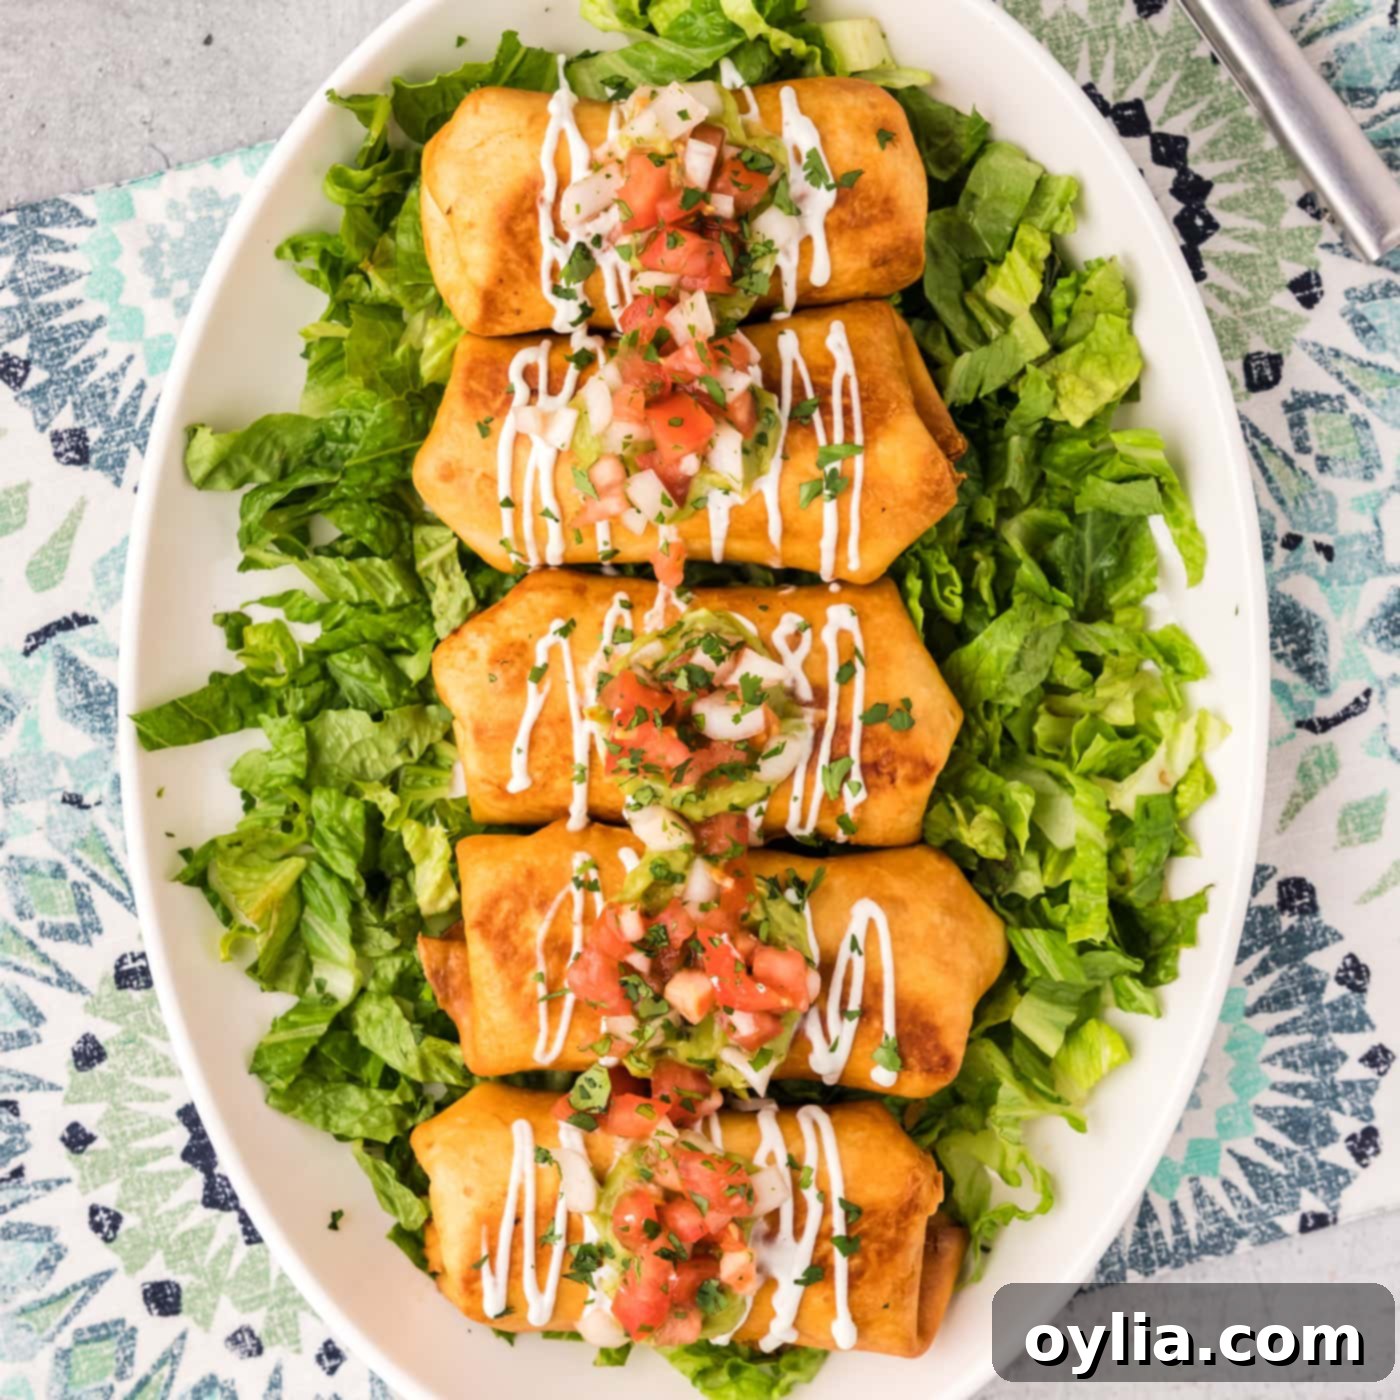
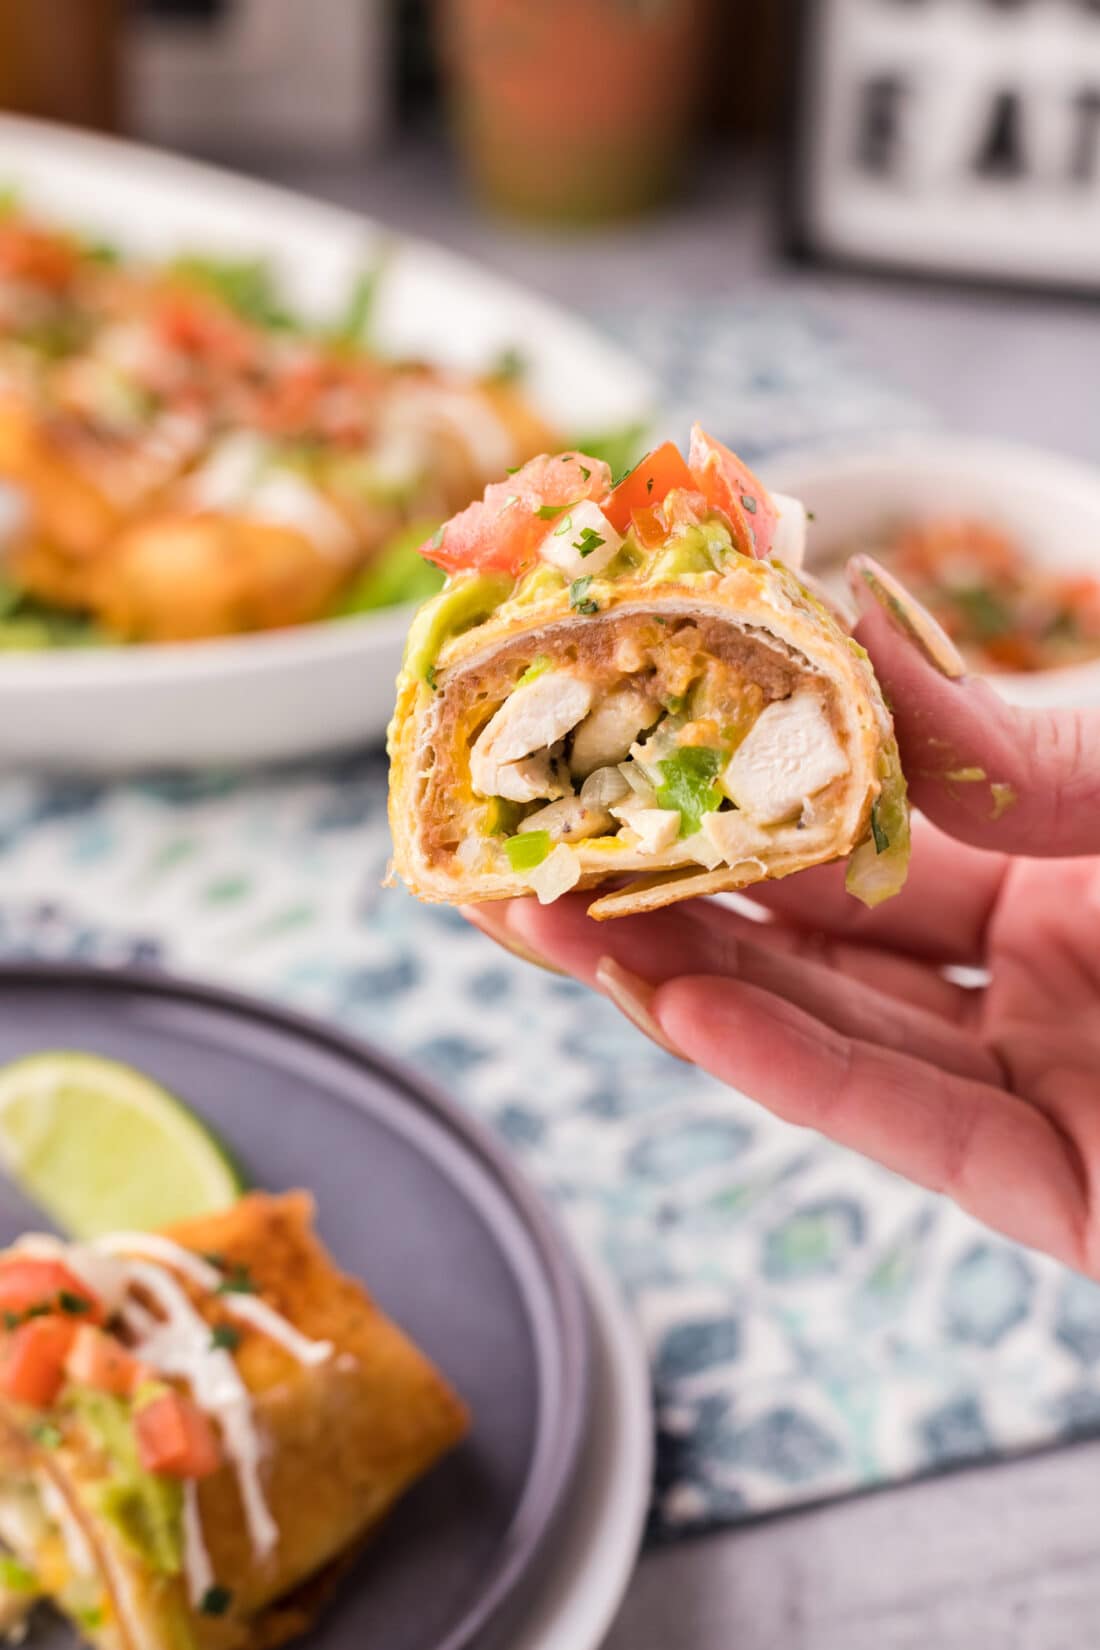
Prepare your taste buds for an extraordinary culinary journey! Today, we’re diving into the delightful world of **homemade chicken chimichangas**. Imagine succulent, tender chicken, perfectly seasoned, nestled with vibrant bell peppers, sweet onions, creamy refried beans, and a generous amount of melting cheese – all lovingly wrapped in a soft flour tortilla. This savory parcel is then skillfully deep-fried in a skillet until it achieves that irresistible, golden-brown crispness that makes chimichangas so uniquely satisfying.
Why This Chicken Chimichanga Recipe Is a Must-Try
You might be familiar with burritos, but chimichangas take that concept to a whole new level of deliciousness. While burritos are typically grilled or steamed, chimichangas are lovingly deep-fried until their outer shell transforms into a wonderfully crispy, crunchy delight. This essential step is what sets them apart, offering a textural contrast that’s simply unmatched. The fillings, however, can remain as familiar and comforting as you like, usually comprising a hearty mix of meat, beans, cheese, and fresh vegetables.
Our recipe focuses on a wonderfully simple yet incredibly flavorful combination: seasoned chicken, creamy refried beans, a blend of melty cheeses, and perfectly sautéed bell peppers and onions. What makes this recipe truly special is its incredible versatility. Don’t hesitate to personalize your chimichangas with your favorite additions! Imagine adding a touch of authentic Spanish rice for a fuller meal, or a kick of heat with diced green chiles or jalapeños. You could even switch up the protein – beef barbacoa, carne asada, or seasoned pork would all be equally delicious. This adaptability means you can tailor this chicken chimichanga recipe to suit any palate, making it a fantastic choice for family dinners or entertaining guests. The ease of preparation, combined with the ability to customize, ensures this dish will quickly become a cherished staple in your home cooking repertoire.
Essential Ingredients for Delicious Chicken Chimichangas
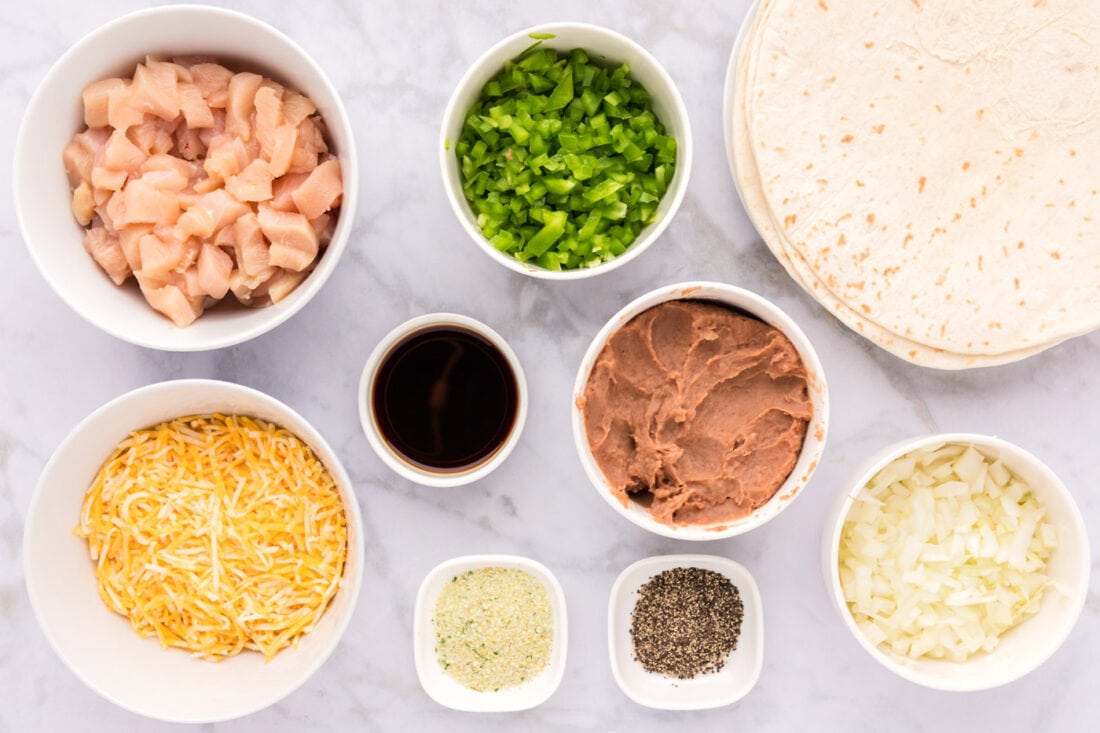
To create these mouth-watering chimichangas, you’ll need a selection of fresh and flavorful ingredients. While we’ll outline the key components here, you can find all specific measurements, quantities, and detailed instructions in the printable recipe card located at the very end of this post. Gather your ingredients and get ready to assemble some truly spectacular deep-fried chicken chimichangas!
Ingredient Deep Dive & Smart Substitution Suggestions
Understanding each ingredient and knowing your options can make all the difference in crafting your perfect chimichangas:
- MEAT – For this recipe, we chose to cube our boneless, skinless chicken breasts, as it provides a satisfying bite. However, if you prefer a more traditional texture, feel free to shred the cooked chicken. This recipe is incredibly adaptable, allowing for easy substitutions of the protein. Consider tender beef barbacoa, flavorful carne asada, or savory seasoned pork for equally delicious results. You can even use pre-cooked rotisserie chicken for a quick shortcut, simply shredding it and seasoning to taste.
- TORTILLAS – The foundation of a great chimichanga is the tortilla. You’ll need 7-inch flour tortillas for this recipe, which are the ideal size for a manageable and well-filled chimichanga. A crucial tip: avoid overstuffing your tortillas, as this will make them incredibly difficult to roll and seal properly, potentially leading to messy frying. For the best handling experience, ensure your tortillas are at room temperature. This will significantly increase their flexibility, making them much easier to roll and fold without cracking or tearing. If they’re a bit stiff, a quick warm-up in the microwave (10-15 seconds) or on a dry skillet can also help.
- ADDITIONS – Our core vegetable fillings include fresh green bell pepper and onion, which add a wonderful aromatic base and texture. For the creamy component, we use refried beans, and for the melty goodness, shredded cheddar or Colby Jack cheese. These are classic choices that deliver rich flavor. For variations, you can easily substitute the refried beans with black beans or pinto beans, either whole or mashed, depending on your preference. While you can incorporate Spanish rice directly into the chimichanga, we often find it’s best served on the side to prevent the chimichanga from becoming too bulky or potentially soggy during frying. If you’re craving some heat, finely diced jalapeños or green chiles are excellent additions that will introduce a pleasant spicy kick. Remember, this recipe is your canvas – get creative with your favorite Mexican-inspired ingredients!
How to Make Crispy Chicken Chimichangas: A Step-by-Step Guide
These step-by-step photos and detailed instructions are provided to help you visualize the process of making this incredibly delicious recipe. For a complete printable version, including all precise measurements and ingredient quantities, please Jump to Recipe at the bottom of this page.
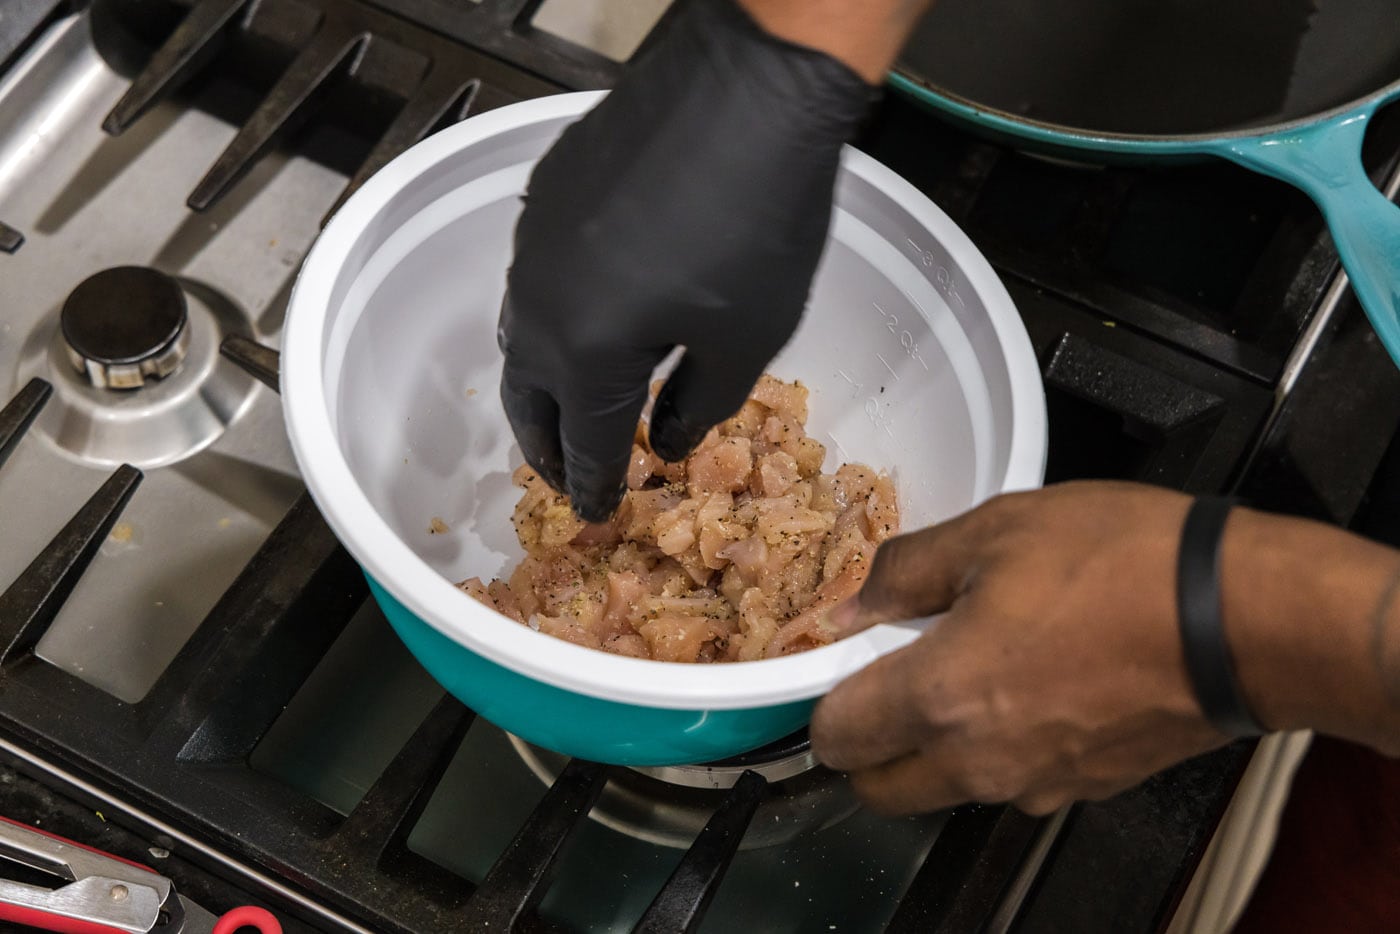
- Season the Chicken: Begin by placing your boneless, skinless chicken breast chunks into a bowl. Season them generously with half of the garlic salt and half of the black pepper, ensuring each piece is evenly coated. This initial seasoning is key to building flavor. Set the seasoned chicken aside while you prepare the other components.

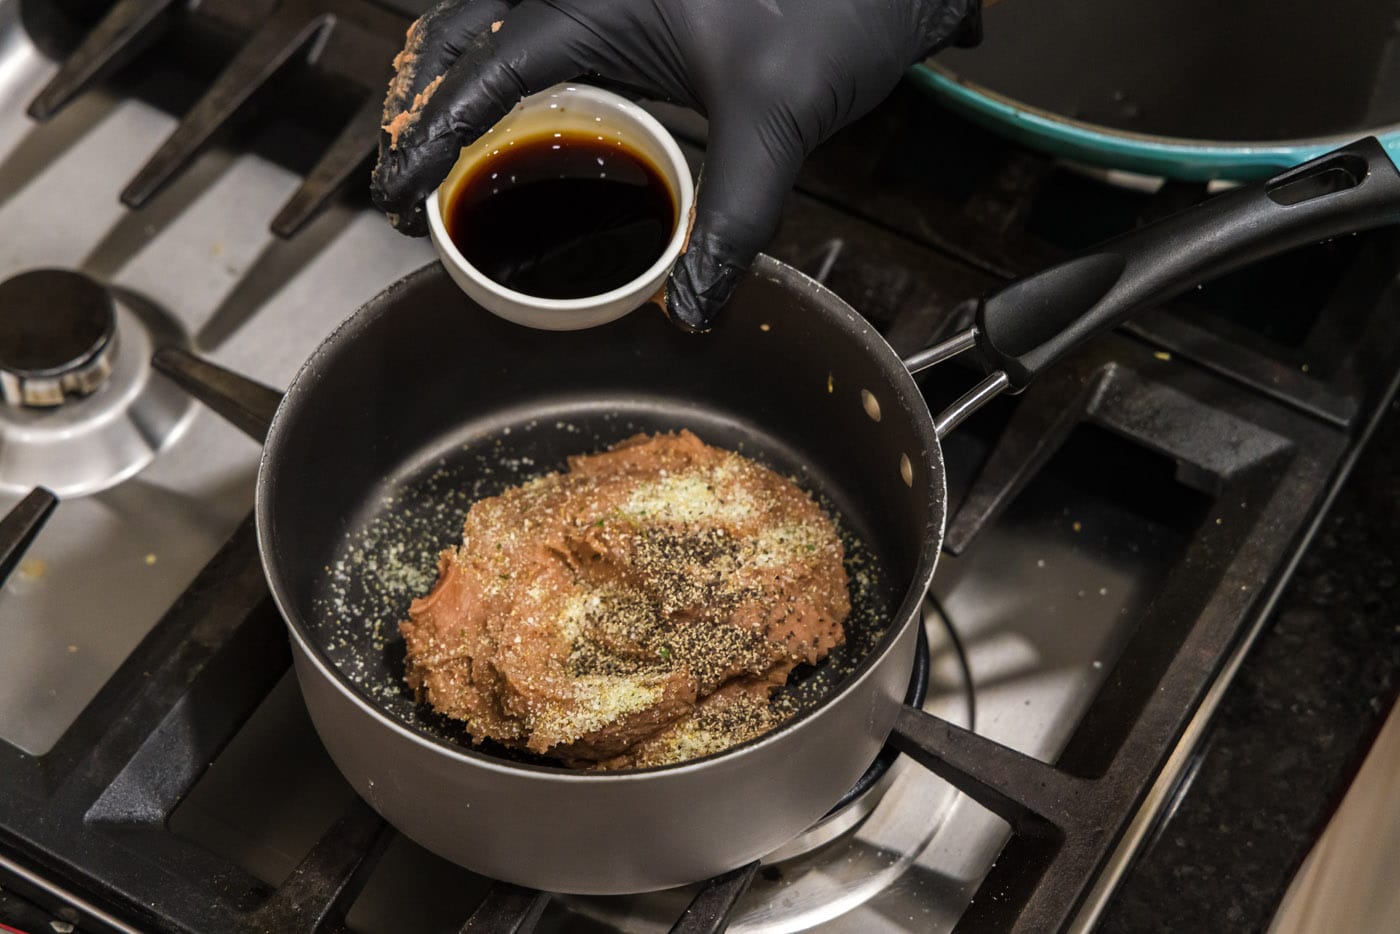
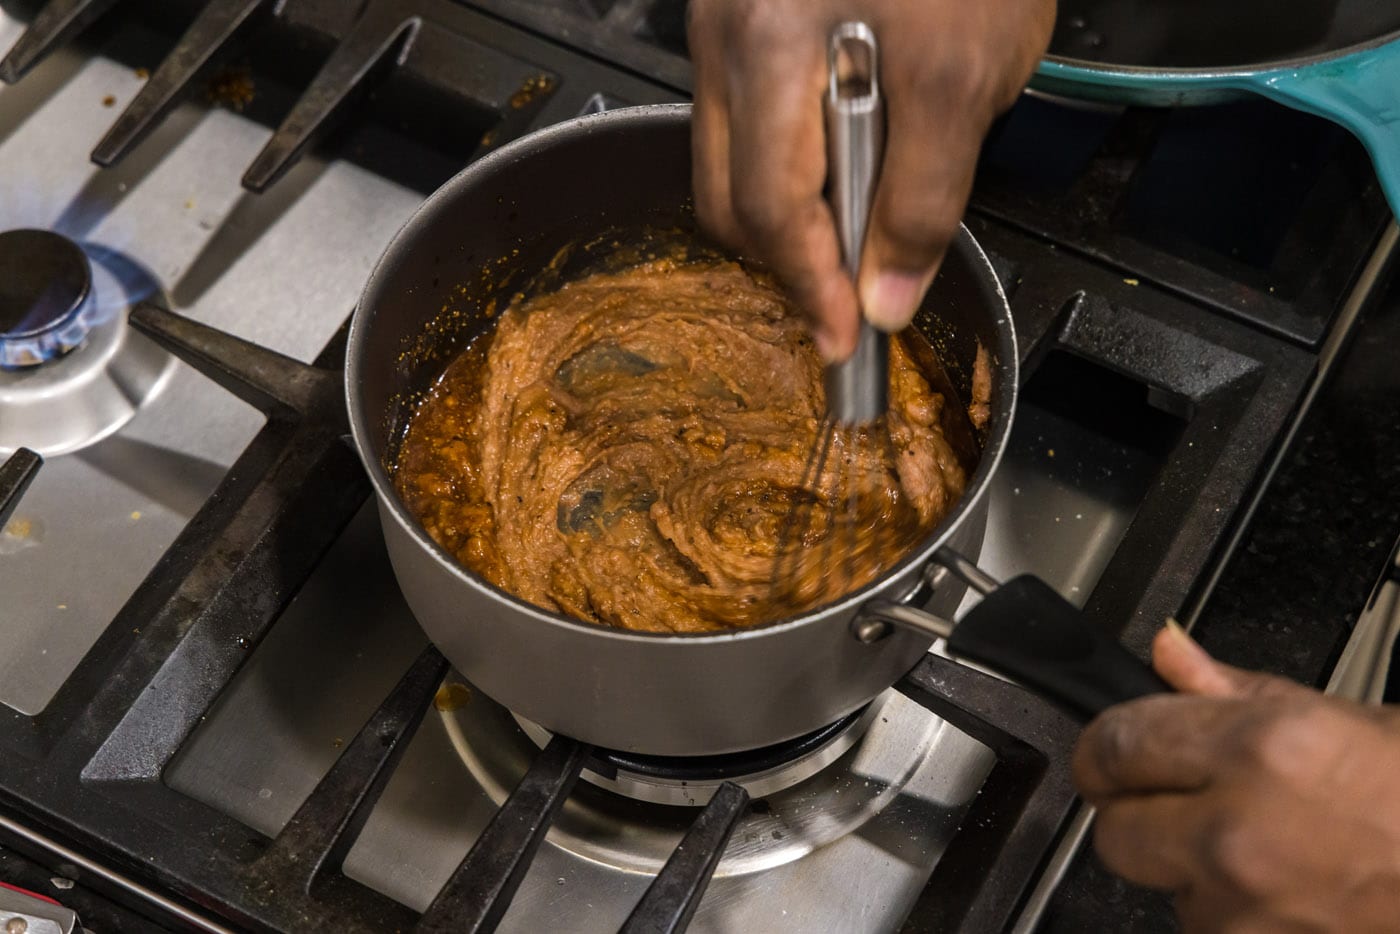
- Prepare the Refried Beans: Transfer the refried beans to a medium saucepan. Season them with the remaining garlic salt and black pepper, then add the soy sauce. Stir or whisk these ingredients together thoroughly. Heat the mixture over medium-high heat for just a few minutes, stirring constantly, to warm the beans and loosen their consistency. This makes them much easier to spread evenly in the tortillas. Once warmed, set the saucepan aside.


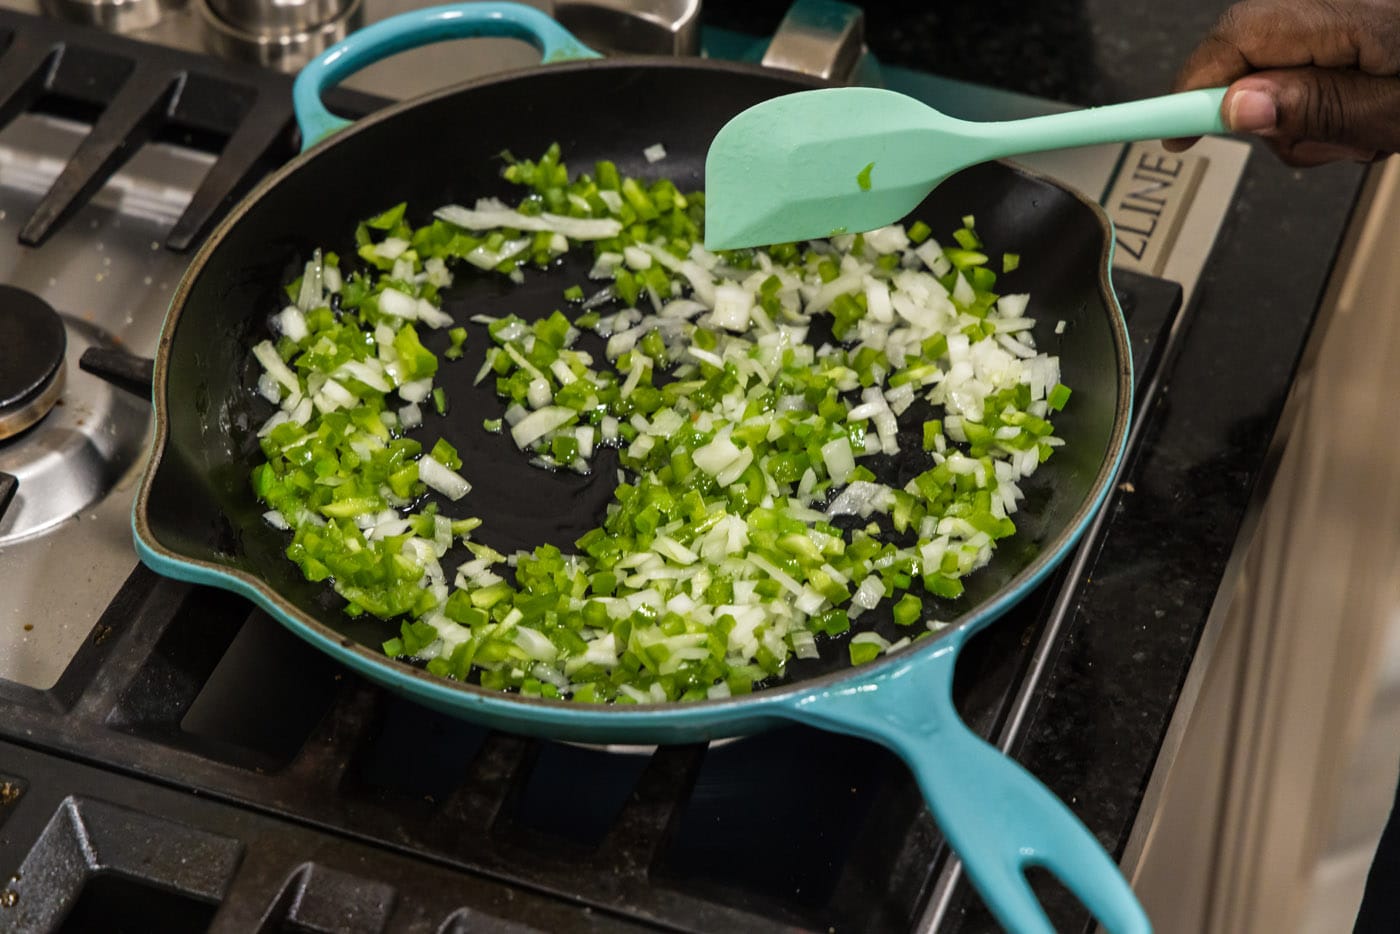
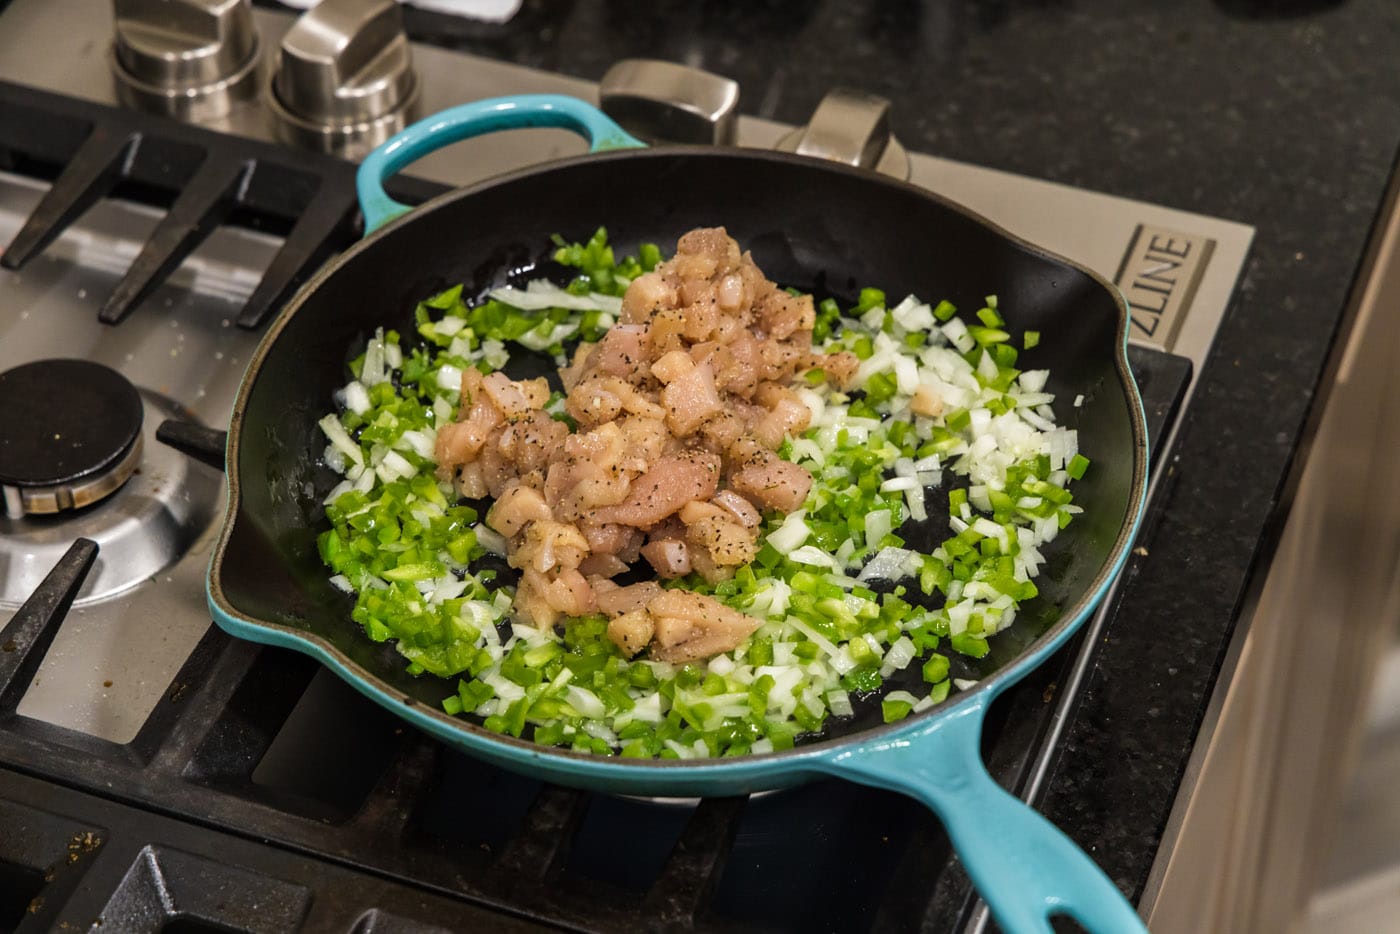
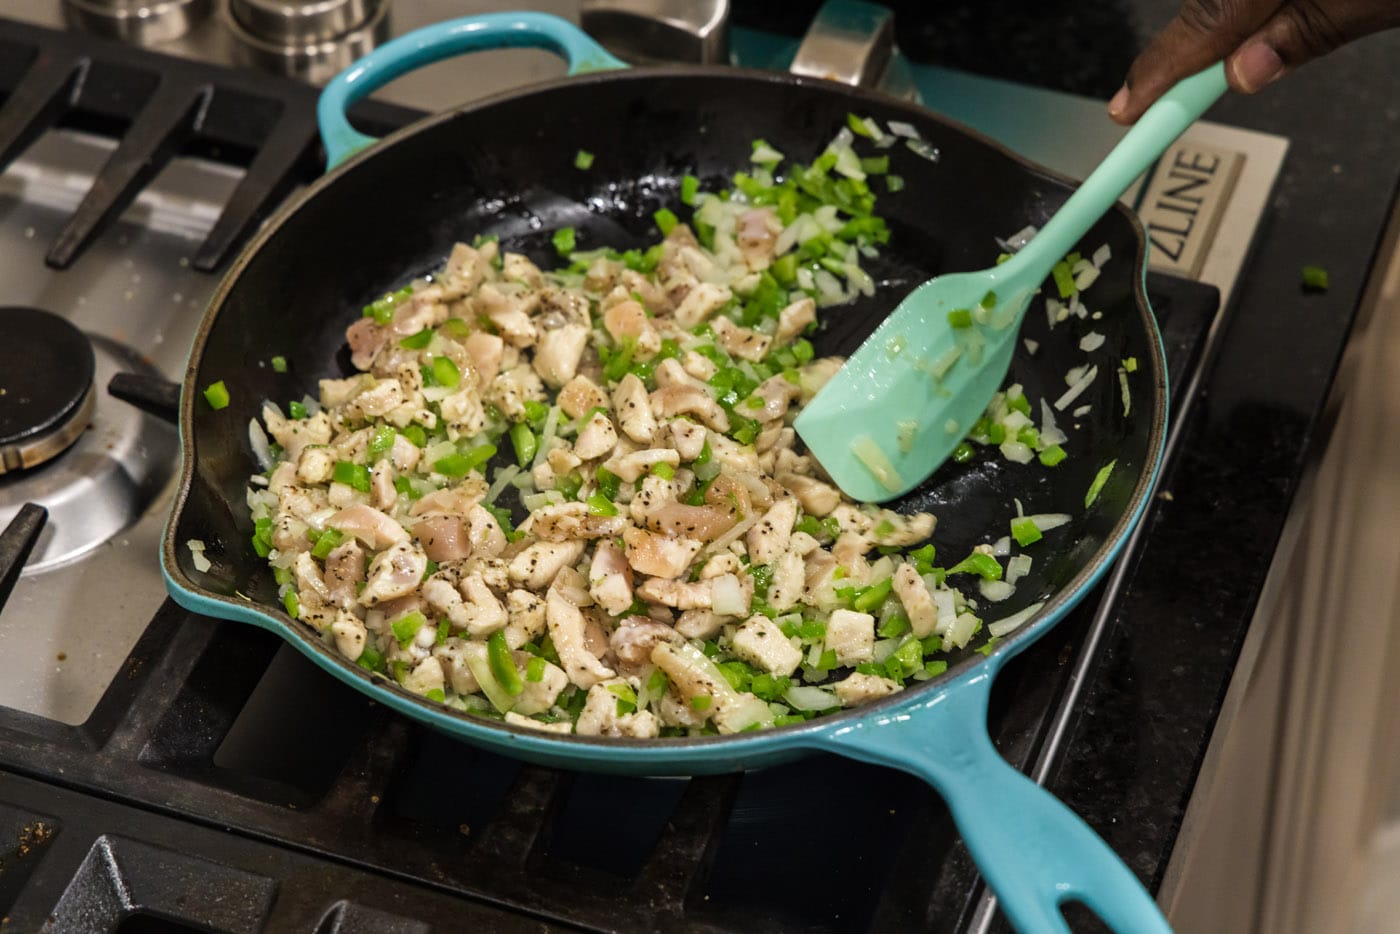
- Sauté Chicken and Vegetables: Heat the olive oil in a large skillet over medium-high heat until it shimmers. Add the chopped onions and green pepper, stirring them for a couple of minutes until they start to soften. Then, add the seasoned chicken chunks to the skillet. Sauté the mixture, stirring occasionally, until the onions become translucent and the chicken is fully cooked through and no longer pink in the center. Remove the skillet from the heat.


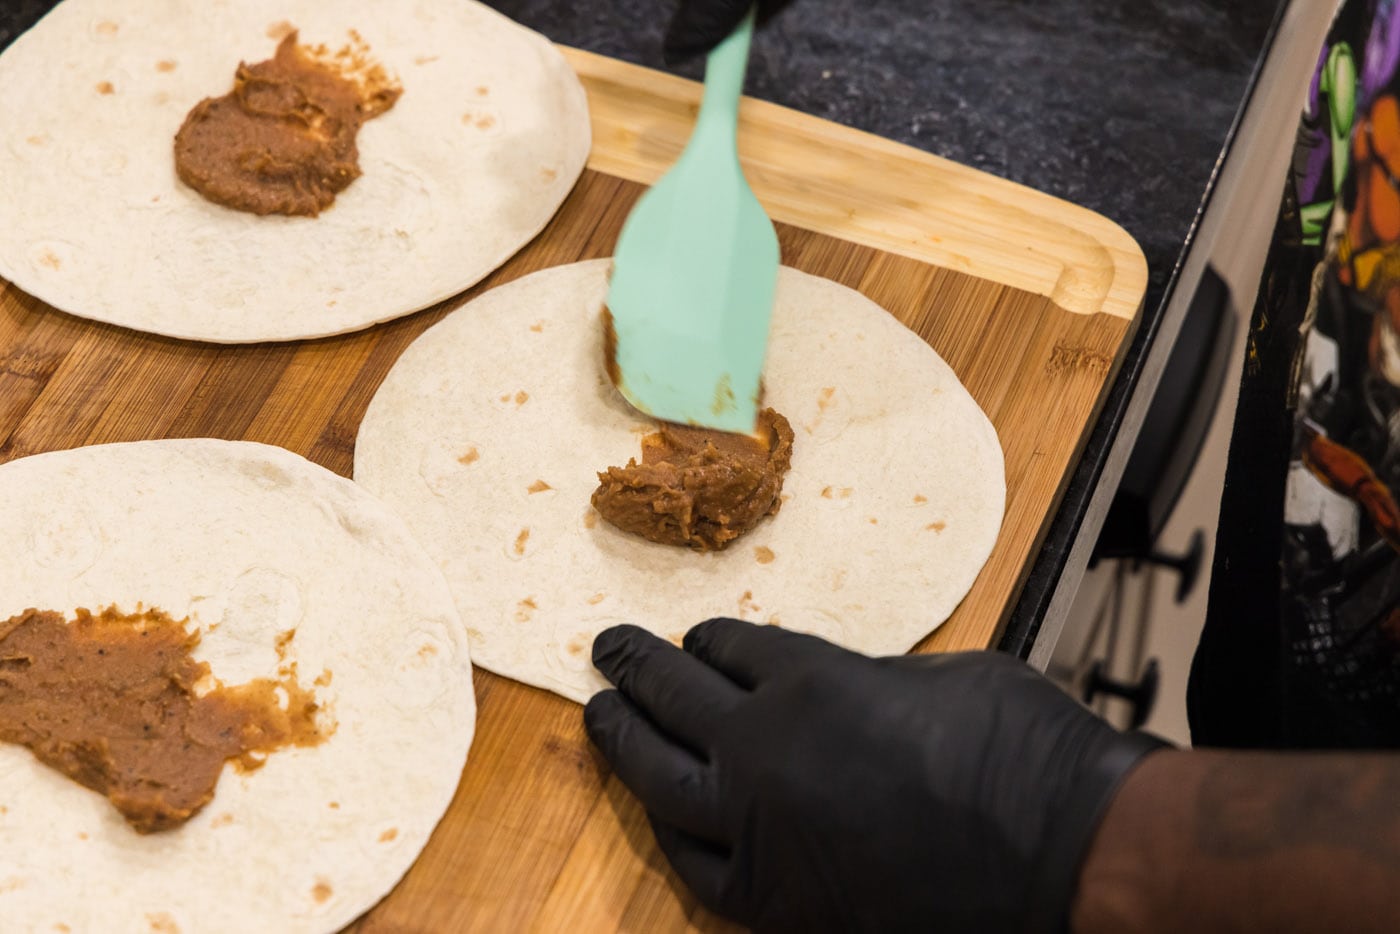
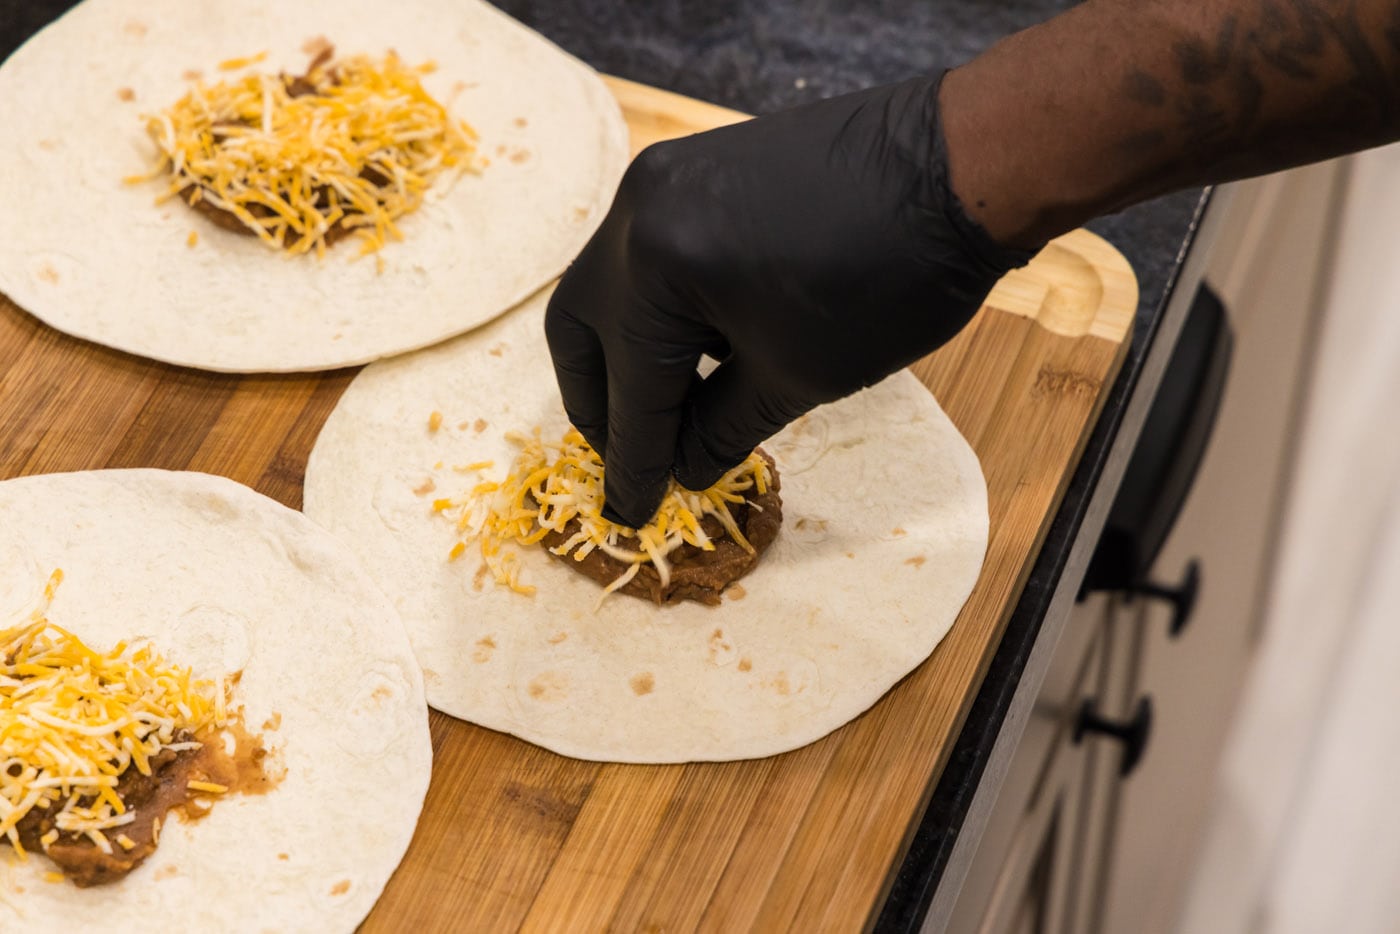
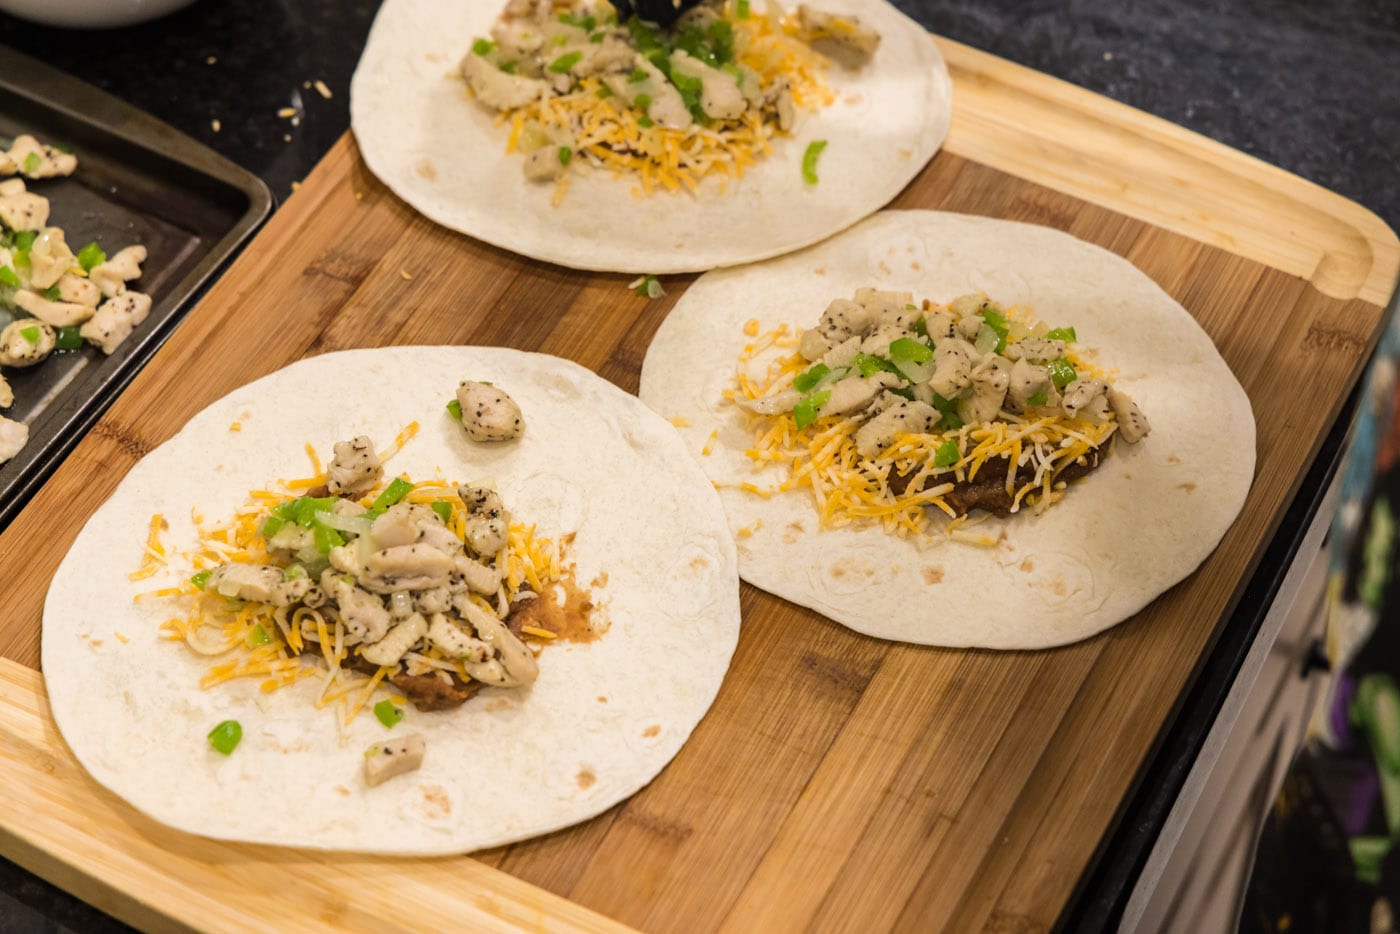
- Assemble the Chimichangas: Lay a flour tortilla flat. Spread a generous layer of the warmed refried bean mixture onto the center of the tortilla, leaving a border around the edges. Next, sprinkle a good amount of shredded cheese over the beans, followed by a handful of the chicken and vegetable mixture. Remember the golden rule: do not overstuff the tortillas! This is critical for successful rolling and to prevent the filling from escaping during frying.


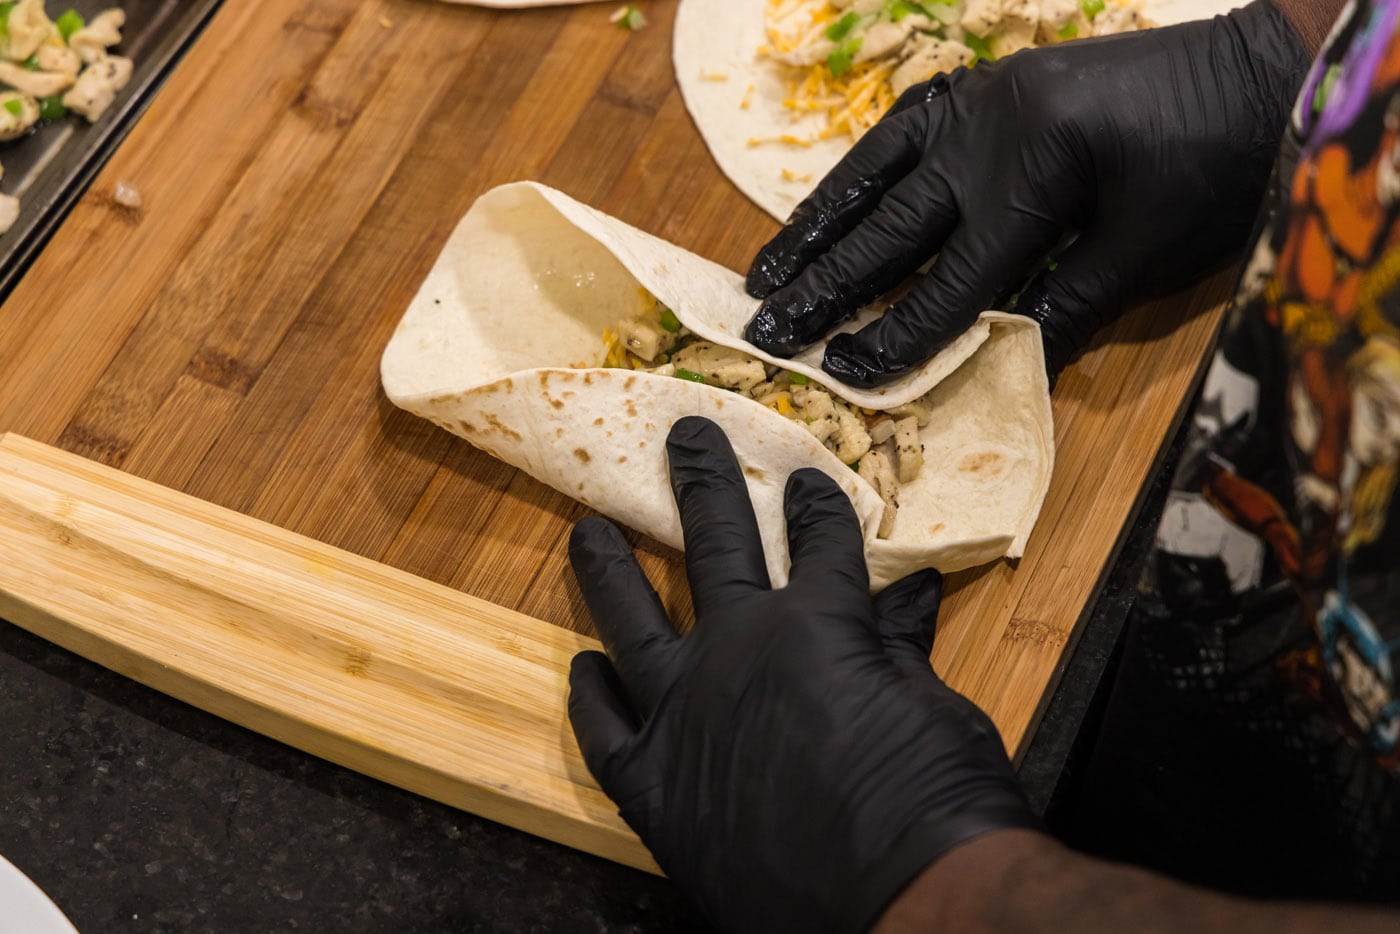
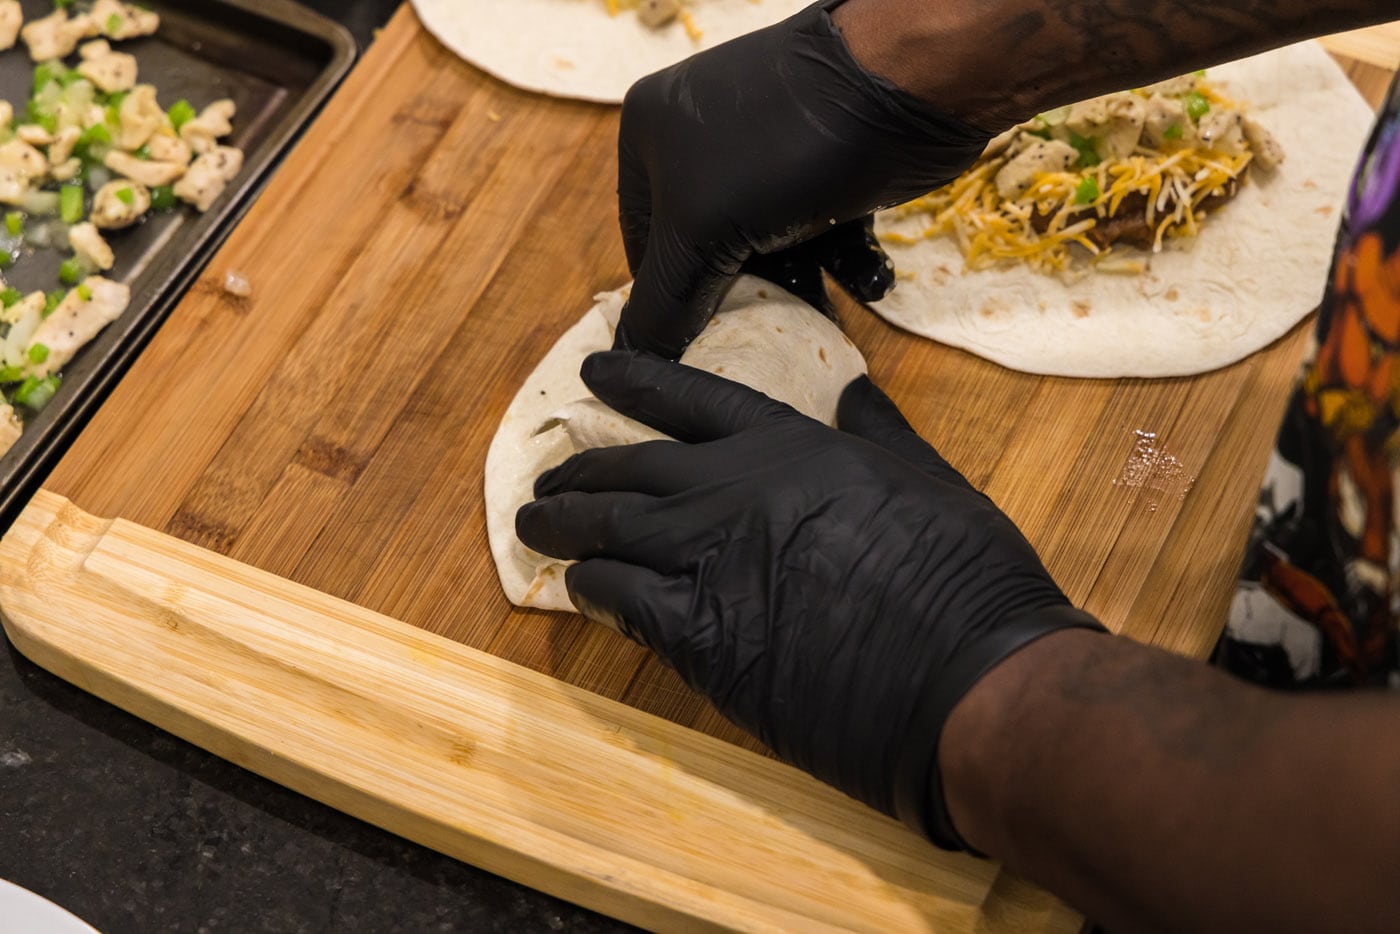
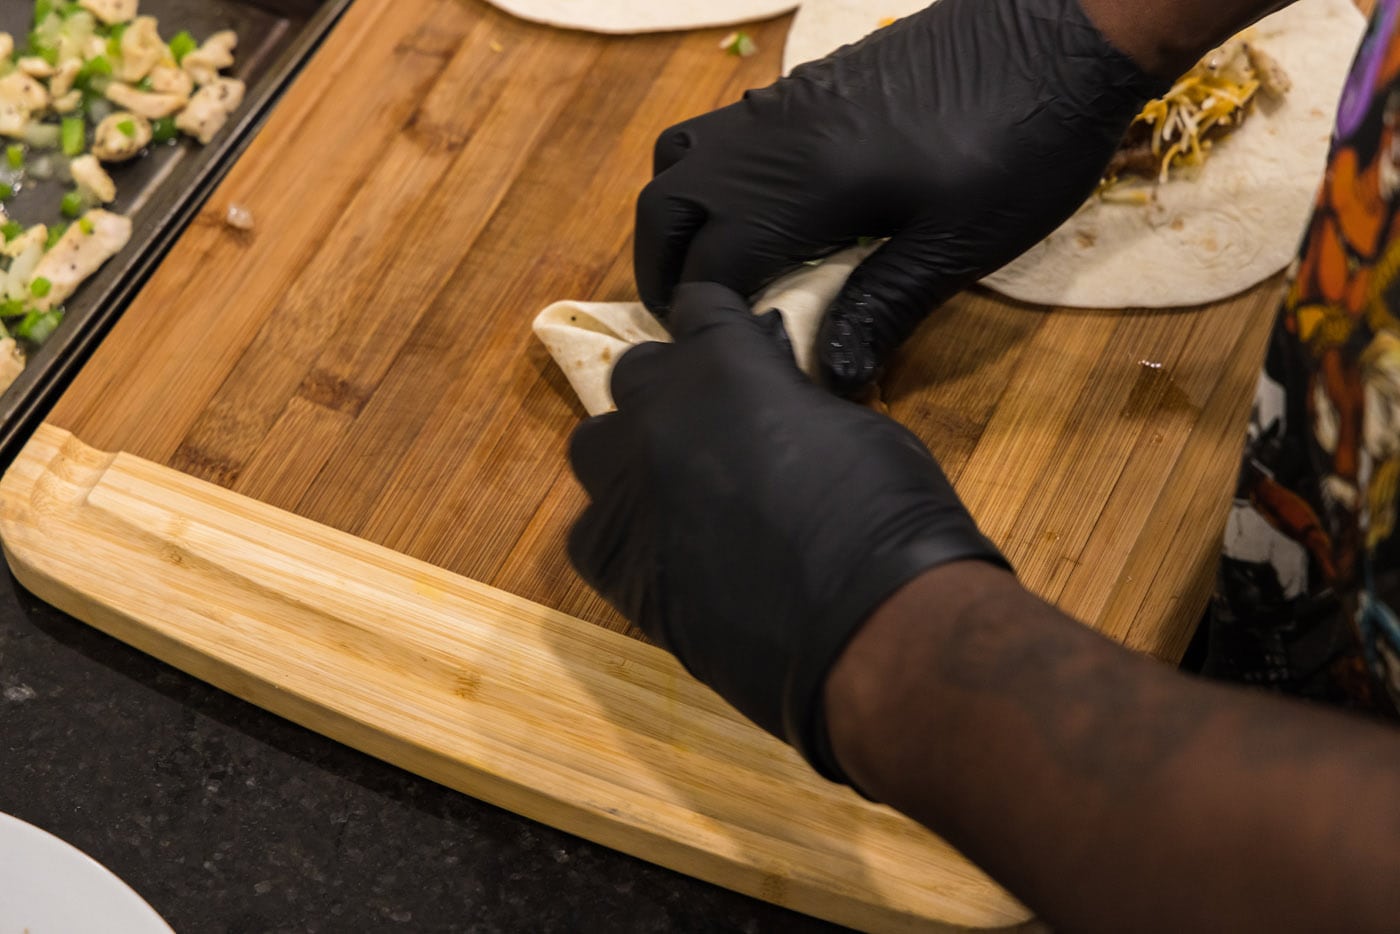
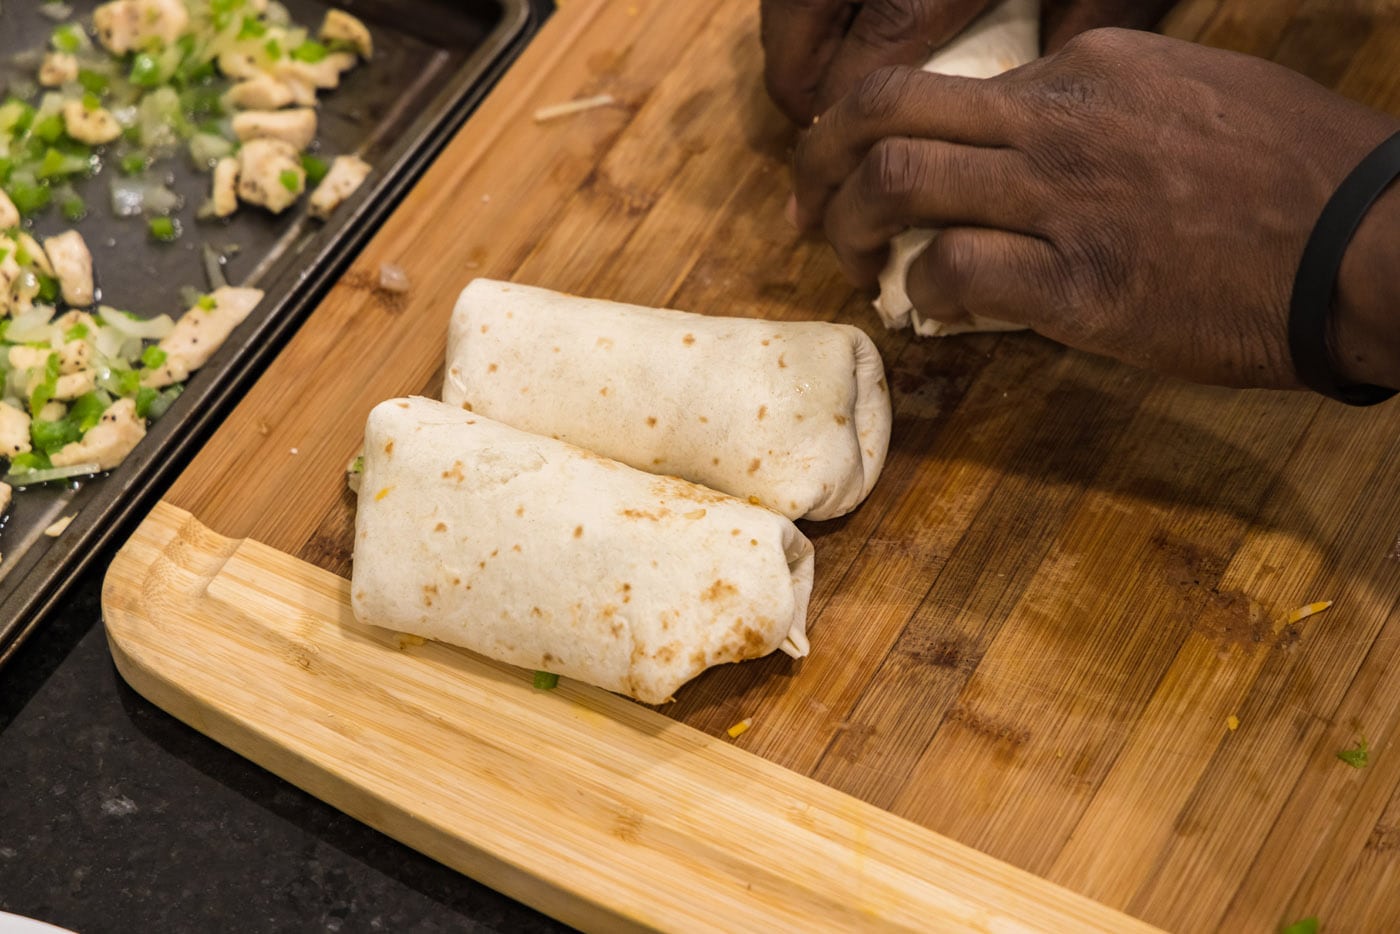
- Roll the Chimichangas: Achieving a tight roll is key to a successful chimichanga. First, lift and fold the sides of the tortilla in towards the center, covering part of the filling. While holding these side folds firmly in place, fold the bottom edge of the tortilla up and tightly over the folded sides and the filling. Continue to roll the tortilla upwards towards the top, ensuring it remains as tight as possible. The goal is to create a compact, sealed package that will hold its shape during frying. Place the finished chimichanga seam-side down on a plate to prevent it from unraveling.


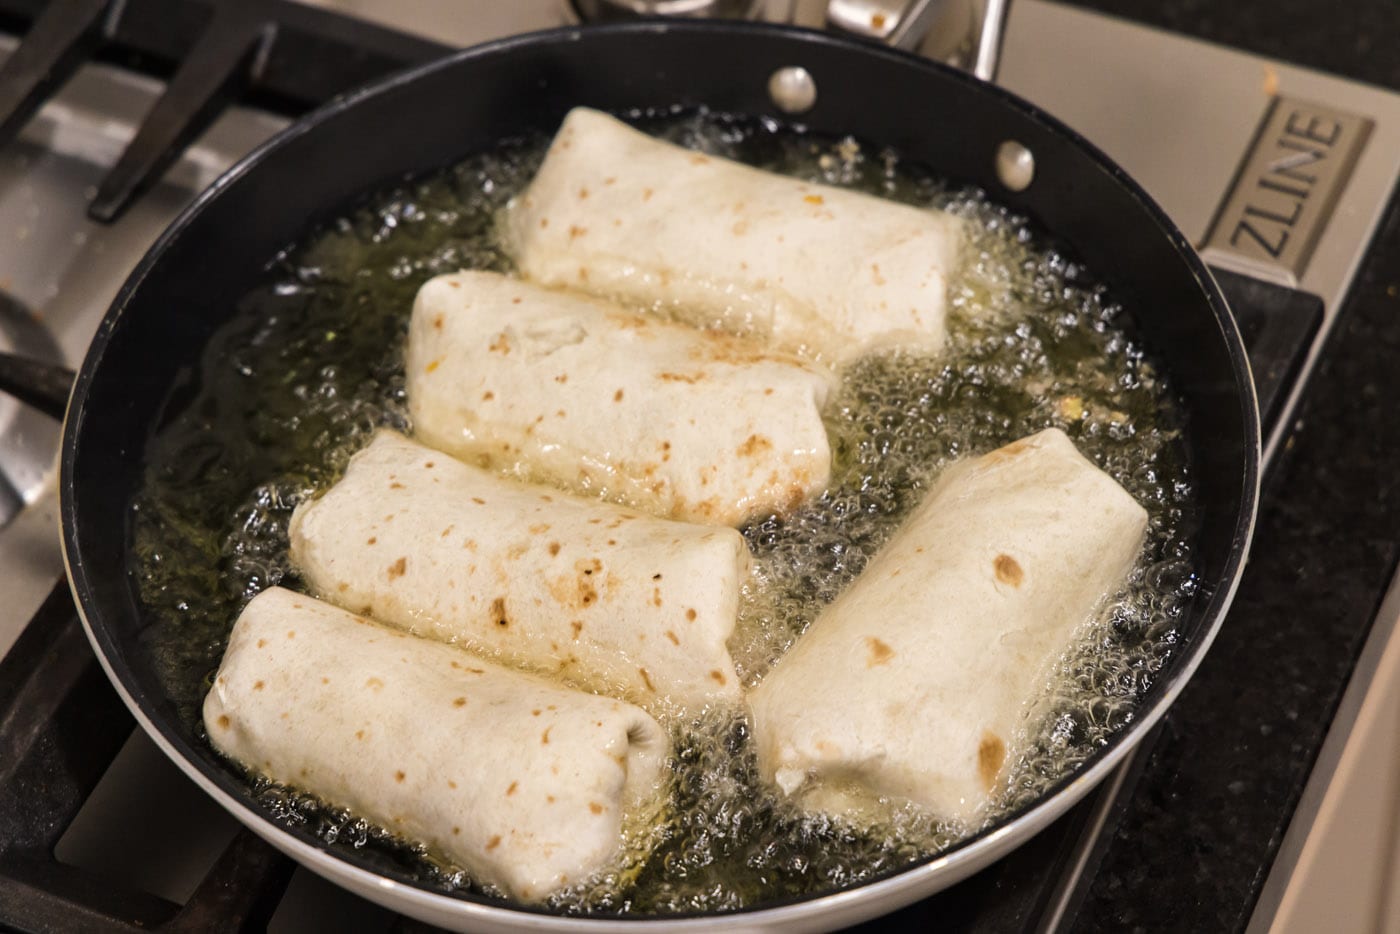
- Heat the Frying Oil: In a large, heavy-bottomed skillet (cast iron works wonderfully), pour enough vegetable oil to reach a depth of about 1 inch up the sides of the pan. Heat the oil over medium-high heat. The ideal temperature for frying chimichangas is around 350-375°F (175-190°C). If you don’t have a thermometer, you can test the oil by dropping a tiny piece of tortilla into it; it should sizzle immediately but not burn. Ensure the oil is hot but not smoking, as smoking oil is too hot and can burn your chimichangas and create unpleasant flavors.
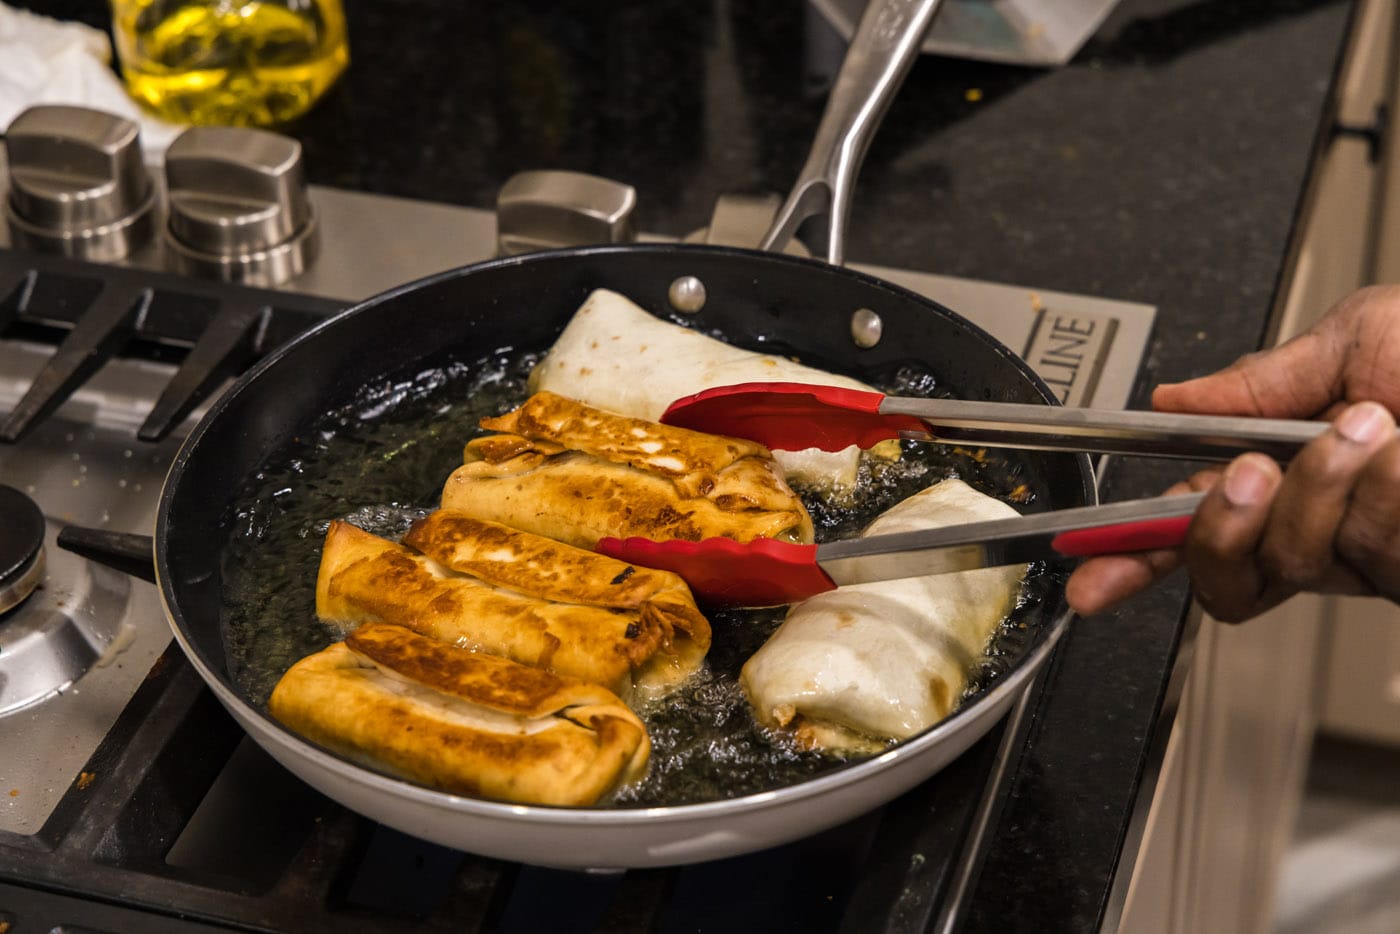
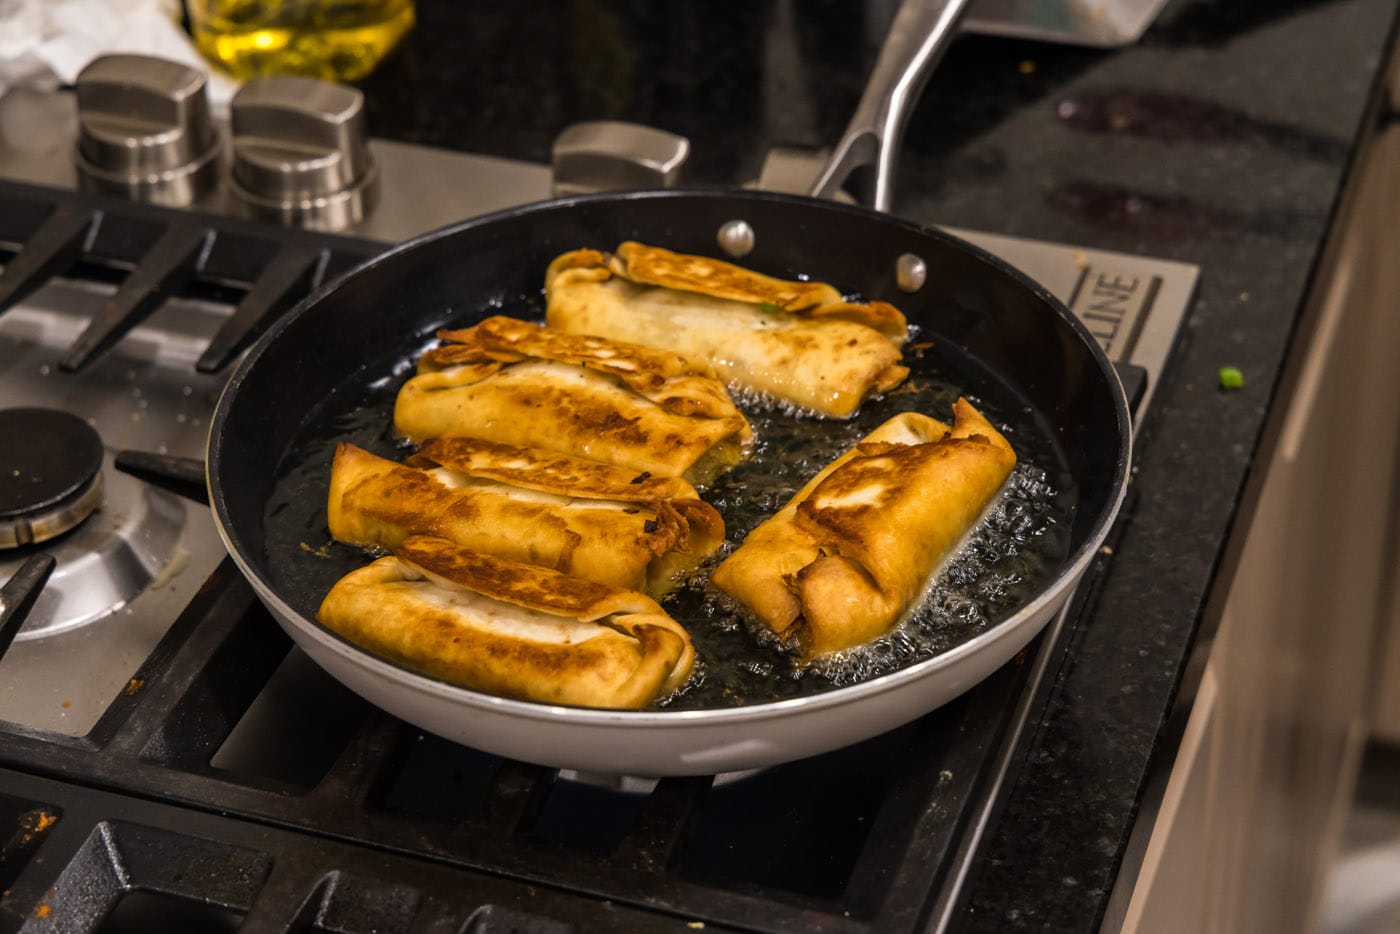
- Deep-Fry to Golden Perfection: Carefully lower each rolled tortilla, seam-side down, into the hot oil using a spatula or tongs. It’s crucial to place them seam-side down first to help seal the wrapper and prevent it from opening during cooking. Do not overcrowd the pan; fry only 2-3 chimichangas at a time to maintain the oil temperature and ensure even cooking. Allow them to cook for approximately 2 minutes on the first side, or until they are beautifully golden brown and crispy. Using tongs, carefully flip the chimichangas over and cook for another 2 minutes, or until the second side is equally golden and crispy.


- Drain and Serve: Once perfectly browned and crispy, carefully remove the chimichangas from the hot oil using tongs. Transfer them to a plate lined with paper towels to drain any excess oil. This helps them maintain their crispiness and prevents them from becoming greasy. Serve them hot and enjoy immediately with your favorite toppings!
Frequently Asked Questions & Expert Tips for Chimichanga Success
To keep your leftover chimichangas fresh and delicious, allow them to cool completely to room temperature. Then, store them in an air-tight container or wrap them individually with aluminum foil. They will stay fresh in the refrigerator for 3-4 days. For reheating, preheat your oven to 350°F (175°C) and bake for about 15 minutes, or until thoroughly warmed through and crispy again. You can also use the reheat function on an air fryer for an even faster and crisper result.
Absolutely! Homemade chimichangas are excellent for freezing, making them a fantastic meal prep option. To freeze, ensure the cooked chimichangas have cooled completely. Wrap each chimichanga tightly a few times in plastic wrap, followed by an additional layer of aluminum foil to prevent freezer burn. Place the individually wrapped chimichangas in a large, labeled freezer-safe ziptop bag, noting the date. They can be frozen for up to 3 months. When you’re ready to enjoy them, thaw the chimichangas overnight in the refrigerator. Reheat them in an air fryer using the reheat function, or in an oven preheated to 350°F (175°C) for approximately 15 minutes, or until they are hot and crispy throughout.
Expert Tips for Perfect Chimichangas:
- Oil Temperature is Key: For the crispiest chimichangas, maintain a consistent oil temperature between 350-375°F (175-190°C). A kitchen thermometer is your best friend here. If the oil is too cool, the chimichangas will absorb too much oil and become greasy. If it’s too hot, they’ll burn on the outside before the inside is fully heated.
- Don’t Overcrowd the Pan: Frying too many chimichangas at once will drop the oil temperature significantly, leading to soggy results. Fry in batches, allowing enough space for each chimichanga to cook evenly.
- Prep Ahead for Ease: You can prepare the chicken and bean mixture ahead of time and store it in the refrigerator for up to two days. This significantly cuts down on prep time when you’re ready to fry, making this a perfect quick weeknight meal.
- Alternative Cooking Methods: While deep-frying offers the classic crispy texture, you can also bake or air fry chimichangas for a slightly lighter version.
- To Bake: Lightly brush the rolled chimichangas with a little oil, then bake in a preheated oven at 400°F (200°C) for 20-25 minutes, flipping halfway, until golden brown and crispy.
- To Air Fry: Lightly spray or brush with oil, then air fry at 375°F (190°C) for 8-12 minutes, flipping halfway, until crispy and heated through.
- Safety First When Frying: Always be cautious when working with hot oil. Use a splatter screen to minimize mess and wear heat-resistant gloves if you have them. Never leave hot oil unattended.
Creative Serving Suggestions for Your Chimichangas
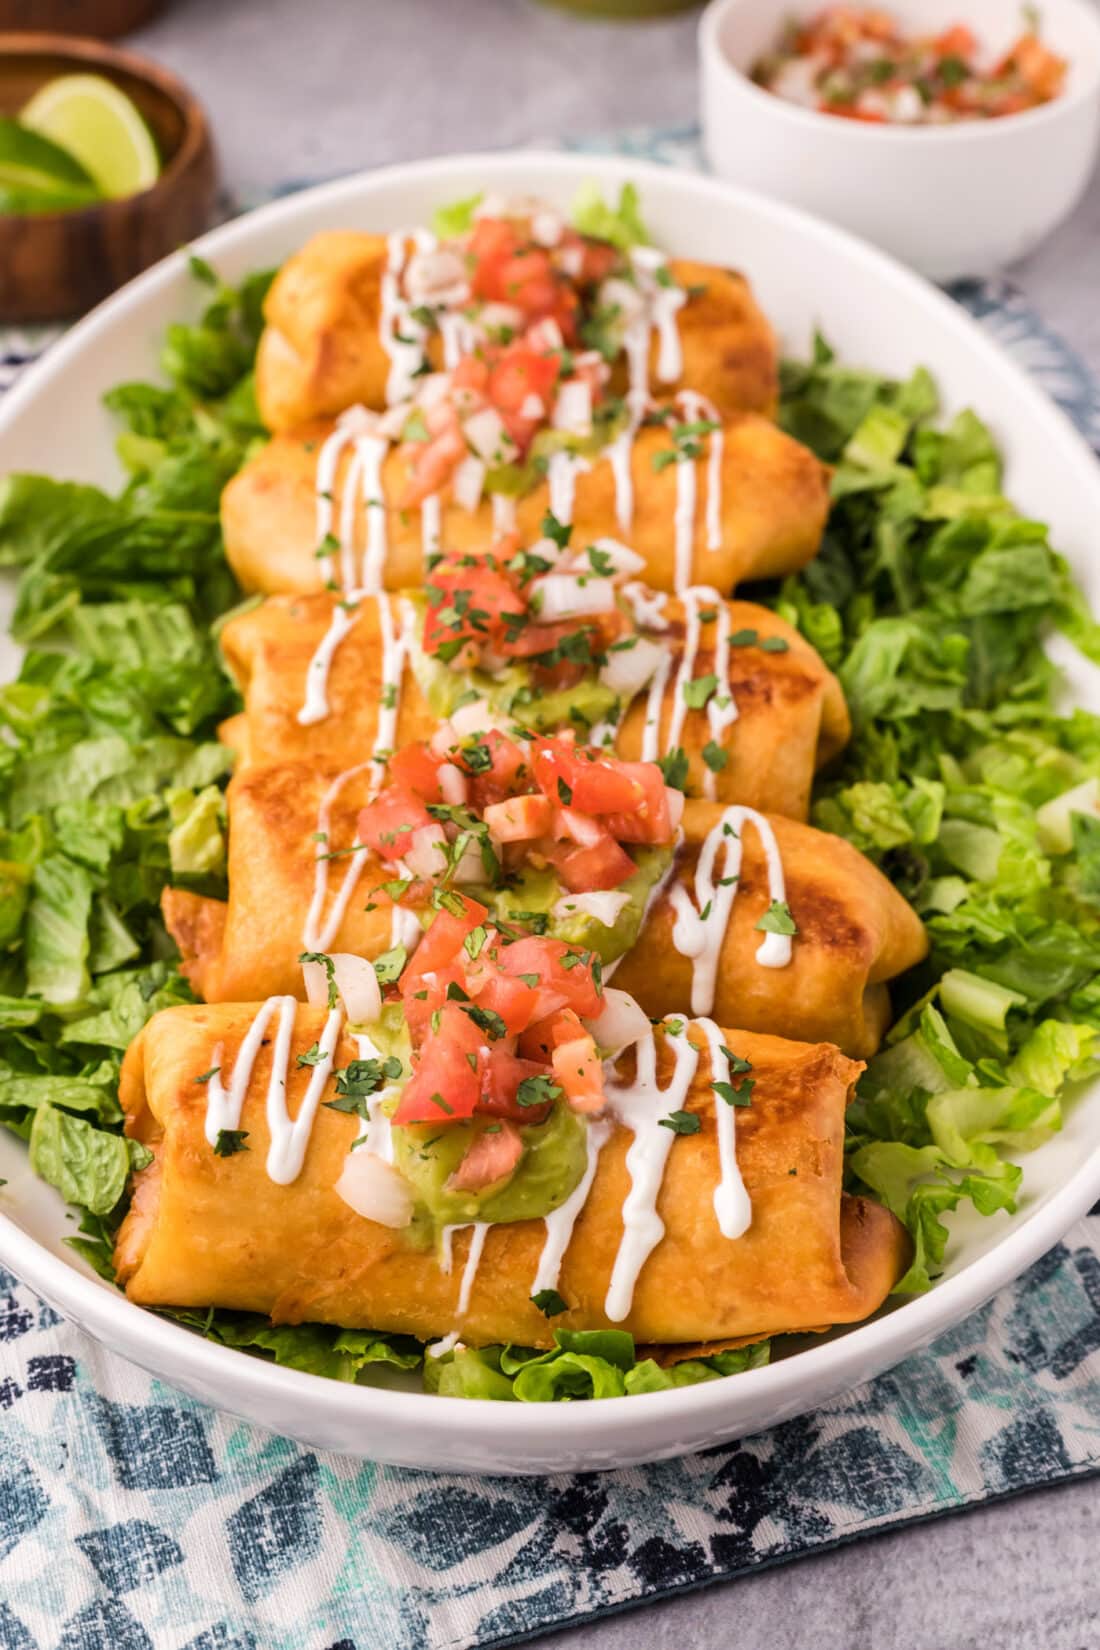
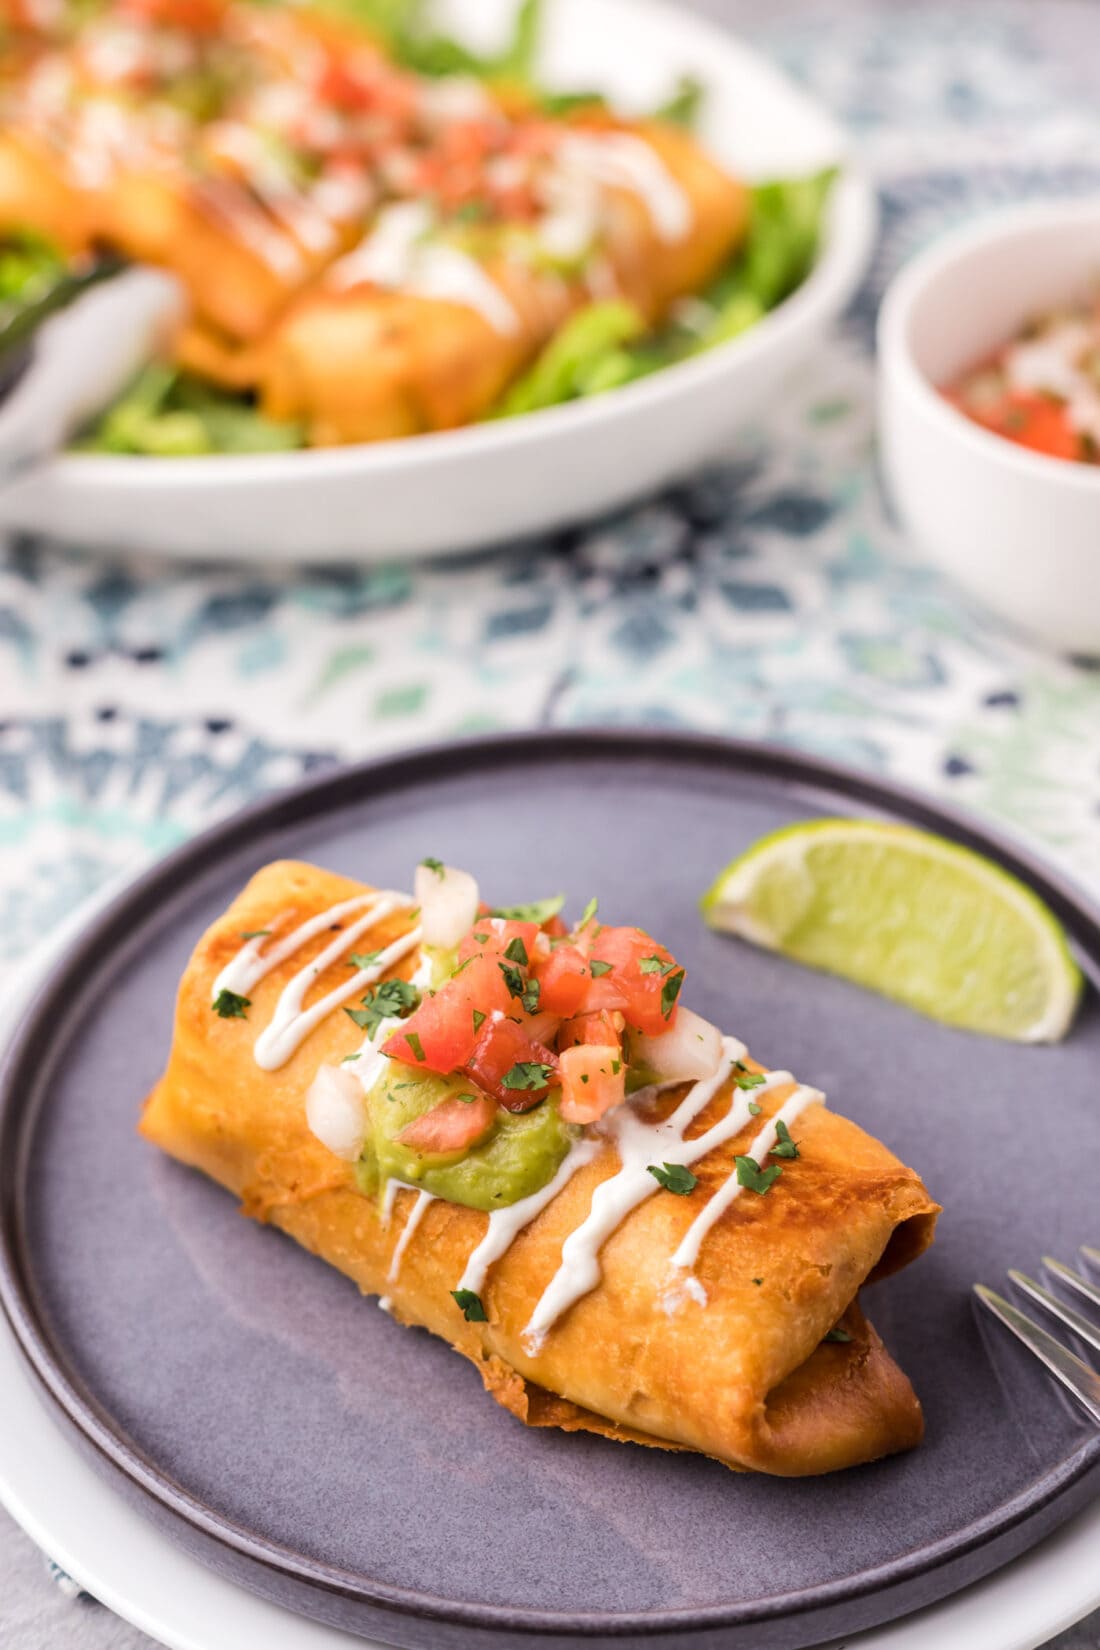
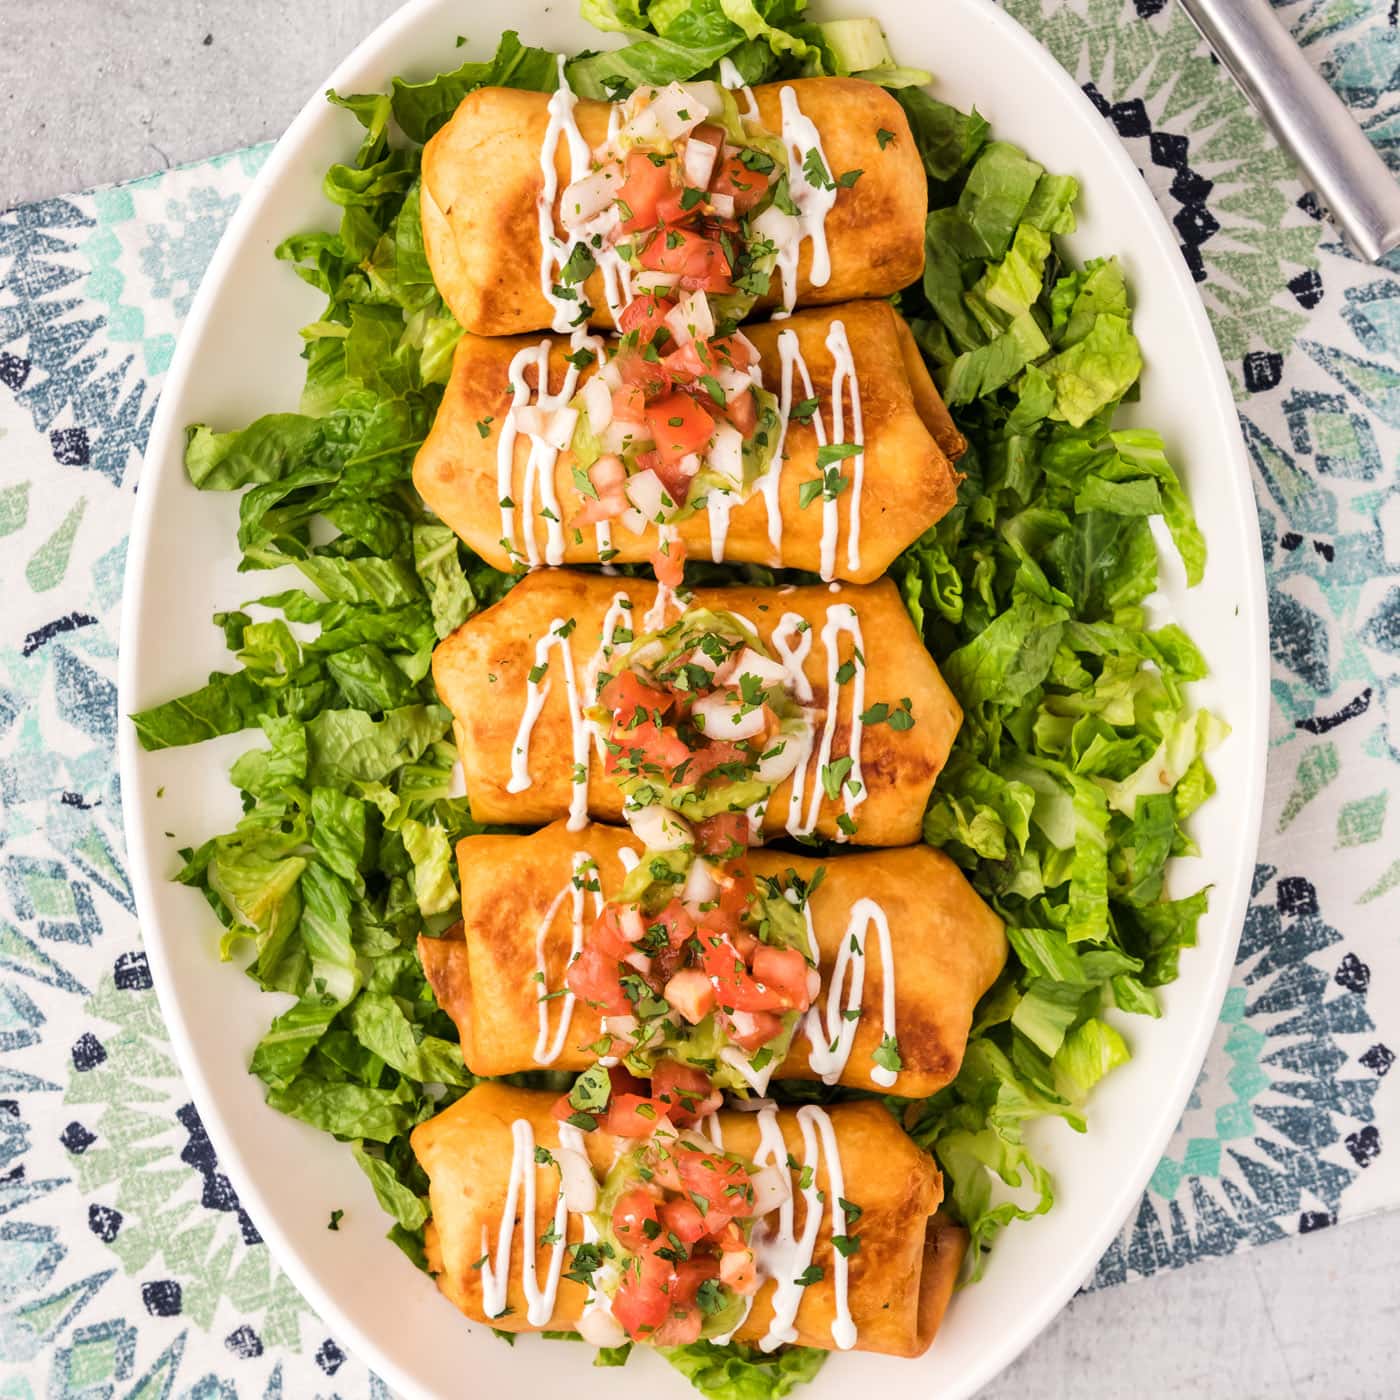
Once your chicken chimichangas are hot and golden, it’s time to complete the experience with an array of delicious toppings and side dishes. For a classic finish, drizzle them with tangy salsa verde or a dollop of cool sour cream. Creamy guacamole and fresh salsa fresca (pico de gallo) are always fantastic choices, adding freshness and zest. Elevate your plate with a sprinkle of shredded lettuce or a dash of hot sauce for an extra kick. On the side, traditional Mexican rice and a simple side of black beans or pinto beans perfectly complement the rich flavors of the chimichanga. You could also serve them with a vibrant corn salad, some crispy tortilla chips with queso, or even a side of roasted vegetables. Enjoy them warm, piled high with your favorite garnishes!
More Delicious Mexican-Inspired Recipes to Try
- Hearty Burrito Bowl
- Sizzling Shrimp Fajitas
- Savory Beef Enchiladas
- Perfect Grilled Chicken Quesadillas
- Flavorful Enchilada Stuffed Peppers
I love to bake and cook and share my kitchen experience with all of you! Remembering to come back each day can be tough, that’s why I offer a convenient newsletter every time a new recipe posts. Simply subscribe and start receiving your free daily recipes!
Chicken Chimichangas
IMPORTANT – There are often Frequently Asked Questions within the blog post that you may find helpful. Simply scroll back up to read them!
Print It
Pin It
Rate It
Save It
Saved!
Prevent your screen from going dark
Course:
Dinner
Cuisine:
American
7
chimichangas
15 minutes
215
Amanda Davis
Ingredients
-
2
boneless skinless chicken breasts
cut into small bite-sized pieces -
1
Tablespoon
garlic salt
divided -
2
teaspoons
black pepper
divided -
½
cup
refried beans -
2
Tablespoons
soy sauce -
1
Tablespoon
olive oil -
¼
cup
chopped onions -
¼
cup
chopped green pepper -
7
flour taco tortillas
7-inch diameter -
¾
cup
shredded cheddar cheese
or Colby Jack -
vegetable oil
for frying
Things You’ll Need
-
Large heavy bottomed skillet -
Rubber spatula -
Tongs -
Saucepan -
Vinyl gloves
Before You Begin
- Having the tortillas at room temperature will make them easier to handle, fold, and roll without tearing.
- We opted to cube our chicken, but you can shred it if that’s your preference. This recipe is highly versatile, so feel free to substitute the type of meat you use. Beef barbacoa, carne asada, or seasoned pork are equally delicious alternatives.
- Store leftover chimichangas in an air-tight container or wrapped with aluminum foil in the refrigerator for 3-4 days. Reheat in a 350°F (175°C) oven for 15 minutes or until warmed through and crispy. You can also use the reheat function on an air fryer for convenience.
- To freeze, wrap the cooled chimichangas a few times in plastic wrap, followed by a layer of aluminum foil, then place them in a large ziptop bag labeled with the date. Freeze for up to 3 months. Thaw in the refrigerator overnight and reheat in the air fryer (using the reheat function) or in the oven set to 350°F (175°C) for around 15 minutes or until warmed through.
Instructions
-
Season chicken breast chunks with half of the garlic salt and half of the black pepper. Set aside.
-
Add refried beans to a medium saucepan and season with remaining garlic salt and black pepper. Add soy sauce. Stir or whisk together and heat over medium-high for a few minutes, just to loosen up the beans. Set aside.
-
Heat olive oil in a large skillet over medium-high heat until shimmering. Add chopped onions and green pepper, stirring together, then add chicken chunks. Sauté until onion is translucent and chicken is no longer pink. Remove from heat.
-
For each tortilla, spread refried bean mixture onto the center then sprinkle with shredded cheese and top with a handful of the chicken mixture.
Do not overstuff the tortillas or you won’t be able to roll them properly.
-
Lift and fold the sides of the tortilla in toward the center. Holding those folds in place, fold the bottom of the tortilla up and over the sides. Roll toward the top of the tortilla until completely closed, keeping seam at the bottom.
Try to roll the tortilla as tight as possible so oil doesn’t get inside when it fries.
-
In a large heavy bottomed skillet, heat enough vegetable oil to come about 1-inch or so up the sides of the pan. Heat oil over medium-high heat until hot, but not smoking.
-
Using a spatula, carefully lower each rolled tortilla, seam side down, into the hot oil. Allow to cook for 2 minutes, or until nicely browned. Using tongs, carefully turn tortillas over and cook another 2 minutes or until nicely browned.
-
Remove to paper towel lined plate to drain.
Nutrition
Serving:
1
chimichanga
|
Calories:
215
cal
|
Carbohydrates:
18
g
|
Protein:
14
g
|
Fat:
9
g
|
Saturated Fat:
4
g
|
Polyunsaturated Fat:
1
g
|
Monounsaturated Fat:
3
g
|
Trans Fat:
0.004
g
|
Cholesterol:
33
mg
|
Sodium:
1720
mg
|
Potassium:
203
mg
|
Fiber:
2
g
|
Sugar:
2
g
|
Vitamin A:
168
IU
|
Vitamin C:
5
mg
|
Calcium:
143
mg
|
Iron:
2
mg
Tried this Recipe? Pin it for Later!
Follow on Pinterest @AmandasCookin or tag #AmandasCookin!
The recipes on this blog are tested with a conventional gas oven and gas stovetop. It’s important to note that some ovens, especially as they age, can cook and bake inconsistently. Using an inexpensive oven thermometer can assure you that your oven is truly heating to the proper temperature. If you use a toaster oven or countertop oven, please keep in mind that they may not distribute heat the same as a conventional full sized oven and you may need to adjust your cooking/baking times. In the case of recipes made with a pressure cooker, air fryer, slow cooker, or other appliance, a link to the appliances we use is listed within each respective recipe. For baking recipes where measurements are given by weight, please note that results may not be the same if cups are used instead, and we can’t guarantee success with that method.
