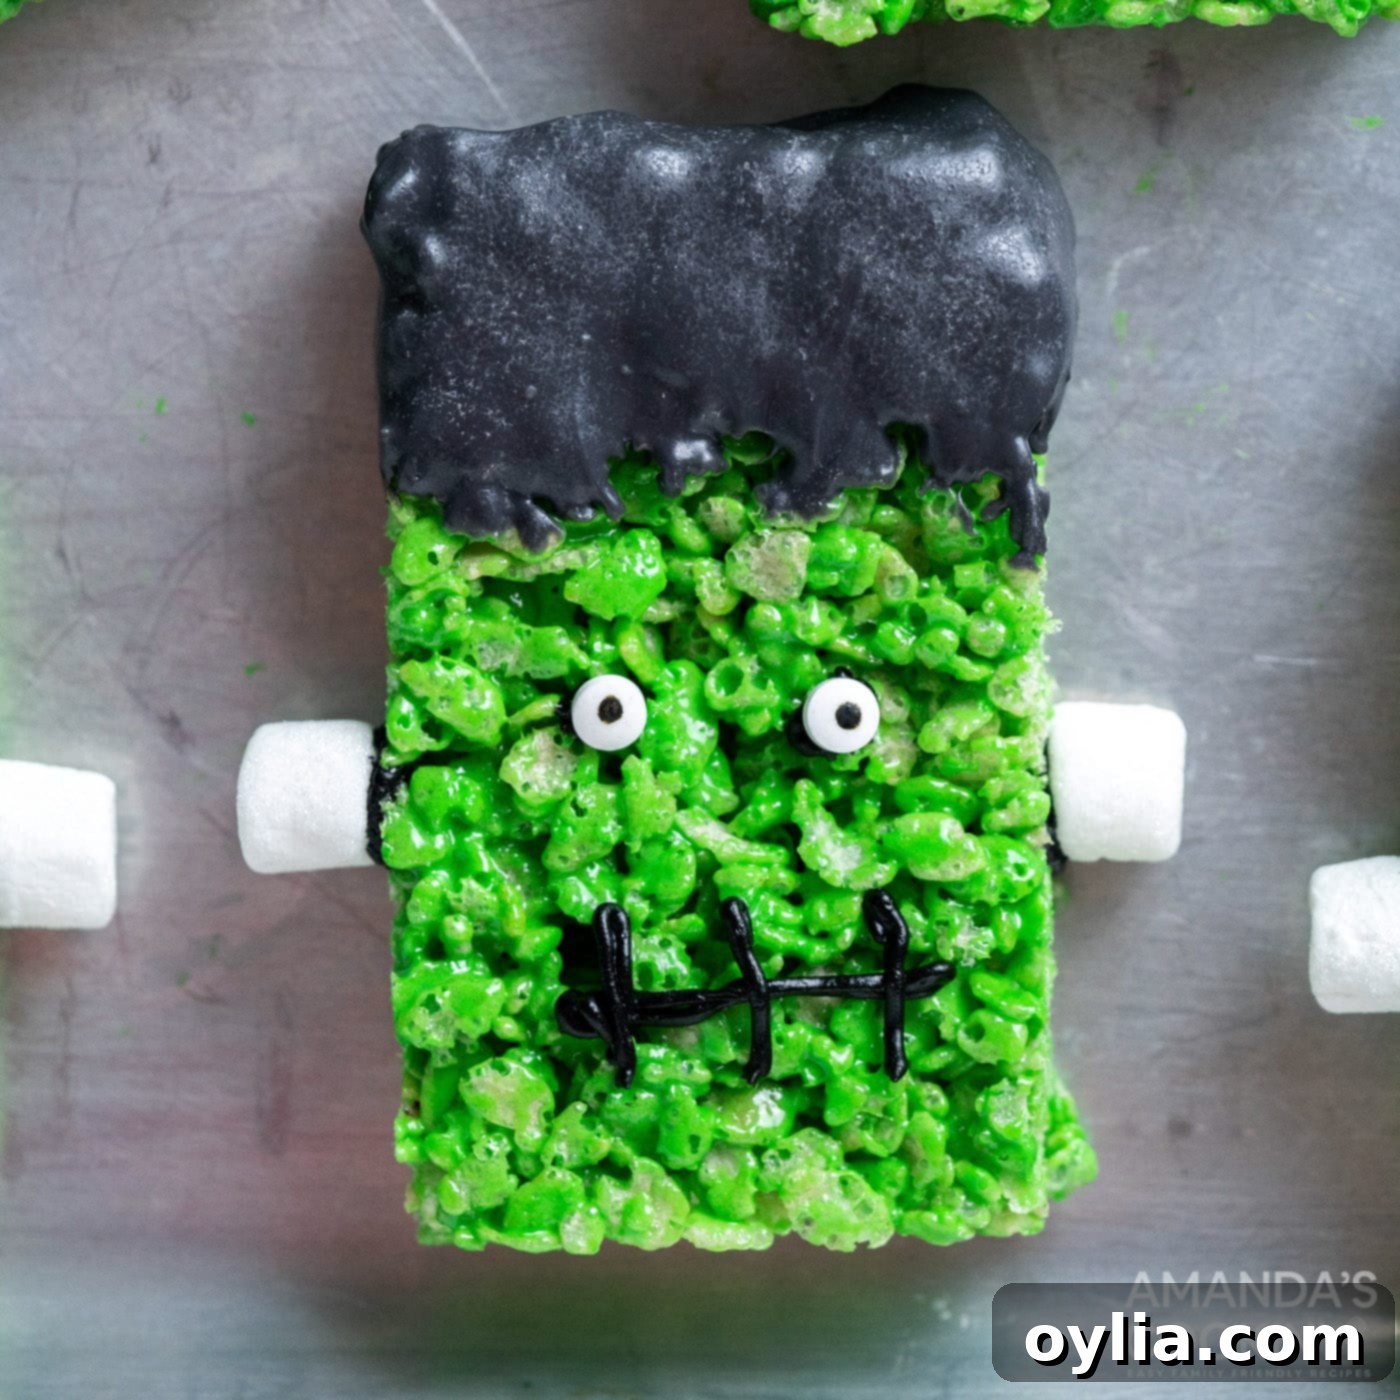
Spooky, Sweet & Simple: How to Make Adorable Frankenstein Rice Krispie Treats for Halloween!
Get ready to unleash your inner mad scientist in the kitchen this Halloween with these incredibly easy and utterly adorable Frankenstein Rice Krispie Treats! Perfect for kids and adults alike, these festive green monsters prove that spooky can also be soft, chewy, and irresistibly cute. Whether you’re planning a Halloween party, looking for a fun classroom treat, or simply want to add a touch of monstrous charm to your dessert table, these treats are a guaranteed hit. Forget complicated baking; this recipe brings classic rice krispie treat simplicity together with a ghoulishly delightful makeover that everyone will love.
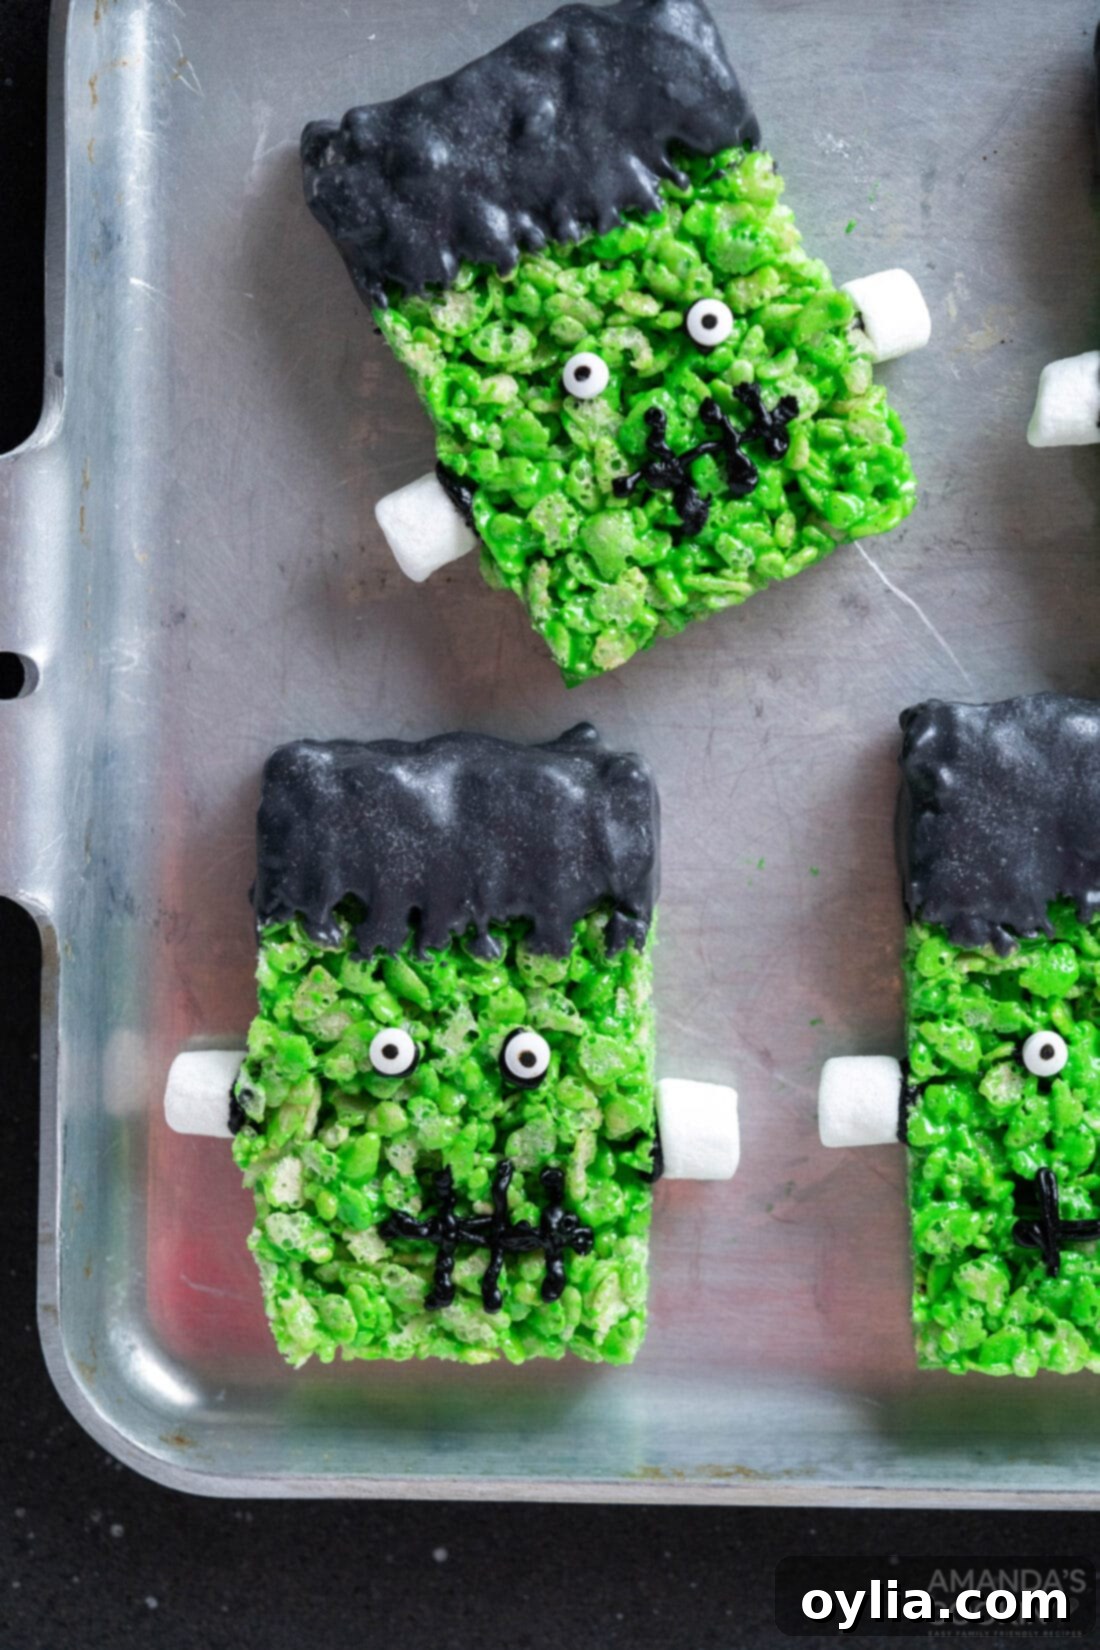
Why This Easy Frankenstein Rice Krispie Treat Recipe is a Must-Try!
There’s something truly magical about turning a simple, beloved treat into a festive masterpiece, especially for Halloween! If you’re a fan of our Halloween food ideas – like our previous adorable pumpkin-shaped rice krispies – then you’ll understand why these Frankenstein Rice Krispie Treats are an absolute hit. This recipe isn’t just about making a dessert; it’s about creating memories and sparking joy.
Here’s why this recipe stands out:
- Kid-Friendly Fun: This is a fantastic recipe for getting children involved in the kitchen. From stirring the gooey marshmallow mixture (with adult supervision, of course!) to decorating each Frankenstein monster’s face with candy eyeballs and frosting, kids will love every step of the creative process. It’s an excellent activity for an autumn afternoon, school projects, or pre-Halloween party prep.
- Effortlessly Spooky: You don’t need to be a gourmet baker to create these impressive Halloween treats. Based on the traditional, no-bake rice krispie treat method, they are incredibly simple to put together. The vibrant green color, achieved with gel food coloring, instantly transforms them into iconic Frankenstein’s monsters, adding just the right amount of spooky flair without any complicated techniques.
- Versatile for Any Occasion: Whether you’re contributing to a school bake sale, serving up unique goodies at a Halloween party, or just want a fun snack for your family, these treats fit perfectly. They’re individually sized, easy to transport, and always a crowd-pleaser, making them ideal for any festive gathering.
- Deliciously Chewy Texture: We all love that classic soft, chewy texture of a perfectly made rice krispie treat. This recipe ensures your Frankenstein creations are just that – delightfully gooey and satisfying with every bite. The fresh ingredients and proper technique prevent them from becoming too hard or sticky.
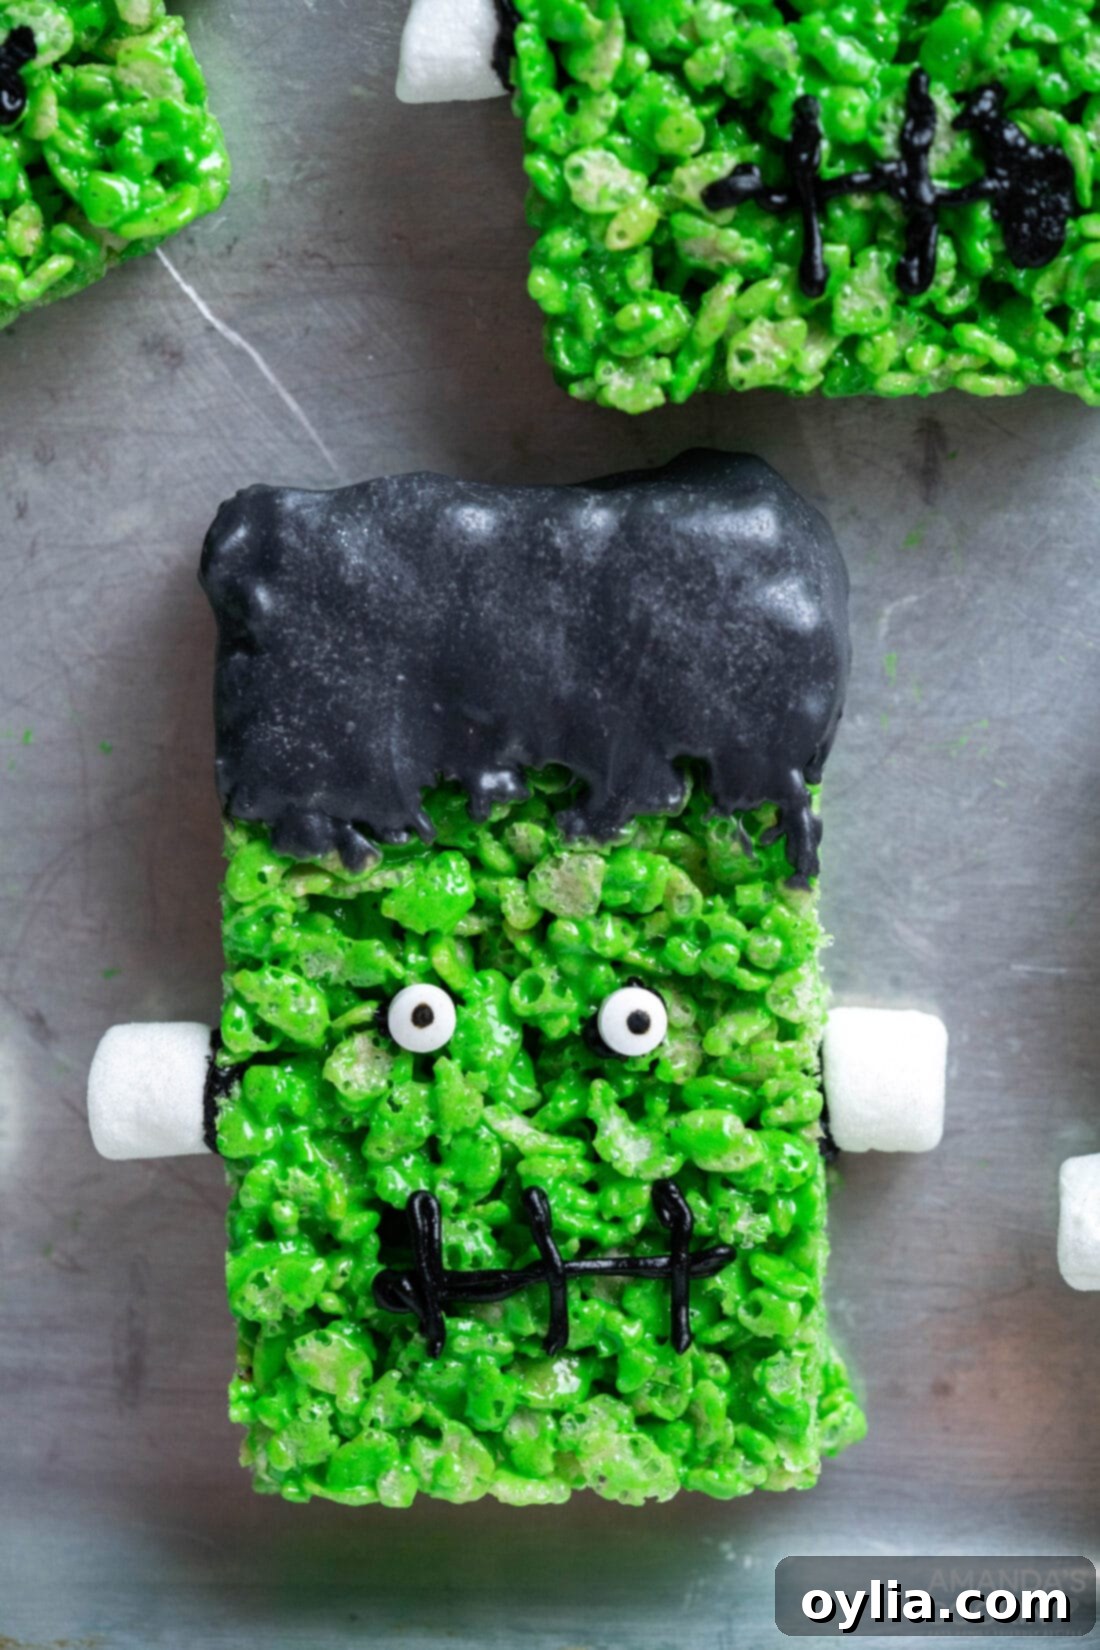
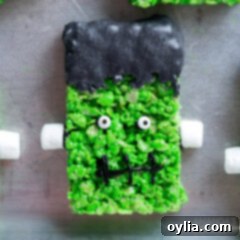
- Visual Appeal: Let’s face it, these green monsters are undeniably cute! Their distinct black candy melt “hair” and playful candy eyes make them incredibly appealing and photo-worthy. Be prepared for compliments when you present these imaginative and tasty Halloween desserts!
So, whether you’re impressing party guests with your creativity or simply enjoying a fun baking session at home, these Frankenstein Rice Krispie Treats offer a delightful combination of ease, festivity, and deliciousness.
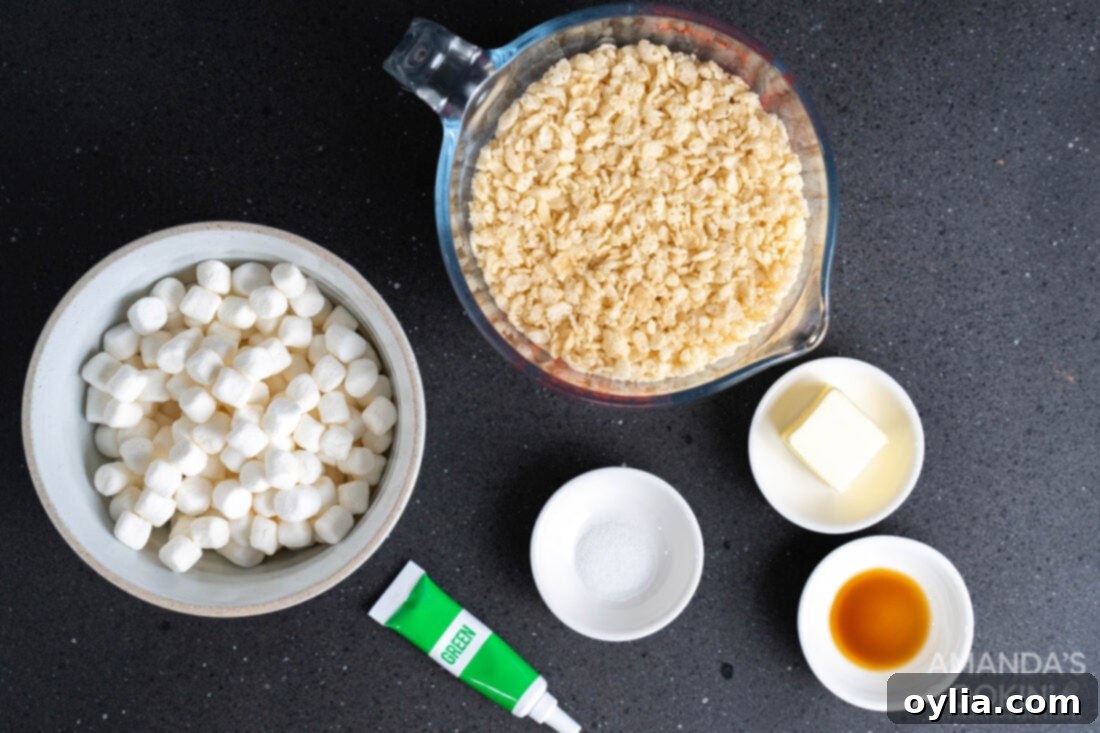
Gather Your Ghoulish Ingredients for Frankenstein Rice Krispie Treats
Crafting these adorable Frankenstein Rice Krispie Treats requires just a handful of common ingredients for the base, plus some fun decorative elements to bring your monsters to life. You’ll find all the exact measurements and detailed instructions in the printable recipe card at the very end of this post, but for now, let’s explore what you’ll need to create your spooky masterpieces!
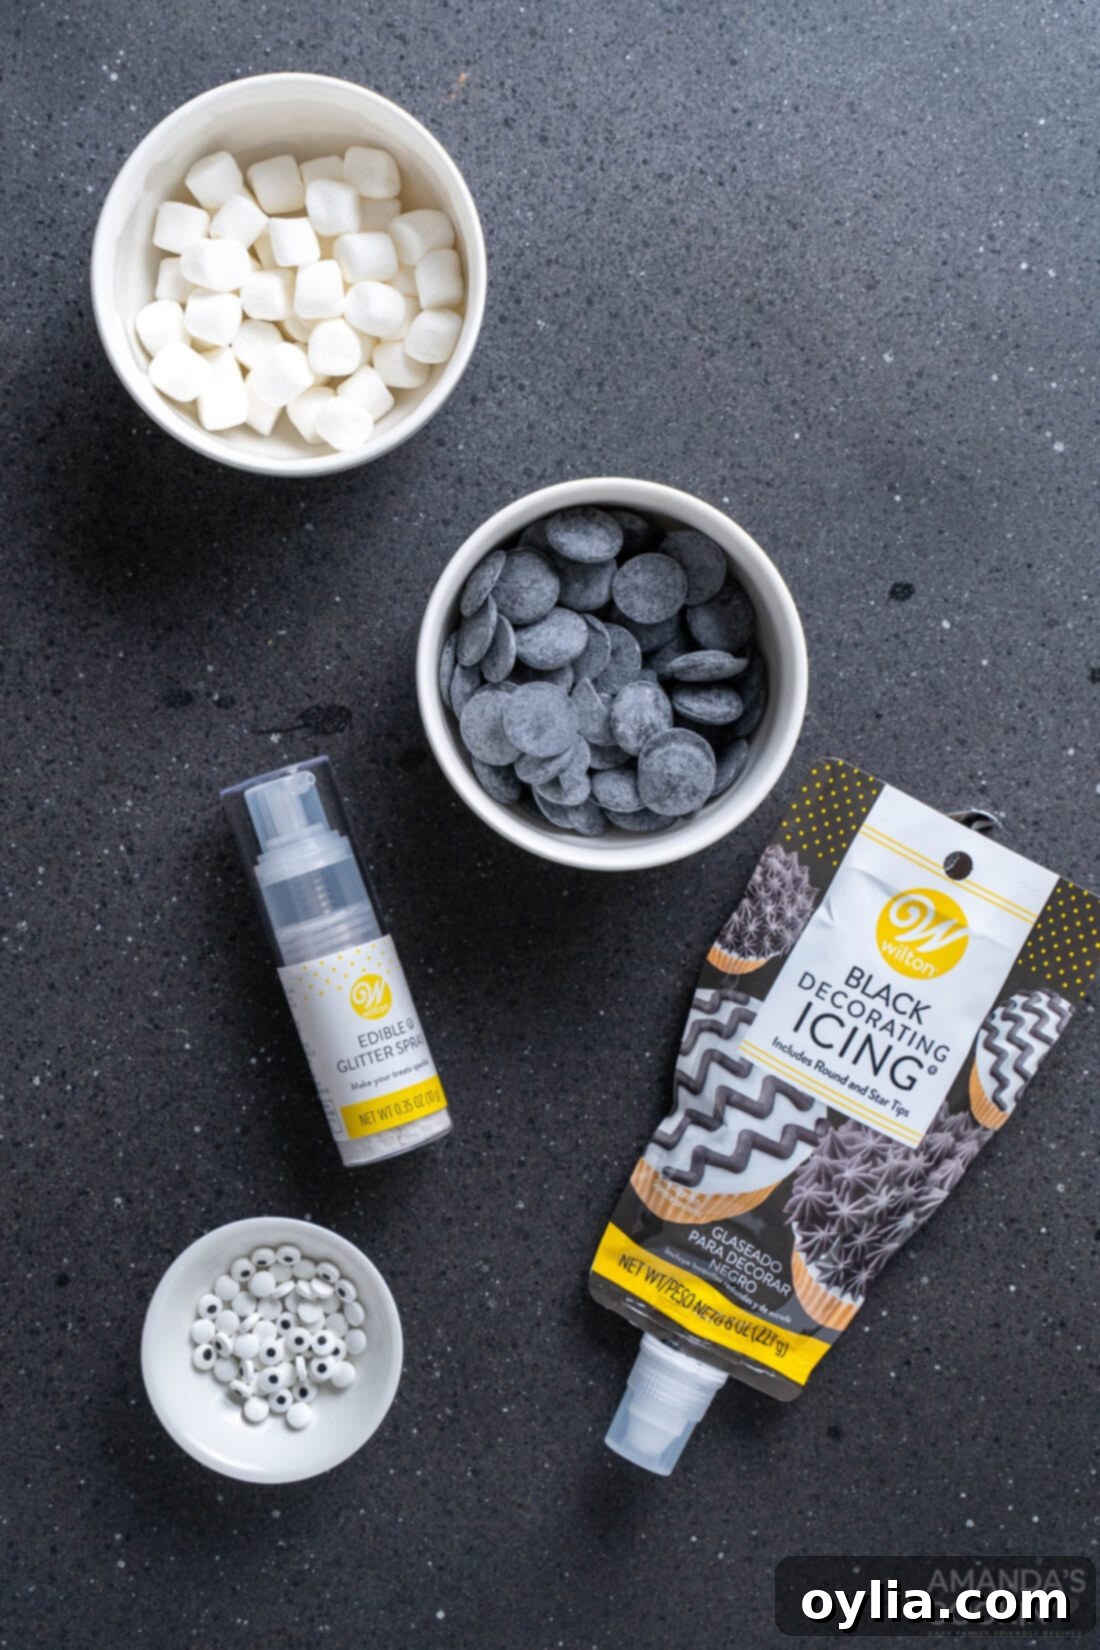
Ingredient Info and Substitution Suggestions for Perfect Frankenstein Treats
To ensure your Frankenstein Rice Krispie Treats are not only visually stunning but also perfectly delicious, here’s a breakdown of the key ingredients and some helpful tips or substitution suggestions:
RICE KRISPIE TREAT BASE:
- Unsalted Butter: We recommend unsalted butter so you can control the overall saltiness of your treats. Butter is essential for that rich flavor and helps the marshmallows melt smoothly.
- Mini Marshmallows: Fresh mini marshmallows are key to achieving soft and chewy treats. Older marshmallows tend to dry out and can result in a tougher texture. Mini marshmallows melt faster and more evenly than larger ones.
- Vanilla Extract: A touch of vanilla extract elevates the flavor profile, adding a warm, comforting note that balances the sweetness.
- Salt: Just a pinch of salt is crucial. It doesn’t make the treats salty, but rather enhances all the other flavors and prevents them from tasting overly sweet.
- Green Gel Food Coloring: This is where the magic happens! We highly recommend using green gel food coloring over liquid food coloring. Gel colors are much more concentrated, meaning you’ll achieve a vibrant, deep green hue without adding excess liquid that could alter the texture of your treats. A little goes a long way!
- Rice Krispies Cereal: While the classic Rice Krispies brand is fantastic, you can certainly use off-brand rice krispies style cereal if desired. Just ensure it’s a crispy puffed rice cereal for the characteristic texture. Fresh cereal is also important – stale cereal will yield stale-tasting treats!
DECORATION ELEMENTS:
- Mini Marshmallows (for bolts) or Pretzel Sticks: These are used to create Frankenstein’s iconic neck bolts. The mini marshmallows offer a softer, edible option. You can optionally spray them with edible silver glitter for a metallic, “nut and bolt” look. If you prefer a salty crunch and a more rigid bolt, feel free to substitute with pretzel sticks (mini or regular, broken to size).
- Edible Silver Glitter Spray: This is an optional but fun touch to add shine to your marshmallow “bolts.” It gives them a realistic, metallic gleam. If you don’t have it or prefer not to use it, your treats will still look great!
- Black Candy Melts: These are perfect for creating Frankenstein’s signature dark hair. Candy melts are designed to melt smoothly and set firm, providing a crisp, chocolatey topping. You can melt them in a double-boiler or carefully in the microwave.
- Candy Eyeballs: These are a must for giving your monsters personality! You can find them in various sizes. We typically use standard medium-sized ones, but feel free to experiment with larger or smaller ones for different expressions.
- Black Decorating Frosting: This is used for drawing the mouth and adding any other facial details or scars. You can use pre-made tubes of decorating icing with a fine tip or transfer frosting to a piping bag with a small round nozzle. This also acts as the “glue” for your candy eyeballs and marshmallow bolts.
By carefully selecting and preparing these ingredients, you’ll be well on your way to creating a batch of Frankenstein Rice Krispie Treats that are both delicious and frightfully fun!
How to Make Spooky & Sweet Frankenstein Rice Krispie Treats (Step-by-Step Guide)
These step-by-step photos and detailed instructions are here to help you visualize how to make this delightful recipe. For the complete printable version of this recipe, including exact measurements and a convenient format, simply Jump to Recipe at the bottom of this post.
- Prepare Your Pan: First, line an 8 by 8-inch baking dish with two pieces of parchment paper. Arrange the paper so that it generously hangs over all four sides – this creates a convenient sling to easily lift your finished treats out of the pan. Lightly spray the parchment paper with coconut oil spray or another non-stick cooking spray. This crucial step prevents sticking and ensures your treats come out perfectly.
- Melt Butter and Marshmallows: In a medium-sized saucepan, melt the unsalted butter over medium heat. Once the butter is mostly melted, reduce the heat to low. Add the mini marshmallows and stir continuously with a spatula. Cook them until they are almost, but not quite, fully melted – you want a few small marshmallow lumps to remain. This process should take approximately 30 seconds. Be very careful not to overheat the marshmallows, as this can make your finished rice krispie treats tough and hard instead of soft and chewy.
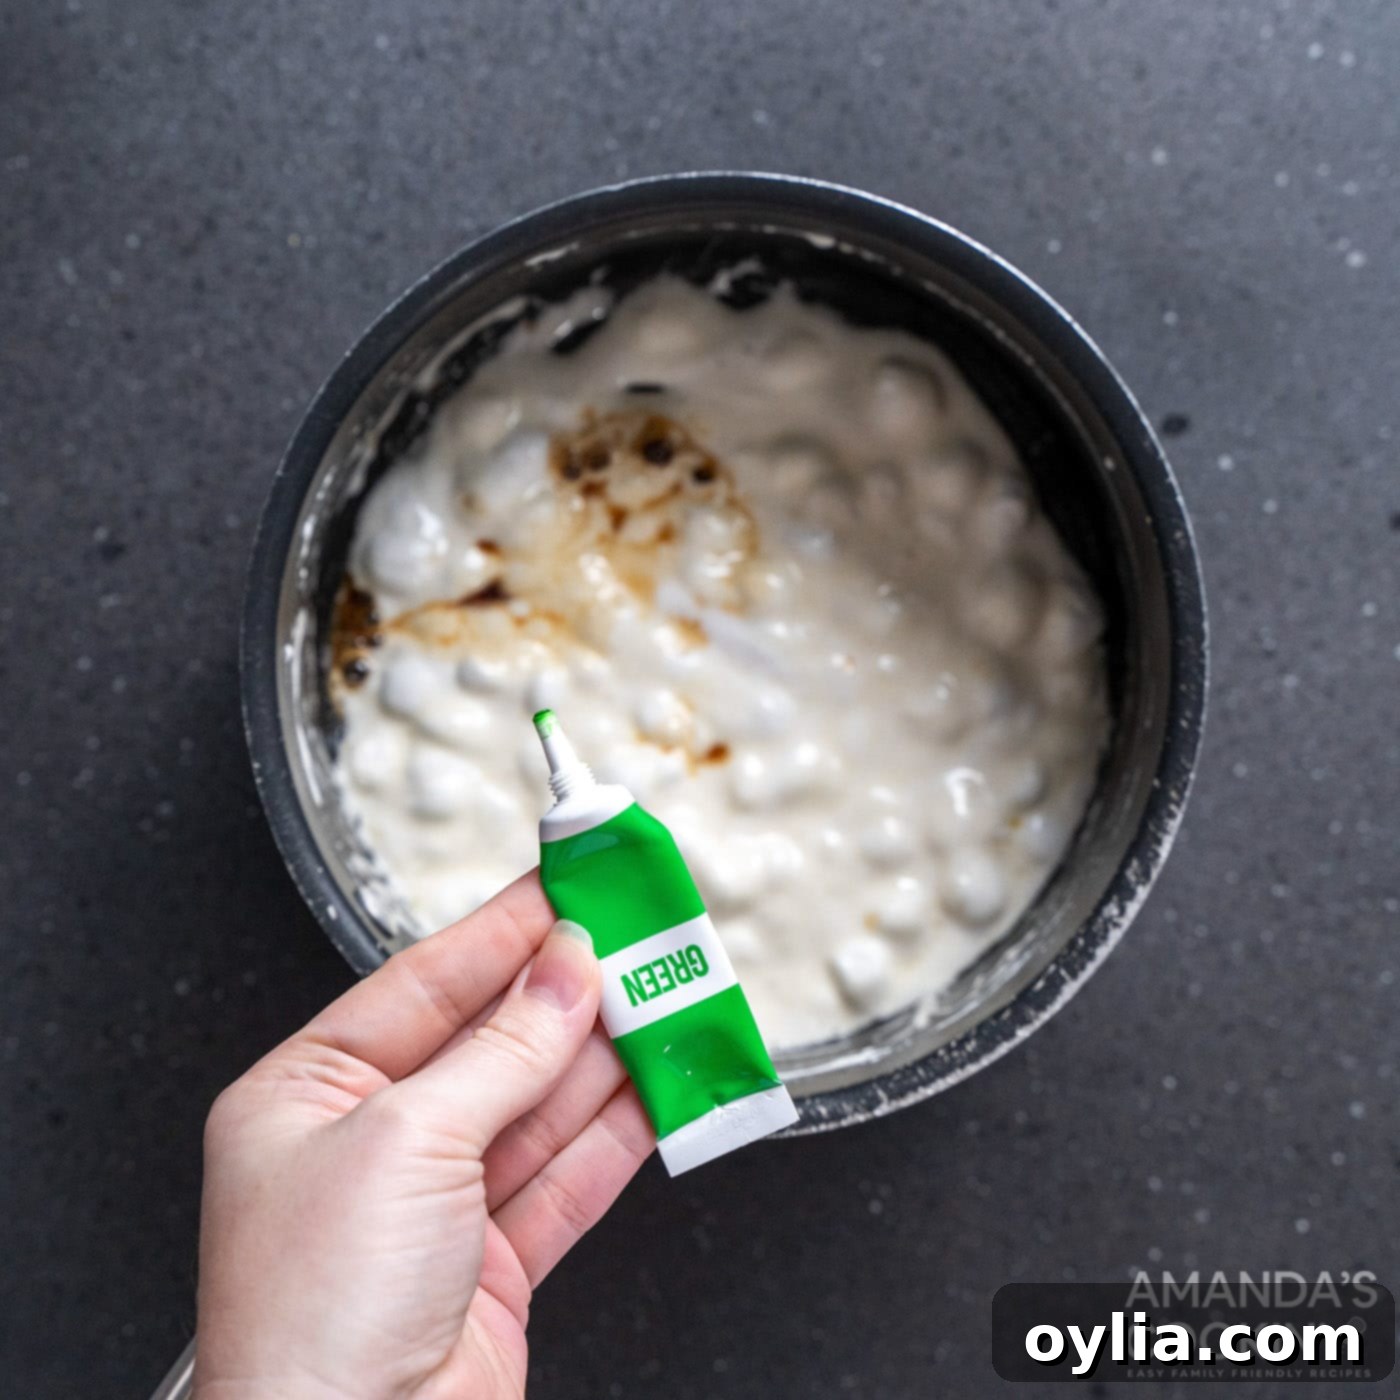
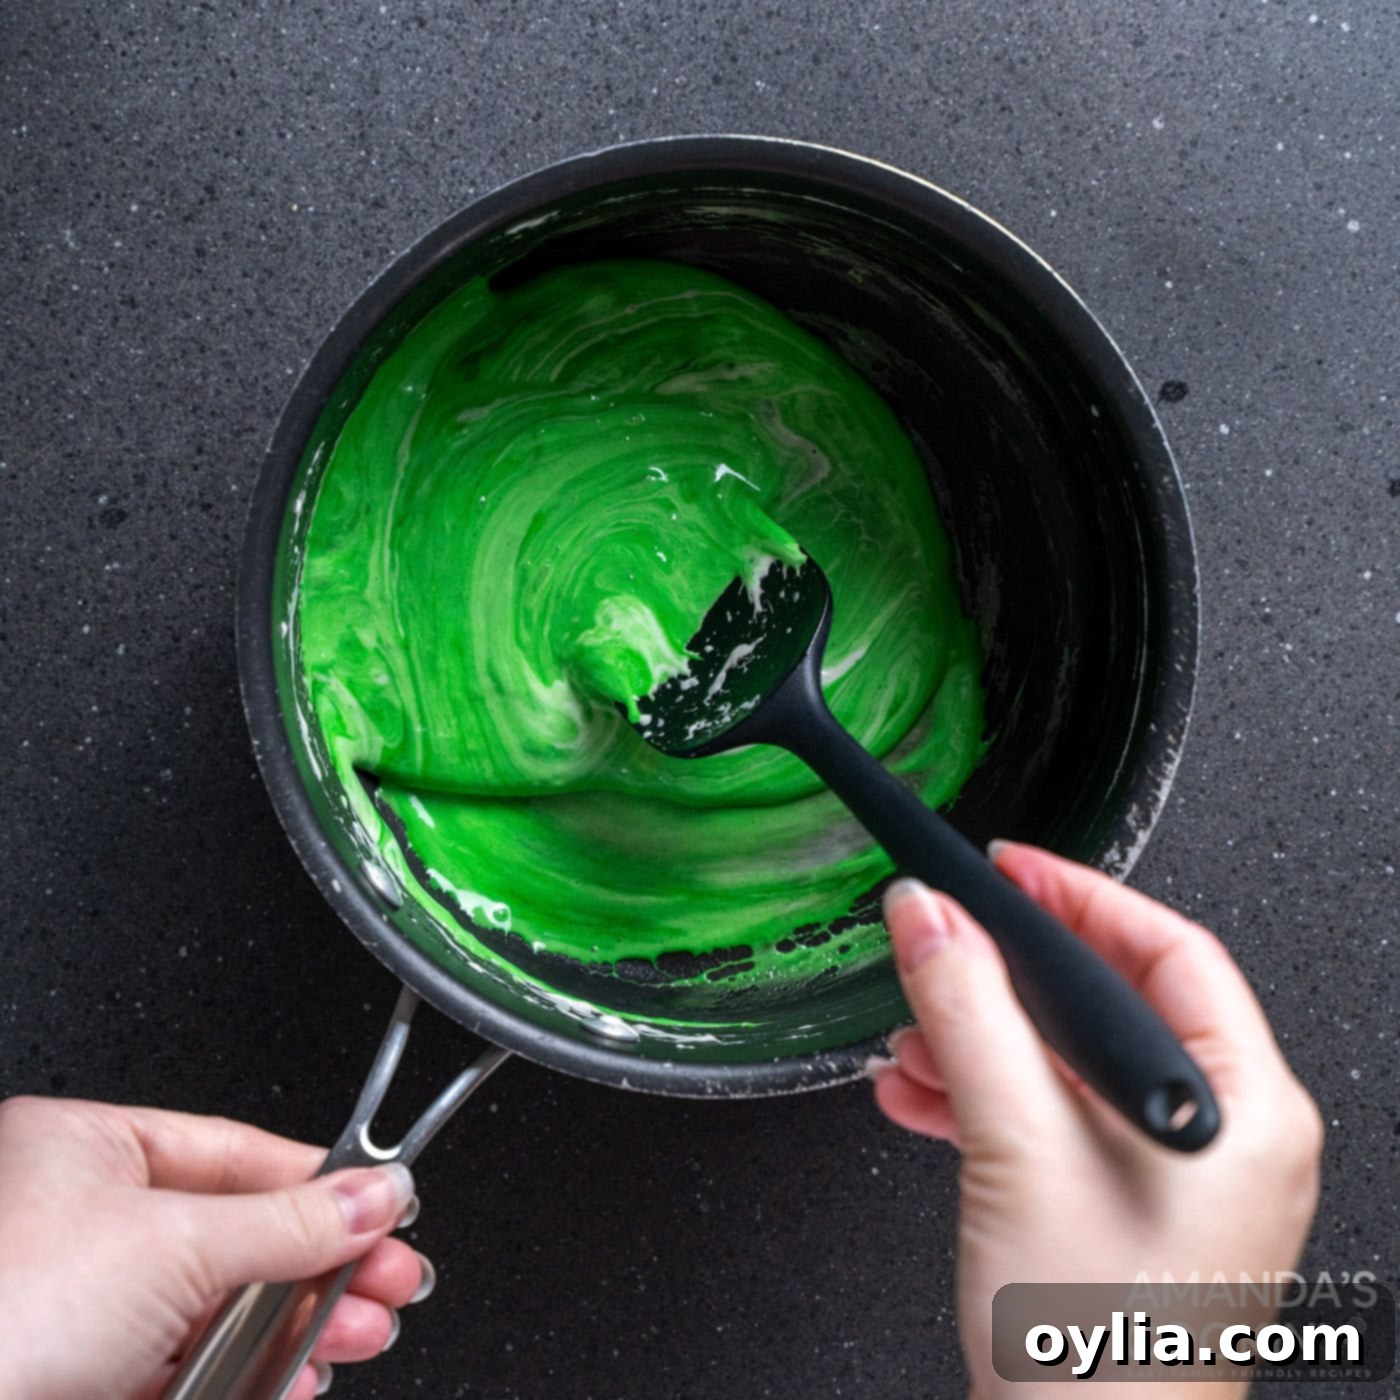
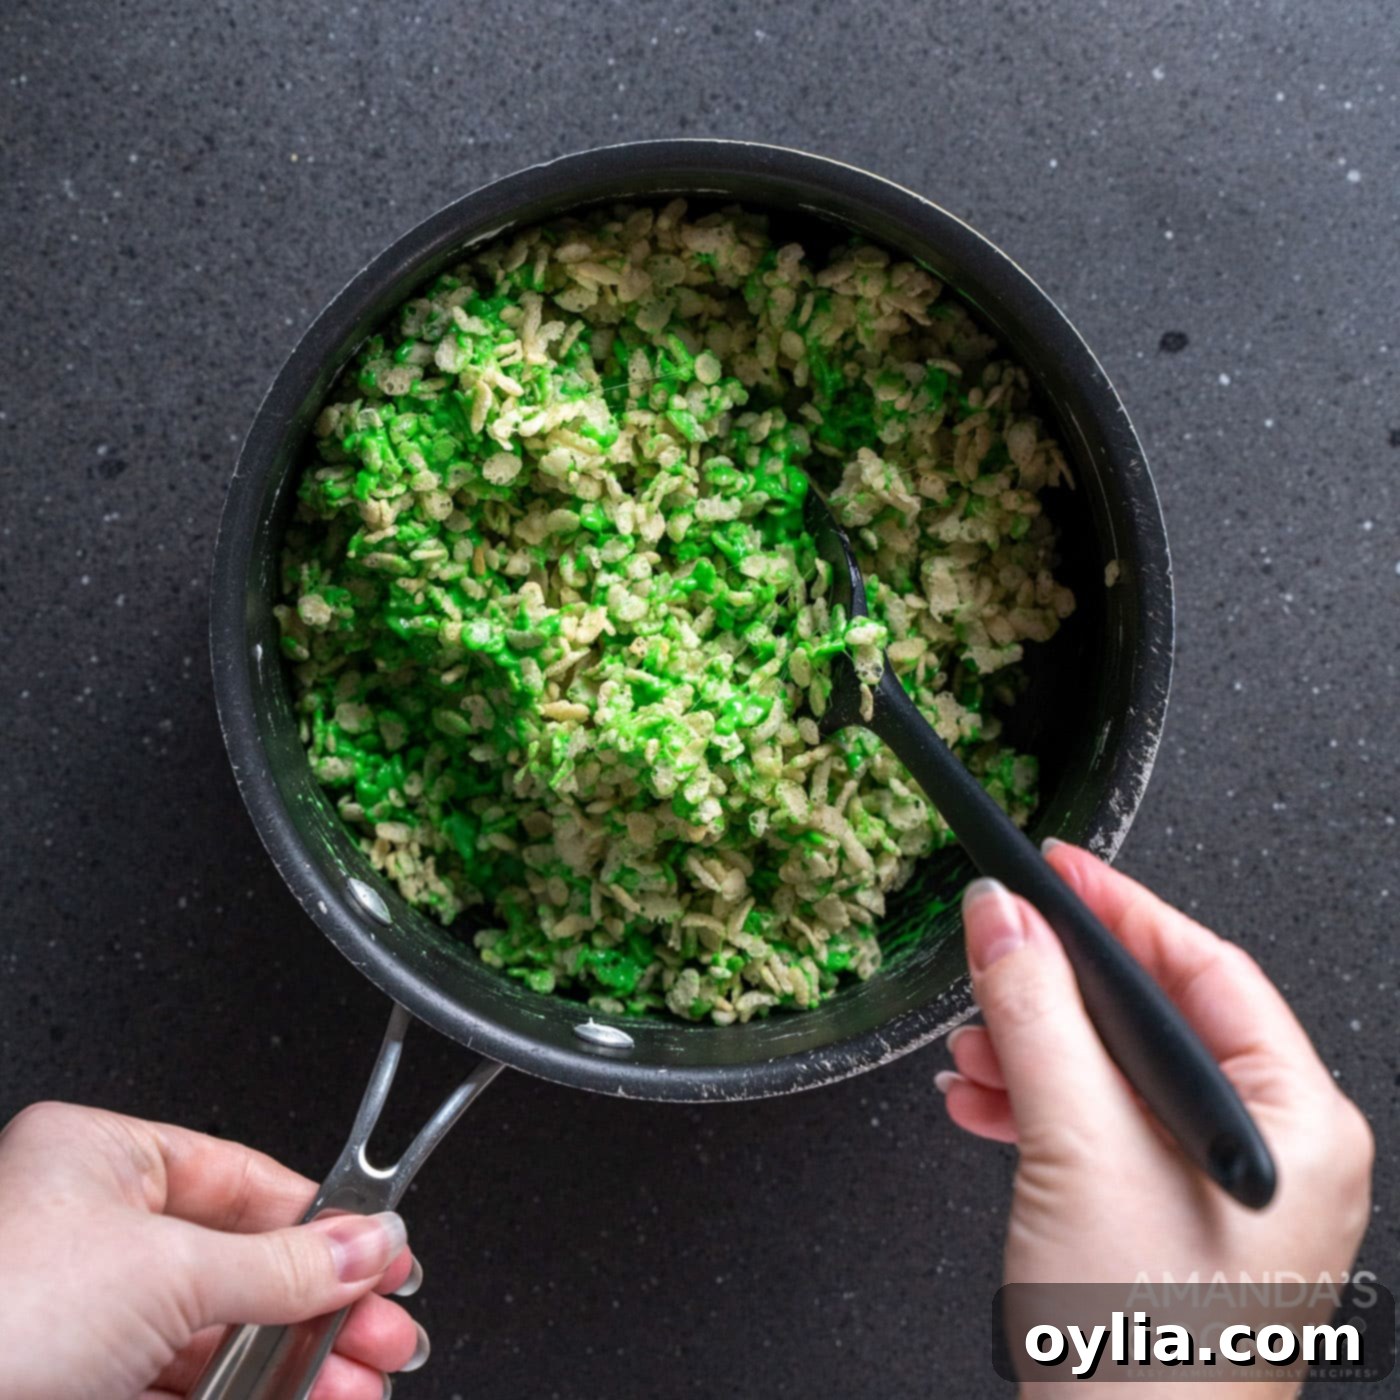
- Add Flavor and Color: Immediately remove the saucepan from the heat. Stir in the vanilla extract, salt, and the vibrant green gel food coloring. Mix thoroughly until the color is evenly distributed and the mixture is a consistent, bright green. Next, add the rice krispies cereal to the green marshmallow mixture. Fold gently with a spatula until all the cereal is well-coated with the gooey green marshmallow goodness.
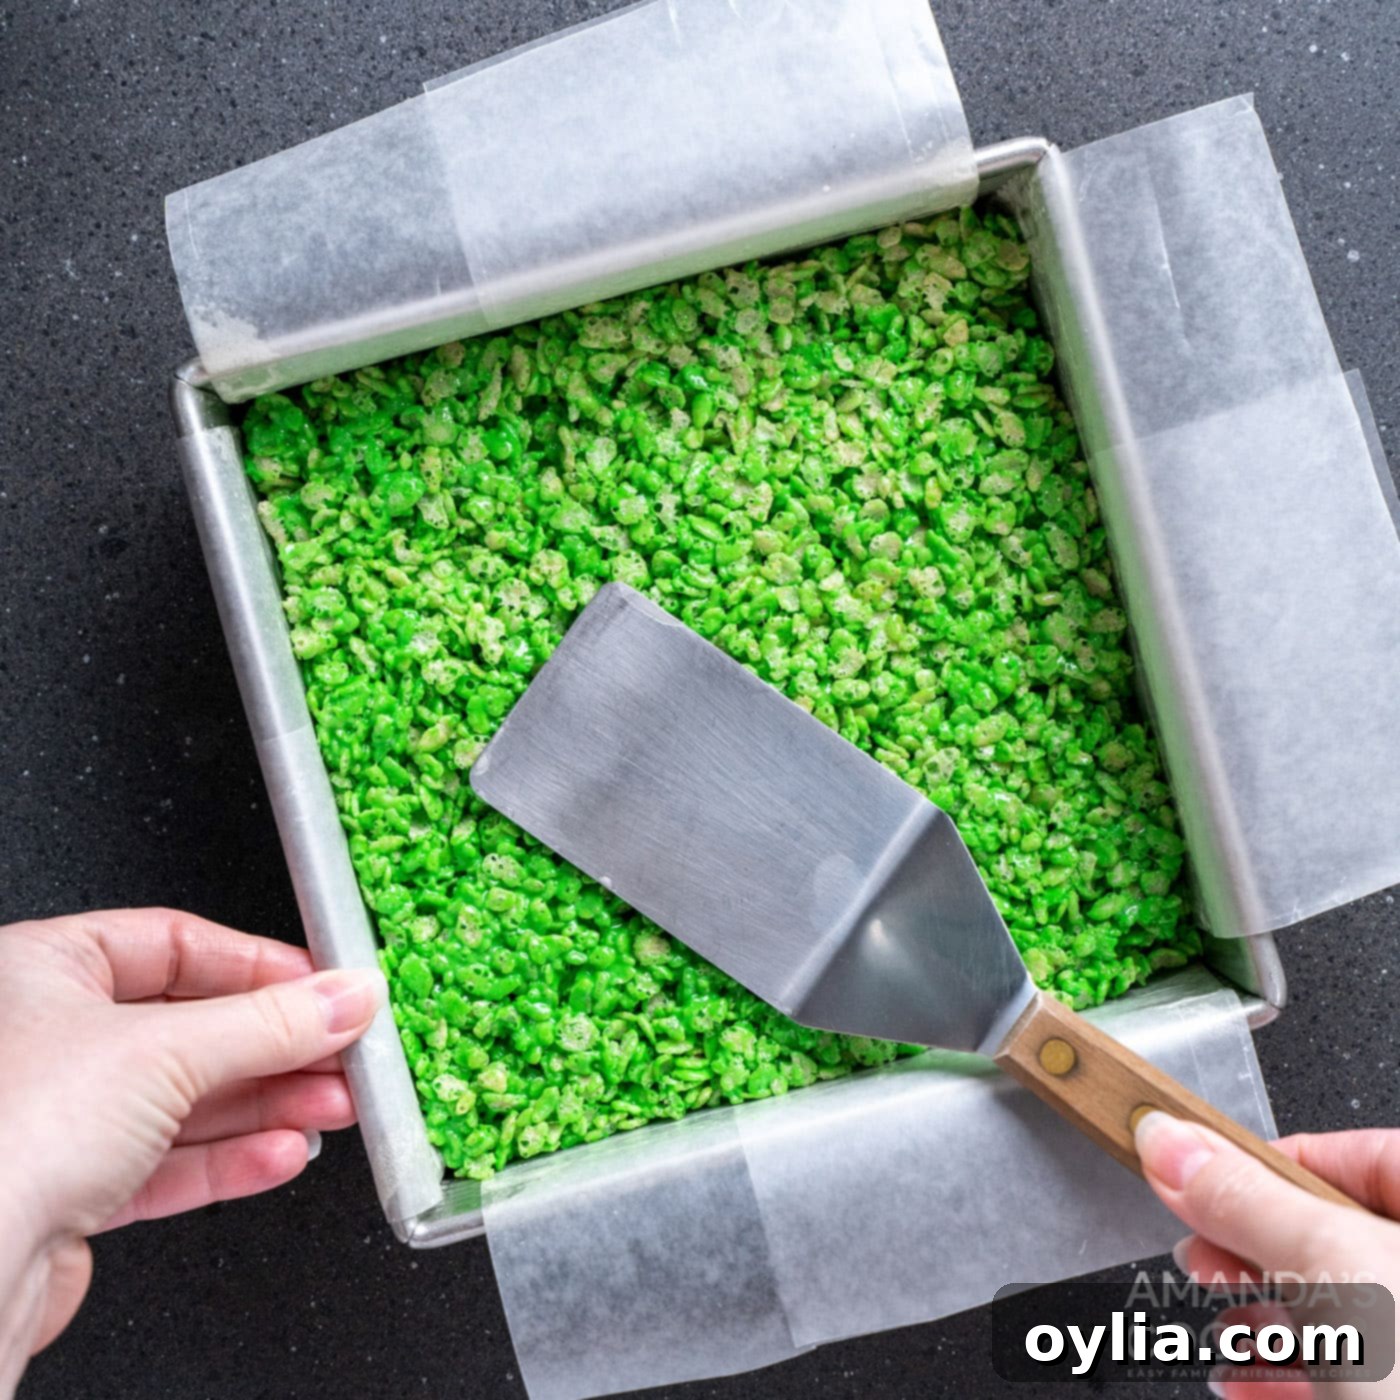
- Press into Pan: Pour the green cereal mixture into your prepared 8×8 inch pan. Lightly spray a thin metal spatula (or your hands, if preferred) with coconut oil spray. Gently and evenly spread the mixture into the pan, pressing down just enough to form an even layer. Avoid pressing too hard, as over-compacting can lead to dense, hard treats instead of light and chewy ones.
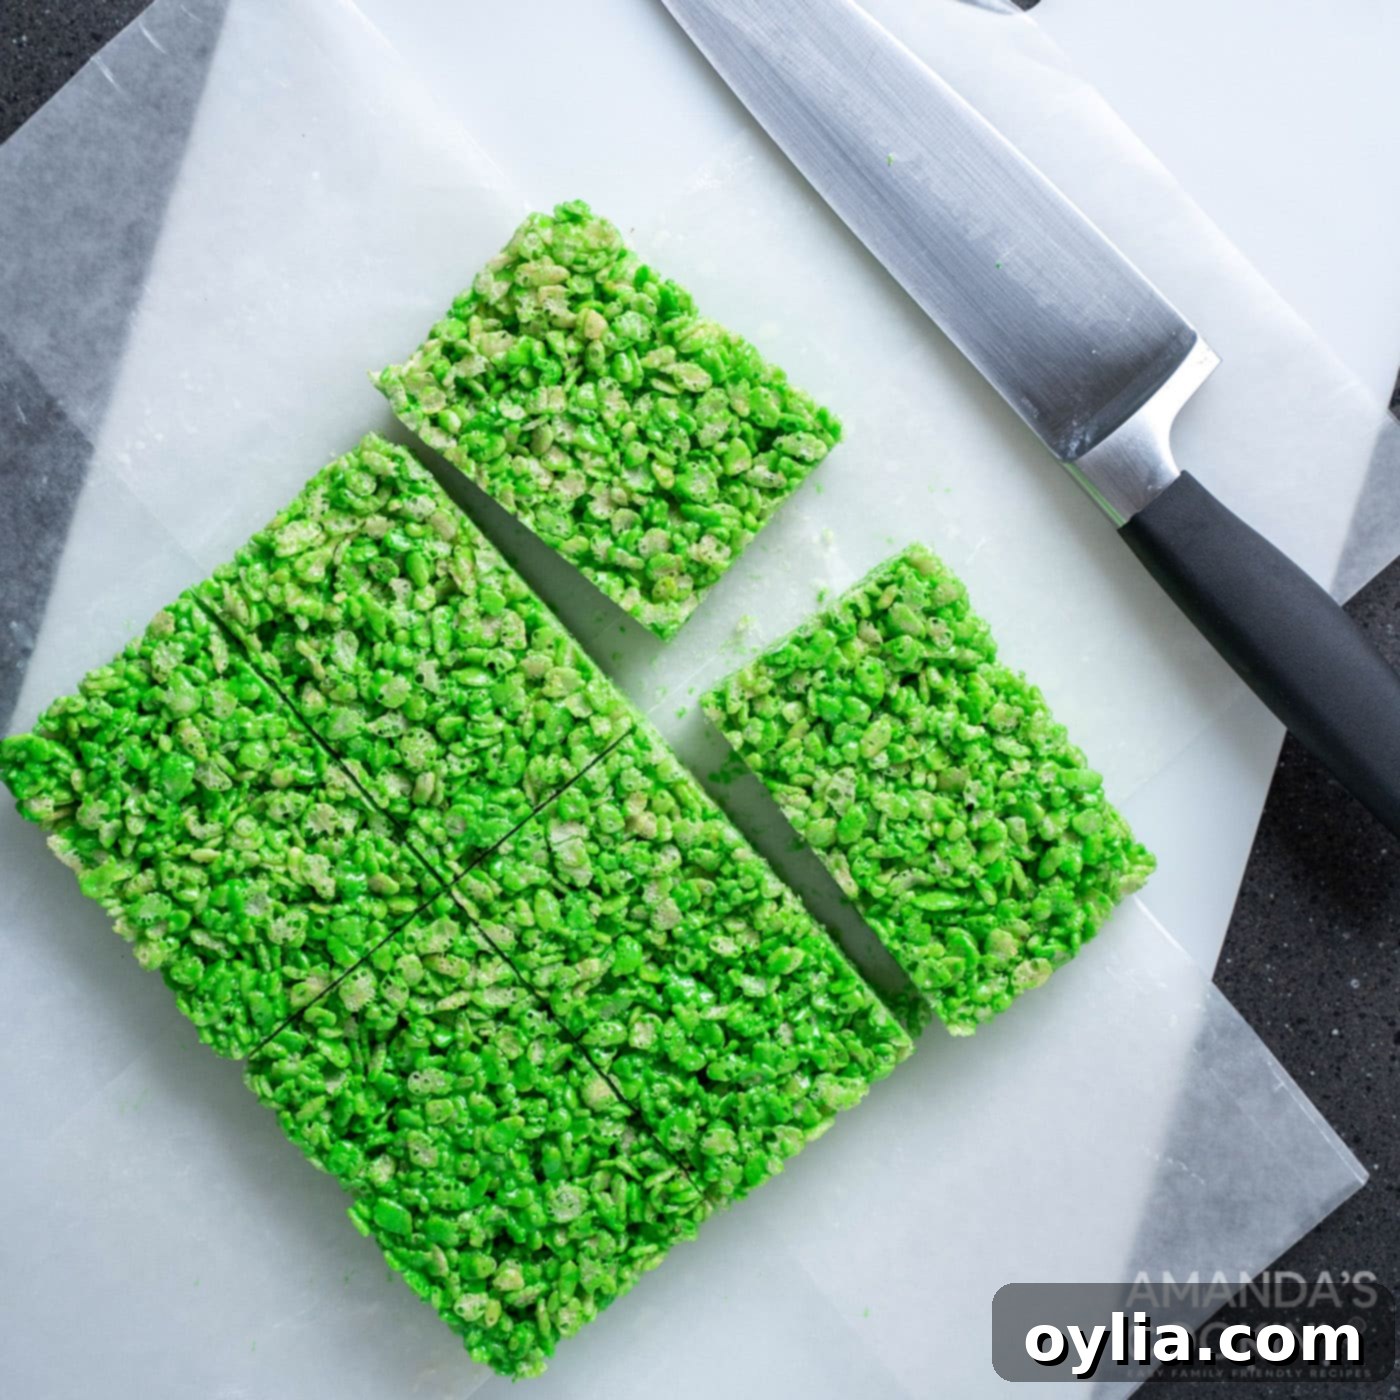
- Cool and Cut: Allow the rice krispie treat slab to cool completely at room temperature. This will take at least an hour. Once fully cooled and firm, use the parchment paper overhangs to lift the slab out of the pan. Place it on a cutting board and cut it into 6 equal rectangular pieces. These rectangles will form the bodies of your Frankenstein monsters.
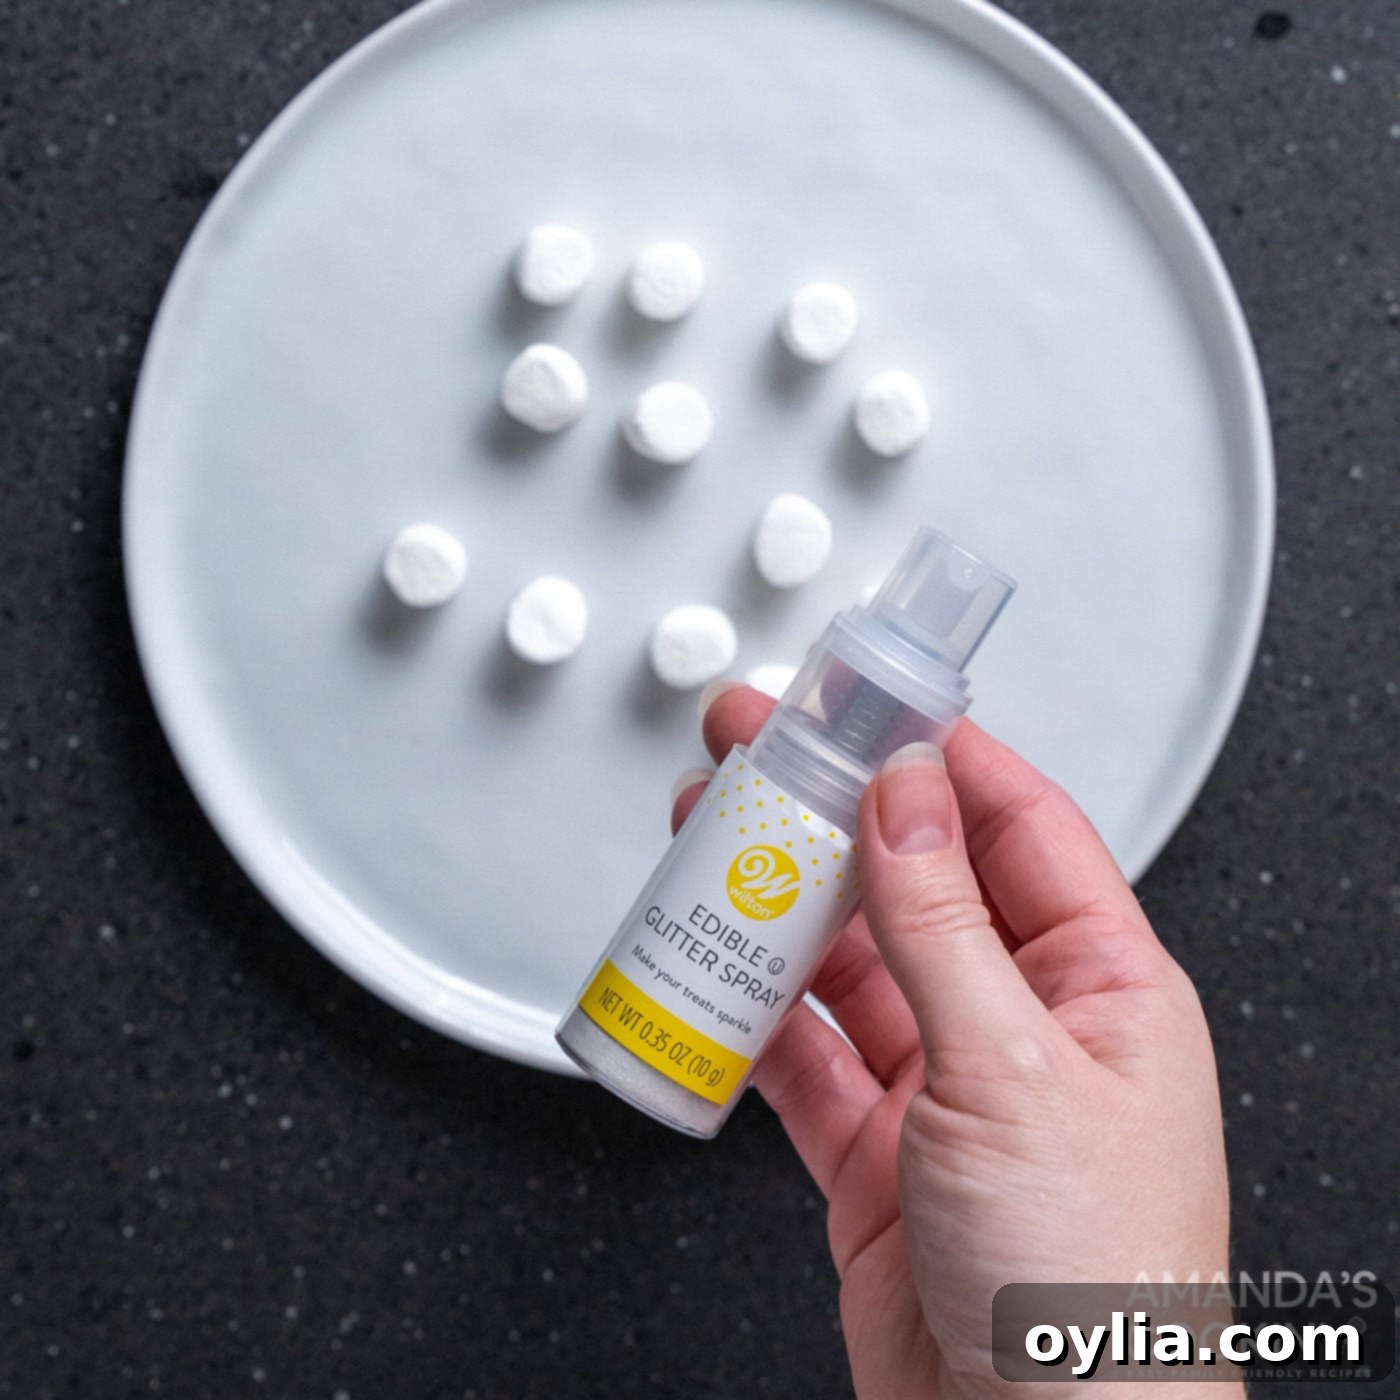
- Prepare Marshmallow Bolts: For decoration, lightly spray the 12 mini marshmallows with edible silver glitter spray if you want a metallic effect for the “bolts.” Set them aside. If using pretzel sticks, you can skip this step.
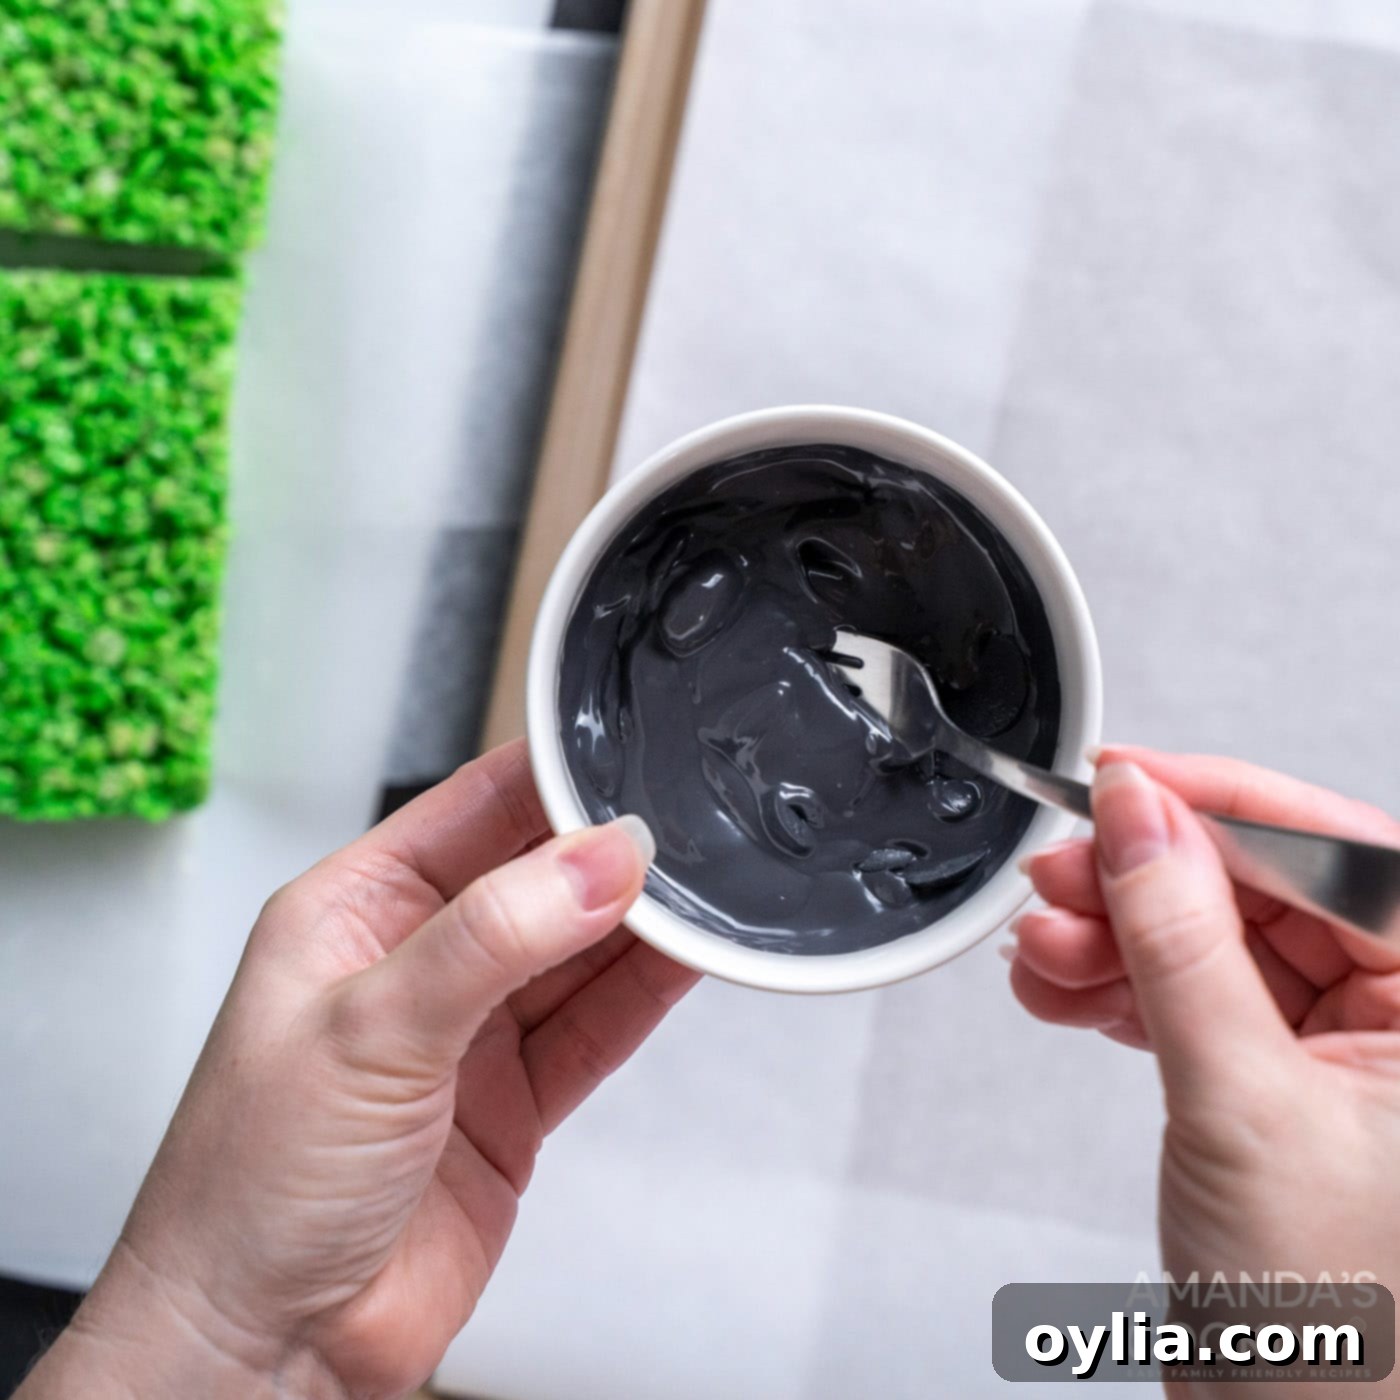
- Melt Black Candy Melts: Melt the black candy melts. You can do this using a double-boiler over simmering water or carefully in a microwave-safe bowl. If using the microwave, heat in 30-second intervals, stirring well after each, until smooth and fully melted. Be careful not to overheat to prevent scorching.
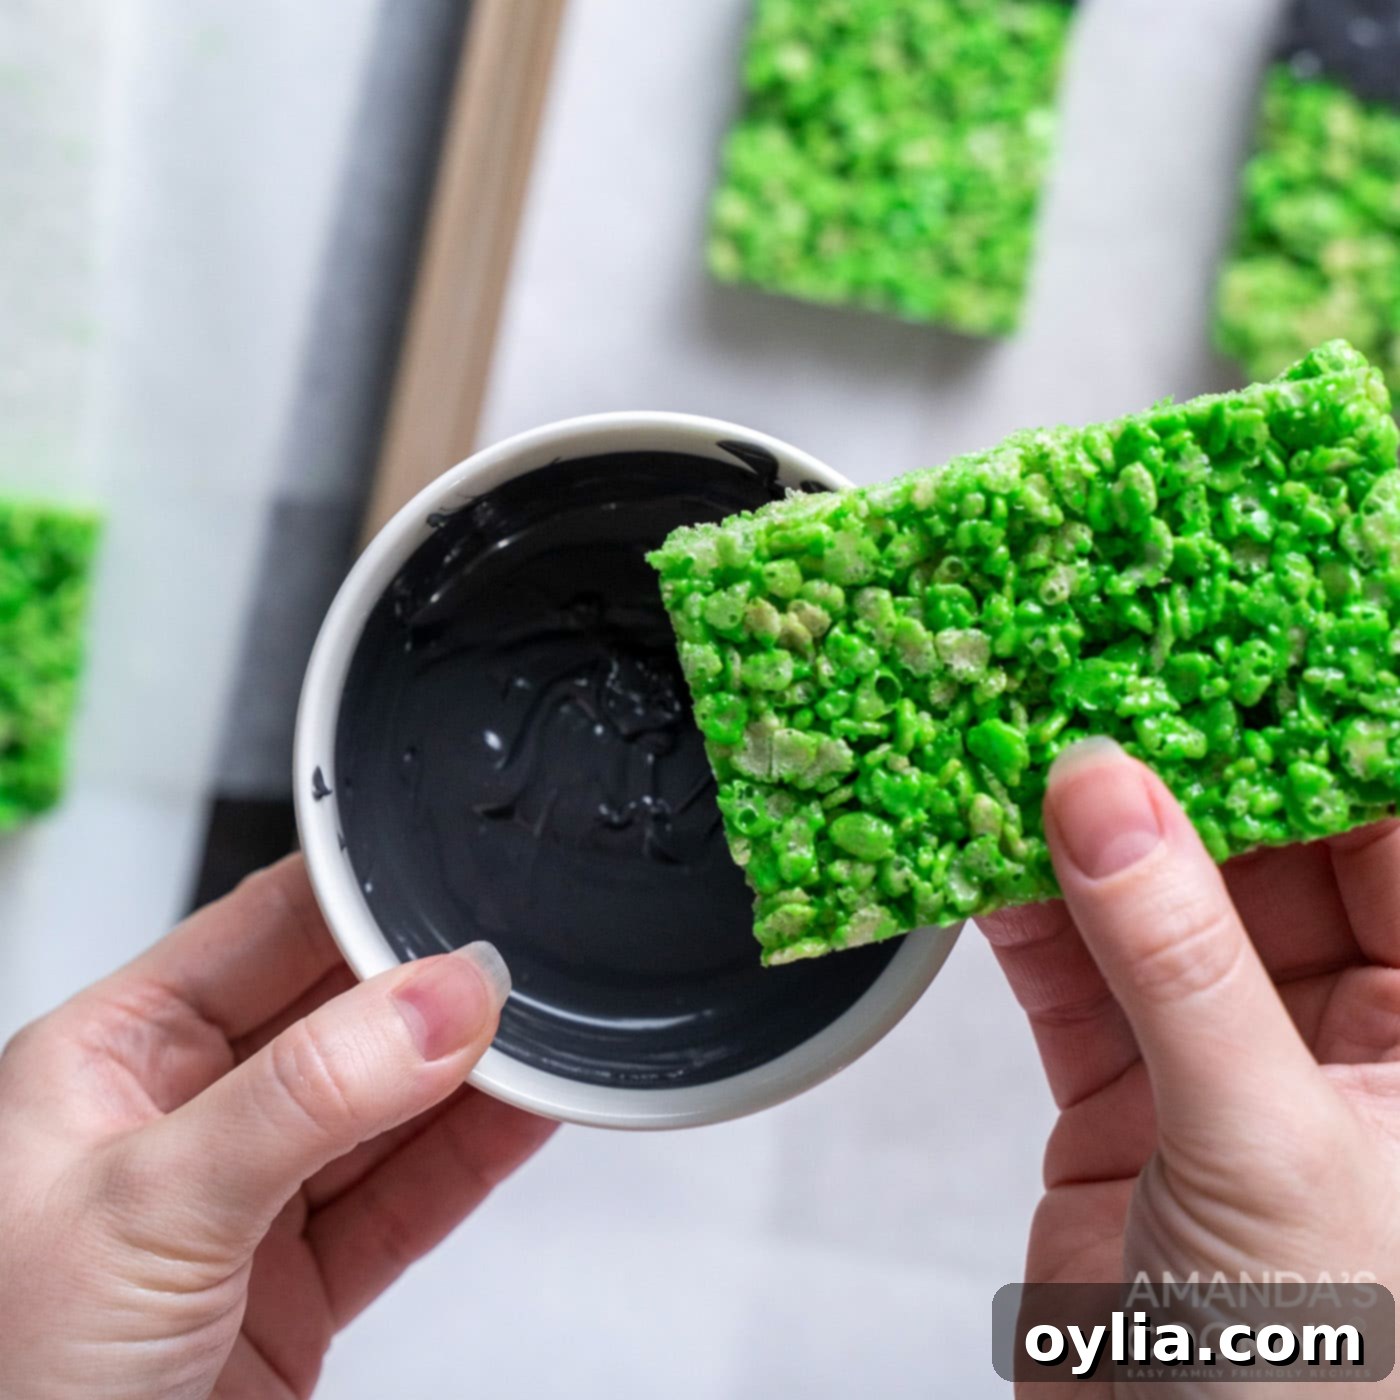
- Create Frankenstein’s Hair: Dip the top inch or so of each green rice krispie treat into the melted black candy melts. Allow any excess to drip off, then place each treat on a parchment-lined baking tray or cooling rack. This will form Frankenstein’s iconic dark hair. Let the candy melts set completely before moving on. You can speed this up by placing them in the refrigerator for 5-10 minutes.
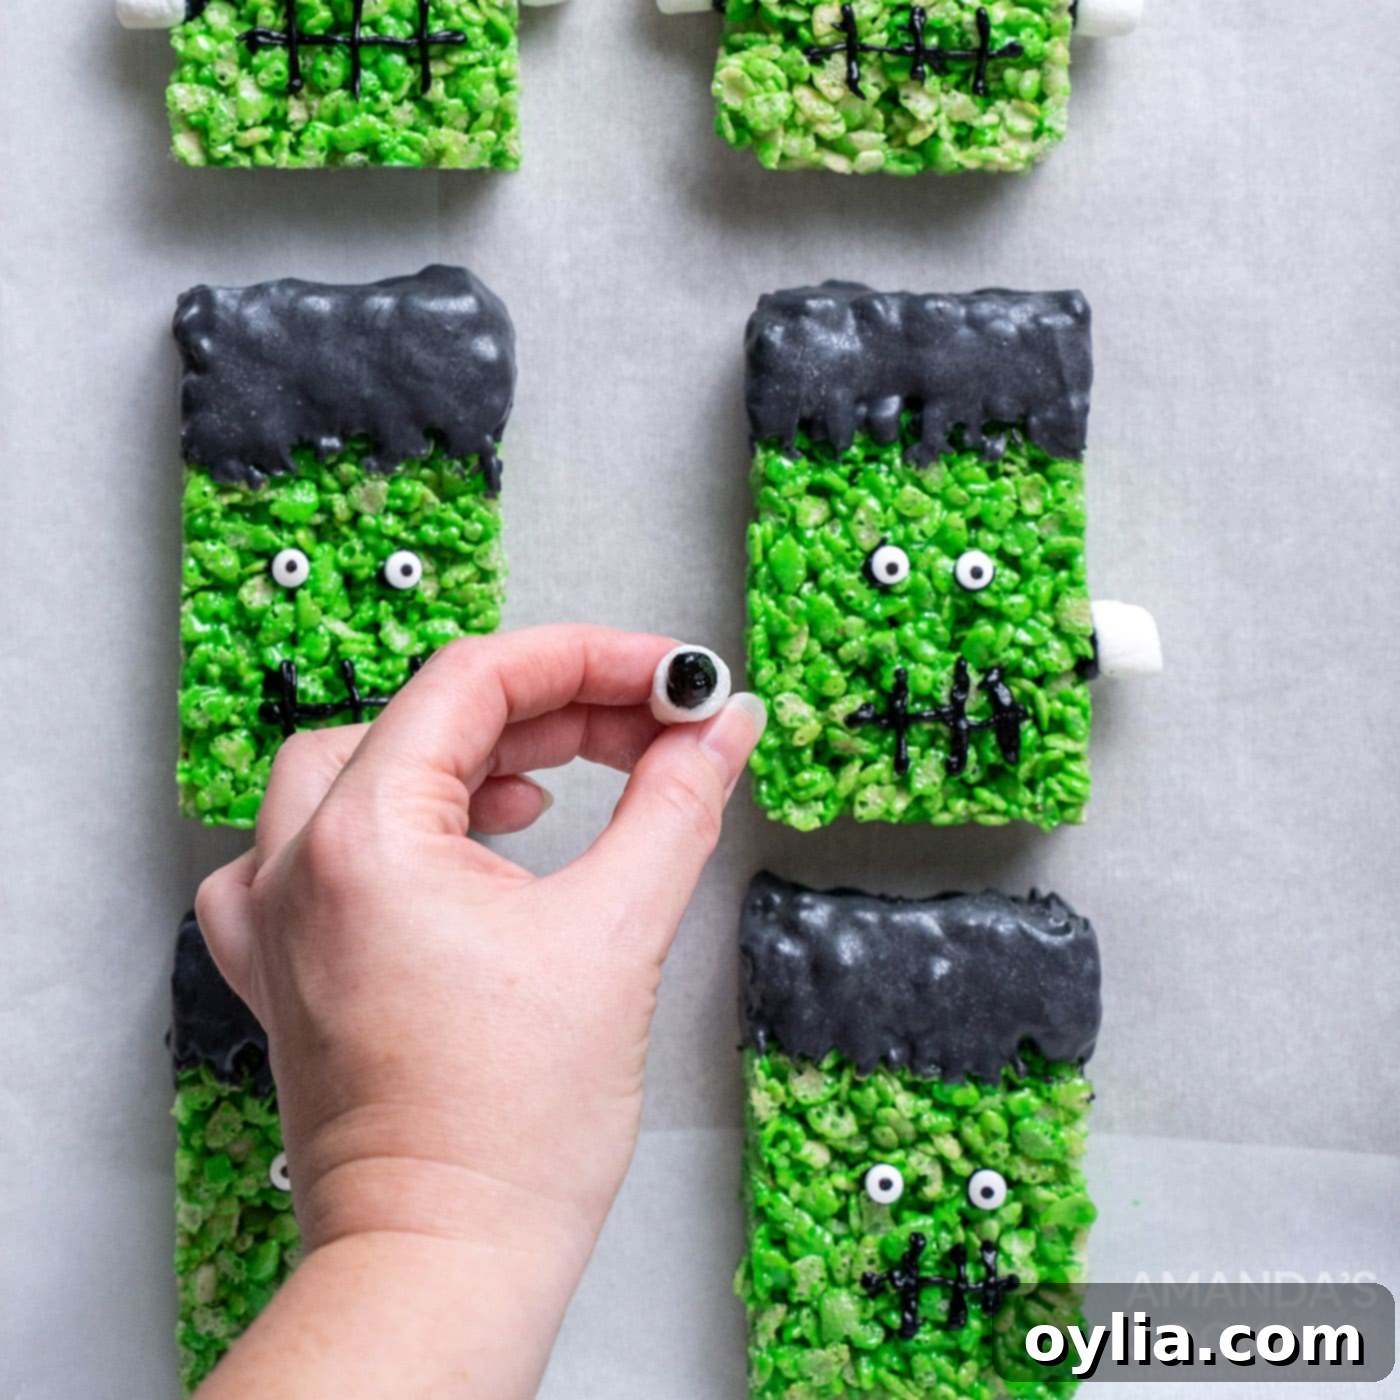
- Attach the Eyes: Once the black candy melt “hair” has set, take your black decorating frosting. Squeeze a small dot of frosting onto the back of each candy eyeball. Press two candy eyeballs onto the face of each Frankenstein treat, using the frosting as glue. Position them just below the black “hair.”
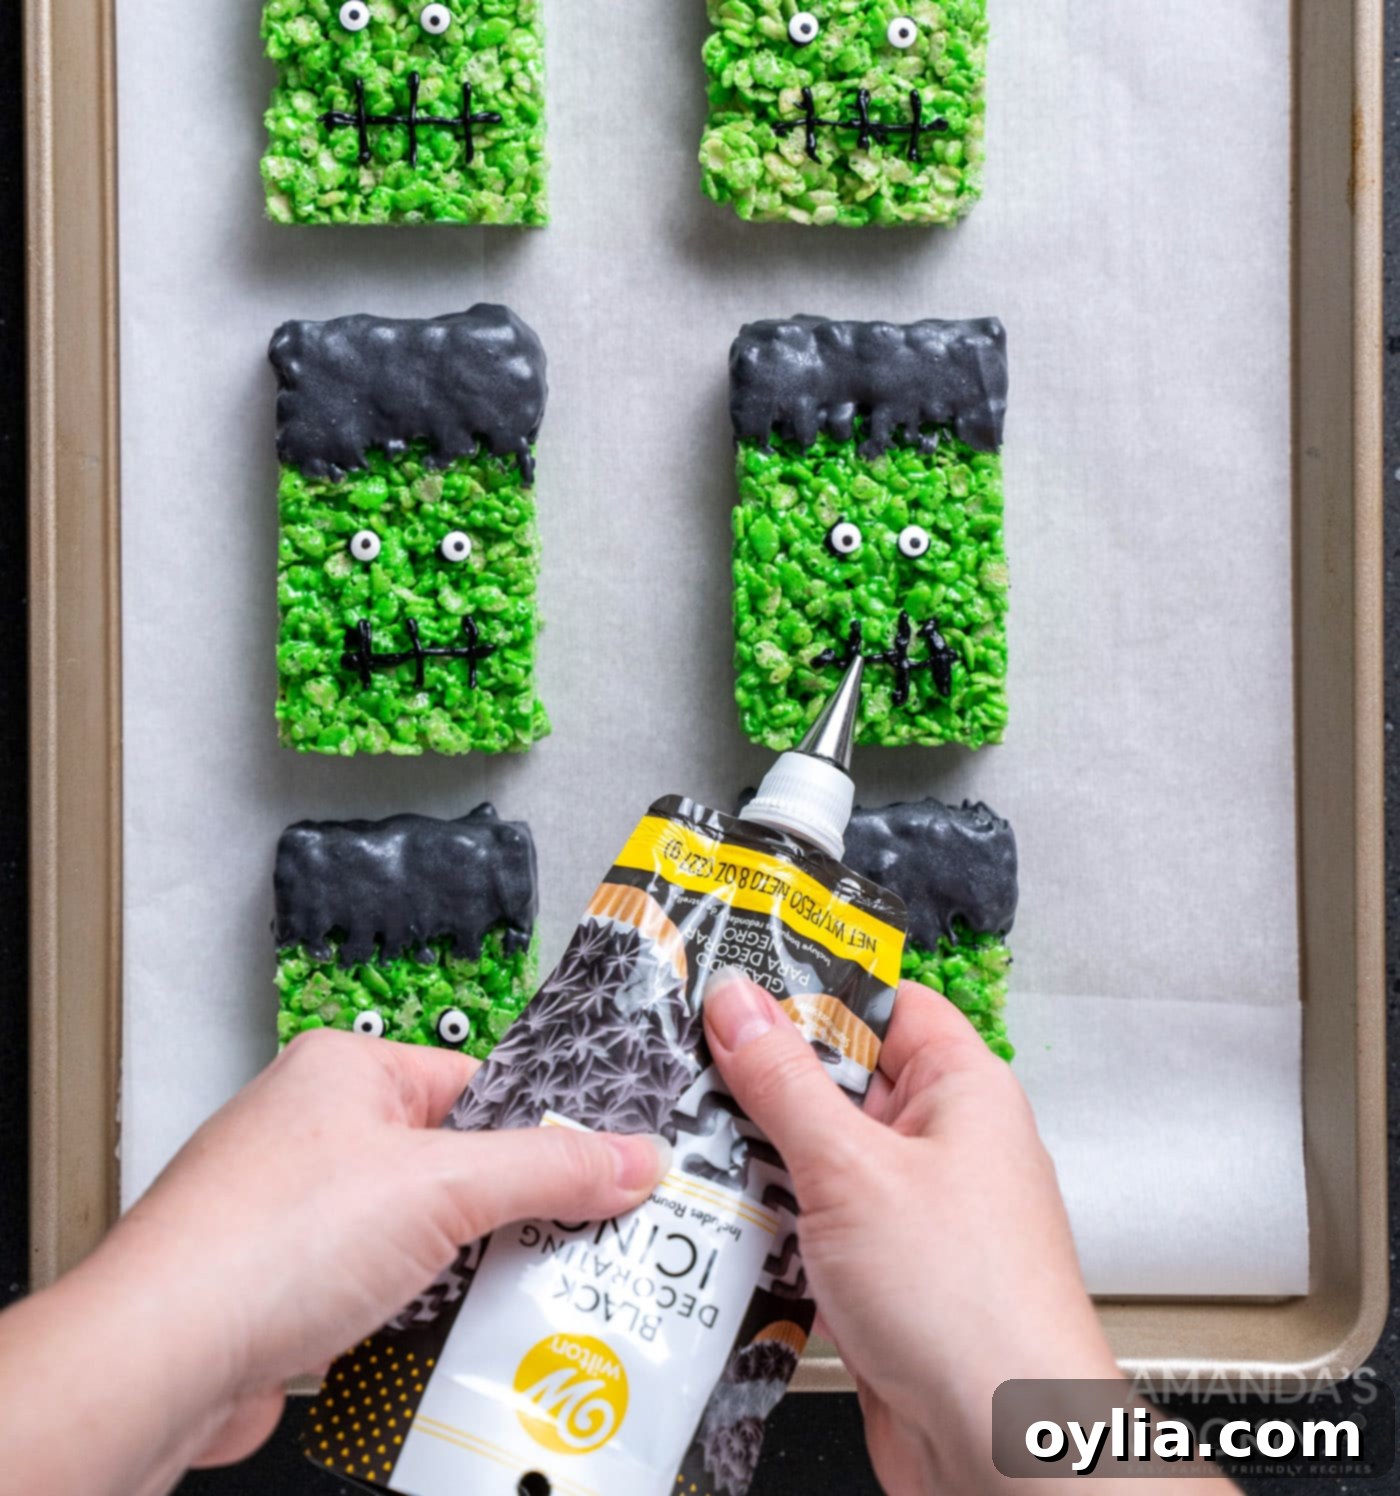
- Draw the Mouth: Using the black decorating frosting, carefully draw a zig-zag or stitched mouth onto each Frankenstein’s face. You can vary the expressions – some can be grumpy, some surprised, or even a little silly!
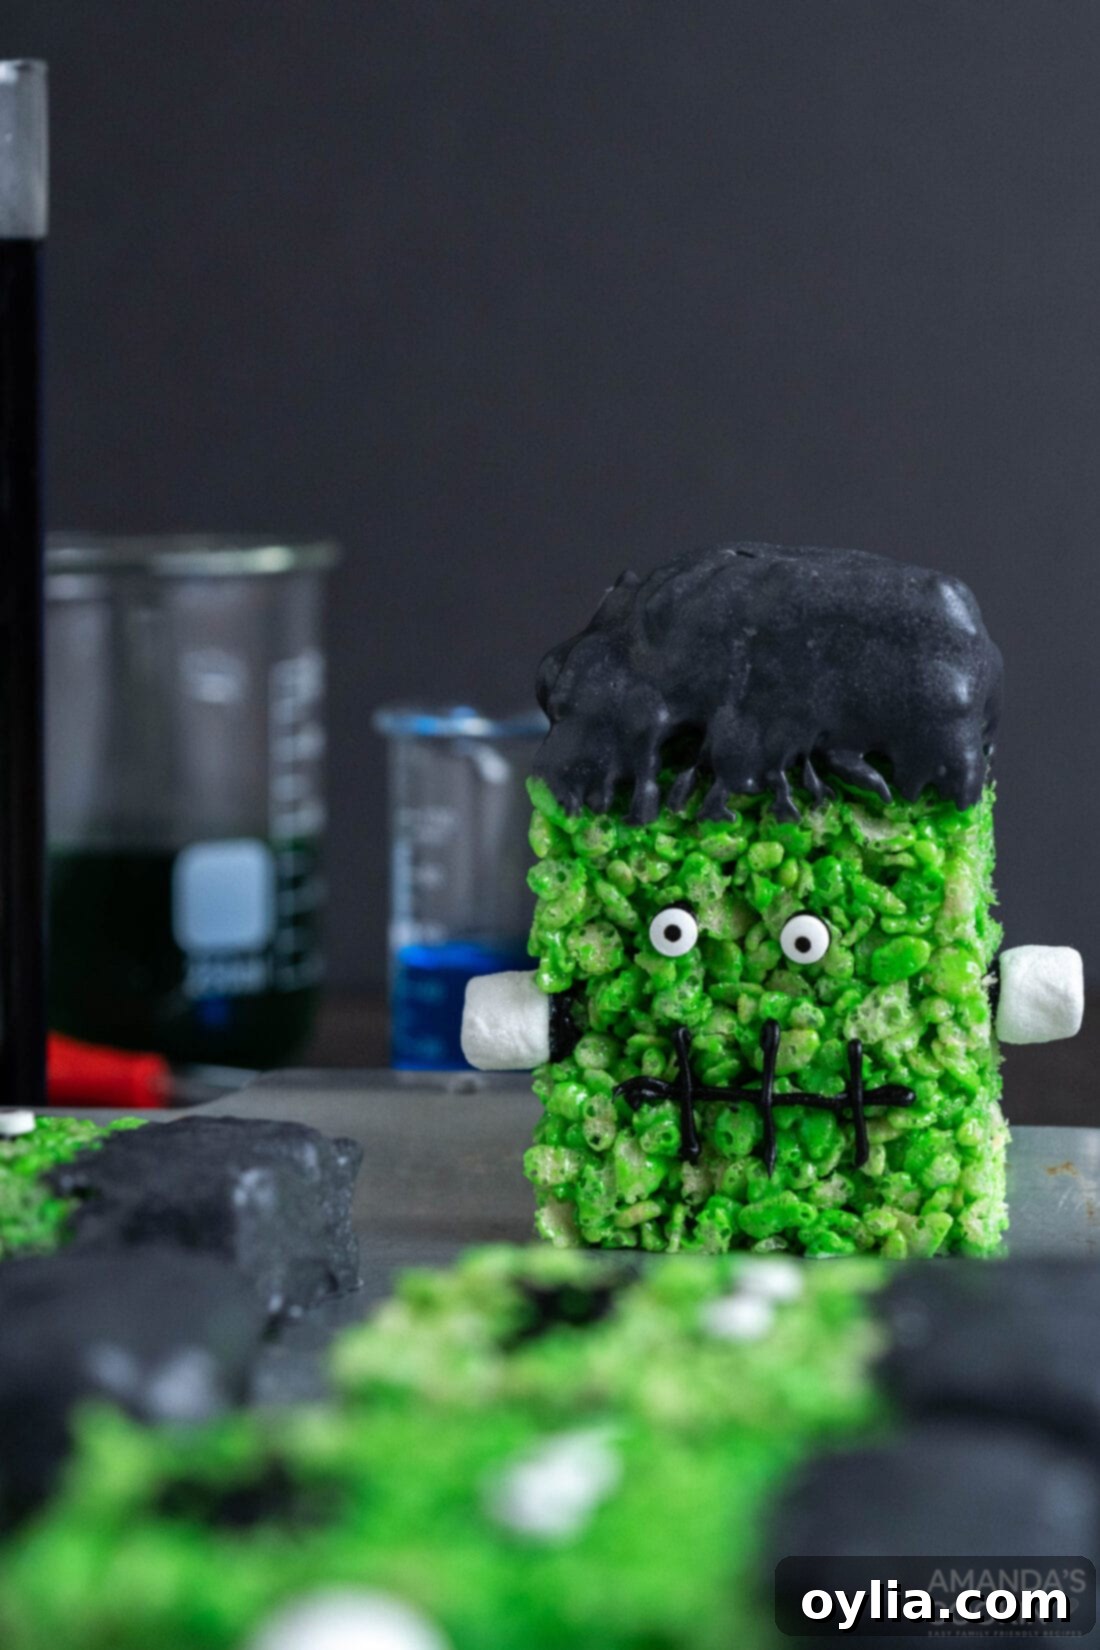
- Add the Bolts: Finally, use a tiny dab of black frosting as glue to stick one prepared mini marshmallow (or pretzel stick) on each side of the Frankenstein’s face, near the bottom of the “hair.” These are the iconic neck bolts!
- Let Set & Serve: Allow all the frosting to set for about 15-30 minutes, or until firm to the touch. This prevents smudging. Once set, your delightful Frankenstein Rice Krispie Treats are ready to be served and enjoyed by all your little monsters!
Frequently Asked Questions & Expert Tips for Best Frankenstein Rice Krispie Treats
To keep these rice krispie treats wonderfully soft and chewy, it’s crucial to store them properly. Always place them in an air-tight container at room temperature, in a cool, dry place. Avoid direct sunlight or very warm spots, as this can make them melt or become overly sticky. When stored correctly, they should remain fresh and delicious for about 2-3 days. If you’re planning to make them in advance for an event, we recommend preparing them no more than one day beforehand for optimal freshness and texture.
Absolutely! These are fantastic make-ahead treats for Halloween. The base rice krispie treats can be made up to 2 days in advance. Store the plain green squares in an airtight container. On the day you plan to serve them, you can quickly add the candy melt hair and facial decorations. This breaks up the work and makes party prep much easier.
There are a couple of common culprits for hard rice krispie treats:
- Overheating Marshmallows: This is the most frequent reason. If marshmallows are cooked at too high a heat or for too long, they become brittle when cooled. Keep the heat on low and remove them from the stove when they are *almost* melted, with a few small lumps remaining.
- Over-Compacting: When pressing the mixture into the pan, be gentle. Pressing too firmly crushes the air out of the cereal, resulting in dense, hard treats. A light, even pat is all you need.
- Stale Marshmallows: Always use fresh marshmallows for the best results. Older, drier marshmallows won’t melt as smoothly and can lead to a tougher treat.
The secret to a truly vibrant green Frankenstein is using gel food coloring. Unlike liquid food coloring, gel colors are highly concentrated and won’t add extra moisture that can affect the texture of your treats. Add a small amount, mix well, and then gradually add more until you achieve your desired intensity. You’ll be surprised how little you need to get a bright, bold green!
For the base, other puffed rice cereals will work, though the classic Rice Krispies have a unique crispiness. For decorations, you can certainly get creative! Instead of mini marshmallows for the bolts, pretzel sticks offer a nice salty crunch and a different texture. For the “hair,” melted chocolate chips or green candy melts (for a different Frankenstein interpretation) could work, but black candy melts provide that classic, stark contrast. Feel free to experiment with different types of candy for eyes or other edible embellishments!
Serving Suggestions for Your Spooky Frankenstein Treats
These Frankenstein Rice Krispie Treats are not just a dessert; they’re a statement! Their vibrant green hue and adorable yet spooky faces make them a standout treat for any Halloween festivity. Here are some fantastic serving suggestions to make the most of your monstrous creations:
- Halloween Party Centerpiece: Arrange them on a platter with other spooky snacks like Ghost Brownies or Witch Finger Cookies for an eye-catching Halloween buffet. They’ll be the first to disappear!
- Classroom Treats or Bake Sales: Individually wrap each Frankenstein treat in a clear cellophane bag and tie it with a festive orange or black ribbon. This makes them perfect for school parties, bake sales, or trick-or-treat alternatives.
- “You’ve Been Booed” Basket Addition: Include a couple of these fun treats in your “You’ve Been Booed” basket. They’re a charming surprise that friends and neighbors will adore.
- Halloween Movie Night Snack: Pair these chewy monsters with a spooky movie marathon for a cozy and festive evening in. Add some Halloween Dirt Cups for an extra touch.
- Lunchbox Surprise: Tuck one into your child’s lunchbox for a delightful Halloween-themed surprise that will bring a smile to their face during the school day.
- Gift Giving: Beyond cellophane bags, consider packaging a few treats in a small, decorative Halloween box for a thoughtful hostess gift or a treat for teachers and colleagues.
- Pair with Spooky Drinks: Serve these alongside other themed beverages, like our Frankenstein Margarita for the adults, or a non-alcoholic green punch for the kids, to complete the monstrous theme.
However you choose to present them, these Frankenstein Rice Krispie Treats are sure to be a memorable and delicious part of your Halloween celebrations!
More Delightfully Spooky Halloween Recipes to Try!
If you’re still in the mood for more festive treats and meals to celebrate Halloween, we have a cauldron full of amazing ideas! From sweet indulgences to savory snacks, these recipes are sure to add more fun to your spooky season:
- Ghost Brownies
- Mummy Meatloaf
- Witch Finger Cookies
- Halloween Candy Apples
- Jalapeno Popper Mummies
- Vampire Sandwich Cookies
- Marshmallow Frankensteins
- Frankenstein Margarita
- Halloween Dirt Cups
I love to bake and cook and share my kitchen experience with all of you! Remembering to come back each day can be tough, that’s why I offer a convenient newsletter every time a new recipe posts. Simply subscribe and start receiving your free daily recipes!
Frankenstein Rice Krispie Treats
IMPORTANT – There are often Frequently Asked Questions within the blog post that you may find helpful. Simply scroll back up to read them!
Print It
Pin It
Rate It
Save ItSaved!
Ingredients
Rice Krispie Treats
- 2 Tbsp unsalted butter
- 2 cups mini marshmallows
- ½ tsp vanilla extract
- ⅛ tsp salt
- ½ Tbsp green gel food coloring
- 3 cups rice krispies cereal
For Decoration
- 12 mini marshmallows
- edible silver glitter spray
- ¾ cup black candy melts
- 12 candy eyeballs
- black decorating icing
Things You’ll Need
-
8×8 baking pan
-
Saucepan
Before You Begin
- You may omit the glitter spray altogether if desired or substitute the marshmallows for pretzel sticks for a different texture and look for the “bolts.”
- It’s critically important not to overheat the marshmallows when melting. If they are over heated, this can cause your rice krispie treats to become tough and hard instead of delightfully soft and chewy. Cook them over low heat and remove from heat when mostly melted, with a few small lumps remaining.
- For best results, use fresh marshmallows and cereal. Stale ingredients can impact the final texture and taste of your treats.
- When pressing the cereal mixture into the pan, apply gentle pressure. Over-compacting can make the treats dense and hard.
Instructions
-
Line an 8 by 8-inch baking dish with 2 pieces of parchment paper so that it hangs over all 4 sides, creating a convenient sling. Lightly spray the paper with coconut oil spray to prevent sticking.
-
Melt the butter in a medium saucepan over medium heat. Turn the heat down to low, stir in the mini marshmallows, and cook (stirring continuously) until they’re almost but not quite fully melted, with a few small lumps remaining. This should take about 30 seconds.
-
Remove the saucepan from the heat and stir in the vanilla, salt, and green gel food coloring until well combined and the color is vibrant. Stir in the rice krispies cereal gently until well-coated with the green marshmallow mixture.
-
Pour the cereal mixture into the prepared pan. Use a thin metal spatula (lightly sprayed with coconut oil) to gently spread it out in an even layer. Avoid pressing too hard to keep the treats soft.
-
Cool completely at room temperature (about 1 hour) until firm. Then, lift the slab out of the pan using the parchment paper and cut into 6 equal rectangular pieces.
-
To decorate, lightly spray the 12 mini marshmallows with edible silver glitter spray to create metallic “bolts.”
-
Melt the black candy melts in a double-boiler or in a microwave-safe bowl (in 30-second intervals, stirring each time) until smooth.
-
Dip the top inch or so of each rice krispie treat in the melted black candy. Let any excess drip off, then place each on a parchment-lined baking tray to set.
-
Use a small dot of black decorating frosting as glue to stick 2 candy eyeballs onto each Frankenstein’s face, just below the black “hair.”
-
Draw a stitched or zig-zag mouth on each face with the black frosting.
-
Again use the black frosting as glue, this time to stick 1 prepared mini marshmallow “bolt” on each side of the faces.
-
Let all the frosting and candy melts set completely (about 15-30 minutes) before serving.
Nutrition
The recipes on this blog are tested with a conventional gas oven and gas stovetop. It’s important to note that some ovens, especially as they age, can cook and bake inconsistently. Using an inexpensive oven thermometer can assure you that your oven is truly heating to the proper temperature. If you use a toaster oven or countertop oven, please keep in mind that they may not distribute heat the same as a conventional full sized oven and you may need to adjust your cooking/baking times. In the case of recipes made with a pressure cooker, air fryer, slow cooker, or other appliance, a link to the appliances we use is listed within each respective recipe. For baking recipes where measurements are given by weight, please note that results may not be the same if cups are used instead, and we can’t guarantee success with that method.
