The Ultimate No-Bake Chocolate Icebox Cake: A Decadent, Easy Dessert for Any Occasion
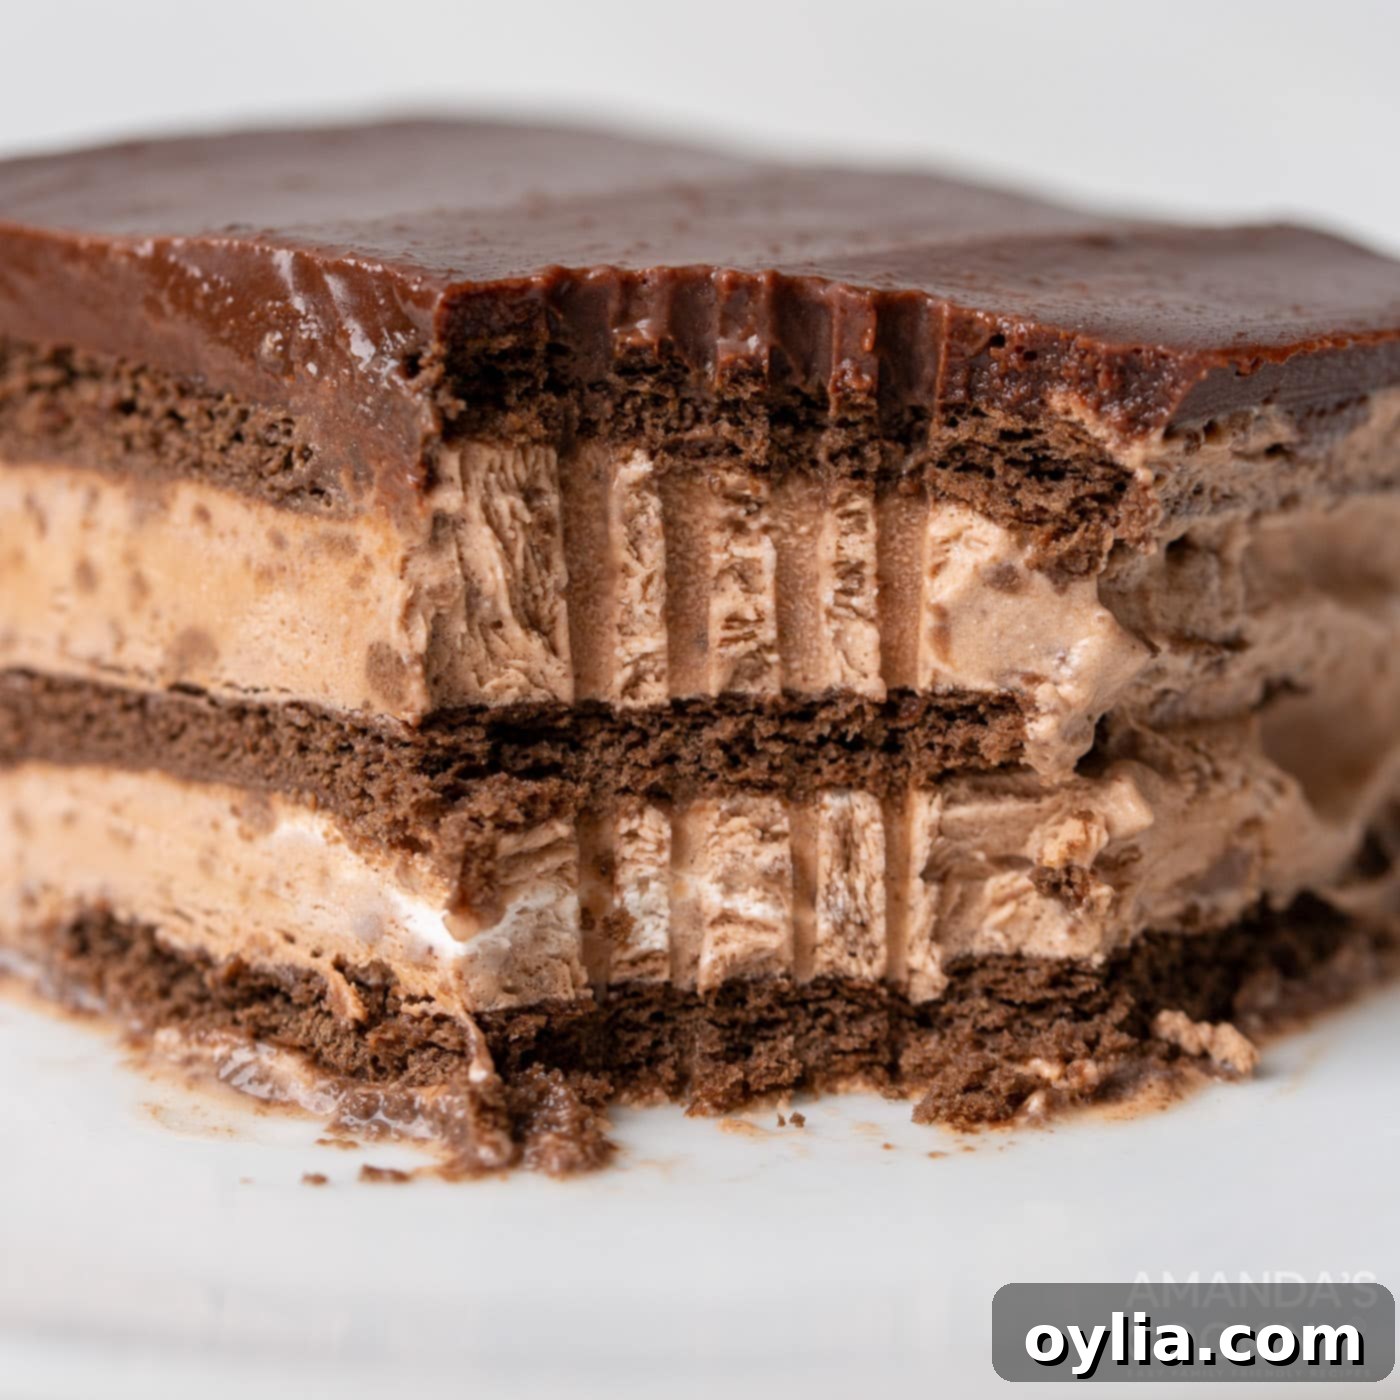
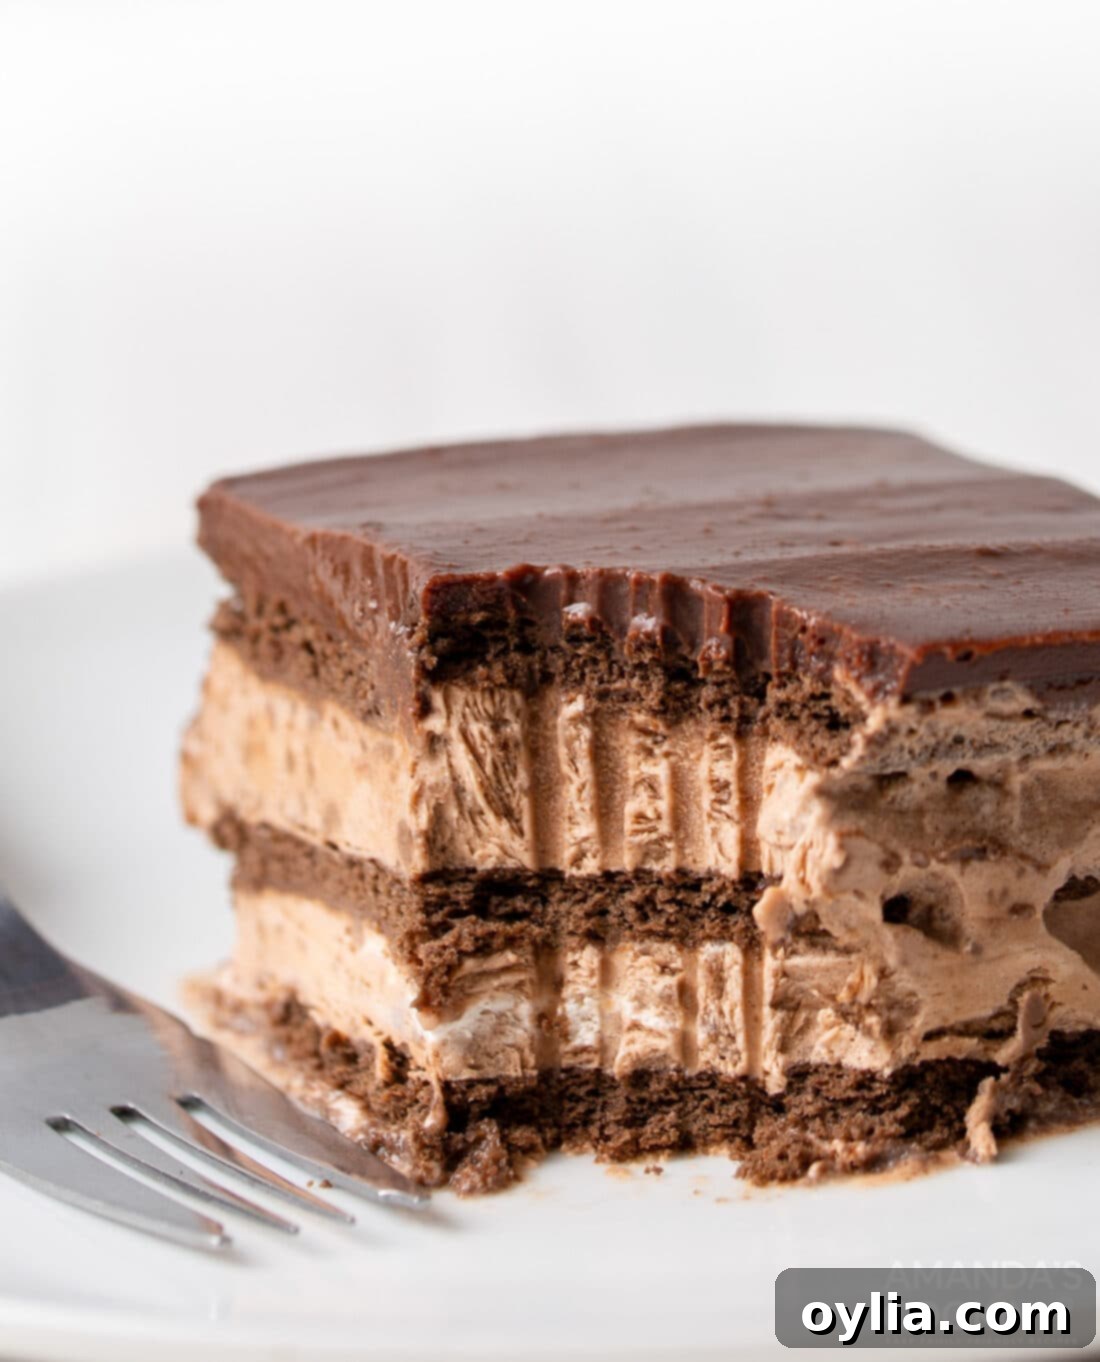
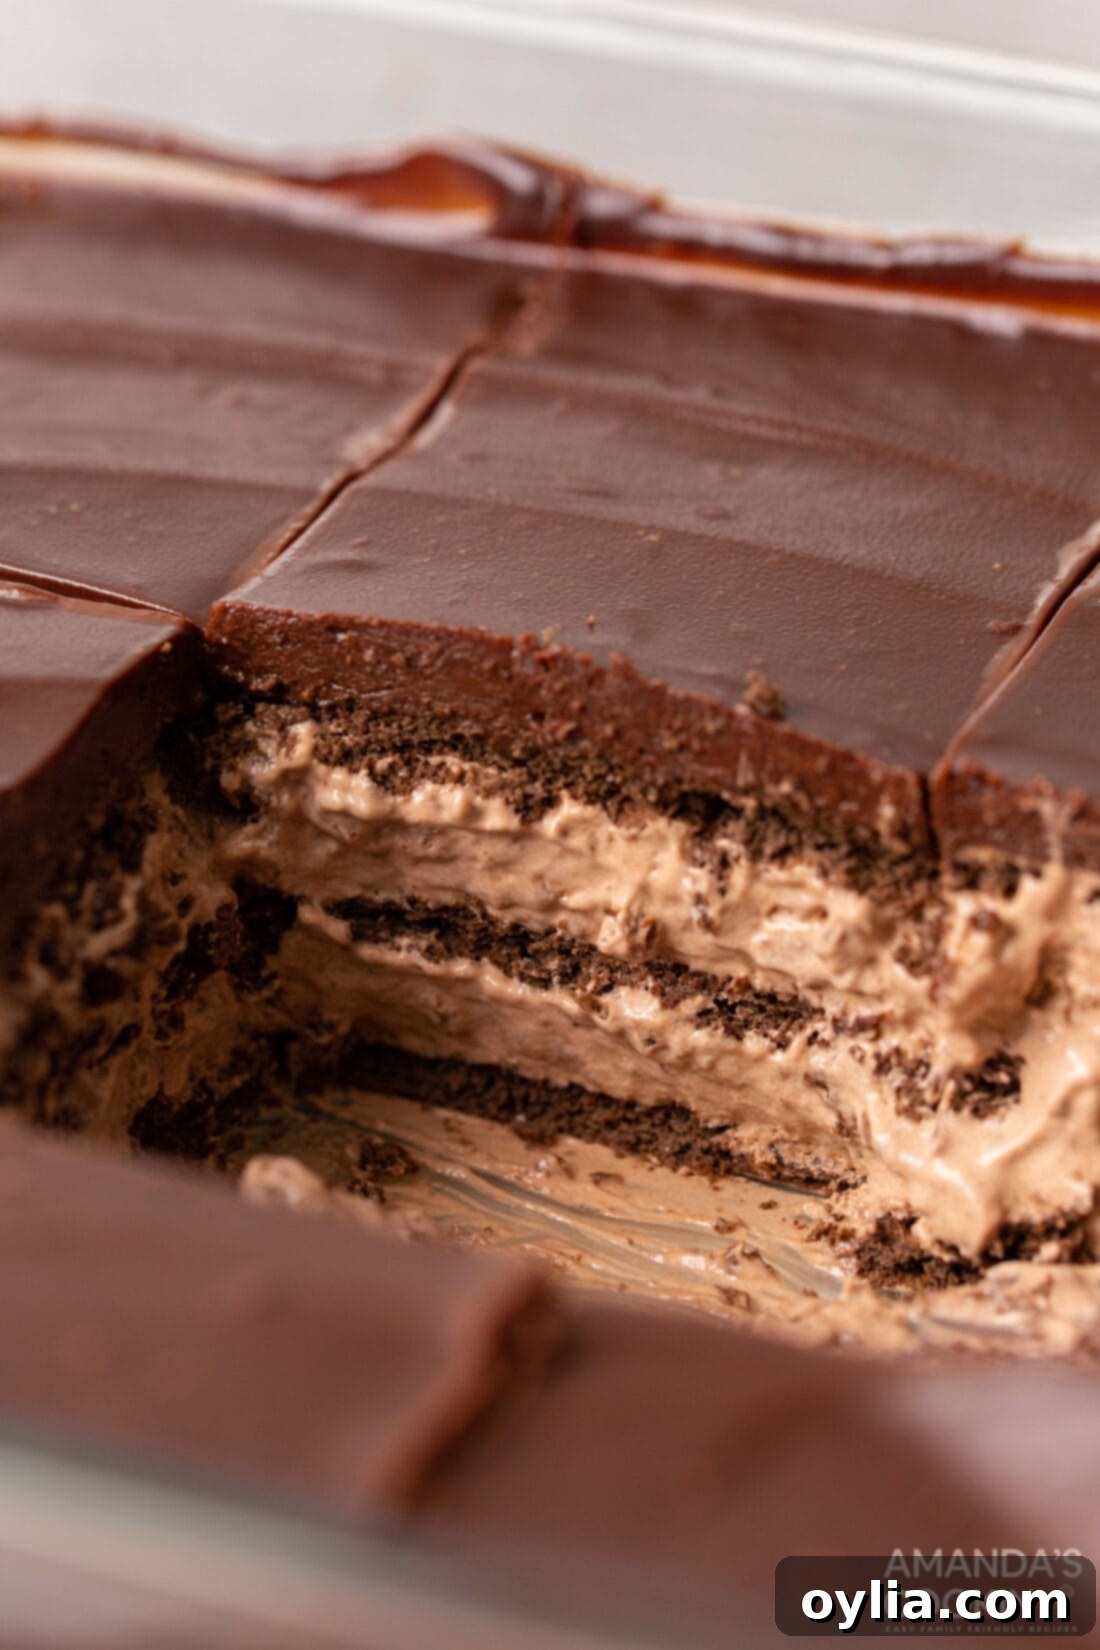
Imagine layers of crisp graham crackers transforming into tender, cake-like sheets, embraced by velvety chocolate pudding, rich cream cheese, and light, airy whipped cream. Crowned with a glossy, irresistible chocolate ganache, this no-bake chocolate icebox cake is a sweet masterpiece that requires no oven, making it the ultimate hassle-free dessert for any chocolate lover. It’s an effortlessly elegant treat that promises pure indulgence with every spoonful.
Why This No-Bake Chocolate Icebox Cake is a Must-Try
For every chocolate lover out there, this no-bake chocolate icebox cake is nothing short of a dream come true. Every layer bursts with rich, deep chocolate flavor, meticulously combined to create a dessert that is creamy, dreamy, and utterly irresistible. It’s a guaranteed crowd-pleaser that delivers maximum flavor with minimal effort.
Icebox cakes are undeniably our favorite summer dessert, and for good reason! Their beauty lies in their simplicity: no oven required, which means no heating up your kitchen during those scorching summer months. The magic happens in your refrigerator as the graham crackers soften and meld with the creamy chocolate layers, transforming into a tender, cake-like texture overnight. As a devoted chocolate enthusiast, I knew we had to craft the ultimate, full-blown chocolate version of this beloved classic. If you’re a fan of cookies and cream, don’t forget to check out our equally delicious Oreo icebox cake – it’s a cookies and cream fantasy that’s just as simple to make!
The Enduring Charm of Icebox Cakes: A No-Bake Wonder
Icebox cakes have a charming history, rooted in the early 20th century as a clever way to make desserts without an oven, leveraging the then-new technology of the refrigerator (or “icebox”). They quickly became a staple for home cooks, particularly during warmer months, and their appeal has only grown. This type of cake relies on the simple principle of allowing crisp cookies or crackers to absorb moisture from a creamy filling, transforming them into soft, cake-like layers overnight. It’s a testament to how simple ingredients, when thoughtfully combined and given time, can create something truly extraordinary.
What makes this chocolate icebox cake particularly special is its ability to deliver a luxurious, decadent experience with such ease. It’s perfect for busy hosts who want to impress without spending hours in the kitchen, or for anyone craving a rich dessert without the fuss of baking. The combination of textures – from the smooth, rich ganache to the yielding, chocolate-infused graham crackers and the creamy filling – creates a delightful sensory experience that’s hard to beat. It’s not just a dessert; it’s a celebration of chocolate and convenience, making it ideal for everything from casual family dinners to elegant gatherings.
Ingredients You Will Need
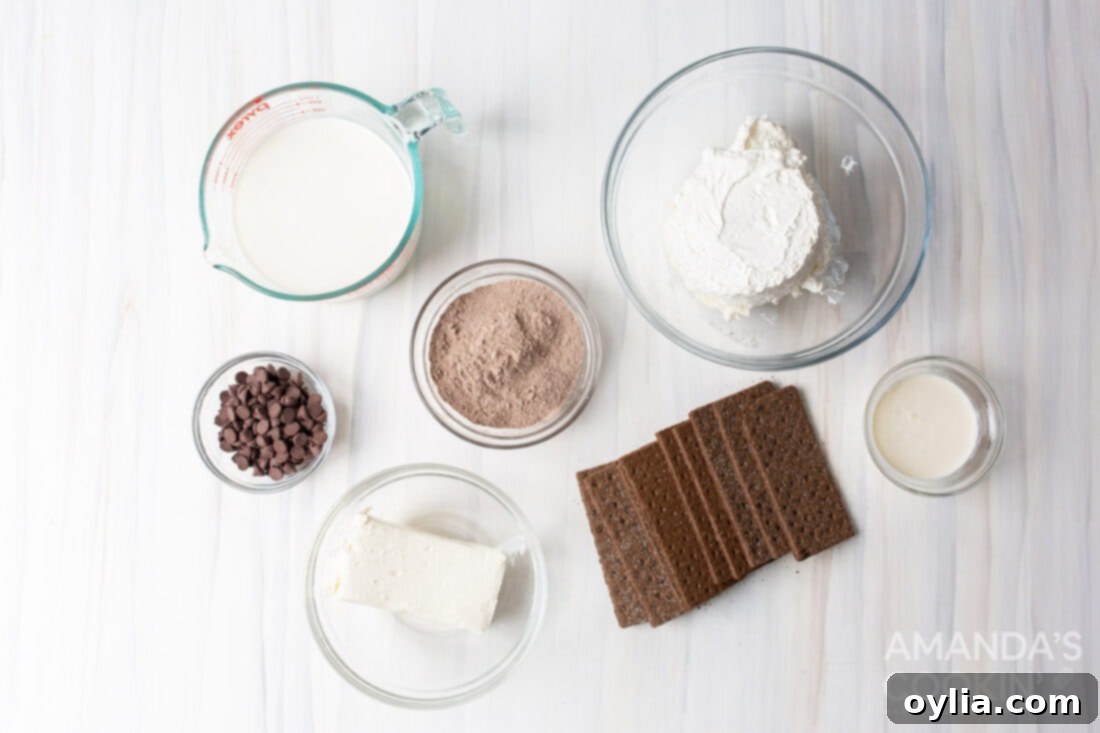
Creating this stunning chocolate icebox cake starts with gathering a few simple, high-quality ingredients. For the full list of measurements and step-by-step instructions, refer to the printable recipe card located at the end of this post. These core ingredients come together to form the rich, layered texture and profound chocolate flavor that defines this indulgent dessert.
Ingredient Info and Substitution Suggestions
Understanding each ingredient’s role and knowing possible substitutions can help you tailor this chocolate icebox cake to your preferences and pantry availability.
WHIPPED CREAM – We opt for the convenience of a container of Cool Whip for this recipe, making the preparation even quicker. However, for a truly homemade touch, you can easily whip up your own. Use heavy whipping cream, granulated sugar, and a touch of vanilla extract (or even vanilla bean paste for richer flavor). Beat on high speed until beautiful medium to stiff peaks form, being careful not to overbeat, which can turn it grainy.
PUDDING – It’s crucial to use instant chocolate pudding mix for this recipe. You will only need the dry powder, and it’s important to ignore the milk and other ingredients listed on the back of the box, as our recipe incorporates the pudding mix directly into the cream cheese mixture for a unique texture and flavor. Other instant pudding flavors, like dark chocolate or even cheesecake, could also be experimented with for a different twist.
GRAHAM CRACKERS – To elevate the chocolate experience, we highly recommend chocolate graham crackers. They add an extra layer of cocoa richness that truly sets this dessert apart. If you prefer a slightly less intense chocolate flavor or can’t find chocolate graham crackers, regular graham crackers are a perfectly suitable and delicious substitute. You could also experiment with chocolate wafers, digestive biscuits, or even thin shortbread cookies for different textural nuances.
CREAM CHEESE – Always use full-fat cream cheese for the best results. The fat content contributes significantly to the creamy texture and rich flavor of the filling. Ensure it is properly softened to room temperature before mixing to prevent any lumps, resulting in a perfectly smooth and uniform consistency.
How to Make Chocolate Icebox Cake
These step-by-step photos and instructions are here to help you visualize how to make this recipe. You can Jump to Recipe to get the printable version of this recipe, complete with measurements and instructions at the bottom.
Crafting this incredible no-bake dessert is surprisingly simple and immensely satisfying. Follow these straightforward steps, and you’ll have a show-stopping chocolate icebox cake chilling in your refrigerator in no time. The key is in the precise layering and allowing ample chill time for each component to meld into a harmonious, irresistible treat. Prepare to be amazed by how easily this decadent dessert comes together!
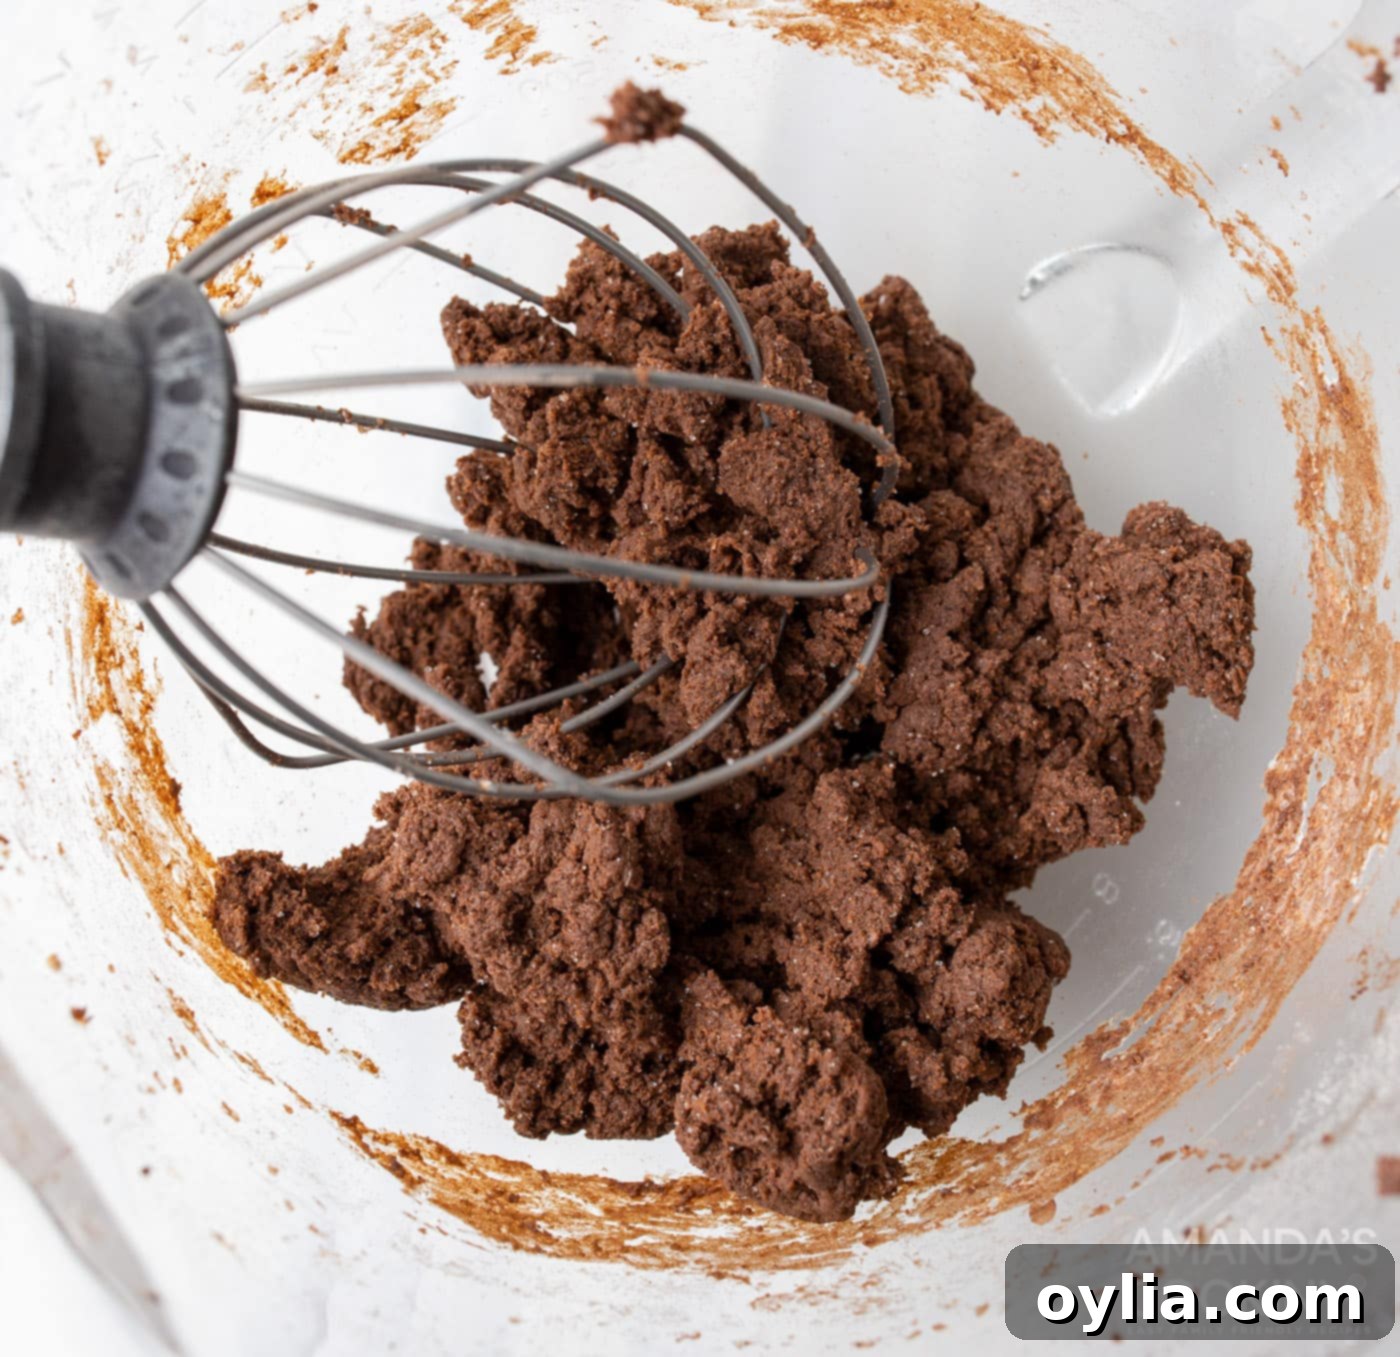
- Using a stand mixer or a handheld mixer, beat the softened cream cheese in a large bowl until light and fluffy, about 2 minutes.
- To the same bowl add instant chocolate pudding powder. Use a stand mixer again to blend until uniform in consistency.

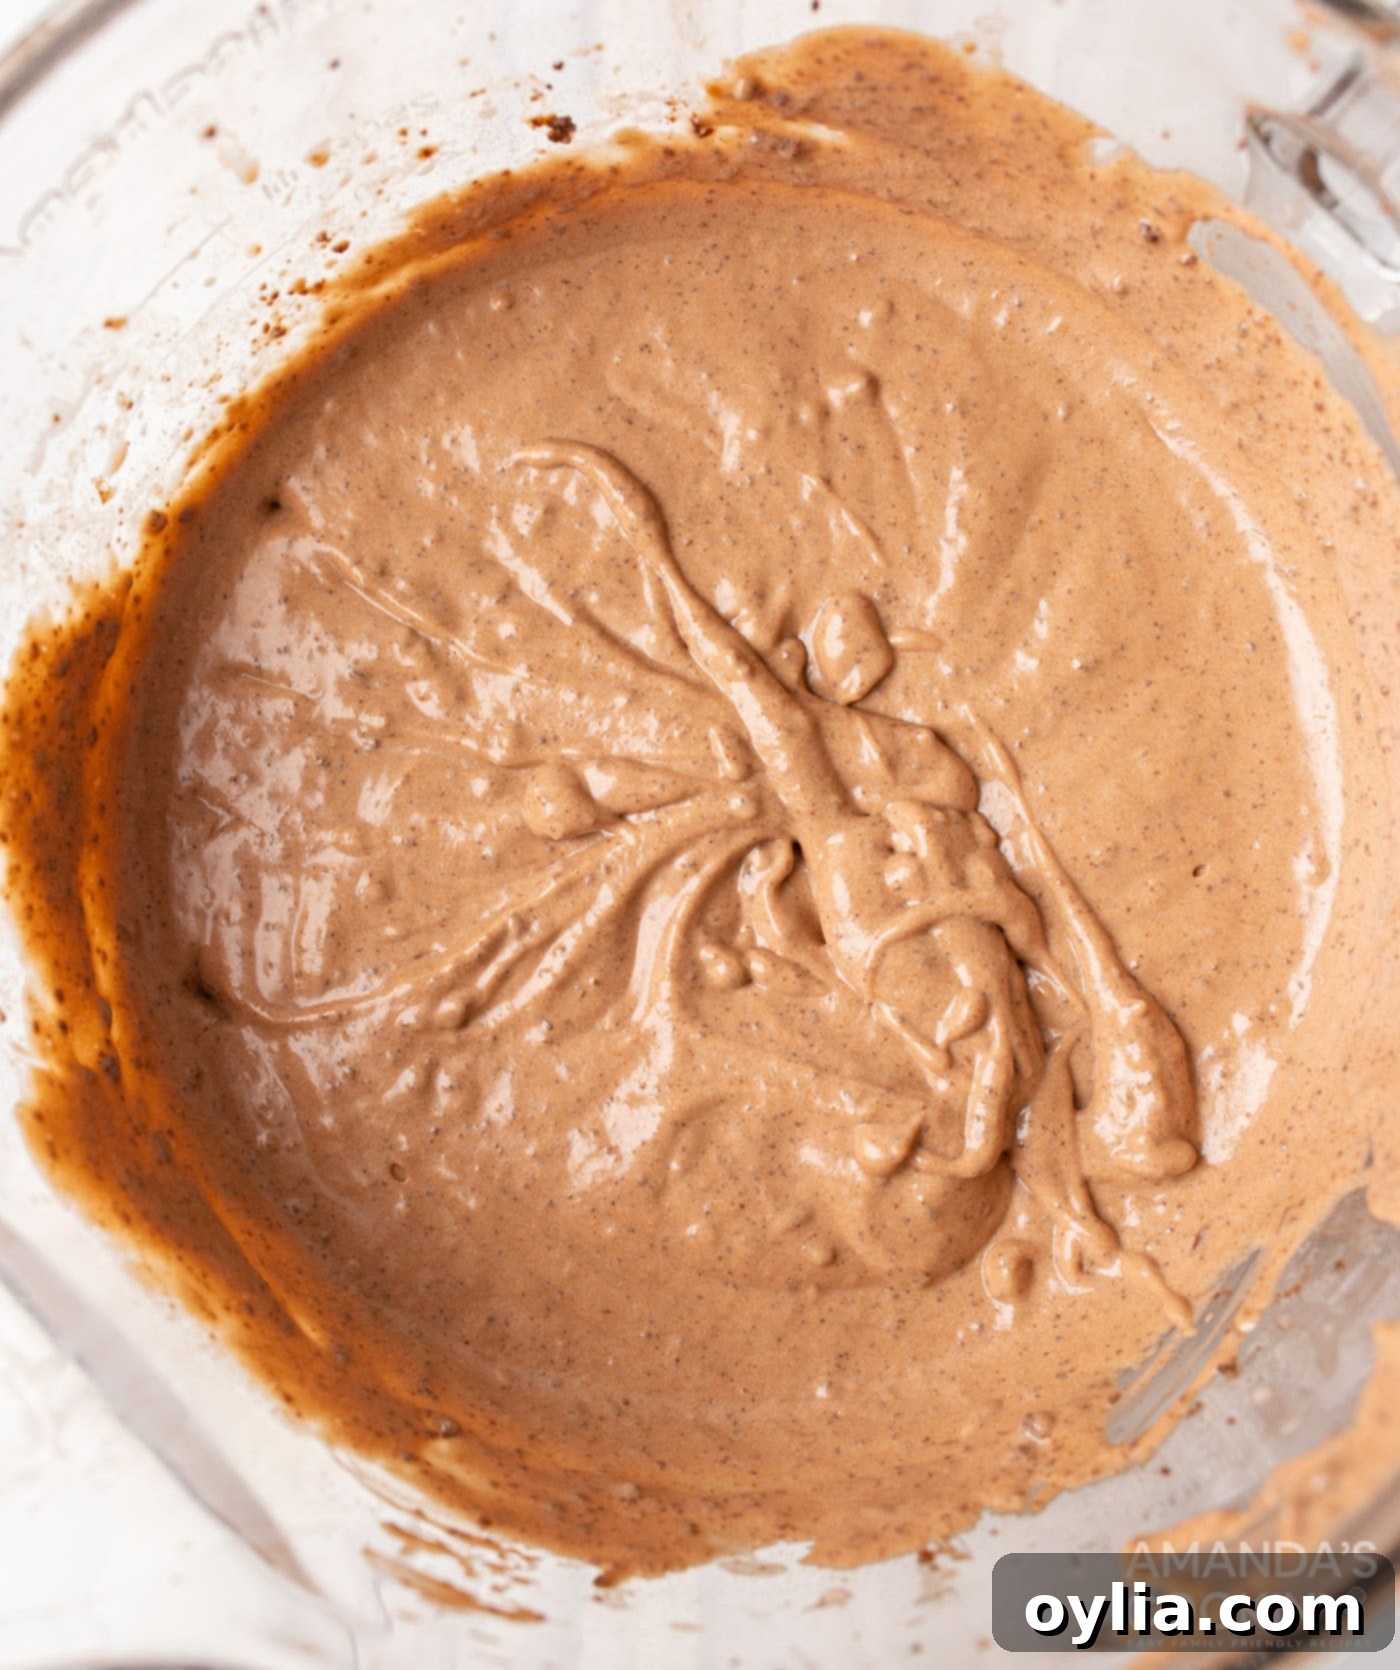
- Slowly pour in the milk and mix until minimal lumps are left.

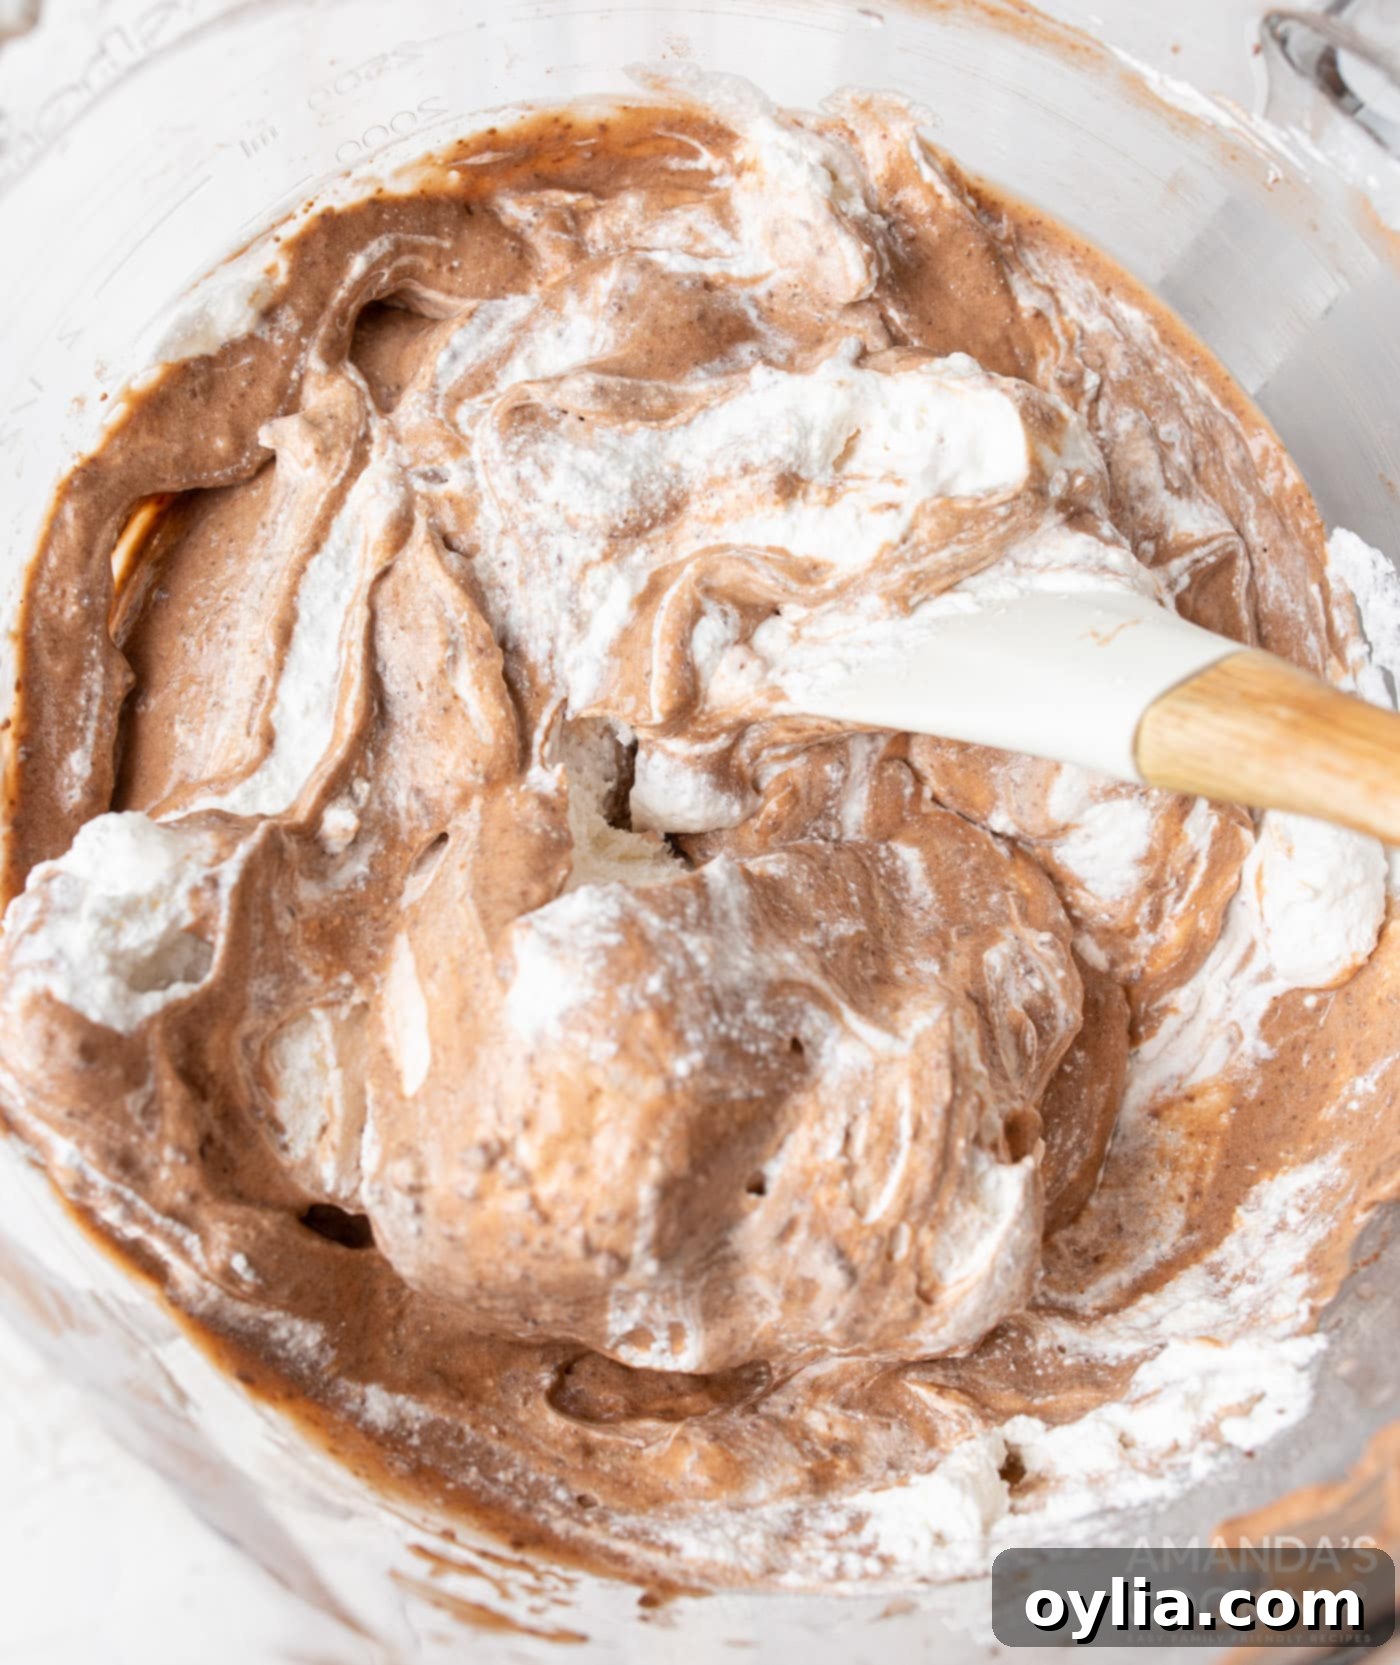
- Add the cool whip and fold in with a rubber spatula.

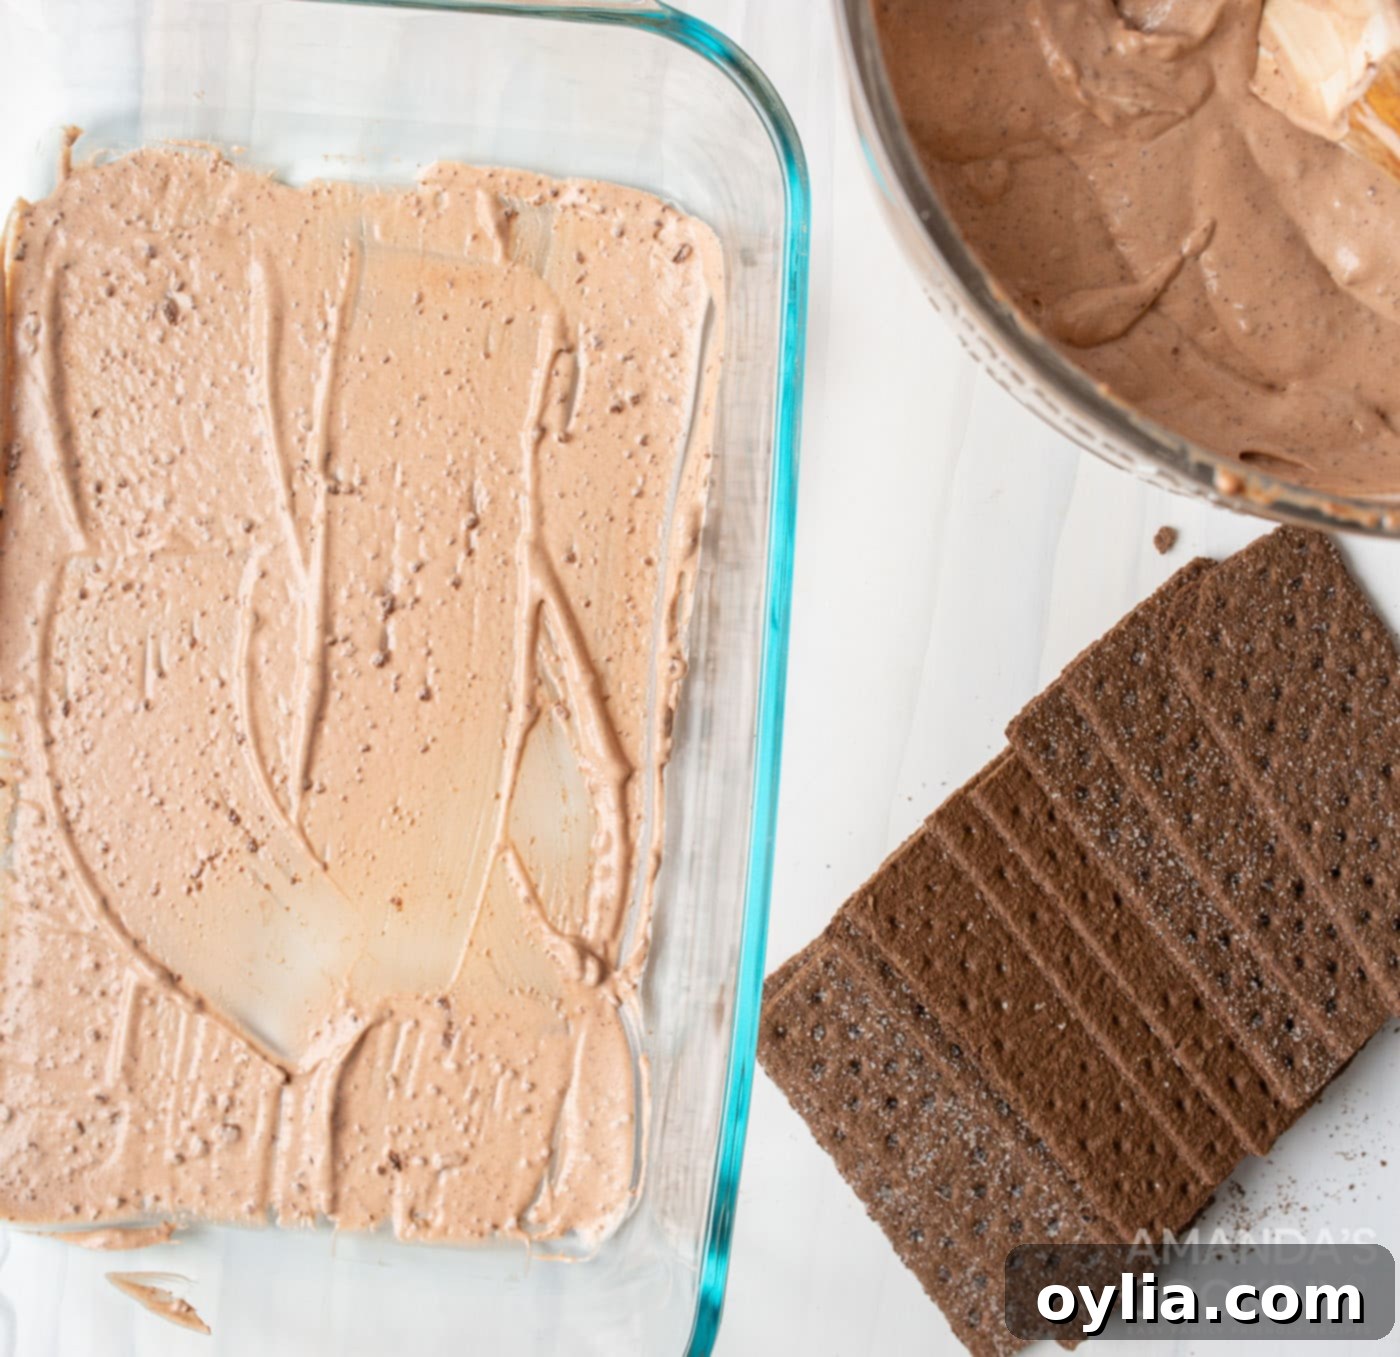
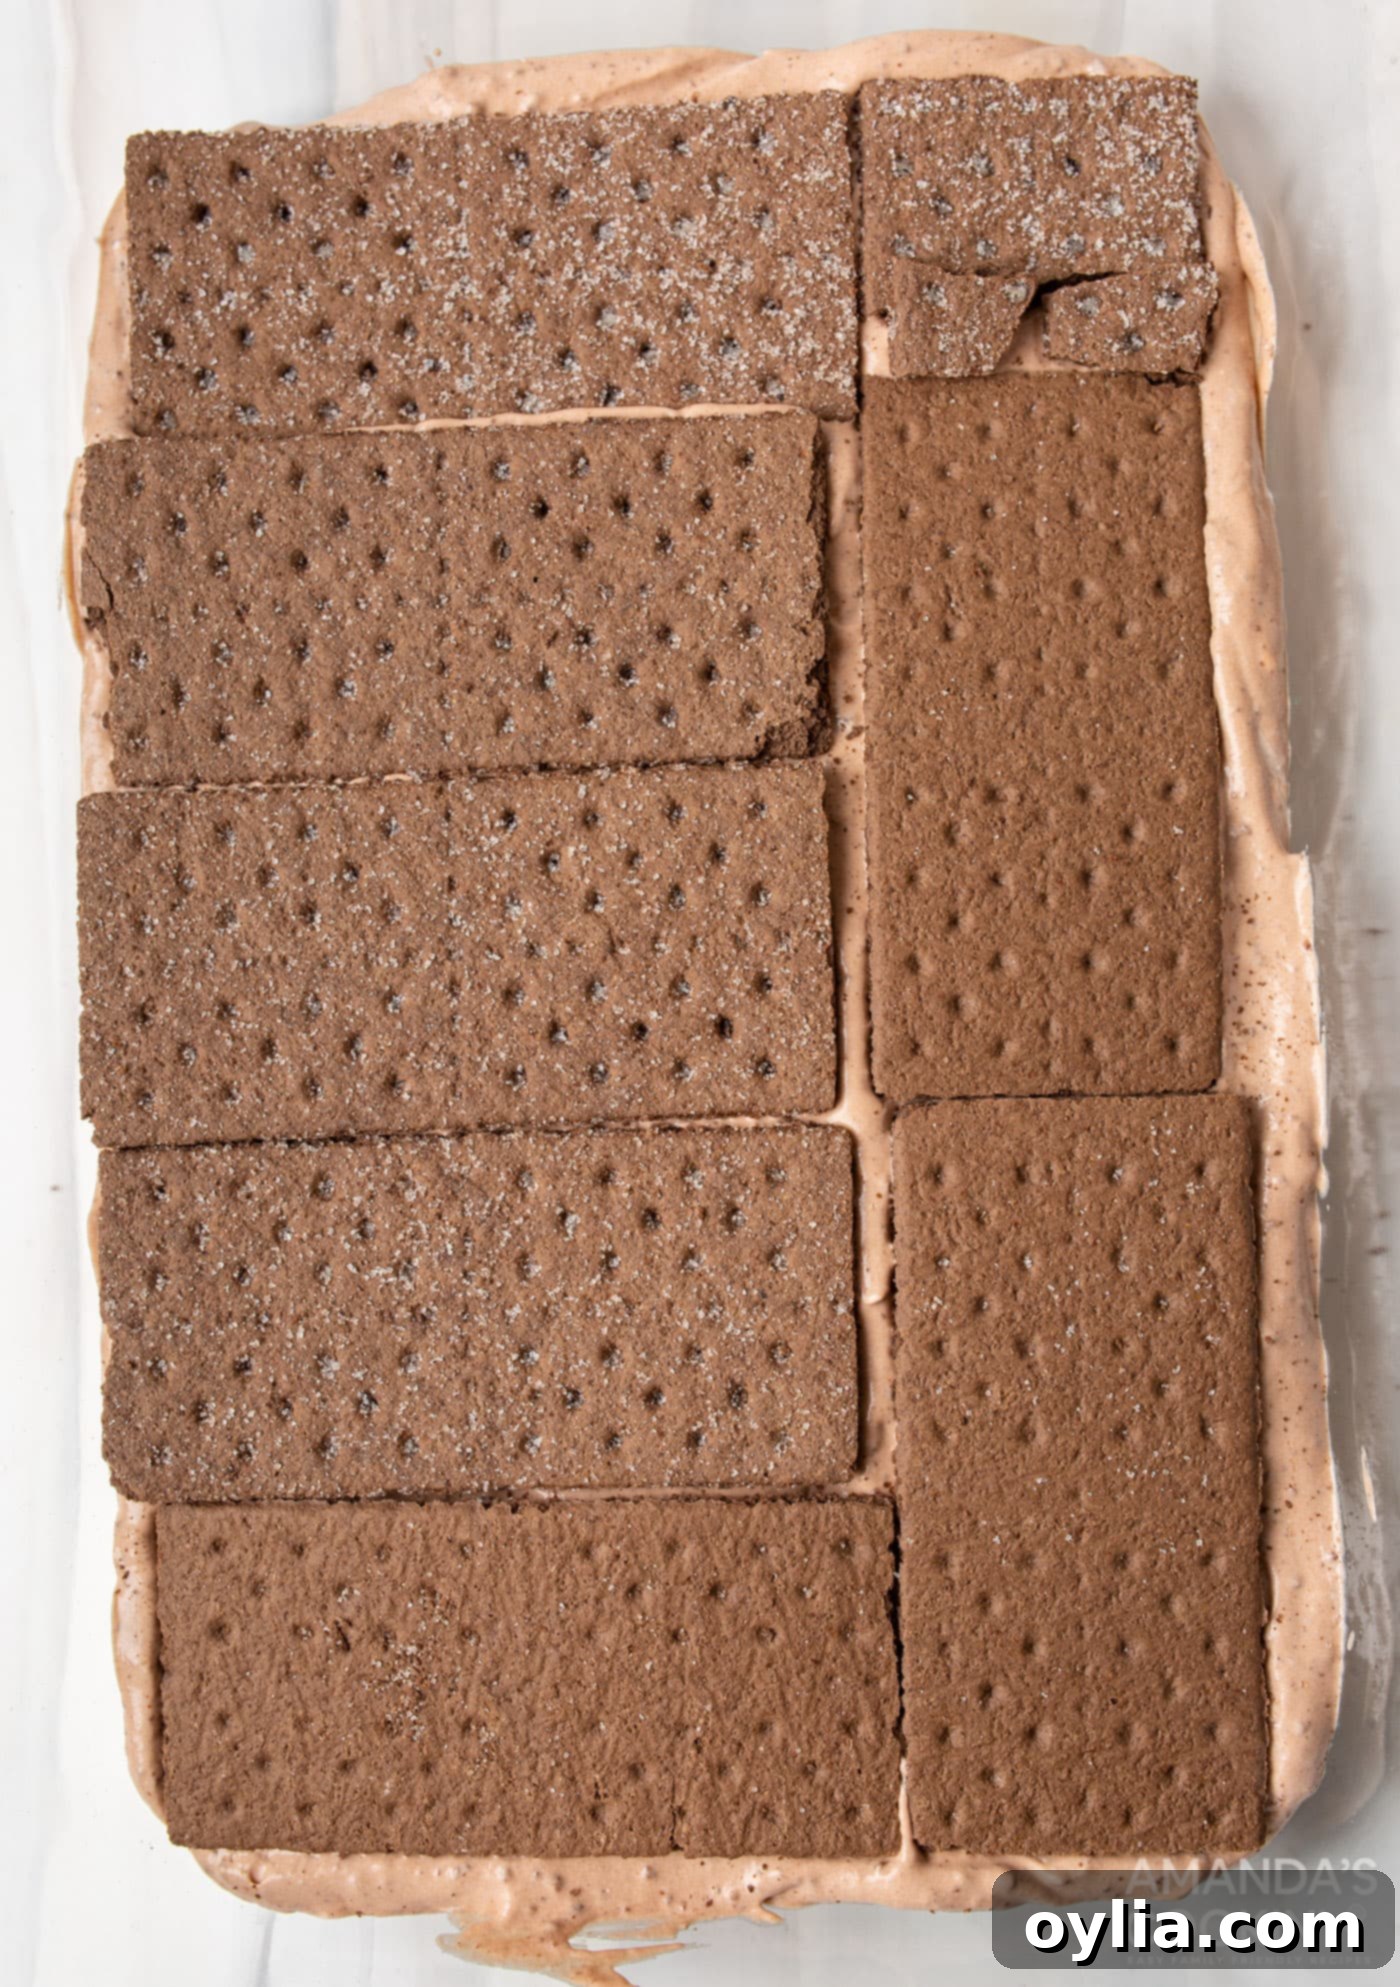
- Using a 9×13 casserole dish, spread 1/2 cup of pudding mixture onto the bottom, similar to how you would lasagna. Layer the crackers as best you can, in one layer. You may need to break pieces of graham crackers to fit the shape and close in the spaces of your casserole dish.


- Pour 1/2 of the remaining pudding mixture on top of the graham crackers and spread evenly.
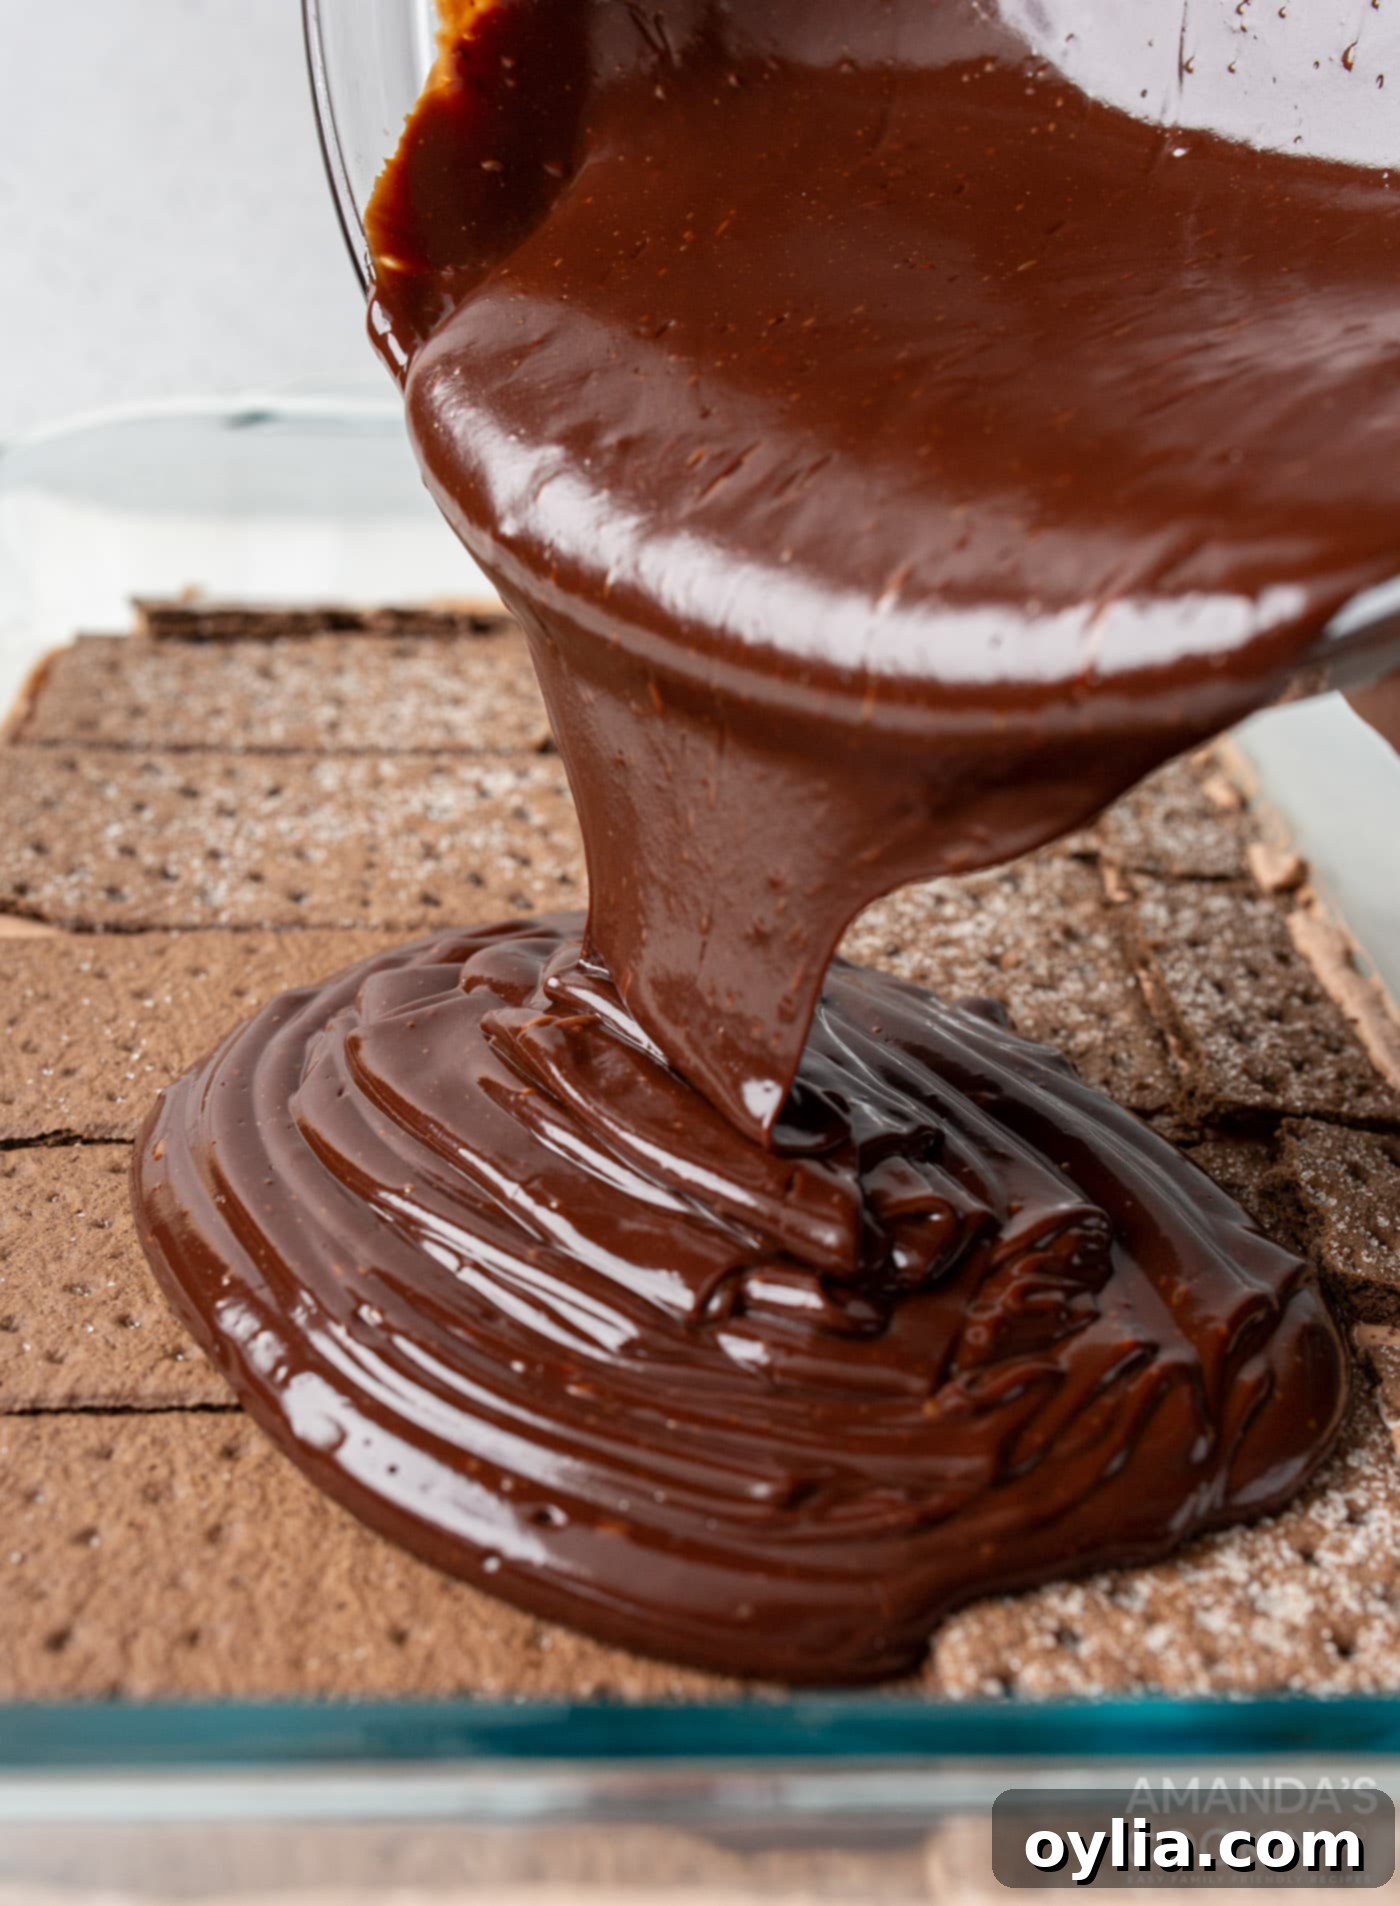
- Repeat: graham crackers, pudding mixture, graham crackers, and top with ganache.

- To make chocolate ganache microwave the whipping cream for 30 seconds to 1 minute. Add the chocolate chips to the bowl and whisk until smooth.
- Freeze OR refrigerate for 4 hours or overnight. Freezing will help you make nice clean slices. Remove from the freezer and allow to sit for 15-20 minutes on the counter to soften before cutting.
Tips for the Perfect Chocolate Icebox Cake
Achieving a truly magnificent chocolate icebox cake is all about attention to a few simple details. Follow these expert tips for an unforgettably delicious and perfectly structured dessert:
- Ensure Cream Cheese is Softened: This is paramount for a lump-free, silky smooth filling. If you forget to take it out ahead of time, slice the cream cheese into smaller cubes and spread them out on a plate; they’ll reach room temperature much faster (about 20 minutes).
- Don’t Overmix the Pudding Mixture: Once the milk is added, mix just until the lumps are gone. Overmixing can lead to a thinner consistency, which we want to avoid for firm layers.
- Even Layers are Key: When spreading your pudding mixture and arranging graham crackers, try to keep your layers as even as possible. This not only makes for a more visually appealing cake but also ensures each slice has a consistent texture.
- Ample Chill Time is Crucial: While the cake is delicious after 4 hours, an overnight chill is truly transformational. The longer it rests, the more the graham crackers absorb moisture, becoming delightfully tender and cake-like.
- Ganache Consistency: For a smooth, pourable ganache, ensure your cream is hot enough to melt the chocolate chips completely. If it seems too thick, add a tiny splash more hot cream and whisk. If too thin, let it sit for a few minutes to cool and thicken slightly.
Frequently Asked Questions & Expert Tips
Absolutely, making this chocolate icebox cake ahead of time is not only possible but highly recommended! The recipe specifically calls for at least 4 hours of chill time after assembly, which is essential for the graham crackers to absorb the luscious cream cheese and chocolate pudding mixture. This process creates that perfectly soft, sponge-like, and smooth texture we all crave. For the best possible flavor and consistency, you can easily prepare it a full day in advance. Simply store it covered in the refrigerator overnight, and it will be perfectly set and ready to enjoy.
When a recipe specifies “softened cream cheese,” it means your cream cheese should be brought to room temperature. This is a critical step to ensure a smooth, lump-free mixture. A fantastic trick to speed up this process is to slice the block of cream cheese into several smaller cubes and separate them slightly. This allows the internal parts of the cream cheese to warm up faster. Leave the cubes on your kitchen counter for about 20-30 minutes. Using softened cream cheese is absolutely essential for avoiding undesirable lumps in your dessert fillings and achieving a velvety texture.
Yes, you can certainly freeze this chocolate icebox cake! To freeze it effectively, first flash freeze the entire cake or individual slices on a wax paper-lined baking sheet until firm. Once frozen, remove it from the freezer and wrap each piece tightly in plastic wrap, then place them into a freezer-safe bag or airtight container. Flash-freezing before wrapping prevents the dessert from sticking to the plastic. To thaw, simply remove the desired portion from the freezer, immediately unwrap it, and let it thaw in the refrigerator for a few hours or at room temperature for about 30-60 minutes until soft enough to enjoy.
You are not required to freeze the icebox cake for the entire 4 hours. However, we do recommend a short stint in the freezer (about 1-2 hours) or even the full 4 hours if you desire super neat, clean slices. Freezing solidifies the layers, making them easier to cut without smudging. If clean cuts aren’t your top priority, or if you prefer a softer, melt-in-your-mouth texture, simply pop it directly into the refrigerator to chill for at least 4 hours, or preferably overnight, for optimal flavor and texture development.
Serving Suggestions
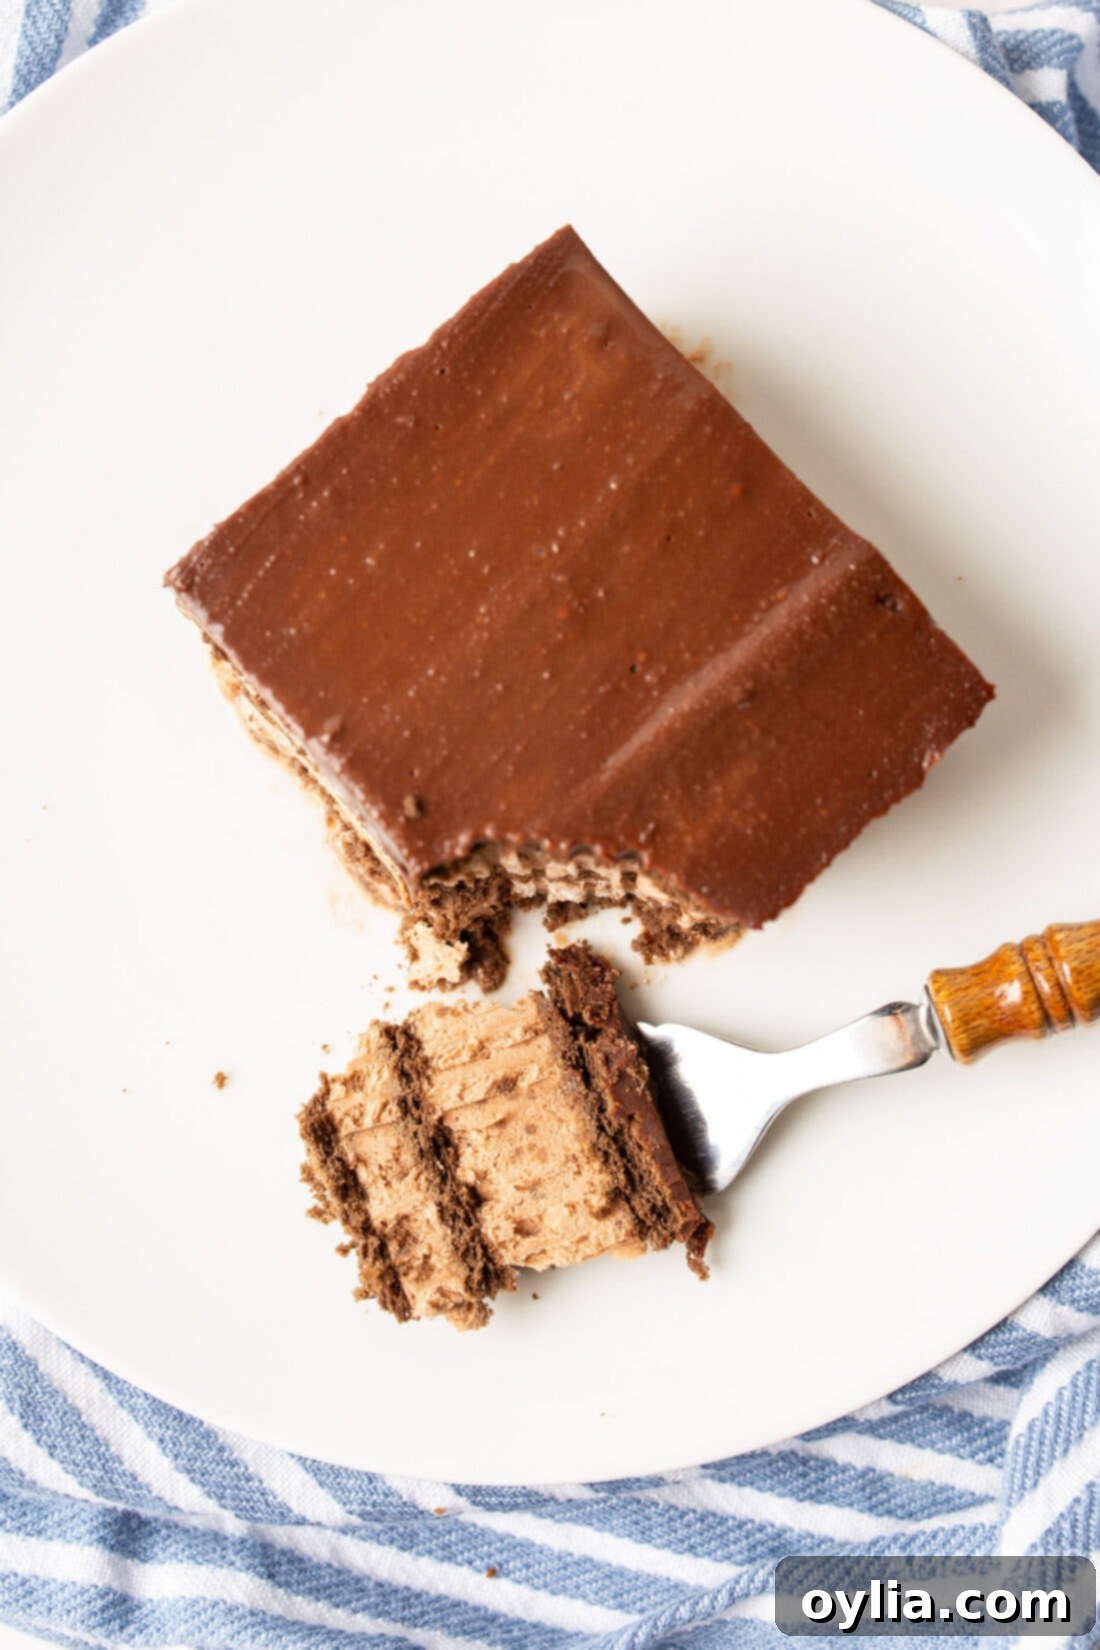
To ensure you get beautiful, clean slices of your chocolate icebox cake, I highly recommend chilling it in the freezer for about 1-2 hours before serving, especially if it’s been in the refrigerator overnight. This firms up the layers perfectly for easy cutting. Once sliced, let it sit on the counter for 10-15 minutes to soften just slightly, bringing out its creamy texture.
For additional topping ideas that elevate this already decadent dessert, consider:
- A dusting of high-quality cocoa powder or finely shaved dark chocolate.
- A sprinkle of mini chocolate chips or finely crushed chocolate graham crackers for added texture.
- Fresh berries like raspberries or strawberries for a bright, contrasting flavor.
- A dollop of extra homemade whipped cream or a drizzle of caramel or fudge sauce.
Chocolate icebox cake is never a heavy dessert, making it the perfect sweet ending to any meal – there’s always room for a slice! It also doubles as a fantastic birthday cake alternative or a sophisticated yet easy treat to bring along to potlucks, holiday gatherings, or any party. Its make-ahead nature and effortless elegance make it a go-to dessert for entertaining.
Customizing Your Chocolate Icebox Cake: Delicious Variations
One of the joys of no-bake desserts like this chocolate icebox cake is how easily you can customize it to suit different tastes or occasions. Here are a few delectable variations to inspire your next creation:
- Mint Chocolate Dream: Add 1/2 to 1 teaspoon of mint extract to your cream cheese pudding mixture. You can also mix in some chopped mint chocolate candies or use mint chocolate chips in your ganache for a refreshing twist.
- Espresso Chocolate Boost: For coffee lovers, dissolve 1-2 teaspoons of instant espresso powder in a tablespoon of hot milk before adding it to the cream cheese pudding mixture. This will deepen the chocolate flavor beautifully.
- Nutty Chocolate Crunch: Sprinkle a layer of finely chopped toasted nuts like pecans, walnuts, or almonds between the graham cracker and pudding layers for an added textural dimension and nutty flavor.
- Boozy Chocolate Indulgence: Introduce an adult twist by adding 1-2 tablespoons of your favorite liqueur to the pudding mixture or the ganache. Kahlua, Baileys Irish Cream, or even a splash of dark rum would be fantastic choices.
- Berry Swirl Delight: For a fruity contrast, gently swirl a few tablespoons of raspberry or cherry compote (store-bought or homemade) into one of your pudding layers before spreading. This adds a beautiful color and a tangy counterpoint to the rich chocolate.
More Irresistible Icebox Cake Recipes
If you’ve fallen in love with the ease and deliciousness of this no-bake chocolate masterpiece, you’re in for a treat! The world of icebox cakes is vast and wonderfully versatile. Be sure to explore our other fantastic icebox cake creations, perfect for any season or preference. Each offers a unique flavor profile but retains the beloved no-bake simplicity.
- Lemon Icebox Cake
- Tiramisu Icebox Cake
- S’mores Icebox Cake
- Funfetti Icebox Cake
- Strawberry Icebox Cake
- Lemon Blueberry Icebox Cake
- Orange Icebox Cake
- Mixed Berry Icebox Cake
I love to bake and cook and share my kitchen experience with all of you! Remembering to come back each day can be tough, that’s why I offer a convenient newsletter every time a new recipe posts. Simply subscribe and start receiving your free daily recipes!
Chocolate Icebox Cake
IMPORTANT – There are often Frequently Asked Questions within the blog post that you may find helpful. Simply scroll back up to read them!
Print It
Pin It
Rate It
Save ItSaved!
Ingredients
- 8 oz cream cheese softened
- 6 oz instant chocolate pudding
- 2 ½ cups whole milk
- 8 oz cool whip 1 container, or homemade whipped topping
- 14.4 oz chocolate graham crackers 1 box
Ganache
- 1 cup heavy whipping cream
- 3 cups semi-sweet chocolate chips
Things You’ll Need
-
13×9 baking dish
-
Hand mixer
Before You Begin
- For additional topping ideas, try some shaved chocolate, mini chocolate chips, or crushed graham crackers sprinkled on top of the ganache.
Instructions
-
Using a stand mixer or handheld mixer, beat the softened cream cheese in a large bowl until light and fluffy, about 2 minutes.
-
To the same bowl add instant chocolate pudding powder. Use a stand mixer again to blend until uniform in consistency.
-
Slowly pour in the milk and mix until minimal lumps are left.
-
Add the cool whip and fold in with a rubber spatula.
-
Using a 9×13 casserole dish, spread 1/2 cup of pudding mixture onto the bottom, similar to how you would lasagna. Layer the crackers as best you can, in one layer. You may need to break pieces of graham crackers to fit the shape and close in the spaces of your casserole dish.
-
Pour 1/2 of the remaining pudding mixture on top of the graham crackers and spread evenly.
-
Repeat: graham crackers, pudding mixture, graham crackers, and top with ganache.
-
To make the ganache, microwave the heavy whipping cream for 30 seconds to 1 minute. Add the chocolate chips to the bowl and whisk until smooth.
-
Freeze OR refrigerate the icebox cake for 4 hours or overnight. Freezing will help you make nice clean slices. Remove from the freezer and allow to sit for 15-20 minutes on the counter to soften before cutting.
Nutrition
The recipes on this blog are tested with a conventional gas oven and gas stovetop. It’s important to note that some ovens, especially as they age, can cook and bake inconsistently. Using an inexpensive oven thermometer can assure you that your oven is truly heating to the proper temperature. If you use a toaster oven or countertop oven, please keep in mind that they may not distribute heat the same as a conventional full sized oven and you may need to adjust your cooking/baking times. In the case of recipes made with a pressure cooker, air fryer, slow cooker, or other appliance, a link to the appliances we use is listed within each respective recipe. For baking recipes where measurements are given by weight, please note that results may not be the same if cups are used instead, and we can’t guarantee success with that method.
