Ultimate No-Bake Oreo Truffles: Easy 4-Ingredient Recipe for Decadent Bites
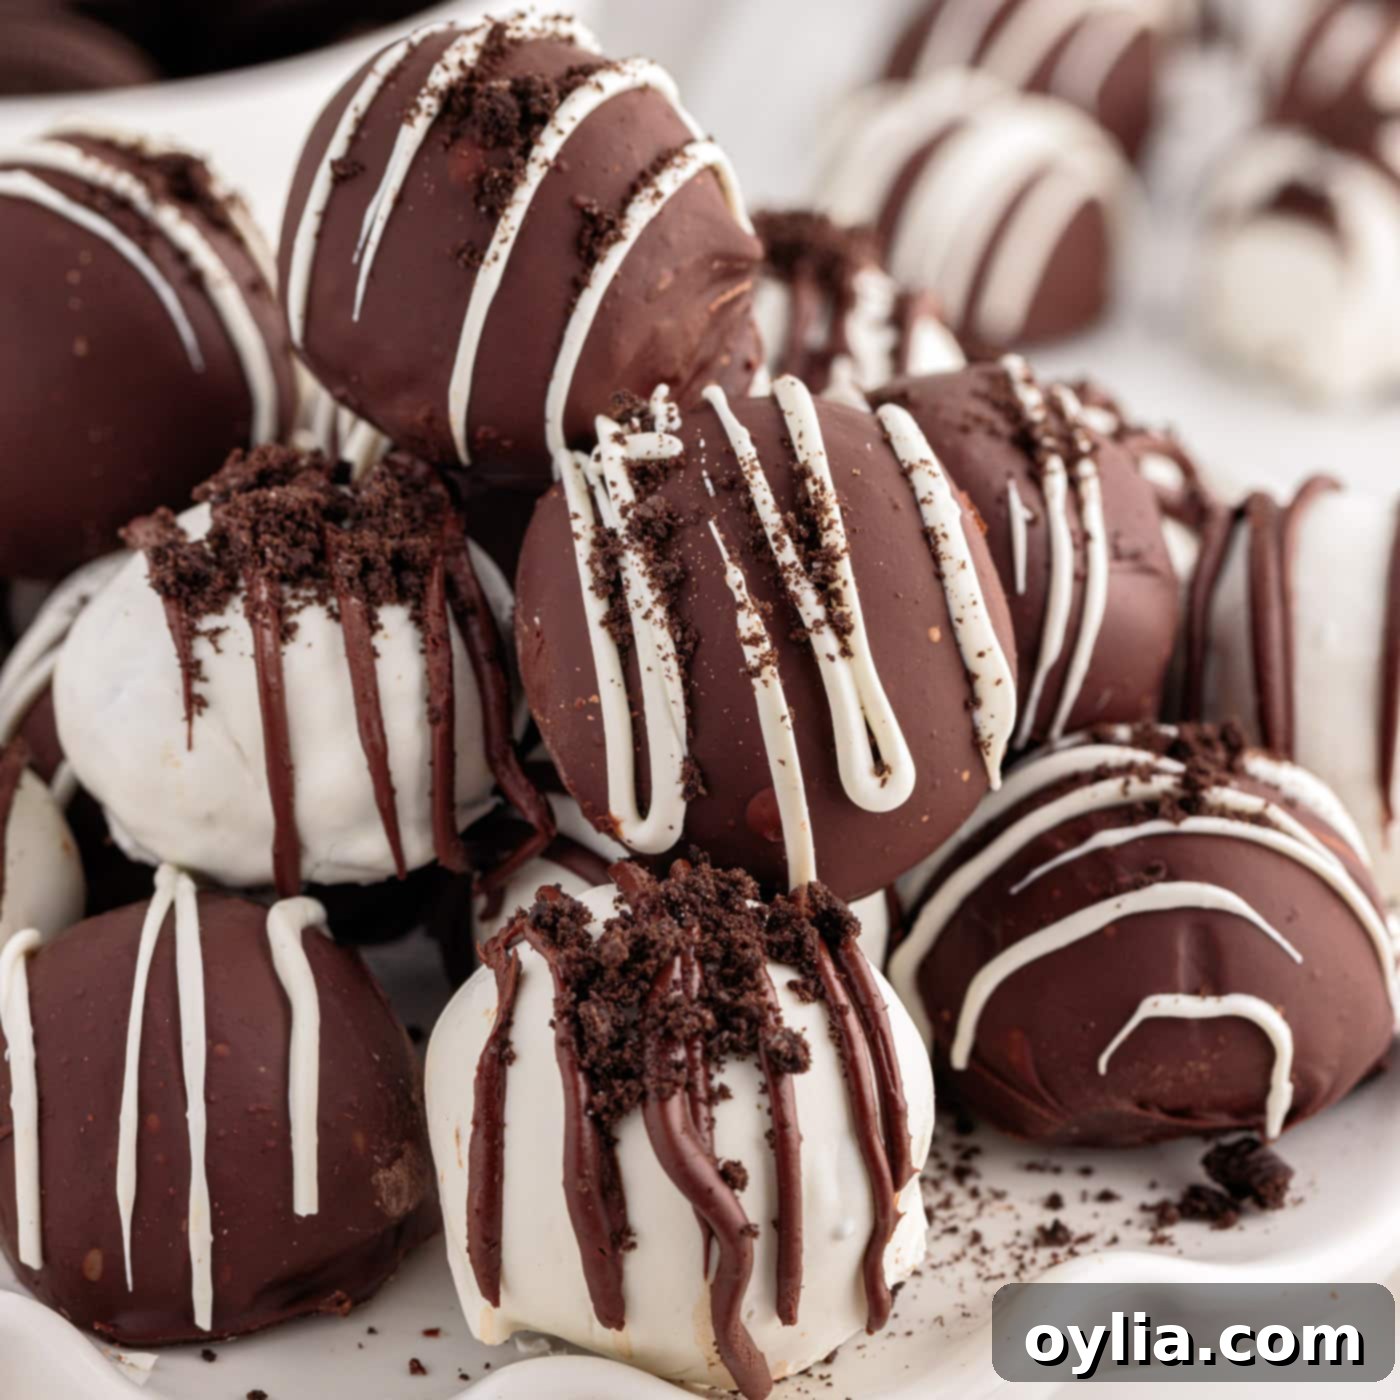
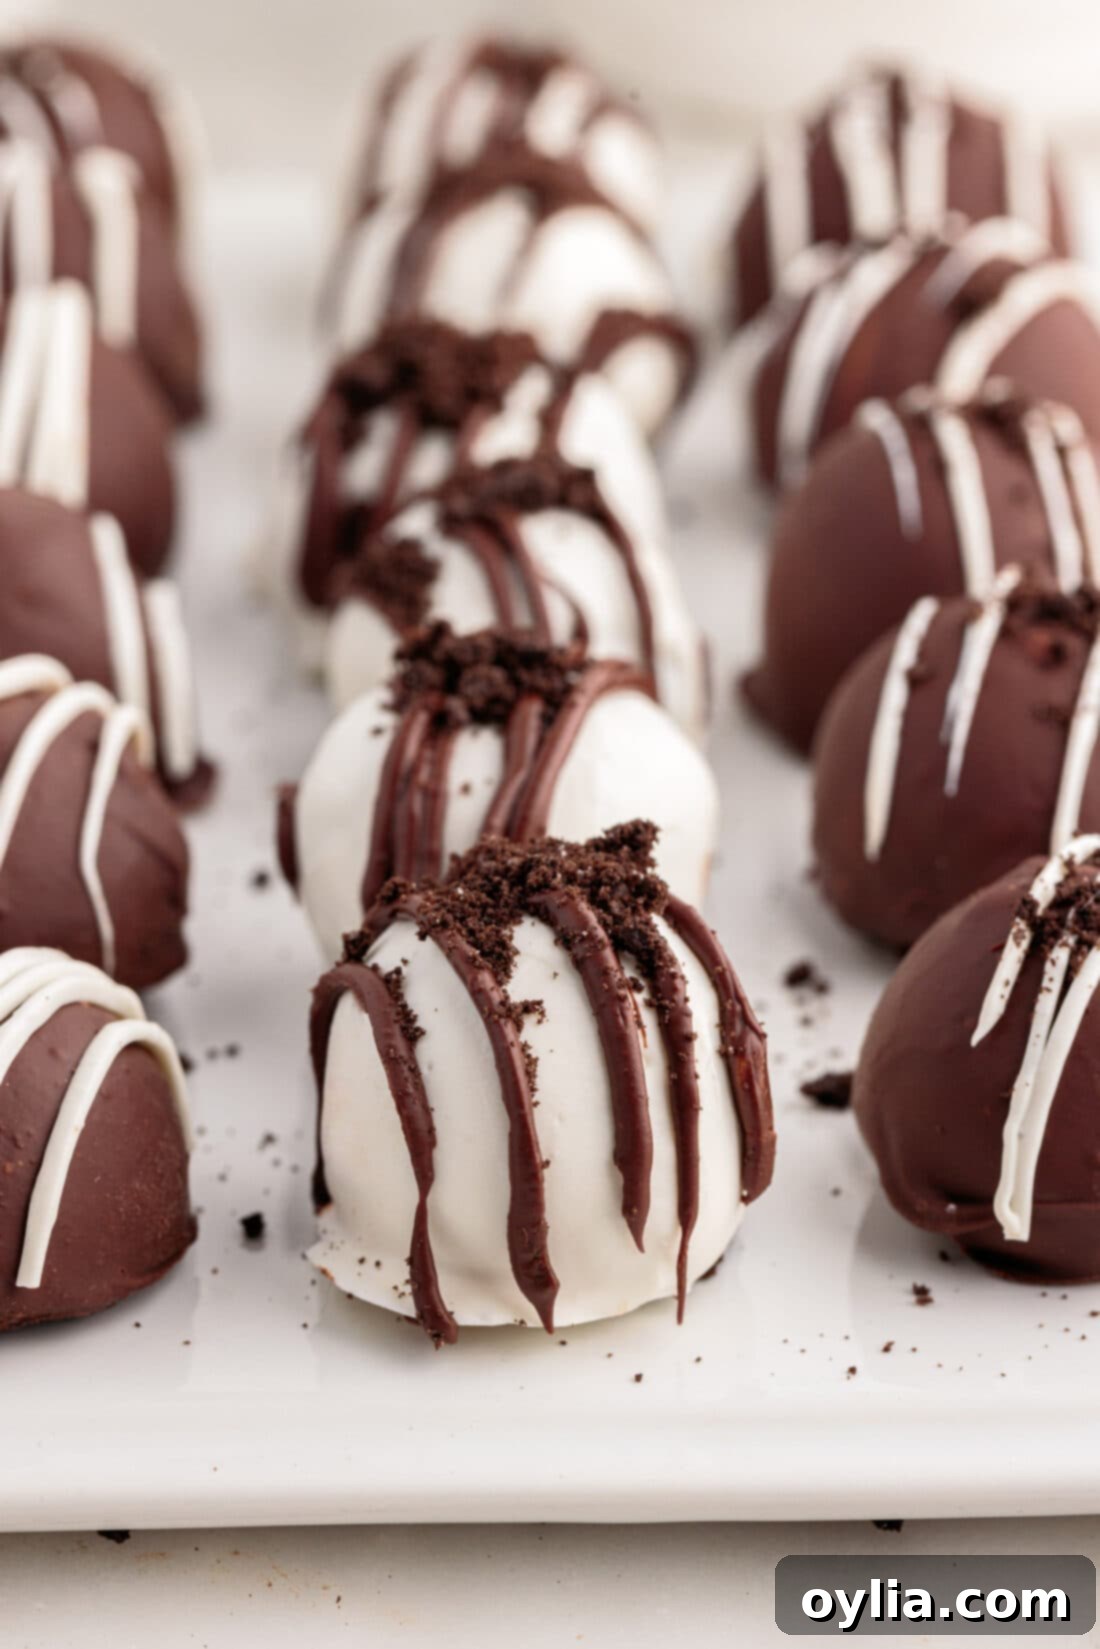
Prepare to be enchanted by the simplest yet most decadent dessert you’ll ever make: our 4-ingredient Oreo Truffles. These delightful no-bake treats are perfect for any occasion, from casual family gatherings to elegant holiday parties. Imagine a rich, creamy center made from crushed Oreo cookies and softened cream cheese, expertly coated in your choice of luscious white or semi-sweet chocolate. Not only are they incredibly easy to prepare, but they also offer endless possibilities for customization, allowing you to dip, drizzle, and decorate them to perfectly match any theme or mood. Get ready to impress with minimal effort and maximum flavor!
Why This Simple Oreo Truffle Recipe Will Be Your Go-To No-Bake Dessert
Oreo truffles, often affectionately called Oreo balls, stand out as an incredibly straightforward dessert that delivers a surprisingly luxurious taste experience. What makes this recipe truly shine is its sheer simplicity, requiring just three core ingredients to bring these miniature delights to life: classic Oreo sandwich cookies, rich cream cheese, and your favorite melting chocolate. It’s genuinely astonishing how such a minimalistic ingredient list can yield a treat that tastes so profoundly magical and indulgent, making it a favorite for both novice and experienced bakers alike.
Beyond their ease of preparation, these chocolate-coated morsels offer unparalleled versatility. You’re not just making a dessert; you’re crafting a canvas for culinary creativity. Imagine the possibilities! You can experiment with different Oreo flavors – from classic chocolate to mint, peanut butter, or even seasonal varieties – each offering a unique twist to the truffle’s core flavor profile. We’ve previously explored the delightful taste of Golden Oreo Truffles, which are exquisite in their own right, proving that the foundation of this recipe is incredibly adaptable to personal preferences and imaginative variations.
Furthermore, these truffles are a dream for holiday and party planning. Their customizable nature allows you to dip, drizzle, and decorate them to match any theme or color scheme imaginable. For instance, we’ve had great fun creating vibrant Red White and Blue Oreo Truffles for patriotic celebrations, showcasing how easily they can be adapted. Picture them adorned with festive sprinkles for Christmas, delicate pastel drizzles for Easter, spooky accents for Halloween, or spirited team colors for game day. The options truly are endless, making these Oreo truffles a consistently popular choice for any celebratory occasion, a thoughtful homemade gift, or simply a quick, satisfying sweet craving.
Essential Ingredients for Your Decadent Oreo Truffles
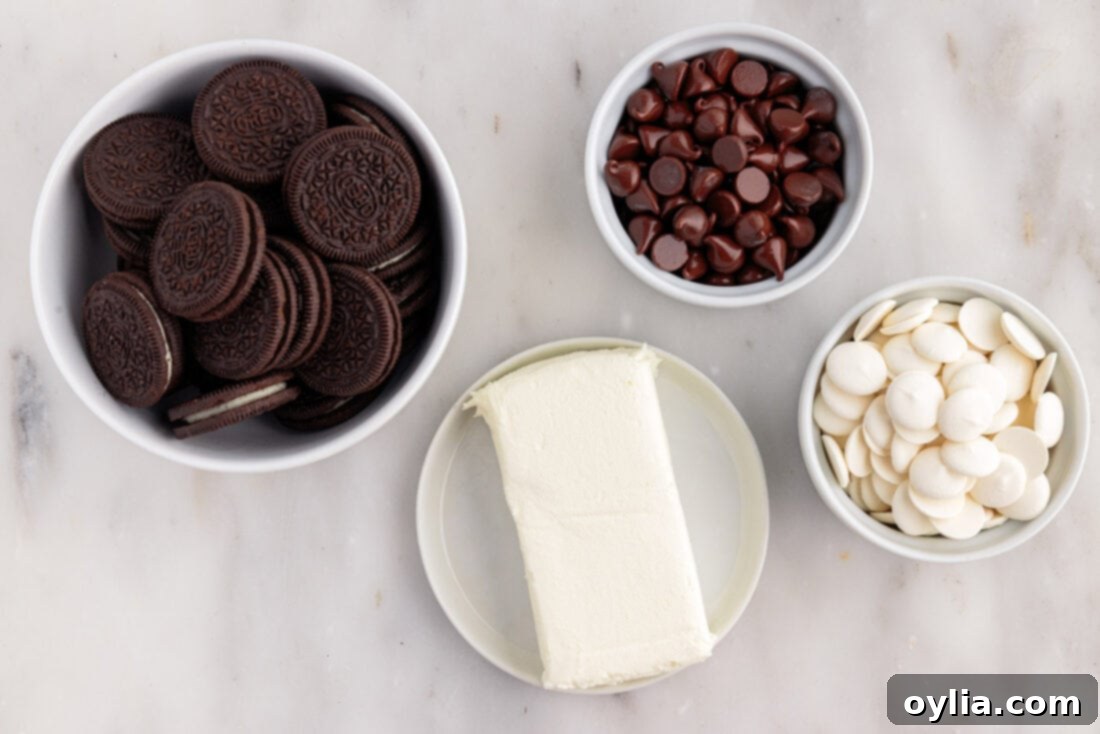
Crafting these delectable Oreo truffles requires just a handful of simple ingredients, making it an accessible recipe for any home baker, regardless of experience. The beauty lies in the minimal components that come together to create something truly special. For precise measurements, detailed instructions, and a convenient printable version of this recipe, be sure to check the dedicated recipe card conveniently located at the end of this post. Here’s a quick overview of what you’ll need to gather:
Ingredient Spotlight & Expert Substitution Tips
Understanding each ingredient and knowing potential substitutions can significantly elevate your baking experience, ensuring consistent and delicious results every time. Here’s a deeper dive into the key components of our amazing Oreo truffles:
- OREO COOKIES: For this recipe, you’ll be using whole Oreo cookies, including their delightful creamy filling. There’s no need for the tedious step of separating the cookie from its white center, as the filling plays a crucial role. It contributes essential moisture, which helps bind the cookie crumbs into a smooth, pliable “dough,” and adds a layer of sweet vanilla flavor that perfectly complements the rich chocolate cookie. For optimal results, we highly recommend sticking to **regular-sized Oreo cookies**. Avoid the “Double Stuffed” varieties, as the extra filling can make the truffle mixture too soft and difficult to shape and coat. Similarly, “Oreo Thins” don’t provide enough cookie volume or filling for the ideal consistency required for these truffles. If you don’t have a food processor, you can easily crush the Oreos by placing them in a sturdy zip-top bag and using a rolling pin to finely pulverize them until they resemble fine crumbs.
- CHOCOLATE FOR COATING: The quality and type of chocolate you choose for coating will significantly impact the final taste, texture, and appearance of your truffles. High-quality melting wafers, such as Ghirardelli semi-sweet or white chocolate melts, are excellent choices for this recipe. These wafers are specifically formulated with stabilizers that ensure a smooth, easy melt and a beautiful, glossy, firm finish that sets quickly without needing tempering. You can also use good-quality baking chocolate bars, finely chopped, for a rich flavor. While regular chocolate chips can work in a pinch, be aware that **white chocolate chips, in particular, tend to melt less smoothly and can seize easily when warmed**. To prevent seizing, melt them very slowly over low heat or in short bursts in the microwave, stirring constantly. Alternatively, almond bark (available in vanilla or chocolate flavor) is a popular and easy-to-use option that melts beautifully and sets quickly, providing a good coating. However, for a truly rich and superior flavor, we consistently prefer the depth of baking chocolate or the convenience and quality of premium chocolate melting wafers. When melting chocolate, always use a microwave-safe bowl and heat in short increments (e.g., 30 seconds at a time), stirring thoroughly between each interval to prevent burning and ensure a silky-smooth, even consistency.
- CREAM CHEESE: The cream cheese is the magical binding agent that transforms simple crushed Oreos into a luxurious, truffle-like filling. For the best possible results, it is absolutely essential that your cream cheese is at **room temperature**. This is what “softened” refers to in nearly all dessert recipe cards. Cold cream cheese will result in a lumpy, inconsistent mixture that’s challenging to combine smoothly with the cookie crumbs, leading to an uneven texture in your truffles. To achieve the perfect softened state, cut the block of cream cheese into 1-inch cubes and let it sit on a plate at room temperature for approximately 30-40 minutes. This allows it to become soft and pliable. If you’re short on time, you can carefully soften it in the microwave on a very low power setting for 10-15 seconds, but be extremely cautious not to melt it, as this can affect its binding properties. A perfectly softened cream cheese will blend seamlessly, creating a wonderfully smooth and cohesive truffle dough that’s a joy to work with.
Step-by-Step Guide: Crafting Your Perfect Oreo Truffles
These step-by-step photos and detailed instructions are designed to help you visualize the process of making these delightful truffles, ensuring your success from start to finish. For a convenient printable version of this recipe, complete with precise measurements and instructions, simply Jump to Recipe at the bottom of the page.
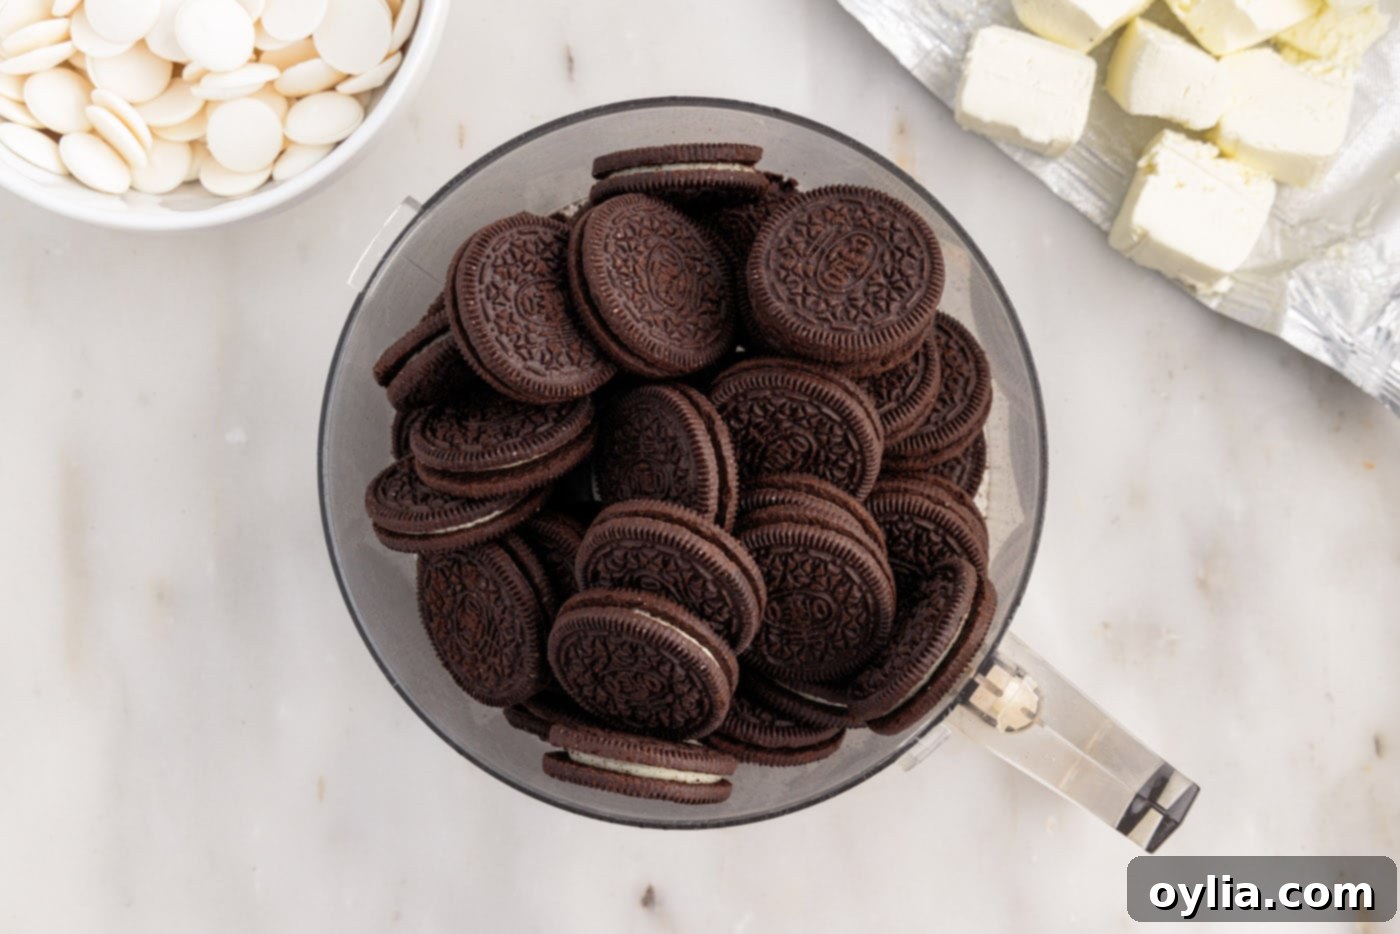
- Crumble the Oreos: Begin by placing your entire package of Oreo cookies (filling and all) into the bowl of a food processor. Pulse the cookies repeatedly until they are completely pulverized into very fine, uniform crumbs, almost like sand. This fine consistency is absolutely key to achieving a smooth, well-bound truffle texture. If you wish to garnish your truffles with extra crumbs later, set aside one whole cookie to crush separately after the main batch.

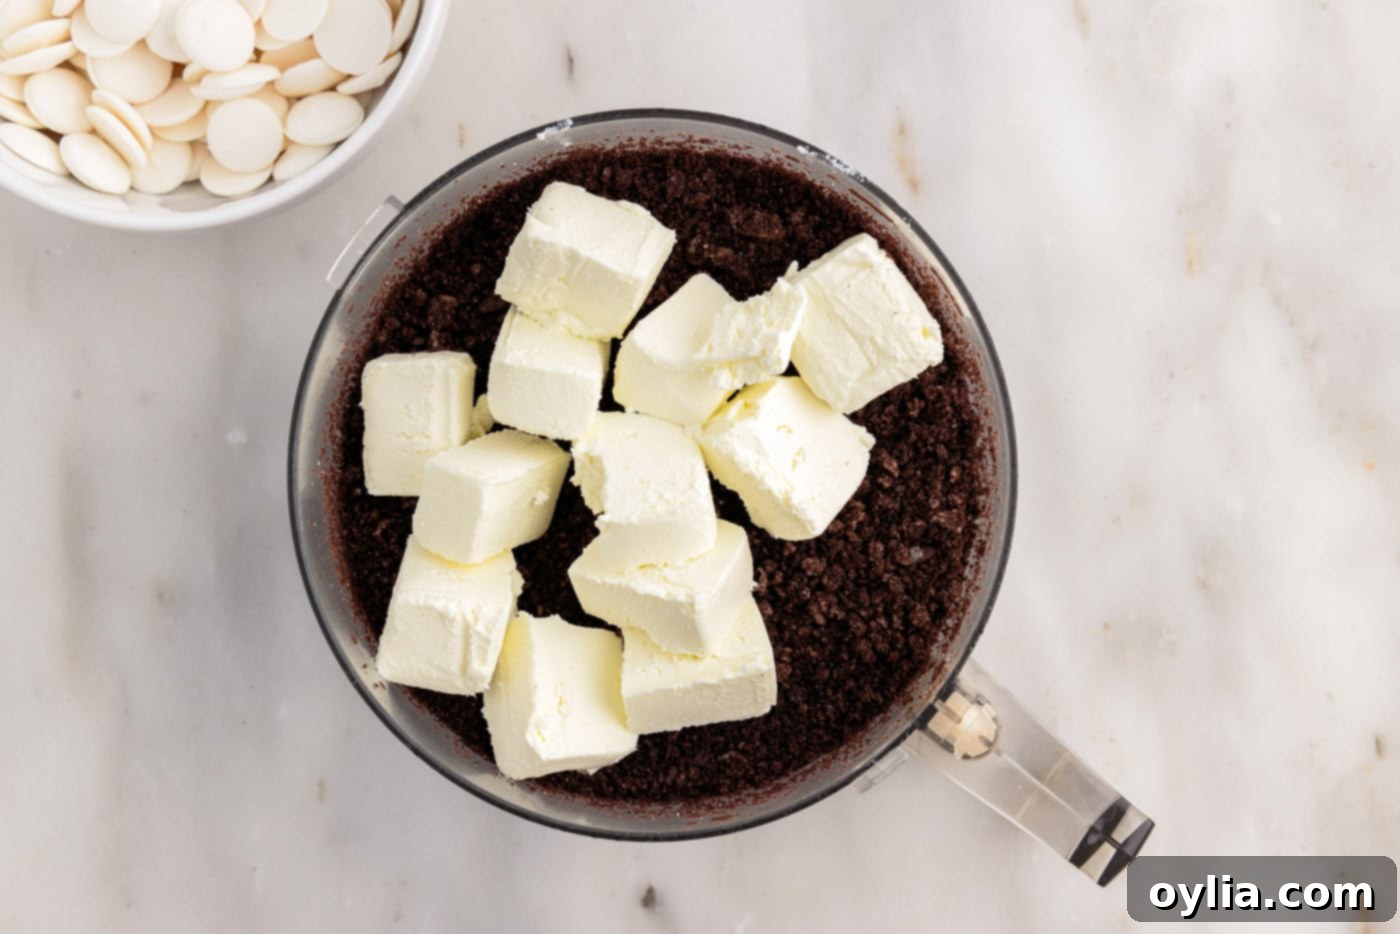
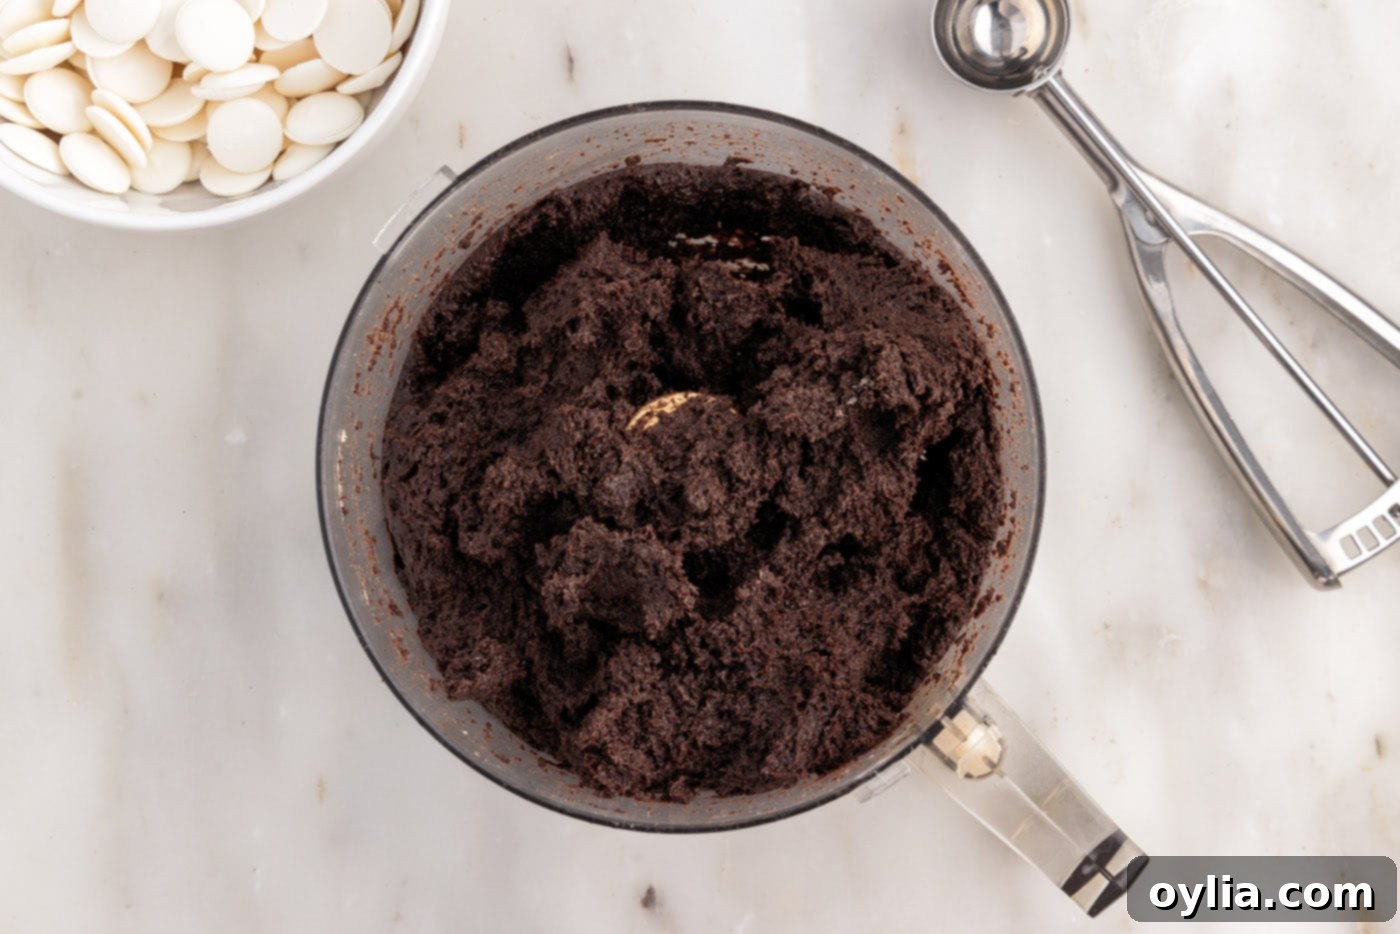
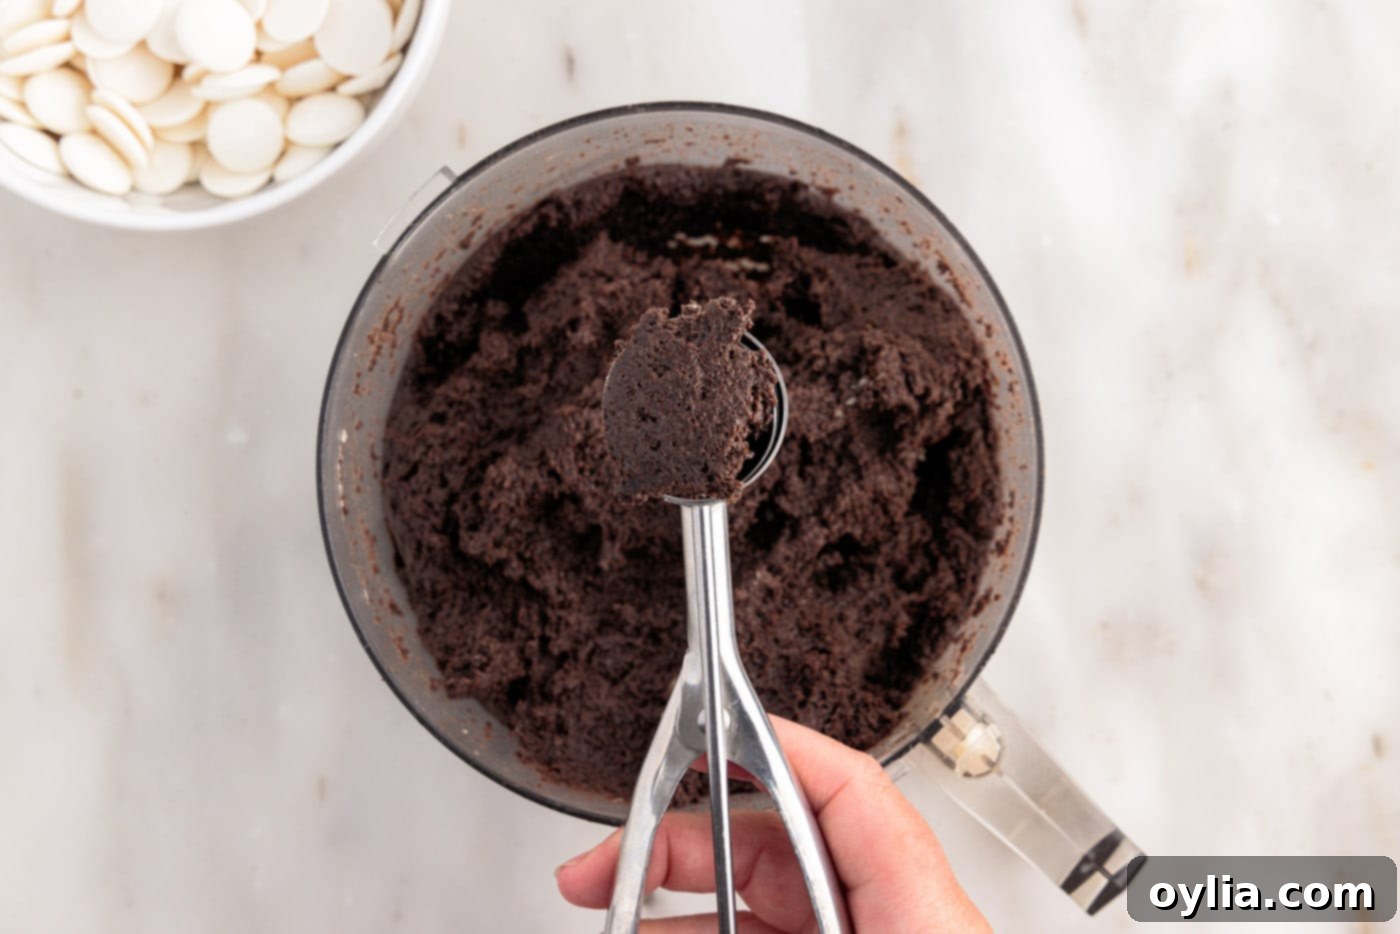
- Combine with Cream Cheese: Once your Oreos are finely crumbled, add the softened, cubed cream cheese directly into the food processor with the cookie crumbs. Process the mixture again, scraping down the sides as needed, until all ingredients are thoroughly combined. Continue processing until the mixture comes together, forming a thick, cohesive “dough” that easily clumps when pressed between your fingers. It should be uniform in color and texture, with no visible lumps of cream cheese.


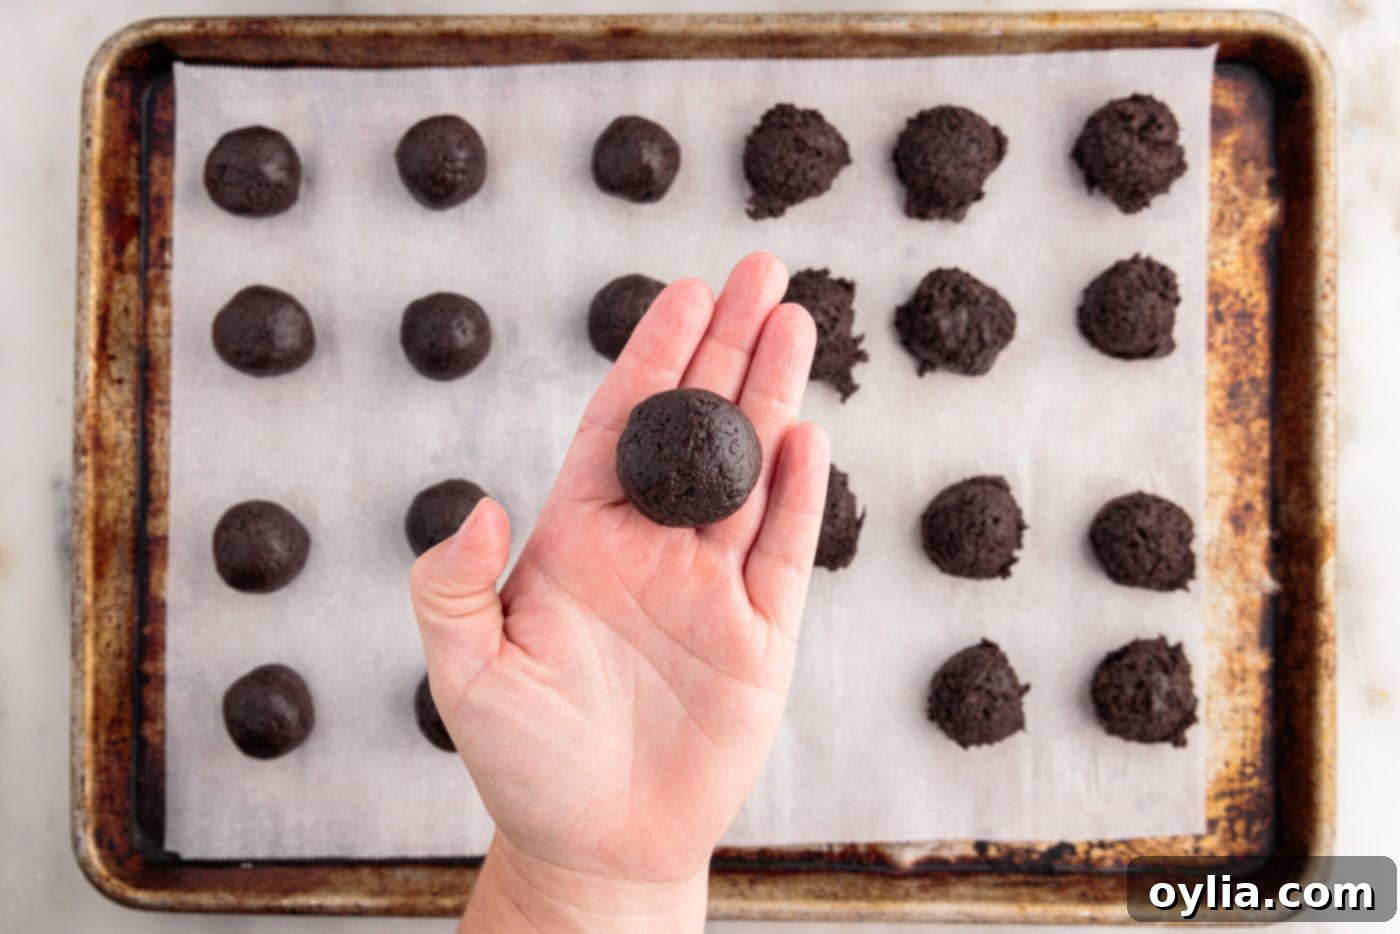
- Scoop the Balls: Using a tablespoon or a small cookie dough scoop (approximately 1-inch in diameter), portion out uniform amounts of the Oreo mixture. Gently roll each portion into a rough ball shape and place them onto a baking sheet that has been lined with parchment paper. Aim for consistent sizing across all balls to ensure they chill and coat evenly, resulting in a professional-looking finished product.

- Initial Chill: Once all the balls are scooped, transfer the baking sheet to the freezer for 5-10 minutes. This quick chill is absolutely crucial as it helps to firm up the dough slightly, making it much easier to handle and roll without sticking excessively to your fingers. It also prepares the balls for their final smooth shaping.
- Roll & Re-Chill for Smoothness: After the initial chill, remove the tray from the freezer. Roll each ball gently and firmly between the palms of your hands to form perfectly smooth, round truffles. A smooth surface ensures a beautiful, even chocolate coating later. Once rolled, place the tray back into the freezer for an additional 10-15 minutes, or into the refrigerator for about 30 minutes. This firming step is essential for the dipping process. Expert Tip: Freezing the dough balls for a short period of time is really helpful to get them firm enough to hold their shape for dipping, but if they are *overly cold* (e.g., left in the freezer for too long), the chocolate coating may crack. This can happen when the warm coating comes into contact with a very cold center – the center can expand as it warms, causing the coating to crack, or the insides might start squirting out a hole in the coating. About 15 minutes in the freezer or 30 minutes in the fridge should strike a good balance, making them cold enough to handle but not so cold as to cause cracking.

- Melt the Chocolate: Place your white chocolate melting wafers and semi-sweet chocolate (wafers or chips) in separate microwave-safe bowls. Heat each bowl in 30-second increments on medium power, stirring thoroughly with a rubber spatula between each interval, until the chocolate is completely melted and smooth with no lumps. To prevent one chocolate from hardening while you work, it’s often most efficient to melt and dip with one type of chocolate at a time, then repeat the melting process for the second type when you’re ready.
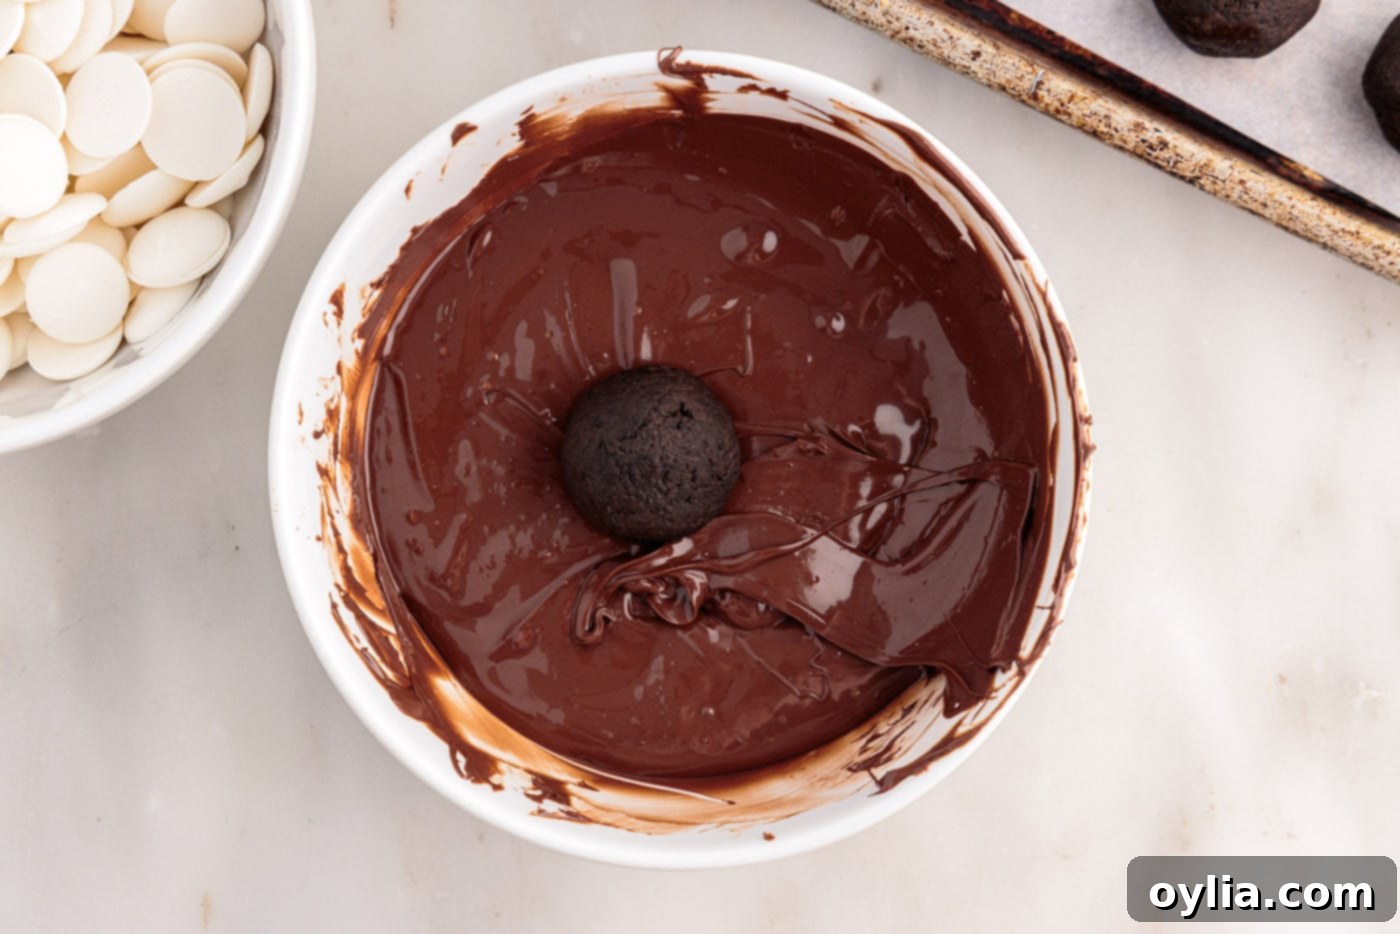
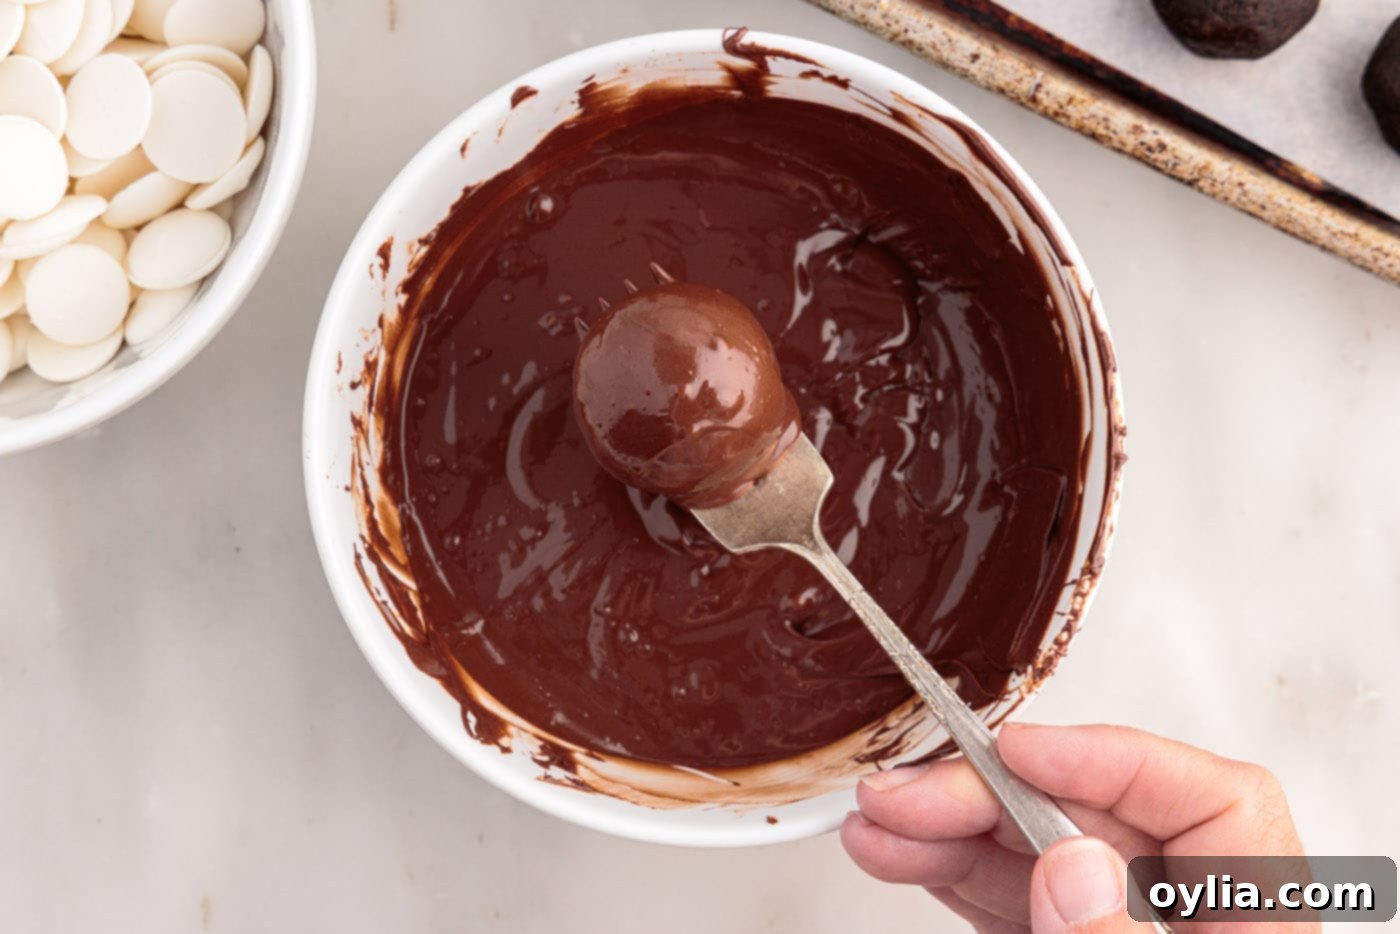
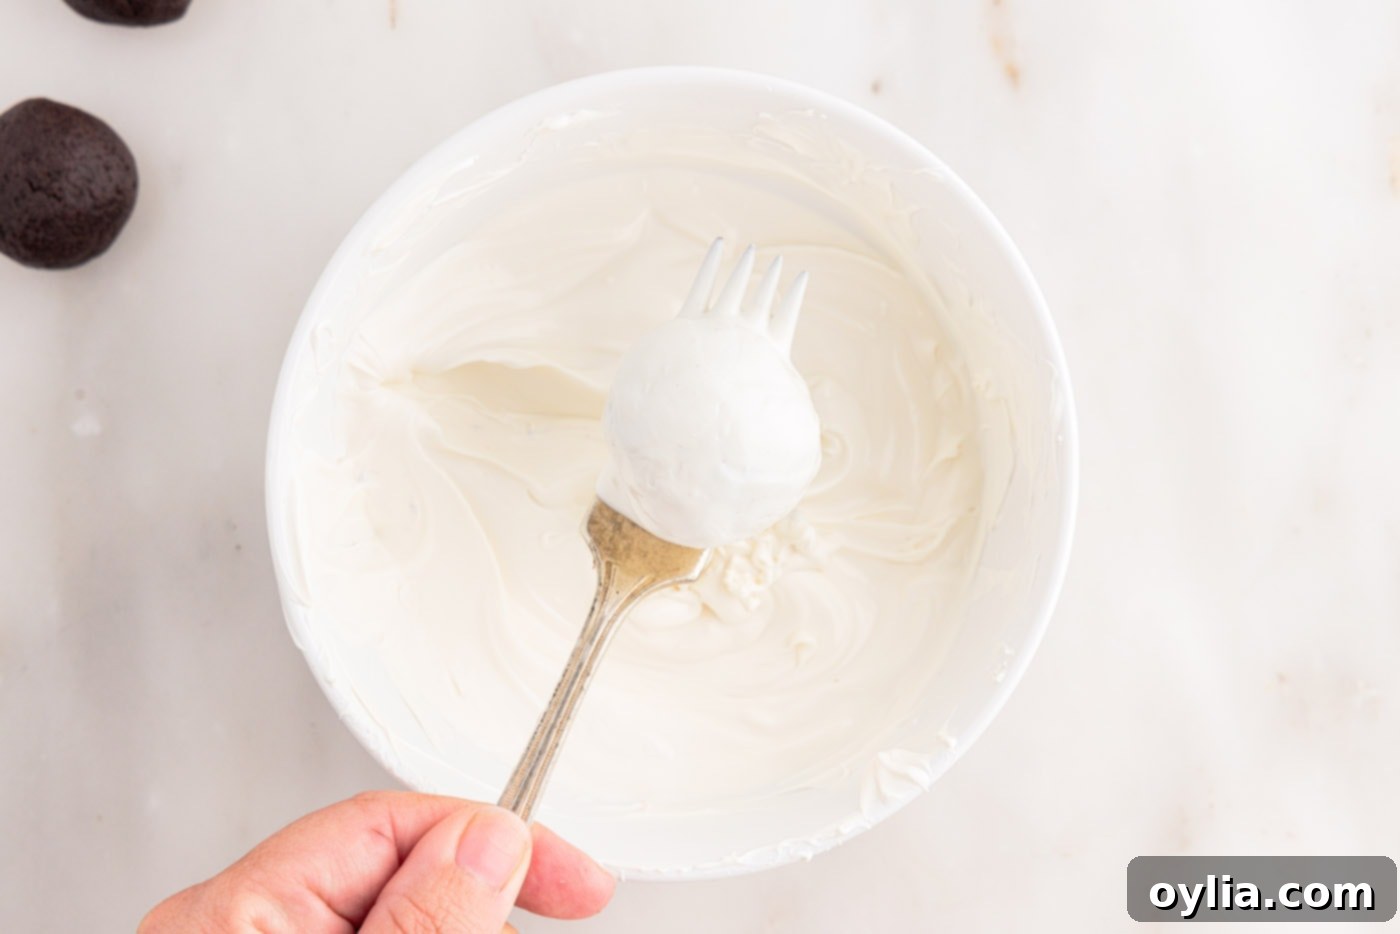
- Dip the Truffles: Working quickly with one firm truffle ball at a time, carefully drop it into the melted chocolate. Fully submerge the ball, then use a dinner fork (or a specialized candy dipping tool) to lift it out. Gently tap the handle of the fork against the side of the bowl several times to allow any excess chocolate to drip off, ensuring a thin, even coating and preventing a thick “foot” at the bottom of the truffle. Carefully place the coated truffle onto a fresh sheet of parchment paper.


TIP: If the chocolate begins to harden or thicken while you are dipping, return it to the microwave for brief 15-second increments and stir until it’s smooth again. You can also stir in a teaspoon of shortening (like Crisco) when initially heating the chocolate; this helps to thin it slightly, allowing for a smoother, more even coating that’s easier to work with.
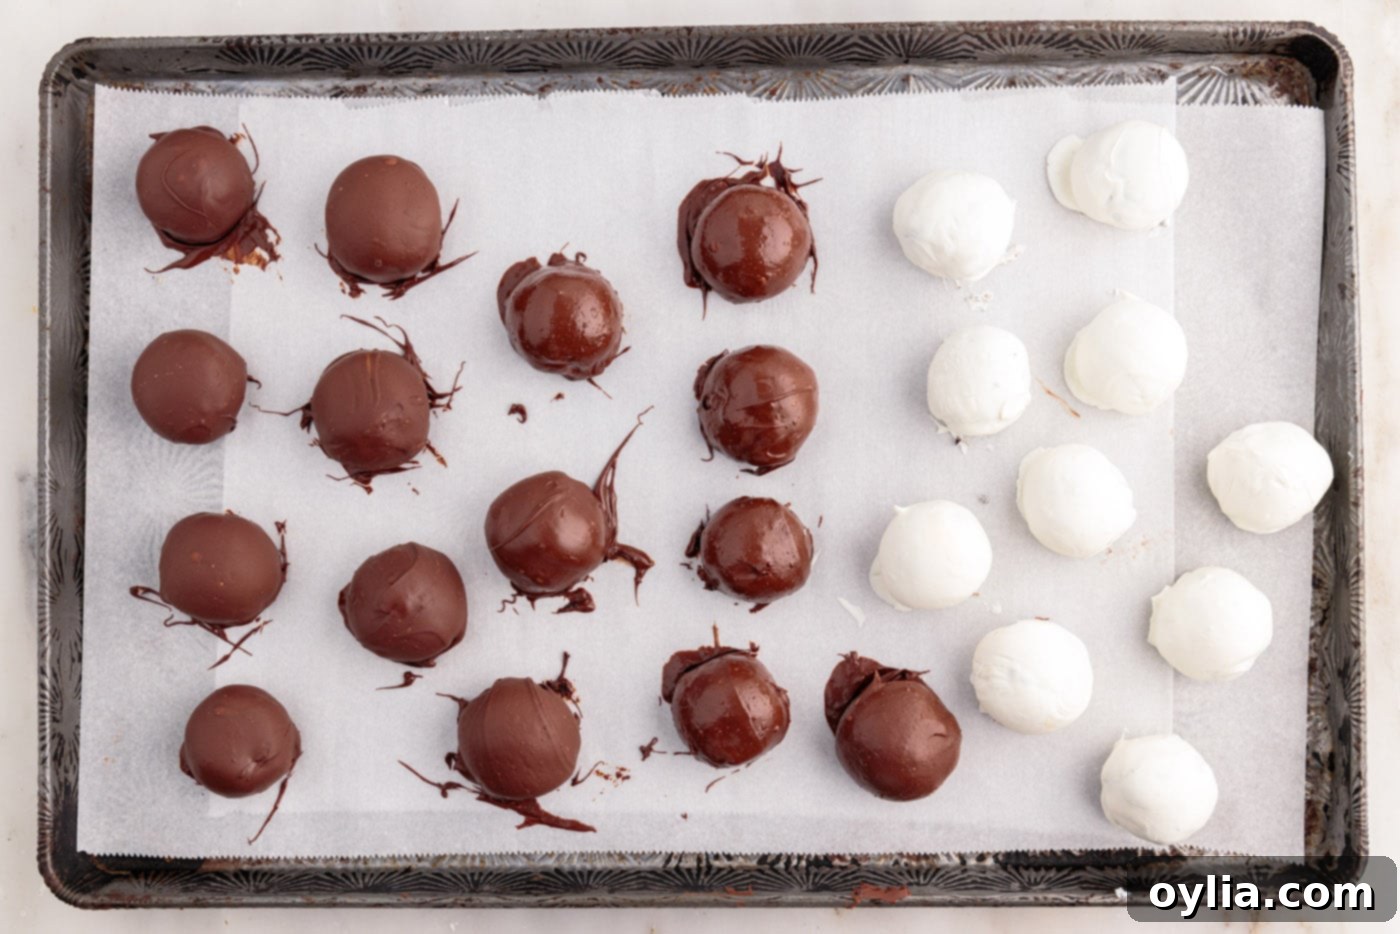
- Alternate Coatings: Continue the dipping process, coating approximately half of your truffles in the white chocolate and the other half in the semi-sweet chocolate. This offers a beautiful contrast and variety in flavor, appealing to different palates.

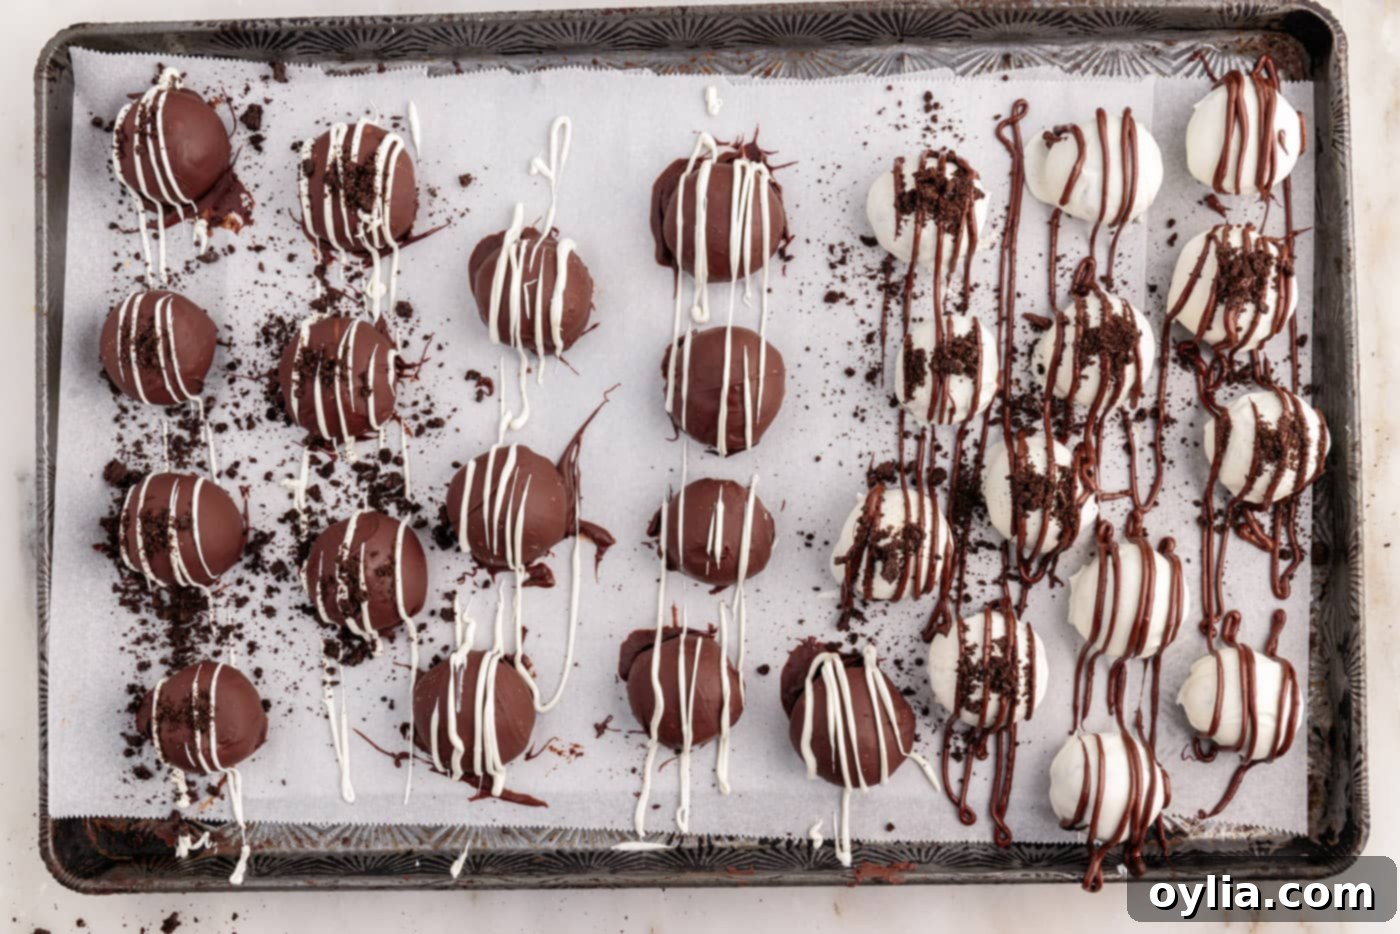
- Decorate (Optional but Recommended!): For an elegant and personalized touch, place any remaining melted chocolate into small plastic bags and snip off a tiny corner. Drizzle a bit of the contrasting chocolate (e.g., semi-sweet drizzle on white chocolate truffles, or white chocolate drizzle on semi-sweet truffles) over the tops in a zig-zag or swirl pattern for a visually appealing decoration. If desired, sprinkle some reserved cookie crumbs, colorful sprinkles, chopped nuts, or even a dash of sea salt onto the truffles immediately after drizzling, before the chocolate has a chance to set. This ensures they adhere beautifully.


- Allow to Set: Once all truffles are dipped and decorated, allow the chocolate coating to fully set. This can happen at room temperature, but placing them in the refrigerator for about 15-30 minutes will speed up the process considerably, making them firm and ready to enjoy sooner. Once the chocolate is firm to the touch and no longer sticky, your delectable homemade Oreo truffles are ready to be savored!
Frequently Asked Questions & Expert Tips for Perfect Oreo Truffles
Oreo truffles, because they contain cream cheese, must always be stored in the refrigerator to maintain their freshness and prevent spoilage. Place them in an airtight container, preferably layered between pieces of parchment paper to prevent sticking and to protect the delicate chocolate coating from getting damaged. When stored properly in the fridge, they will maintain their delicious taste and texture for up to 2 weeks. It’s important to note that when you remove them from the cold refrigerator into a warmer room, they may develop some condensation on the chocolate coating due to temperature change. This is completely normal and will not affect the taste or quality of the truffles themselves; simply let them sit at room temperature for a few minutes before serving to allow the condensation to dissipate.
Absolutely, and we highly encourage it! This is one of the most exciting and fun aspects of making Oreo truffles. The base recipe is incredibly versatile and will work beautifully with almost any flavor of Oreo cookie you can find. Feel free to unleash your creativity and experiment! Imagine using mint Oreos for a refreshing, cooling twist, peanut butter Oreos for a rich, nutty delight, or even seasonal flavors like pumpkin spice, gingerbread, or lemon for a festive or unique treat. Just remember our expert tip for consistency: always stick to **regular-sized Oreo cookies**, avoiding the “Thin” varieties (which don’t provide enough bulk and moisture) and the “Double Stuffed” versions (which can make the mixture too moist and challenging to form into firm balls).
Yes, Oreo truffles freeze exceptionally well, making them a fantastic make-ahead dessert for future enjoyment or for holiday planning! You have two convenient options for freezing, depending on your needs:
- Freezing Uncoated Balls: If you want to prepare the truffle base and dip them at a later time, follow steps 1-5 of the recipe to create the Oreo cream cheese balls. Place these uncoated balls on a baking sheet and flash-freeze them until they are completely solid (this usually takes about 30-60 minutes). Flash-freezing is crucial as it prevents the balls from sticking together. Once solid, transfer the balls to a large zip-top freezer bag or an airtight freezer-safe container. They can be stored in the freezer for up to 3 months. When you’re ready to use them, thaw them slightly in the refrigerator until they are firm but not rock-hard, then proceed with dipping.
- Freezing Coated Truffles: If your truffles are already dipped and decorated, simply ensure the chocolate coating is completely set and firm. Then, arrange them in a single layer in an airtight freezer-safe container. If you need to stack them, place a layer of parchment paper between each layer of truffles to prevent them from sticking. Freeze for up to 3 months. To serve, thaw them in the refrigerator for a few hours or at room temperature for about 30 minutes before enjoying.
Absolutely, making Oreo truffles ahead of time is highly recommended and one of their greatest advantages, especially when you’re preparing for parties, events, or busy holidays. You can completely prepare them a day or even two days in advance. Once they are dipped, decorated, and the chocolate coating has fully set, simply store them in an airtight container in the refrigerator until you are ready to serve. This not only significantly saves you time on the day of your event but also allows the delicious flavors to meld and deepen, often enhancing their overall deliciousness.
Achieving a perfect, smooth, and even chocolate coating is all about technique and a little patience. Here’s our expert method for a flawless finish:
- Always work with one firm truffle ball at a time. This keeps the truffle cold and the chocolate from cooling down too quickly as you dip.
- Submerge the ball fully into the melted chocolate, ensuring it’s completely covered.
- Carefully lift the truffle out of the chocolate using a dinner fork or a specialized candy dipping tool. Avoid using a spoon, as it tends to leave too much excess chocolate.
- Gently tap the handle of the fork (with the truffle still on it) a couple of times on the side of the bowl. This crucial step helps any excess chocolate drip off, ensuring a thin, even layer and preventing a thick “foot” or pool of chocolate at the bottom of the truffle.
- Once most of the excess chocolate has dripped off, use a toothpick to delicately help push the truffle off the fork onto your parchment-lined baking tray. This prevents unsightly finger marks and ensures a clean, smooth transfer.
- Keep a paper towel nearby to wipe off your fork or dipping tool regularly. This prevents chocolate buildup, which can create streaks or uneven coatings on subsequent truffles.
Chocolate seizing (turning from a smooth liquid into a thick, gritty, clumpy mass) is a common issue and usually occurs for one of two reasons: either it got too hot too quickly, or a tiny amount of water came into contact with it. Unfortunately, once chocolate has seized, it’s very difficult, if not impossible, to fully rescue it for smooth dipping purposes. Prevention is truly key here:
- Melt Slowly: Always melt chocolate over low heat or in short, controlled bursts in the microwave, stirring frequently.
- Keep Water Away: Ensure your bowls, spatulas, and any other tools are completely dry. Even a single drop of water can cause chocolate to seize.
- Consider Shortening: As mentioned in the recipe, adding a teaspoon of vegetable shortening (like Crisco) to the chocolate as it melts can help thin it out and make it more resistant to seizing, ensuring a smoother consistency for dipping.
Creative Serving & Decorating Ideas for Your Oreo Truffles
The true beauty of Oreo truffles lies in their incredible versatility, especially when it comes to serving and decorating. They offer a delightful blank canvas for your creativity, allowing you to tailor them perfectly for any event, celebration, or personal preference. These bite-sized delights are not just delicious; they’re also a fantastic opportunity to showcase your artistic flair!
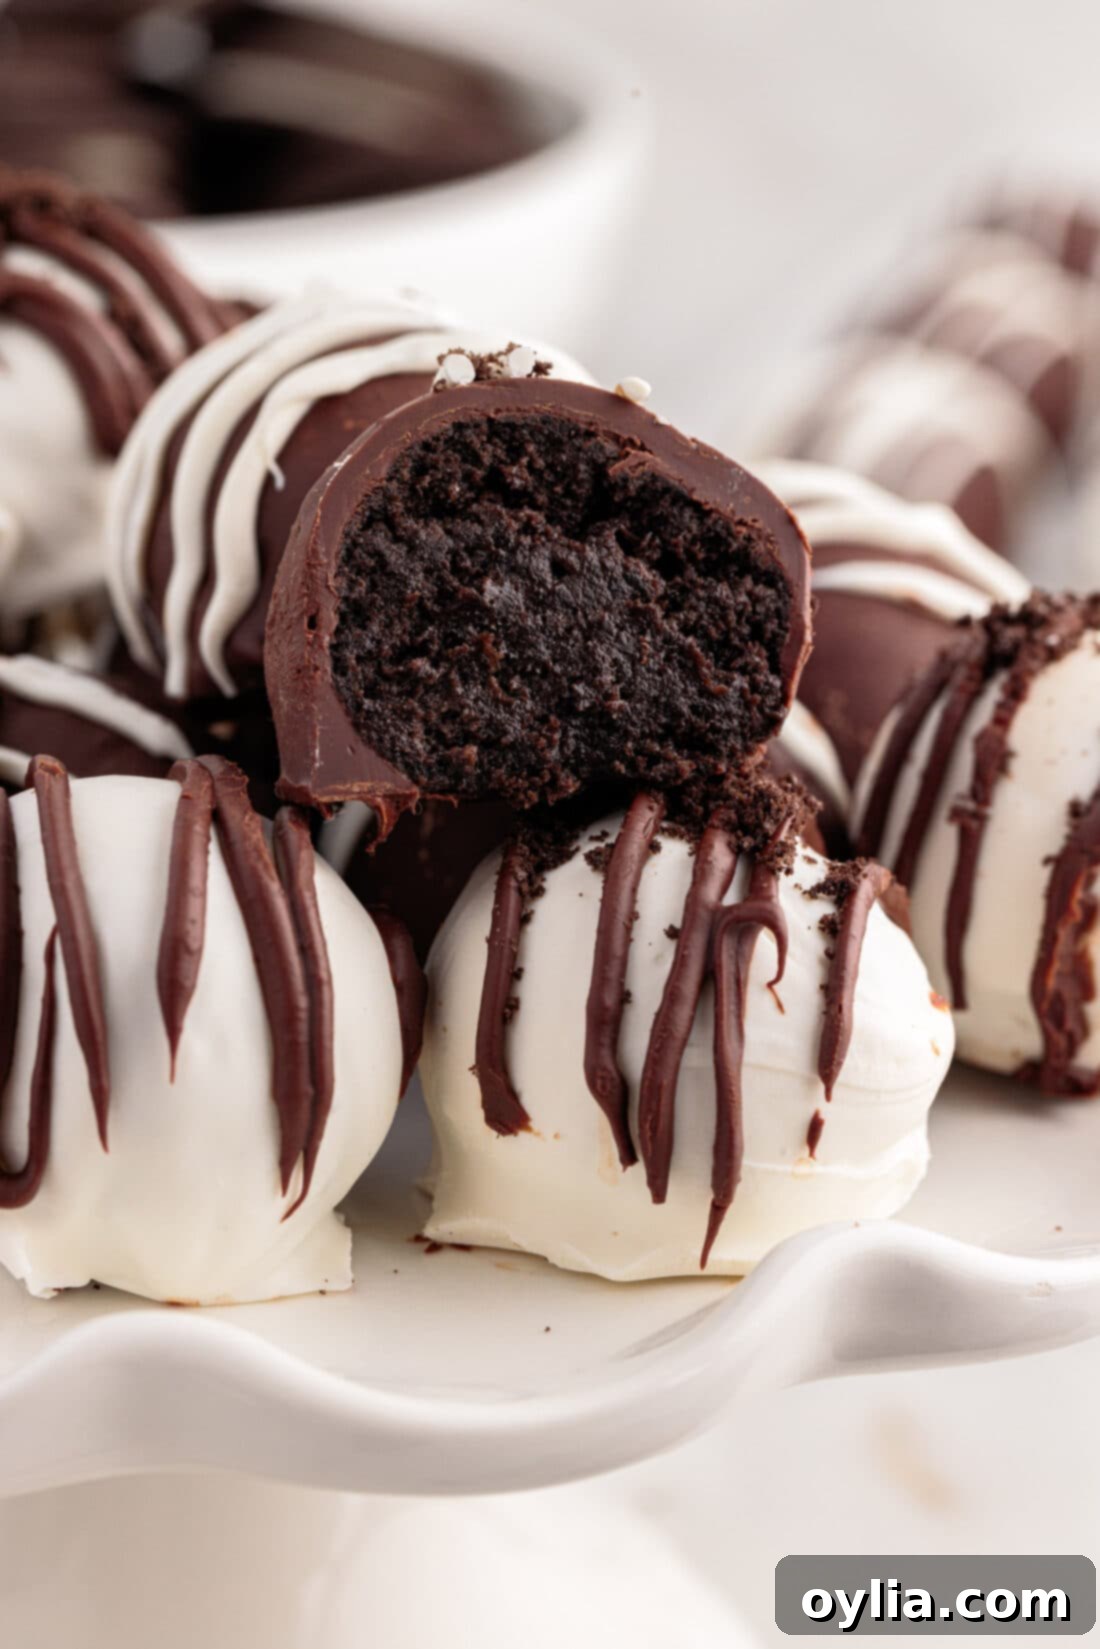
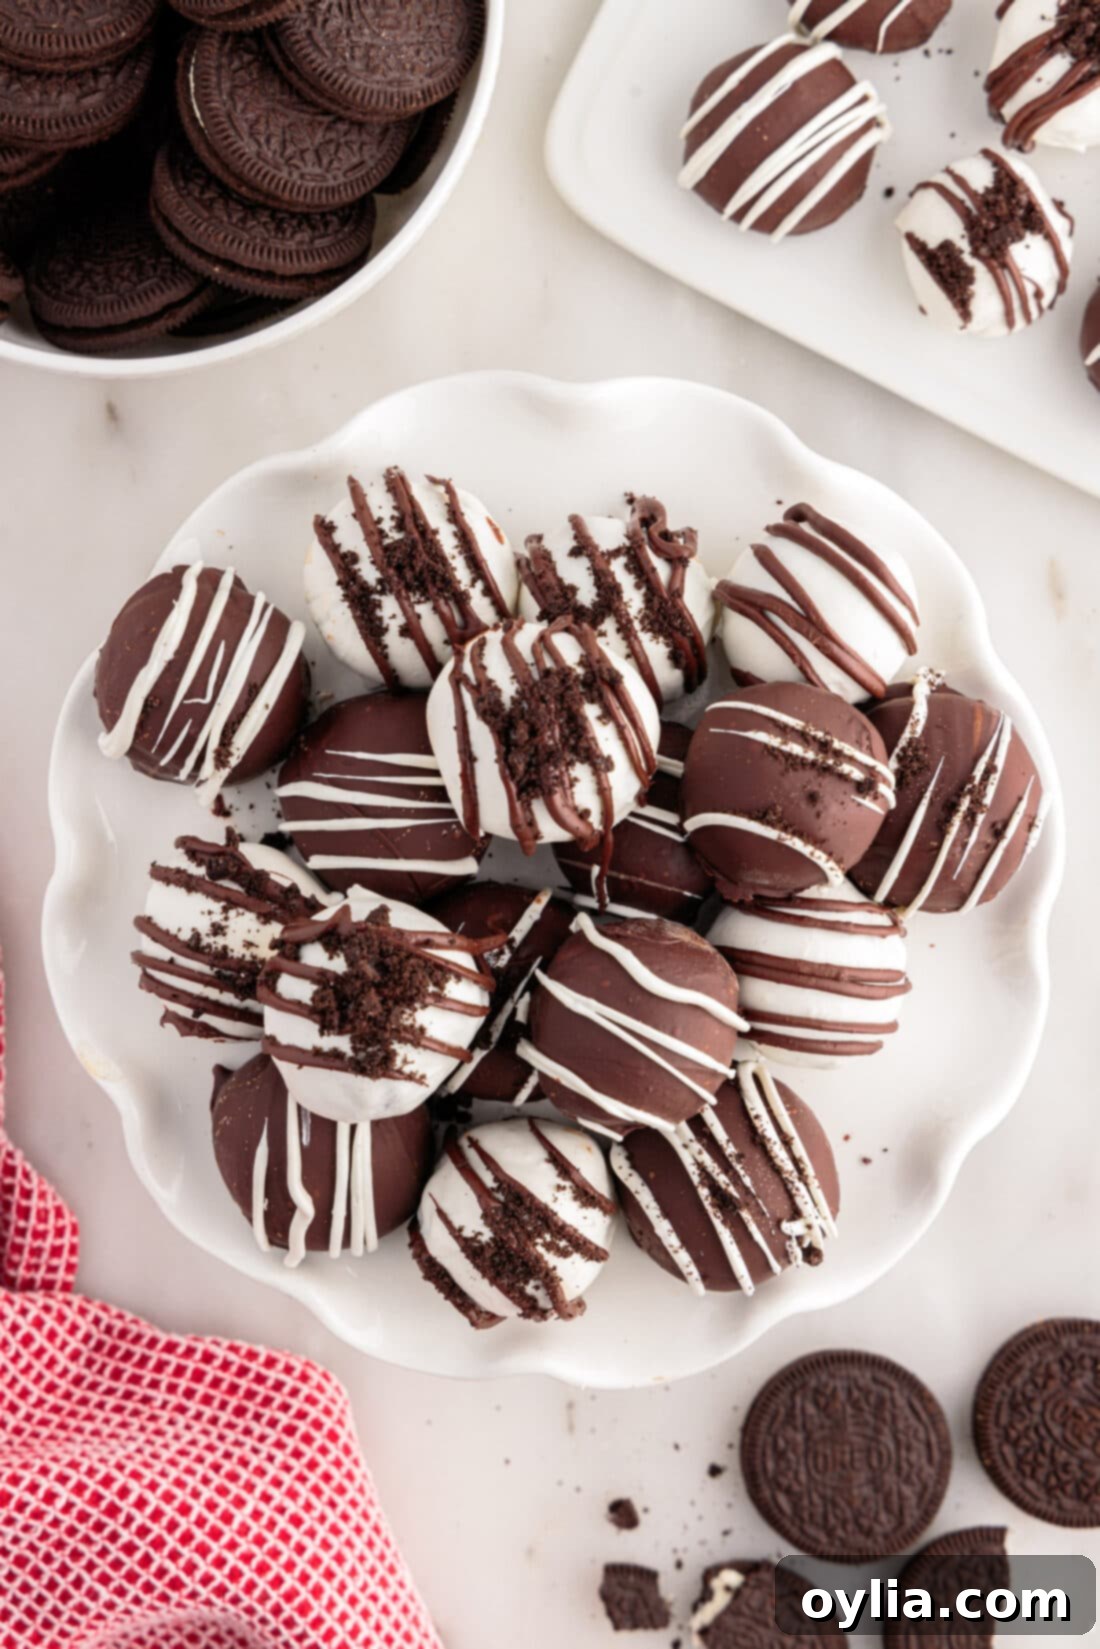
For a timeless and elegant presentation, we kept it classic in this recipe: a delightful mix of white chocolate-coated truffles and semi-sweet chocolate-coated truffles. To add a sophisticated touch and visual appeal, we drizzled the white chocolate truffles with melted semi-sweet chocolate, and conversely, drizzled the semi-sweet truffles with white chocolate. This contrasting drizzle creates a beautiful, eye-catching pattern. A simple yet stunning garnish of additional crushed Oreos, sprinkled on top before the chocolate sets, adds texture and reinforces the classic Oreo flavor, making them instantly recognizable and utterly irresistible.
But don’t stop there! The decorating possibilities are truly endless, limited only by your imagination:
- Themed Parties & Holidays: Easily customize your Oreo balls for any celebration imaginable. Use assorted colored candy melting wafers (readily available at most craft or baking stores) to match specific themes or holidays. Think vibrant reds and greens for Christmas, delicate pastels for Easter, spooky orange and black for Halloween, or spirited team colors for game day parties. You can even use edible glitter or food coloring to tint white chocolate for even more custom hues.
- Sprinkle Fun: Elevate the festive factor with a variety of sprinkles! Nonpareil sprinkles offer a classic, colorful look, while decorating sugar adds a sparkling, elegant touch. For a more natural and textural finish, consider adding finely crushed nuts (like pecans, walnuts, or almonds), shredded coconut flakes, mini chocolate chips, or even a light dusting of cocoa powder or powdered sugar to create different flavor profiles and visual interest.
- Elegant Drizzles & Designs: Beyond simple contrasting chocolate drizzles, consider using colored candy melts for vibrant drizzles that truly pop against the chocolate coating. A zig-zag pattern, a delicate swirl, or even intricate lines can transform a plain truffle into a miniature work of art. You can also press small candies, edible pearls, or even fresh berry halves onto the wet chocolate for extra flair.
- Packaging for Gifts: Oreo truffles make wonderful homemade gifts or party favors. Arrange them neatly in small decorative boxes with individual cupcake liners, tie with a festive ribbon, and you have a thoughtful, delicious, and personalized present that everyone will appreciate. They’re also perfect for cookie exchanges or bake sales.
No matter how you choose to present them, these easy-to-make Oreo truffles are guaranteed to be a crowd-pleaser, offering a delicious bite-sized burst of flavor and a charming touch of homemade sweetness to any occasion.
More No-Bake & Decadent Dessert Recipes You’ll Love
If you’ve fallen in love with the ease, versatility, and undeniable deliciousness of these Oreo truffles, you’ll be thrilled to discover more of our favorite no-bake and decadent dessert creations. Perfect for satisfying your sweet tooth or impressing guests with minimal effort, these recipes are tried-and-true favorites that deserve a permanent spot in your baking repertoire. Explore these delightful options for more effortless indulgence:
- Classic Cake Balls
- Rich Mocha Truffles
- Elegant Chocolate Truffles
- Festive Heart Oreo Truffles
- Delightful Golden Oreo Truffles
- Irresistible Chocolate Peanut Butter Balls
I love to bake and cook and share my kitchen experience with all of you! Remembering to come back each day can be tough, that’s why I offer a convenient newsletter every time a new recipe posts. Simply subscribe and start receiving your free daily recipes!
Oreo Truffles
IMPORTANT – Don’t forget to check out the detailed Frequently Asked Questions and Expert Tips section within the main blog post for additional helpful advice, troubleshooting, and customization ideas. Simply scroll back up to read them!
Print It
Pin It
Rate It
Save It
Saved!
Prevent your screen from going dark
Course:
Dessert
Cuisine:
American
30
Oreo balls
1 hour
184
Amanda Davis
Ingredients
- 36 Oreo cookies filling included. 1 regular size package (crucial for proper consistency, avoid double stuffed or thin varieties)
- 8 ounces cream cheese cut into pieces and softened (essential for smooth blending, see tips for softening)
- 12 ounces white chocolate melting wafers (Ghirardelli or similar for best results)
- 12 ounces semi-sweet chocolate melting wafers or good quality chocolate chips (Ghirardelli or baking chocolate recommended)
Things You’ll Need
-
Food processor (or large zip-top bag and rolling pin)
-
Small cookie scoop or Tablespoon (for uniform balls)
-
Parchment paper
-
Baking sheet
-
Microwave-safe bowls
-
Dinner fork or candy dipping tool
Before You Begin: Important Tips for Success
- You will use whole Oreo cookies in this recipe. No need to separate the cookie from its filling as the filling will lend moisture and flavor. Stick to regular Oreos, not the double stuffed or the thin variety.
- Ghirardelli semi-sweet or white chocolate melts are great for this recipe, ensuring a smooth coating and quick setting. You can also chop up a bar of good-quality baking chocolate. Chocolate chips will also work but be aware that **white chocolate chips don’t melt as smoothly and can easily seize when warming.** For a richer experience, we prefer the flavor of baking chocolate or the Ghirardelli chocolate melts/chips over almond bark, though almond bark also melts and sets well.
- It’s best to let your cream cheese come to room temperature before beginning, as this ensures a smooth, lump-free mixture. To do so, cut the cream cheese into cubes and let it rest on a plate for around 30-40 minutes at room temperature.
- Keep a paper towel nearby to wipe off your fork and/or toothpick while dipping. It’s helpful to use a fork to lift the truffle and tap off excess chocolate, and then a toothpick can assist in gently moving the truffle from the fork onto the parchment paper without leaving marks.
- Don’t over-chill your truffle balls before dipping. While firming them up is crucial to prevent stickiness and hold their shape, if they are too cold, the warm chocolate coating might crack when it comes into contact with the very cold center. Aim for about 10-15 minutes in the freezer or 30 minutes in the refrigerator for the ideal temperature.
Instructions
-
Place Oreo cookies (filling included) in the bowl of a food processor and pulverize into fine crumbs. (If desired, reserve one cookie to crumble for garnish later.)
-
Add the softened cream cheese into the food processor and process until the mixture is fully combined and clumps together into a cohesive “dough.”
-
Use a tablespoon or a cookie dough scoop to portion out the mixture, forming rough balls. Place each ball on a baking sheet lined with parchment paper.
-
Chill the baking sheet with the dough balls in the freezer for 5-10 minutes to firm the dough slightly, making it easier to handle and roll.
-
Remove from the freezer and roll each ball between the palms of your hands to form a smooth, perfectly round truffle. Place the tray back into the freezer for an additional 10-15 minutes or the refrigerator for about 30 minutes. This ensures they are firm but not overly cold for dipping.
Expert Tip: Freezing the dough balls for a short period of time is really helpful to get them firm enough to hold their shape for dipping, but if they are *overly cold*, the chocolate coating may crack. This can happen when the warm coating comes into contact with the very cold center – the center expands and the coating cracks or the insides start squirting out a hole in the coating. About 15 minutes in the freezer should be a good balance between cold enough and not too cold.
-
Place the white chocolate melting wafers and semi-sweet chocolate melting wafers (or chocolate chips) in separate microwave-safe bowls. Heat each in 30-second increments, stirring thoroughly between each interval, until the chocolate is completely melted and smooth. To prevent one chocolate from hardening, you can melt and dip with one type at a time.
-
Working with one truffle ball at a time, dip the firm ball into the melted chocolate, turning to coat it completely. Lift the truffle from the chocolate using a fork. Gently tap off any excess chocolate and then carefully place the coated ball onto a clean sheet of parchment paper.
TIP: If the chocolate starts to harden or thicken while you’re dipping, place it back into the microwave in 15-second increments and stir until smooth. You can also add a teaspoon of shortening to the chocolate when initially heating it to help thin it, ensuring it spreads smoothly over the truffles.
-
Continue dipping approximately half of the truffles in white chocolate and the other half in semi-sweet chocolate for a delightful variety.
-
For decoration, place any remaining melted chocolate into small plastic bags and snip off a tiny corner. Drizzle a bit of each contrasting chocolate over the tops of the truffles. If desired, sprinkle with some reserved cookie crumbs, sprinkles, or chopped nuts before the chocolate fully sets.
-
Allow the chocolate coating to fully set at room temperature or in the refrigerator. Once firm, your homemade Oreo truffles are ready to be savored!
Additional Expert Tips & Storage
- Storage: Store the Oreo truffles in an airtight container layered between pieces of parchment paper. They must be refrigerated due to the cream cheese content and will last for up to 2 weeks. Be aware that condensation may form on the chocolate when removed from the fridge, but this will not affect the truffles.
- Freezing for Later: You have two options for freezing. To freeze the balls without the chocolate coating, place them on a baking sheet and flash-freeze until solid (to prevent sticking), then transfer to a large ziptop bag and freeze for up to 3 months. To freeze with the chocolate coating, allow the chocolate to fully set first, then transfer to a ziptop bag or airtight container and freeze for up to 3 months. Thaw in the refrigerator before serving.
- Customization is Key: Don’t be afraid to experiment with different Oreo flavors or types of chocolate. Add a drop of peppermint extract to the cream cheese mixture, or sprinkle sea salt on top of semi-sweet chocolate for a gourmet touch.
- Troubleshooting Seized Chocolate: If your chocolate seizes (becomes thick and clumpy), it usually means it got too hot or water got into it. Unfortunately, seized chocolate is difficult to rescue for dipping purposes. Prevention is key: melt slowly, stir often, and ensure your bowls and tools are completely dry.
Nutrition Information (Estimated)
Tried this Recipe? Pin it for Later!
Follow on Pinterest @AmandasCookin or tag #AmandasCookin!
The recipes on this blog are tested with a conventional gas oven and gas stovetop. It’s important to note that some ovens, especially as they age, can cook and bake inconsistently. Using an inexpensive oven thermometer can assure you that your oven is truly heating to the proper temperature. If you use a toaster oven or countertop oven, please keep in mind that they may not distribute heat the same as a conventional full sized oven and you may need to adjust your cooking/baking times. In the case of recipes made with a pressure cooker, air fryer, slow cooker, or other appliance, a link to the appliances we use is listed within each respective recipe. For baking recipes where measurements are given by weight, please note that results may not be the same if cups are used instead, and we can’t guarantee success with that method.
