Effortlessly Festive: The Ultimate Guide to Making a Delicious Candy Cane Danish
Transform your Christmas morning into a magical and delicious experience with this incredibly easy Candy Cane Danish recipe. Crafted with convenient crescent rolls, a delightful fruit pie filling, and a luscious cream cheese center, this festive pastry is crowned with a simple, sweet icing glaze. It’s the perfect way to bring holiday cheer to your breakfast table without the usual fuss of traditional baking.

Why This Candy Cane Danish Recipe is Your New Holiday Favorite
This Candy Cane Danish isn’t just a treat; it’s a delightful shortcut to a whimsical and delicious Christmas breakfast. Imagine the joy on everyone’s faces when they see a festive, candy cane-shaped pastry adorning your holiday table. What makes this recipe truly special is its incredible ease and speed, making it perfect for one of the busiest mornings of the year.
At its heart, this recipe is a clever take on a classic cherry cheese danish, ingeniously shaped into a candy cane. The magic begins with store-bought crescent rolls, which eliminate the need for complicated dough kneading or time-consuming proofing. This means you can whip up this impressive holiday pastry in a fraction of the time it would take with traditional methods. Paired with your favorite pie filling and a rich, creamy cheese mixture, it delivers a burst of flavor in every bite.
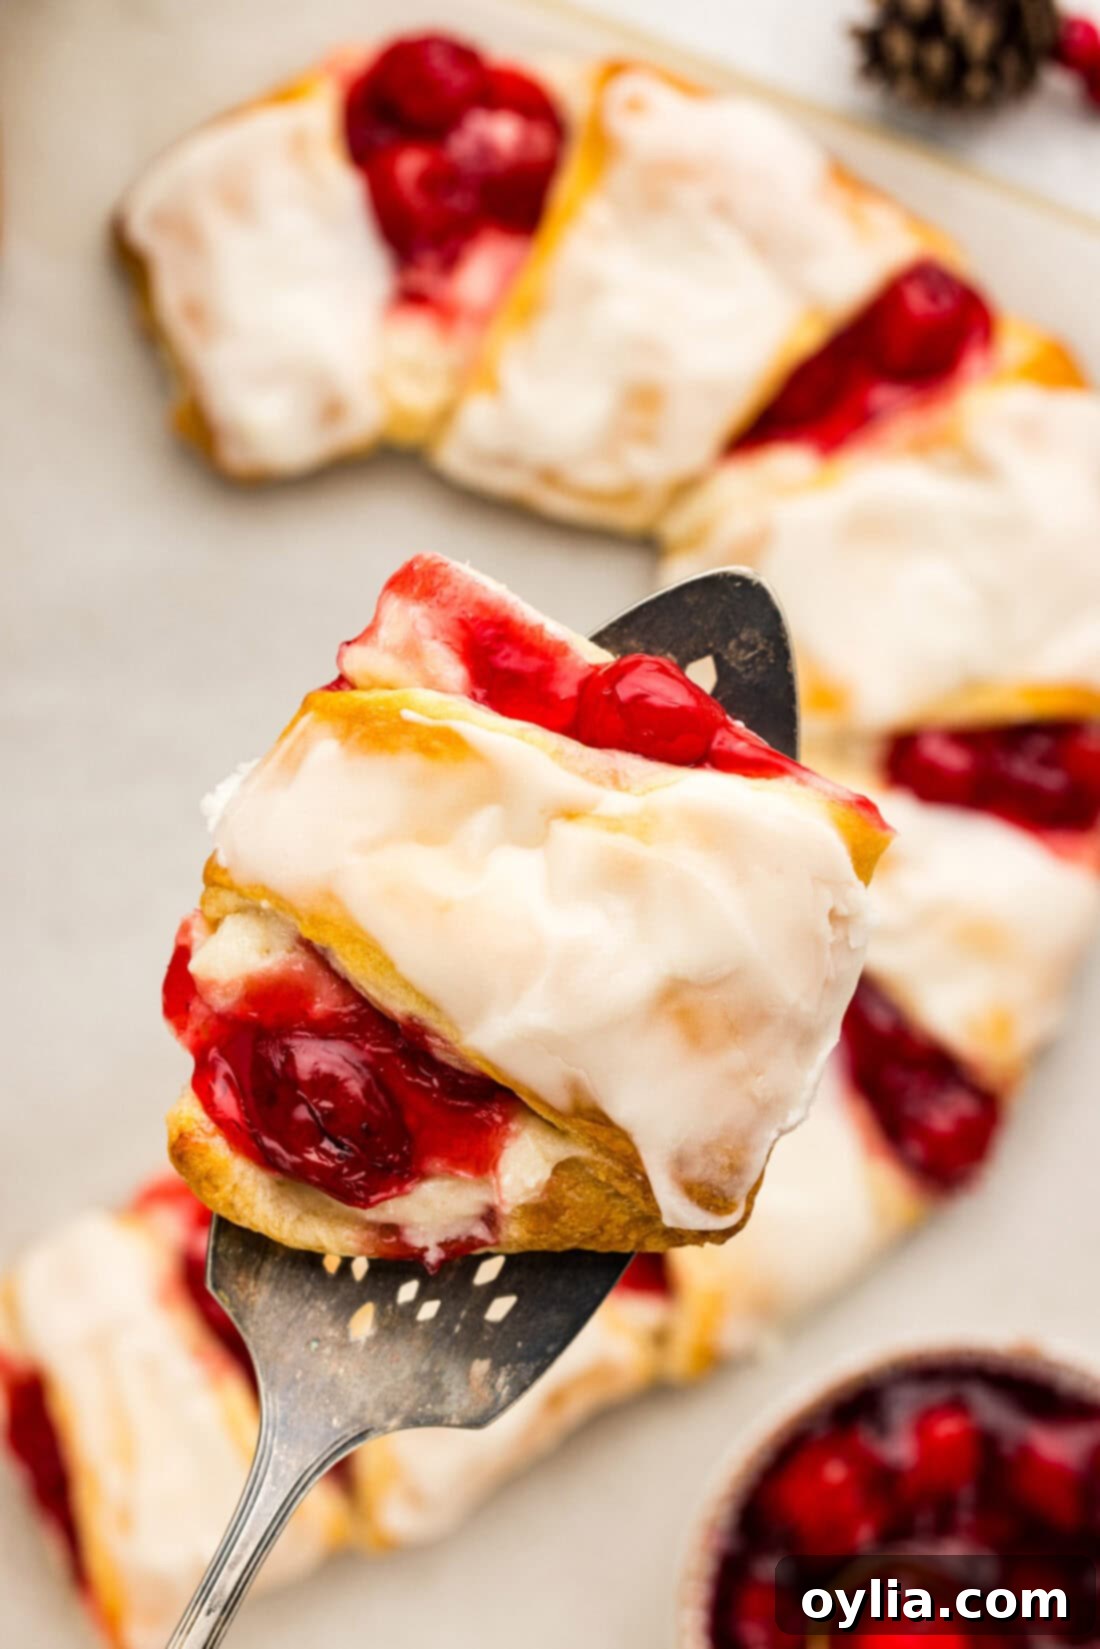
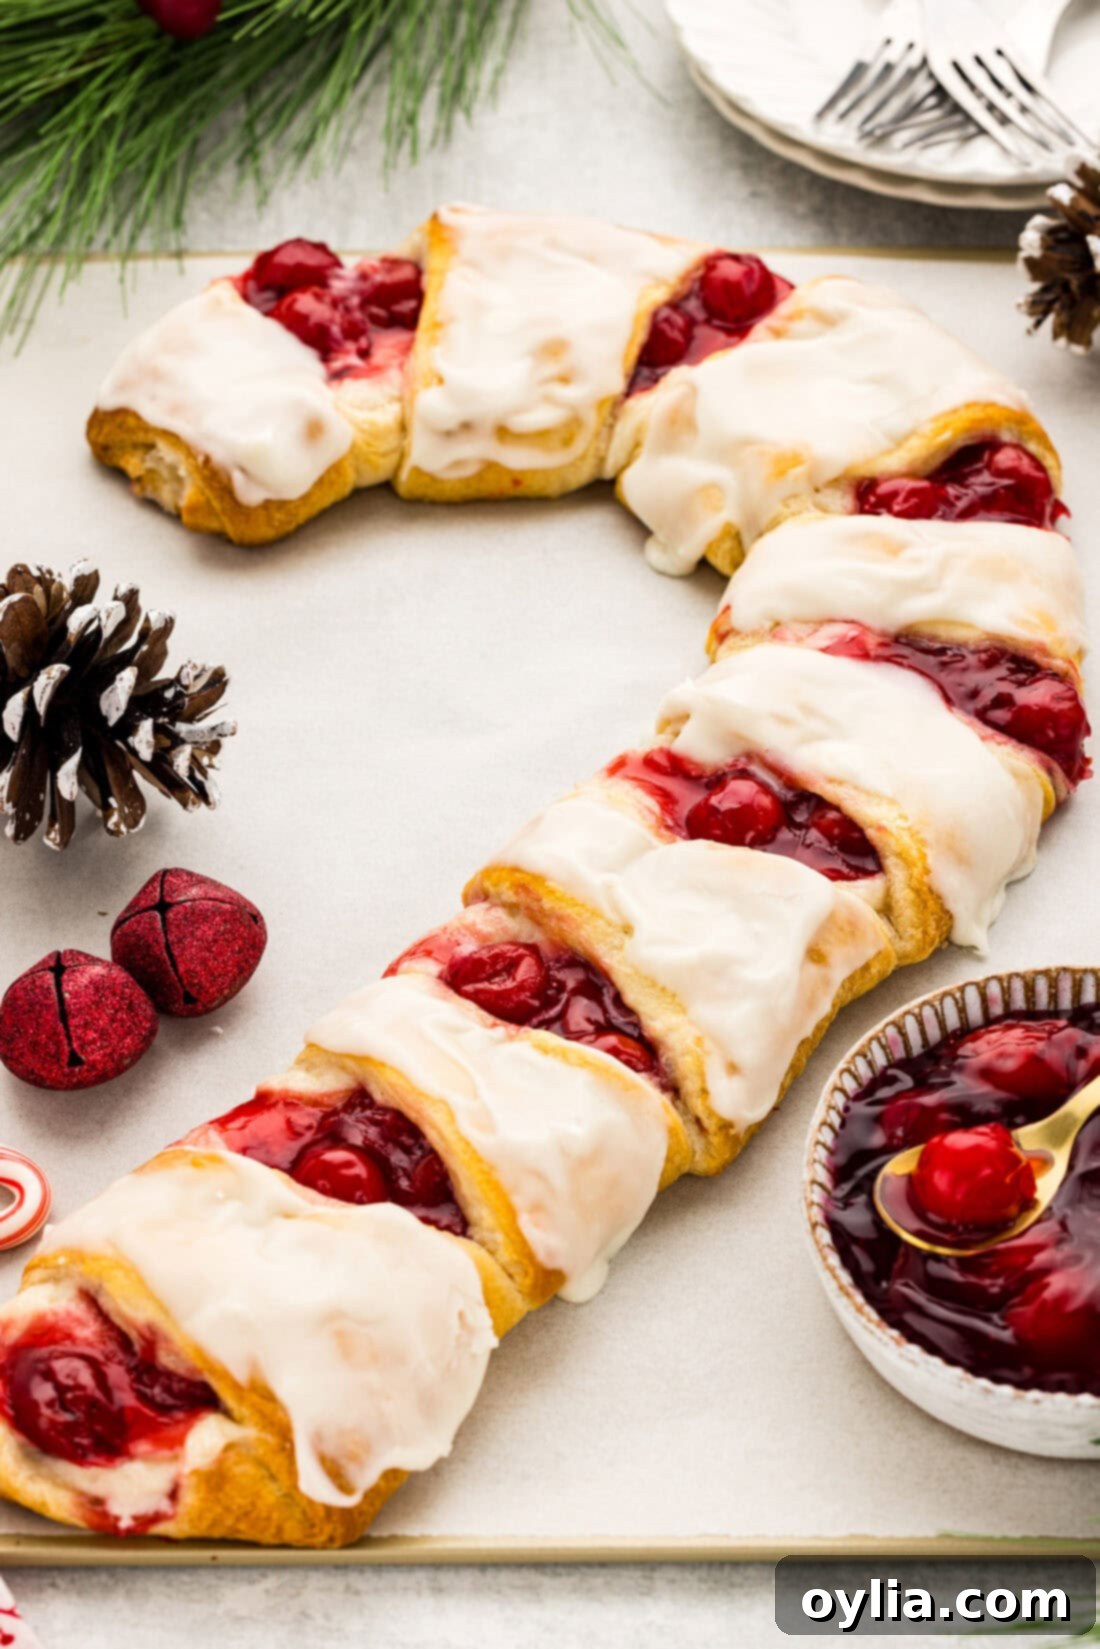
The visual appeal is undeniable. The classic red and white stripes, created by the fruit filling and dough, are perfectly accentuated by a simple, sweet icing glaze drizzled over the top. It’s a showstopper that tastes as good as it looks, ensuring your Christmas morning is filled with effortless charm and delicious memories. Say goodbye to stress and hello to a beautiful, homemade-tasting danish that truly works wonders for your holiday celebration.
Gather Your Simple Ingredients for This Festive Danish
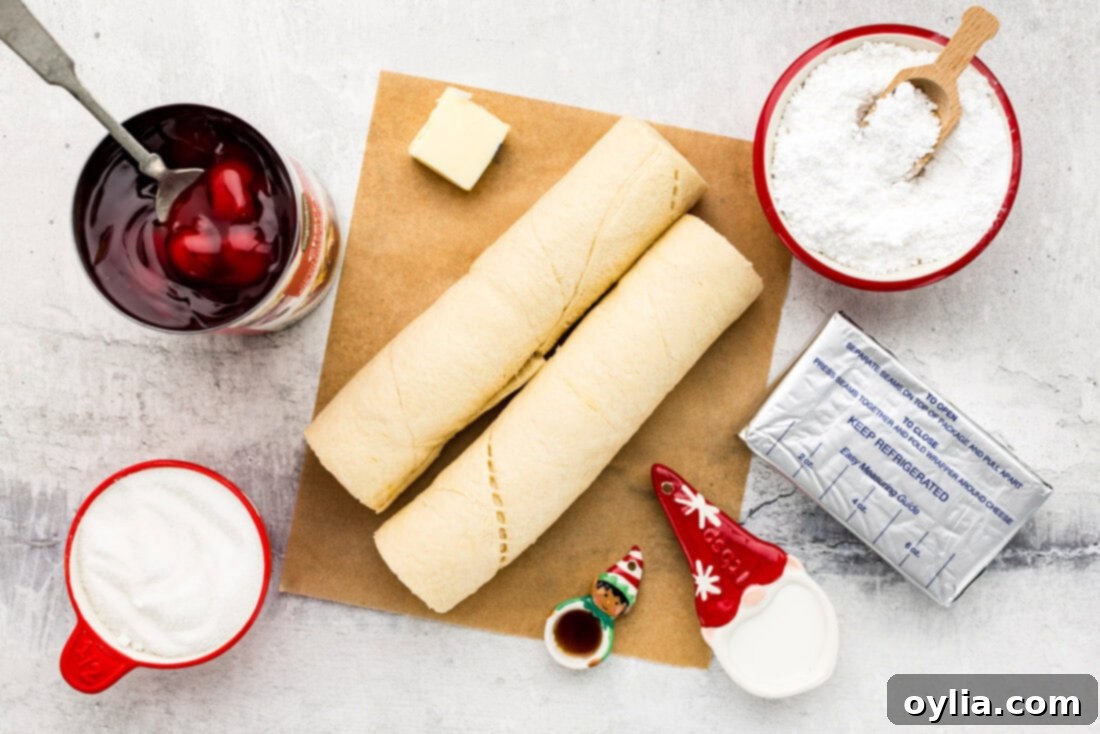
The beauty of this Candy Cane Danish lies in its accessible ingredients, many of which you likely already have on hand, or can easily find at your local grocery store. No exotic items or complex preparations are required. For precise measurements and detailed instructions, scroll down to the printable recipe card at the end of this post. Here’s a quick overview of what you’ll need to create this holiday masterpiece:
Ingredient Spotlight: Tips & Substitutions for Your Candy Cane Danish
Let’s dive a little deeper into the key components of this delightful Candy Cane Danish and explore some options to customize it to your taste.
DOUGH: You will need two 8-ounce tubes of pre-made crescent rolls for this recipe. These are truly the secret weapon for making this danish incredibly simple and quick. Their flaky texture and buttery flavor are perfect for creating that classic pastry feel without any of the hard work. While some might consider using puff pastry, crescent rolls are specifically designed to yield that soft, airy interior and golden-brown exterior that makes this danish so irresistible and easy to shape into a candy cane.
PIE FILLING: The vibrant red filling is crucial for that iconic candy cane look and delicious fruity flavor. You have several fantastic options here:
- Store-Bought Cherry Pie Filling: This is the easiest and most common choice, ensuring consistent results every time. Look for a good quality brand for the best flavor.
- Homemade Cherry Pie Filling: If you enjoy canning or have some homemade cherry pie filling prepped from the past year, it will undoubtedly add an extra layer of gourmet flavor.
- Other Berry Fillings: Don’t limit yourself to just cherries! We’ve successfully made this danish with both raspberry and strawberry pie filling in the past, and both were equally delicious and visually appealing, offering a slightly different fruity tang. Feel free to experiment with your favorite red berry.
CREAM CHEESE FILLING: This rich, creamy center is what elevates the danish from good to absolutely amazing. The cream cheese filling in this Candy Cane Danish recipe is wonderfully versatile. You can flavor it simply with classic vanilla extract for a sweet, aromatic base. For a more sophisticated and complementary flavor profile, consider using a blend of vanilla and almond extracts. The subtle nuttiness of almond extract truly enhances the sweetness and tartness of cherry and other berry fillings, creating a harmonious taste sensation. Don’t hesitate to play around with the flavoring to find your perfect balance. A touch of lemon zest could also add a bright note if you’re feeling adventurous!
Step-by-Step Guide: How to Make a Festive Candy Cane Danish
These step-by-step photos and instructions are here to help you visualize how to make this recipe with ease. For the complete printable version of this recipe, including all measurements and detailed instructions, simply Jump to Recipe located at the bottom of this post.
- Prepare Your Workspace: Preheat your oven to 375°F (190°C). Line two standard cookie sheets with parchment paper. This crucial step prevents sticking and makes cleanup a breeze later. Set them aside for assembly.
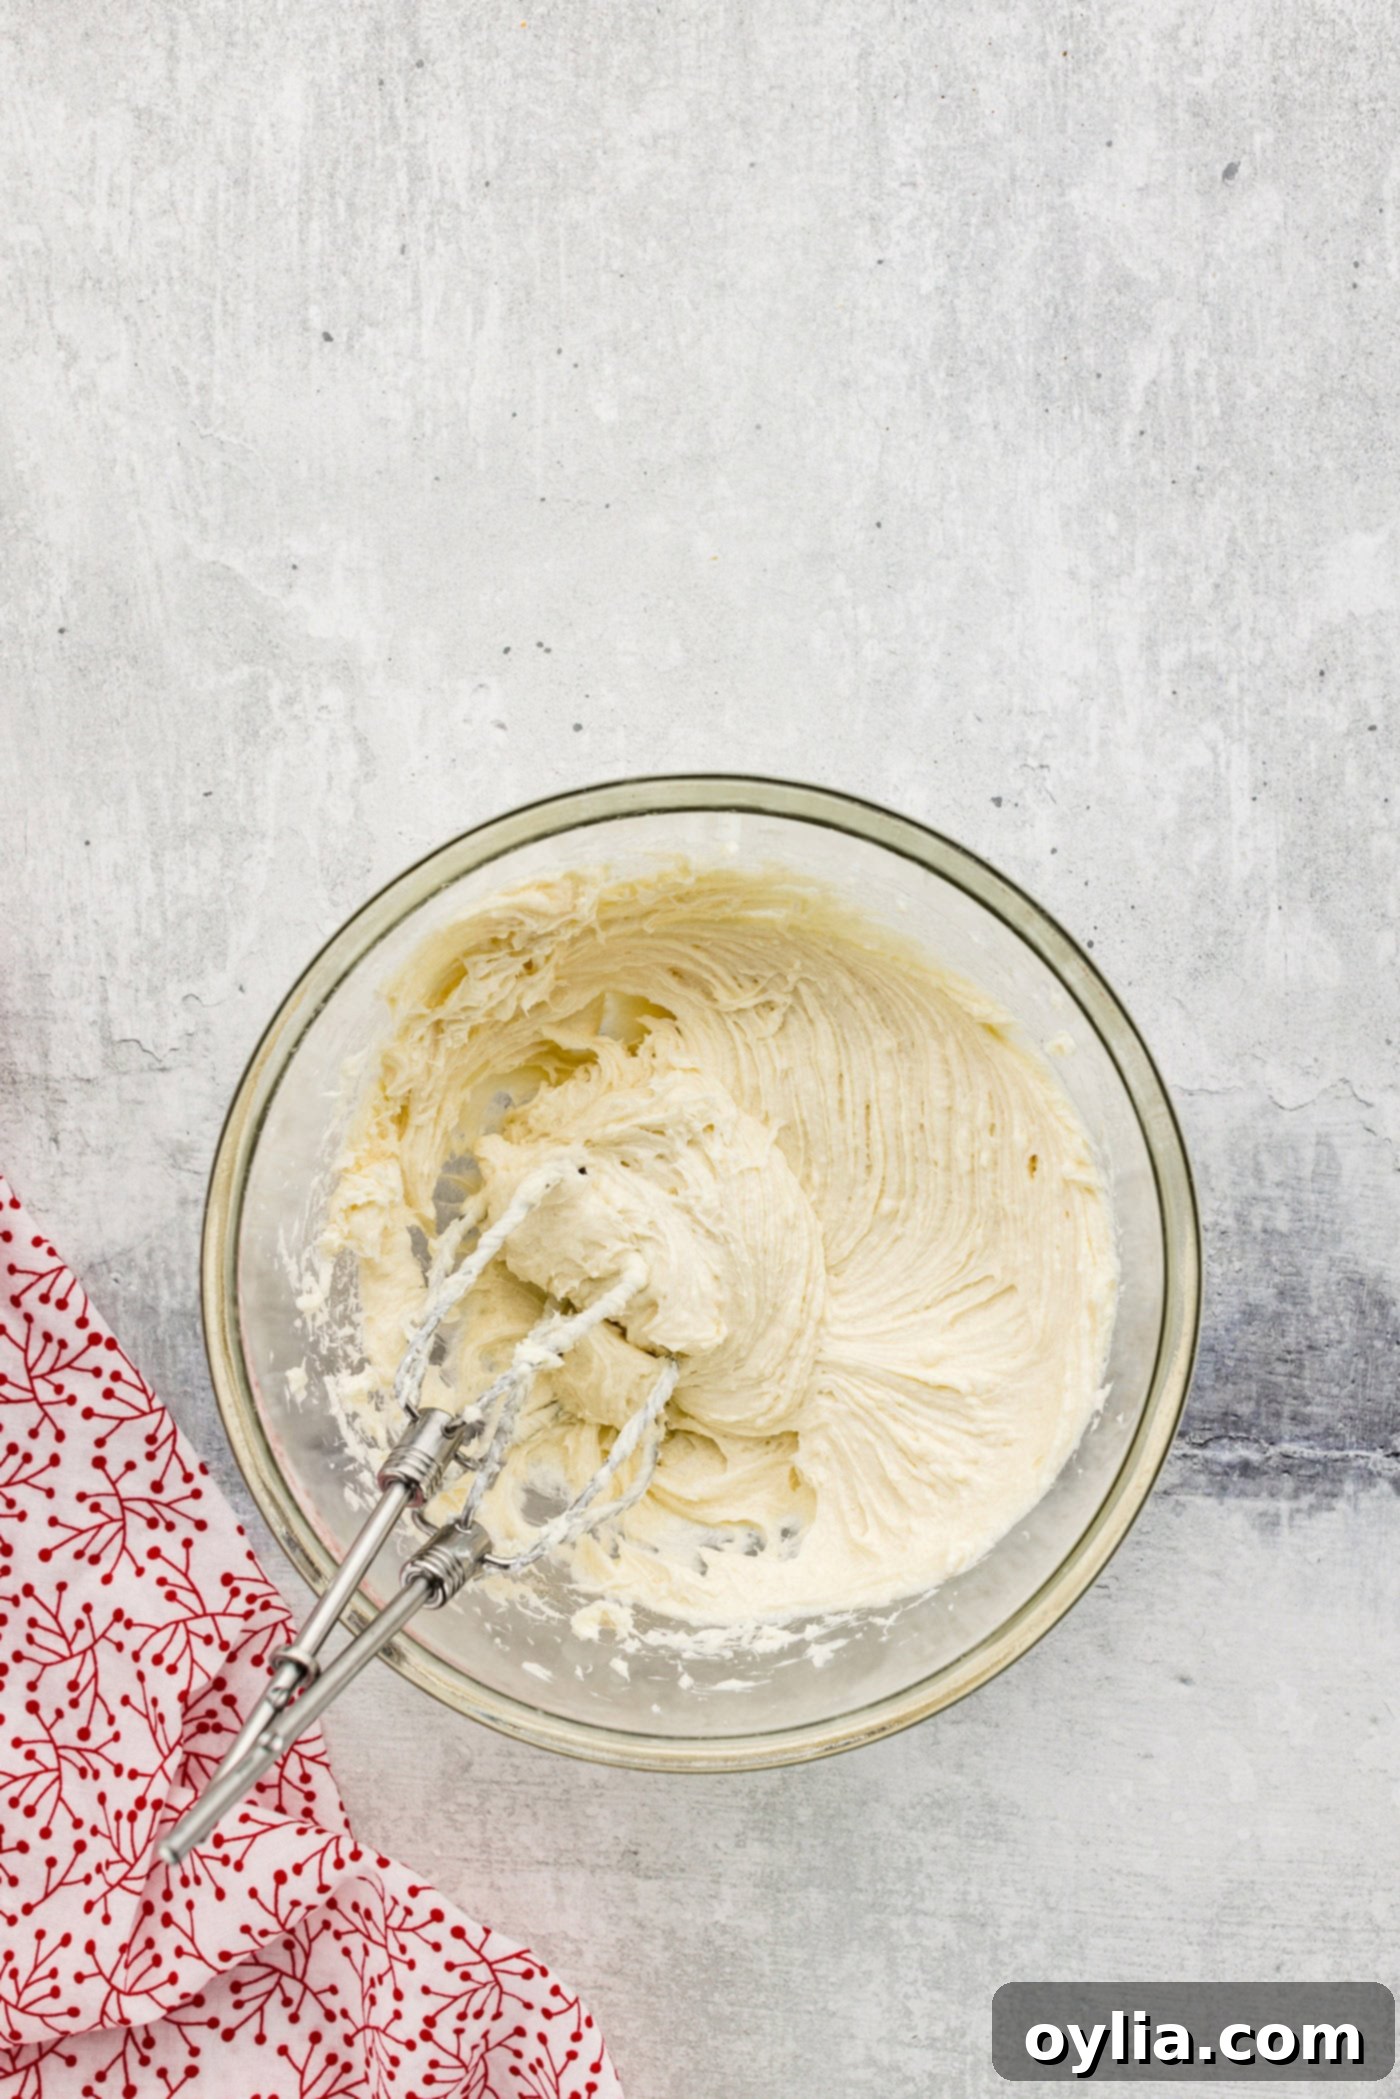
- Craft the Cream Cheese Filling: In a medium mixing bowl, combine the softened cream cheese, granulated sugar, and your chosen extract(s) – either vanilla, or a harmonious blend of vanilla and almond extract. Beat these ingredients together until the mixture is completely smooth and creamy. Ensure there are no lumps, creating a luscious filling.

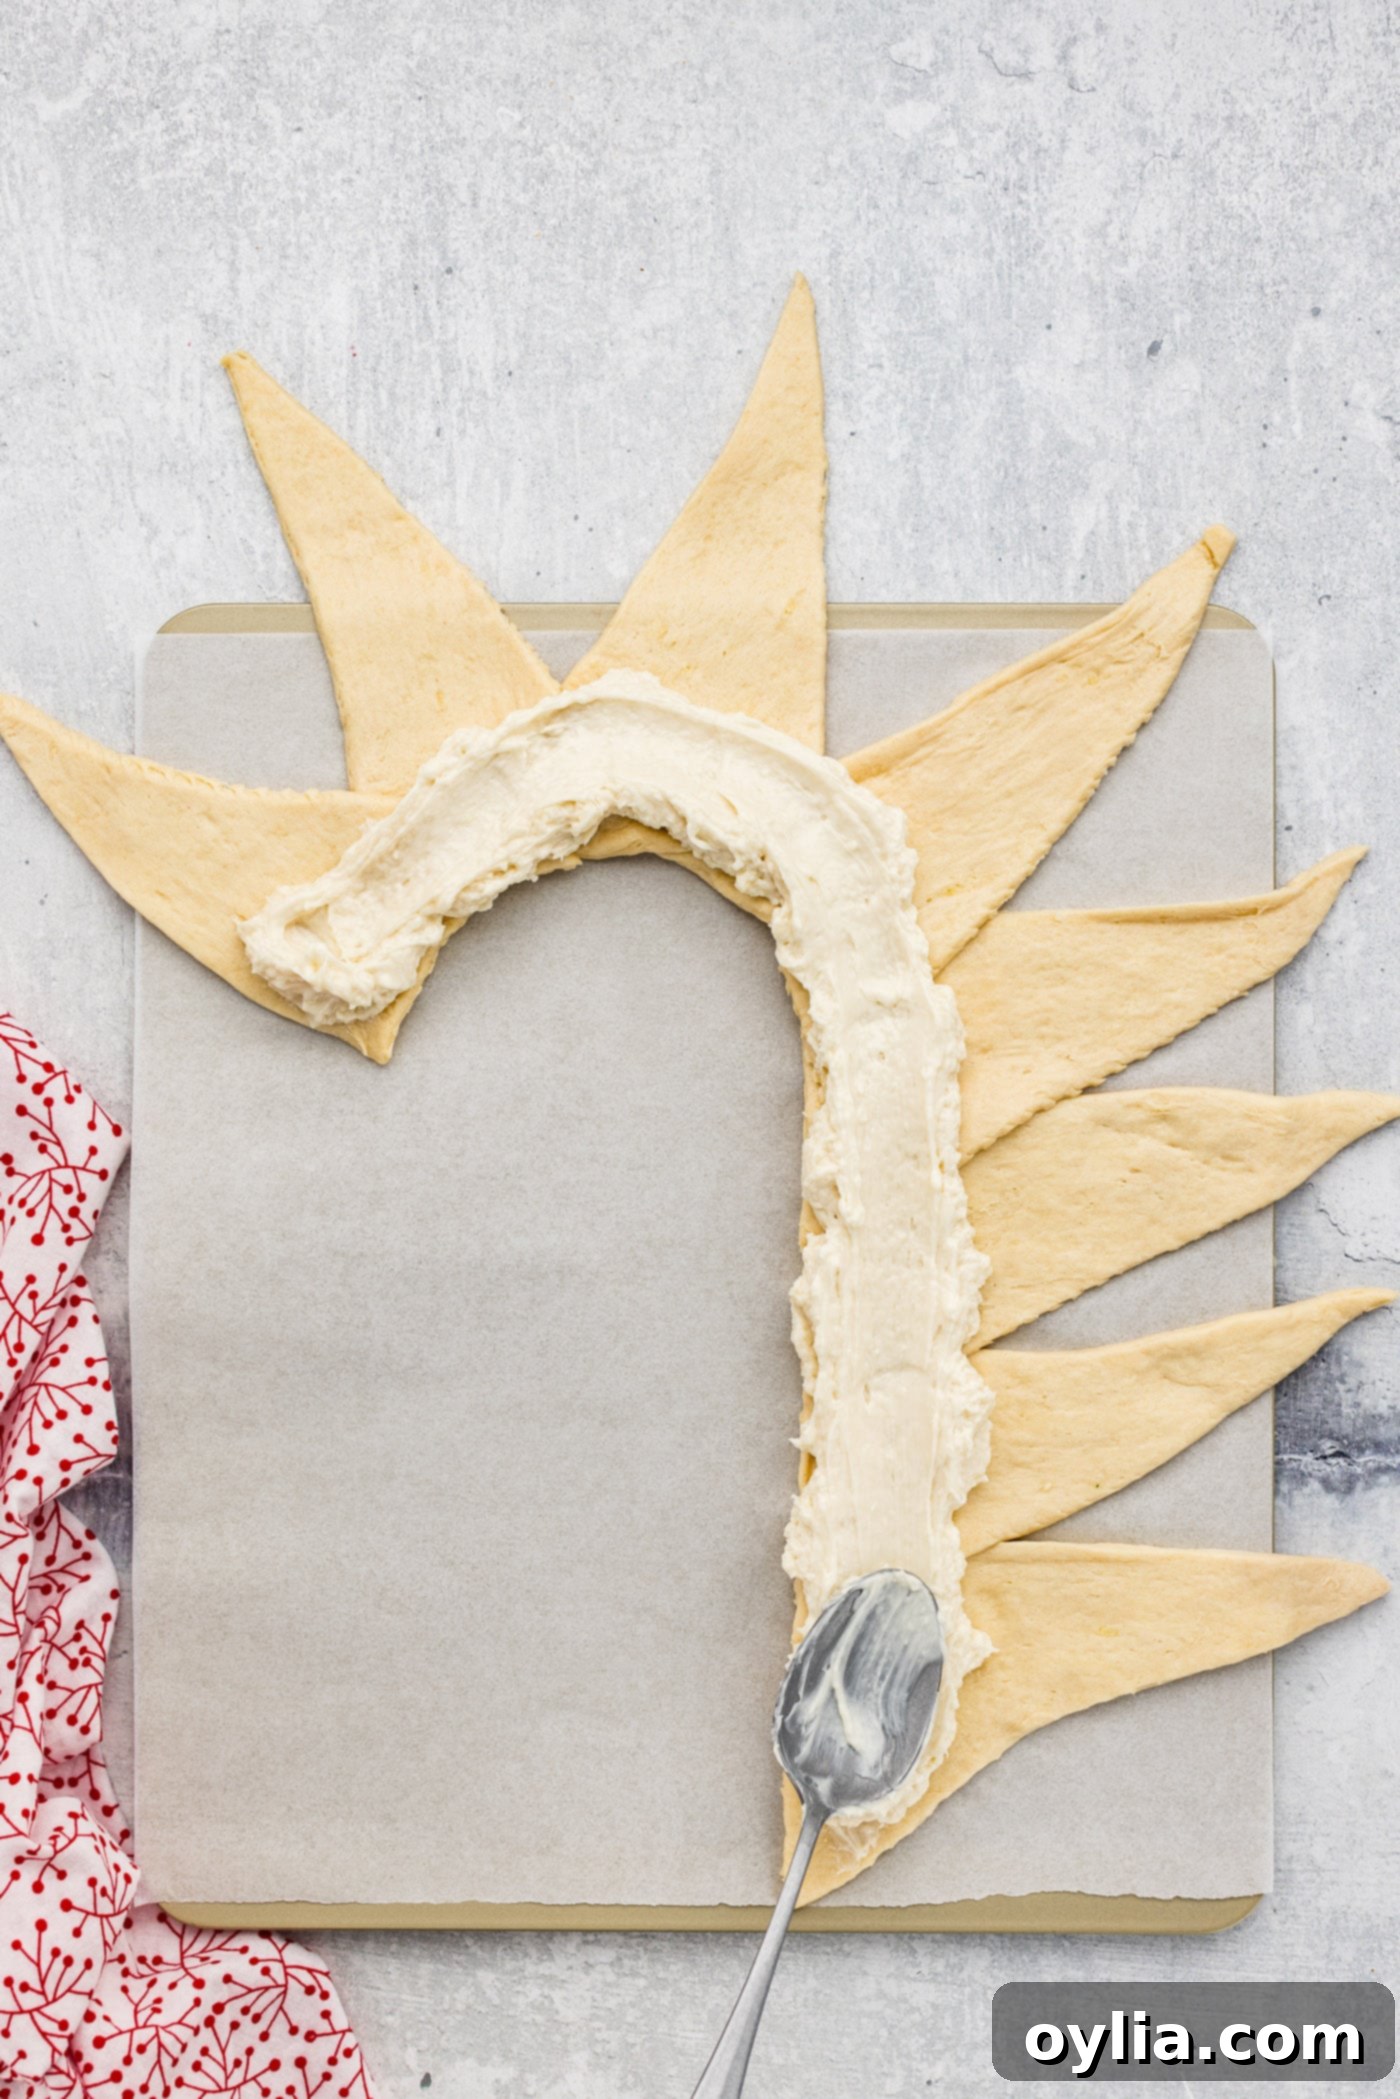
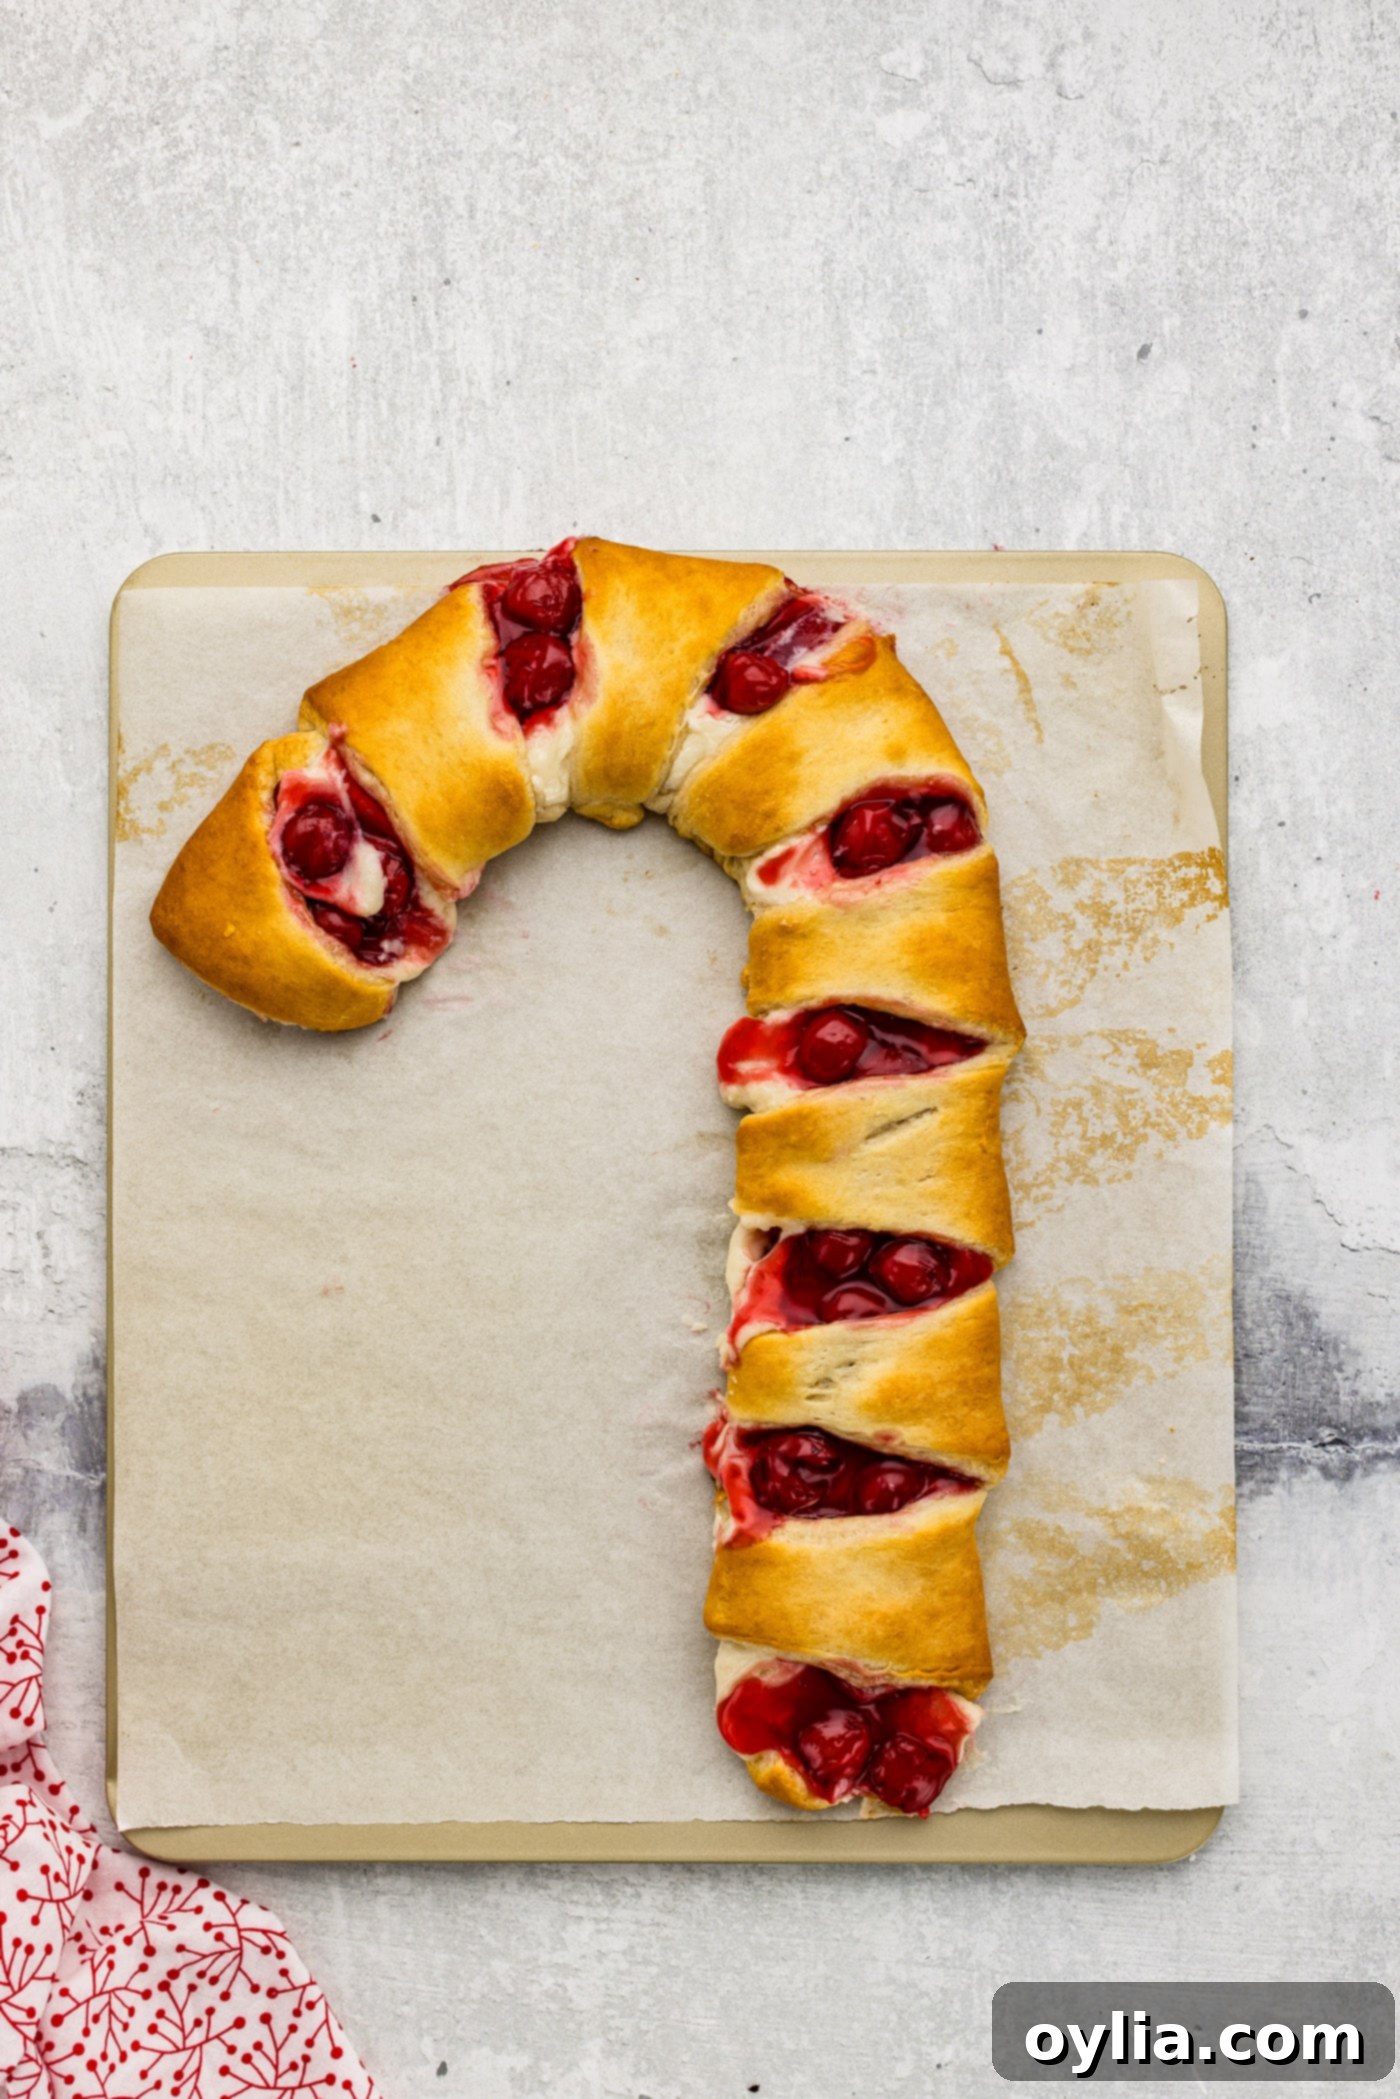
- Shape the Candy Cane Base: On one of your prepared cookie sheets, carefully unroll a tube of crescent rolls. Arrange four crescent triangles in a straight line, aligning them along their wide ends and slightly overlapping the corners. This forms the straight “body” of the candy cane. For the distinctive curve, take the fifth crescent and begin to gently curve it upwards and inwards, shaping the “head” or hook of the cane. Gently press seams together to create a continuous base.

- Fill with Creamy Goodness: Spread half of your prepared cream cheese mixture evenly along the wide end of the crescent roll triangles, forming a generous strip. Be careful not to go all the way to the edges, leaving a small border.

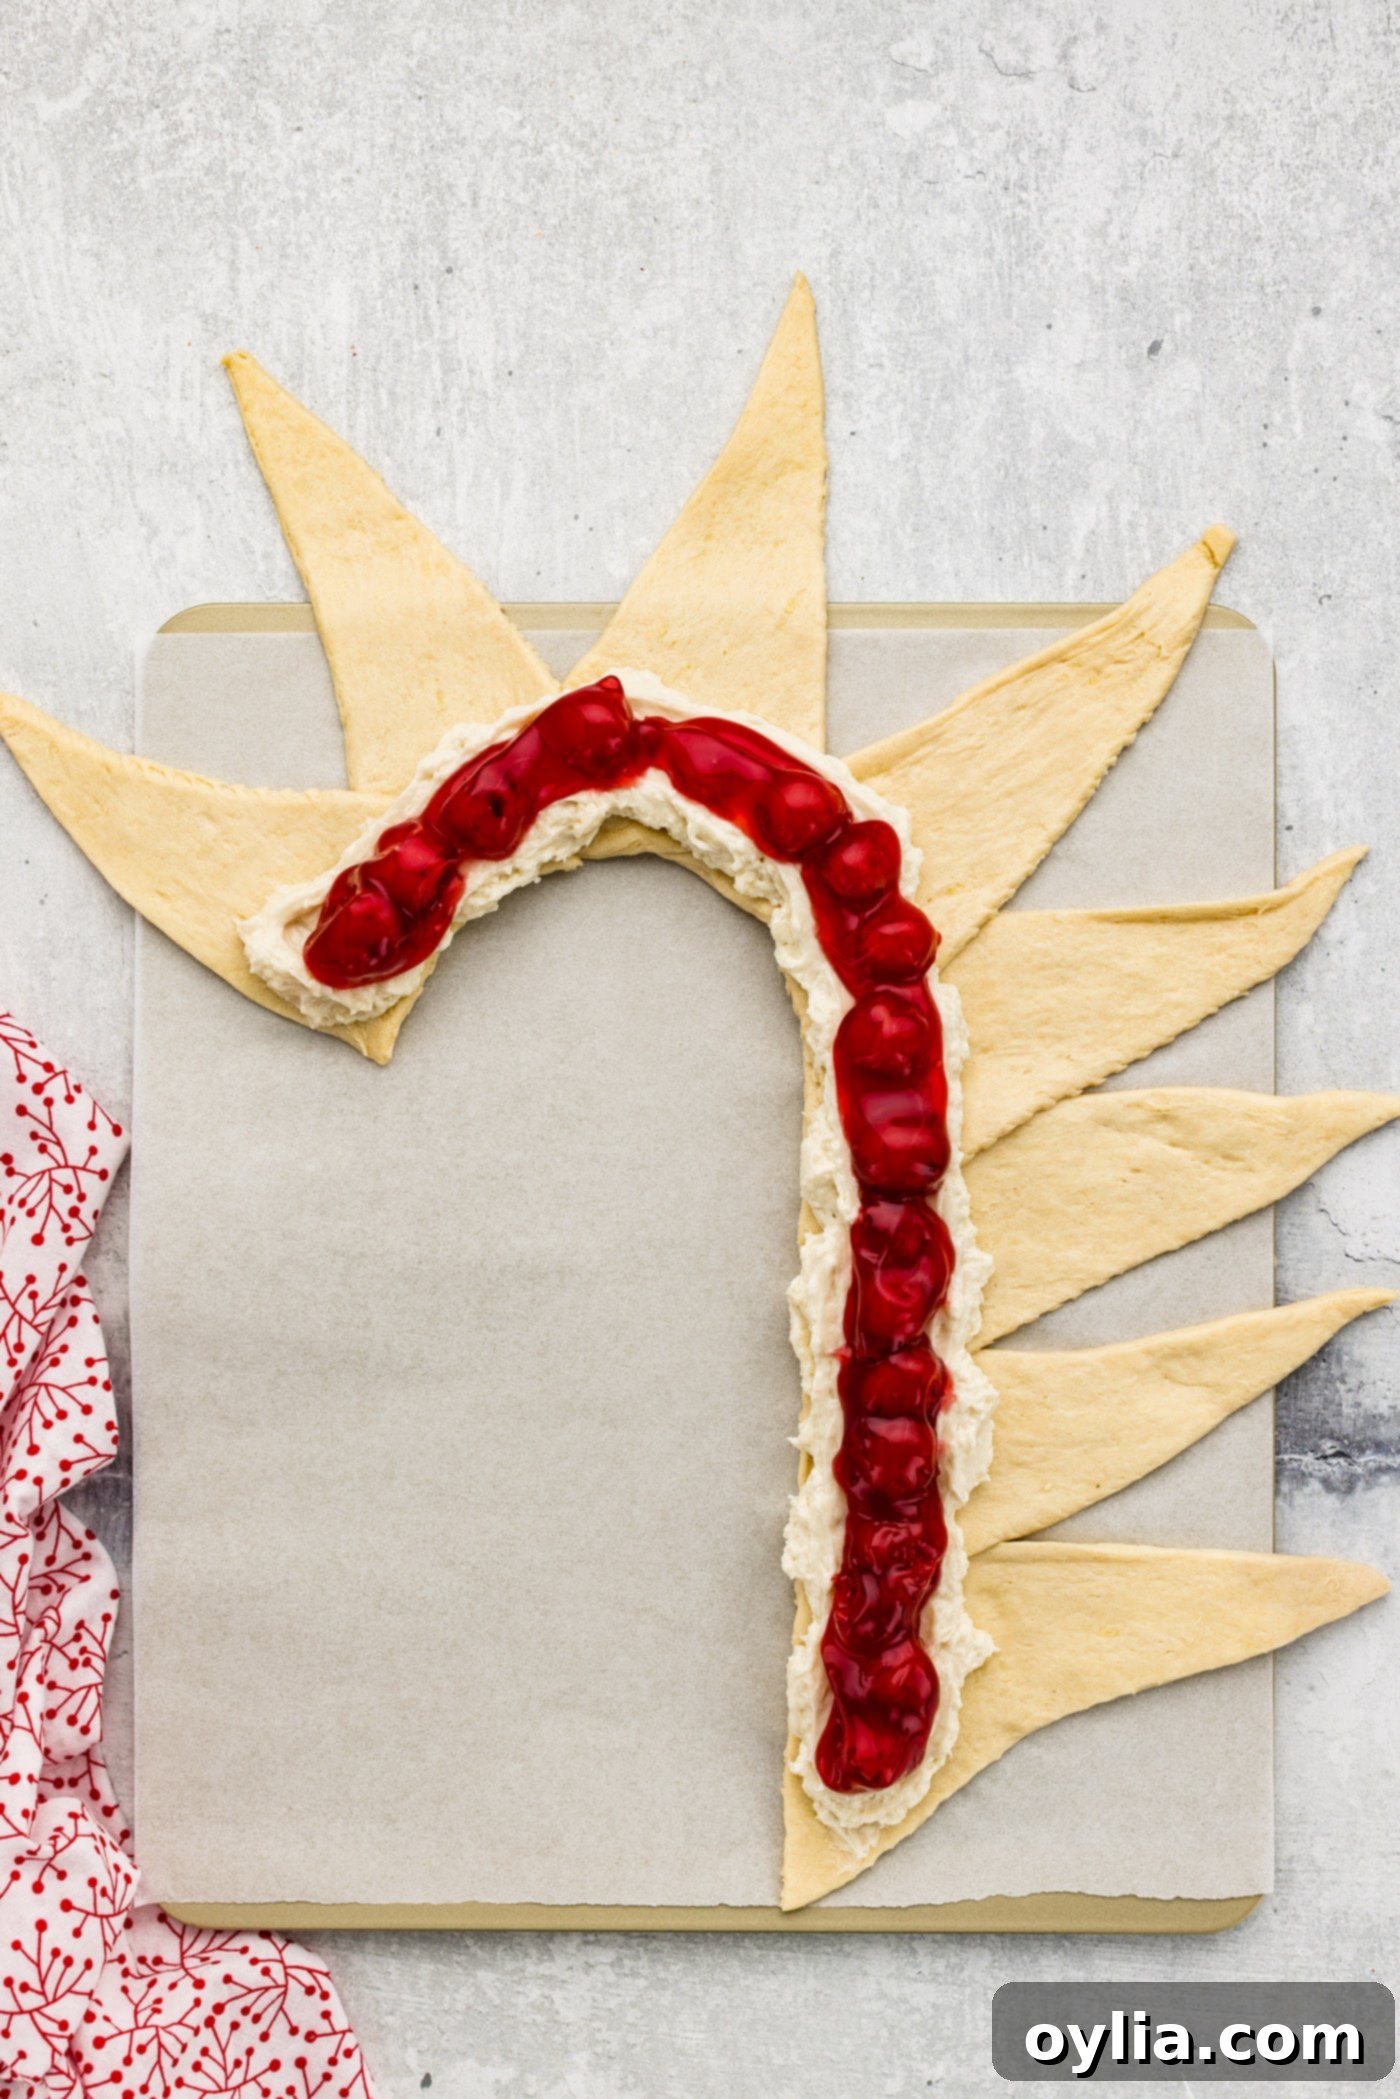
- Add the Fruity Layer: Next, generously spoon half of the cherry pie filling (or your chosen berry filling) directly over the cream cheese layer. Spread it gently to cover the cream cheese, ensuring an even distribution of fruit.

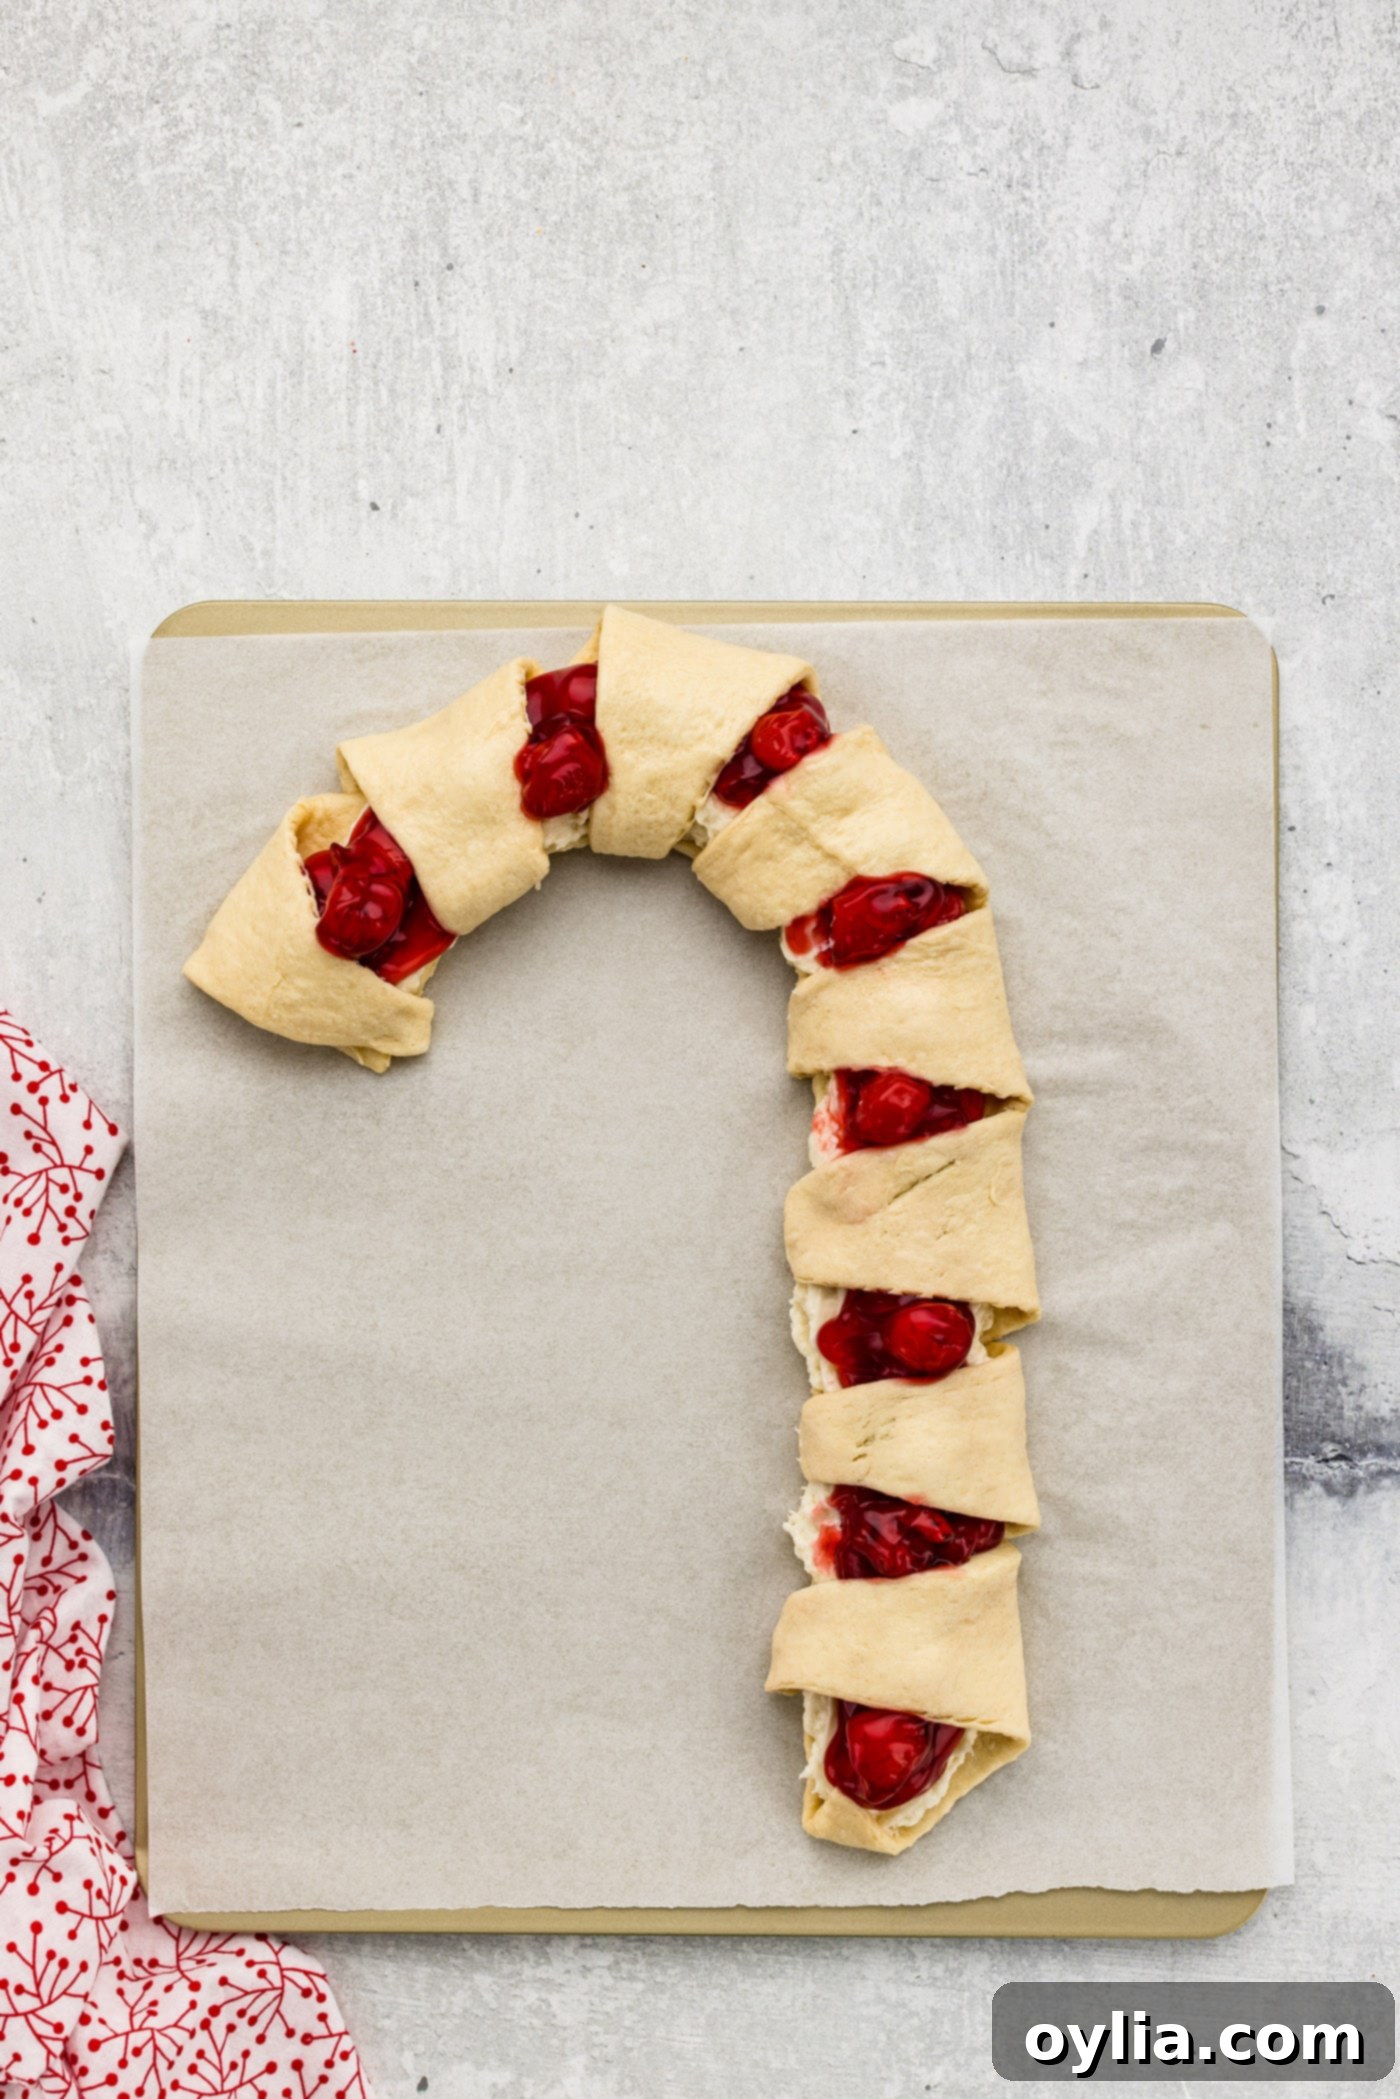
- Form the Stripes: Now, it’s time to create those iconic candy cane stripes! Starting from the top of the cane (the curved end), carefully fold over the pointed ends of the crescent roll triangles towards the center, gently tucking them along the length of the pastry to enclose the filling. This creates the appealing striped effect. Repeat the entire assembly process with the remaining tube of crescent rolls, the second half of the cream cheese mixture, and the rest of the cherry pie filling on your other prepared cookie sheet.

- Bake to Golden Perfection: Place your assembled candy cane pastries in the preheated oven. Bake for approximately 15-20 minutes, or until the crescent rolls are beautifully golden brown and the filling is bubbly. Keep an eye on them to prevent over-browning.

- Glaze While Warm: While your pastries are still warm from the oven, prepare the simple icing glaze. In a small bowl, combine all the glaze ingredients (powdered sugar, softened butter, milk, and vanilla extract) and mix until completely smooth and free of lumps. Drizzle the glaze generously over the warm danish, making sure to focus on the crescent stripes. The heat from the pastry will slightly melt the glaze, allowing it to spread beautifully and create a shiny, smooth finish.
Frequently Asked Questions & Expert Tips for Your Candy Cane Danish
To ensure your Candy Cane Danish turns out perfectly every time, here are some common questions and expert tips to guide you:
Absolutely! This is a fantastic make-ahead recipe, perfect for busy holiday mornings. You can assemble the entire candy cane danish the night before you plan to bake it. Simply prepare it up to the point of baking, then carefully cover the parchment-lined baking sheet with plastic wrap and store it in the refrigerator. In the morning, remove it from the fridge while the oven preheats, then bake as directed. This ensures a fresh, warm pastry without all the morning rush.
While the recipe as written yields two candy cane pastries, some of our readers have successfully halved it to make just one. If you choose to do so, remember you’ll only need one tube of crescent rolls, half the cream cheese mixture, and half the pie filling. You’ll also only need one cookie sheet. The baking time should remain similar, but keep a close eye on it for doneness.
To keep your leftovers fresh and delicious, store them in an airtight container or tightly covered with plastic wrap in the refrigerator. It will stay good for up to 2 days. Beyond that, the pastry may start to lose its crispness and become a bit soggy, especially with the fruit filling. For best results, gently warm individual slices in the microwave or a toaster oven before serving.
While crescent rolls are highly recommended for their ease and the specific texture they provide, you could theoretically use store-bought puff pastry. However, the shaping technique for the candy cane might differ slightly, and the resulting texture will be flakier rather than the softer, bread-like texture of a crescent roll danish. For this specific recipe’s simplicity and charm, crescent rolls are your best bet!
Pro Tips for a Perfect Candy Cane Danish Every Time
Achieving a beautiful and delicious Candy Cane Danish is simple, especially with these helpful tips:
- Baking Sheet Strategy: This recipe is designed to make two candy cane pastries, each requiring its own standard cookie sheet. If you’re only making one, ensure your baking sheet is large enough to accommodate the full candy cane shape. For maximum ease, always use parchment paper or a silicone baking mat on your pans. This prevents the danish from sticking, guarantees easy lifting, and makes cleanup an absolute breeze, allowing you to enjoy your holiday without scrubbing. A rimless insulated baking sheet can also be a game-changer, allowing you to slide the delicate danish off without the risk of breaking it when trying to lift it.
- Gentle Shaping for Perfect Stripes: After forming the crescent cane shape and adding the luscious filling, the folding technique is key. Start from the very top (the curved end) of the cane to fold the pointed ends of the triangles over the filling. Gently tuck the ends along the entire length of the pastry, ensuring the filling is mostly enclosed and the stripes are well-defined. Don’t press too hard; a gentle touch will suffice.
- Warm Danish, Smooth Icing: The timing for glazing is important! Be sure to add the simple icing glaze while the danish is still quite warm, shortly after it comes out of the oven. The residual heat from the pastry will slightly melt the icing, allowing it to spread effortlessly and self-level into a beautifully smooth, shiny, and inviting finish. This also helps the glaze adhere better to the pastry.
- Don’t Overfill: While it’s tempting to load up on the delicious filling, resist the urge to overfill the crescent rolls. Too much filling can cause it to leak out during baking, making your danish less tidy and potentially sticking to the parchment. Aim for a generous but manageable layer.
- Leftover Filling Solutions: Chances are you might have a little pie filling left over. Don’t let it go to waste! It’s delicious on its own, or you can repurpose it for other treats like cherry hand pies, cherry pie cookies, a topping for ice cream, yogurt, or even pancakes.
- Quick Cleanup for a Pristine Look: After adding the icing, if any filling has spilled out during baking and solidified, use an icing spatula or a small rubber spatula to carefully clean up the edges. This small step ensures your Candy Cane Danish looks as perfect and festive as it tastes.
Delightful Serving Suggestions for Your Candy Cane Danish
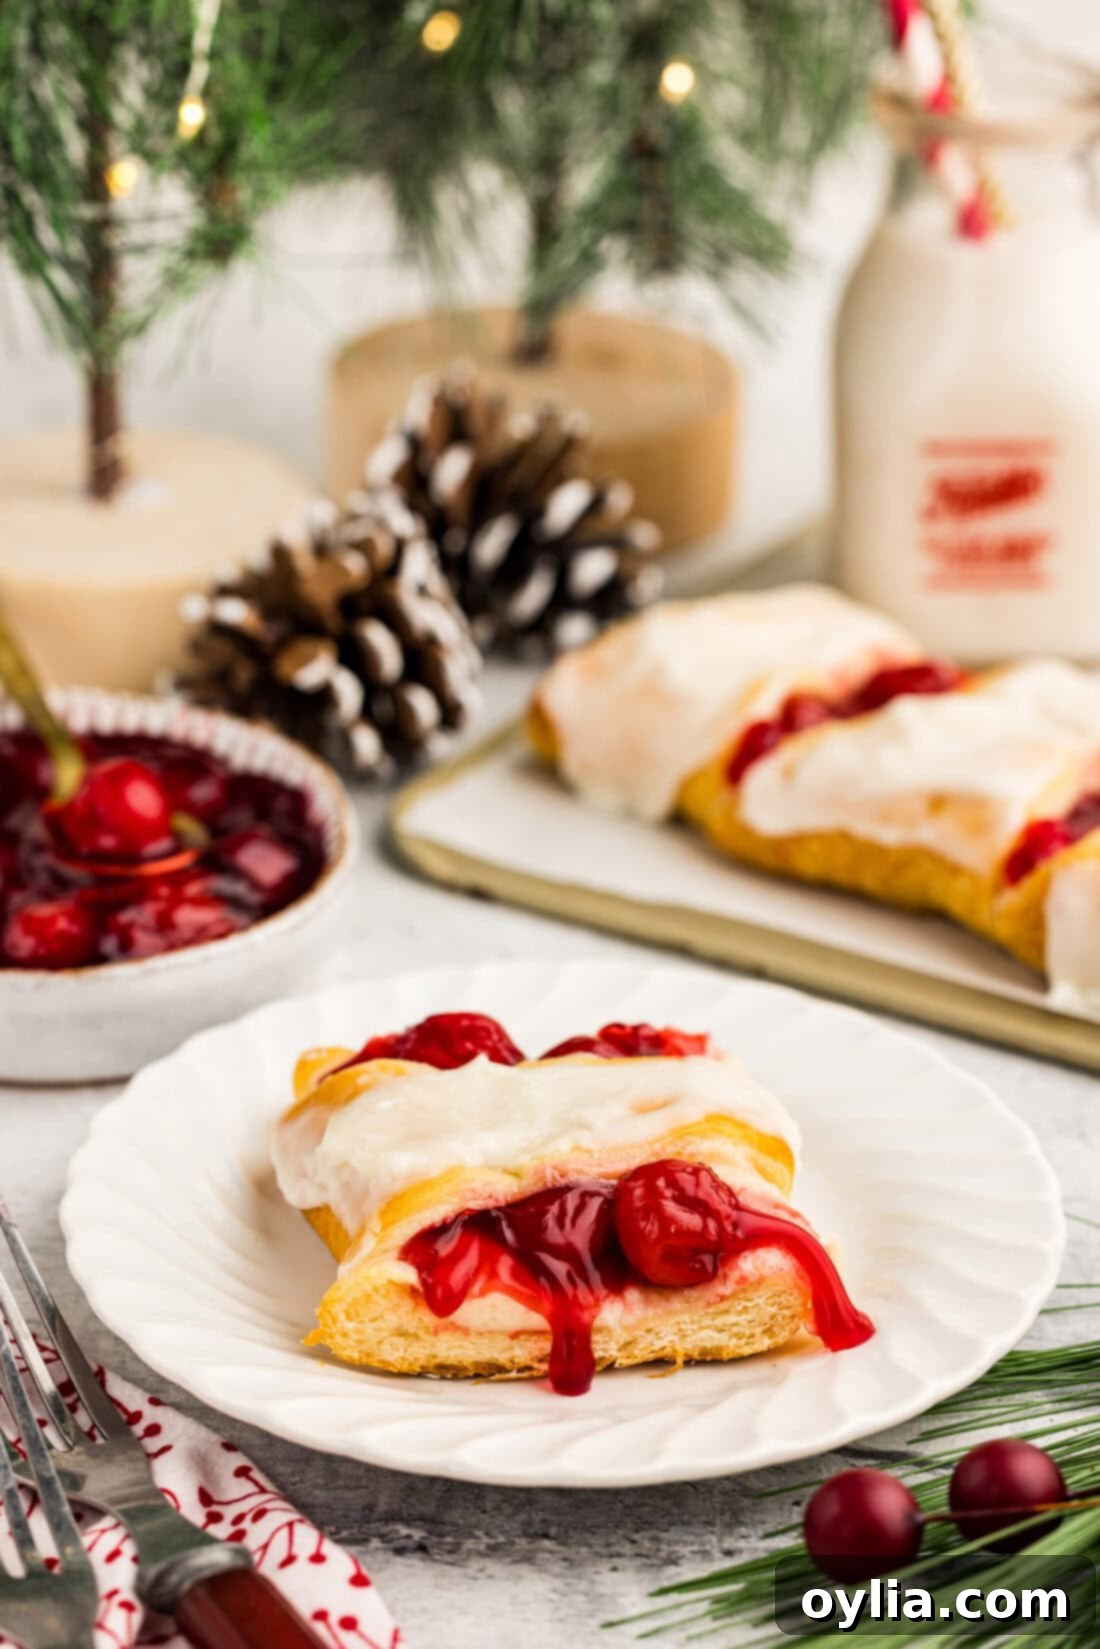
This Candy Cane Danish is a star on its own, but it truly shines when served warm alongside your favorite hot beverage. Imagine a cozy Christmas morning, enjoying a slice with a steaming cup of coffee, a creamy latte, or a refreshing glass of cold milk. It’s equally delicious at room temperature, making it a perfect grab-and-go option for guests or a delightful mid-morning snack. To complete your festive breakfast spread, consider pairing it with savory items like crispy bacon, fluffy scrambled eggs, or a vibrant fruit salad. We have a feeling this charming and delicious Christmas breakfast will quickly become a cherished tradition in your household, just as it has in ours!
Discover More Festive Christmas Recipes
Looking for more holiday inspiration? Explore these other wonderful Christmas-themed recipes to make your festive season even more delicious:
- Antipasto Wreath
- Crockpot Hot Chocolate
- Christmas Tree Cheese Platter
- Christmas Tree Pull Apart Bread
I love to bake and cook and share my kitchen experience with all of you! Remembering to come back each day can be tough, that’s why I offer a convenient newsletter every time a new recipe posts. Simply subscribe and start receiving your free daily recipes!

Candy Cane Danish
IMPORTANT – There are often Frequently Asked Questions within the blog post that you may find helpful. Simply scroll back up to read them!
Print It
Rate It
Save ItSaved!
Ingredients
- 8 ounces cream cheese brick style, softened at room temp
- ½ cup granulated sugar
- 1 teaspoon vanilla extract OR 1/2 teaspoon vanilla and almond extract, each
- 16 ounces crescent rolls two 8-oz tubes
- 21 ounces cherry pie filling canned
For the Glaze
- 1 cup powdered sugar
- 1 Tablespoon butter softened at room temp
- 1 Tablespoon milk
- ¼ teaspoon vanilla extract
Things You’ll Need
-
Silicone baking mat
-
Rubber spatula
-
Mixing bowls
-
Cookie sheets
Before You Begin
- The cream cheese filling in this candy cane danish recipe can be flavored with vanilla or a blend of vanilla and almond extracts. The almond complements the cherries so well.
- Use a silpat or parchment paper so you can easily lift the candy cane danish from the cookie sheet. A rimless insulated baking sheet will also allow you to slide the danish off rather than trying to lift it, running the risk of breaking it.
- Chances are you won’t use all the pie filling. If that’s the case save it for some hand pies!
- After adding the icing, use an icing spatula or small rubber spatula to clean up any filling that may have spilled out during baking.
Instructions
-
Preheat oven to 375°F. Line 2 cookie sheets with parchment and set aside.
-
In a medium mixing bowl, mix together cream cheese, sugar, and vanilla (or vanilla and almond extract).
-
On one cookie sheet, align four crescent triangles in a straight line along the wide ends, slightly overlapping the corners. Starting with the fifth crescent, begin curving the head of the cane.
-
Spread the inside along the wide end of the triangles with half the cream cheese. Top with half the cherry pie filling.
-
Fold over the points of the triangles to form stripes. Start from the top of the cane to fold the triangles over. Gently tuck the ends along the length of the pastry. Repeat assembly with remaining tube of crescent rolls, cream cheese, and cherries.
-
Bake for 15-20 minutes until golden brown.
To Make the Icing
-
While the pastries are baking, combine all the ingredients for the glaze, mixing until smooth. Frost the danish while it is still warm, taking care to only frost the crescent stripes.
Expert Tips & FAQs
- Store leftovers in an air-tight container or tightly covered with plastic wrap in the refrigerator for up to 2 days. Beyond that, your danish may get soggy.
Nutrition
The recipes on this blog are tested with a conventional gas oven and gas stovetop. It’s important to note that some ovens, especially as they age, can cook and bake inconsistently. Using an inexpensive oven thermometer can assure you that your oven is truly heating to the proper temperature. If you use a toaster oven or countertop oven, please keep in mind that they may not distribute heat the same as a conventional full sized oven and you may need to adjust your cooking/baking times. In the case of recipes made with a pressure cooker, air fryer, slow cooker, or other appliance, a link to the appliances we use is listed within each respective recipe. For baking recipes where measurements are given by weight, please note that results may not be the same if cups are used instead, and we can’t guarantee success with that method.
This post was originally published here on Nov 28, 2016 and has since been updated with new photos and expert tips. Recipe contributed by Rebekah from KitchenGidget.

