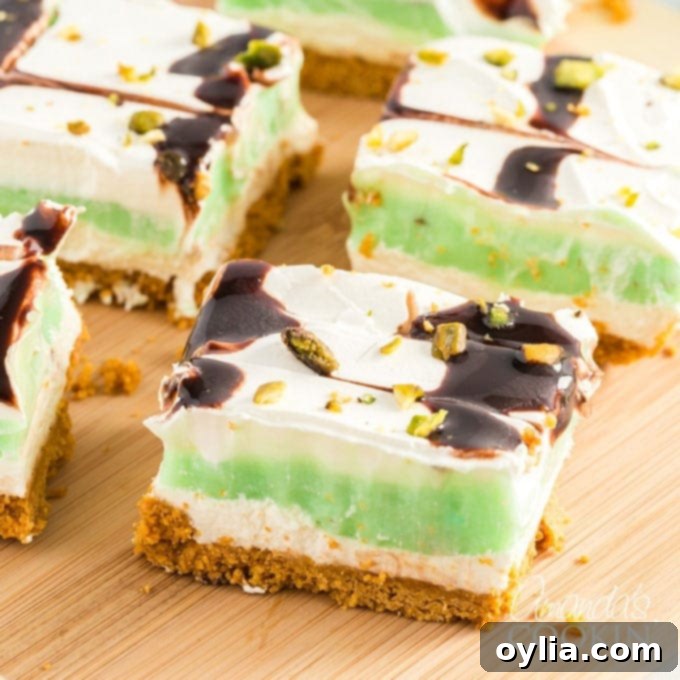
Irresistible No-Bake Pistachio Lush Dessert: Easy Layers of Creamy Goodness
Prepare to be amazed by this effortlessly delicious no-bake Pistachio Lush dessert! Whether you’re planning for potlucks, celebrating holidays, or simply entertaining guests, this layered treat is guaranteed to steal the show. Combining a delightful trio of smooth cream cheese, light-as-air whipped cream, and vibrant pistachio pudding, it offers an easy-to-make dessert option that will have everyone asking for the recipe.
Pistachio desserts hold a special place in our hearts, and while our beloved pistachio poke cake is a long-standing favorite, this incredible one-pan dessert stands right alongside it in popularity. Its vibrant green hue and distinct, creamy flavor make it a visual and culinary delight, perfect for brightening up any dessert table without the fuss of baking.
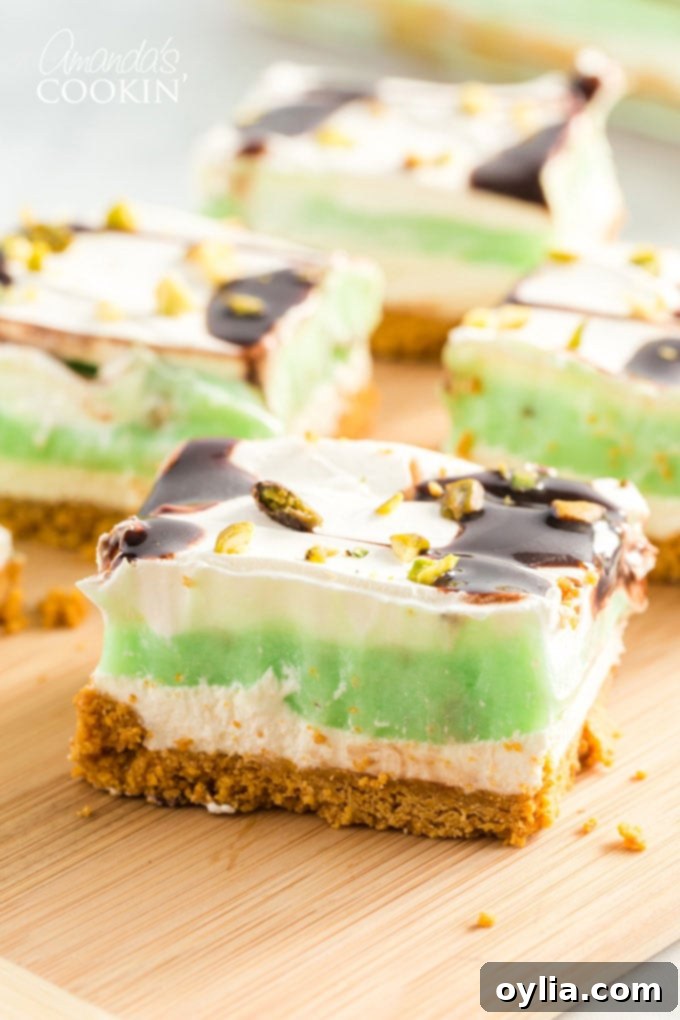
The Ultimate Easy Pistachio Lush Recipe
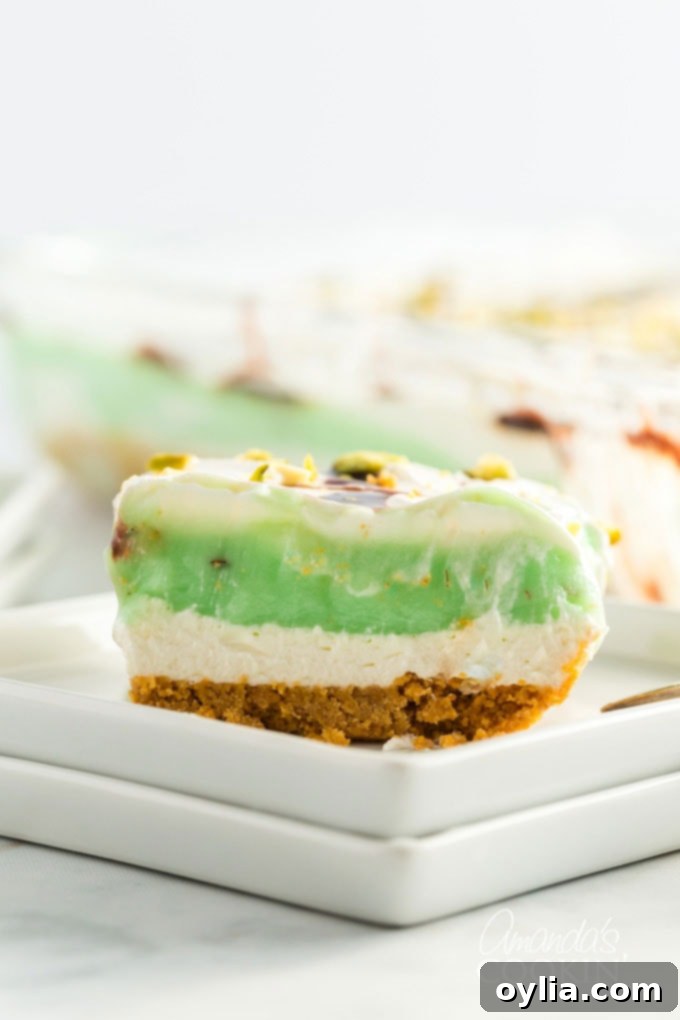
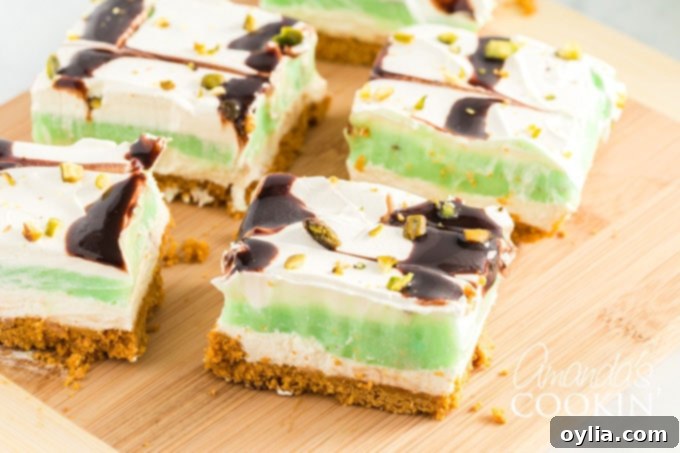
If you’re searching for an effortlessly impressive potluck recipe or a simple dessert for any gathering, this Pistachio Lush is your answer. With its irresistible layers of sweet graham cracker crust, a velvety cheesecake layer, creamy pistachio pudding, and a cloud of whipped cream, it’s truly hard to resist. Your guests will not only rave about its taste but will surely be asking for the recipe, so be ready to share the secret to this amazing treat!
This dessert is a fantastic alternative to traditional baked goods, especially when you want something light yet satisfying. Its cooling properties make it ideal for warmer months or as a refreshing end to a hearty meal. Plus, the vibrant green color of the pistachio layer adds a touch of festive cheer to any table, making it perfect for St. Patrick’s Day, Easter, or any celebration where a pop of color is welcome.
RELATED: If you love the delightful flavor of pistachios, you might also enjoy this recipe – Pistachio Cake.
Essential Ingredients for Your Pistachio Lush
Crafting the perfect Pistachio Lush begins with understanding each ingredient and its role. Below, you’ll find important tips and recommendations, including potential substitutions. The complete list of ingredients with precise measurements is available in the detailed, printable recipe card at the very end of this post.
- Graham Cracker Crumbs: For the crust, we’ve simplified things by using readily available graham cracker crumbs. This creates a perfectly crunchy, buttery base that complements the creamy layers. If you can’t find pre-crushed crumbs, simply crush whole graham crackers in a food processor or by hand.
- Melted Butter: You’ll need cooled, melted butter to bind the crust. Unsalted butter is usually preferred for baking to control the salt content, but salted butter works perfectly fine here if that’s what you have on hand. Just make sure it’s slightly cooled before mixing to avoid cooking the crumbs.
- Cream Cheese: The cheesecake layer relies on softened cream cheese for its rich, tangy flavor and smooth texture. Ensure it’s at room temperature for easy blending, which will prevent lumps and create a wonderfully creamy layer.
- Milk: A small amount of milk is used in both the cream cheese layer and the pudding. For the best results in the cream cheese layer, whole milk adds a touch more richness, but any milk will work.
- Granulated White Sugar: Just a touch of sugar sweetens the cream cheese layer, balancing its tanginess without making the dessert overly sweet.
- Cool Whip (or Homemade Whipped Cream): We use Cool Whip for ultimate convenience and its stable, fluffy texture. If you prefer a homemade option, you can certainly substitute with freshly whipped heavy cream. For homemade whipped cream, whisk 2 cups of heavy cream with 1/4 cup of powdered sugar and 1 teaspoon of vanilla extract until stiff peaks form, then divide as per the recipe instructions.
- Instant Pistachio Pudding Mix: This is crucial! Be sure to grab instant pistachio pudding mix, not the “cook and serve” variety. Instant pudding sets up quickly and forms the iconic green, creamy layer of this lush dessert. You’ll need two boxes to achieve the perfect depth of flavor and consistency.
- Chocolate Syrup: While entirely optional, a drizzle of bottled chocolate syrup adds a beautiful visual contrast and a complementary flavor note to the top of the dessert.
- Crushed Pistachios: For a final elegant touch and an extra burst of pistachio flavor and texture, crushed pistachios are sprinkled on top.
NOTE on Crushed Pistachios: To prepare your crushed pistachios, place about two tablespoons of shelled pistachios in a sturdy sandwich bag. Use a meat mallet or a rolling pin to gently crush them. The goal is to achieve small, chopped pieces, not a fine dust, which provides a lovely textural element. I typically use one tablespoon to sprinkle evenly over the entire dessert for a balanced finish.
Helpful Kitchen Tools for Your No-Bake Creation
Having the right tools can make preparing this dessert even smoother. Here are some essentials that will come in handy:
- Casserole Dish (13×9 inch): The perfect size for this layered dessert.
- Food Processor: Great for quickly crushing graham crackers, though a zip-top bag and rolling pin work too.
- Measuring Cups and Spoons: Essential for accurate ingredient measurements.
- Electric Mixer: For beating cream cheese until fluffy and combining ingredients smoothly.
- Offset Spatula: Ideal for spreading layers evenly and smoothly.
How to Make This Incredible Pistachio Pudding Layered Dessert
This dessert is not only incredibly delicious but also remarkably easy to assemble. For the best possible results and clean slices, I highly recommend preparing it ahead of time. Refrigerating it for several hours, or even better, overnight, allows all the layers to properly set and meld together. This extra chill time ensures that each slice is perfectly firm and holds its shape beautifully. While you can certainly enjoy it as soon as it’s finished, patience will be rewarded with cleaner cuts and a more satisfying texture.
Creating the Perfect Graham Cracker Crust
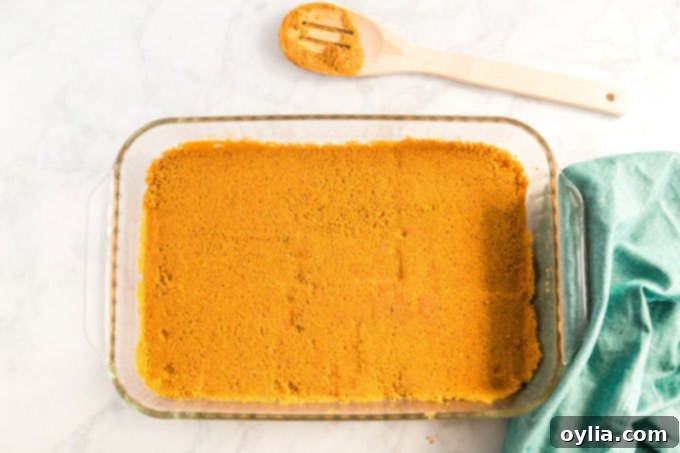
- In a medium bowl, combine your graham cracker crumbs with the slightly cooled melted butter. Mix these two ingredients thoroughly until all the crumbs are moistened and resemble wet sand.
- Carefully press this crumb mixture evenly into the bottom of a 13×9 inch baking dish. For a compact and even crust, use the bottom of a measuring cup or a flat-bottomed glass to firmly press it down. Once pressed, transfer the dish to the refrigerator to chill for at least 10 minutes. This helps the butter solidify and the crust to firm up, providing a stable base for the layers to come.
Preparing the Creamy Cheesecake Layer
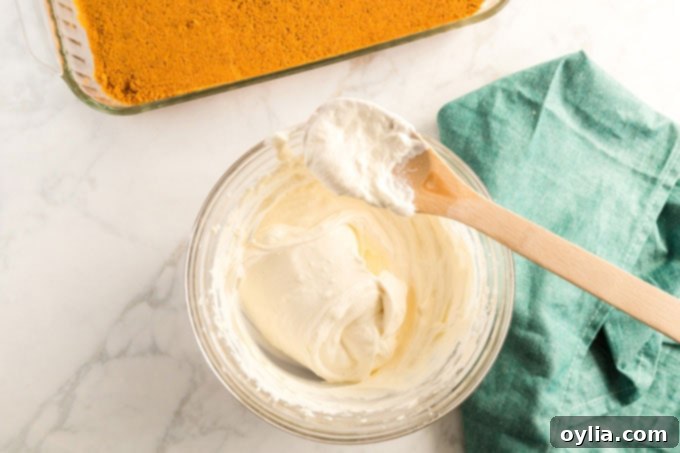
- While your crust chills, take a medium bowl and beat the softened cream cheese until it’s light and fluffy. This step is crucial for a smooth, lump-free cheesecake layer. Add the two tablespoons of milk and the granulated sugar to the cream cheese, mixing well until everything is thoroughly combined and smooth.
- Gently fold half of the Cool Whip (approximately 8 ounces) into the cream cheese mixture until just combined. Be careful not to overmix, as this can deflate the whipped cream. Evenly spread this creamy mixture over the chilled graham cracker crust. Return the dish to the refrigerator for another 10 minutes to allow this layer to slightly firm up.
Adding the Vibrant Pistachio Pudding Layer
- As the cream cheese layer sets, prepare your pistachio pudding. In a separate bowl, combine both boxes of instant pistachio pudding mix with 2 3/4 cups of cold milk. Whisk vigorously until the mixture begins to thicken. This usually takes about 2-3 minutes. Once thickened, refrigerate for 5 minutes to ensure it’s ready for spreading.
- Carefully spread the slightly chilled pudding mixture over the top of the cream cheese layer, making sure to cover it completely and evenly. Place the dish back in the refrigerator for a minimum of 30 minutes. This allows the pudding to fully set and create a distinct, firm layer.
Finishing with Whipped Cream and Garnish
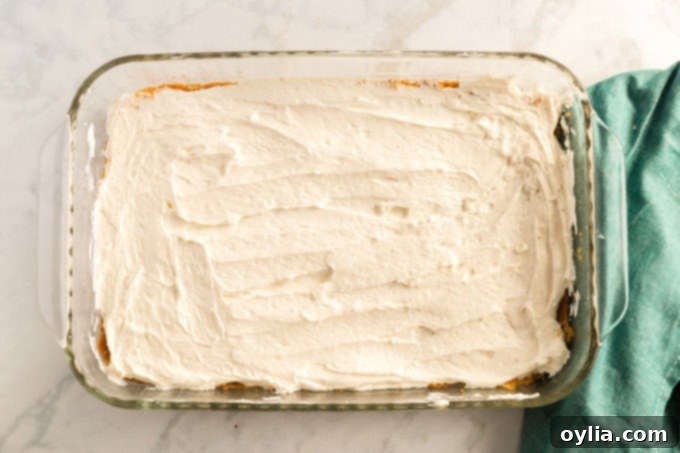
- Once the pudding layer is firm, spread the remaining 8 ounces of Cool Whip evenly over the top. This creates a fluffy, white cloud that beautifully contrasts with the green pudding.

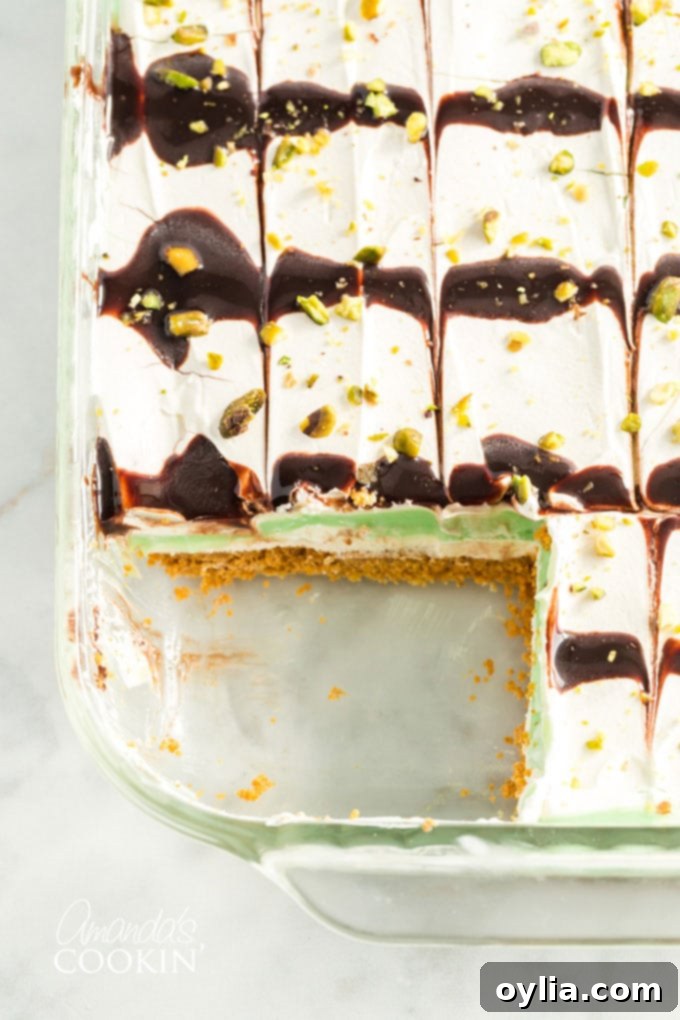
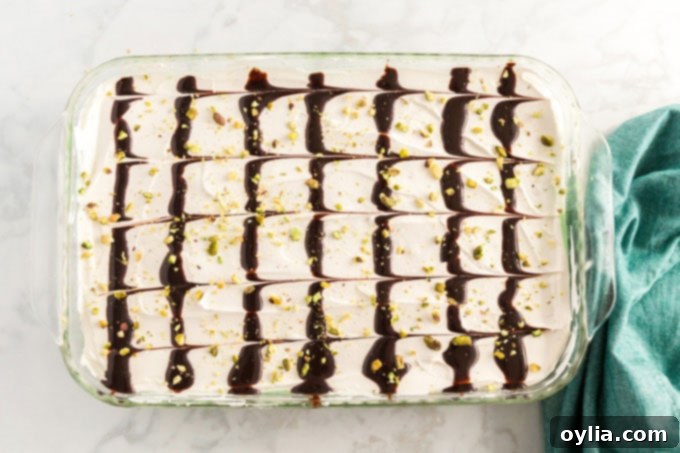
- For an optional but delightful decoration, draw lines of chocolate syrup across the top of the whipped cream.
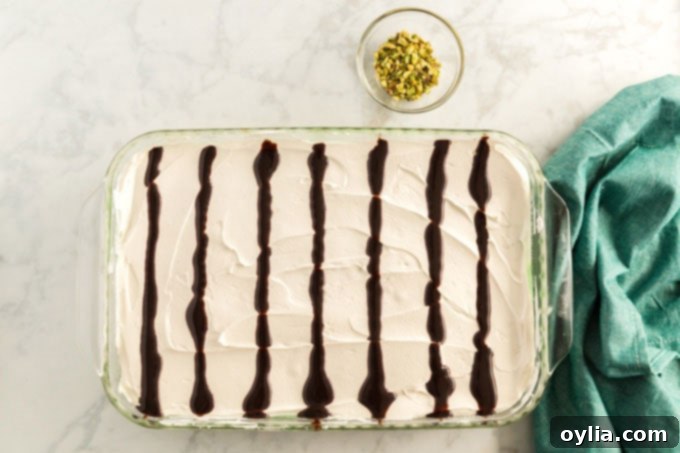
- To create a beautiful feathered effect, run a knife down the top in the opposite direction of the syrup lines, spaced about an inch or so apart. This technique creates an elegant marbled look. Finish by sprinkling your prepared crushed pistachios over the entire dessert.
- Finally, refrigerate the Pistachio Lush for at least 2 hours to allow all the layers to firm up completely. For optimal setting and ease of slicing, chilling it overnight is highly recommended. This ensures every layer is distinct and the dessert holds its shape beautifully when served.
Tips for Perfect Pistachio Lush Every Time
- Room Temperature Cream Cheese: This is key! Softened cream cheese blends smoothly, preventing lumps in your cheesecake layer.
- Don’t Overmix Whipped Cream: When folding Cool Whip into the cream cheese, mix just until combined to maintain its airy texture.
- Cold Milk for Pudding: Always use cold milk when preparing instant pudding. This helps it set properly and quickly.
- Chilling is Crucial: The longer your dessert chills, the better it will set. Overnight chilling yields the cleanest slices and best texture.
- Even Layers: Use an offset spatula or the back of a spoon to spread each layer as evenly as possible for a beautiful presentation.
- Customize Your Topping: Feel free to experiment with other toppings like white chocolate shavings, a sprinkle of cocoa powder, or even a few whole pistachios for extra flair.
Frequently Asked Questions About Pistachio Lush
Can I make Pistachio Lush ahead of time?
Absolutely! In fact, this dessert benefits greatly from being made ahead. Preparing it the day before allows the layers to fully set and the flavors to meld, resulting in a more delicious and easier-to-serve dessert. Just cover it loosely with plastic wrap and refrigerate.
How long does Pistachio Lush last in the refrigerator?
When properly covered and refrigerated, Pistachio Lush will stay fresh for 3-4 days. After that, the graham cracker crust might start to get a bit soft, though it will still be edible.
Can I freeze this dessert?
While technically possible, freezing is not recommended for this specific recipe. The texture of the cream cheese and whipped cream layers can change upon thawing, becoming a bit watery or grainy. It’s best enjoyed fresh and chilled from the refrigerator.
What if I don’t have graham crackers?
You can substitute graham cracker crumbs with other crushed cookies! Vanilla wafers, shortbread cookies, or even Golden Oreos would make a delicious alternative crust.
Can I use real whipped cream instead of Cool Whip?
Yes, you certainly can! If you prefer to make your own whipped cream, whip 2 cups of heavy cream with 1/4 cup of powdered sugar and 1 teaspoon of vanilla extract until stiff peaks form. Then, divide and use it in the recipe as you would with Cool Whip.
Why is my pudding layer not setting?
Ensure you are using instant pistachio pudding mix, not the “cook and serve” variety. Also, make sure your milk is cold, and whisk vigorously for the recommended time until it thickens. Insufficient whisking or warm milk can prevent it from setting properly.
Do you have a special event coming up where this Pistachio Lush would be the perfect addition? It’s wonderful for a casual lunch with friends, a lively potluck, or even as a light and refreshing dessert after a heavy barbecue. Its vibrant appearance and delightful taste make it suitable for almost any occasion!
More Delicious One-Pan Dessert Recipes You Will Love
Craving more easy one-pan desserts that are fantastic for large groups or potlucks? Look no further! These recipes are designed for convenience without compromising on flavor:
- Lemon Lush: A bright and zesty alternative with a similar layered structure.
- Pineapple Dream Dessert: Tropical flavors in a cool, creamy package.
- Strawberry Icebox Cake: A classic no-bake treat bursting with strawberry goodness.
- Chocolate Lasagna: Rich, decadent, and incredibly satisfying for chocolate lovers.
- Strawberry Jello Pretzel Salad: The perfect sweet and salty combination.
Pistachio Lush
IMPORTANT – There are often Frequently Asked Questions within the blog post that you may find helpful. Simply scroll back up to read them!
Print It
Rate It
Save ItSaved!
Ingredients
- 2 ½ cups graham cracker crumbs 2 sleeves
- ½ cup unsalted butter melted and cooled slightly
- 8 ounces cream cheese softened
- 2 tablespoons milk
- ¼ cup granulated sugar
- 16 ounces Cool Whip divided
- 2 ¾ ounces instant pistachio pudding mix 2 3.9-ounces boxes
- 3 tablespoons chocolate syrup
- 1 tablespoon crushed pistachios
Before You Begin
Instructions
-
Combine graham cracker crumbs and melted butter until throughly mixed.
-
Press crumb mixture into a 13×9 baking dish using the bottom of a measuring cup. Refrigerate crust for 10 minutes.
-
In a medium bowl, beat cream cheese until fluffy. Add in the 2 tablespoons of milk and the sugar. Mix well.
-
Fold half of the Cool Whip (8 ounces) into the cream cheese mixture, and spread over the top of the crust. Refrigerate 10 minutes.
-
While cream cheese is setting, add both boxes of pudding mix and 2 3/4 cups of milk to a bowl. Whisk until it begins to thicken. Refrigerate 5 minutes.
-
Spread pudding mixture over the top of the cream cheese layer. Refrigerate for 30 minutes.
-
Spread remaining 8 ounces of Cool Whip over the top of the pudding layer.
-
Draw lines of chocolate syrup across the top. Run a knife down the top in the opposite direction of the syrup lines, about an inch or so apart. Sprinkle with crushed pistachios.
-
Refrigerate for at least 2 hours to let everything firm up. Overnight is even better.
Nutrition
The recipes on this blog are tested with a conventional gas oven and gas stovetop. It’s important to note that some ovens, especially as they age, can cook and bake inconsistently. Using an inexpensive oven thermometer can assure you that your oven is truly heating to the proper temperature. If you use a toaster oven or countertop oven, please keep in mind that they may not distribute heat the same as a conventional full sized oven and you may need to adjust your cooking/baking times. In the case of recipes made with a pressure cooker, air fryer, slow cooker, or other appliance, a link to the appliances we use is listed within each respective recipe. For baking recipes where measurements are given by weight, please note that results may not be the same if cups are used instead, and we can’t guarantee success with that method.
This post originally appeared here on Apr 7, 2017.
