Irresistible Fudge Frosted Espresso Brownies: The Ultimate Decadent Chocolate Coffee Dessert
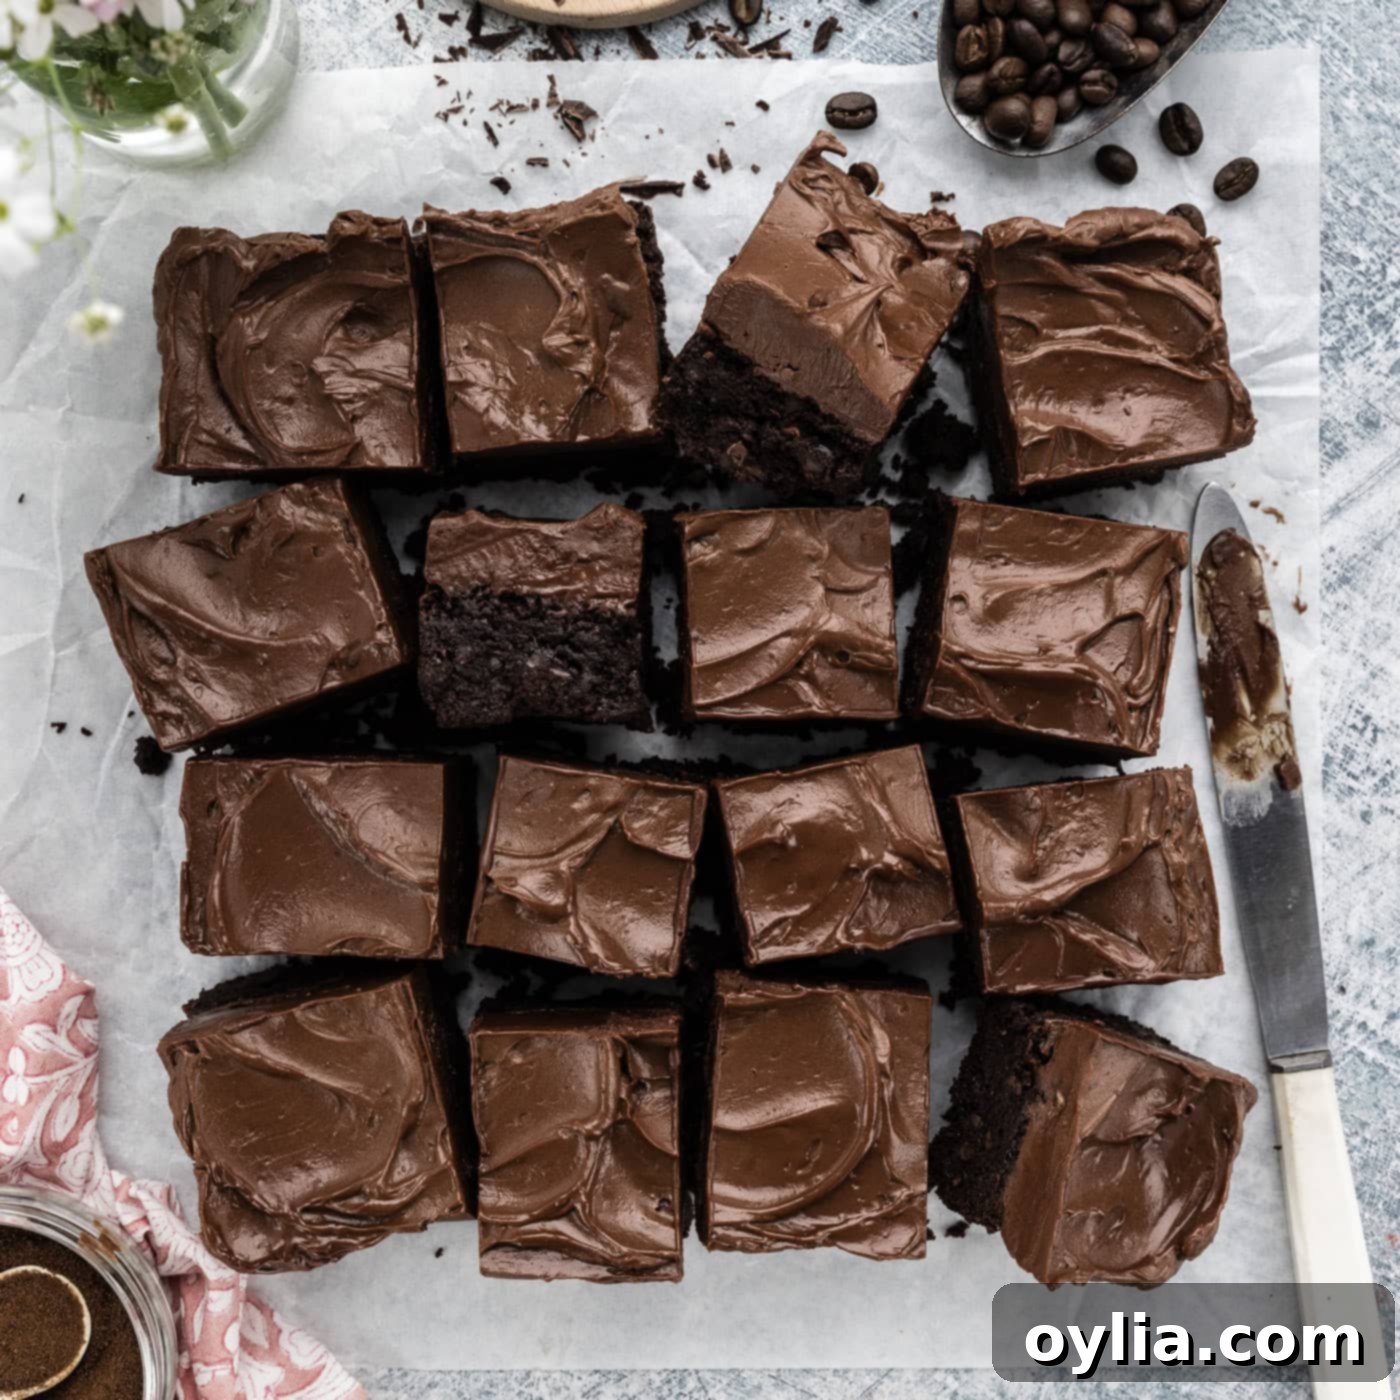
Prepare for an extraordinary treat that combines the best of two worlds: rich, deep chocolate and aromatic espresso. These Fudge Frosted Espresso Brownies aren’t just any brownies; they feature a thick, intensely chewy base expertly infused with espresso powder, designed to amplify every nuance of the chocolate flavor. Topped with a luscious, smooth fudge frosting, they are a truly irresistible dessert experience that will captivate your taste buds and leave you craving more.
Why These Espresso Brownies are Unbeatable
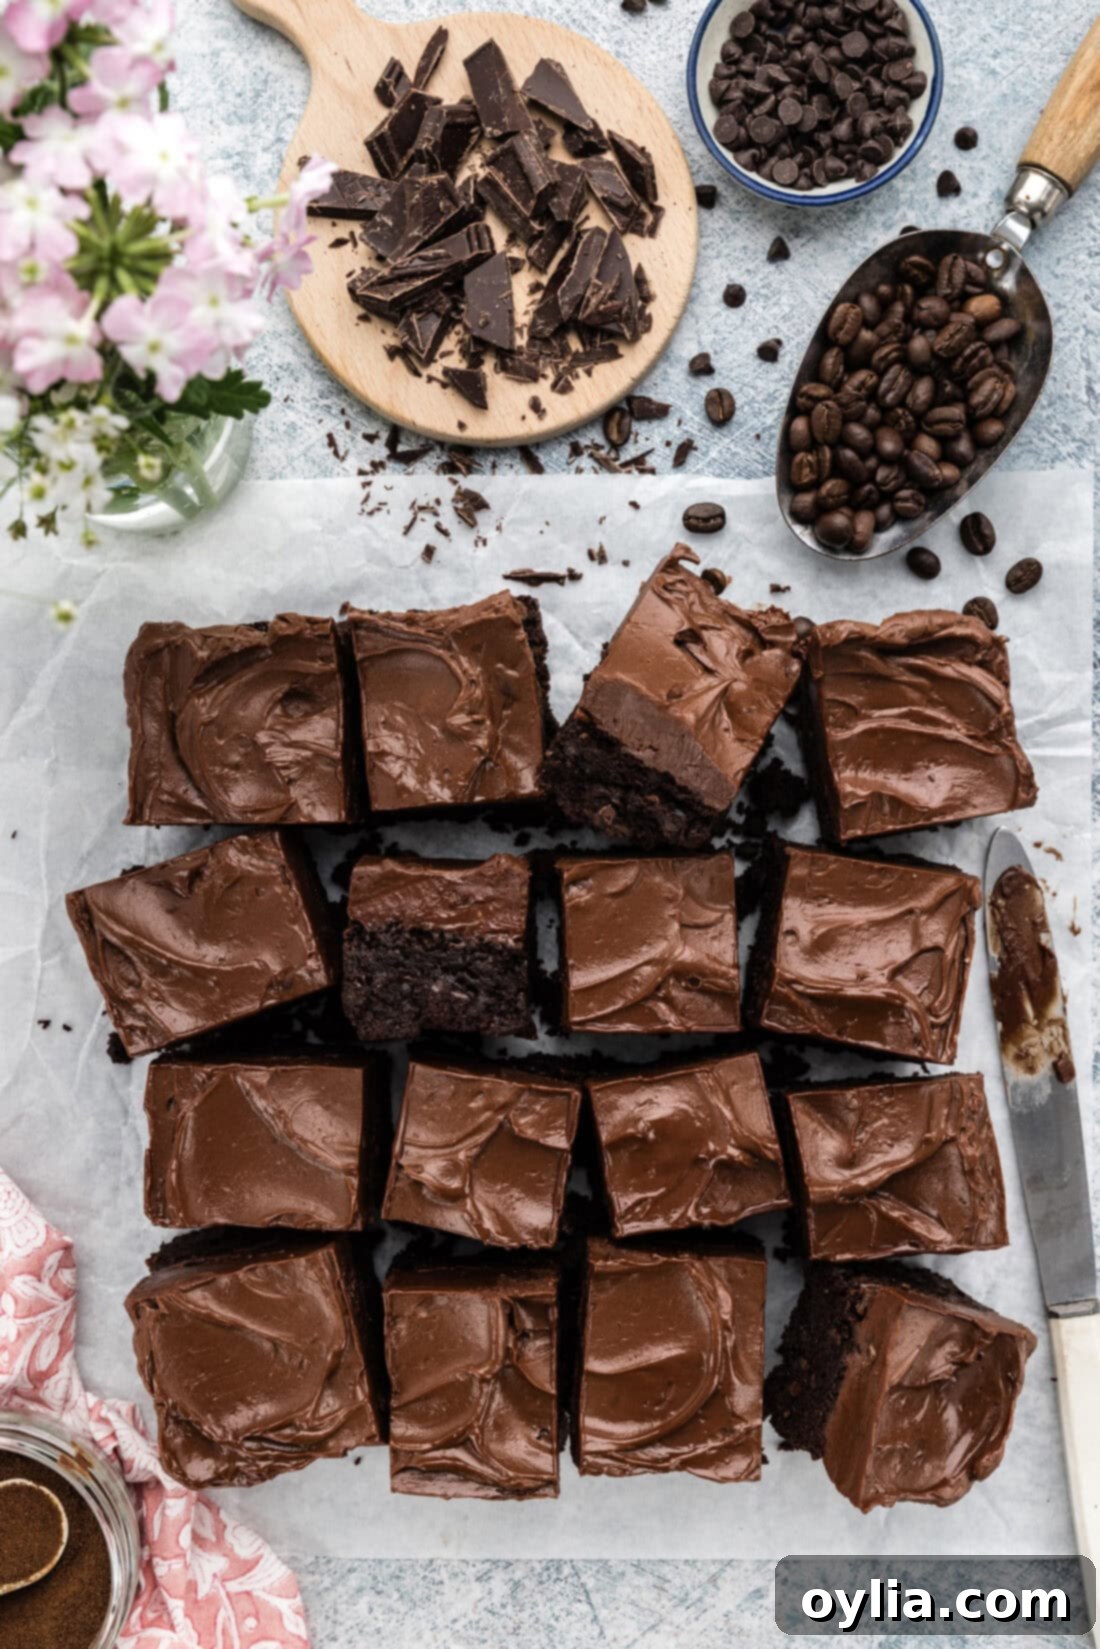
Pure decadence is truly what these fudge frosted espresso brownies deliver. These aren’t just your run-of-the-mill fudge brownies; they’re an elevated experience. The magic lies in the generous addition of espresso powder. While it’s widely known that espresso enhances chocolate flavor, here, it plays a starring role far beyond a mere flavor enhancer. We’re not talking about a subtle hint from a teaspoon; this recipe calls for a whole tablespoon of espresso powder, creating a distinct and utterly delightful chocolate-coffee fusion that sets these brownies apart.
The espresso flavor is perfectly balanced – present enough to be noticed and appreciated, yet never overpowering. It adds an “oomph” that transforms a classic brownie into something truly special and incredibly addictive. Just one glance at their fudgy texture and glossy frosting is enough to make them irresistible! Crowned with a velvety, homemade fudge frosting, you’ll find yourself in a state of pure chocolate bliss. This rich combination of espresso-infused chocolate and creamy fudge is, without a doubt, a match made in dessert heaven.
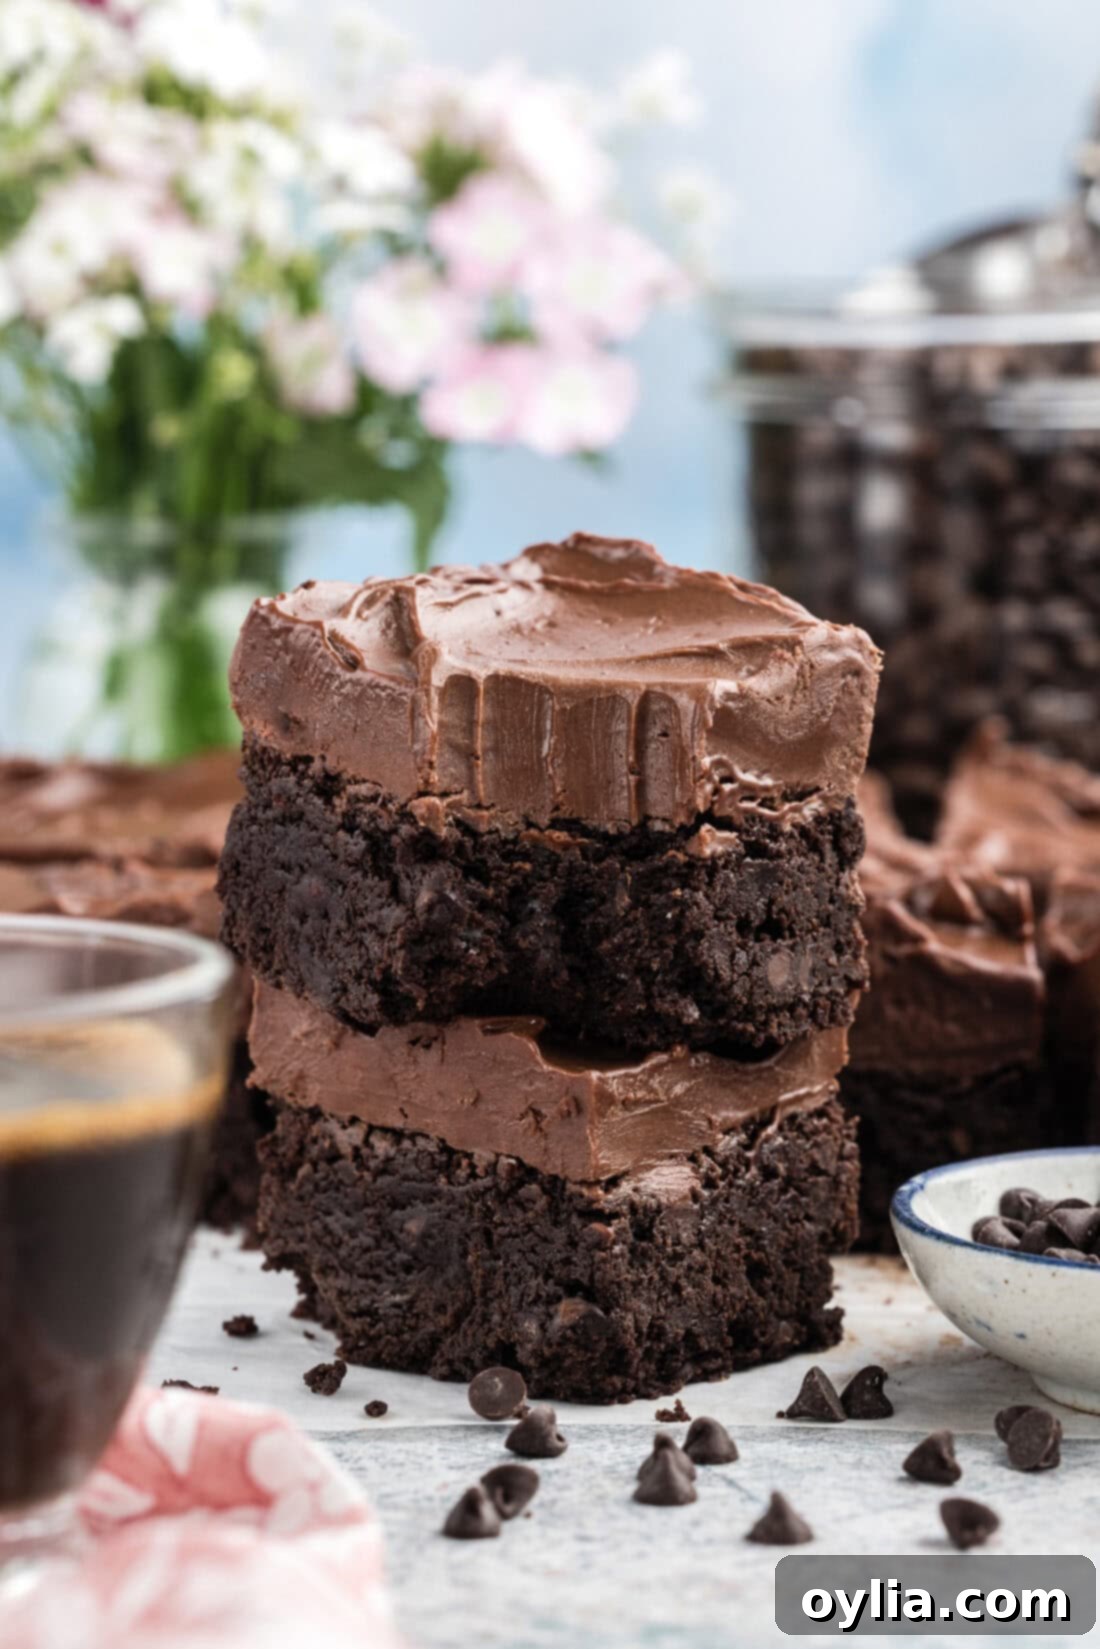
Beyond the incredible flavor, these brownies boast a perfect texture. They are thick, dense, and wonderfully chewy, a hallmark of a truly great brownie. The combination of bittersweet and unsweetened chocolate, along with the correct fat-to-flour ratio, ensures a rich, moist crumb that doesn’t lean towards cakey. Every bite offers a satisfying chew, followed by an explosion of deep chocolate and subtle coffee notes, all brought together by the smooth, sweet frosting. This careful balance of ingredients and techniques ensures a consistently perfect result every time you bake them.
Key Ingredients for Decadent Espresso Brownies
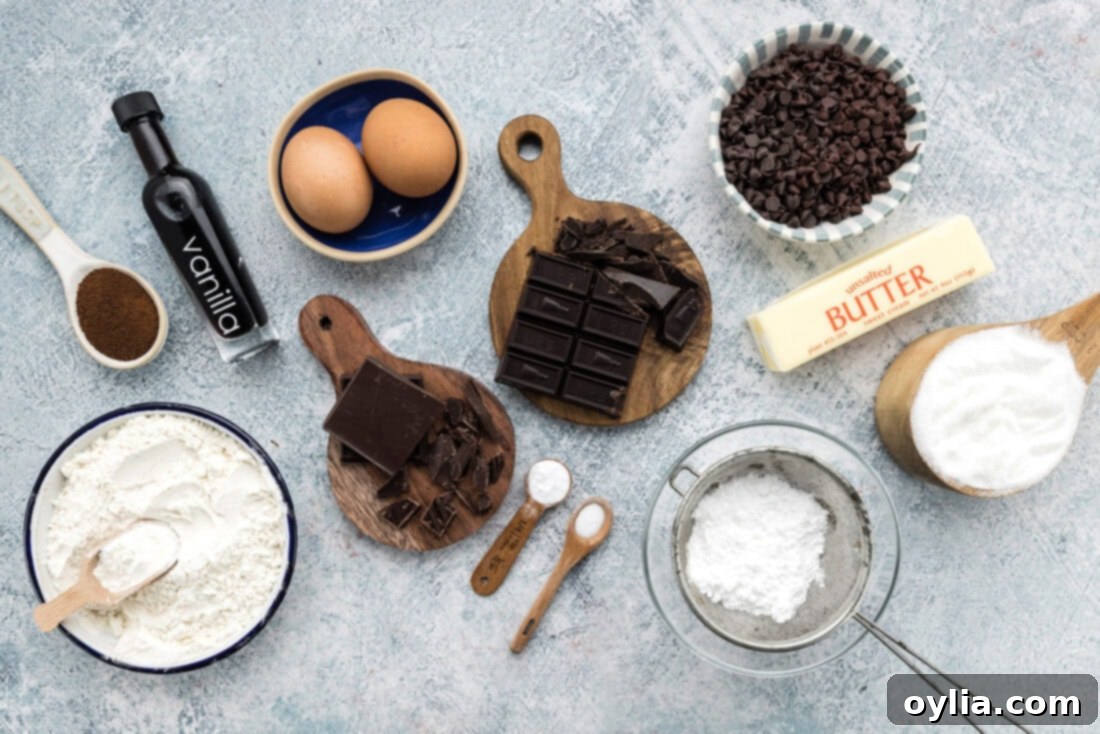
To create these incredibly rich and chewy espresso brownies, you’ll need a selection of high-quality ingredients. Each component plays a vital role in achieving the perfect flavor and texture that makes this recipe stand out. For precise measurements, the full list of ingredients, and detailed instructions, please refer to the printable recipe card at the very end of this post.
Ingredient Breakdown & Expert Tips
Understanding each ingredient’s role is key to baking perfect brownies. Here’s a closer look at what makes these espresso brownies so special:
- The Brownie Base: A thick, chewy, and intensely chocolatey foundation is non-negotiable for these brownies. This recipe achieves that perfection by using two types of melted chocolate: bittersweet and unsweetened. This combination is crucial for several reasons. Firstly, it adds a profound depth and complexity to the chocolate flavor that cocoa powder alone cannot achieve. Secondly, using melted chocolate contributes significantly to the brownies’ moisture content and rich, fudgy texture, preventing them from becoming dry or cakey. The inclusion of miniature chocolate chips throughout the batter also adds pockets of melted chocolate goodness in every bite, further enhancing the indulgent experience.
- Espresso Powder – The Secret Weapon: As highlighted, espresso powder is more than just a subtle addition here; it’s a flavor booster and a star in its own right. Its primary function is to draw out and intensify the rich, complex notes of the chocolate, making the brownies taste even more profoundly chocolatey. However, unlike many recipes that use just a touch, our recipe uses a whole tablespoon, which imparts a wonderful, noticeable hint of coffee. This creates an exquisite mocha-like flavor profile that perfectly complements the sweetness and richness of the chocolate. For best results, use instant espresso powder, which dissolves easily and distributes evenly throughout the batter.
- Unsalted Butter: Essential for richness and moisture. Using unsalted butter allows you to control the overall salt content of the recipe. Ensure it’s softened for the frosting, but melted for the brownie base.
- Granulated Sugar: Provides sweetness and contributes to the chewy texture. Don’t reduce the sugar too much, as it’s crucial for the structural integrity and moisture of the brownies.
- Eggs: Act as a binder, adding structure and moisture to the brownies. They also contribute to the fudgy texture. Adding them one at a time ensures proper incorporation.
- Vanilla Extract: A classic flavor enhancer that complements chocolate beautifully. Use pure vanilla extract for the best taste.
- All-Purpose Flour: Just enough to provide structure without making the brownies tough or cakey. Unbleached all-purpose flour is generally preferred for baking.
- Baking Soda & Salt: Baking soda helps with a slight lift, contributing to a chewy edge, while salt balances the sweetness and enhances all the flavors.
- Confectioners’ Sugar (for frosting): Gives the fudge frosting its smooth, melt-in-your-mouth texture. Sifting is important to avoid lumps.
Step-by-Step Guide: Crafting Your Fudge Frosted Espresso Brownies
These step-by-step photos and detailed instructions are designed to help you visualize each stage of making this delectable recipe. For a convenient printable version, complete with all measurements and full instructions, you can Jump to Recipe at the bottom of this post.
- Preheat your oven to 350°F (175°C). This ensures your oven is at the correct temperature for even baking from the moment your brownies go in.
- In a microwave-safe bowl, combine the unsalted butter, bittersweet chocolate, and unsweetened chocolate. Melt them together by heating in 30-second intervals, stirring well after each interval, until the mixture is completely smooth and glossy. Be careful not to overheat the chocolate, as it can seize. Once melted, set the chocolate mixture aside and allow it to cool slightly while you prepare the pan.
- Prepare an 8×8 inch baking pan. Line the pan with aluminum foil, ensuring there’s an overhang on two opposite sides; these will serve as handles later for easy removal. Lightly spray the foil with cooking spray to prevent sticking.
- Once the melted chocolate has cooled to just warm, stir in the granulated sugar until it’s well blended. Next, add the eggs, one at a time, mixing thoroughly with a wooden spoon or spatula after each addition, just until combined. Avoid overmixing the eggs. Then, incorporate the espresso powder and vanilla extract, stirring until they are fully integrated into the chocolate mixture. The batter will be rich and fragrant.
- In a separate medium bowl, whisk together the dry ingredients: all-purpose flour, baking soda, and salt. This step ensures an even distribution of the leavening agent and salt throughout the brownies.
- Gradually add the flour mixture to the wet chocolate mixture. Stir gently with your wooden spoon or spatula until just combined. The key here is not to overmix, as overmixing can develop the gluten in the flour, leading to tougher, cakey brownies instead of fudgy ones. Once the flour streaks have almost disappeared, fold in the miniature semi-sweet chocolate chips.
- Pour the brownie batter evenly into your prepared 8×8 inch baking pan. Use your spatula to spread it smoothly into the corners.
- Bake the brownies in the preheated oven for approximately 30 minutes. A toothpick inserted into the center should come out with moist crumbs, not wet batter. Remember, slightly underbaked brownies are better than overbaked, as they will be fudgier.
- Remove the pan from the oven and place it on a wire rack to cool completely. Allowing the brownies to cool fully in the pan is essential for them to set properly and for the frosting to apply smoothly.
- While the brownies are cooling, prepare the luscious fudge frosting. In a microwave-safe bowl, melt the bittersweet chocolate (minimum 70% cocoa solids). Heat it in 30-second intervals on medium power, stirring in between, for 2 to 3 minutes, or until smooth. Alternatively, you can melt it in a heatproof bowl set over a saucepan of simmering water (a double boiler), stirring frequently. Once melted, let the chocolate cool slightly.
- In a separate large mixing bowl, beat the softened unsalted butter (plus the extra two tablespoons) with an electric mixer until it’s light, soft, and creamy. Gradually add the sifted confectioners’ sugar, beating until the mixture is light and fluffy. This can take a few minutes.
- Gently mix in the vanilla extract and the slightly cooled melted chocolate into the butter and sugar mixture. Continue to beat with the electric mixer until all ingredients are perfectly combined and the frosting is smooth, rich, and spreadable.
- Once the brownies are completely cool, spread the homemade fudge frosting evenly over the top of the brownies in the pan. Use an offset spatula for a smooth, professional finish.
- Using the foil overhang as handles, carefully lift the frosted brownies out of the pan. Place them on a cutting board and cut them into 16 squares or bars. For clean cuts, use a hot knife (run it under hot water and wipe dry before each cut). Serve immediately or store for later enjoyment!
Frequently Asked Questions & Expert Baking Tips
Absolutely, you can easily substitute coffee powder for instant espresso powder. However, it’s important to note that the flavor intensity will likely be more mild, as coffee powder generally has a less concentrated flavor than espresso powder. Additionally, coffee powder tends to be coarser. For a smoother texture and better distribution in the batter, I recommend placing the coffee powder in a sealed bag and grinding it with a rolling pin or a spice grinder to create finer granules before adding it to the recipe. This will help prevent a gritty texture and ensure the flavor is more evenly dispersed.
To maintain their freshness and fudgy texture, store your frosted brownies in an airtight container at room temperature. They will remain delicious for 4-5 days. If you live in a very warm or humid climate, or if you prefer a firmer texture, you can store them in the refrigerator, but allow them to come to room temperature before serving for the best taste and chewiness. You can also freeze unfrosted or frosted brownies for longer storage. Wrap them tightly in plastic wrap and then in foil, and store in a freezer-safe bag or container for up to 3 months. Thaw at room temperature.
The main difference lies in the fat-to-flour ratio and how the ingredients are mixed. Fudgy brownies, like these espresso brownies, have a higher fat content (butter and chocolate) and less flour, resulting in a dense, moist, and chewy texture. They are typically mixed just enough to combine ingredients. Cakey brownies, on the other hand, have more flour and often include a leavening agent like baking powder, along with more eggs, giving them a lighter, fluffier, and less dense crumb, similar to a cake.
While this recipe specifically calls for bittersweet and unsweetened chocolate for optimal depth and richness, you can experiment. Using all bittersweet chocolate would result in a slightly sweeter brownie, while using milk chocolate would make them considerably sweeter and perhaps less rich. For the best flavor profile, sticking to the bittersweet and unsweetened combination is highly recommended, as it creates a complex chocolate base that truly shines with the espresso.
Achieving that ideal balance comes down to a few factors. First, preheating your oven correctly is crucial. An inexpensive oven thermometer can confirm your oven’s true temperature. Second, using a metal baking pan (like the recommended 8×8 inch pan) helps with heat distribution for crispier edges. Finally, avoiding overbaking is key. Begin checking for doneness a few minutes before the recommended bake time. The edges should be set, but a toothpick inserted into the center should still come out with some moist crumbs attached, indicating a gooey interior.
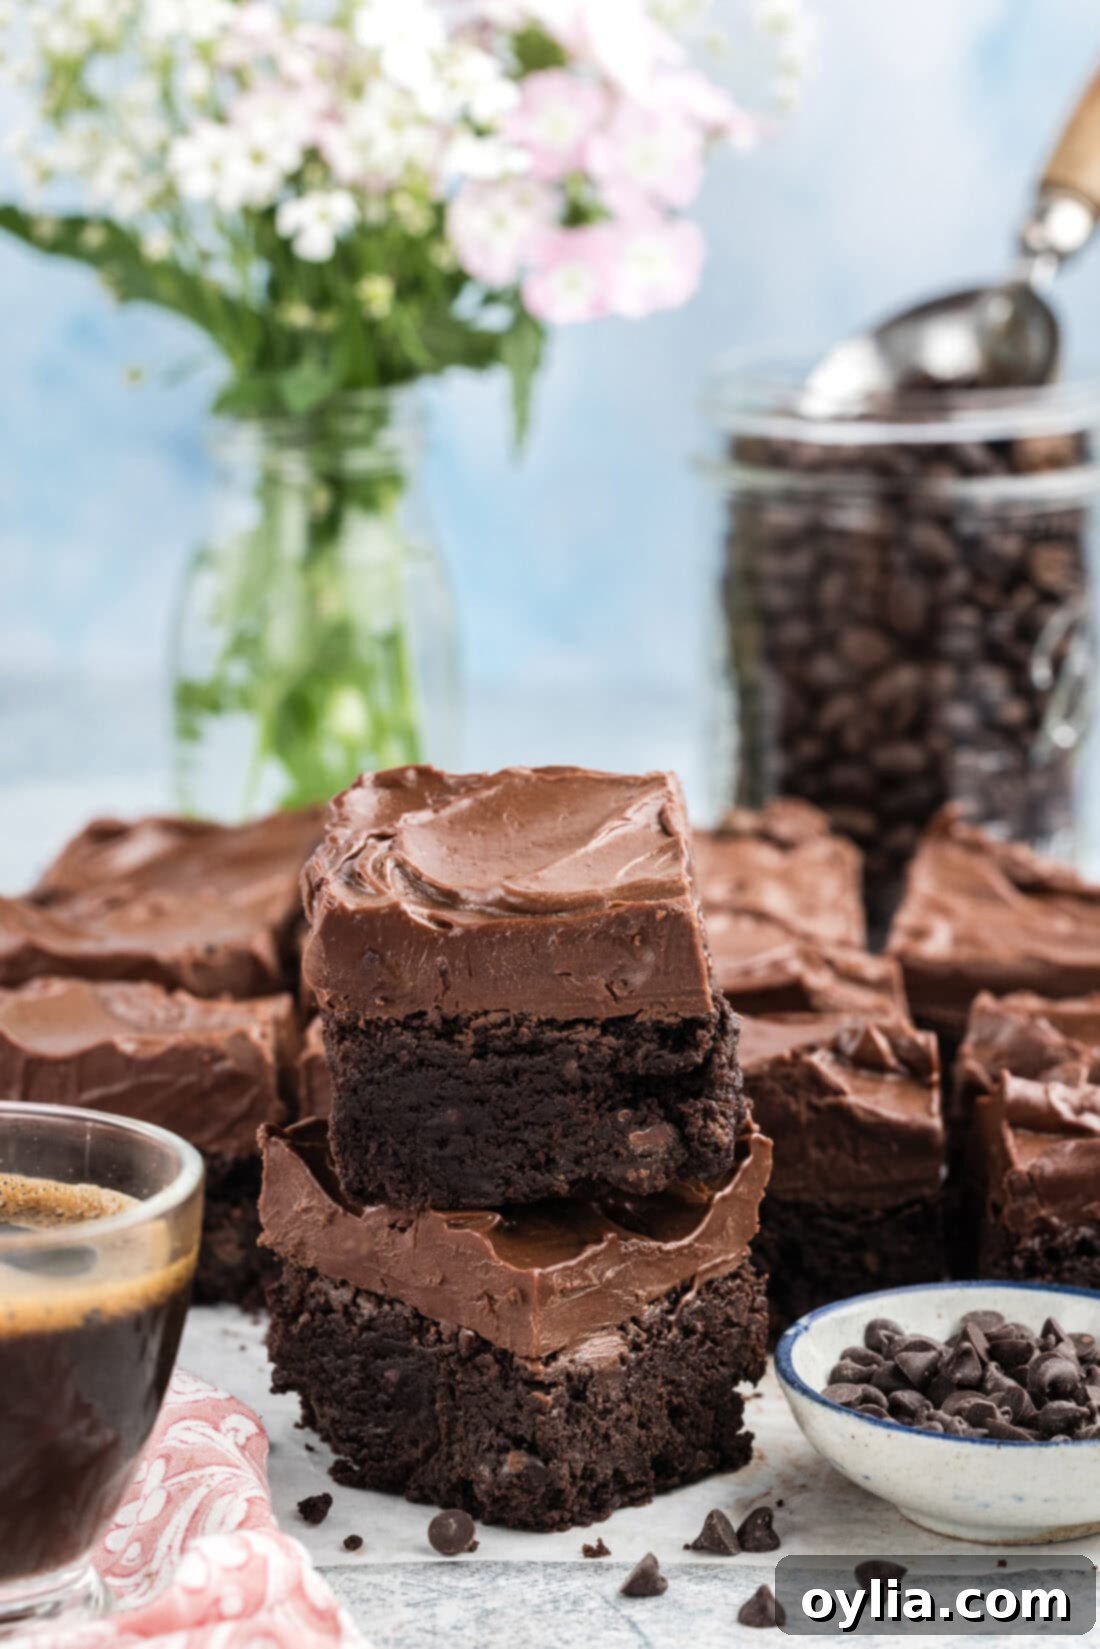
Delightful Serving Suggestions for Your Espresso Brownies
These fudge frosted espresso brownies are a showstopper on their own, but a little presentation can make them even more special. For those picture-perfect, clean-cut squares, first chill your brownies in the refrigerator for about 30-60 minutes after the frosting has set. This firming-up period makes them much easier to slice neatly. Once cut, let them sit out, loosely covered with foil, for a short while until they return to their wonderfully chewy texture – this is a secret to maximizing their indulgence!
They are ideal for entertaining, whether for a casual get-together or a more formal dessert spread. Cut them into small, bite-sized squares, and they transform into the perfect finger food dessert, easy to pick up and enjoy. While you certainly *could* serve them without the rich fudge frosting, those silky, sweet layers on top are truly the crowning glory and complement the deep chocolate-espresso base beautifully. Imagine pairing a square with a scoop of vanilla bean ice cream, a dollop of fresh whipped cream, or even a dusting of cocoa powder for an elegant touch. And of course, a hot cup of coffee or a glass of cold milk makes a classic accompaniment to these indulgent treats.
More Irresistible Brownie Recipes to Explore
If you’ve fallen in love with these espresso brownies, you’re in for a treat! Our collection of brownie recipes offers a variety of flavors and textures to satisfy every craving. Dive into these other popular options:
- Slutty Brownies: A layered delight featuring chocolate chip cookies, Oreos, and brownies.
- S’mores Brownies: The nostalgic campfire treat reimagined as a rich brownie with toasted marshmallows.
- Millionaire Brownies: Layers of shortbread, caramel, and chocolate atop a chewy brownie base.
- Salted Brownie Cookies: All the fudgy goodness of a brownie in a convenient, perfectly portioned cookie form, finished with a sprinkle of sea salt.
- Classic Chewy Brownies: For those who love a timeless dessert, our classic chewy brownie recipe is a go-to. It’s simple, straightforward, and consistently delivers that perfect fudgy texture without any fuss.
- Blondies: If you’re looking for a change from chocolate, try our delectable blondie recipe. These caramel-butterscotch flavored bar cookies offer a delightful contrast, with a rich, chewy texture and often studded with white chocolate chips or nuts.
I absolutely adore spending time in the kitchen, experimenting with new recipes, and perfecting classic dishes, all to share my culinary adventures and creations with you! Keeping up with new recipes can be a delightful challenge, which is why I offer a convenient newsletter delivered right to your inbox every time a new recipe is posted. Simply subscribe here and start receiving your free daily dose of delicious inspiration!
Fudge Frosted Espresso Brownies
IMPORTANT – There are often Frequently Asked Questions within the blog post that you may find helpful. Simply scroll back up to read them!
Print It
Pin It
Rate It
Save ItSaved!
Course: Dessert
Cuisine: American
Ingredients
- ½ cup unsalted butter (1 stick, softened for frosting, melted for brownies)
- 4 ounces bittersweet chocolate (chopped)
- 3 ounces unsweetened chocolate (chopped)
- 1 cup granulated sugar
- 2 large eggs
- 1 Tablespoon instant espresso powder
- 1 teaspoon vanilla extract
- ⅔ cup unbleached all-purpose flour
- ¼ teaspoon baking soda
- ⅛ teaspoon salt
- 1 cup miniature semi-sweet chocolate chips
For the Fudge Frosting:
- 6 ounces bittersweet chocolate (minimum 70 percent cocoa solids, chopped)
- 1 cup unsalted butter (plus 2 tablespoons, softened at room temperature)
- 1 ¾ cups confectioners’ sugar (sifted)
- 1 Tablespoon vanilla extract
Tools You’ll Need
-
8×8 inch baking pan
-
Mixing bowls
-
Electric mixer
-
Wooden spoon
Before You Begin
- We’ve found that using two types of melted chocolate, bittersweet and unsweetened, adds unparalleled complexity and depth to the brownie base. This blend prevents them from being overly sweet, providing a rich, sophisticated flavor, and significantly contributes to their moist and fudgy texture compared to recipes relying solely on cocoa powder.
- Ensure all cold ingredients, especially the butter for the frosting and the eggs for the brownies, are at room temperature. This allows them to incorporate more smoothly, creating a more uniform batter and a creamier frosting.
- Do not overmix the brownie batter once the flour is added. Overmixing develops gluten, which can lead to tougher, cake-like brownies instead of the desired fudgy texture. Stir just until the flour streaks disappear.
Instructions
-
Preheat oven to 350°F (175°C).
-
Melt butter, bittersweet chocolate, and unsweetened chocolate in a microwave-safe bowl. Heat in 30-second increments, stirring after each, until smooth. Let chocolate cool to warm.½ cup unsalted butter, 4 ounces bittersweet chocolate, 3 ounces unsweetened chocolate
-
Prepare an 8×8 inch baking pan by lining it with foil, leaving an overhang on two sides for handles. Spray the foil with cooking spray. Set aside.
-
Once chocolate has cooled, stir in the granulated sugar until well blended. Add eggs one at a time, stirring well with a wooden spoon until just combined. Stir in espresso powder and vanilla until combined.1 cup granulated sugar, 2 large eggs, 1 Tablespoon instant espresso powder, 1 teaspoon vanilla extract
-
In another bowl, whisk together flour, baking soda, and salt. Add this flour mixture to the chocolate mixture and stir until just combined. Fold in miniature chocolate chips. Spread batter evenly into the prepared pan.⅔ cup unbleached all-purpose flour, ¼ teaspoon baking soda, ⅛ teaspoon salt, 1 cup miniature semi-sweet chocolate chips
-
Bake for 30 minutes. Remove from oven and cool completely in the pan on a wire rack.
Make the Frosting
-
Melt the 6 ounces of bittersweet chocolate in the microwave (2-3 minutes on medium, stirring) or in a bowl over simmering water. Let cool slightly.6 ounces bittersweet chocolate
-
In another bowl, beat the softened butter until soft and creamy. Add the sifted confectioners’ sugar and beat again until light and fluffy. Gently add the vanilla and the slightly cooled melted chocolate, mixing until fully combined and smooth.1 cup unsalted butter, 1 ¾ cups confectioners’ sugar, 1 Tablespoon vanilla extract
-
Spread the finished fudge frosting evenly over the completely cooled brownies in the pan.
-
Using the foil handles, lift the brownies out of the pan. Place them on a cutting board and cut into individual bars. For neat cuts, chill first, then use a hot, clean knife for each slice.
Expert Tips & FAQs
- Store your frosted brownies in an airtight container kept at room temperature for 4-5 days for optimal freshness.
- For a truly professional and clean presentation, chill your fudge frosted espresso brownies in the refrigerator for at least 30 minutes before cutting. This firms up the frosting and makes slicing much easier. Once cut, let them sit out, covered loosely with foil, so they can return to that perfect chewy texture. This trick is especially great when preparing for guests or a party.
- To make perfectly straight cuts, use a large, sharp knife. For the cleanest slices, wipe the knife clean with a damp cloth and warm it under hot water after each cut.
- Avoid overbaking your brownies! This is the most common mistake that leads to dry, cakey brownies. They should still look slightly underdone in the center when you pull them out, as they will continue to cook slightly from residual heat as they cool.
Nutrition Information
Tried this Recipe? Pin it for Later!Follow on Pinterest @AmandasCookin or tag #AmandasCookin!
The recipes on this blog are tested with a conventional gas oven and gas stovetop. It’s important to note that some ovens, especially as they age, can cook and bake inconsistently. Using an inexpensive oven thermometer can assure you that your oven is truly heating to the proper temperature. If you use a toaster oven or countertop oven, please keep in mind that they may not distribute heat the same as a conventional full sized oven and you may need to adjust your cooking/baking times. In the case of recipes made with a pressure cooker, air fryer, slow cooker, or other appliance, a link to the appliances we use is listed within each respective recipe. For baking recipes where measurements are given by weight, please note that results may not be the same if cups are used instead, and we can’t guarantee success with that method.
This post originally appeared here on June 26, 2013, and has since been updated with new photos, expanded expert tips, and enhanced recipe details to provide you with the best baking experience.
