The Best Shredded Beef Enchiladas: Tender Chuck Roast & Creamy Green Chile Sauce Recipe
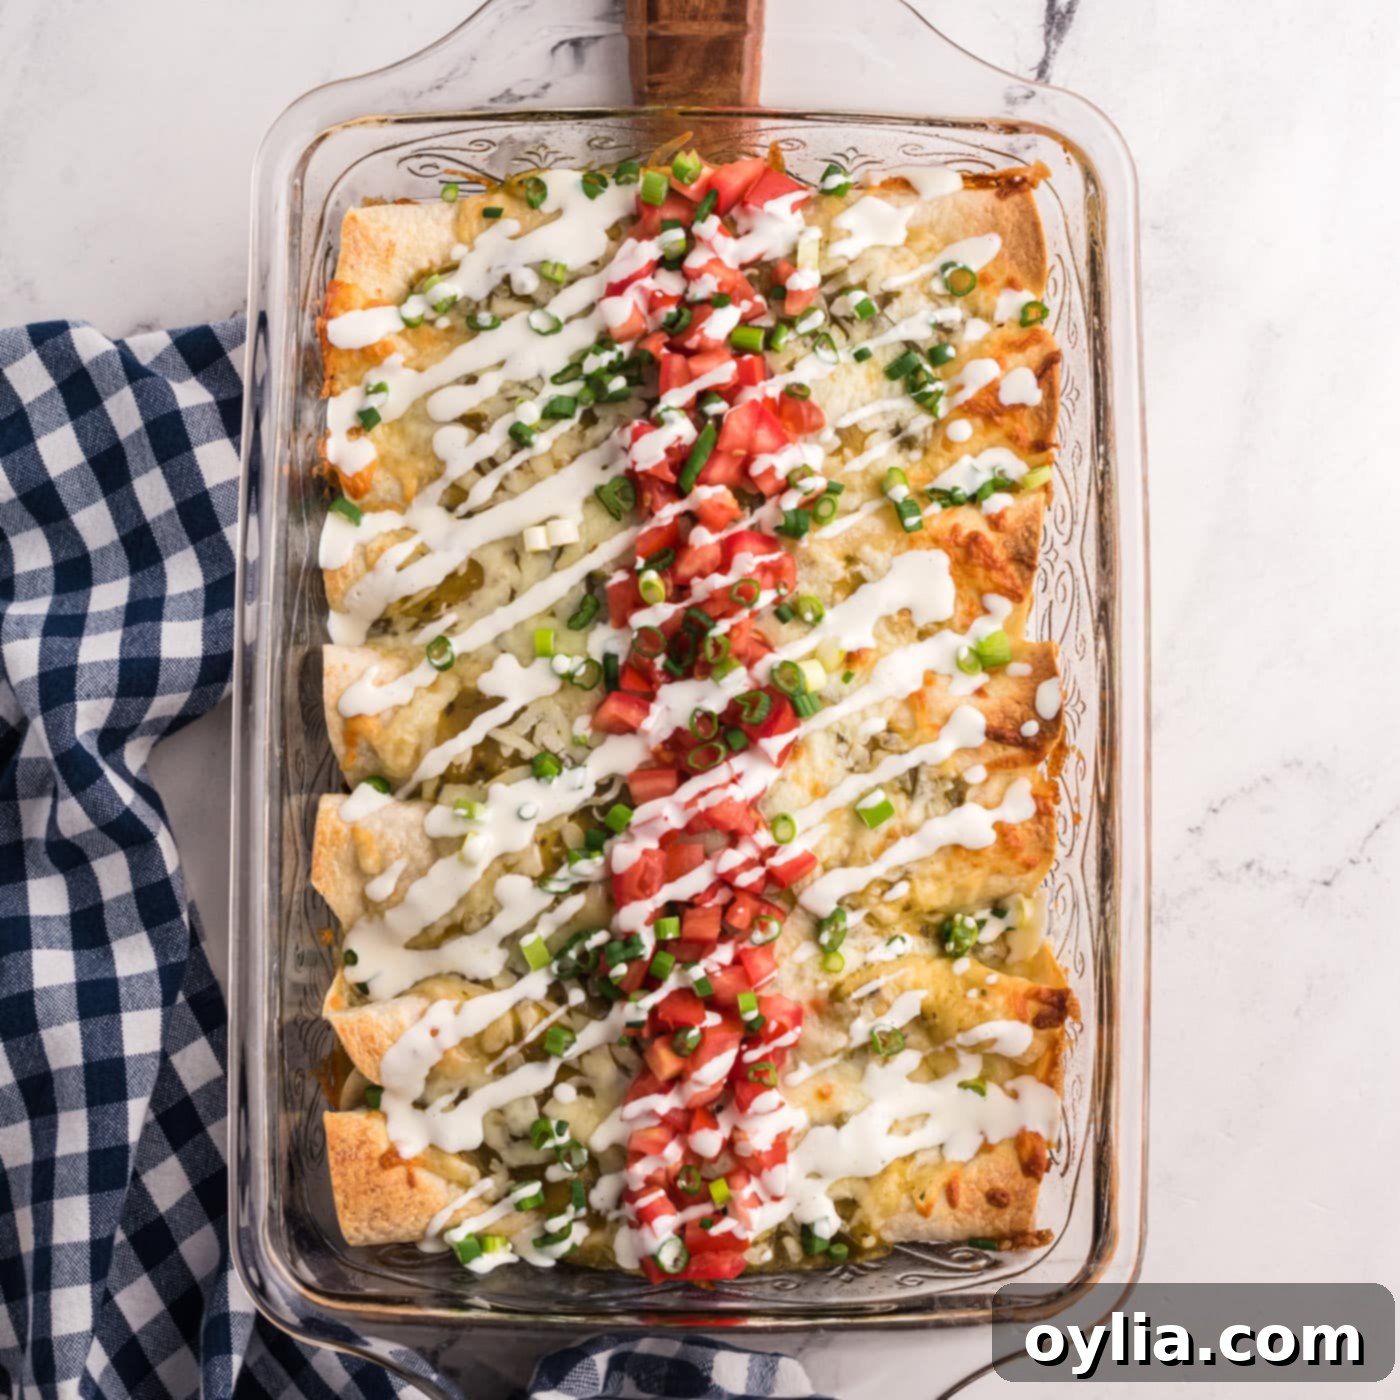
Prepare to be delighted by the richness of these homemade shredded beef enchiladas. Each bite offers a harmonious blend of ultra-tender, pull-apart chuck roast, infused with savory onions, and enveloped in a luscious green chile sour cream mixture, all nestled within soft, perfectly rolled flour tortillas. This isn’t just a meal; it’s a comforting, flavor-packed experience that promises to become a cherished family favorite in your kitchen.
The Irresistible Charm of These Shredded Beef Enchiladas
This shredded beef enchilada recipe is a true winner for countless reasons, making it a reliable crowd-pleaser that even the most discerning palates will appreciate. At its core, this dish shines thanks to the deeply flavorful and incredibly tender chuck roast. We start with a whole chuck roast, slow-roasted to perfection, allowing it to develop an unmatched depth of flavor and a melt-in-your-mouth texture that’s simply impossible to resist. Tossed with sweet, caramelized onions, the beef becomes a star ingredient, moist and savory.
What truly elevates these enchiladas is the luxurious, creamy, cheesy, green chile sauce. This vibrant sauce isn’t just an topping; it’s an integral component that infuses every layer with moisture and a subtle, tangy heat. It perfectly complements the rich beef, ensuring that the enchiladas are never dry and always bursting with authentic Mexican-inspired flavors. The combination of tender beef, flavorful onions, and this decadent sauce creates a casserole that’s both hearty and incredibly satisfying.
Beyond its incredible taste, one of the best aspects of this recipe is its adaptability. While we provide a method for preparing a mouthwatering chuck roast, these enchiladas serve as a fantastic canvas for your culinary creativity. If time is short, feel free to substitute the chuck roast with other protein options like savory ground beef, convenient shredded rotisserie chicken, or even rich leftover brisket. For those who love variety, consider enhancing the filling with additions such as sweet corn kernels, a kick of diced jalapeños, or hearty black beans. And when it comes to the sauce, whether you prefer the robust flavor of a traditional red enchilada sauce or the bright, zesty notes of our green chile version, the choice is yours!
This recipe consistently delivers a comforting, rich, and customizable meal that brings everyone to the table, making it an essential addition to your recipe repertoire.
Essential Ingredients for Authentic Shredded Beef Enchiladas
Crafting delicious shredded beef enchiladas begins with selecting high-quality ingredients. Each component plays a crucial role in building the layers of flavor that make this dish so extraordinary. Below, you’ll find a detailed list of what you’ll need to create this fantastic meal. For precise measurements, the full printable recipe card is conveniently located at the end of this post.
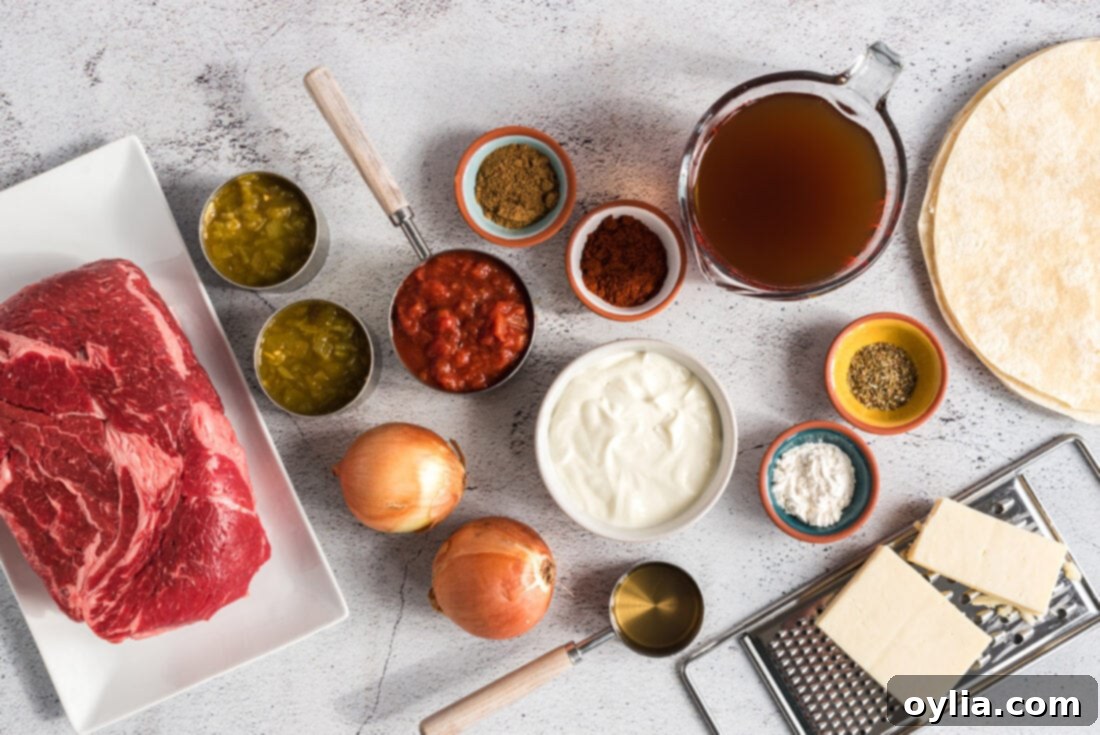
Ingredient Spotlight & Smart Substitution Suggestions
BEEF – We specifically chose a tender chuck roast for its rich flavor and incredible ability to become fall-apart tender when slow-cooked. This cut is perfect for shredding and absorbing the wonderful spices and pan juices. However, if you’re looking for an alternative with a similar texture, brisket is an excellent swap. For those seeking a quicker preparation, ground beef (browned and seasoned) or pre-cooked shredded rotisserie chicken can be used as convenient fillings. The beauty of enchiladas is their flexibility, so feel free to use whatever protein you love most!
TORTILLAS – While traditional enchiladas often feature corn tortillas, we’ve found that flour tortillas (7-8 inches each) offer superior structural integrity. They are less prone to tearing or falling apart when rolled and baked, ensuring your delicious filling stays perfectly contained. If you prefer the authentic flavor of corn tortillas, a brief dip in warm oil or enchilada sauce before filling can make them more pliable and prevent cracking.
SAUCE – Our recipe highlights a creamy green chile sauce, which adds a wonderful tang and mild heat. You have options here: use a quality store-bought salsa verde for convenience, whip up a batch of our homemade salsa verde, or try our rich homemade enchilada sauce for a classic red sauce experience. Each option brings its unique deliciousness to the table!
CHEESE – Monterey Jack cheese is our top recommendation for its excellent melting properties and mild, creamy flavor that complements the robust beef and zesty sauce without overpowering them. However, a blend of Monterey Jack and cheddar, or even a Mexican blend, would also work wonderfully, adding a slightly sharper note if desired.
AROMATICS & SPICES – Onions, chili powder, cumin, and dried oregano are fundamental to the Mexican-inspired flavor profile of these enchiladas. They create a fragrant base for the roast and a warm, earthy tone in the sauce. Don’t skimp on rubbing the spices generously into the beef; this step is key for maximizing flavor penetration.
BROTH & VINEGAR – Beef broth adds rich liquid for slow-roasting the chuck roast, ensuring it stays incredibly moist and tender. White wine vinegar, while a small addition, contributes a subtle acidity that helps tenderize the meat and brighten the overall flavor, cutting through the richness. These liquids are essential for creating the flavorful pan juices that will later moisten your shredded beef.
Step-by-Step Guide: Crafting Your Perfect Shredded Beef Enchiladas
These step-by-step photos and instructions are here to help you visualize how to make this recipe. You can Jump to Recipe to get the printable version of this recipe, complete with measurements and instructions at the bottom.
- Preheat your oven to 325°F (160°C). Begin by carefully trimming any excess fat from your beef chuck roast. In a small bowl, combine 4 teaspoons of chili powder with the ground cumin and dried, crushed oregano. This spice blend will infuse the beef with deep, aromatic flavors.
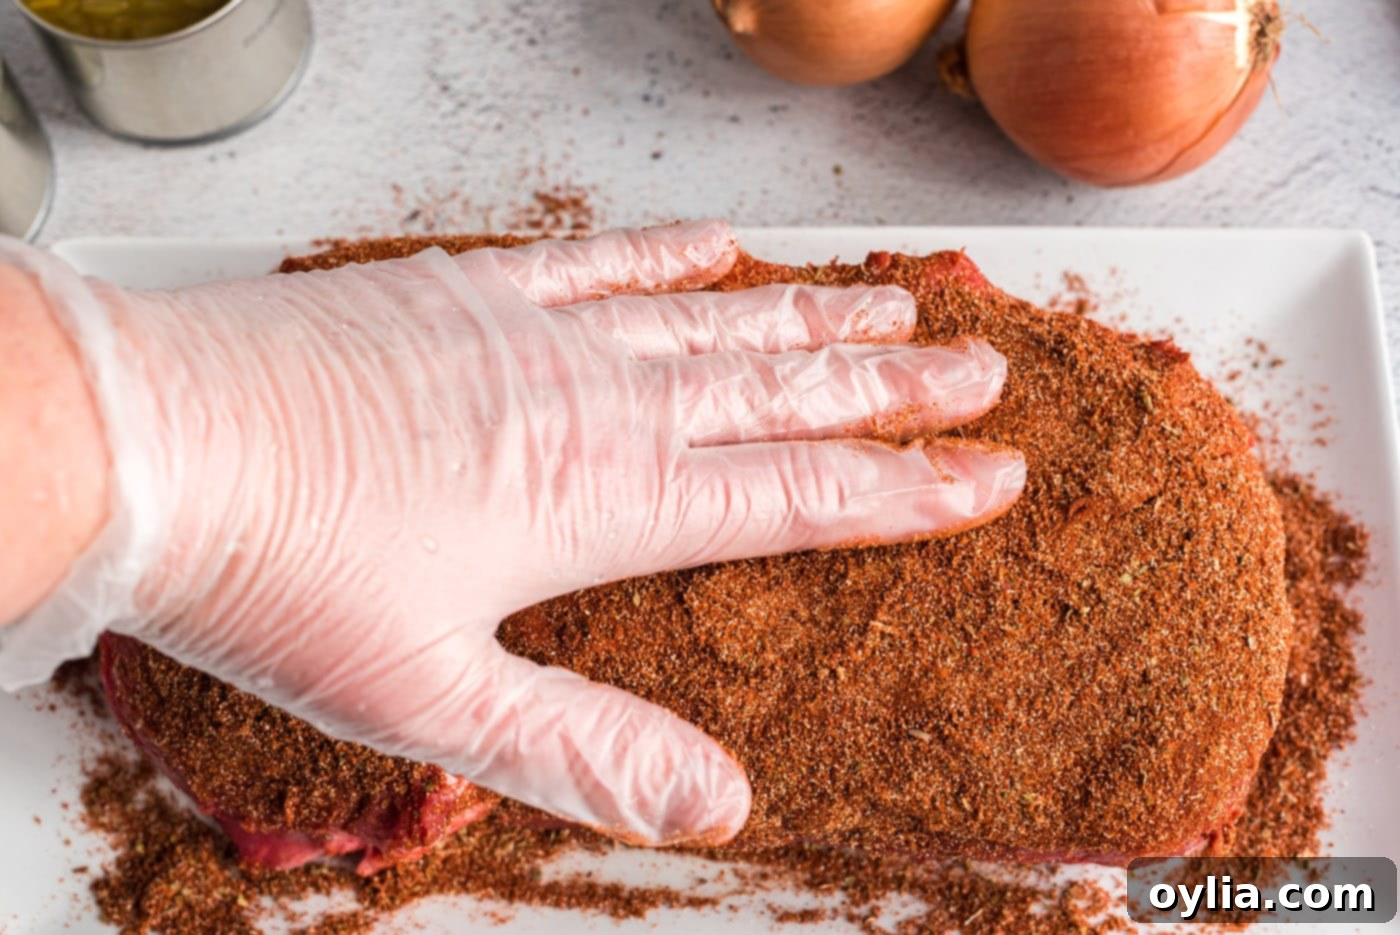
- Generously sprinkle this spice mixture over all sides of the beef, taking the time to rub it in thoroughly with your fingers. This ensures that every inch of the roast is coated and ready to absorb the delicious seasoning as it cooks.

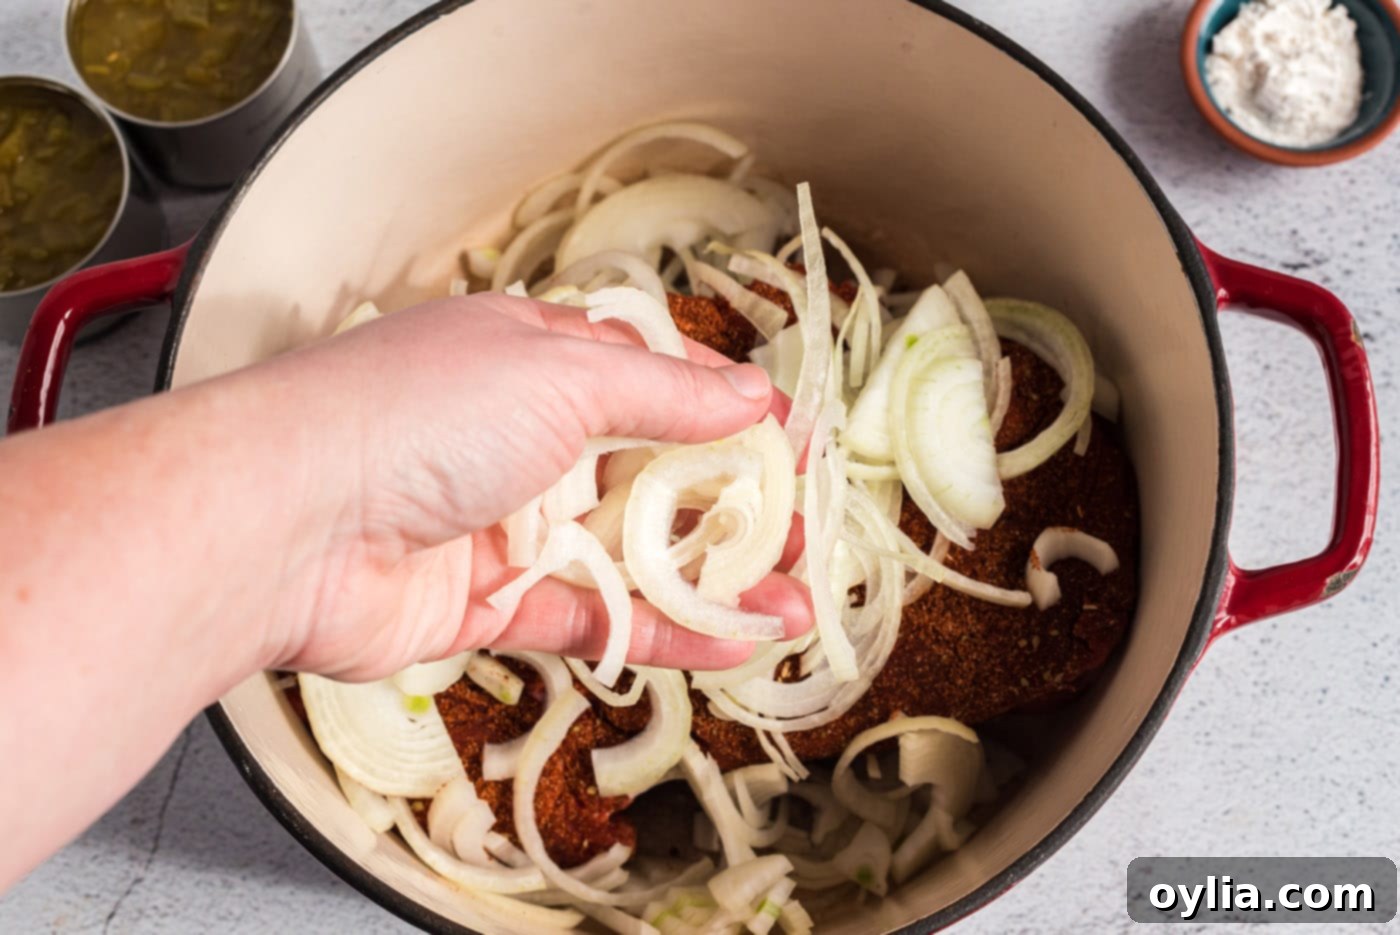
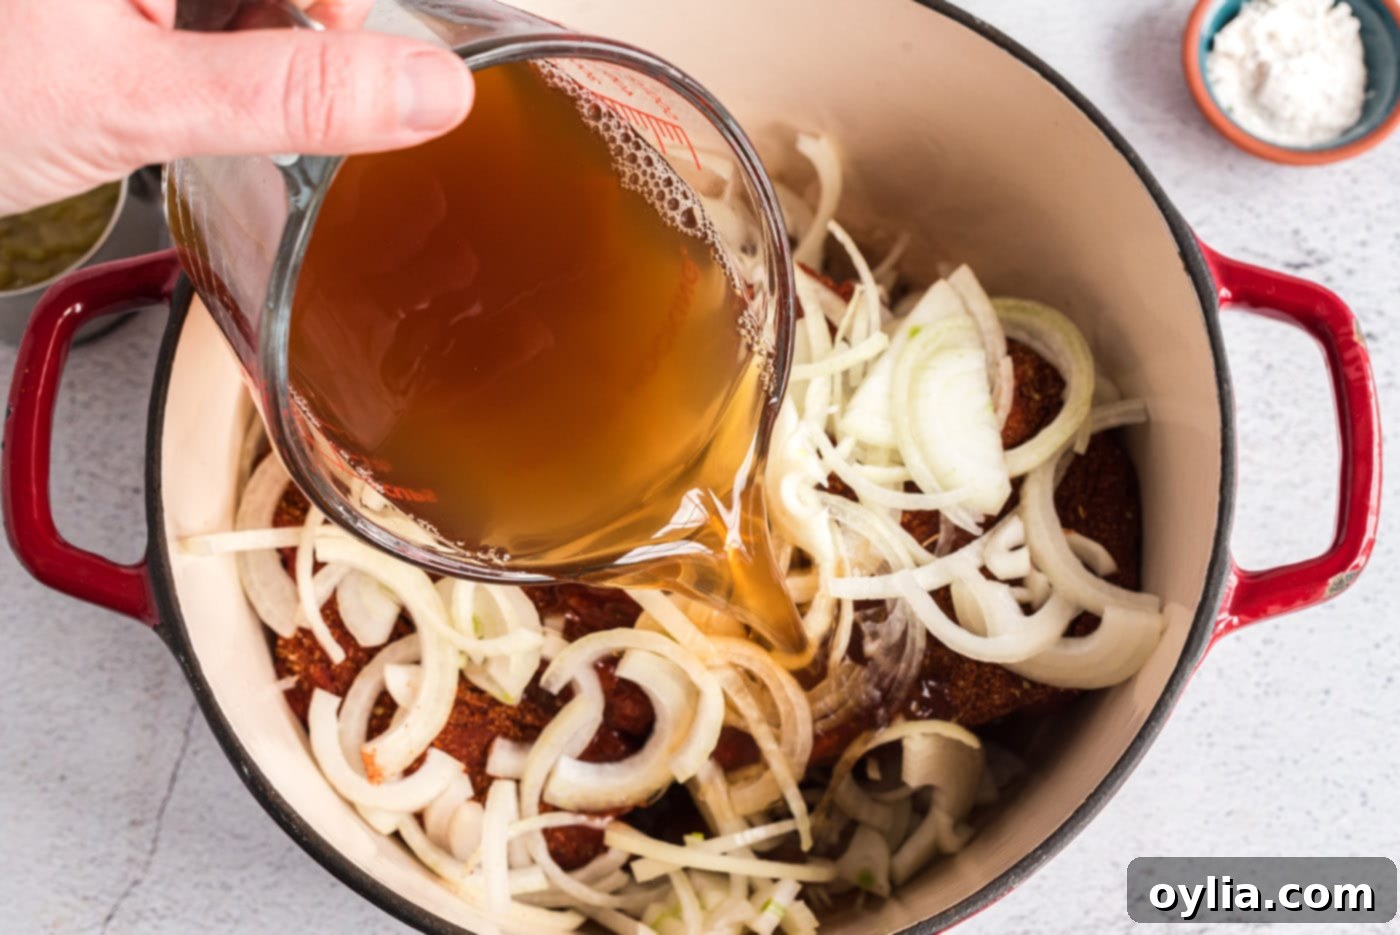
- Place the seasoned beef into a shallow roasting pan or a Dutch oven. Arrange the thinly sliced onions on top of the beef. Then, pour the beef broth and white wine vinegar over the meat. Cover the pan tightly and roast in the preheated oven for approximately 3 hours, or until the meat is incredibly tender and easily pulls apart with a fork. This slow roasting process is key to achieving that perfect shredded texture.


- Once cooked, remove the beef from the oven and let it rest in the pan juices for about 15 minutes. This resting period allows the juices to redistribute, resulting in even more tender and flavorful shredded beef. The meat should be cool enough to handle comfortably.
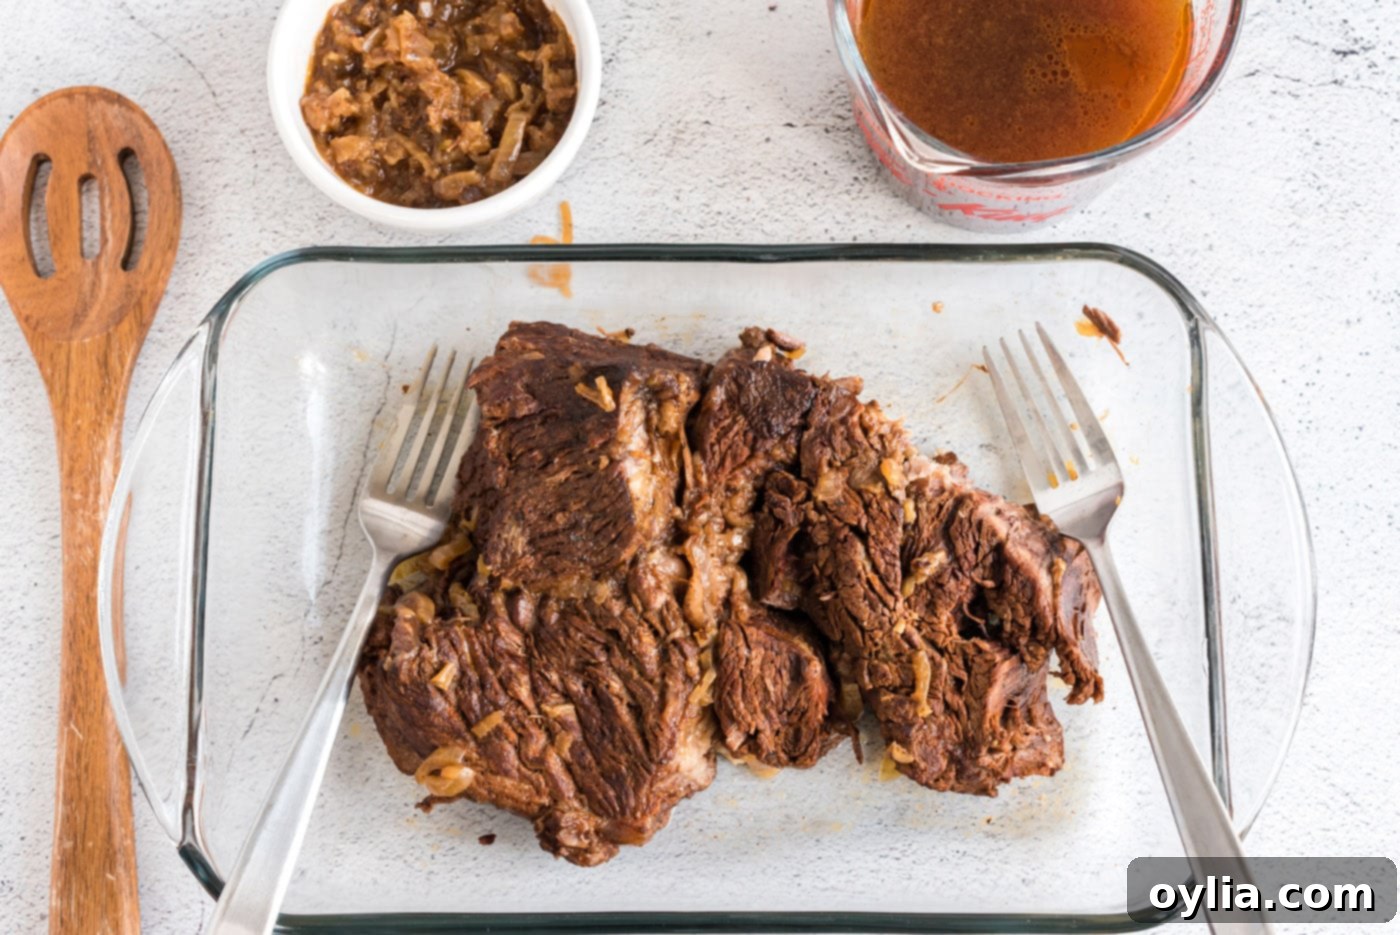
- Carefully remove the meat from the pan. Using a slotted spoon, scoop out the cooked onions and set them aside. Reserve the pan juices, as they are packed with flavor and will be used later.
EXPERT TIP – If you did a good job trimming the fat from the meat initially, there shouldn’t be much surface fat. However, if you notice any excess, simply skim it off with a spoon or use a fat separator to ensure your sauce isn’t overly greasy.
- Halve the tender meat crosswise, then use two forks to easily shred it into fine strands. The meat should practically fall apart.

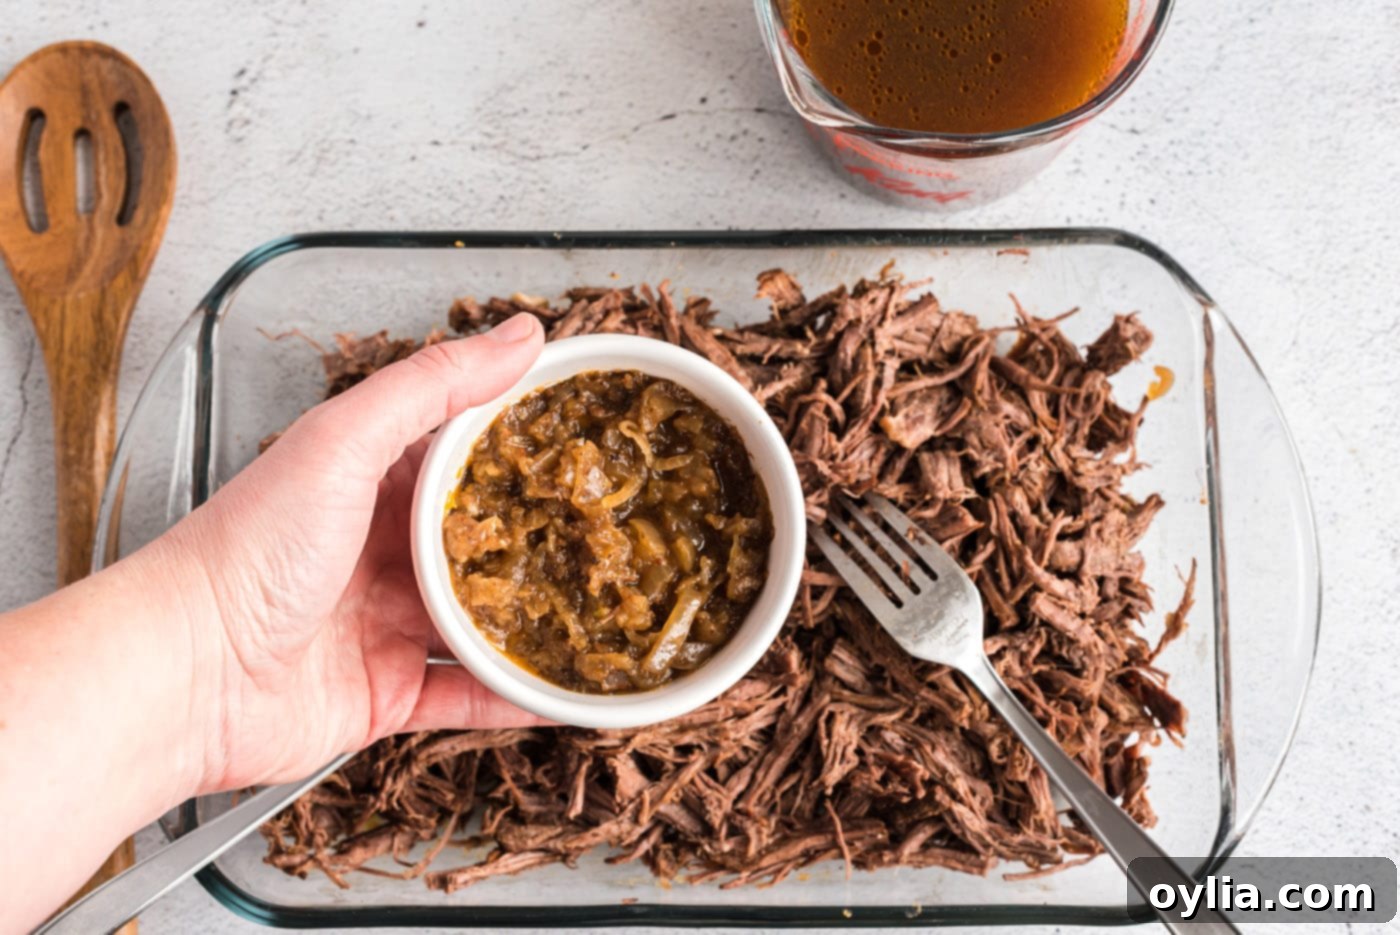
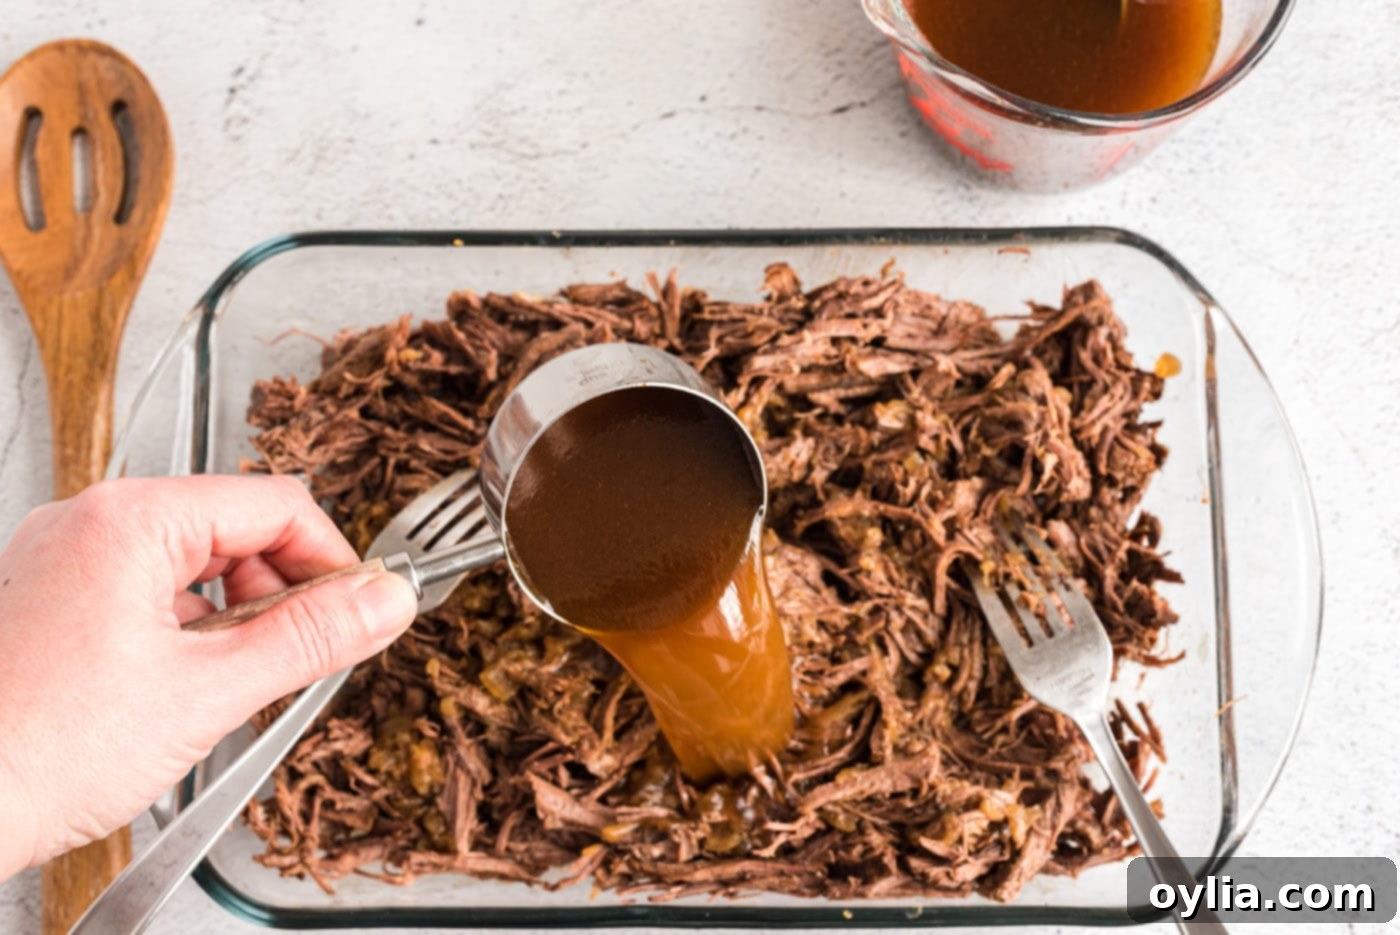
- Stir the reserved cooked onions into the shredded beef. Then, add about 1/2 to 1 cup of the reserved pan juices to moisten the meat mixture. This step is crucial for ensuring the filling remains juicy and flavorful. Discard any remaining pan juices.


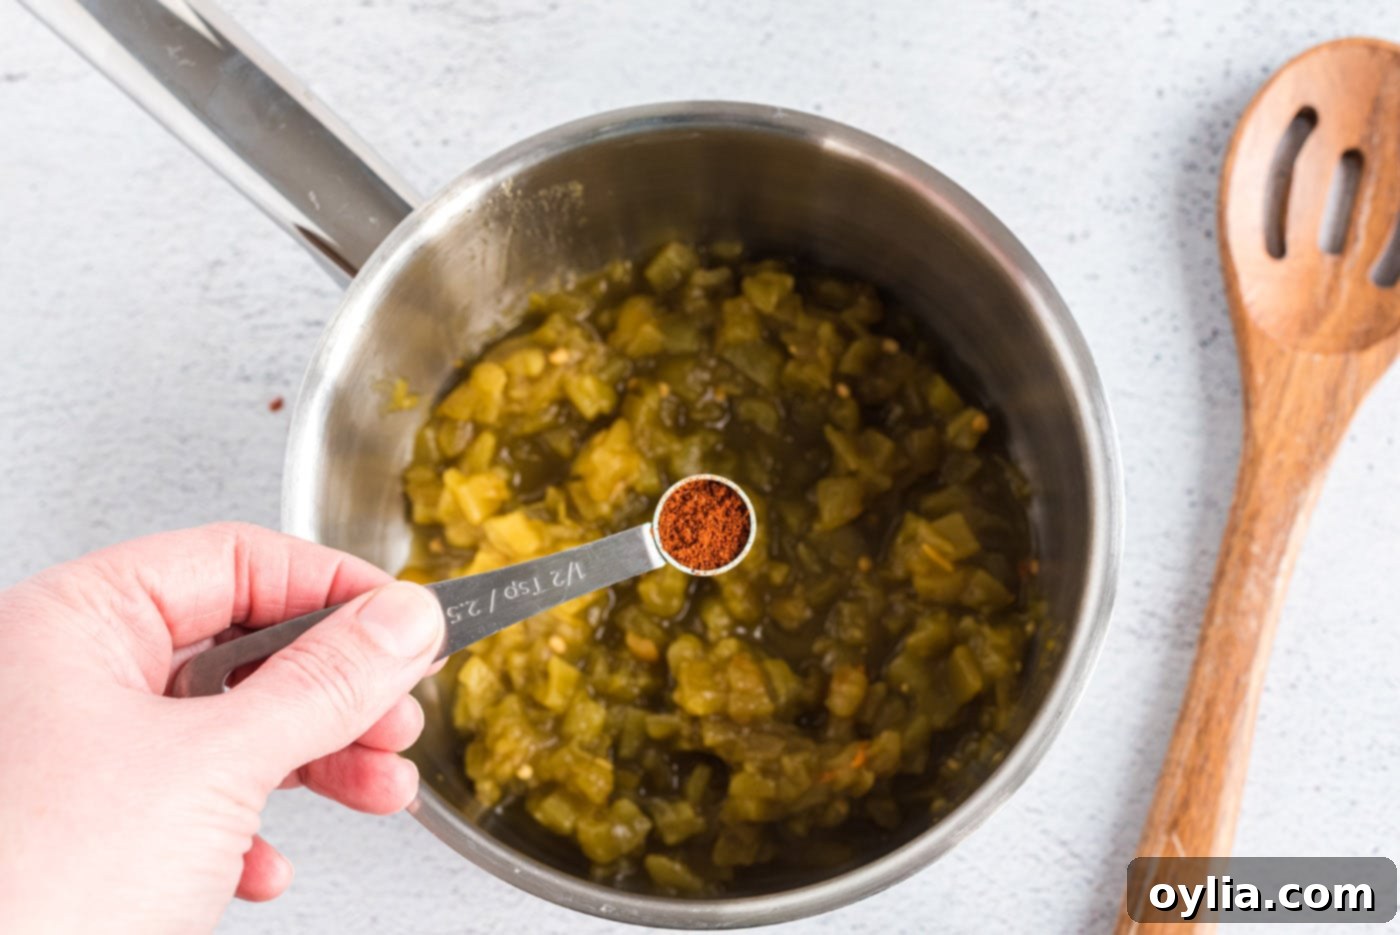
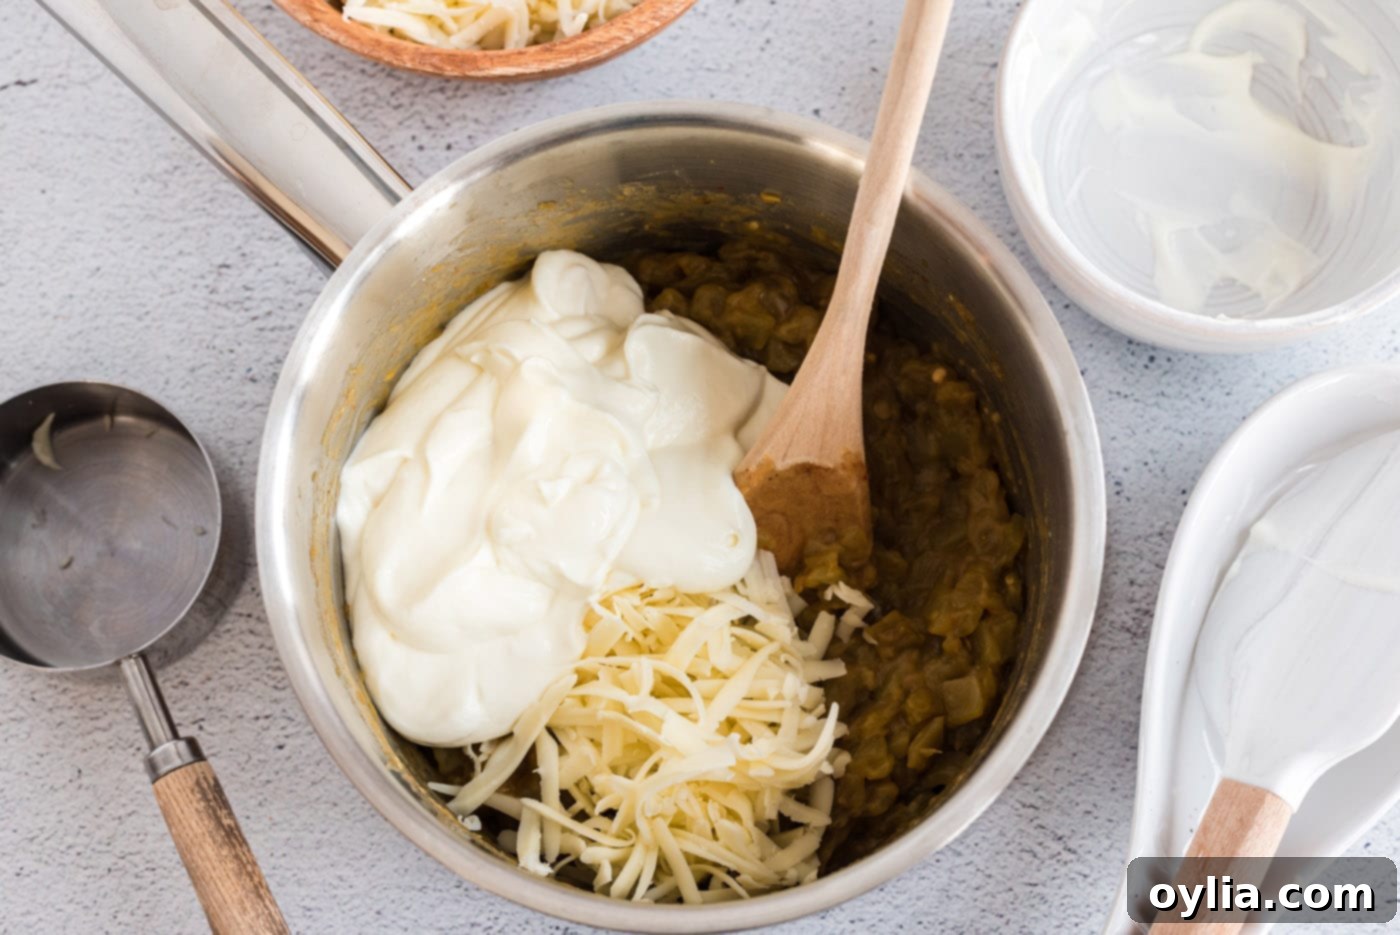
- In a medium saucepan, combine the undrained diced green chile peppers with the remaining 1/2 teaspoon of chili powder. Cook this mixture over medium heat for about one minute, or until it’s fragrant and heated through. Stir in the all-purpose flour, cooking and stirring for another minute. This creates a quick roux, which will thicken our creamy sauce.


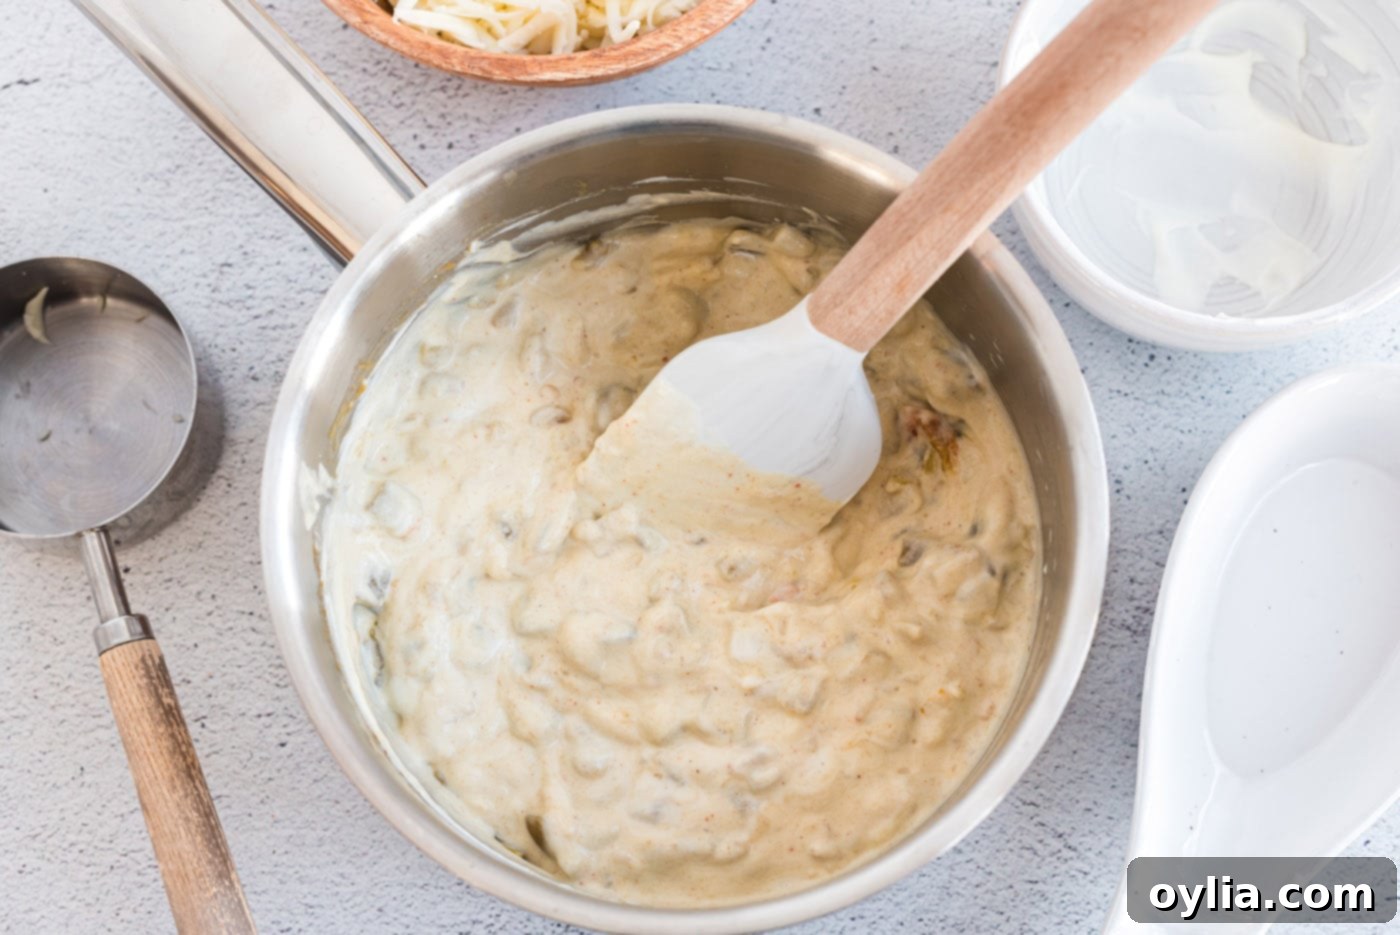
- Remove the saucepan from the heat. Stir in the sour cream until smooth and then fold in 1/2 cup of the shredded Monterey Jack cheese. The residual heat will gently melt the cheese, creating a wonderfully creamy and cheesy green chile sauce that will form the core of your enchilada’s flavor.


- Increase the oven temperature to 350°F (175°C). Lightly grease or spray a 13×9 inch baking dish and set it aside, ready for the assembled enchiladas.
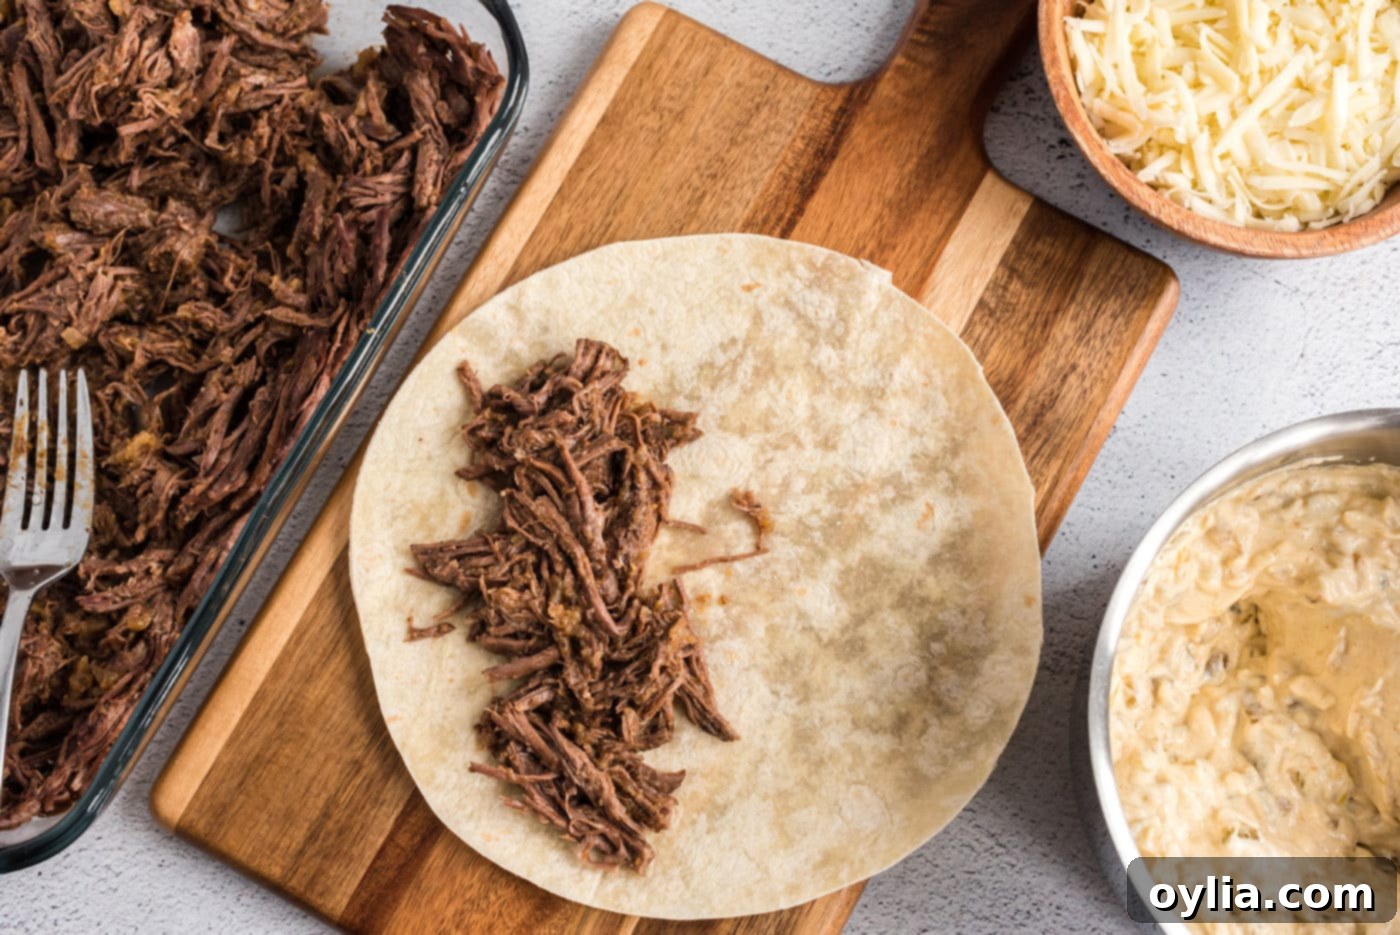
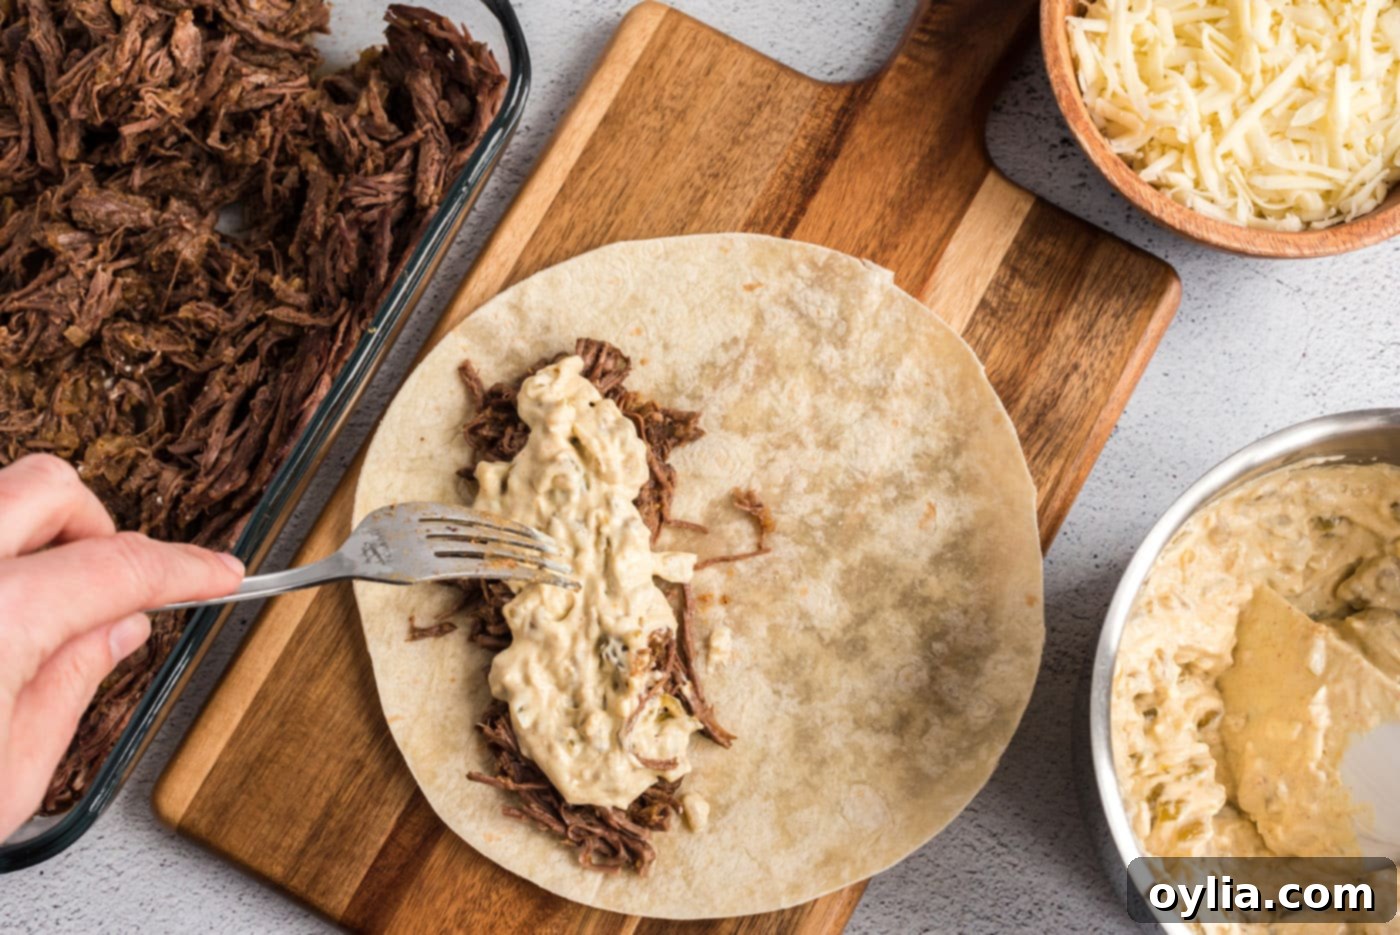
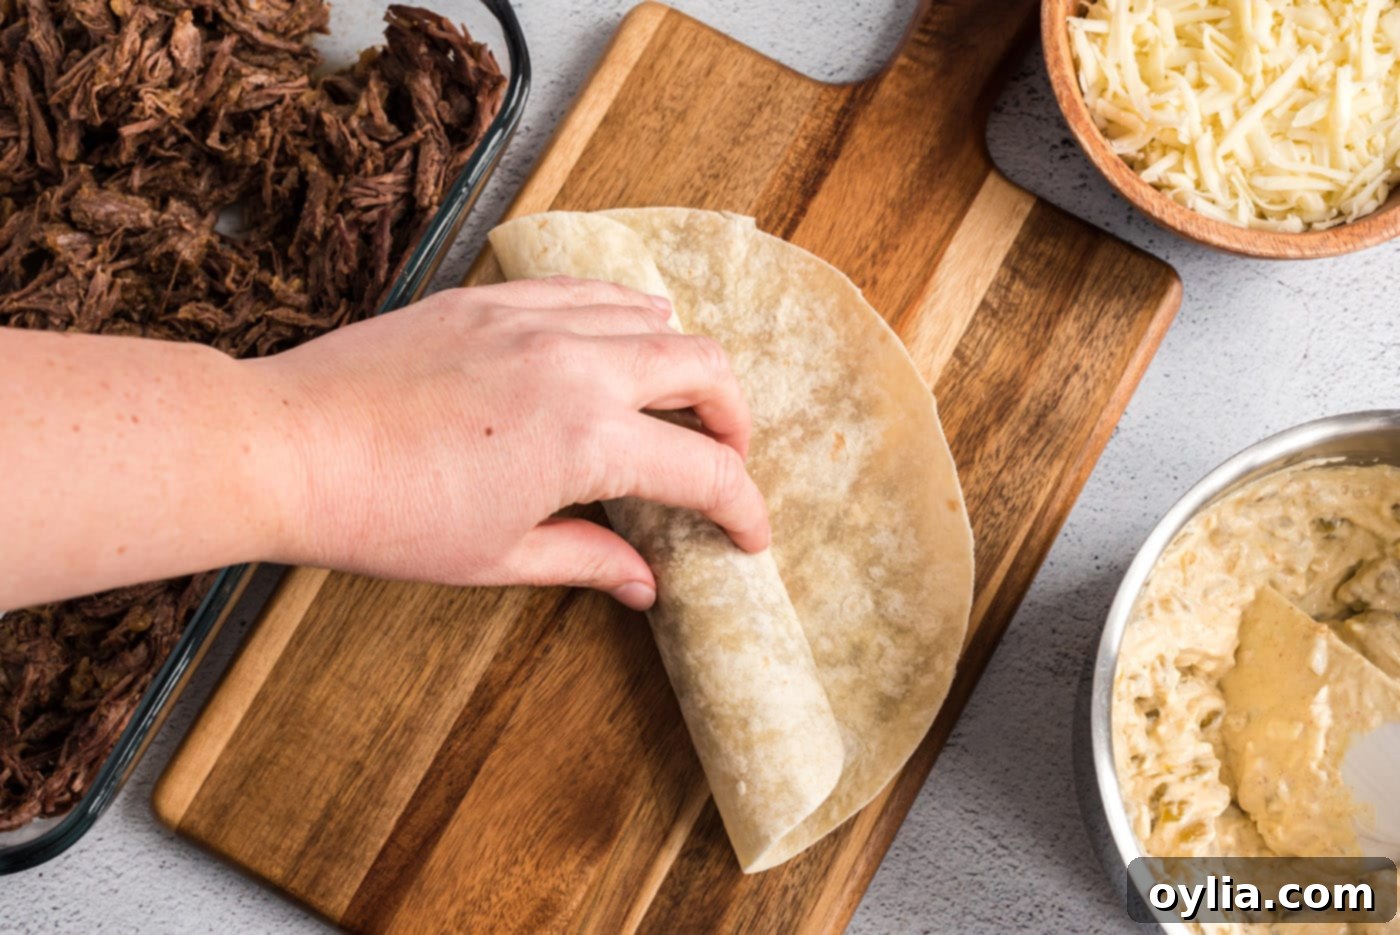
- Divide the savory shredded beef mixture evenly among the flour tortillas. Place the meat mixture along one edge of each tortilla. Top the beef with a generous dollop of the creamy green chile sour cream mixture, then carefully roll up the tortillas. Don’t be shy with the filling; they should be well-stuffed!


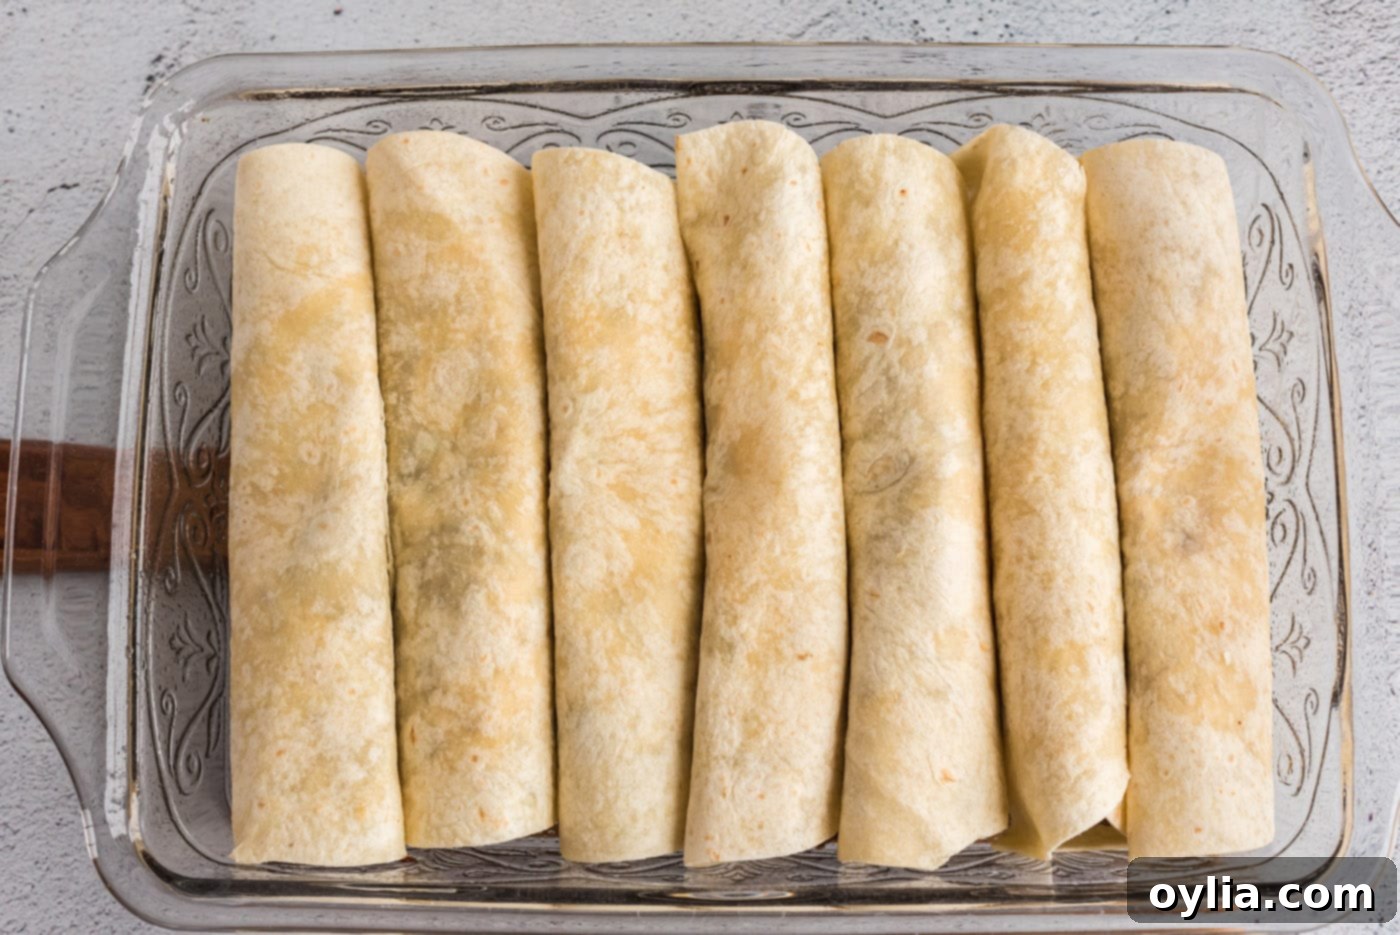
- Arrange the rolled enchiladas in the prepared baking dish, placing them seam side down to prevent unrolling during baking. Cover the dish tightly with foil and bake for 30 minutes. This initial covered baking ensures the enchiladas heat through evenly and the tortillas soften perfectly.

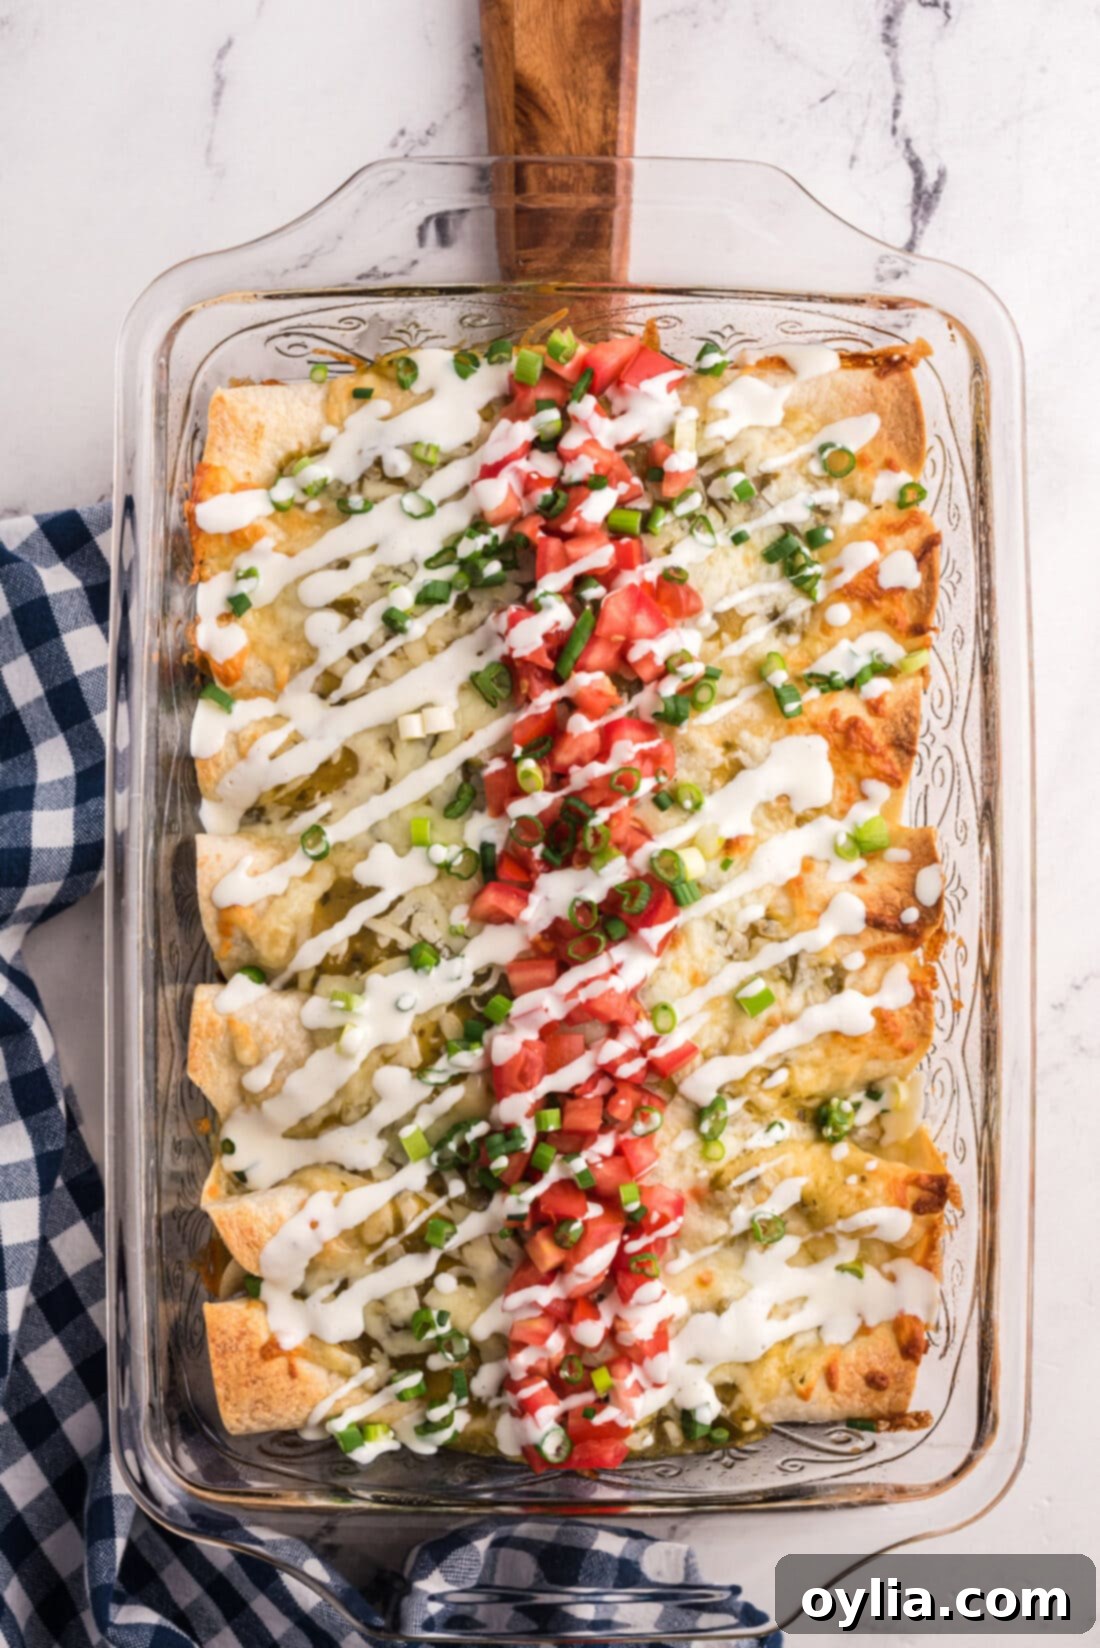
- After 30 minutes, uncover the baking dish. Spoon additional salsa verde (or enchilada sauce if using red) generously over the enchiladas, then sprinkle with the remaining 1 1/2 cups of shredded cheese. Return the dish to the oven, uncovered, and bake for another 10 minutes, or until the cheese is beautifully melted and bubbly, and the enchiladas are heated through. Serve immediately and enjoy every cheesy, meaty bite!
Frequently Asked Questions & Expert Tips
Absolutely! Beef enchiladas are excellent for meal prepping and freezing. For best results, I recommend freezing them *before* adding the final layer of salsa verde or any sauce on top, especially if you plan to freeze them uncooked. This prevents the tortillas from becoming soggy upon thawing. Place the prepared enchiladas, either cooked or uncooked, seam side down, in an airtight container or a large freezer-safe zip-top bag. They can be frozen for up to 3 months. To reheat, allow the enchiladas to thaw in the refrigerator overnight, then bake according to the directions, adding a few extra minutes to the baking time if needed to ensure they are heated through.
Store any leftover shredded beef enchiladas in an airtight container in the refrigerator for 3-4 days. They reheat beautifully in the microwave for a quick meal or in the oven at 350°F (175°C) until warmed through, which helps maintain a crispier tortilla texture.
Yes, absolutely! For the shredded beef, you can adapt the roasting step to a slow cooker or Instant Pot. For a slow cooker, simply add the seasoned chuck roast, sliced onions, beef broth, and white wine vinegar. Cook on low for 6-8 hours or on high for 3-4 hours until fork-tender. For an Instant Pot, cook on high pressure for 60-75 minutes with a natural release, then proceed with shredding and moistening with the pan juices as directed in the recipe.
Flour tortillas are generally more flexible than corn tortillas, which is why we recommend them for this recipe. To ensure maximum pliability, briefly warm the tortillas before filling and rolling. You can do this by wrapping a stack of tortillas in a damp paper towel and microwaving for 30-60 seconds, or by quickly heating them on a dry skillet for 10-15 seconds per side until warm and soft.
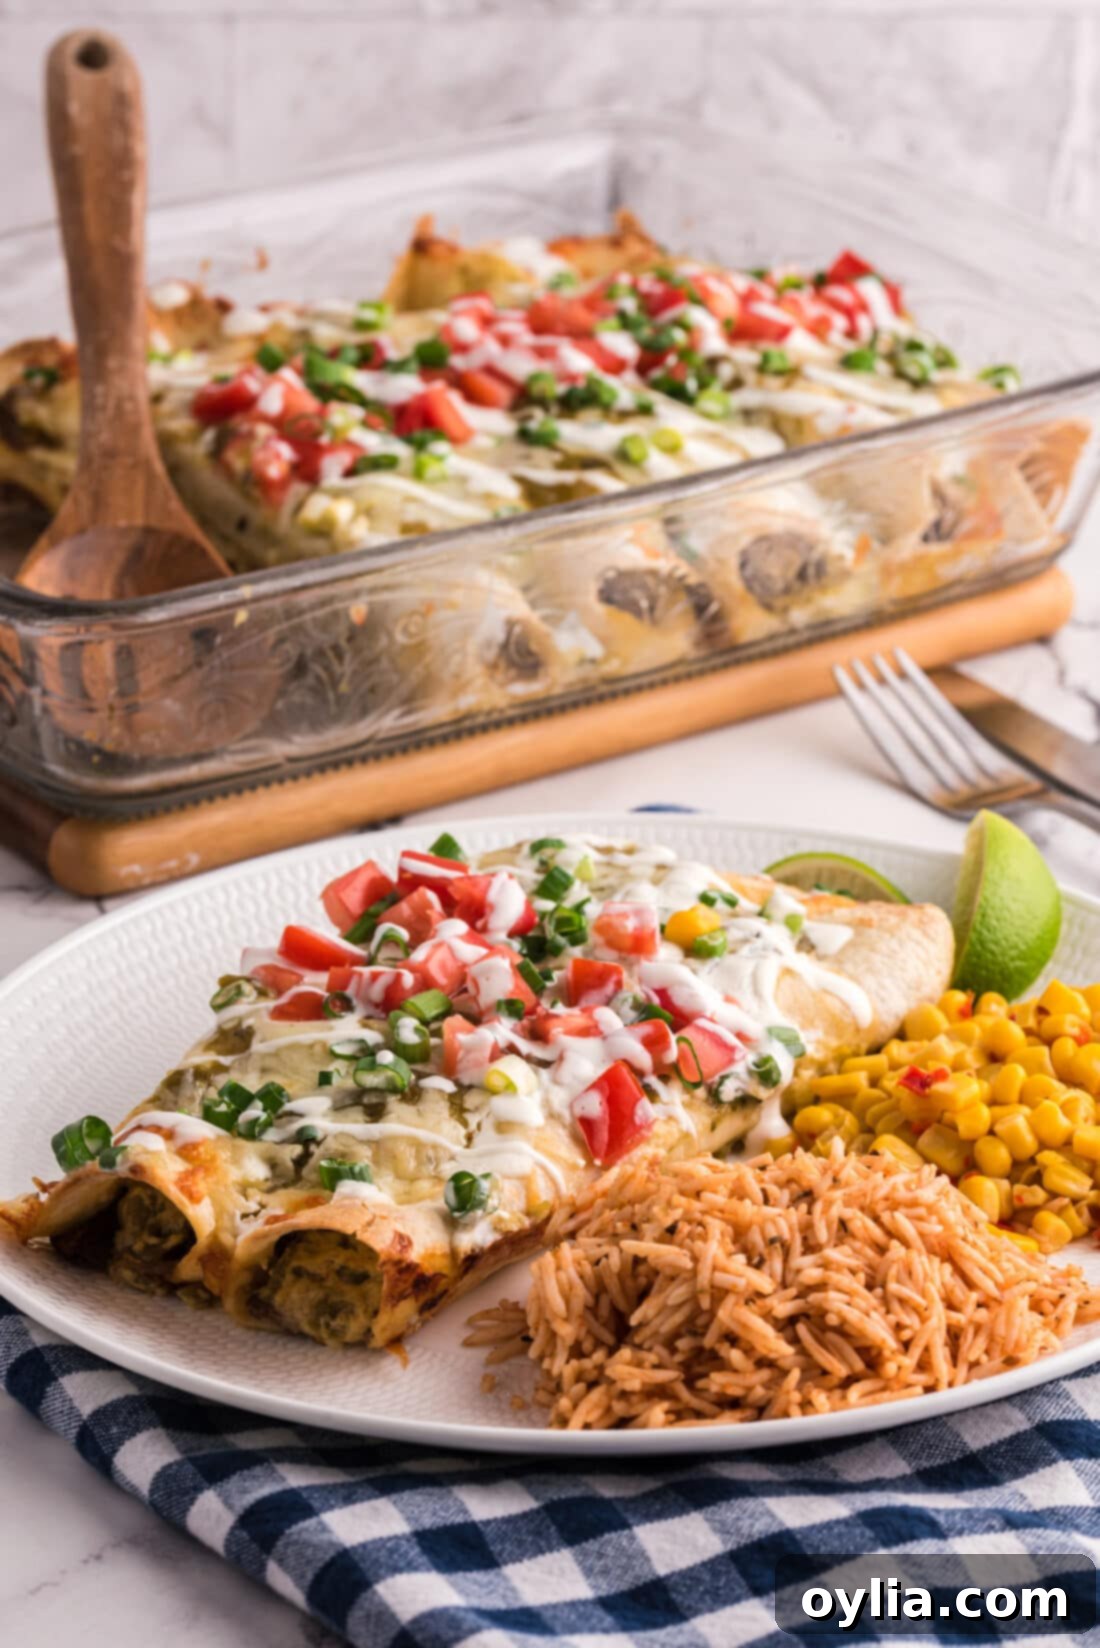
Delicious Serving Suggestions for Your Enchiladas
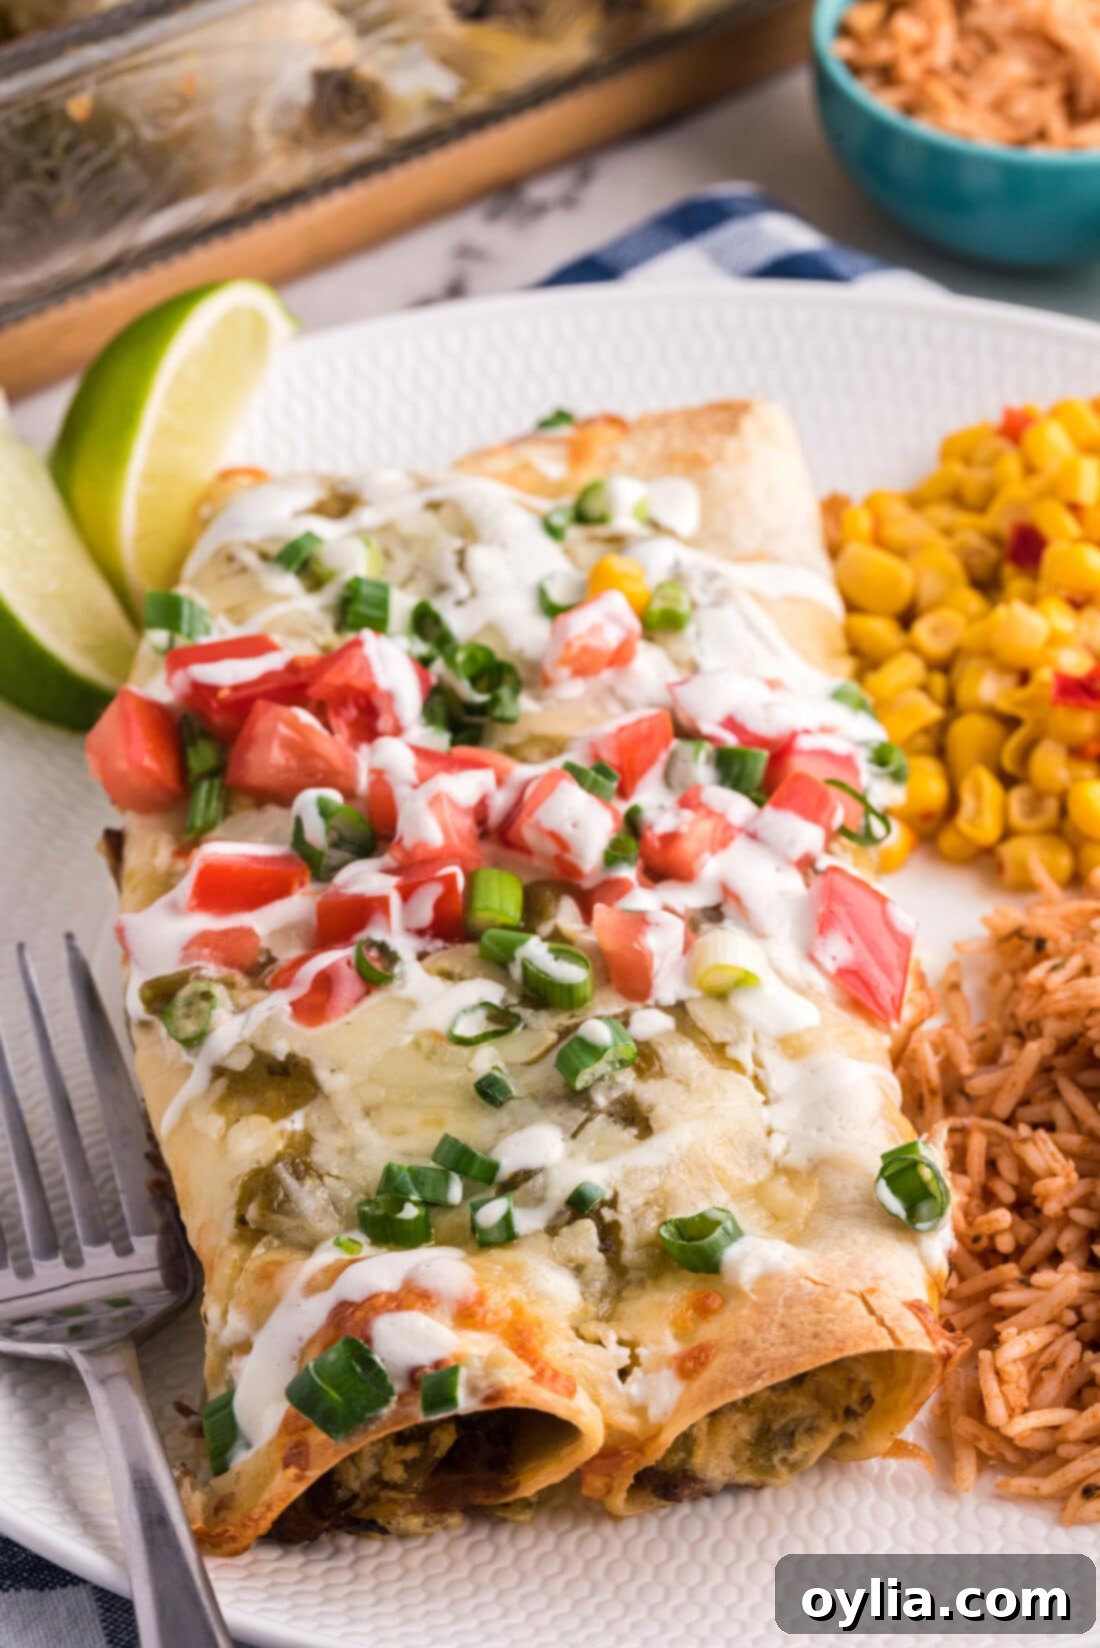
These rich and flavorful shredded beef enchiladas are a complete meal on their own, but pairing them with a few complementary sides can elevate your dining experience. They are absolutely delightful served with classic Spanish rice, a simple side of refried or black beans, or some roasted corn with a hint of lime. For an extra touch of freshness and visual appeal, we love to garnish our enchiladas with a drizzle of thinned sour cream (just mix a little water into sour cream for a pourable consistency), fresh chopped tomatoes, and vibrant sliced green onions. A sprinkle of fresh cilantro and a wedge of lime on the side for a squeeze of brightness would also be perfect.
Explore More Mexican-Inspired Recipes
If you loved these shredded beef enchiladas, you’re in for a treat! The world of Mexican cuisine is vast and full of exciting flavors. Here are more delicious Mexican-inspired recipes from our kitchen that you’re sure to enjoy, perfect for expanding your culinary adventures:
- Cheesy Quesadillas
- Quesados (Mexican Appetizer)
- Authentic Carne Asada
- Classic Mexican Corn (Elote)
- Sopa de Fideos (Mexican Noodle Soup)
- Easy Crockpot Mexican Chicken
- Hearty Chicken Enchilada Casserole
- Tender Beef Barbacoa
I love to bake and cook and share my kitchen experience with all of you! Remembering to come back each day can be tough, that’s why I offer a convenient newsletter every time a new recipe posts. Simply subscribe and start receiving your free daily recipes!

Beef Enchiladas
IMPORTANT – There are often Frequently Asked Questions within the blog post that you may find helpful. Simply scroll back up to read them!
Print It
Pin It
Rate It
Save It
Saved!
Ingredients
- 3 lb beef brisket I used chuck roast
- 4 ½ tsp chili powder divided
- 1 Tbsp ground cumin
- 1 tsp dried oregano crushed
- 2 medium onions thinly sliced
- 14 oz beef broth 1 can or homemade beef stock
- ¼ cup white wine vinegar
- 8 oz diced green chile peppers undrained, two 4 oz cans
- 1 Tbsp all purpose flour
- 8 oz sour cream
- 2 cups shredded Monterey Jack cheese
- 12 flour tortillas 7-8 inches each
- 1 cup salsa verde or enchilada sauce
Things You’ll Need
-
13×9 baking dish
-
roasting pan or dutch oven
-
Measuring cups and spoons
-
Saucepan
Before You Begin
- This recipe will make 7-8 enchiladas. Easily double the recipe to feed more or to freeze for later.
- To freeze – place the prepared enchiladas, cooked or uncooked, in an air-tight container or large ziptop bag, seam side down. Freeze for up 3 months. Allow enchiladas to thaw in the refrigerator overnight then bake according to directions, adding a few extra minutes if needed.
- Store leftovers in an air-tight container kept in the refrigerator for 3-4 days.
Instructions
-
Preheat oven to 325 F. Trim fat from meat. In a small bowl, combine 4 teaspoons of the chili powder, the cumin, and oregano.
-
Sprinkle spice mixture evenly over all sides of beef, rubbing it in with your fingers.
-
Place beef in a shallow roasting pan or dutch oven and top with sliced onions. Pour broth and vinegar over the meat. Roast in oven, covered, for about 3 hours or until meat is fork tender.
-
Let meat stand in pan juices for about 15 minutes or until it is cool enough to handle.
-
Remove the meat from the pan. Using a slotted spoon, remove the onions and reserve the pan juices. If you trimmed the meat well you shouldn’t have too much fat on the surface, but if you do, skim off with a spoon or use a fat separator.
-
Halve the meat crosswise then shred it using two forks.
-
Stir onions into the shredded meat then add in enough of the reserved pan juices to moisten (1/2 to 1 cup). Set meat mixture aside and discard remaining pan juices.
-
In a medium saucepan, combine undrained chile peppers and the remaining 1/2 teaspoon chili powder; cook about one minute or until heated through. Stir in flour. Cook and stir for one minute more.
-
Remove from heat. Stir in sour cream and 1/2 cup of the cheese.
-
Increase oven temperature to 350 F. Grease or spray a 13×9 baking dish and set aside.
-
Divide the shredded meat mixture among tortillas, placing the meat mixture along one edge. Top with sour cream mixture and roll up tortillas (they will be full).
-
Arrange in baking dish, seam side down. Bake, covered, for 30 minutes.
-
Uncover and spoon salsa verde over the enchiladas, and sprinkle with the remaining 1 1/2 cups of cheese. Bake uncovered for 10 minutes more, or until cheese is melted and enchiladas are heated through. Enjoy!
Nutrition
The recipes on this blog are tested with a conventional gas oven and gas stovetop. It’s important to note that some ovens, especially as they age, can cook and bake inconsistently. Using an inexpensive oven thermometer can assure you that your oven is truly heating to the proper temperature. If you use a toaster oven or countertop oven, please keep in mind that they may not distribute heat the same as a conventional full sized oven and you may need to adjust your cooking/baking times. In the case of recipes made with a pressure cooker, air fryer, slow cooker, or other appliance, a link to the appliances we use is listed within each respective recipe. For baking recipes where measurements are given by weight, please note that results may not be the same if cups are used instead, and we can’t guarantee success with that method.
Adapted from Ultimate Mexican magazine. This recipe was originally published on this blog on Aug 30, 2010 and has since been updated with new photos and expert tips.
