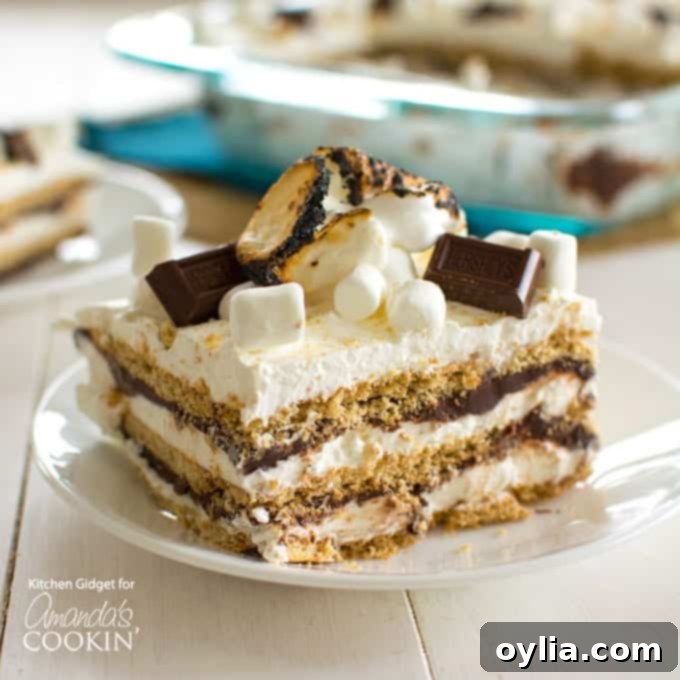
Easy No-Bake S’mores Icebox Cake: Your Ultimate Crowd-Pleasing Dessert
Craving the classic campfire flavors of s’mores but without the hassle of a bonfire? Look no further! This spectacular S’mores Icebox Cake brings all the gooey, chocolatey, graham-cracker goodness indoors, making it the perfect no-bake dessert for any occasion. Designed to feed a crowd, this irresistible treat features delightful layers of crisp graham crackers, airy marshmallow whipped cream, and a decadent chocolate ganache. We guarantee that after one bite, everyone will be clamoring for “s’more”!
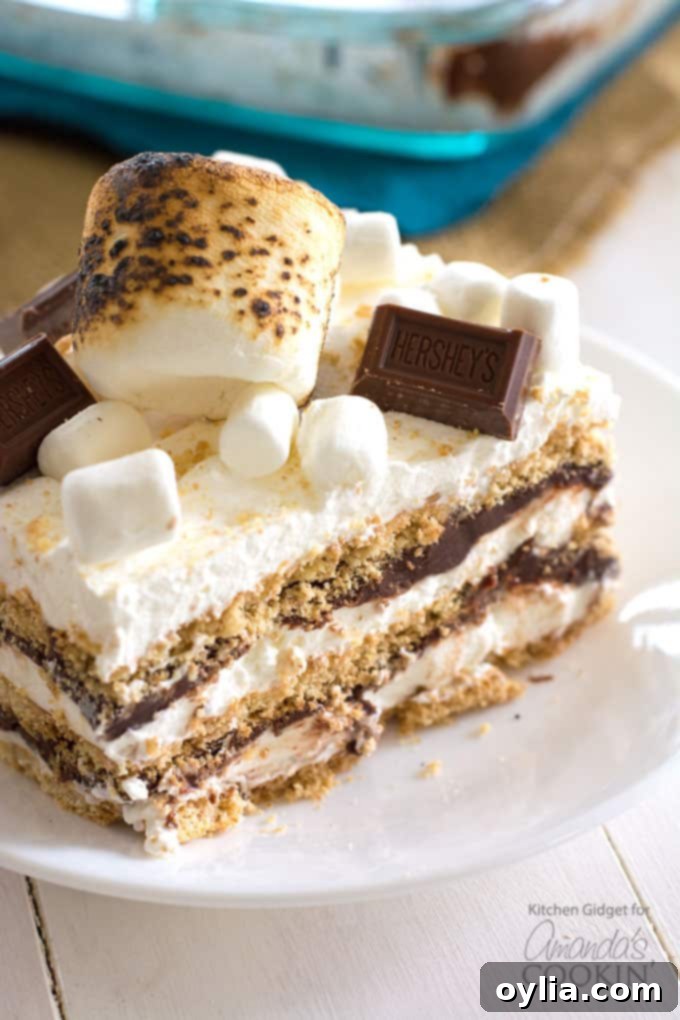
Just like our popular S’mores Cupcakes, this s’mores icebox cake is a true showstopper. It’s an incredibly easy, one-pan, no-bake dessert that promises to be a hit with everyone, from kids to adults. Whether you’re hosting a summer barbecue, a holiday gathering, or simply want to satisfy a sweet craving, this recipe is your secret weapon for a stress-free yet utterly delicious treat.
The Irresistible Allure of S’mores Icebox Cake
We all have those certain foods we’re utterly obsessed with – those delightful, slightly guilty pleasures that make us giddy with anticipation. For many, that obsession centers around the magical combination of s’mores. There’s something undeniably captivating about the perfectly toasted marshmallow, the rich, melting chocolate, and the crisp, honey-kissed graham cracker. This classic trio evokes memories of campfires, starry nights, and shared laughter.
However, making s’mores exclusively around a campfire isn’t always feasible, nor is it enough to satisfy a deep-seated s’mores craving. That’s precisely why this no-bake s’mores icebox cake was created. It’s designed to deliver all those beloved flavors in a convenient, make-ahead format that can be enjoyed anytime, anywhere. Imagine indulging in that familiar taste of summer, even in the middle of winter!
Why an Icebox Cake is a Dessert Game-Changer
Icebox cakes are truly marvelous inventions, and their charm lies in their simplicity and versatility. The concept is beautifully straightforward: layers of cookies, crackers, or cake are alternated with layers of cream, pudding, or custard, then left to set and meld in the refrigerator – or the “icebox,” as this fantastic invention was called by our ancestors. This method allows the dry components to soften and absorb the moisture from the creamy layers, transforming into a tender, cake-like texture without ever touching an oven.
These desserts are especially perfect for various occasions. They shine during the hot summer months when the last thing you want to do is turn on your oven, heating up your kitchen. They are also an ideal make-ahead dessert, allowing you to prepare them a day or two in advance, freeing up your time on the day of your event. But don’t relegate them to just summer! An icebox cake can be a delightful pick-me-up on a cold, snowy day when you’re dreaming of warmer weather. Pair it with a hearty meal, like a comforting Spaghetti Salad and a pot of BLT Lentil Soup, and you can almost pretend it’s 60 degrees warmer outside!
Crafting Your Dream S’mores Icebox Cake: A Layer-by-Layer Guide
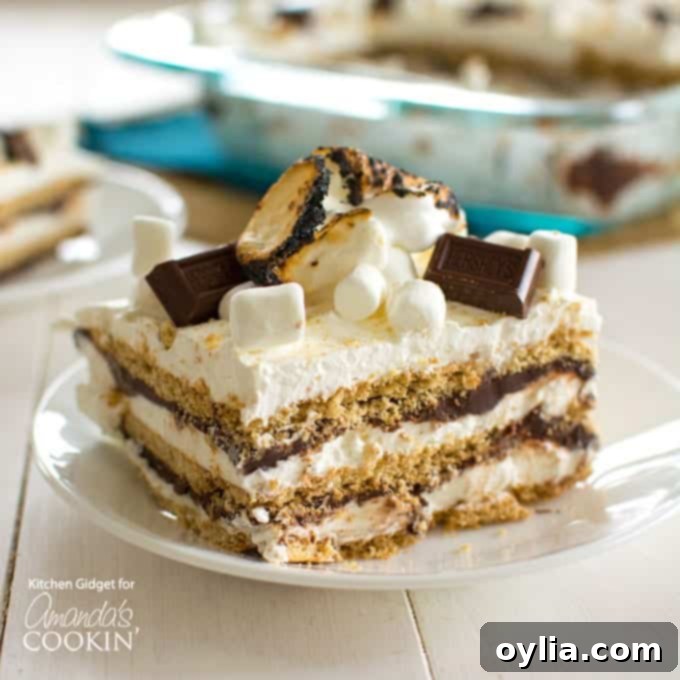
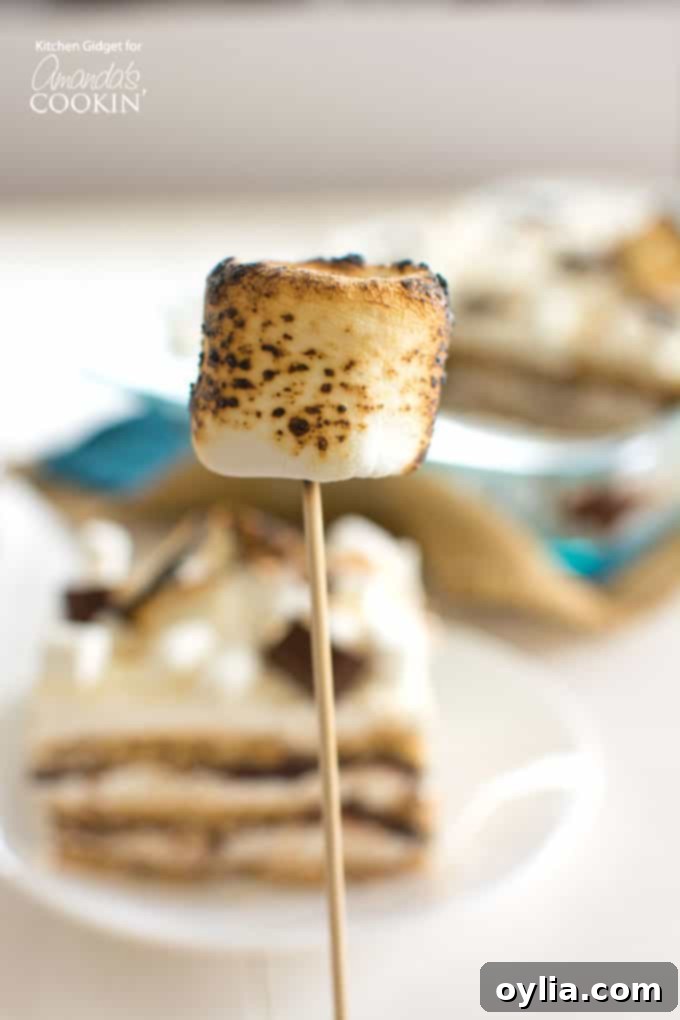
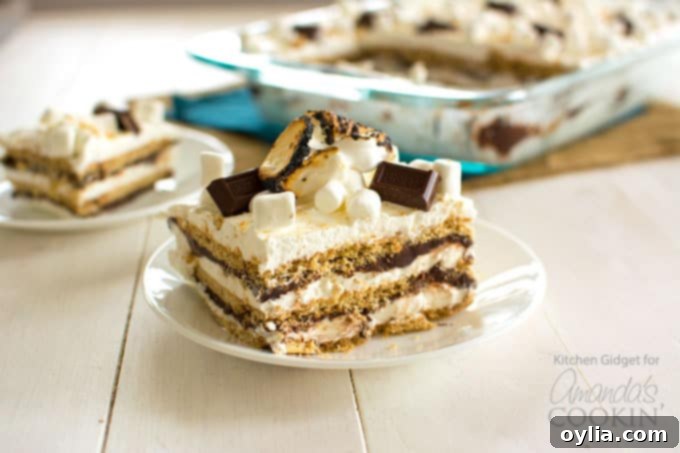
Our version of this ultimate s’mores icebox cake is a symphony of textures and flavors. It features soft, yet still-structured graham crackers, a fluffy marshmallow-infused whipped cream, and a rich, smooth milk chocolate ganache. To ensure that essential “toasty” s’mores flavor, we highly recommend broiling a few marshmallows for garnish right before serving. This step adds a delightful visual and textural contrast, enhancing the authentic s’mores experience. Trust us, you might have a little too much fun toasting them – but that’s exactly the point of s’mores, isn’t it?
To begin, you’ll spread a thin layer of the luscious marshmallow whipped cream on the bottom of your chosen pan. This initial layer serves a crucial purpose: it anchors the first layer of graham crackers, preventing them from shifting as you build your dessert masterpiece. For the whipped cream, you have options! You can opt for the convenience of store-bought whipped topping, or, for a truly superior flavor and texture, whip up a batch of fresh homemade whipped cream and fold in marshmallow fluff. While both work wonderfully, we find the taste of fresh whipped cream combined with the fluff truly elevates this dessert.
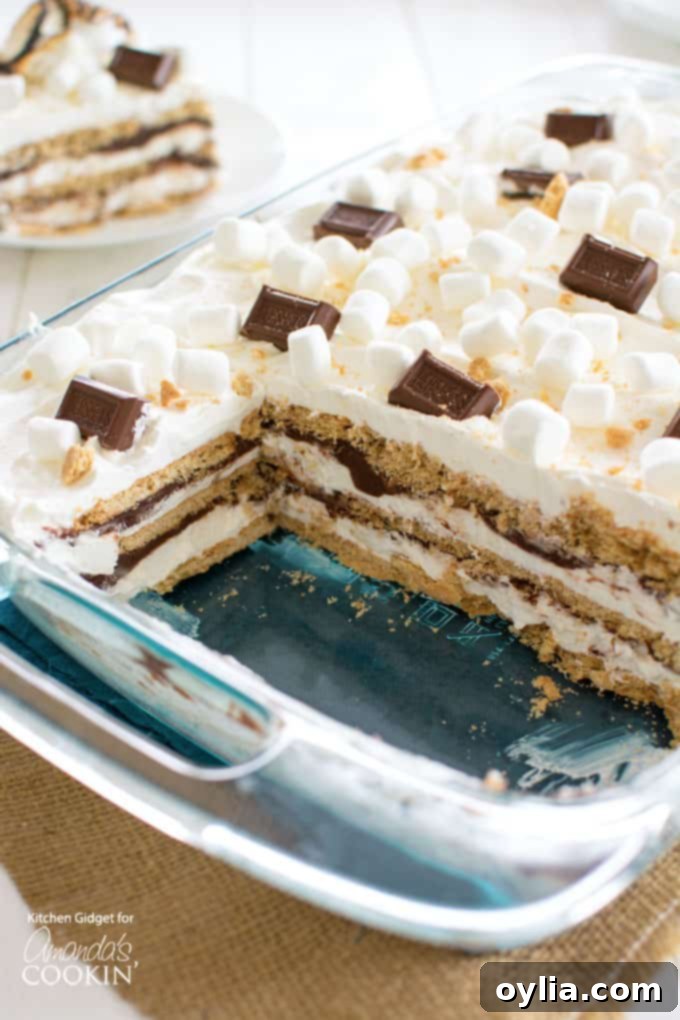
Next, carefully place a layer of graham crackers directly on top of the marshmallow cream. These humble crackers are the structural backbone of your cake, and their magic truly happens during the chilling process. As they sit, they will gradually soak up the moisture from the creamy layers, softening beautifully to achieve a delightful, cake-like texture that still retains a hint of its original crunch. Don’t worry about perfect placement; you can easily cut crackers to fill any gaps, just like building a delicious edible puzzle.
Finally, a generous sheet of fudgy, rich chocolate ganache completes each layer. This isn’t just any chocolate sauce; ganache is a luxurious mixture of chocolate and cream, the very same base used to create exquisite truffles and glossy pastry glazes. It’s incredibly simple to make, yet tastes unbelievably indulgent. Be warned: it’s so delicious, you might find it hard not to eat it straight from the bowl!
You’ll repeat these layers until your pan is full, creating a visually stunning and incredibly flavorful dessert. Once all layers are assembled, cover the pan tightly and chill your s’mores icebox cake in the refrigerator for at least 4 hours, or ideally, overnight. This crucial chilling period allows all the flavors to meld and the graham crackers to soften perfectly. Before serving, unleash your inner s’mores artist! Garnish with a sprinkle of crushed graham crackers, a handful of chocolate chunks, and, of course, a few perfectly toasted marshmallows. To achieve that signature char, you can use a kitchen torch, your oven broiler, or even a stovetop burner if you have a gas range. The slightly burnt, caramelized marshmallow is what truly sets s’mores apart!
Essential Ingredients for the Perfect S’mores Icebox Cake:
Gathering your ingredients is the first step to s’mores heaven. Here’s what you’ll need for this decadent no-bake dessert:
- 3 packs of graham crackers (one full box): These form the foundational layers and soften beautifully to a cake-like texture.
- 16 oz whipped topping, thawed: For convenience and a light, fluffy texture. Alternatively, you can use homemade whipped cream for a richer flavor.
- 1 jar (7 oz) marshmallow fluff: The secret ingredient for that unmistakable marshmallow taste and smooth consistency in your cream layers.
- 2 cups mini marshmallows: These are folded into the whipped cream mixture, adding extra pockets of marshmallowy goodness and a slight chew.
- 2 1/2 cups chocolate chips: The base for your rich chocolate ganache. Milk chocolate chips are classic for s’mores, but semi-sweet or dark chocolate chips can also be used for a different flavor profile.
- 2 cups heavy cream: Essential for creating a luxurious, pourable chocolate ganache that sets beautifully.
- Extra marshmallows, graham crackers, and chocolate chunks, for garnish (optional but highly recommended): For that picture-perfect, authentic s’mores look and added texture.
Helpful Kitchen Tools for Easy Preparation:
While this recipe is quite straightforward, having a few key tools on hand will make the process even smoother:
- 13×9 inch pan: A glass pan is highly recommended! Not only is it practical for chilling, but it also allows your guests to admire all the beautiful, mouth-watering layers you’ve created.
- Offset spatula: While a butter knife can work, an offset (icing) spatula makes spreading the cream and ganache layers much easier and smoother, ensuring an even distribution.
- Mixing bowls: You’ll need at least two – one for the marshmallow whipped cream and one for preparing the ganache.
- Small saucepan: For gently warming the heavy cream to create your silky smooth chocolate ganache.
- Kitchen torch (optional): For achieving that perfect toasted marshmallow topping with ease and precision.
We truly hope you enjoy making and devouring this incredible S’mores Icebox Cake! Who wouldn’t? This ultra-enticing dessert is guaranteed to have s’mores lovers rejoicing with every bite. The simplicity of its preparation combined with its unforgettable taste makes it an instant classic in any recipe collection. If you find yourself captivated by all things s’mores, don’t stop here! Be sure to explore some of our other fantastic s’mores creations, including Frozen S’mores, a delightful S’mores Dip perfect for sharing, a sophisticated S’mores Martini for adult gatherings, these adorable S’mores Cupcakes, and even our irresistible Crumb-Coated S’more Cookies! There’s a s’mores treat for every mood and moment!
More No-Bake & One-Pan Dessert Inspirations:
If you love the ease and deliciousness of this S’mores Icebox Cake, you’ll be thrilled to discover more of our favorite simple, one-pan (or no-bake) dessert ideas. These recipes are perfect for busy days, warm weather, or whenever you need a crowd-pleasing treat without the fuss:
- Mint Chocolate Lasagna
- Funfetti Icebox Cake
- Pineapple Dream Dessert
- Lemon Cheesecake Pudding Dessert
- Lemon Blueberry Trifle
- Chocolate Lasagna
- Mixed Berry Icebox Cake
S’mores Icebox Cake
IMPORTANT – There are often Frequently Asked Questions within the blog post that you may find helpful. Simply scroll back up to read them!
Print It
Pin It
Rate It
Save ItSaved!
Ingredients
- 2 ½ cups chocolate chips
- 2 cups heavy whipping cream
- 16 oz whipped topping thawed
- 7 ounce marshmallow fluff
- 2 cups mini marshmallows
- 14.4 ounces graham crackers 1 box: 3 sleeves
- Extra marshmallows, graham crackers and chocolate chunks, for garnish
Instructions
Make the Ganache
-
Place the chocolate chips in a heatproof bowl.
-
In a small saucepan, gently warm the heavy cream over medium heat until it just begins to simmer around the edges. Do not let it boil.
-
Pour the hot cream directly over the chocolate chips. Let it sit undisturbed for 2-3 minutes to allow the chocolate to melt. Then, stir gently with a whisk or spatula until the mixture is completely melted, smooth, and glossy.
-
Place the ganache in the refrigerator for about 15-20 minutes to cool and thicken slightly while you prepare the remaining ingredients. It should still be pourable but not piping hot.
Assemble the Cake:
-
In a large mixing bowl, combine the thawed whipped topping, marshmallow fluff, and mini marshmallows. Stir gently until well combined and fluffy. This is your marshmallow whipped cream.
-
Spread a thin, even layer of the marshmallow whipped cream on the bottom of a 13×9 inch pan. This layer acts as an adhesive, securely anchoring the graham cracker layers.
-
Carefully arrange a single layer of graham crackers over the whipped cream. Break or cut crackers as needed to fill in any gaps and create a solid, even surface.
-
Top the graham cracker layer with approximately one-third of the remaining marshmallow mixture and spread it evenly to the edges of the pan.
-
Next, gently pour or spread half of the cooled chocolate ganache over the marshmallow cream layer. Use an offset spatula to spread it smoothly.
-
Repeat the layering process: add another layer of graham crackers, followed by another third of the marshmallow mixture, and then the remaining half of the chocolate ganache.
-
Finish with a final layer of graham crackers, topped with the last one-third of the marshmallow mixture, spread smoothly to create the top surface of your cake.
-
Cover the pan tightly with plastic wrap and refrigerate for at least 4 hours, but preferably overnight (12-24 hours). This chilling time is crucial for the crackers to soften and the flavors to fully develop.
-
Before serving, remove from the fridge. Garnish generously with graham cracker crumbs, extra chocolate chunks, and a few toasted marshmallows, if desired. For perfectly toasted marshmallows, use a kitchen torch, oven broiler (watch carefully!), or hold them over a gas stovetop flame. Slice and serve!
Nutrition
The recipes on this blog are tested with a conventional gas oven and gas stovetop. It’s important to note that some ovens, especially as they age, can cook and bake inconsistently. Using an inexpensive oven thermometer can assure you that your oven is truly heating to the proper temperature. If you use a toaster oven or countertop oven, please keep in mind that they may not distribute heat the same as a conventional full sized oven and you may need to adjust your cooking/baking times. In the case of recipes made with a pressure cooker, air fryer, slow cooker, or other appliance, a link to the appliances we use is listed within each respective recipe. For baking recipes where measurements are given by weight, please note that results may not be the same if cups are used instead, and we can’t guarantee success with that method.
