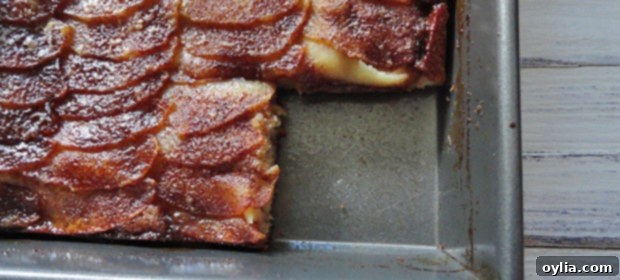
Indulge in Nostalgia: Gilda Radner’s Dutch Apple Snack Cake – A Simple & Flavorful Twist
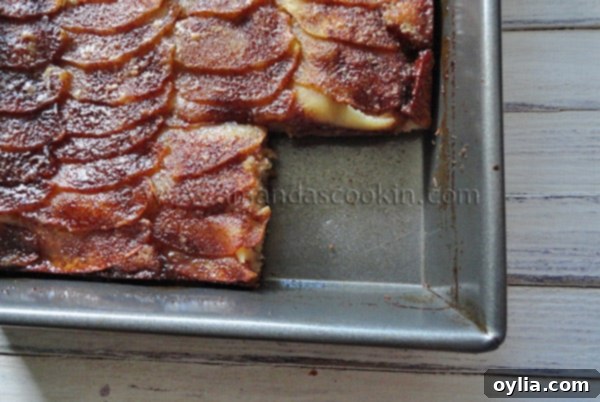
Sometimes, the best recipes are born from a desire for simplicity and a look at what’s already on the counter. Today was one of those days. With a bounty of crisp apples and a few ripe bananas eyeing me from the kitchen, I craved a comforting bake that wouldn’t demand hours of complicated steps. My recent acquisition, “The Dead Celebrity Cookbook,” came to the rescue, opening its pages to a Dutch Apple Cake recipe attributed to the legendary Gilda Radner. What started as a simple idea quickly evolved into a delightful journey, blending classic flavors with a touch of personal adaptation and a hefty dose of nostalgia.
Finding Gilda Radner’s recipe was more than just stumbling upon a dessert; it was a trip down memory lane. I have incredibly fond memories of watching Gilda on *Saturday Night Live* (SNL), back when she was one of the iconic “Not Ready For Prime Time Players.” Her unique blend of humor, wit, and unforgettable characters brought laughter into homes every week. It’s truly heartwarming to find a tangible connection to such a beloved figure through something as comforting as a home-baked cake.

Photo credit – Washington Post
Gilda Radner was a comedic genius whose presence lit up the stage and screen. Her characters, like the hard-of-hearing Emily Litella with her famous “Never mind!” retorts, or the boisterous consumer reporter Roseanne Roseannadanna, were masterpieces of observational comedy. Along with her fellow cast members like Chevy Chase, John Belushi, Dan Aykroyd, Jane Curtin, and Laraine Newman, she helped forge the groundbreaking humor that defined SNL for generations. It’s hard to overstate the impact of those early SNL years, launching countless stars and shaping the landscape of American comedy. Her untimely death in 1989 from ovarian cancer was a profound loss, but her work continues to inspire and entertain, and her spirit, it seems, lives on even in the kitchen.
When I saw Gilda’s Dutch Apple Cake recipe, a spark ignited. It felt like a small way to connect with her enduring charm and wit. Of course, my mind immediately went to Emily Litella’s classic catchphrase, “Never mind!” – because while I admired Gilda’s original, I couldn’t resist putting my own spin on it to make it truly perfect for my pantry and palate. This cake wasn’t just about baking; it was about honoring a memory while creating something new and delicious.
A Modern Twist on a Classic Recipe
Gilda’s original recipe called for two sticks of butter. While butter is undeniably delicious, I was eager to make good use of the ripe bananas I had on hand. Bananas are a fantastic natural sweetener and a great source of moisture in baking, making them an ideal substitute for some of the fat. So, for one of the butter sticks, I swapped in two ripe, mashed bananas. This not only added a wonderful subtle banana flavor but also created an incredibly tender crumb. I also noticed her recipe requested milk, which I was completely out of! Our household goes through milk so fast, sometimes I wonder if we need our own cow. Fortunately, I had buttermilk, a fantastic ingredient for cakes as its acidity reacts with baking powder to create a lighter, more tender texture. I used buttermilk and also slightly reduced the remaining butter by one tablespoon to account for the richness of the buttermilk. These small adjustments already started to elevate the cake’s profile.
However, the most significant change, and one I couldn’t compromise on, was the lack of spices in Gilda’s original cake batter. As a lover of all things warm and comforting, an apple cake without spices simply wouldn’t do! And with all due respect to Gilda, a fan or not, I believe a Dutch apple cake truly shines with a medley of aromatic spices. So, I enthusiastically added ground cinnamon, nutmeg, and a touch of allspice to the batter. These additions are crucial; they transform a good cake into a truly exceptional one, infusing it with that quintessential warmth and fragrance that perfectly complements the apples and bananas.
Crafting the Perfect Apple Cake: Step by Step
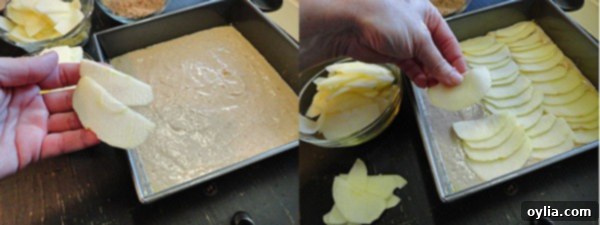 After expertly mixing the batter, ensuring all ingredients are well combined and the banana-butter mixture is homogenized, it’s time to prepare it for baking. The batter is poured into a well-greased 9-inch square pan, forming a lovely base for the star of the show: the apples. For beautifully even and thin apple slices, I highly recommend using a mandoline. This simple tool makes quick work of slicing, ensuring each apple piece is uniformly thin, which allows them to soften perfectly during baking and create an elegant presentation on top of the cake. These delicate slices are then carefully arranged on top of the batter, overlapping slightly to create a beautiful, continuous layer.
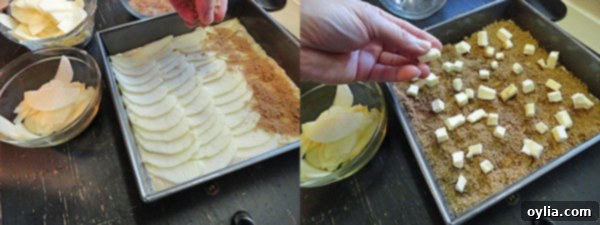 The next step is where the magic truly happens, creating that irresistible top layer. Once the apples are nestled into place, a generous sprinkle of cinnamon brown sugar mixture covers them. This sweet and spiced topping is not just for flavor; it caramelizes beautifully in the oven, forming those deliciously chewy, slightly crisp edges that are a hallmark of a great Dutch apple cake. To further enhance this, small pieces of cold butter are dotted over the cinnamon-sugar. As the cake bakes, these butter pieces melt, infusing the apples and topping with richness and contributing to a tender, golden-brown crust. The aroma that fills your kitchen during this stage is absolutely heavenly – a sure sign of the deliciousness to come!
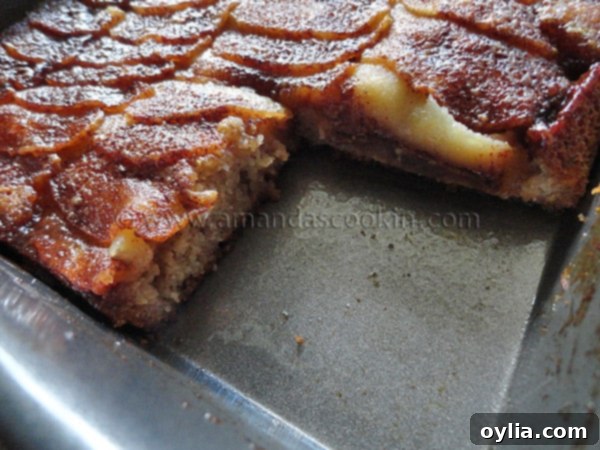
The Irresistible Result: A Perfect Snack Cake
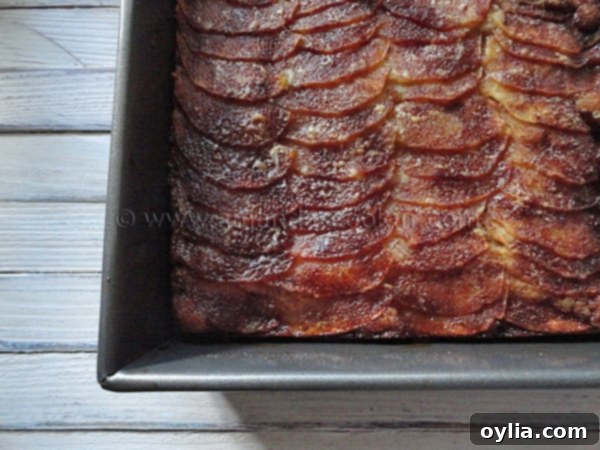
The beauty of this Dutch Apple Snack Cake lies not only in its ease of preparation but also in the delightful combination of textures and flavors it delivers. Each slice boasts wonderfully chewy, caramel-like edges that provide a satisfying contrast to the soft, tender apple slices on top. The cake itself is incredibly moist, thanks to the buttermilk and the inclusion of ripe bananas, which impart a subtle yet distinct sweetness that perfectly complements the apples and warm spices. The spices – cinnamon, nutmeg, and allspice – create an inviting aroma that fills your home as it bakes, making the anticipation almost as enjoyable as the first bite.
This cake is incredibly versatile and shines in many ways. It’s absolutely perfect enjoyed warm, straight from the oven, allowing its comforting flavors to truly sing. For a simple indulgence, a dollop of freshly whipped cream adds a touch of creamy luxury. And if you’re feeling truly decadent, a scoop of rich vanilla ice cream melting slowly over a warm slice takes this humble snack cake to an entirely new level of deliciousness. Whether for an afternoon treat, a casual dessert, or a cozy breakfast, this Dutch Apple Snack Cake is sure to become a cherished recipe in your home. Enjoy every flavorful bite!
Dutch Apple Snack Cake
IMPORTANT – There are often Frequently Asked Questions within the blog post that you may find helpful. Simply scroll back up to read them!
Print It
Pin It
Rate It
Save ItSaved!
Ingredients
- 1 cup all-purpose flour
- ¼ cup granulated sugar
- 2 teaspoons baking powder
- pinch of salt
- 1 teaspoon ground cinnamon
- ¼ teaspoon nutmeg
- ¼ teaspoon allspice
- 7 tablespoons unsalted butter softened
- 2 ripe bananas (mashed)
- 1 teaspoon vanilla extract
- 1 large egg
- ¼ cup buttermilk
- ½ cup brown sugar packed
- 1 teaspoon ground cinnamon
- 1 large Honeycrisp apple cored, peeled and sliced thin
- 4 tablespoons cold unsalted butter cut into small pieces
Instructions
-
Preheat your oven to 375°F (190°C). Lightly grease or spray a 9-inch square baking pan and set aside.
-
In a medium bowl, combine the flour, granulated sugar, baking powder, pinch of salt, 1 teaspoon ground cinnamon, nutmeg, and allspice. Whisk these dry ingredients together thoroughly until well combined, then set aside.
-
In the bowl of a stand mixer fitted with the paddle attachment (or using a hand mixer), combine the softened butter and mashed ripe bananas. Beat on medium speed for two minutes until the mixture is well combined. It might appear slightly curdled, which is normal. Add the vanilla extract, egg, and buttermilk, and continue to beat until the mixture is smooth and homogenized.
-
With the mixer on low speed, gradually add the dry ingredients to the wet mixture. Beat for one to two minutes, just until everything is combined and no dry streaks of flour remain. Be careful not to overmix. Scrape down the sides of the bowl with a spatula, give it one final gentle stir, then pour the batter evenly into your prepared 9-inch square pan.
-
Take your thinly sliced apples and arrange them on top of the cake batter. Lay them on their side, overlapping slightly, working your way across the entire surface of the batter until it is completely covered with a beautiful layer of apples.
-
In a small bowl, combine the ½ cup brown sugar with the remaining 1 teaspoon of ground cinnamon. Use your fingers to mix them well, ensuring the cinnamon is evenly distributed throughout the brown sugar. Sprinkle this fragrant mixture generously over the arranged apples. Finally, dot the surface with the small pieces of cold unsalted butter.
-
Bake the cake in the preheated oven for 35 minutes, or until a toothpick inserted into the center comes out clean and the top is golden brown and bubbly. Remove from the oven and allow to cool for at least ten minutes on a wire cooling rack before slicing and serving.
-
This Dutch Apple Snack Cake is truly best enjoyed warm from the oven. If you have leftovers, they can be quickly reheated in the microwave. Serve plain, with a dollop of whipped cream, or for an extra special treat, with a scoop of vanilla ice cream.
The recipes on this blog are tested with a conventional gas oven and gas stovetop. It’s important to note that some ovens, especially as they age, can cook and bake inconsistently. Using an inexpensive oven thermometer can assure you that your oven is truly heating to the proper temperature. If you use a toaster oven or countertop oven, please keep in mind that they may not distribute heat the same as a conventional full sized oven and you may need to adjust your cooking/baking times. In the case of recipes made with a pressure cooker, air fryer, slow cooker, or other appliance, a link to the appliances we use is listed within each respective recipe. For baking recipes where measurements are given by weight, please note that results may not be the same if cups are used instead, and we can’t guarantee success with that method.
