The Ultimate Moist Carrot Cake Recipe with Cream Cheese Frosting
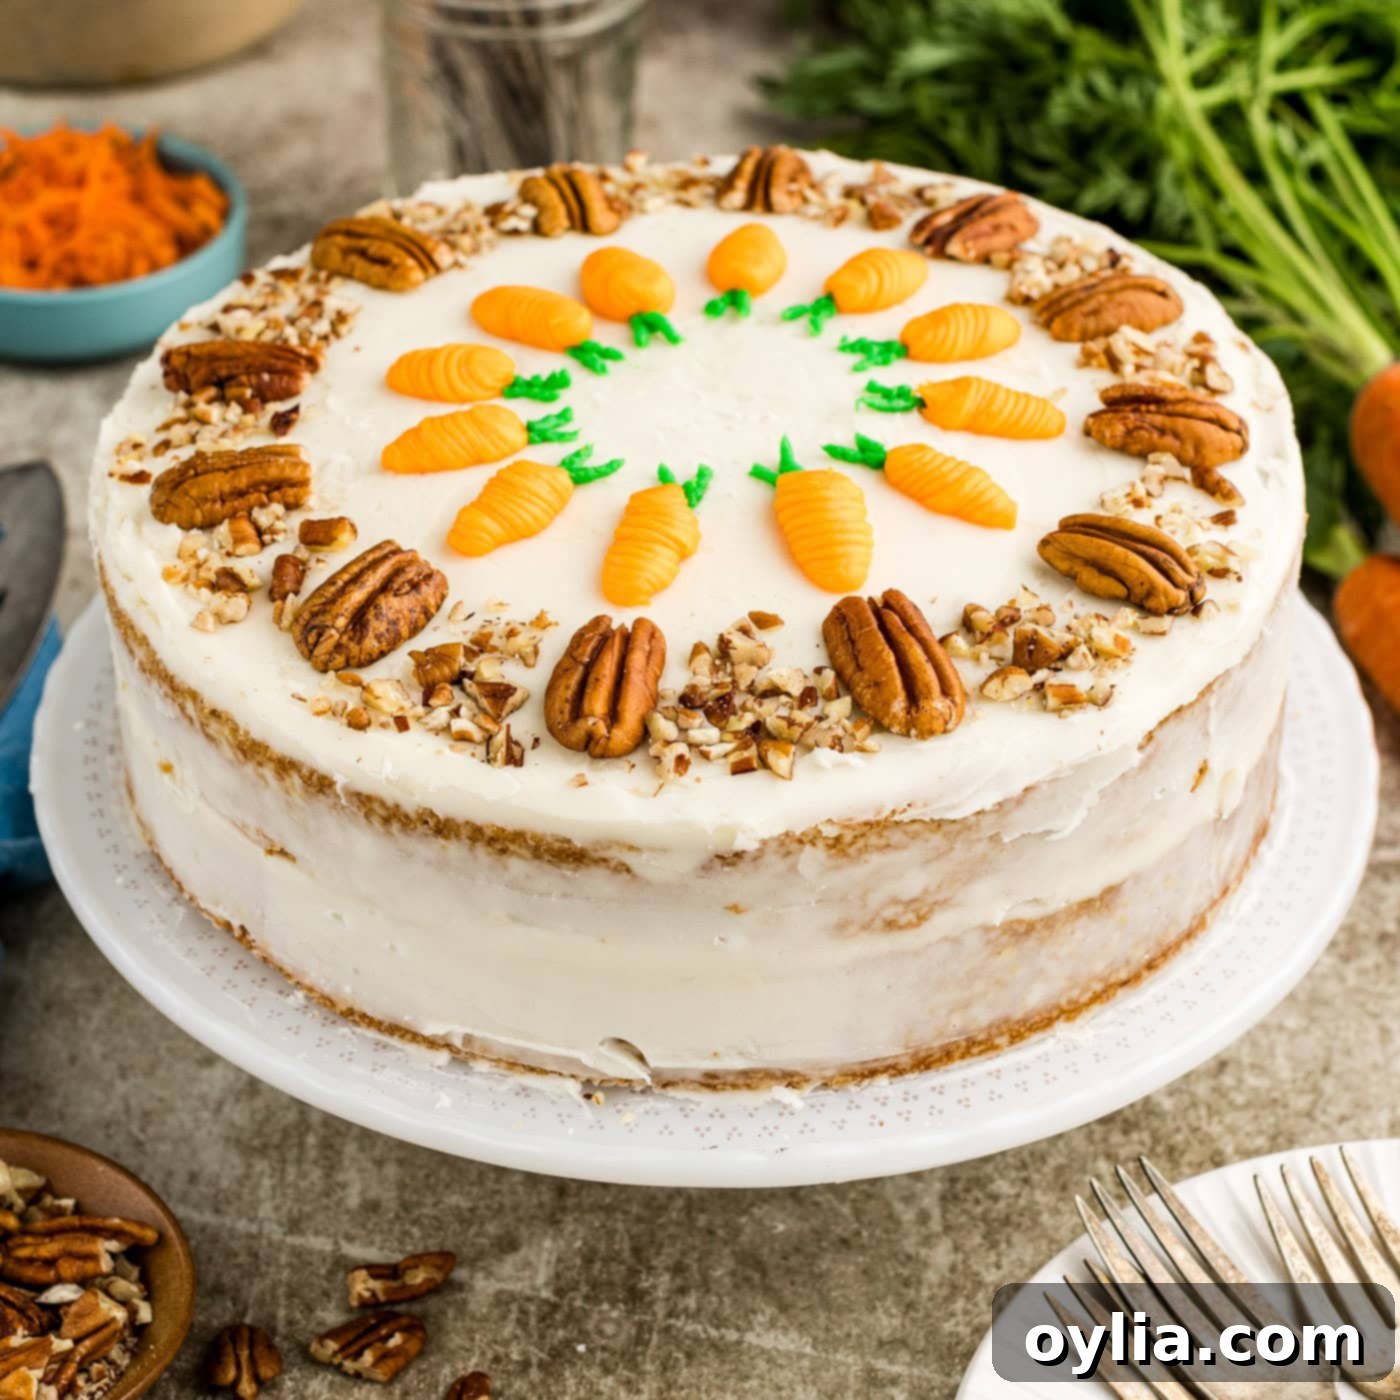
Indulge in the heavenly delight of our two-tiered carrot cake, a truly stunning dessert that will captivate your senses. Each bite offers a symphony of flavors and textures, featuring finely shredded carrots, a warm embrace of aromatic cinnamon, and a luxurious blanket of rich, tangy cream cheese frosting. This isn’t just any carrot cake; it’s an experience—a testament to classic baking elevated to perfection.
Why This Is the Best Carrot Cake Recipe You’ll Ever Make
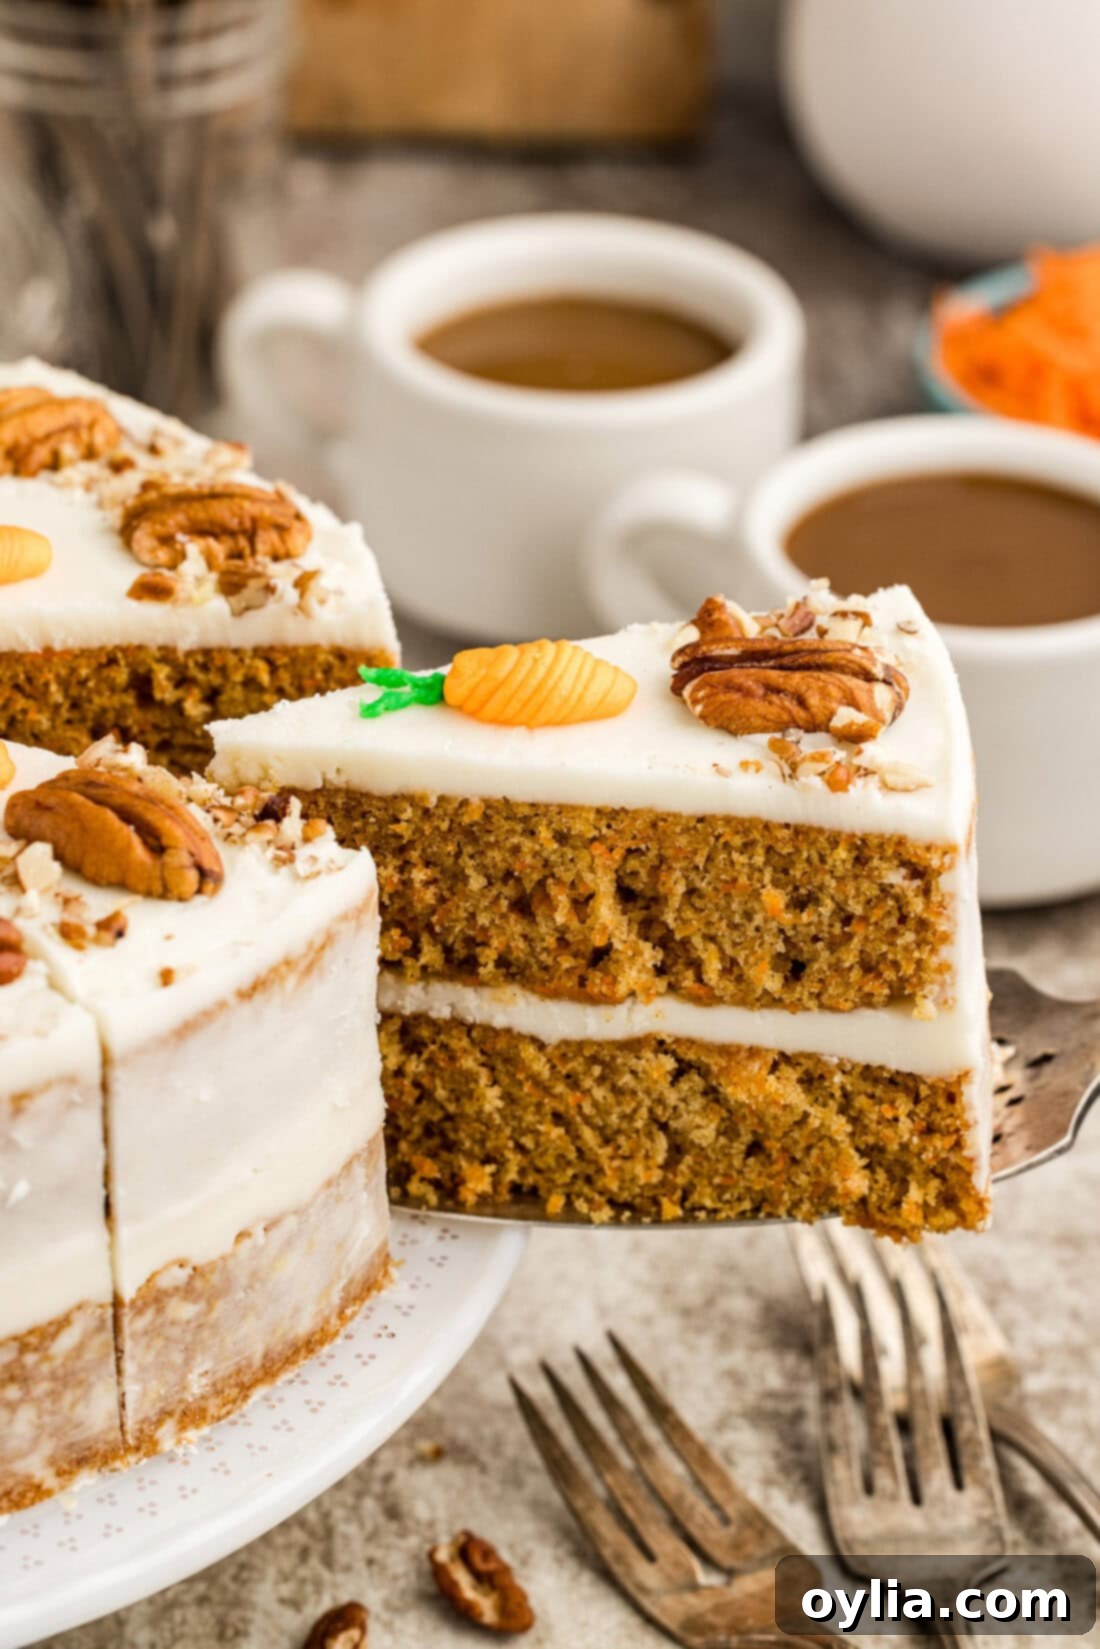
We are confident that this is the best carrot cake recipe you’ll ever encounter! What makes it so exceptional? Let’s start with the cake layers themselves: they are incredibly fluffy, irresistibly moist, and remarkably soft, generously speckled with finely shredded carrots that lend a beautiful, natural orange hue. The tantalizing aroma of cinnamon filling your kitchen as it bakes is, to say the least, absolutely incredible. But the magic doesn’t stop there. The silky-smooth cream cheese frosting, expertly layered between the two tiers and delicately crumb-coated on the outside, adds the quintessential finishing touch to this classic dessert. It’s a true winner that will impress even the most discerning palates!
This recipe isn’t just about the sum of its parts; it’s about how each element perfectly complements the others. The sweetness of the carrots balances the warmth of the spices, while the rich, slightly tart cream cheese frosting provides a delightful counterpoint, creating a harmonious and unforgettable flavor profile. Whether you’re a seasoned baker or new to the kitchen, this easy-to-follow guide will help you create a masterpiece that tastes as good as it looks.
Essential Ingredients for Your Perfect Carrot Cake
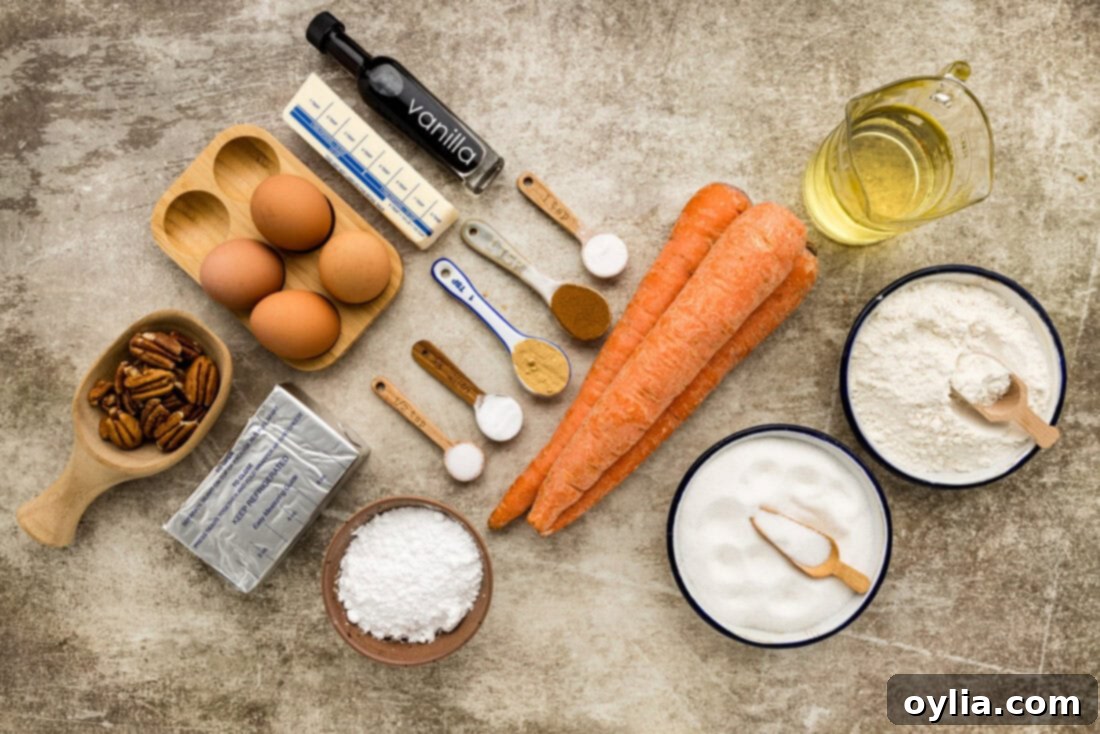
Before you begin your baking adventure, gather all your ingredients. You’ll find all precise measurements, a complete list of ingredients, and detailed instructions in the printable recipe card conveniently located at the end of this post. Having everything prepped and ready will ensure a smooth and enjoyable baking process.
Ingredient Spotlight & Expert Tips for Success
Understanding each ingredient’s role is key to baking the perfect carrot cake. Here’s what you need to know:
CARROTS – The foundation of our carrot cake! It is absolutely crucial that your carrots are thoroughly washed, their ends trimmed, and completely peeled. Carrot skins can impart a slightly bitter taste, which would detract from the sweetness of this delightful dessert. For the ideal cake texture, you’re aiming for a *fine shred*. We highly recommend using a box grater for this task, as opposed to a food processor. A food processor can sometimes create pieces that are too thick or uneven, which might lead to a crumbly cake texture. Fine shreds integrate seamlessly into the batter, ensuring even moisture and tenderness throughout each slice.
CAKE FLOUR & LEAVENING AGENTS – For perfectly risen and airy layers, the freshness of your baking powder and baking soda is paramount. Always double-check their expiry dates. When it comes to baking, precision is your best friend. For the most consistent and superior results, we strongly advise weighing your ingredients, especially flour, using a kitchen scale. Too much flour can significantly alter the cake’s consistency, leading to a dense and dry outcome. We specify all-purpose flour, but cake flour can be used for an even softer crumb.
EGGS – This is a critical detail often overlooked! Always use room temperature eggs. When beaten, room temperature eggs incorporate and trap air far more efficiently than cold eggs, which directly contributes to a lighter, fluffier cake. Cold eggs can cause the fats in your butter and oil to seize up, resulting in a denser, less uniform texture that you want to avoid.
OIL – This recipe specifically calls for Canola oil, which is a neutral-flavored oil. Unlike butter, which can make cakes denser and drier over time, oil ensures a consistently moist and tender crumb that stays fresh for longer. Its liquid state helps create a rich texture without adding a heavy flavor, letting the carrots and spices shine.
SPICES – Cinnamon is the star here, providing that signature warm and inviting aroma. We recommend using Saigon cinnamon for its potent and fragrant qualities. The addition of ground ginger is optional but highly recommended; it adds another layer of subtle warmth and complexity that truly enhances the cake’s flavor profile. Ensure your spices are fresh for maximum impact.
FROSTING – What’s a classic carrot cake without its iconic cream cheese frosting? It’s the perfect sweet and tangy complement. Be absolutely sure to use confectioners’ sugar (also known as powdered sugar or icing sugar) and not granulated sugar. Granulated sugar will not dissolve properly in the frosting, resulting in an unpleasantly gritty texture. Also, ensure your cream cheese and butter are at room temperature for the smoothest possible frosting.
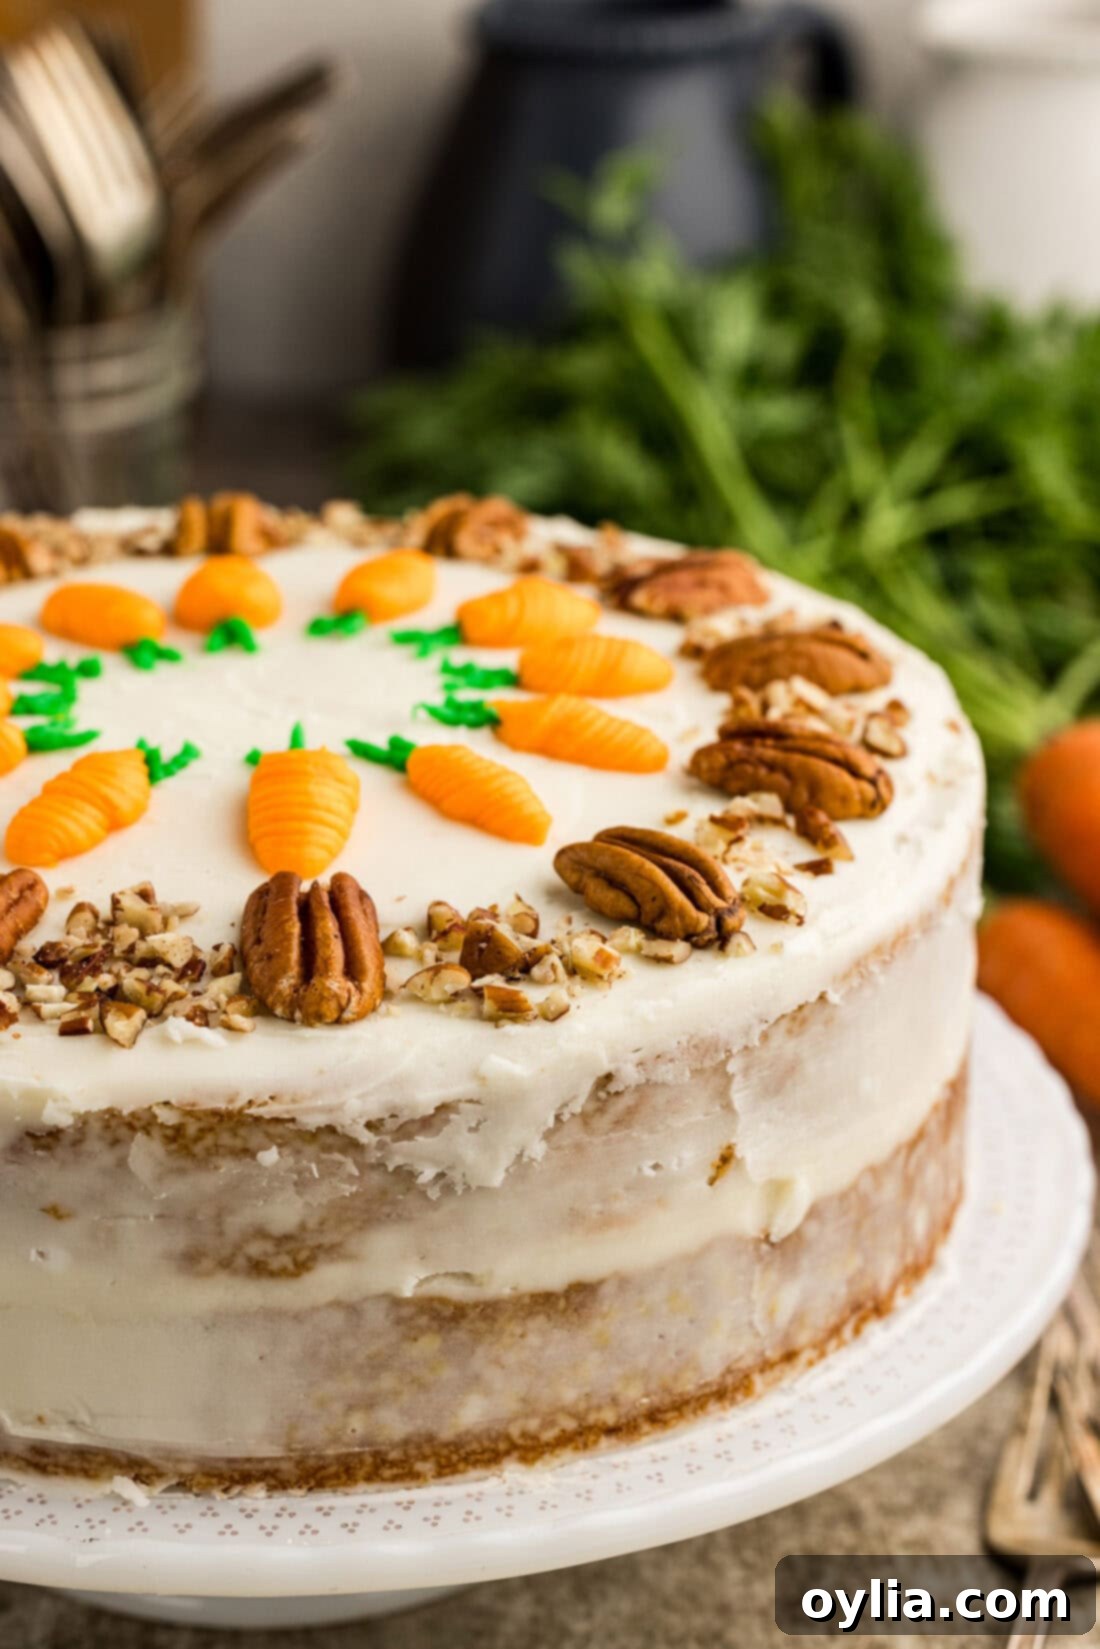
DECORATION – In the comprehensive recipe card below, we’ll guide you through separating the frosting into three parts to beautifully pipe miniature carrots and leaves for an authentic and charming presentation. However, feel free to unleash your creativity! You can decorate the cake as you please, perhaps using all of your frosting for a thicker, more lavish coat, or adding other edible elements. Beyond our piped carrots and leaves, we suggest creating an elegant perimeter of pecan halves and sprinkling additional chopped pecans for a lovely crunch and visual appeal.
Step-by-Step Guide: How to Bake the Perfect Carrot Cake
These step-by-step photos and instructions are designed to help you visualize each stage of making this delicious carrot cake. For the complete printable version of this recipe, including all measurements and instructions, you can Jump to Recipe at the bottom of this page.
- Prepare Your Cake Pans: Begin by thoroughly spraying two 9-inch round cake pans with Canola cooking spray. This initial layer of grease is crucial for preventing sticking. Next, place two perfectly round pieces of parchment paper, cut to fit the bottom of each cake pan, inside. Spray another layer of cooking spray over the parchment paper. This double-layer preparation ensures that your cake layers release effortlessly from the pans after baking, staying completely intact. Set these prepared pans aside.
- Preheat Your Oven: Position your oven rack in the very center of the oven. This ensures even heat distribution for both cake layers. Preheat your oven to 350 degrees F (175 degrees C). Allowing the oven to fully preheat is vital for consistent baking.
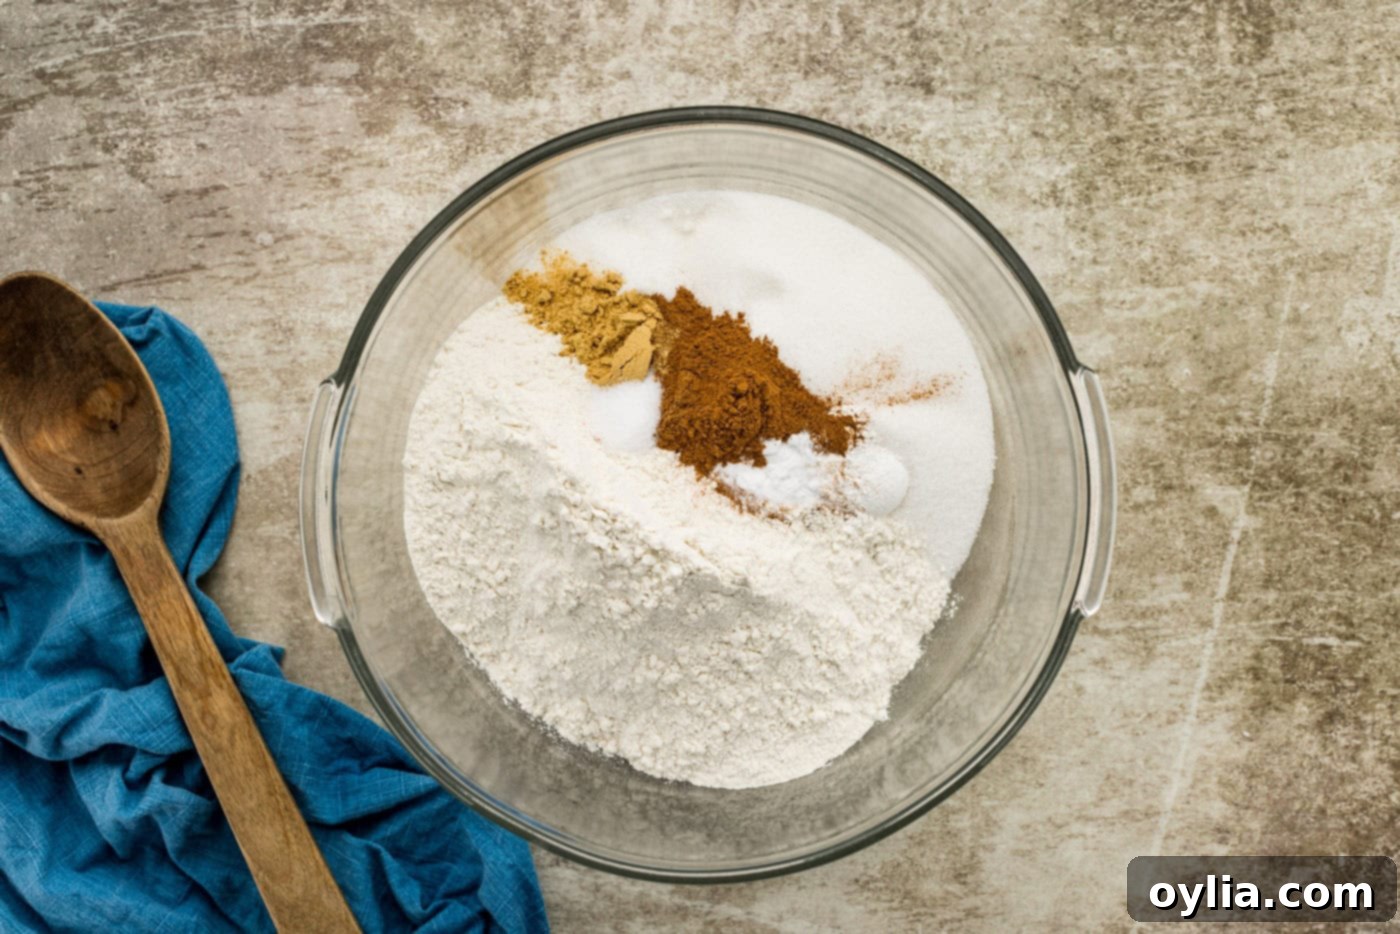
- Combine Dry Ingredients: In a large mixing bowl, combine your dry ingredients: flour, granulated white sugar, baking powder, ground cinnamon, optional ground ginger (we highly recommend it for extra depth!), Kosher salt, and baking soda. Whisk these ingredients together thoroughly to ensure they are well combined and evenly distributed. This step prevents pockets of leavening agents or spices in your cake.

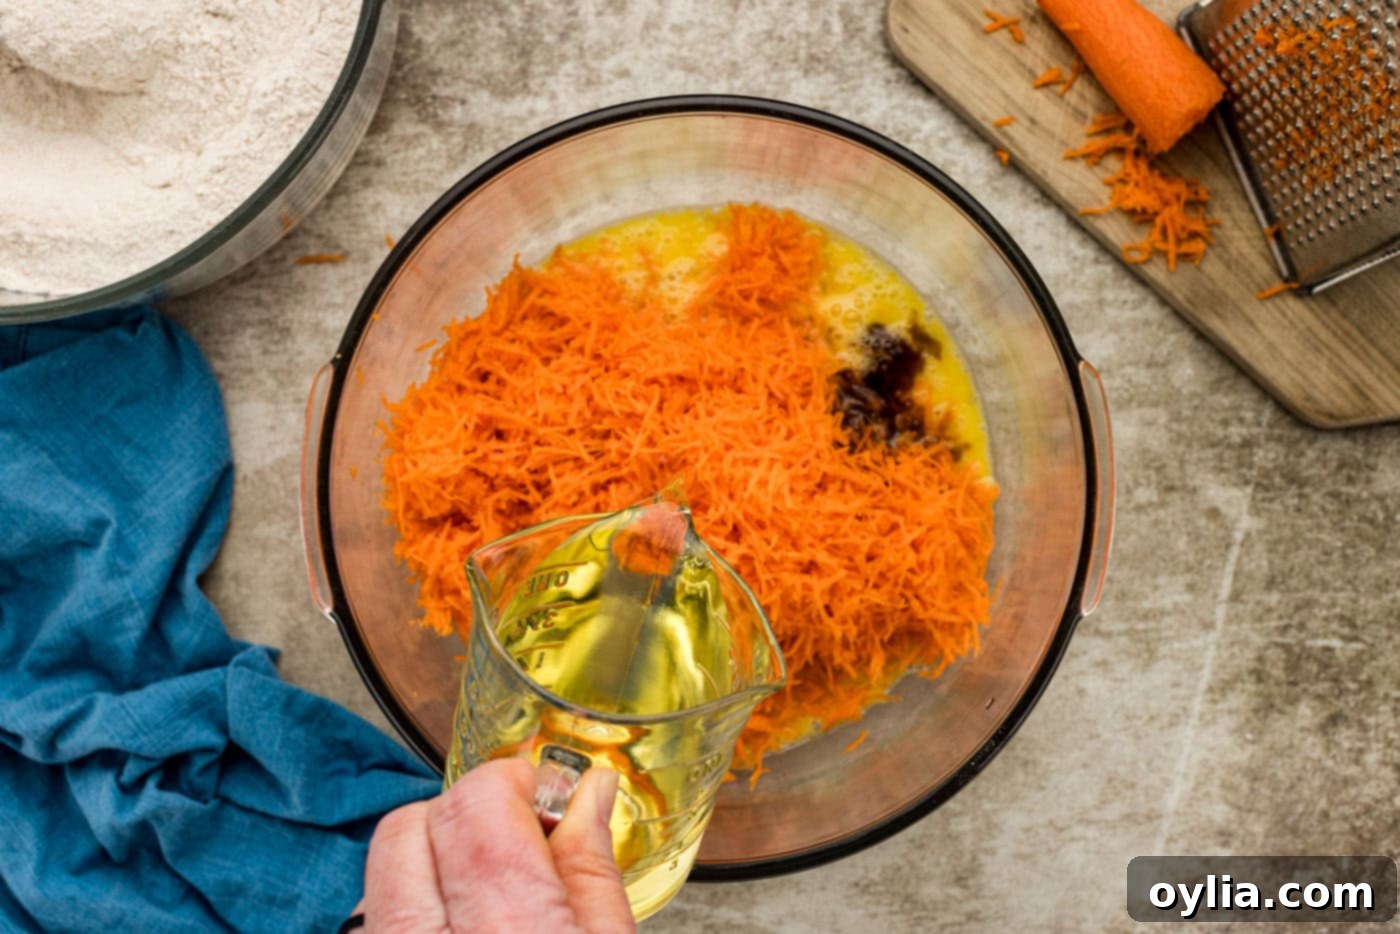
- Mix Wet Ingredients: In a separate large mixing bowl, add your wet ingredients: the beaten room temperature eggs, finely shredded carrots, pure vanilla extract, and Canola oil. Stir this mixture gently until all components are completely combined. The oil helps keep the cake incredibly moist, while the room temperature eggs ensure a smooth emulsion with other liquids.

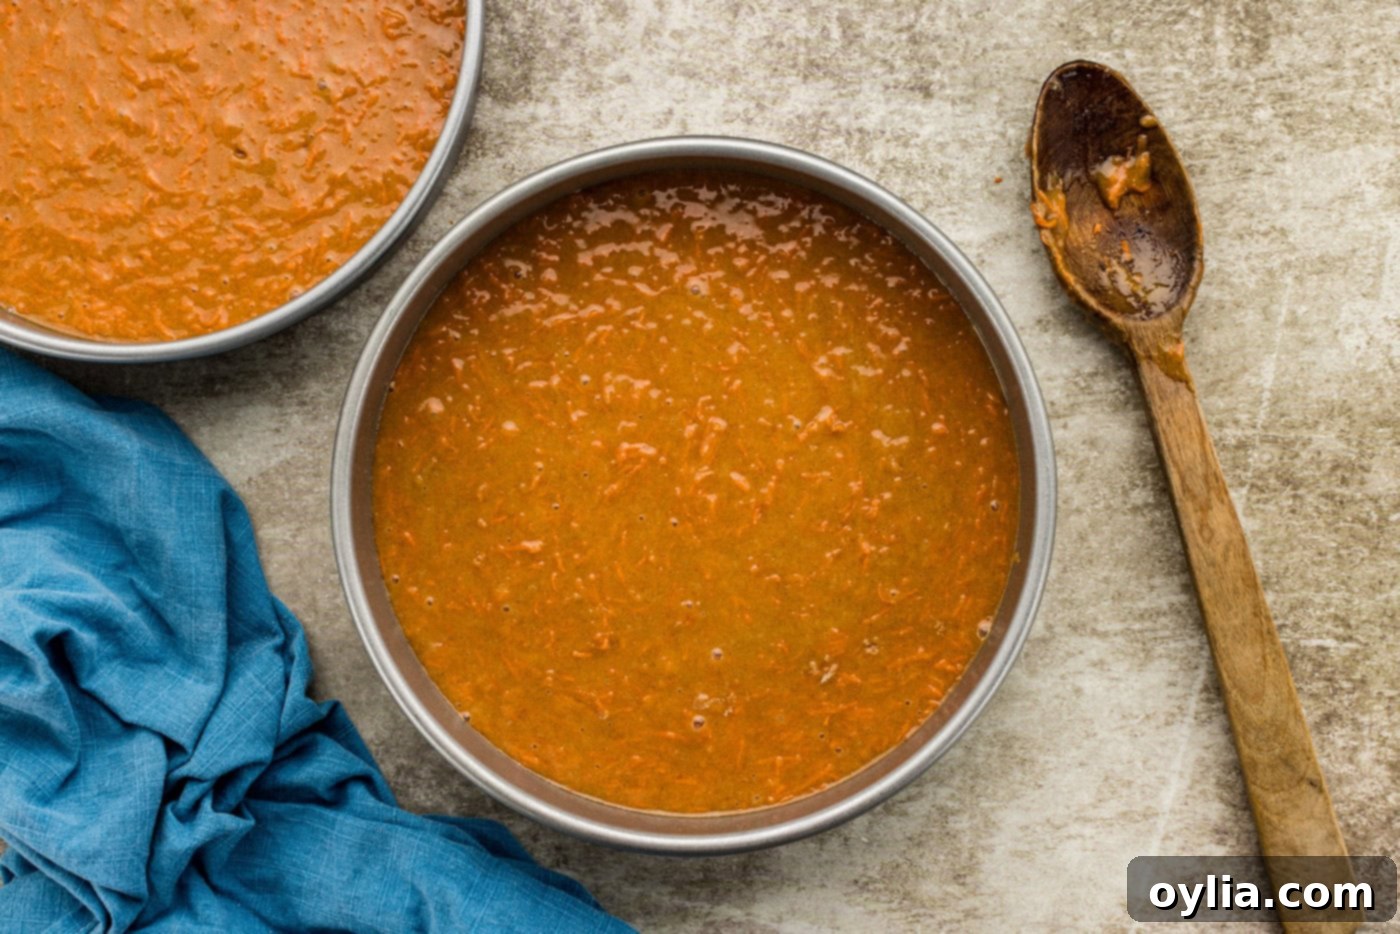
- Combine Wet and Dry Mixtures: Gradually incorporate the dry flour mixture into the wet carrot mixture. Add it in small increments, stirring gently between each addition, just until everything is combined. Be careful not to overmix, as this can lead to a tough cake. Once the batter is ready, divide it evenly between your two prepared baking pans. Distributing the batter equally ensures both cake layers bake uniformly.

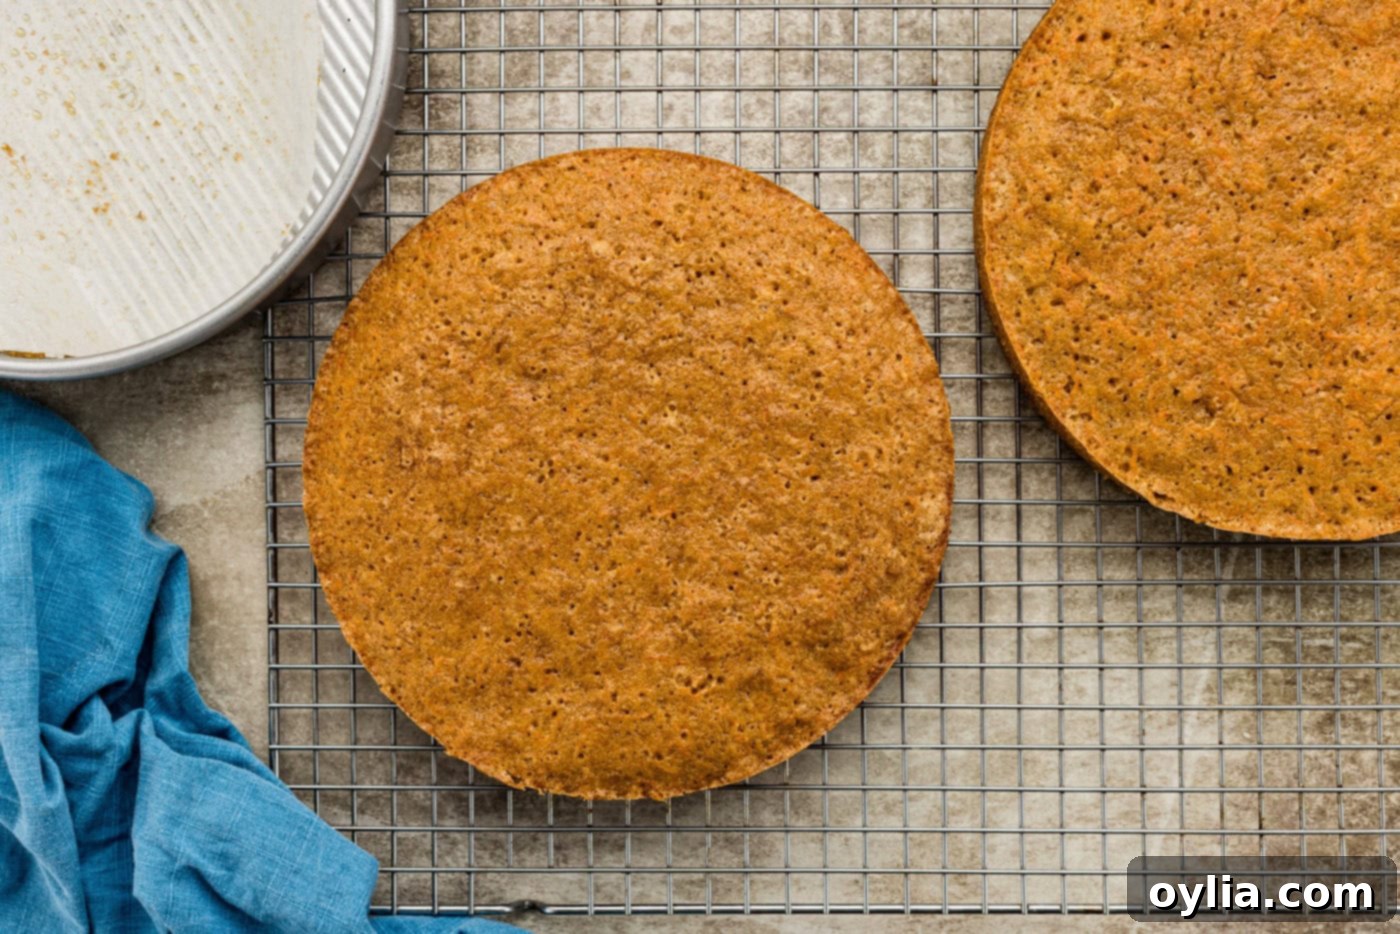
- Bake and Cool Your Cake Layers: Bake the cake layers on the center rack for 30-35 minutes. To check for doneness, gently insert a knife or a wooden toothpick into the center of a cake layer; it should come out clean, indicating it’s fully baked. Once done, remove the cake pans from the oven and allow them to cool on wire racks for 10 minutes. This initial cooling helps the cakes set. After 10 minutes, carefully invert the cake layers onto the wire racks and allow them to cool completely. Promptly remove and discard the parchment paper. It is absolutely essential that the cake layers are completely cooled before you even think about applying the frosting. Attempting to frost a warm cake will result in melted, messy frosting.

- Leveling the Cake (Optional but Recommended): Once the cake is entirely cool, if your cake layers have domed significantly, now is the time to level them. Use a sharp bread knife or a cake leveling tool to carefully slice off any domed tops, creating flat, even surfaces. This step is crucial for achieving perfectly stacked layers and a professional-looking finished cake during assembly. If your layers baked relatively flat, this step might not be necessary.
Crafting the Irresistible Cream Cheese Frosting
The velvety cream cheese frosting is just as important as the cake itself. Here’s how to create it:
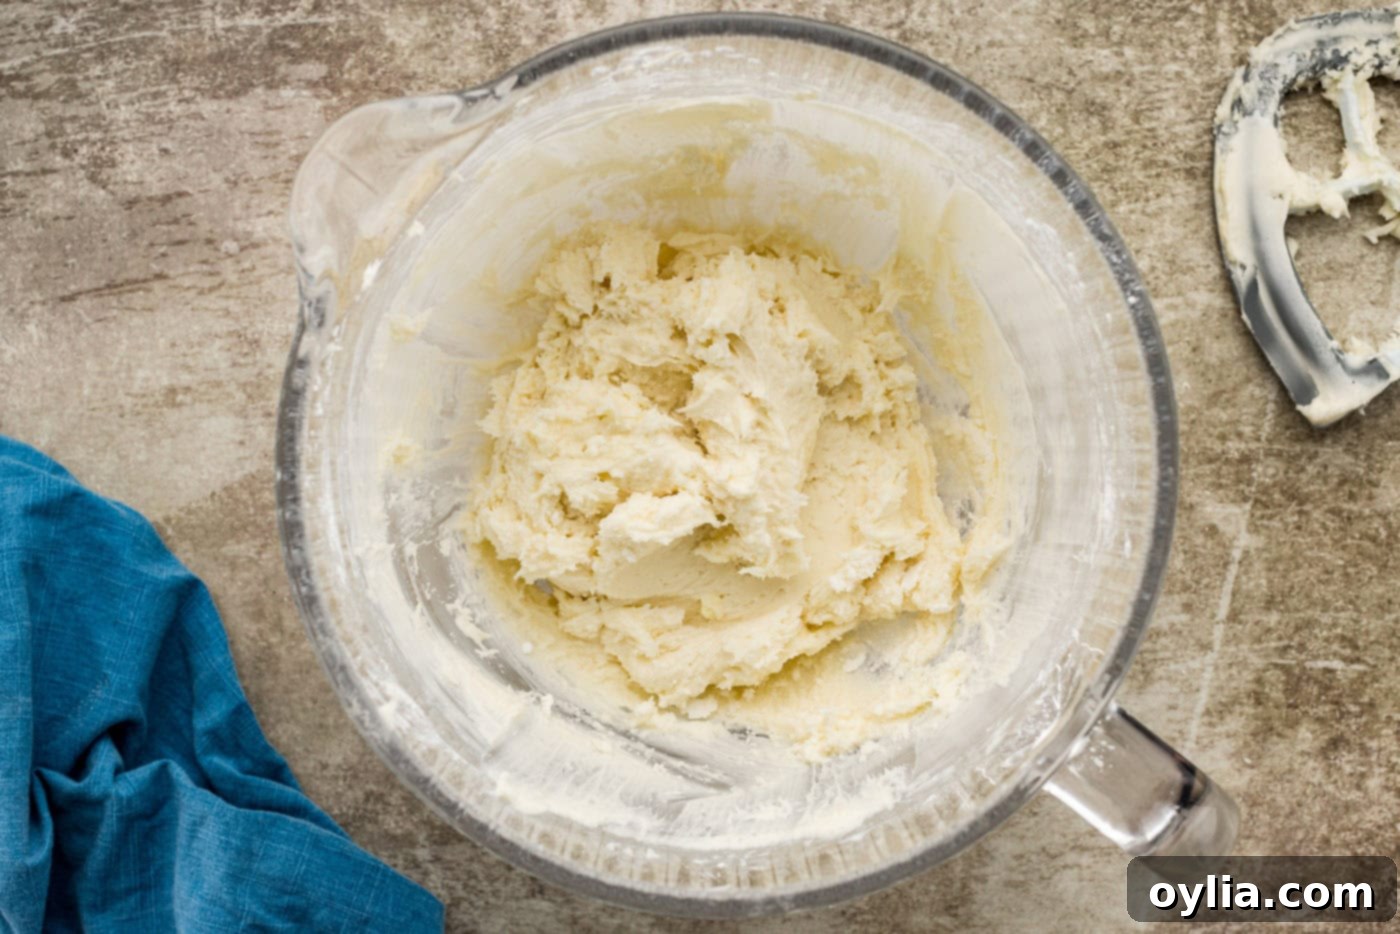
- Creaming the Base: In the bowl of a stand mixer fitted with a paddle attachment (or using a hand mixer in a large bowl), combine the softened cream cheese, unsalted butter, and 1 teaspoon of pure vanilla extract. Beat these ingredients together on medium speed until they are light, fluffy, and completely combined, with no lumps of cream cheese remaining. This ensures a smooth base for your frosting.
- Adding Confectioners’ Sugar: Gradually add the sifted confectioner’s sugar, sprinkling it in 1/2 cup at a time. Mix on low speed initially to avoid a sugar cloud, then increase to medium speed. Continue mixing until the frosting is silky smooth and achieves your desired consistency. You may use 5-6 cups depending on how thick you prefer your frosting.

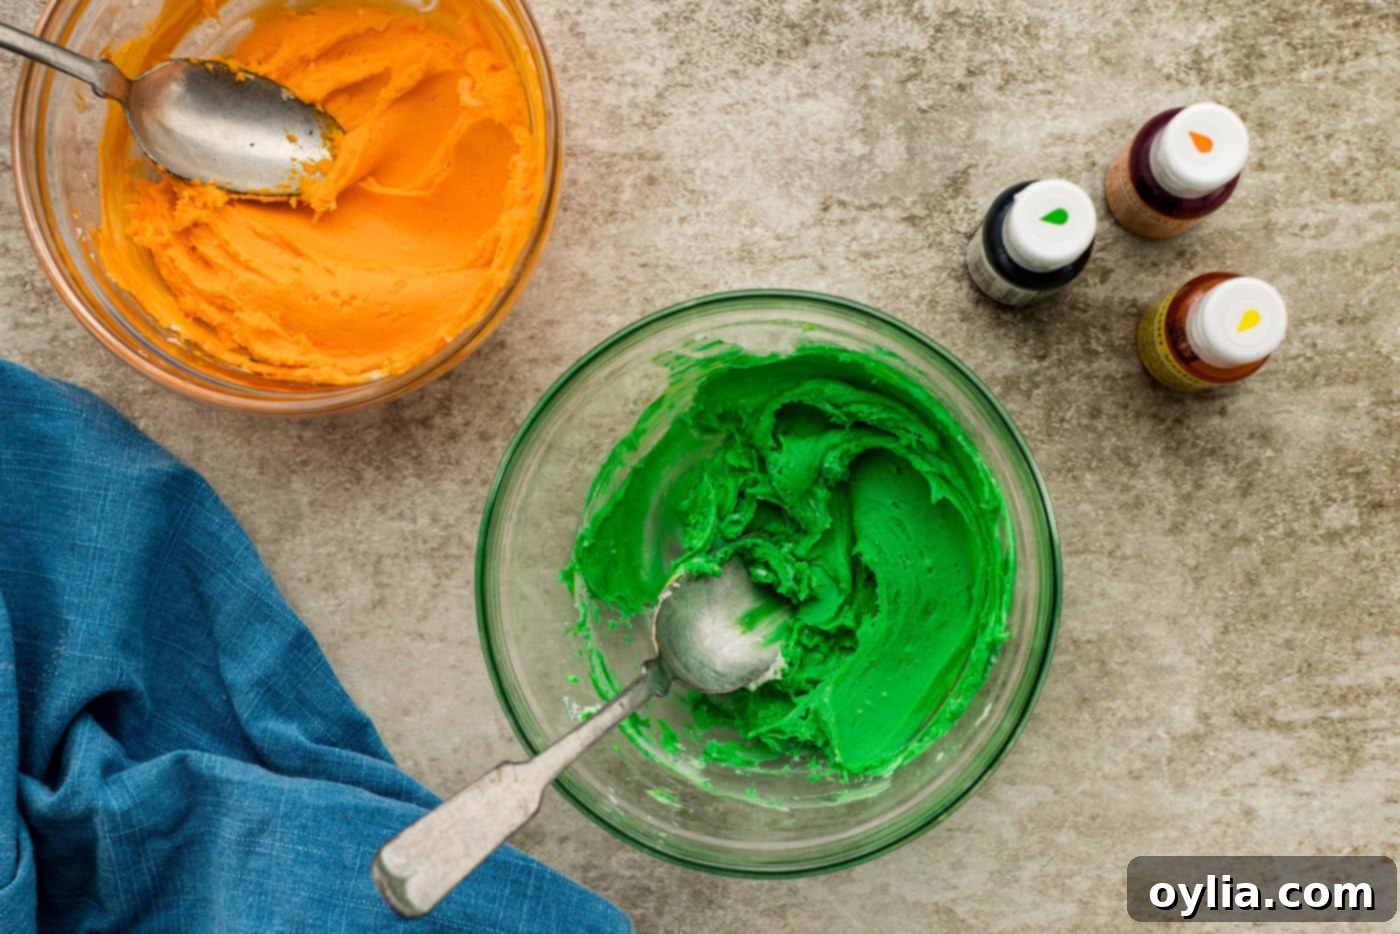
- Preparing for Decoration (Optional): If you plan to pipe decorative carrots and leaves, reserve 1/2 cup of frosting for the carrots and 1/4 cup for the leaves. Place these portions into separate small bowls.
- Coloring the Carrot Frosting: To achieve a vibrant orange for your piped carrots, add 2 drops of orange food coloring and 1 drop of yellow food coloring to the 1/2 cup of reserved frosting. Mix until the color is uniform and appealing.
- Coloring the Leaf Frosting: For the delicate green leaves, add 1 drop of green food coloring and 1 drop of yellow food coloring to the 1/4 cup of reserved frosting. Mix thoroughly.

- Storing the Frosting: Set your frosting aside until your cake layers are completely cooled and ready for frosting. If there will be a significant delay, you can refrigerate the frosting. However, it’s crucial to let it return to room temperature (which typically takes about 30 minutes) and give it a good re-whip before applying it to the cake to ensure it’s spreadable and smooth.
Assembling Your Show-Stopping Two-Tiered Carrot Cake
Now for the exciting part – bringing your masterpiece together! Follow these steps for a beautifully assembled cake:
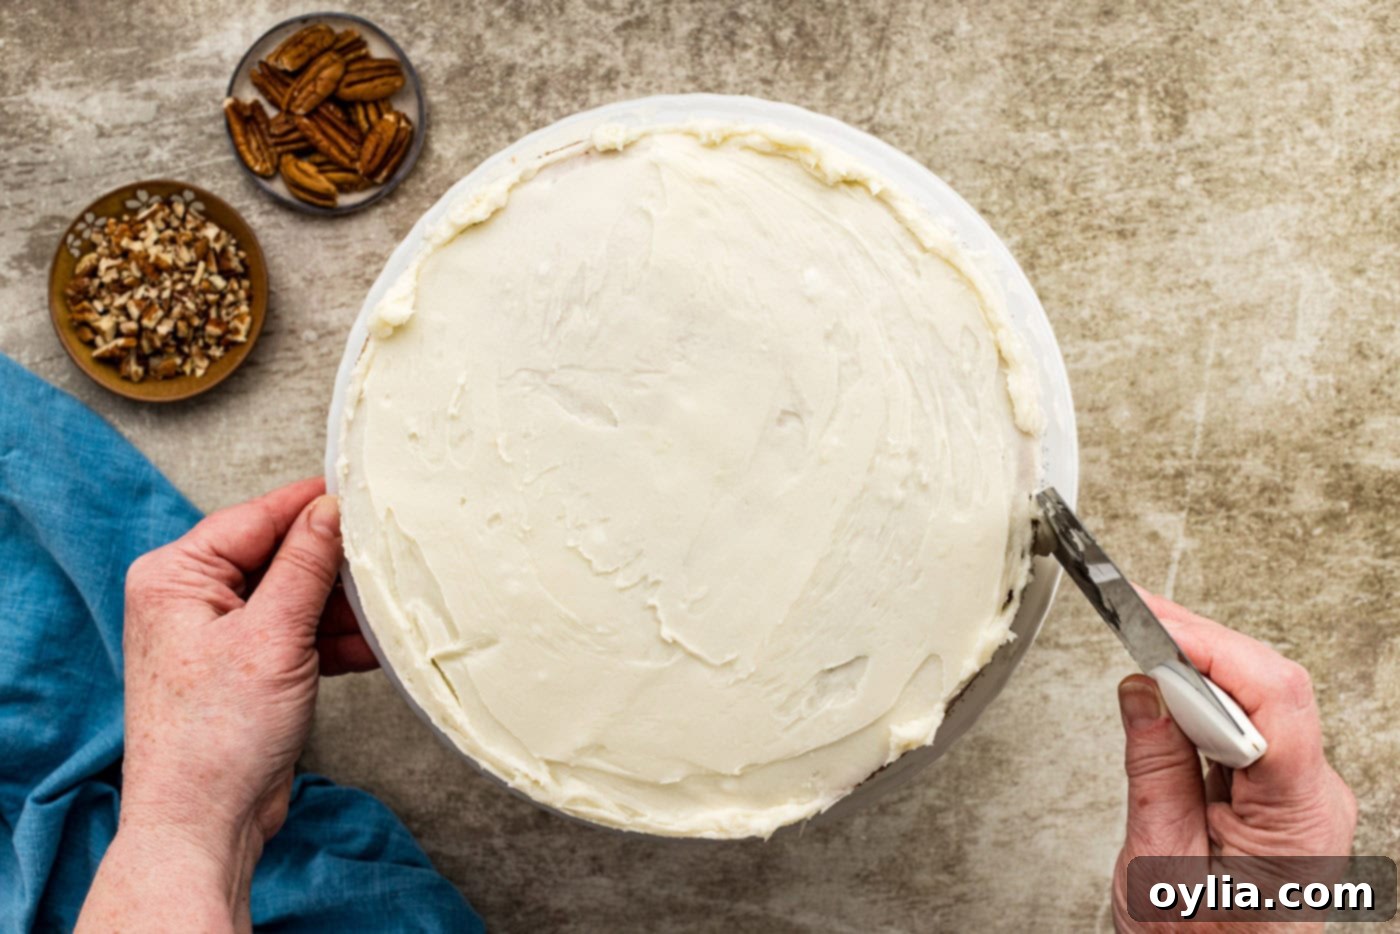
- Building the Layers: Carefully place the first cooled cake layer onto a cake turntable or directly onto your chosen cake stand. Apply a generous amount of frosting to the top of this layer and use an offset spatula to spread it evenly, allowing a little to gently hang over the edge. This creates a lovely, rustic look. Carefully place the second cake layer directly on top. Apply another generous dollop of frosting to the top of the second layer, again spreading it so it slightly overhangs the edge.
- Crumb Coat and “Naked” Effect: Add several dollops of frosting around the sides of the cake. To achieve the popular “naked” or crumb-coated look seen in our photos, a turntable makes this step significantly easier. Using a bench scraper, hold it perpendicularly against the side of the cake and gently rotate the turntable, removing excess frosting. Scrape any excess frosting into a separate bowl. Repeat this process a couple of times, gradually removing frosting until you achieve your desired level of exposed cake and a smooth, thin layer of frosting remains. This technique not only looks beautiful but also seals in any loose crumbs, creating a clean finish.

Decorating Your Carrot Cake Masterpiece
Add the final flourishes to make your carrot cake truly special:
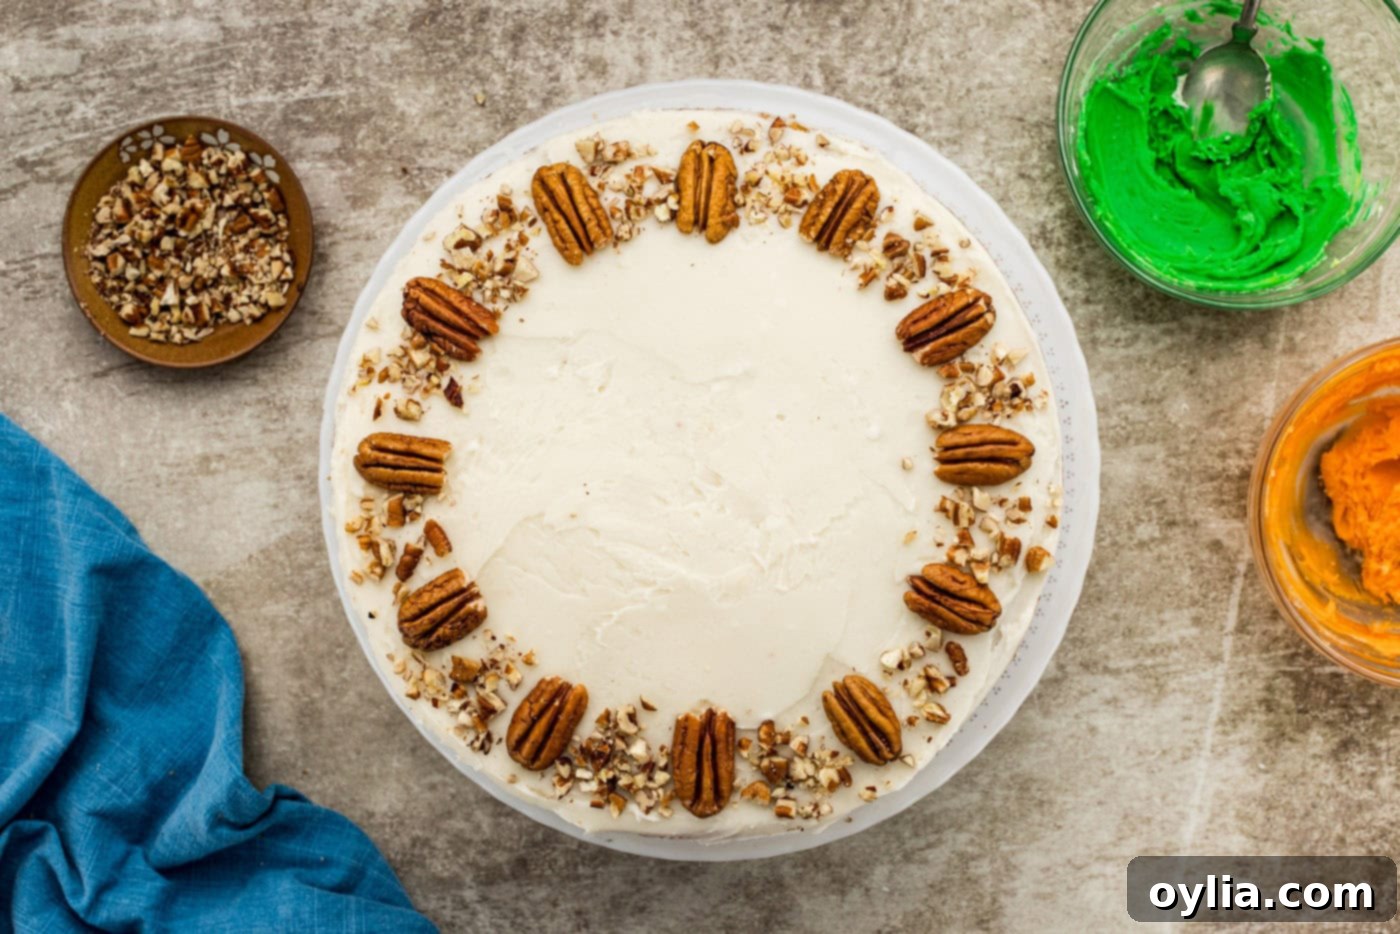
- Pecan Placement: Artfully arrange twelve pecan halves around the perimeter of the top of your cake. These not only add a delicious crunch and elegant visual appeal but also serve as excellent markers for where you will pipe your decorative carrots. Finish by sprinkling additional chopped pecans generously over the top for extra texture and flavor.

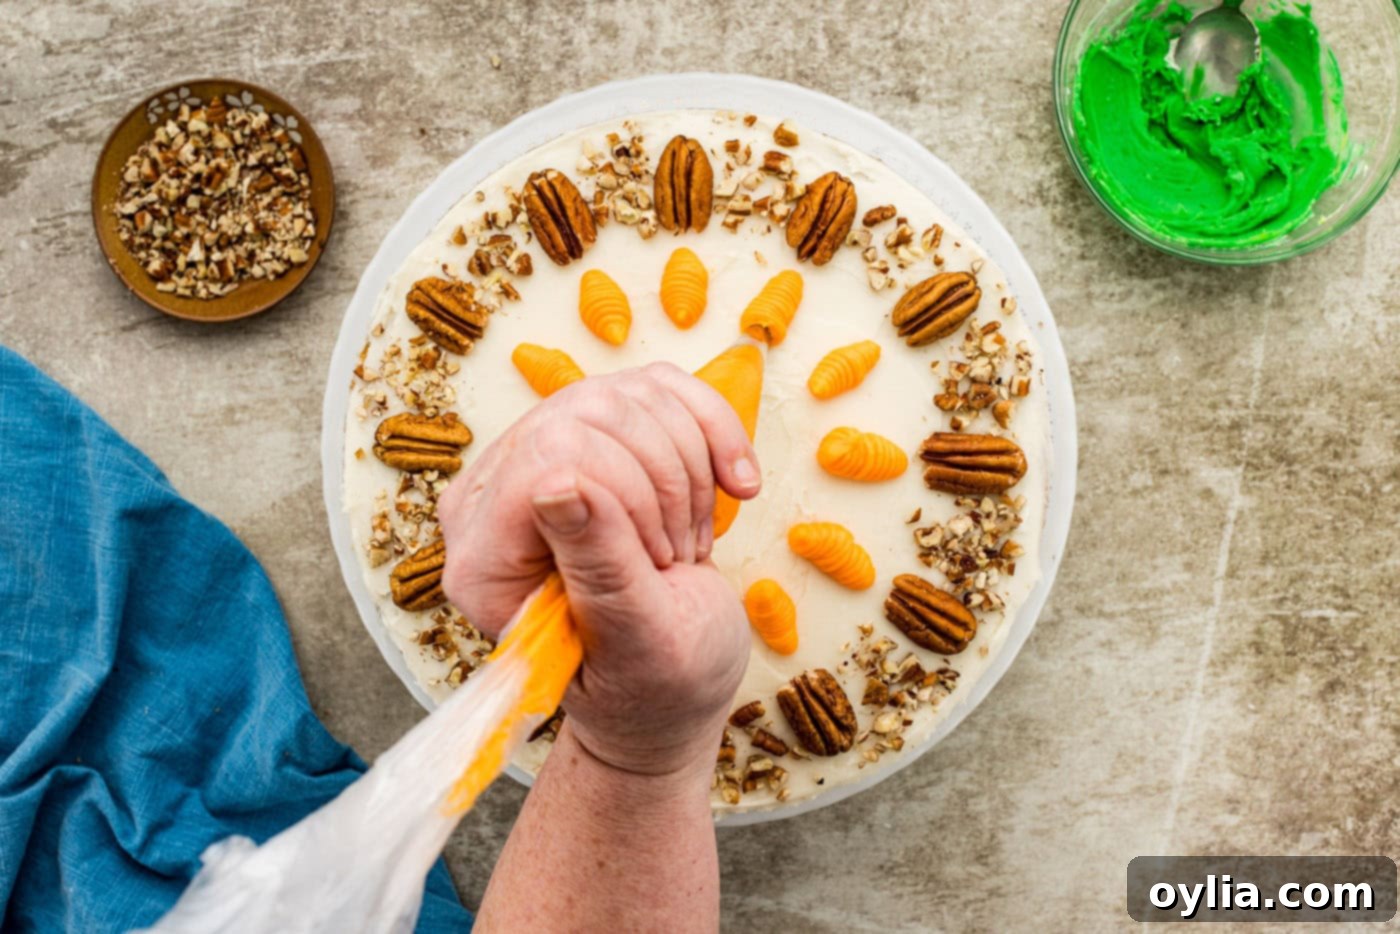
- Piping the Carrots: Fill a piping bag fitted with a Wilton tip 10 (or a similar round tip) with your orange-tinted frosting. Begin piping the carrots, using the pecan halves as your guide. Start with gentle pressure to create a narrow tip, then gradually apply more pressure as you elongate the carrot shape, pulling towards the center of the cake. Releasing pressure at the end will create a natural carrot shape. This technique will create subtle ridges and enlarge the carrot, giving it a realistic appearance as shown in our photos. The “thick end” of your piped carrot should be closer to the center of the cake.

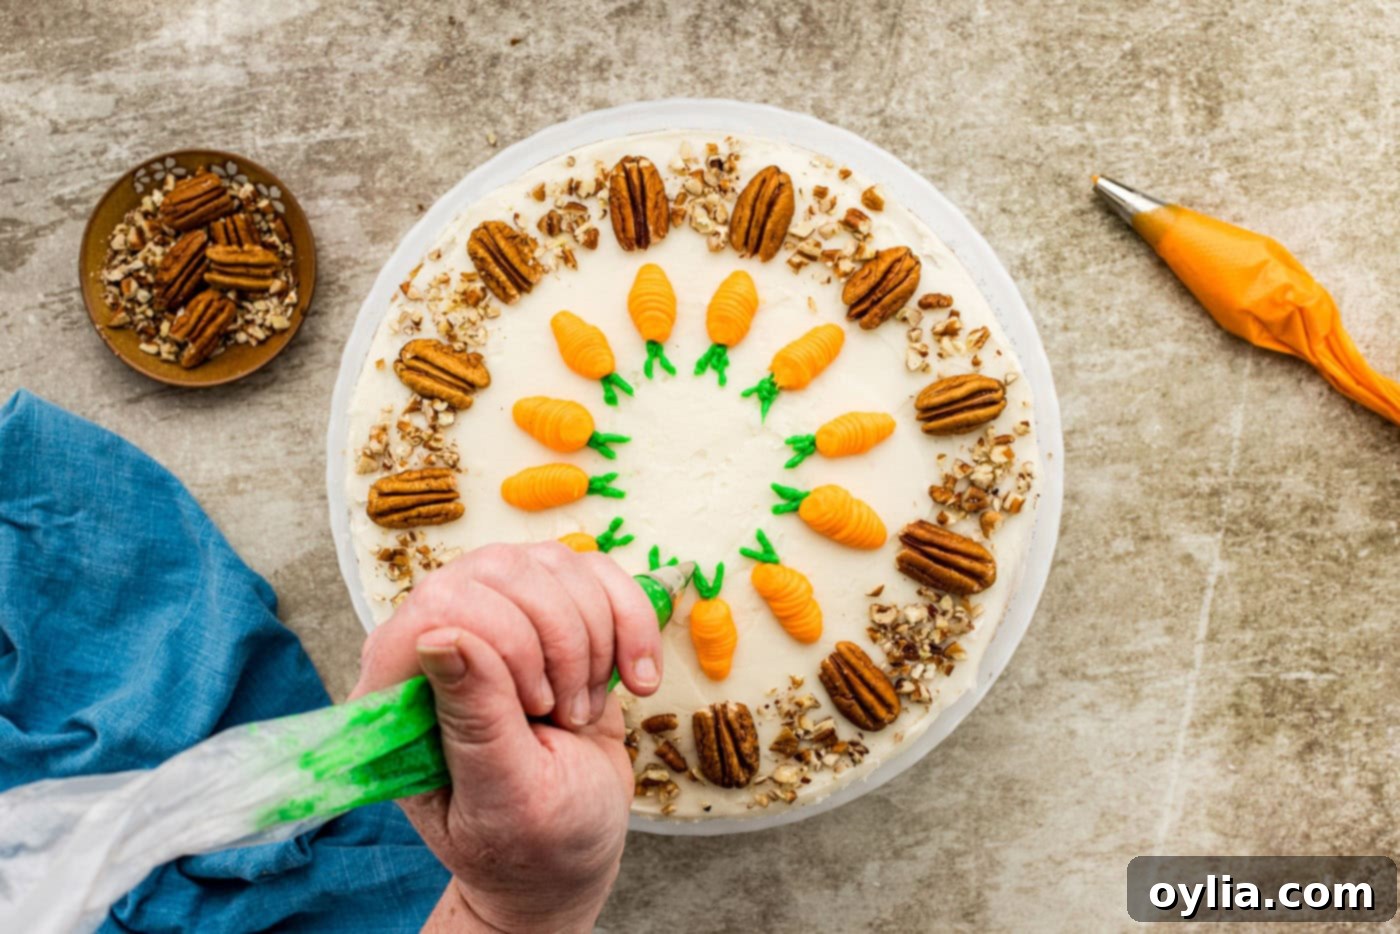
- Adding the Leaves: Switch to your green-tinted frosting in a piping bag fitted with a Wilton tip 5 (or a small round tip). For a simple yet effective leaf design, pipe two small lines or dots directly from the thick end of each piped carrot. This adds a charming, fresh touch to your edible garden.

Frequently Asked Questions & Expert Baking Tips
We’ve rigorously tested this carrot cake recipe both with and without cake strips, and we’re happy to report that the results are fantastic either way. Because carrot cake is inherently a semi-dense cake, quite similar to a quick bread, it typically doesn’t experience extreme doming and tends to rise fairly flat on its own. So, while cake strips can certainly help achieve perfectly level layers, especially for delicate cakes, they aren’t strictly necessary for this recipe. If you’re accustomed to using them in your baking, by all means, go ahead! But if you don’t have them handy, don’t sweat it – your cake will still turn out beautifully.
Absolutely! Carrot cake is an excellent make-ahead dessert. You can prepare, frost, and even decorate your entire carrot cake 1-2 days in advance of when you plan to serve it. To ensure it remains fresh, moist, and delicious, we highly recommend storing it in an airtight cake carrier in the refrigerator. The frosting will firm up slightly in the fridge, but the cake itself will remain wonderfully tender.
Yes, carrot cake freezes exceptionally well, both in layers and individual slices!
- Freezing Cake Layers: You can freeze the baked carrot cake layers before assembly. Once the layers are completely cooled, wrap each one individually in several layers of plastic wrap, followed by a layer of aluminum foil. Freeze them flat (you can place them on a baking sheet until they are firmly frozen for stability). When you’re ready to use them, thaw in the refrigerator overnight.
- Freezing Frosted Slices: To freeze individual frosted slices, first flash freeze the slices on a baking sheet for about 30-60 minutes until the frosting is solid to the touch. This prevents the frosting from sticking to the wrapping. Once firm, wrap each slice individually in plastic wrap, followed by a layer of aluminum foil. Transfer the wrapped slices to a large plastic zip-top freezer bag. To thaw, simply remove the wrapping and allow the slice to thaw in the refrigerator for a few hours or at room temperature for about an hour.
A dry carrot cake is often a result of too much flour or overbaking. Ensure you’re measuring your flour accurately, ideally by weight. If using cups, spoon the flour into the measuring cup and level it off without compacting. Overbaking removes too much moisture, so always check for doneness using the toothpick test and remove from the oven as soon as it comes out clean.
Absolutely! Many classic carrot cake recipes include mix-ins like chopped pecans, walnuts, or raisins. If you wish to add them, stir 1/2 to 1 cup of your preferred mix-ins into the batter during step 5, just before dividing it into the pans. This will add extra texture and flavor to your cake.
Serving Suggestions: Perfect Pairings for Your Carrot Cake
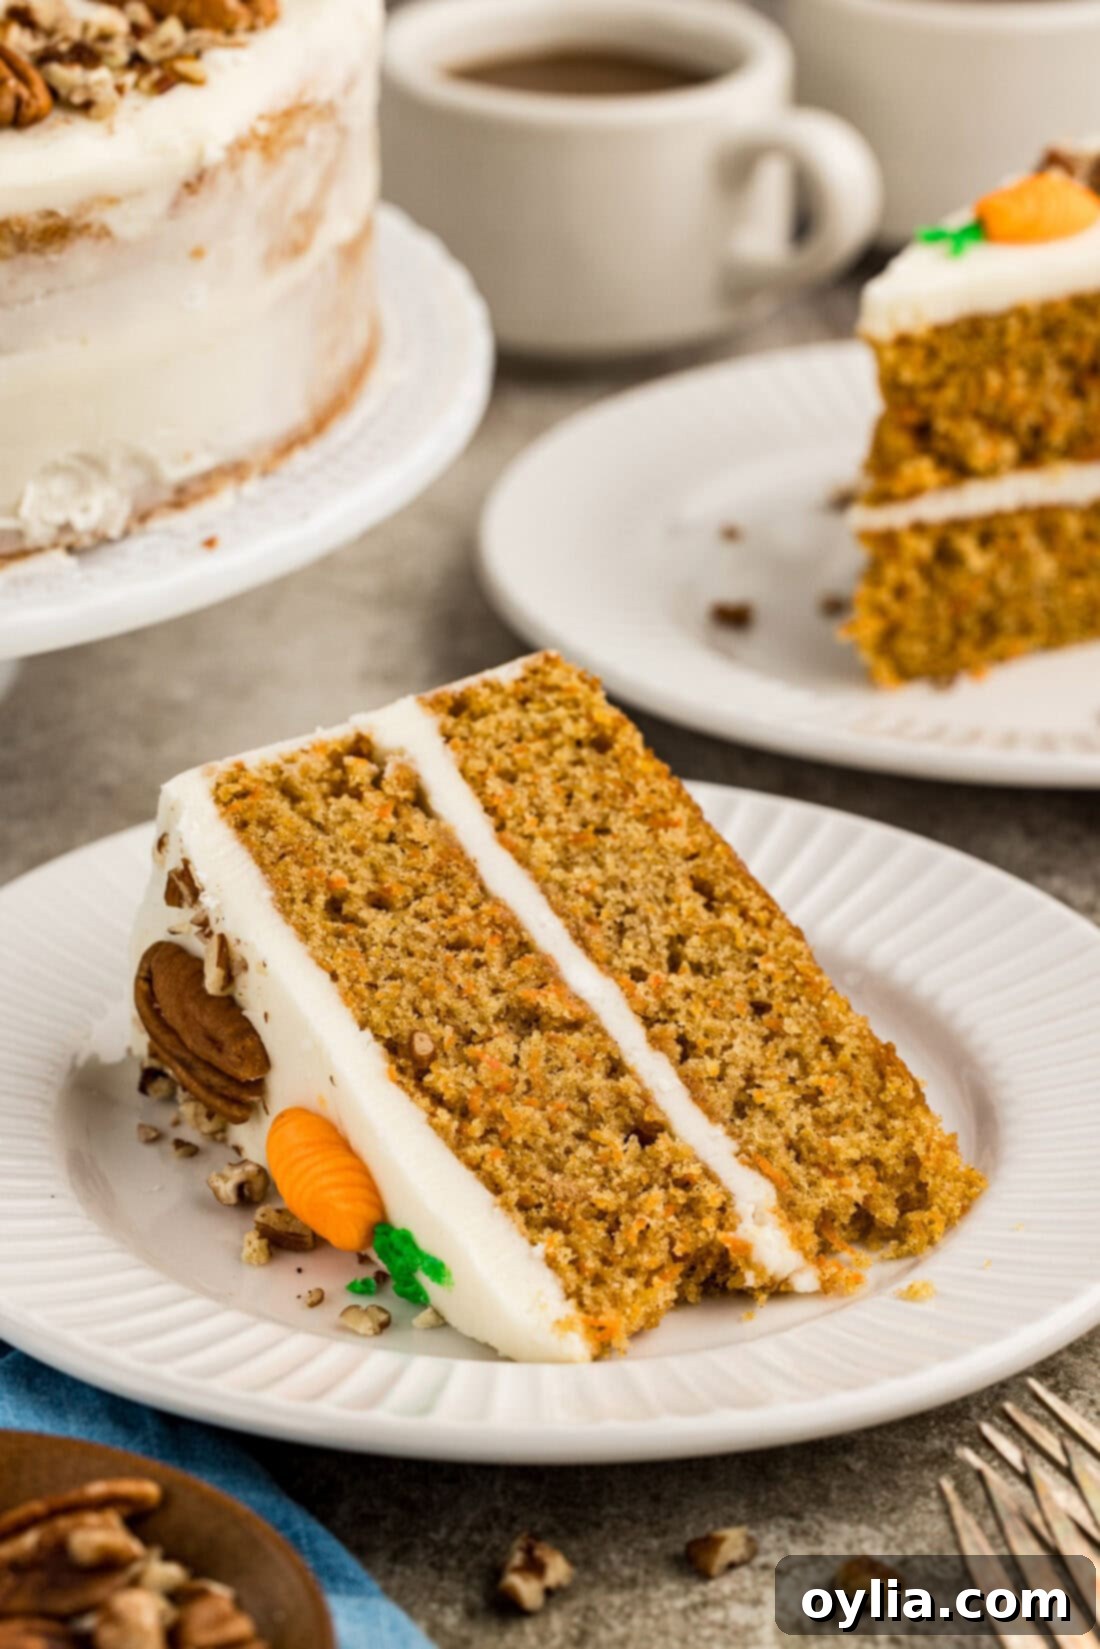
For me, a slice of carrot cake with its luscious cream cheese frosting is my ultimate weakness, my kryptonite! I’m completely unashamed to admit that I’ve enjoyed a generous slice for breakfast alongside my morning coffee on more than a few occasions. This exquisitely beautiful cake is, of course, a beloved staple around Easter and throughout the springtime, symbolizing new beginnings and sweet celebrations. However, its appeal is by no means limited to a specific time of year. It transforms into a truly lovely addition for any festive occasion: a memorable birthday treat, an elegant bridal shower centerpiece, a charming baby shower dessert, or a welcome potluck contribution of any magnitude.
Feel free to garnish your carrot cake exactly as you prefer, letting your personal style shine through, and savor it whenever the mood strikes you. Whether you decide it’s the perfect midnight snack, a delightful start to your day, or the grand finale to a meal – that joyful decision is entirely up to you. It pairs wonderfully with a warm cup of coffee, a soothing herbal tea, or a cold glass of milk. You can also elevate the experience by serving it with a scoop of vanilla bean ice cream or a dollop of fresh whipped cream.
Explore More Delightful Carrot Cake Inspired Recipes
If you love the flavors of carrot cake, you’re in for a treat! We have many more creative and delicious recipes inspired by this classic dessert:
- Carrot Cake Roll: A light sponge cake rolled with creamy filling.
- Carrot Cake Trifle: Layers of cake, pudding, and whipped cream.
- Carrot Cake Truffles: Bite-sized delights perfect for gifting.
- Carrot Cake Sandwich Cookies: A fun twist on a classic, perfect for any occasion.
I absolutely adore baking and cooking, and my greatest joy is sharing my kitchen experiences and delicious recipes with all of you! Remembering to come back and check for new recipes every day can be a challenge, which is precisely why I offer a convenient newsletter. Every time a new recipe is posted, it’s delivered straight to your inbox. Simply subscribe today and start receiving your free daily recipes, making sure you never miss out on a culinary adventure!
Classic Two-Tiered Carrot Cake
IMPORTANT – There are often Frequently Asked Questions within
the blog post that you may find helpful. Simply scroll back up to read them!
Print It
Rate It
Save ItSaved!
your screen from going dark
Desserts
American
12 servings
30 minutes
723
Amanda Davis
Ingredients
To make
the Carrot Cake Layers
- Canola cooking spray for greasing
the 2 cake pans - 2 cups all-purpose flour 275g. or the
same amount of cake flour - 2 cups granulated white sugar 437g
- 2 teaspoons baking powder
- 2 teaspoons ground cinnamon *Saigon
cinnamon is most fragrant - 1 teaspoon ground ginger optional
- ½ teaspoon Kosher salt
- ½ teaspoon baking soda
- 4 large eggs beaten *room
temperature - 3 cups shredded carrots 285g. very
finely shredded, lightly packed. *the carrots must be peeled and ends cut - 1 teaspoon pure vanilla extract
- ¾ cup Canola oil
Cream
Cheese Frosting
- 8 ounces cream cheese plain, room
temperature - ½ cup unsalted butter 1 stick, room
temperature - 1 teaspoon pure vanilla extract
- 5-6 cups confectioner’s sugar sifted. 744g
(weighed pre-sifted)
Optional
Toppings
- 12 pecan halves
- ¼ cup chopped pecans
Optional
Piped Carrots
- orange food coloring
- yellow food coloring
- green food coloring
Things You’ll Need
-
2 9-inch cake pans
-
Stand mixer or hand
mixer -
Wire cooling racks
-
cake turntable optional for
decorating -
Bench scraper
-
Wilton tip 5 optional for
decorating -
Wilton tip 10 optional for
decorating
Before You Begin
- The carrots must be washed, ends
cut, and completely peeled. Carrot skins are bitter and since this is a sweet recipe, it’s
best to do so. You’re aiming for a fine shred, so I recommend using a box grater as opposed
to a food processor. Otherwise, too thick of carrots can cause the cake to be crumbly. - Double check your baking powder and baking soda for freshness.
- Use room temperature eggs
which when beaten, trap air more efficiently leading to a lighter, fluffier cake.
Instructions
-
Spray the 2 (9 inch) round cake pans with Canola cooking
spray. Place 2 round pieces of parchment paper fitted to the bottom of the cake
pans and spray more cooking spray over the parchment. This helps the cake separate
from the cake pan after baking completely intact. Set the prepared pans aside.Canola cooking spray -
Make sure the oven rack is in the center of the oven then
preheat your oven for 350 degree F. -
In a large mixing bowl, stir the flour, granulated white
sugar, baking powder, ground cinnamon, ground ginger (optional), Kosher salt, and
baking soda.2 cups all-purpose flour, 2 cups granulated white sugar,
2 teaspoons baking powder,
2 teaspoons ground cinnamon,
1 teaspoon ground ginger, 1/2 teaspoon Kosher salt, 1/2 teaspoon baking soda -
In another large mixing bowl, add the beaten eggs, 3 cups
finely shredded carrot, 1 teaspoon vanilla extract, and 3/4 cup Canola oil. Stir
the mixture until completely combined.4 large eggs, 3 cups shredded carrots, 1 teaspoon pure vanilla extract,
3/4 cup Canola oil -
Gradually add the flour mixture to the wet mixture,
stirring in between each addition, until combined. Add an even amount of batter
to each prepared baking pan. -
Bake the cake layers in the center rack for 30-35 minutes.
Test for doneness by inserting a knife or wooden toothpick into the center of the
cake and it should come out clean. Cool the cake pans on wire racks for 10 minutes,
then remove the cake layers from the cake pans and allow to cool completely on the
wire racks. Remove and discard the parchment paper. The cake must be completely
cooled before applying the frosting. -
When the cake is completely cool, if the cake needs to be
leveled you can now level with a bread knife. This allows you to stack the layers
evenly when assembling. If the layers are pretty flat, it is not necessary to level
the cake layers.
To Make
the Cream Cheese Frosting
-
In a stand mixer (or using a hand held electric mixer), in
a large mixing bowl, mix the cream cheese, unsalted butter, and pure vanilla
extract until combined.8 ounces cream cheese, 1/2 cup unsalted butter, 1 teaspoon pure vanilla extract -
Gradually mix in the sifted confectioner’s sugar,
sprinkling 1/2 cup at a time until the mixture is smooth.5-6 cups confectioner’s sugar -
Reserve 1/2 cup of frosting to pipe on the carrots, and 1/4
cup to pipe the leaves (if desired). You can place them all in separate bowls. -
To color the 1/2 cup of frosting for the carrot decor, add
2 drops of orange food coloring and 1 drop yellow. -
To color the 1/4 cup of frosting for the leaves, add 1 drop
green and 1 drop yellow. -
Set your frosting aside until ready to frost the cake. If
you have some time until frosting the cake, you can refrigerate it but make sure it
is room temperature before frosting. It usually takes a 1/2 hour to become room
temperature after removing from the refrigerator.
To
Assemble the Carrot Cake
-
Add the first layer to the cake turntable or cake stand.
Add frosting to the top of the layer and spread it out so that it hangs over the
edge. Add the 2nd layer. Add enough frosting so that it hangs over the edge. Add
dollops of frosting to the sides and using a bench scraper, cake comb and/or offset
spatula spread the frosting on the sides. -
To create a crumb coat look as seen in our photos, it’s
easiest to use a turntable. Using a bench scraper, gently rotate around the cake
removing excess frosting. Scrape excess frosting into a bowl. Repeat a couple times
until you achieve the desired level of “nakedness” on your cake.
To
Decorate
-
Place twelve pecan halves around the perimeter of the cake.
The pecans are a good indicator as to where you should pipe the carrots on.
Sprinkle with additional chopped pecans.12 pecan halves, 1/4 cup chopped pecans -
Using a Wilton tip 10 or similar, begin piping the carrots.
You can use the pecan halves as a marker for where to pipe each carrot. Start with
gentle pressure then apply more pressure as you elongate the carrot. Doing so will
create ridges and enlarge the carrot as seen in the photos. The “thick end” of the
carrot should be in the centermost part of the cake. -
Using a Wilton tip 5 for the leaves, simply pipe two lines
from the thick end of your carrots.
Expert Tips & FAQs
- You can prepare, frost, and decorate your carrot cake 1-2 days in advance. I would highly
recommend storing it in a cake carrier in the refrigerator so that it stays air-tight. - Freezing – You can freeze the carrot cake layers before assembling. Wrap the fully cooled
cake layers in plastic wrap a few times followed by a layer of aluminum foil. Freeze them
flat (optionally on a baking sheet until firmly frozen). - To freeze individual frosted slices of this cake, flash freeze the slices on a baking sheet.
Once solid to the touch, wrap them individually in plastic wrap followed by a layer of
aluminum foil. Transfer the wrapped slices to a plastic zip-top bag. To thaw, remove the
wrapping and allow to thaw in the refrigerator.
Nutrition
Later!Follow on Pinterest @AmandasCookin or tag #AmandasCookin!
The recipes on this blog are tested with a
conventional gas oven and gas stovetop. It’s important to note that some ovens, especially as they age,
can cook and bake inconsistently. Using an inexpensive oven thermometer can assure you that your oven is
truly heating to the proper temperature. If you use a toaster oven or countertop oven, please keep in
mind that they may not distribute heat the same as a conventional full sized oven and you may need to
adjust your cooking/baking times. In the case of recipes made with a pressure cooker, air fryer, slow
cooker, or other appliance, a link to the appliances we use is listed within each respective recipe.
For baking recipes where measurements are given by weight, please note that results may not be the same
if cups are used instead, and we can’t guarantee success with that method.
This recipe originally appeared here on April 6, 2019 and has since been updated with new photos and expert
tips. The recipe is inspired by “Carrot Cake” from The Better Homes and Gardens New Cook Book and was
contributed to the blog by Sara from Life’s Little Sweets.
