The Ultimate Guide to Building an Epic Bloody Mary Charcuterie Board for Your Next Party
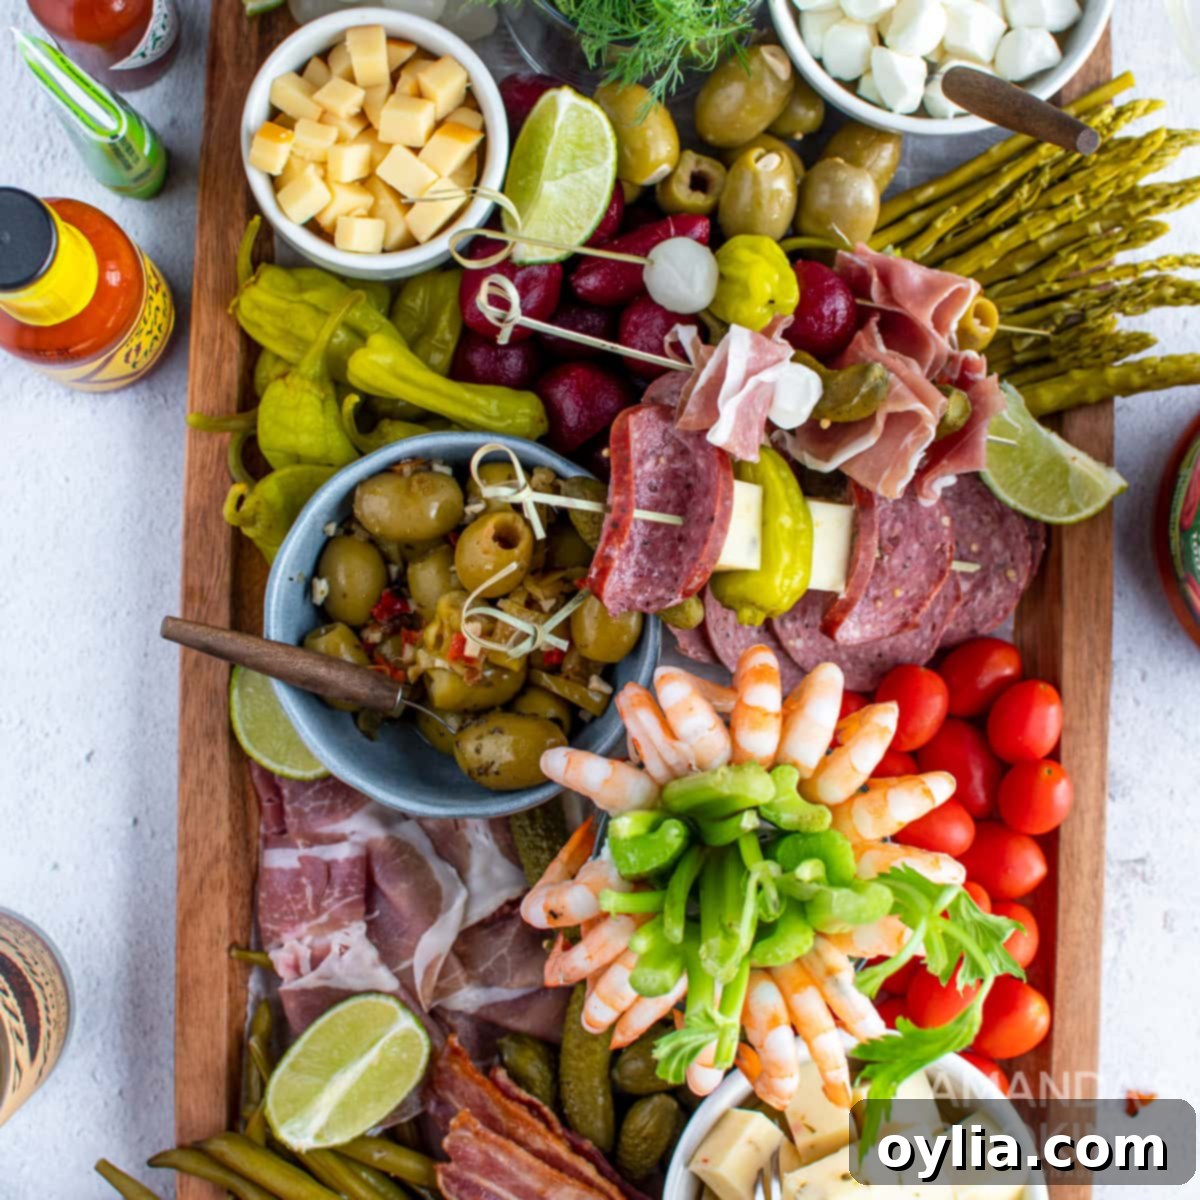
A classic Bloody Mary is a treat on its own, but when you’re hosting friends and family, why not transform your gathering into an unforgettable event? This comprehensive guide to creating a Bloody Mary Charcuterie Board will elevate your brunch, tailgate, or weekend get-together from ordinary to extraordinary. Imagine a vibrant spread of delicious, customizable garnishes, allowing everyone to craft their perfect cocktail masterpiece. Get ready to impress your guests and make some incredible memories!
Why a Bloody Mary Charcuterie Board is Perfect for Entertaining
The magic of a Bloody Mary Charcuterie Board lies in its interactive and visually stunning presentation. It goes beyond just serving drinks; it creates an experience. Here’s why this concept is a winner for any gathering:
- Unmatched Customization: One of the biggest appeals of Bloody Marys is the vast array of possible garnishes. A charcuterie board transforms this into a self-serve bar, allowing each guest to personalize their drink exactly to their liking. Whether they prefer a savory, spicy, or fresh profile, all the components are laid out beautifully.
- Engaging Social Interaction: Guests will love discussing their topping choices, discovering new combinations, and even creating playful “skewer towers.” It’s an instant conversation starter and a fun activity that gets everyone involved in the drink-making process.
- Visually Stunning Centerpiece: A well-arranged charcuterie board is a feast for the eyes. The vibrant colors and varied textures of the garnishes create an appealing focal point for your party spread. It shows thoughtfulness and effort, making your guests feel truly special.
- Ease of Hosting: While it looks elaborate, much of the preparation for a Bloody Mary Charcuterie Board can be done in advance. Most ingredients are store-bought, requiring minimal cooking (like bacon) and simple assembly. This frees you up to enjoy your guests instead of being stuck in the kitchen.
- Perfect for Any Occasion: From a lazy Sunday brunch to a lively game day tailgate, a sophisticated cocktail party, or a holiday gathering, a Bloody Mary board is incredibly versatile and always a hit.
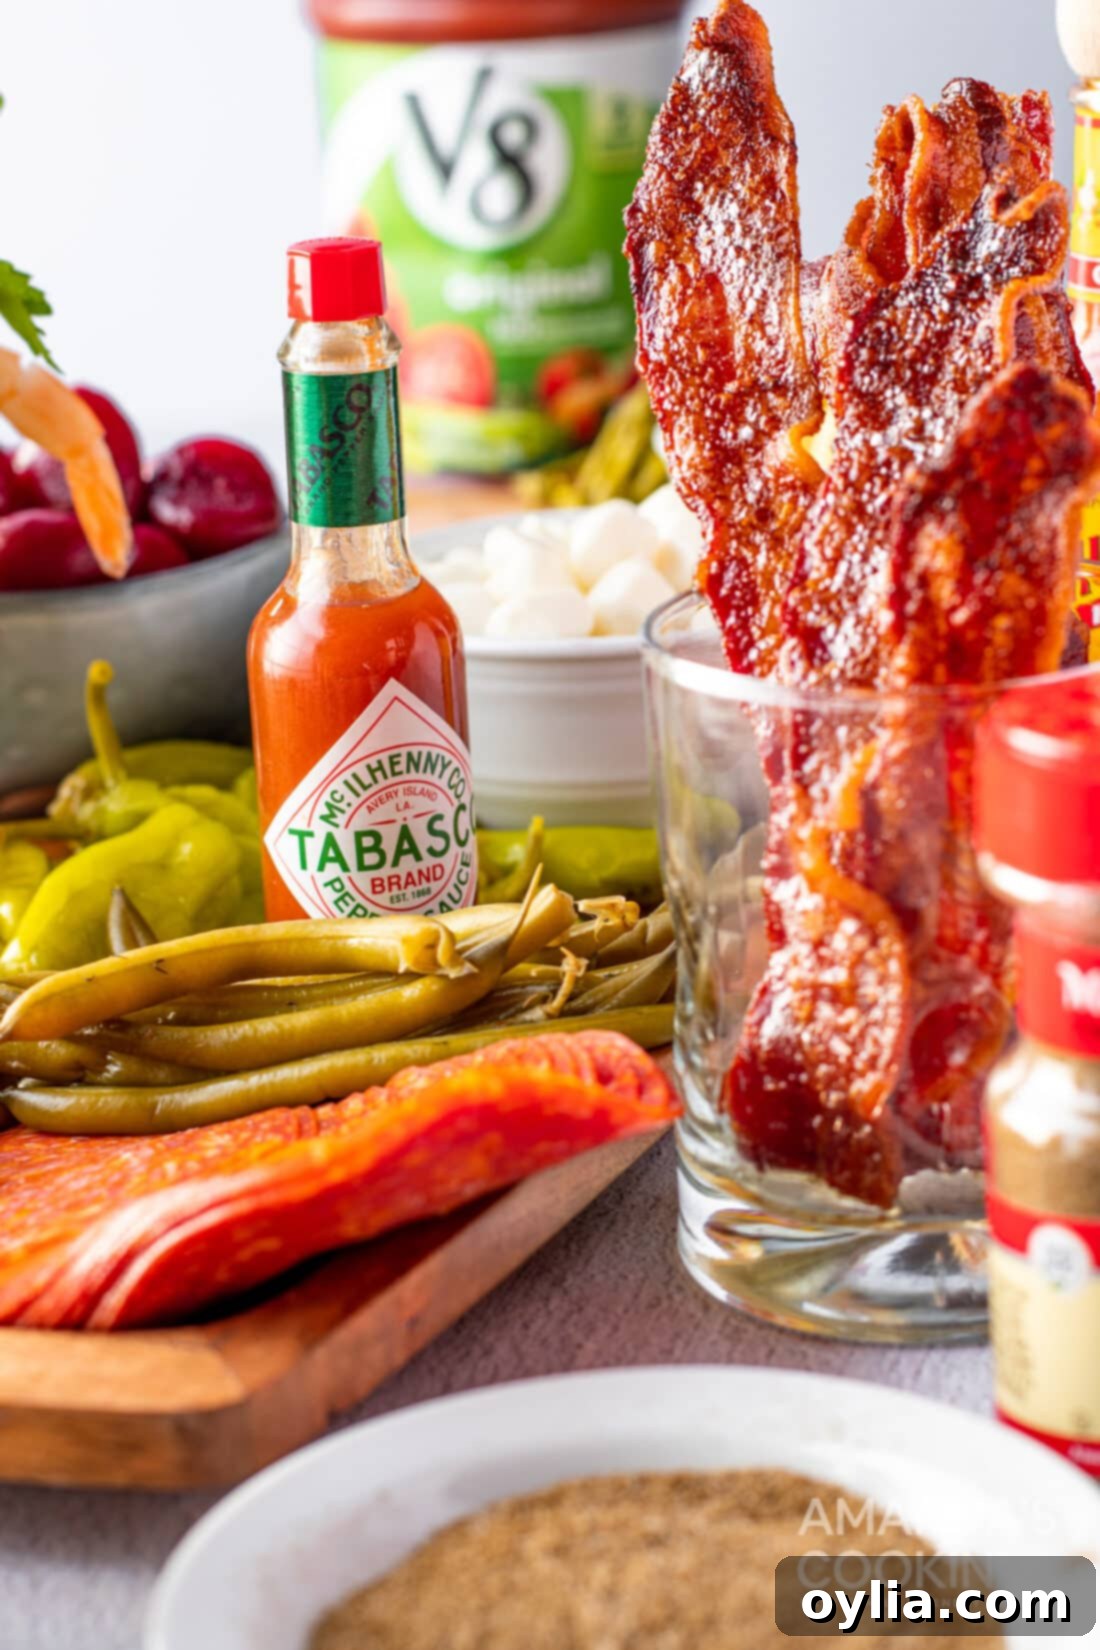
Curating Your Bloody Mary Charcuterie Board: A World of Garnishes
The beauty of a Bloody Mary bar is that you can truly make it your own. Think of a charcuterie board as a canvas where you can paint with flavors and textures. The following categories and suggestions will help you select a diverse and exciting range of garnishes:
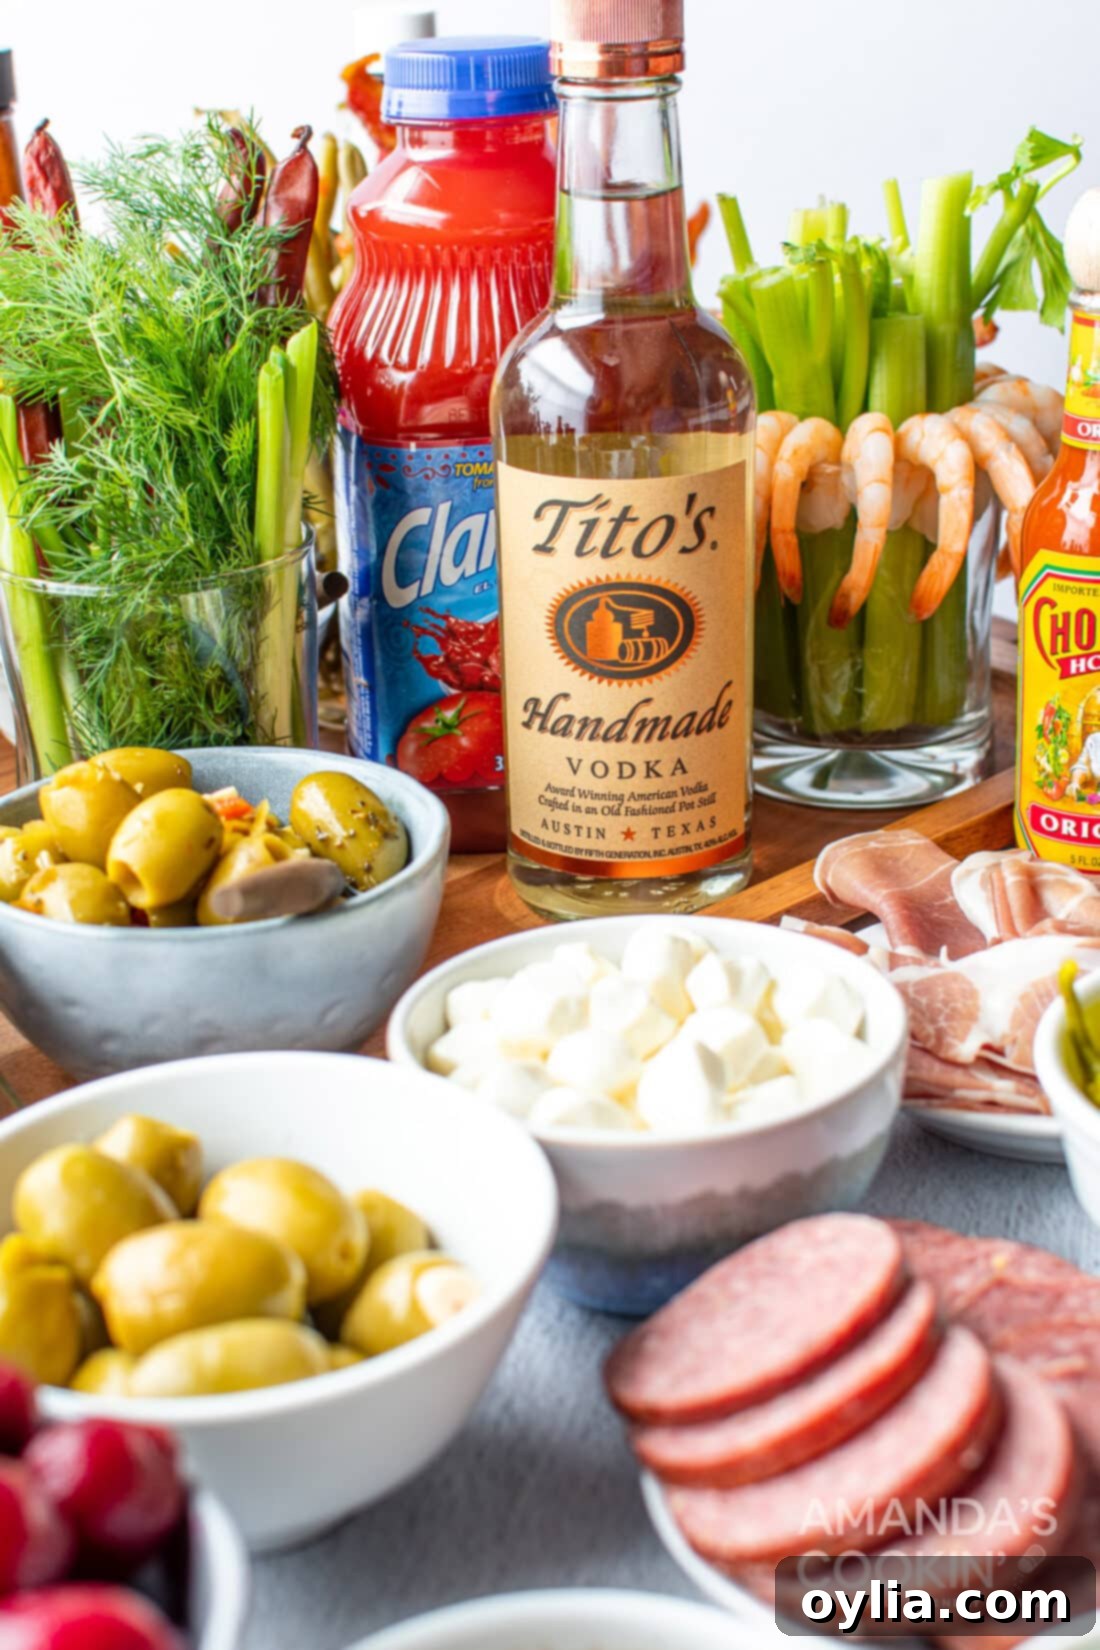
Essential Garnishes: The Foundation of Flavor
- Pickled & Briny: These are non-negotiables for any good Bloody Mary. They add that classic salty, tangy kick.
- Garlic stuffed green olives
- Pimento stuffed olives
- Mini dill pickles (don’t forget to save some juice for the drinks!)
- Pickled onions
- Pickled beets (for a touch of color and earthy sweetness)
- Pickled green beans
- Pickled asparagus (especially long spears for elegant stirring)
- Pepperoncinis (for a mild heat and vinegary zest)
- Fresh & Crisp: These elements add vital freshness and a satisfying crunch.
- Cherry or grape tomatoes (bright pops of color and juicy sweetness)
- Celery ribs with leaves (cut into long pieces, they double as stirrers and a classic garnish)
- Lime slices or wedges (essential for that citrusy finish)
- Fresh Dill or Parsley (for aromatic freshness and a touch of green)
- Meaty & Savory: Elevate the richness and heartiness of your Bloody Marys with these protein-packed options.
- Cooked bacon strips (crispy is key for the best texture!)
- Long meat sticks (such as Slim Jims or gourmet beef sticks)
- Prosciutto (thinly sliced, adds a delicate salty flavor)
- Large pepperoni slices (can be folded or rolled)
- Thinly sliced summer sausage
- Cooked shrimp with tails on (a luxurious addition that pairs wonderfully with tomato)
- Cheesy Delights: A variety of cheeses adds creamy, sharp, or smoky notes.
- Jalapeno Cheddar cheese (cubed for easy grabbing, adds a spicy kick)
- Pepper Jack cheese (cubed, another spicy and creamy option)
- Smoked Gouda (cubed, offers a rich, smoky flavor)
- Mini mozzarella balls (bocconcini, soft and mild)
- Sauces & Seasonings (on the side): While the Bloody Mary mix itself is seasoned, having extra options allows for even more customization.
- Small bottles of hot sauce (Tabasco, Cholula, Sriracha)
- Prepared horseradish (for a powerful sinus-clearing kick)
- Worcestershire sauce
- Celery salt or smoked paprika for rimming glasses (optional, but a nice touch!)
Crafting Your Stunning Bloody Mary Charcuterie Board: Step-by-Step
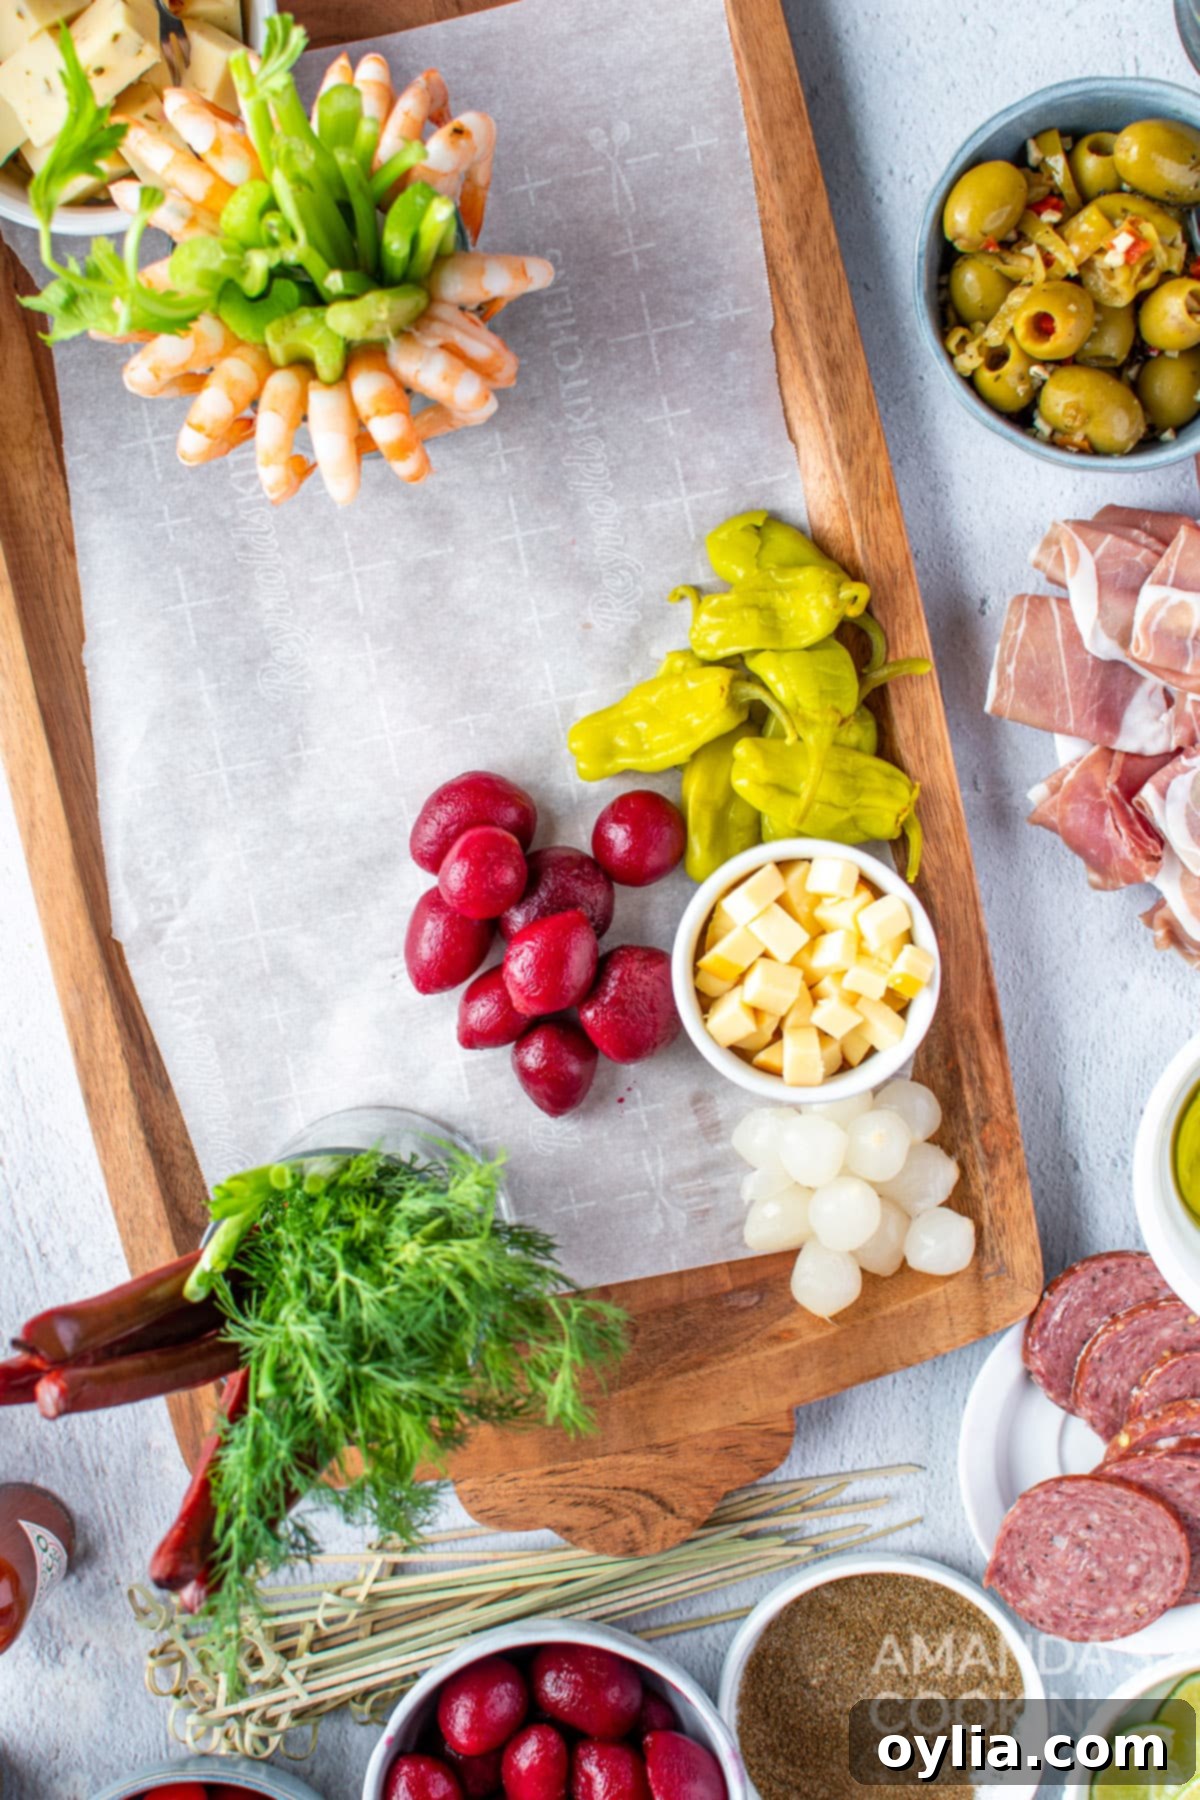
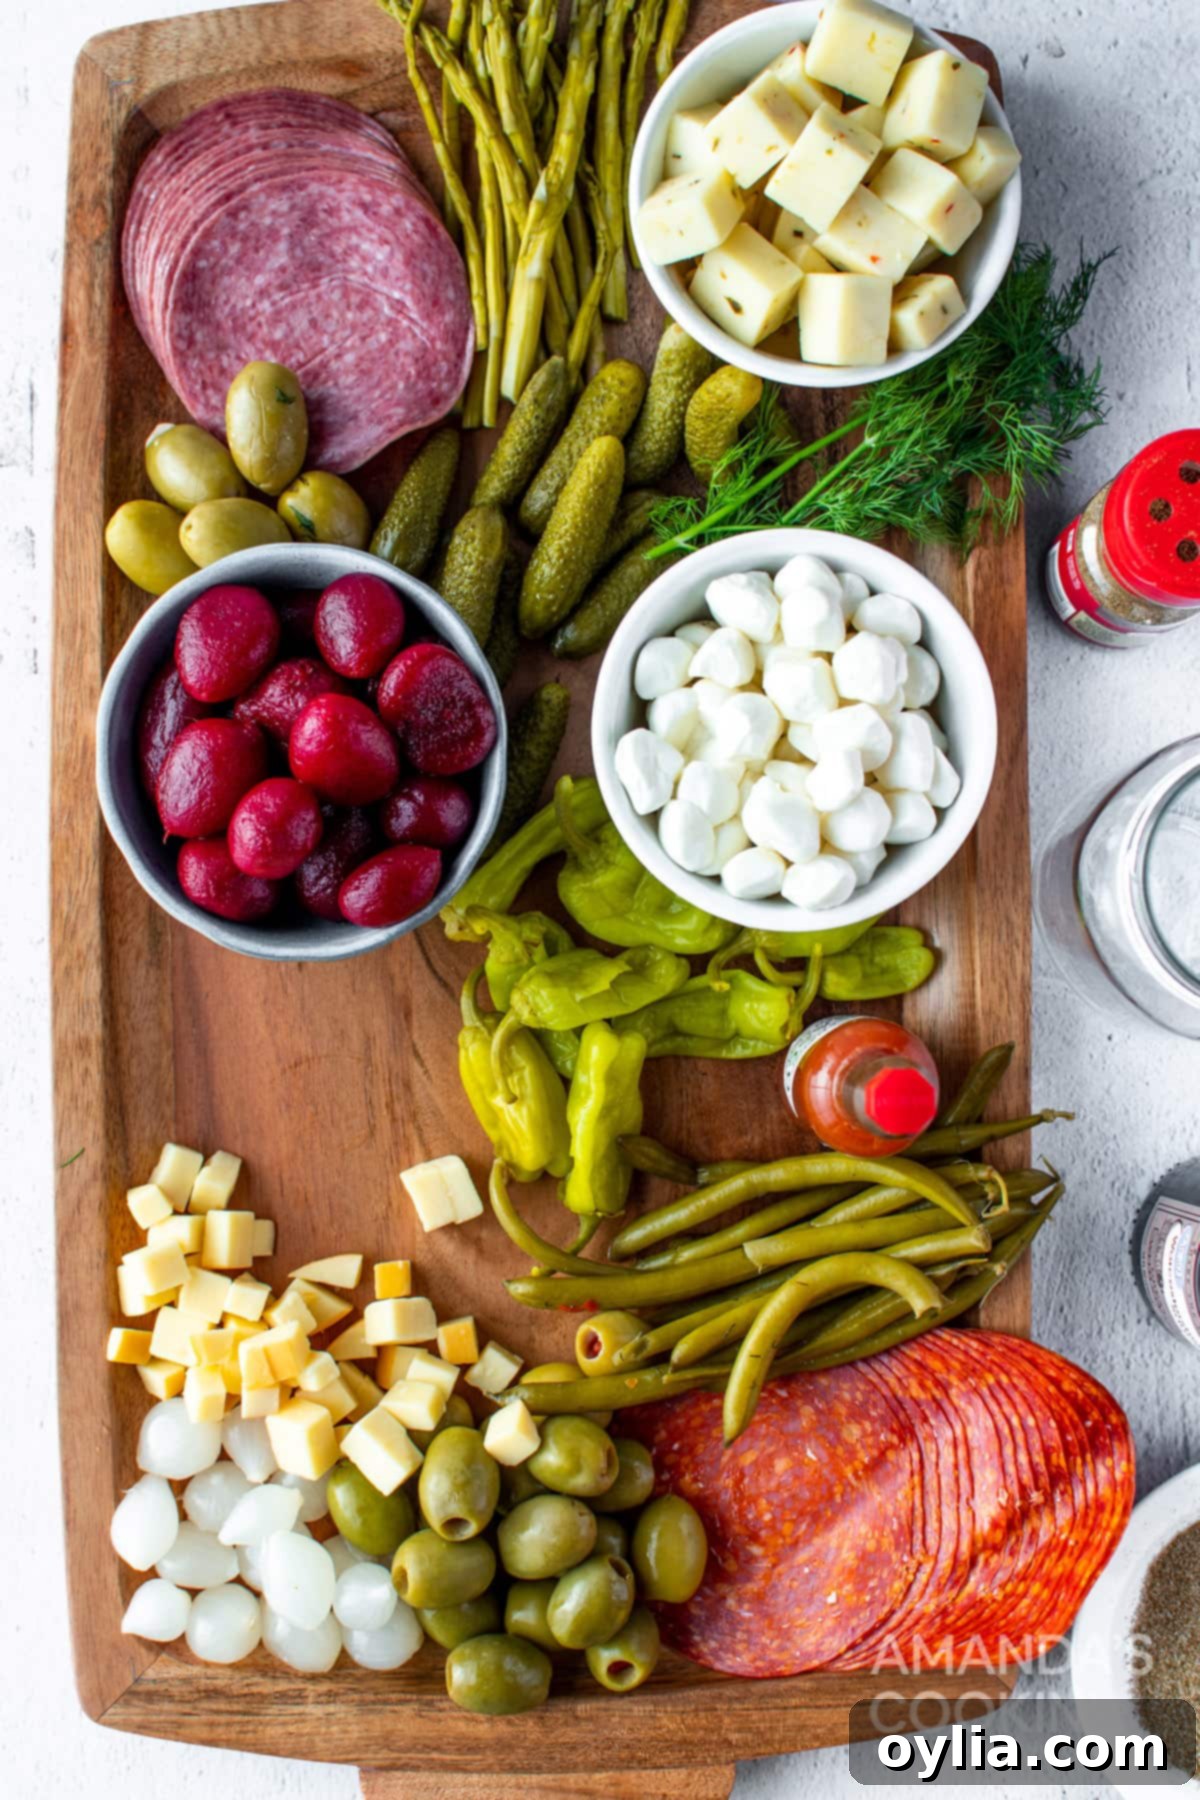
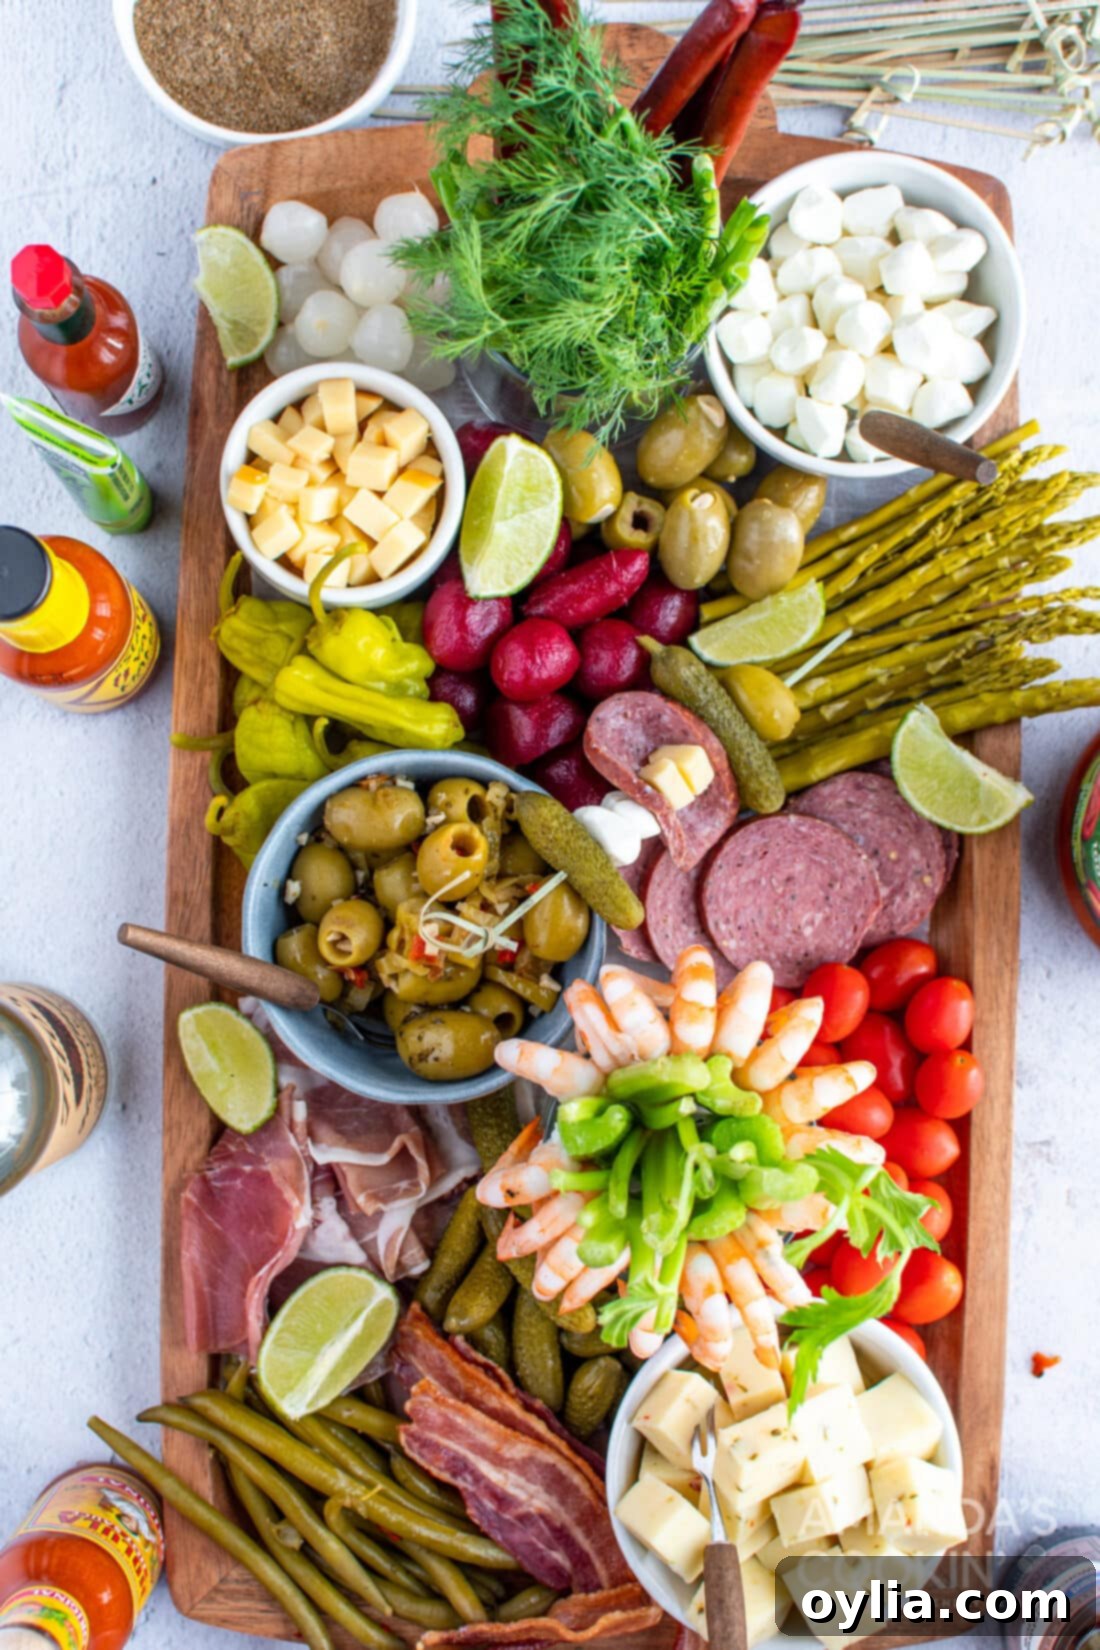
These step by step photos and instructions are here to help you visualize how to make this recipe. You can Jump to Recipe to get the printable version of this recipe, complete with measurements and instructions at the bottom.
- Choose Your Foundation: Begin with a large cutting board, an elegant tray, or a spacious serving platter. The size will depend on the number of guests and the variety of garnishes you plan to offer. Consider materials like wood, slate, or ceramic for visual appeal.
-
Anchor with Tall & Wet Items: Strategically place some items in cups or small bowls. This creates height and contains messier ingredients. For example, tall celery stalks, crispy bacon, and longer pickled vegetables like asparagus or green beans look great in slender glasses. Smaller bowls are perfect for olives, pickled beets, or onions, preventing their juices from mingling with other ingredients on the board.

-
Fill in the Gaps with Core Garnishes: Once your anchor items are in place, start filling the remaining spaces on the platter. Arrange cheeses, pickles, a variety of olives, other pickled vegetables, and cherry tomatoes. Don’t just dump them; try to create attractive mounds or lines.

- Add the Finishing Touches & Tools: Place the cocktail picks or long toothpicks in a small cup or holder right next to or on the board itself. These are essential for guests to easily skewer their chosen garnishes.
- Embrace Visual Interest: Don’t be afraid to spread items of different colors and shapes around the board. This creates a vibrant and inviting display. For instance, intermix the green of asparagus with the bright red of cherry tomatoes, or place cubed cheeses next to rolled meats. Varying heights and textures makes the board more dynamic and appealing.
Tips for the Perfect Bloody Mary Bar Experience
- Prepare the Drinks Separately: While the garnishes are on the charcuterie board, have your Bloody Mary mix, vodka, and ice ready at a separate station. This prevents the board from getting messy and allows guests to build their drink first, then garnish.
- Keep it Chilled: If you’re preparing the board ahead of time or hosting outdoors, consider chilling your board or using ice packs underneath (if feasible) to keep perishable items fresh.
- Offer Variety, Not Overload: You don’t need every single garnish suggestion. Choose a good mix of 10-15 different items, ensuring a balance of savory, spicy, fresh, and briny options.
- Mindful Placement: Place complementary items near each other. For example, olives near cheese, or bacon near hot sauce. This subtly guides guests to delicious combinations.
- Replenish as Needed: Keep an eye on the board throughout your gathering and replenish popular items to keep the display looking full and inviting.
Frequently Asked Questions About Bloody Mary Charcuterie Boards
Yes, absolutely! To complete your ultimate Bloody Mary experience, I have an amazing Bloody Mary recipe that perfectly balances savory, spicy, and tangy flavors. It’s the ideal base for all these fantastic garnishes. Enjoy!
Not at all! The beauty of a charcuterie board, especially a Bloody Mary one, is its flexibility. You can customize it entirely to your preferences, your guests’ tastes, or what’s available at your local store. Feel free to pick and choose your favorite garnishes, and don’t hesitate to experiment with new ones!
Yes, many components can be prepped in advance. Cook and crisp your bacon, chop your celery, cube your cheeses, and drain your pickled items a few hours before the party. Store them separately in airtight containers in the refrigerator. Assemble the board about 30-60 minutes before serving to ensure freshness and visual appeal, especially for items like tomatoes and fresh herbs.
The serving size is highly adaptable. For a smaller gathering of 4-6 people, you might use a medium-sized board with 8-10 different garnish options. For a larger party of 10-15 guests, opt for a very large board or even two separate boards, offering a wider variety of 15-20 garnishes. Always consider your guest count and plan your ingredient quantities accordingly.
A large, sturdy cutting board (wood or bamboo is popular), a slate board, or a wide ceramic platter works wonderfully. The key is to have enough surface area to display a variety of items without overcrowding. The material itself can also add to the aesthetic, so choose one that complements your party’s theme or your personal style.
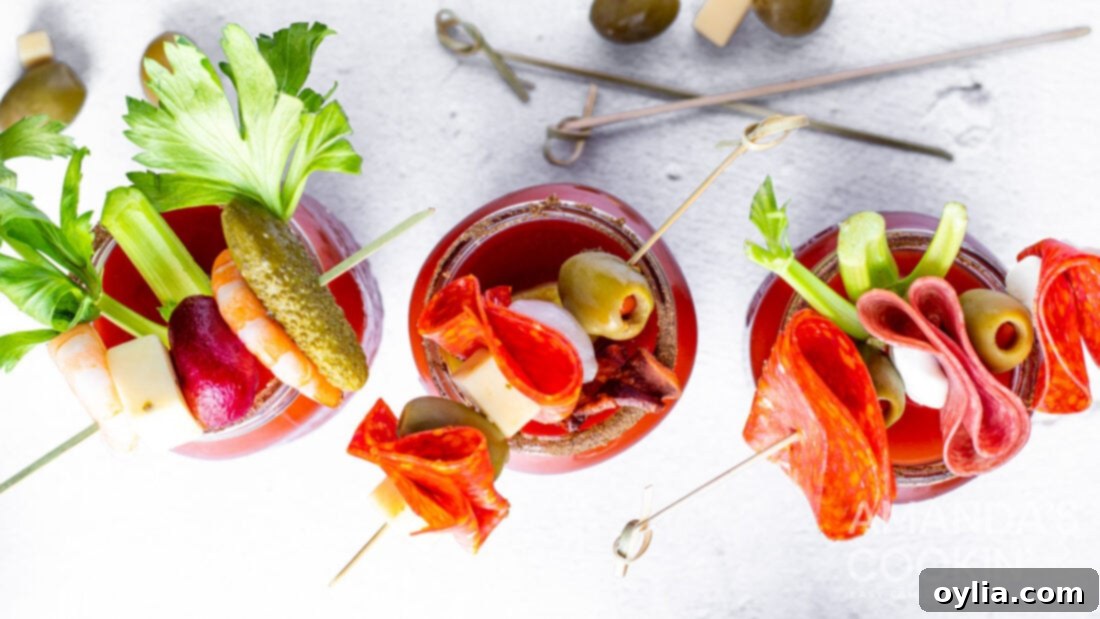
Transform your next get-together into an epic event with this incredible Bloody Mary Charcuterie Board. Your guests will be amazed by the stunning presentation and delighted by the opportunity to create their very own, perfectly customized Bloody Mary cocktails. It’s not just a drink; it’s a delightful culinary adventure!
More Fantastic Party Recipes to Complement Your Board
Looking for more crowd-pleasing appetizers and party foods to serve alongside your Bloody Mary Charcuterie Board? Here are some delicious ideas that pair perfectly with a festive atmosphere:
- Partybrot – German Party Bread: A cheesy, pull-apart bread that’s perfect for sharing.
- Loaded Nachos: A hearty and satisfying dish for any casual gathering.
- Crispy Fried Jalapeno Slices: For those who love an extra kick!
- Shrimp Cocktail: A classic appetizer that always feels elegant.
- Pizza Sliders: Easy to make and universally loved, these are great for a diverse spread.
I love to bake and cook and share my kitchen experience with all of you! Remembering to come back each day can be tough, that’s why I offer a convenient newsletter every time a new recipe posts. Simply subscribe and start receiving your free daily recipes!
Bloody Mary Charcuterie Board
IMPORTANT – There are often Frequently Asked Questions within the blog post that you may find helpful. Simply scroll back up to read them!
Print It
Pin It
Rate It
Save ItSaved!
Course: Appetizer
Ingredients
- 1 jar garlic stuffed green olives
- 1 jar pimento stuffed olives
- 1 jar mini dill pickles save the juice for the Bloody Mary mix
- 1 jar pickled onions
- 1 jar pickled beets
- 1 jar pickled green beans
- 1 jar pickled asparagus
- Cherry or grape tomatoes
- Pepperoncinis
- 3 celery ribs with leaves cut into long pieces for stirring
- 6 – 8 whole pieces bacon cooked until crispy
- Long meat sticks
- Prosciutto
- Large pepperoni slices
- Thin sliced summer sausage
- Shrimp cooked with tails on
- Jalapeno Cheddar cheese cubed
- Pepper Jack cheese cubed
- Smoked Gouda cubed
- Mini mozzarella balls
- Fresh Dill
- Limes sliced into wedges
Things You’ll Need
-
Large cutting board or serving platter
-
Cocktail picks or Long toothpicks
-
Small bowls or ramekins for wet ingredients
Before You Begin
Instructions
-
Select Your Board: Start with a spacious cutting board, decorative tray, or serving platter as your base. Consider the number of guests and the variety of garnishes to determine the appropriate size.
-
Place Anchor Items: Begin by strategically placing taller items like celery and bacon in small, sturdy cups. Use smaller bowls for wet items such as olives, pickled beets, and pickled onions to keep them contained and prevent liquids from spreading across the board. Distribute these around the platter to create visual anchors.
-
Arrange Fillers: Fill in the remaining spaces on the board with the rest of your chosen garnishes. Create inviting clusters of cubed cheeses, neatly arranged pickles, various olives, other pickled vegetables, and vibrant cherry tomatoes. Think about creating ‘rivers’ or distinct sections of ingredients for an organized yet bountiful look.
-
Provide Tools: Place a small cup filled with cocktail picks or long toothpicks near the board. These are essential for guests to easily skewer their desired garnishes.
-
Final Touches for Visual Appeal: Distribute fresh herbs like dill or parsley for a pop of color and aroma. Intermix items of contrasting colors and shapes to create visual interest – for example, arrange long, slender pickled asparagus spears next to bright red cherry tomatoes, or place dark prosciutto slices beside light mozzarella balls. Ensure a balanced and abundant presentation.
Tried this Recipe? Pin it for Later!Follow on Pinterest @AmandasCookin or tag #AmandasCookin!
The recipes on this blog are tested with a conventional gas oven and gas stovetop. It’s important to note that some ovens, especially as they age, can cook and bake inconsistently. Using an inexpensive oven thermometer can assure you that your oven is truly heating to the proper temperature. If you use a toaster oven or countertop oven, please keep in mind that they may not distribute heat the same as a conventional full sized oven and you may need to adjust your cooking/baking times. In the case of recipes made with a pressure cooker, air fryer, slow cooker, or other appliance, a link to the appliances we use is listed within each respective recipe. For baking recipes where measurements are given by weight, please note that results may not be the same if cups are used instead, and we can’t guarantee success with that method.
