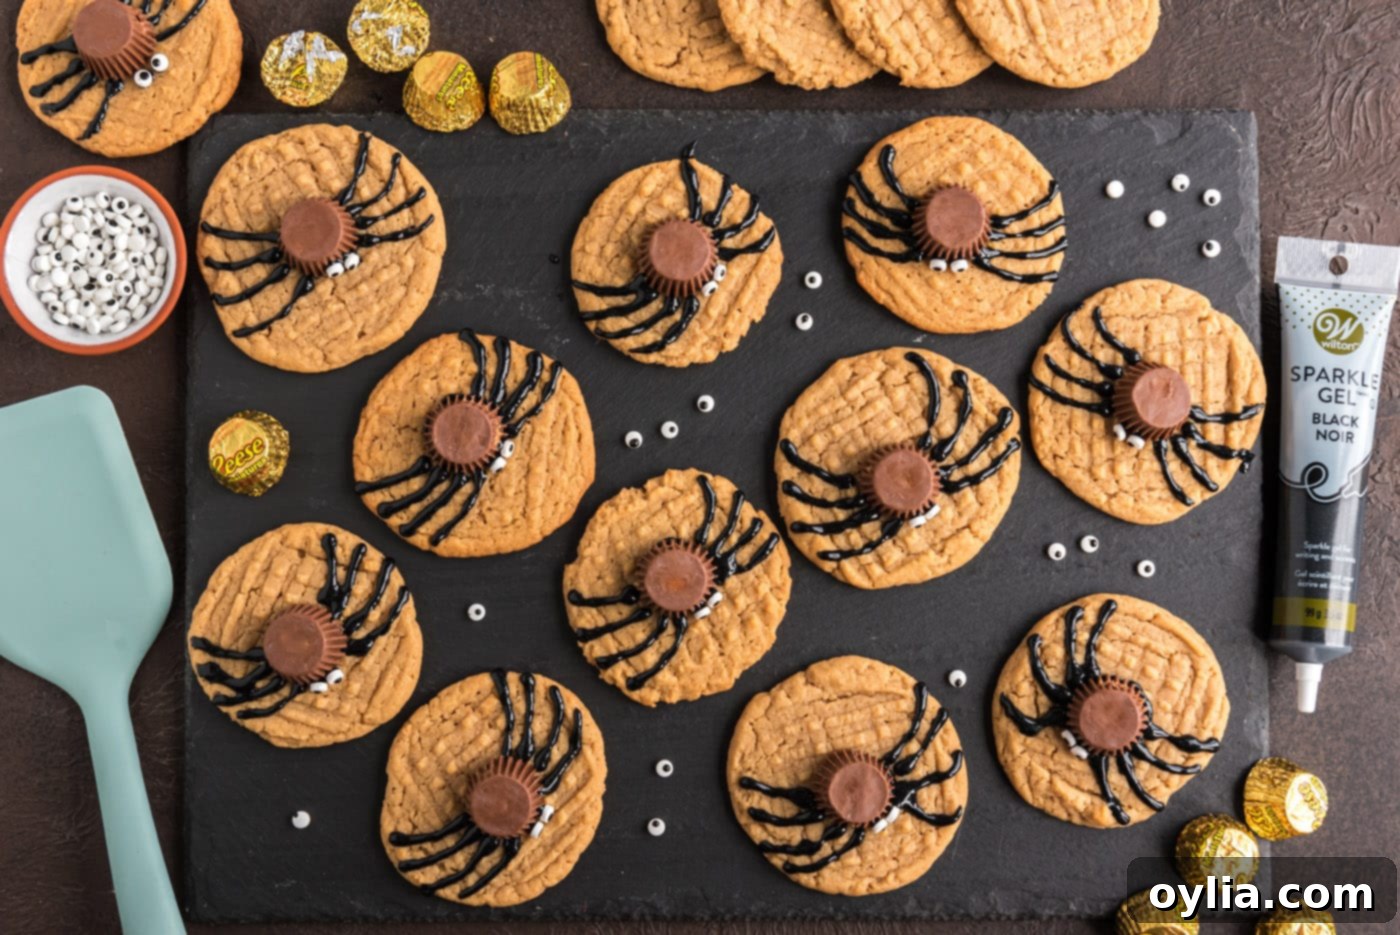
Spooktacularly Simple Spider Cookies: The Ultimate Easy Halloween Treat!
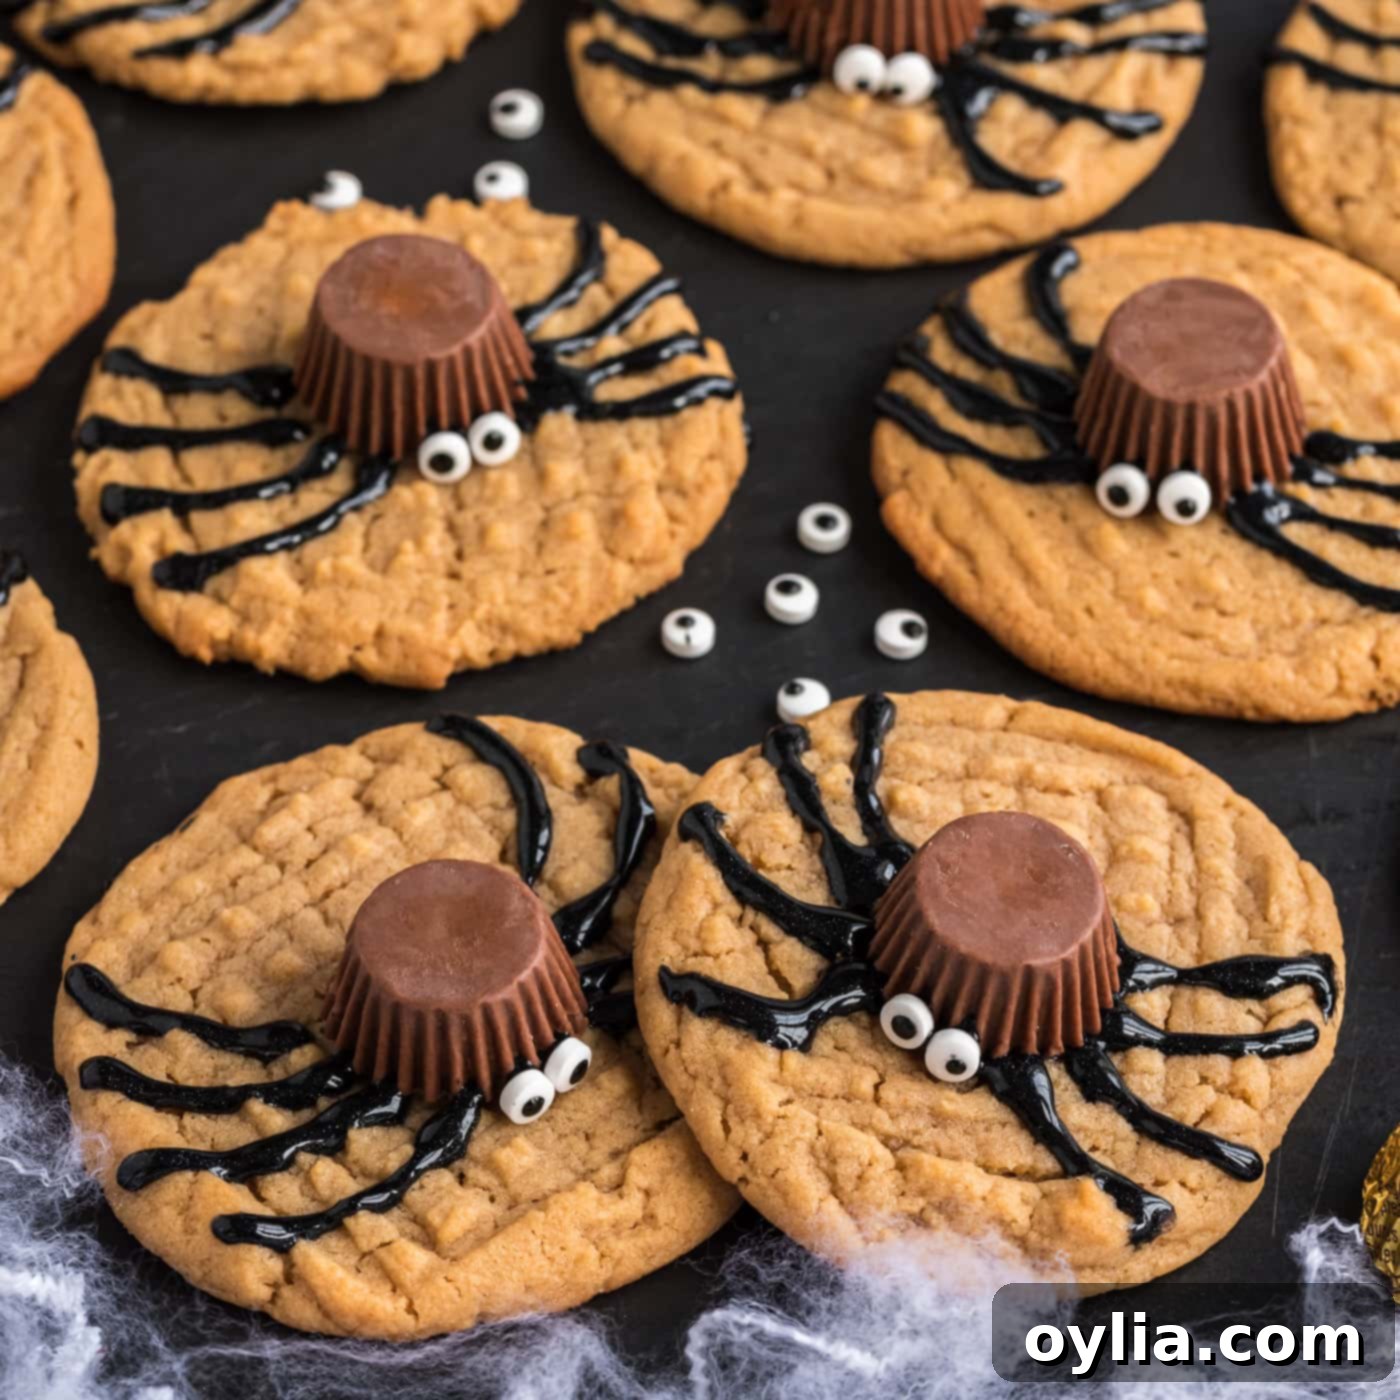
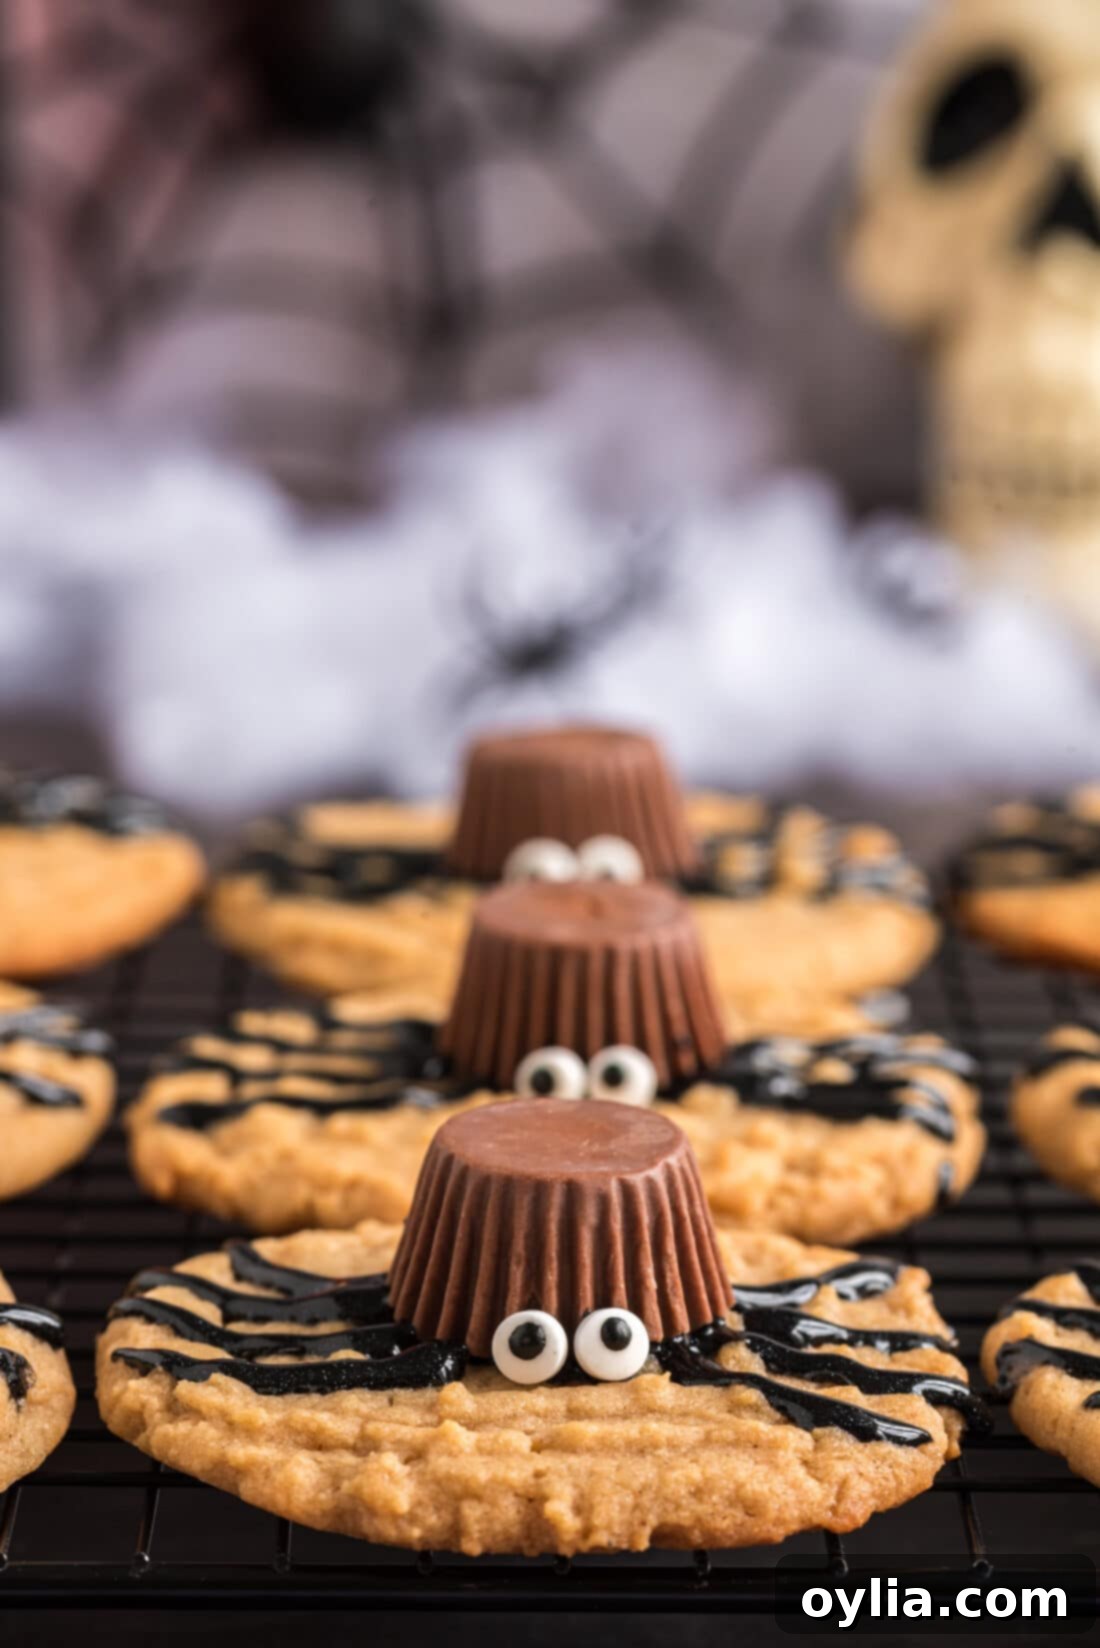
Get ready for a treat that’s as cute as it is delicious! These adorable **Spider Cookies** are the perfect blend of sweet and spooky, designed to disappear from your Halloween dessert table in mere minutes. Crafted with a soft, chewy homemade peanut butter cookie base, each treat is crowned with a mini Reese’s peanut butter cup and whimsical candy eyeballs, brought to life with piped decorator gel for realistic (and fun!) spider legs. They’re an absolute must-have for any Halloween celebration, offering a delightful bite that kids and adults alike will adore.
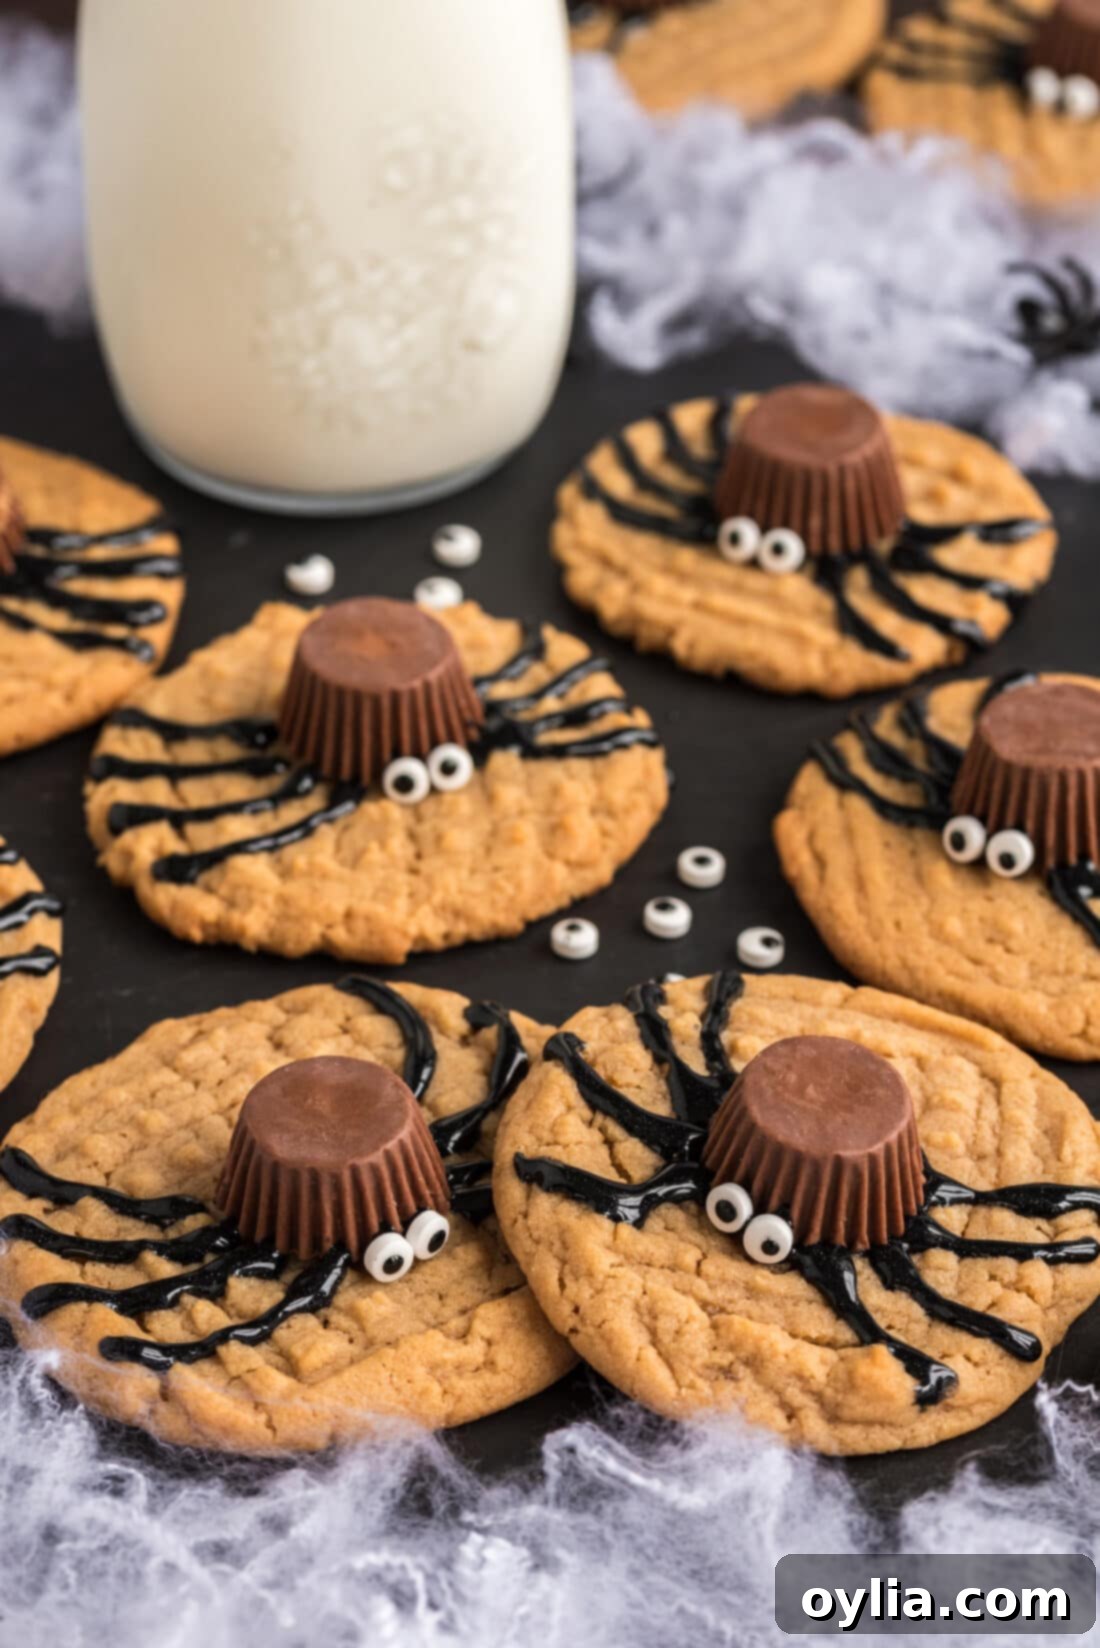
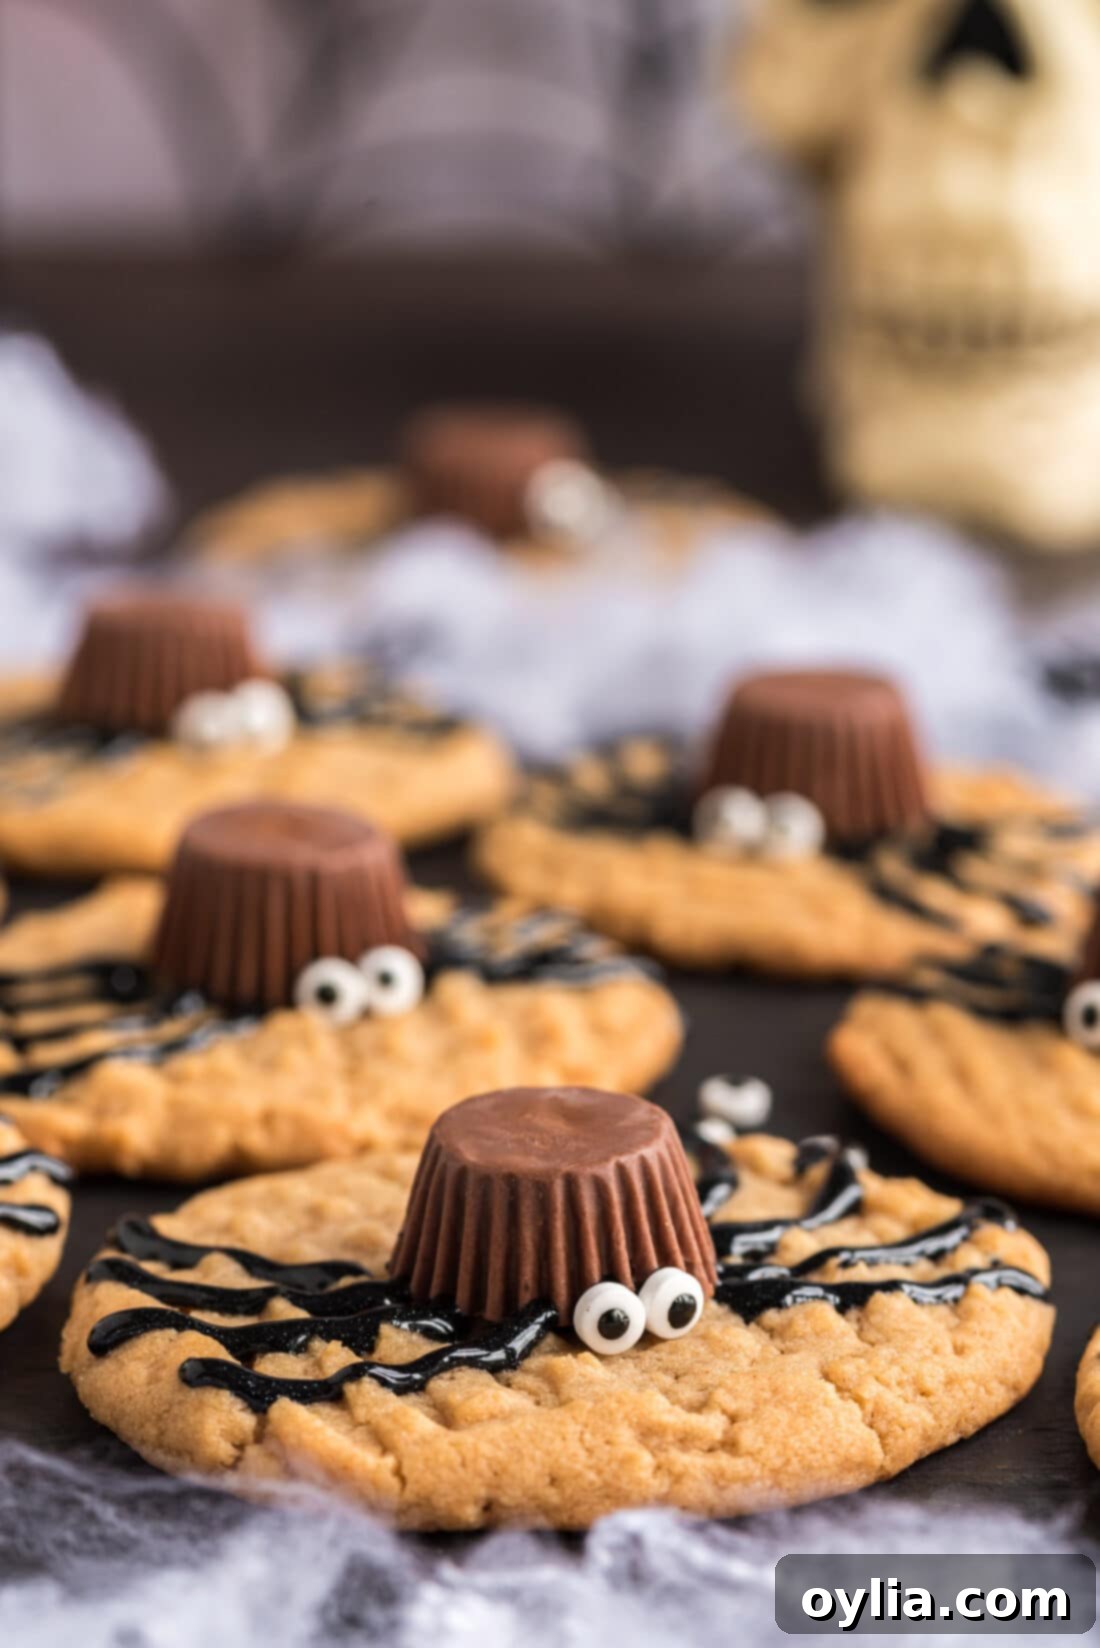
Why These Easy Halloween Spider Cookies Are a Must-Make
These aren’t just any cookies; they’re a Halloween staple that brings smiles and a touch of delightful fright to any gathering. Our **Spider Cookies** recipe stands out because it marries convenience with homemade goodness. It’s truly the only time you’ll want creepy crawlies making an appearance on your food! By starting with our tried-and-true, soft, and chewy peanut butter cookie recipe as the base, you’re guaranteed a delicious foundation. Then, with the simple addition of a Reese’s cup for the spider’s body, candy eyeballs for that googly stare, and a few artful lines of decorator gel for the legs, you transform ordinary cookies into an extraordinary festive treat. We first introduced these at our pumpkin painting party a couple of years ago, and they were, without a doubt, the first dessert to vanish from the table.
What makes this recipe particularly amazing is its incredible ease. You don’t need to be a master baker or decorator to achieve stunning results. The process is straightforward: whip up some homemade cookies, cool them, then a quick pipe-and-place for the decorations. It’s a fun, low-stress activity that even allows for enthusiastic little helpers in the kitchen. Imagine the joy on kids’ faces as they help create these edible arachnids! From prepping the dough to rolling and baking, then the final decorating flourish, each step is simple, making it a perfect project for families looking to add a homemade touch to their Halloween festivities without spending hours in the kitchen.
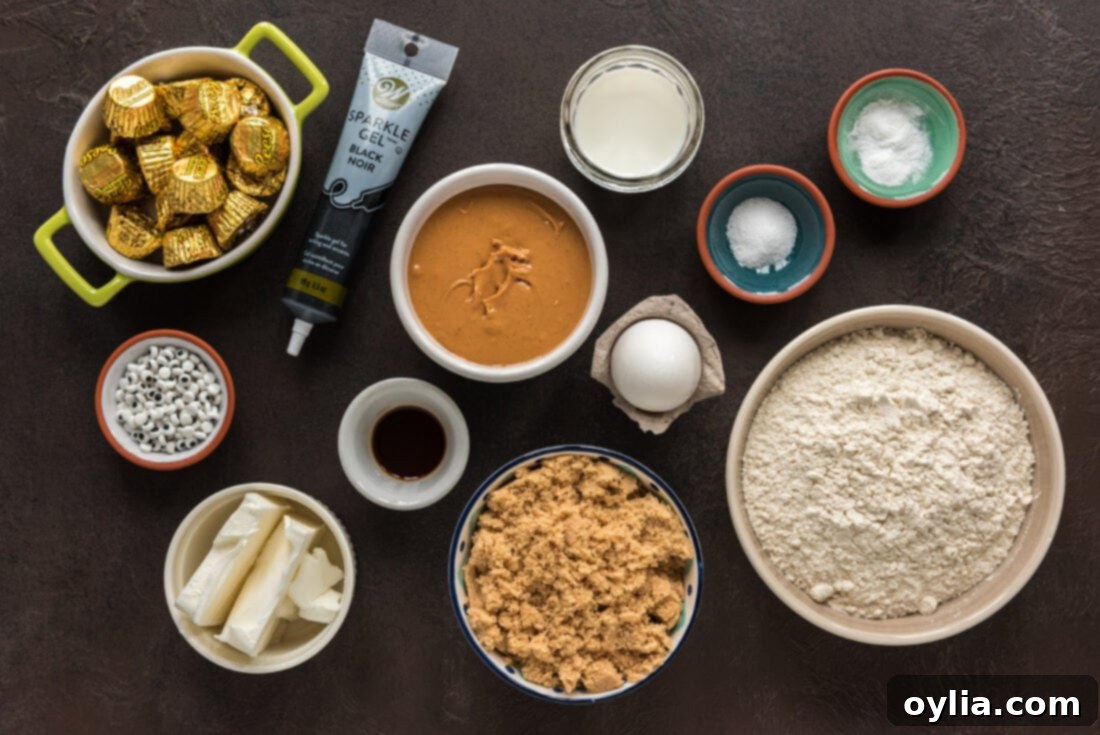
Key Ingredients for Your Adorable Spider Cookies
Below, you’ll find an overview of the essential ingredients needed to create these delightful Halloween treats. For precise measurements and step-by-step instructions, please refer to the printable recipe card located at the end of this article. Gather these simple components, and you’ll be well on your way to baking up a batch of spooky-sweet goodness!
Ingredient Insights and Clever Substitutions
Understanding your ingredients and knowing when to substitute can elevate your baking experience. Here’s a closer look at what goes into our spider cookies and how you can adapt the recipe to your liking or what you have on hand:
- COOKIES – The heart of our spider cookies is our beloved soft and chewy peanut butter cookie recipe. For an even chewier texture, try underbaking them by just a minute or so – they’ll continue to set as they cool. While the traditional crisscross fork marks are characteristic of peanut butter cookies, feel free to skip them for a smoother top if you prefer. Want a shortcut? Our cake mix peanut butter cookies make an excellent base, saving you time without compromising on flavor. Beyond peanut butter, these spider decorations can transform any round cookie. Consider using classic sugar cookies, rich chocolate chip cookies, or even festive pumpkin cookies for a unique twist on this Halloween treat! The key is a relatively flat, stable cookie surface for easy decoration.
- DECORATOR GEL – Black decorator gel is essential for piping the spindly spider legs and securely “gluing” the Reese’s cup body and candy eyeballs into place. Be mindful that decorator gel can take a little while to fully set, so it’s best to decorate your cookies on a flat surface and avoid moving them excessively until everything is firm. This prevents the Reese’s cups or candy eyes from sliding around. If you don’t have decorator gel, don’t fret! You can achieve similar results with cookie icing, or by melting semi-sweet chocolate chips, baking chocolate, almond bark, or candy melts. For melted chocolate alternatives, ensure it’s melted smoothly but not too hot, and use a piping bag with a small round tip or even a Ziploc bag with a tiny corner snipped off for precise lines.
- REESE’S PEANUT BUTTER CUPS – These iconic peanut butter candies serve as the perfect round body for our spiders. Make sure to use individually wrapped mini Reese’s cups for convenience and the ideal size. It’s crucial that your cookies are completely cool before you attempt to place the Reese’s cups on top. Applying them to warm cookies will cause the chocolate to melt and spread, resulting in a messy (though still tasty!) spider. Patience here ensures a clean, well-defined spider body.
- CANDY EYEBALLS – No spider is complete without its creepy-cute eyes! Candy eyeballs are readily available in most baking aisles, especially around Halloween. These edible decorations come in various sizes; we recommend choosing a smaller size for the mini Reese’s cups to maintain proportion. You’ll need two per spider, giving each cookie a distinct, adorable, yet slightly unsettling gaze.
Crafting Your Spooky-Sweet Spider Cookies: A Step-by-Step Guide
These step-by-step photos and instructions are here to help you visualize how to make this recipe successfully. You can Jump to Recipe to get the printable version of this recipe, complete with measurements and instructions at the bottom.
- Preheat your oven to 375 degrees F. This ensures your oven is at the correct temperature for even baking, preventing cookies from spreading too much or baking unevenly.
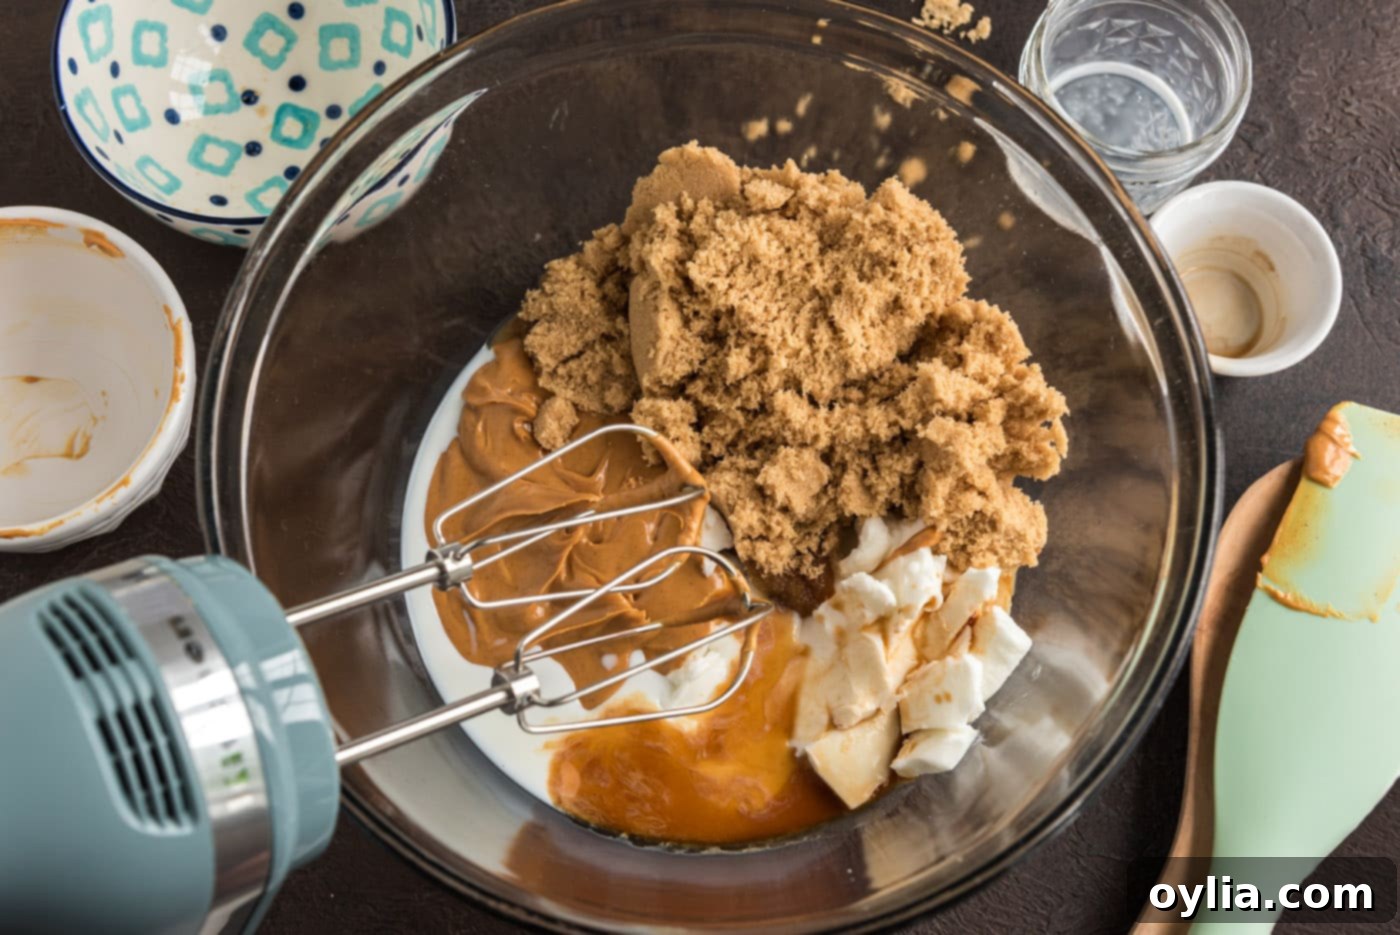
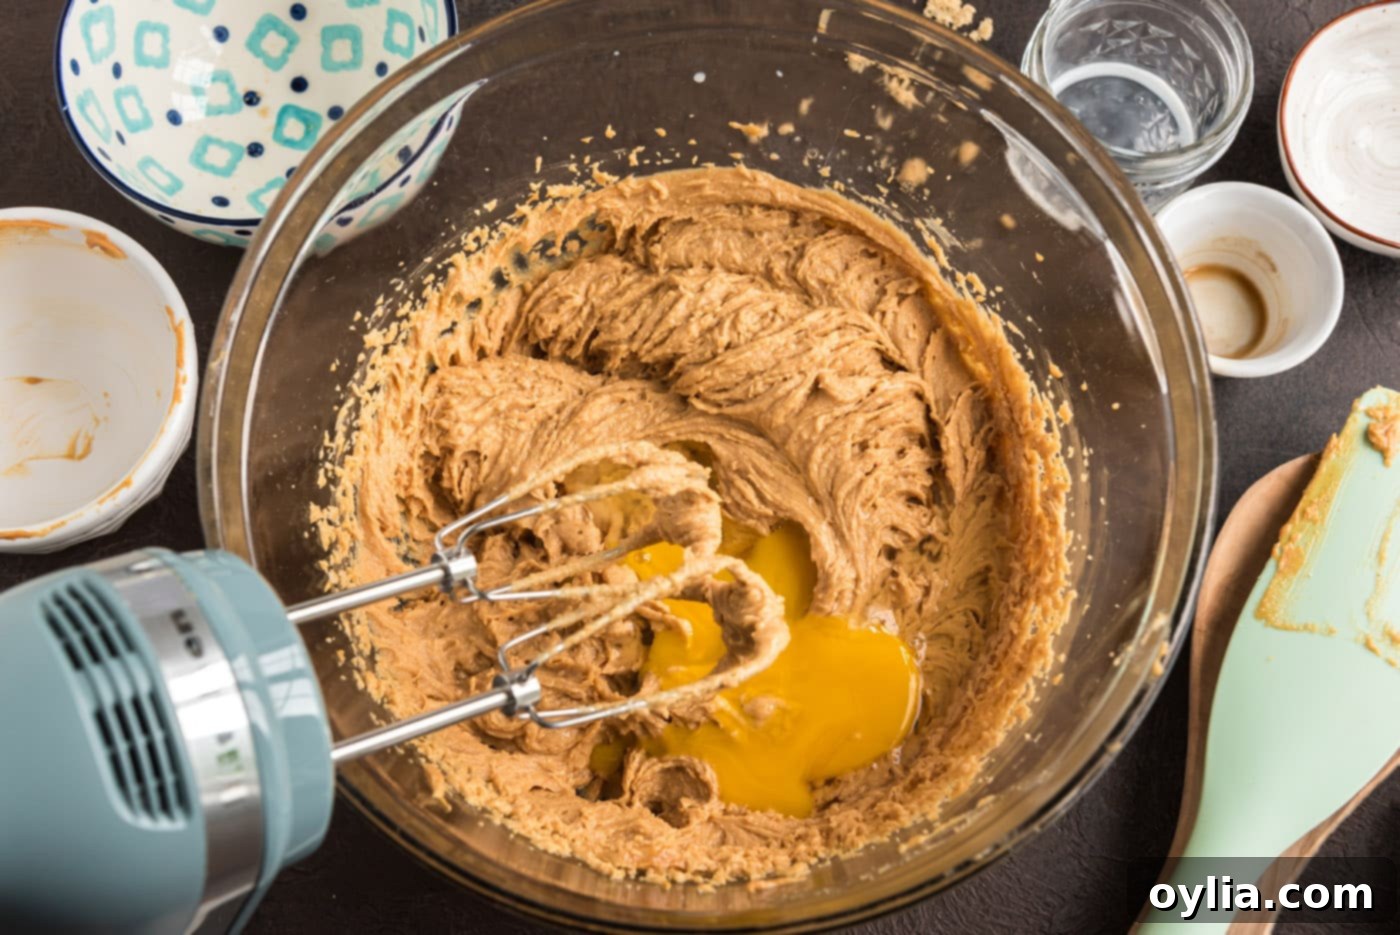
- In a large mixing bowl, combine the shortening (or butter-flavored shortening), creamy peanut butter, firmly packed light brown sugar, milk, and vanilla extract. Use an electric mixer set to medium speed and beat until all these ingredients are thoroughly blended and creamy. Next, add the large egg and beat again, just until it’s fully incorporated into the mixture. Avoid overmixing once the egg is in.


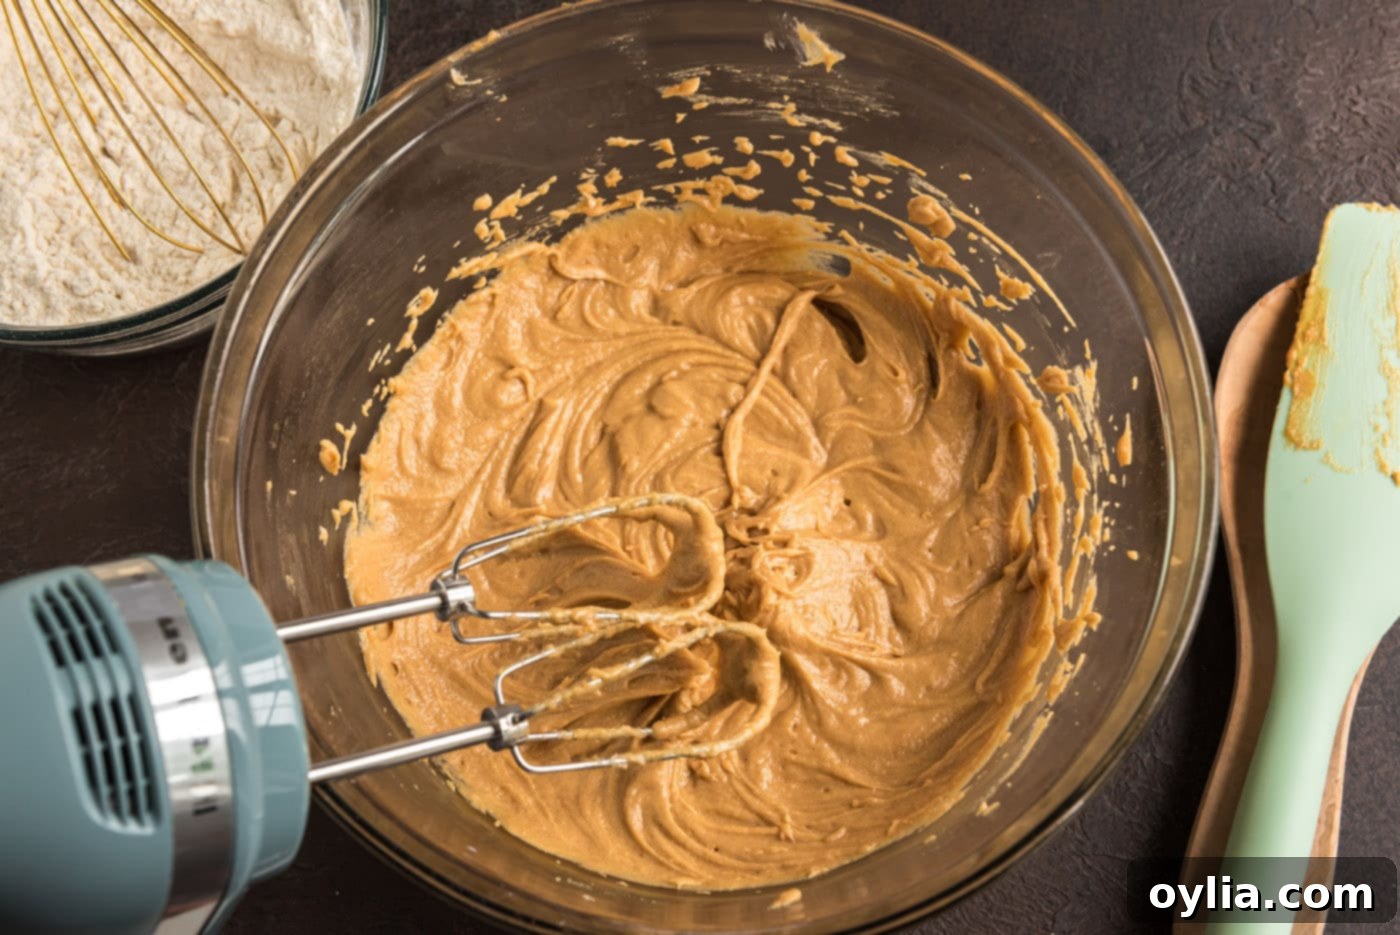
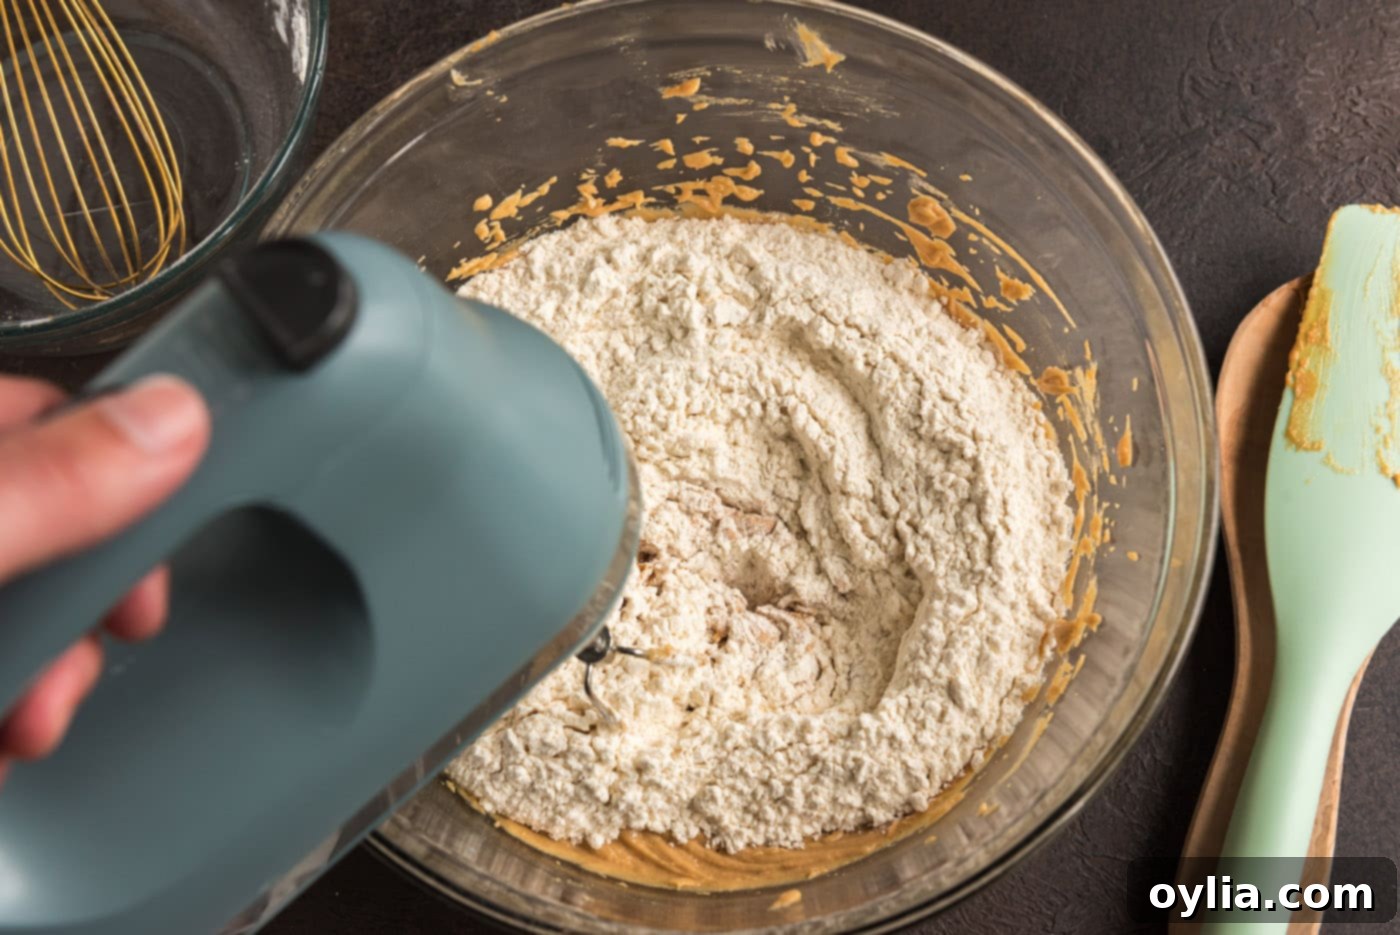
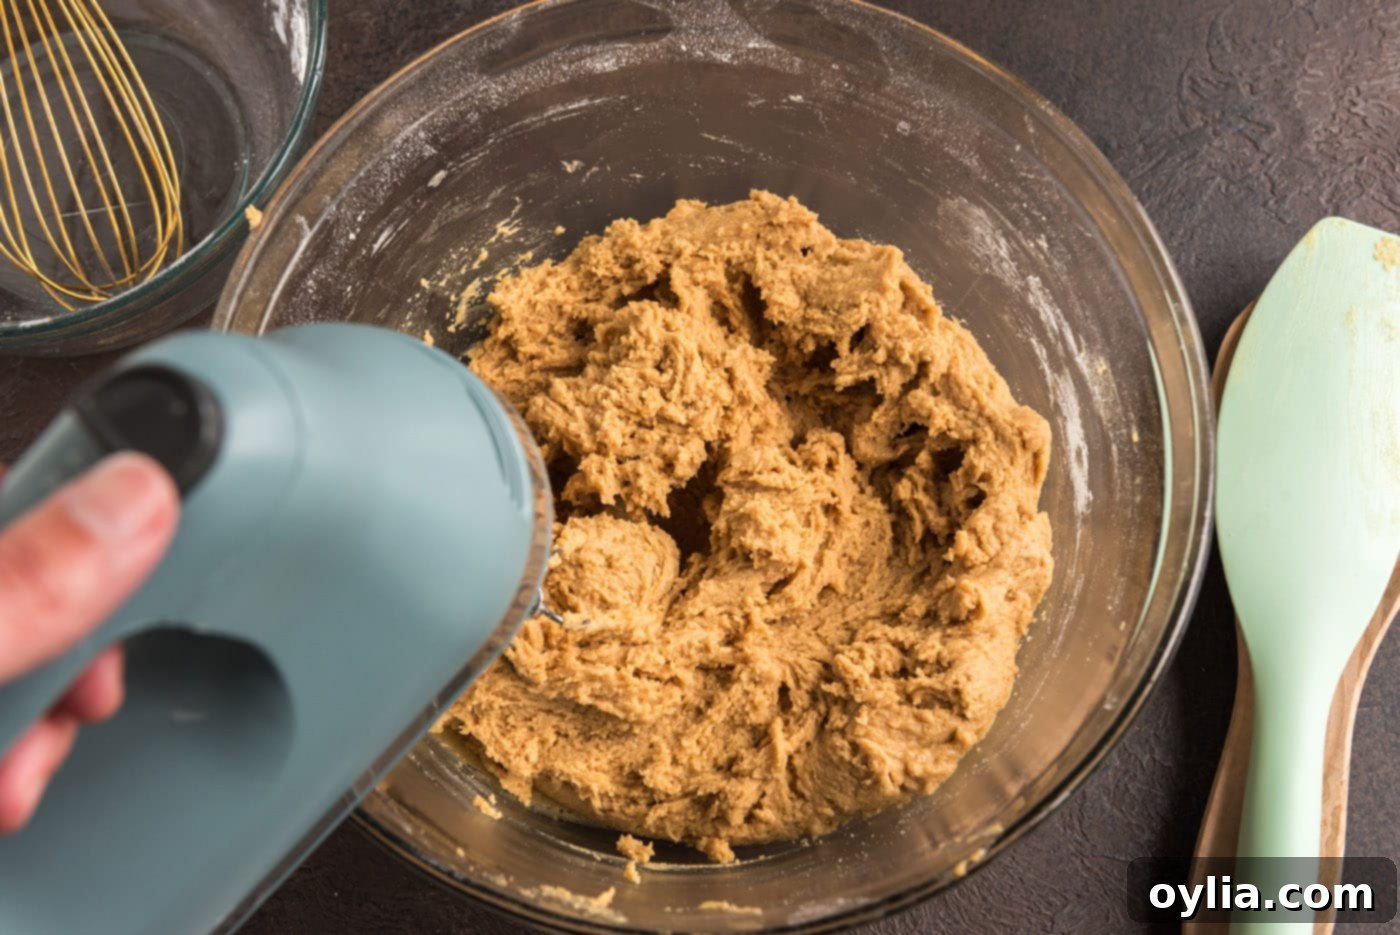
- In a separate bowl, whisk together the all-purpose flour, salt, and baking soda. Gradually add this dry mixture to your creamed wet ingredients, mixing on low speed with the electric mixer. Continue to mix only until the flour is just combined and no streaks remain. Overmixing the dough can lead to tougher cookies.


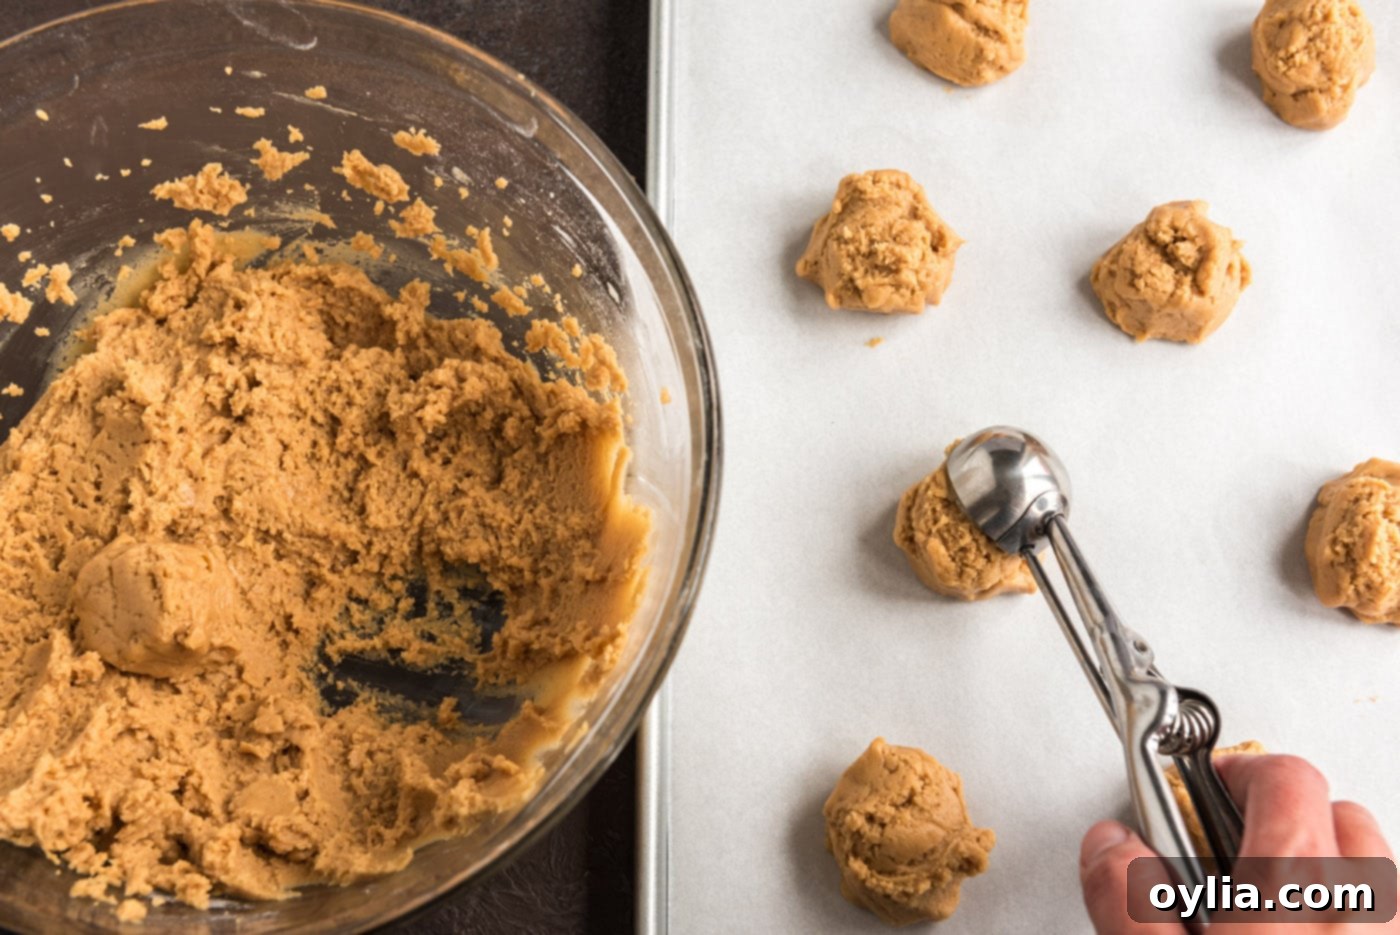
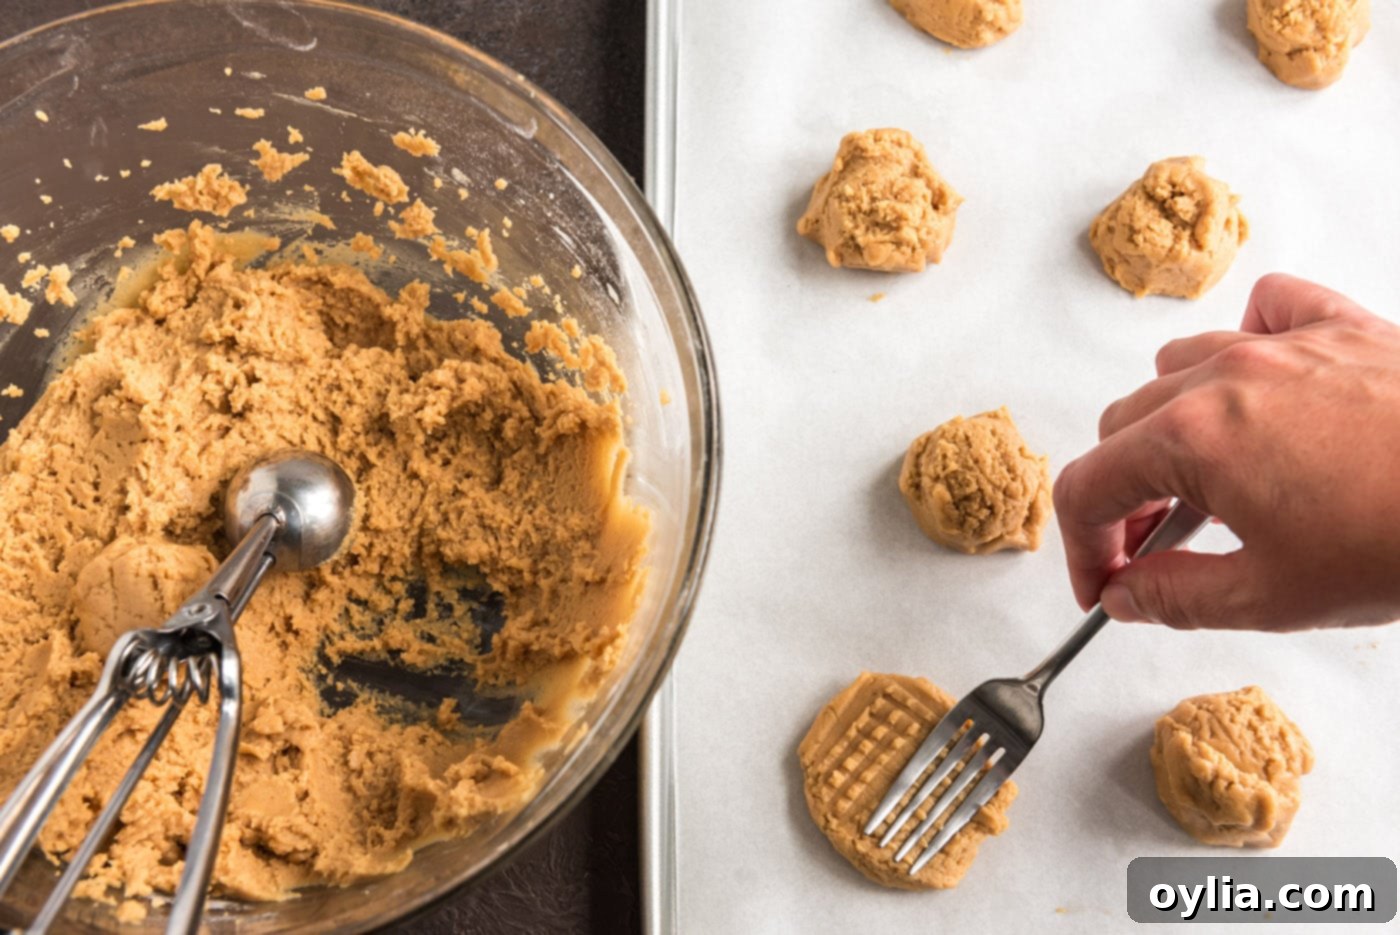
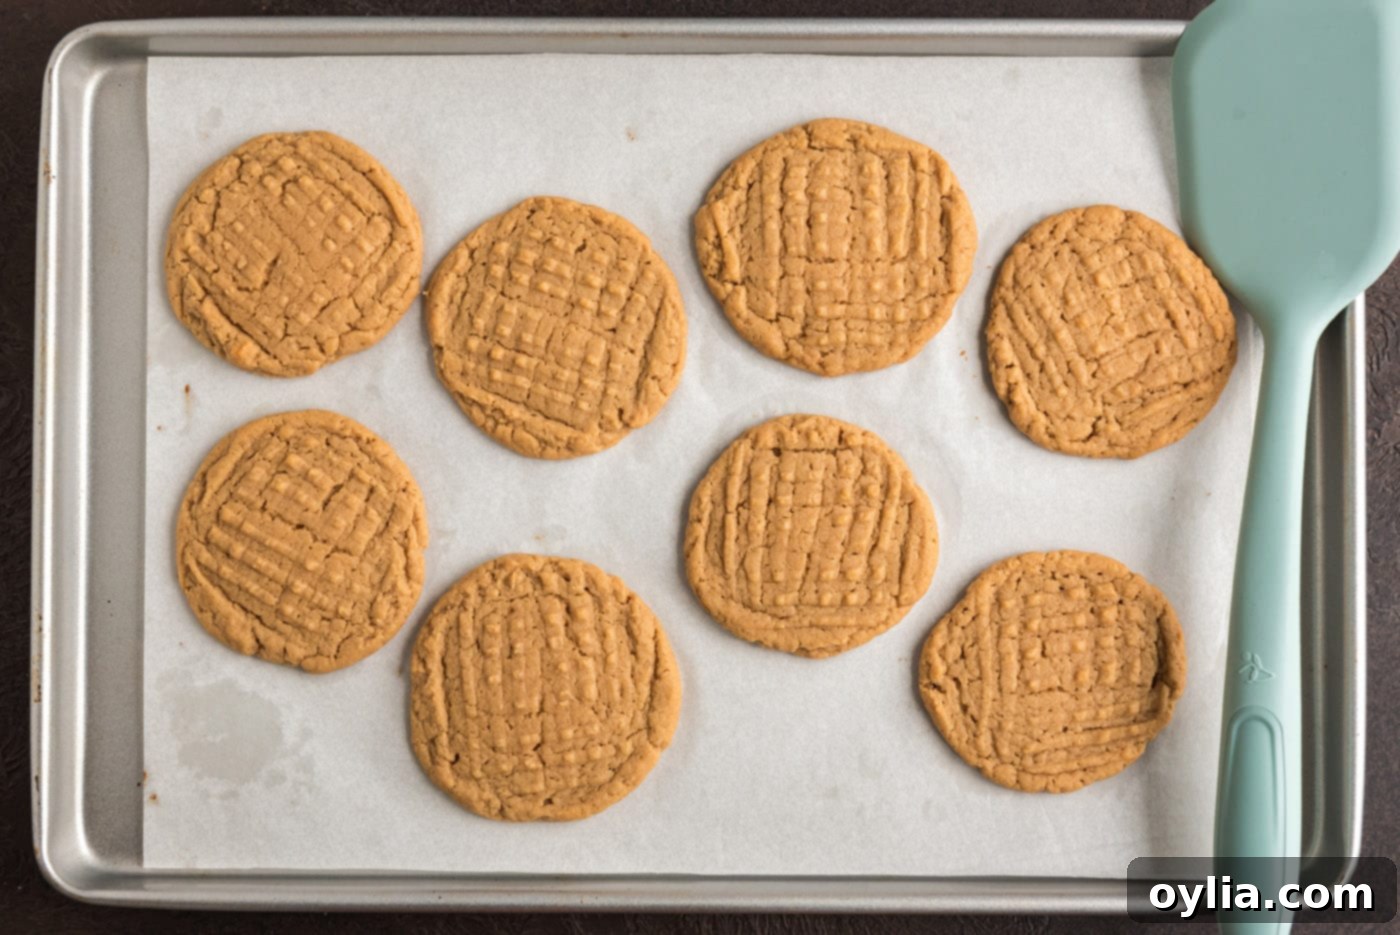
- Using a cookie scoop (which helps ensure uniform cookie sizes) or a regular spoon, drop heaping tablespoonfuls of dough onto an ungreased baking sheet, spacing them about 2 inches apart. Gently flatten each dough ball slightly in a crisscross pattern using the tines of a fork. While traditional for peanut butter cookies, this step is optional if you prefer a smoother canvas for your spiders.


- Bake the cookies for 7 to 8 minutes. You’re looking for them to be just set and slightly golden brown around the edges, with a still slightly puffy center. It’s crucial not to overbake them, as this will result in a dry, crumbly cookie rather than a soft, chewy one. Remove from the oven and let them cool on the baking sheet for about 2 minutes. This brief cooling period helps them firm up before transferring. Then, carefully move the cookies to wire racks to cool completely. They must be fully cool before decorating to prevent melting of your Reese’s cups and smudging of the gel.

- Once your delicious peanut butter cookies are completely cool to the touch, it’s time for the fun part: decorating!
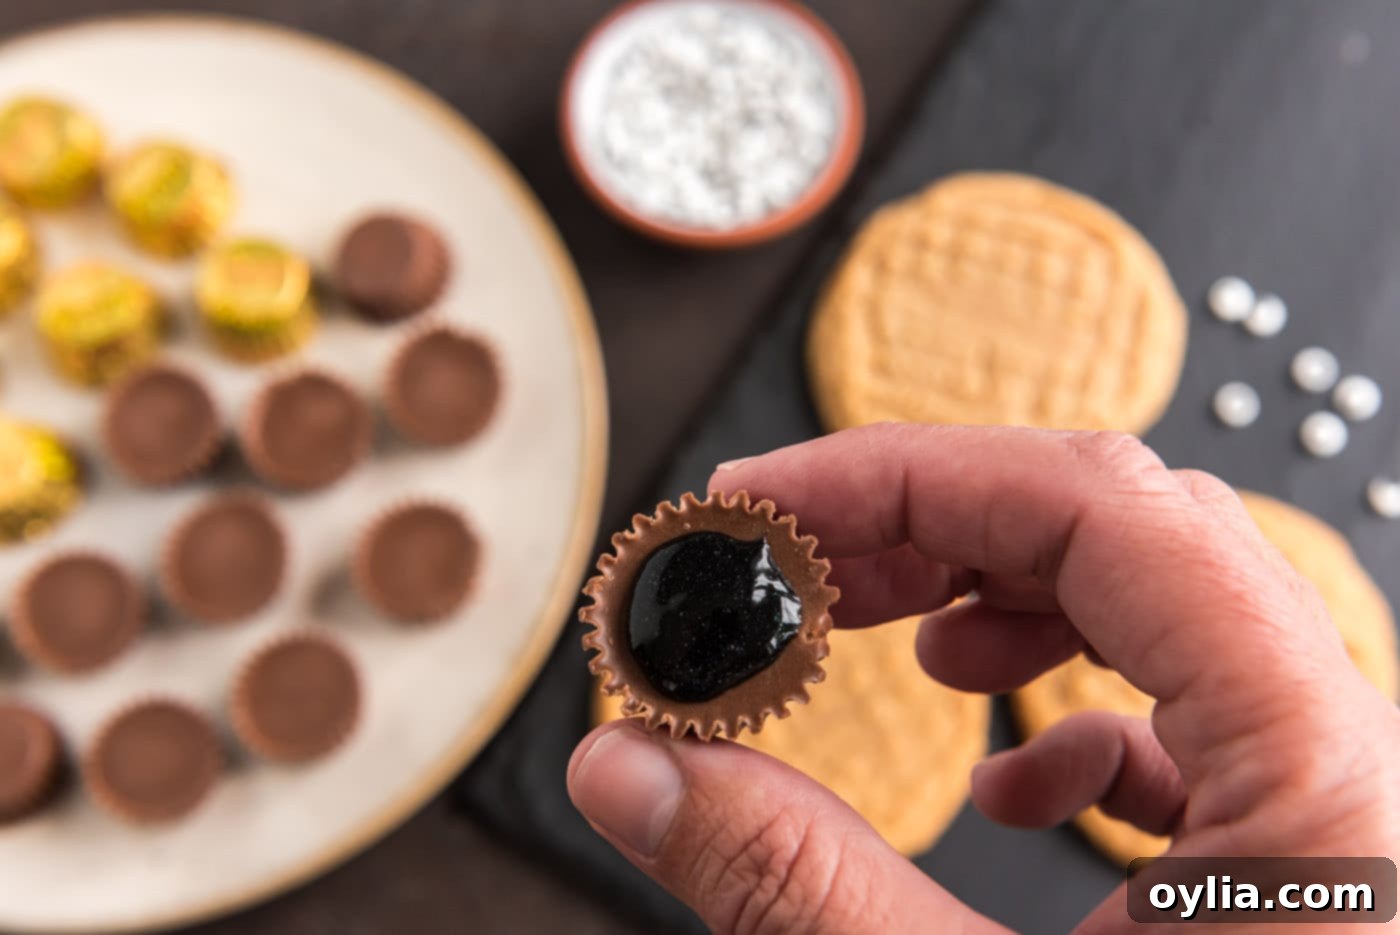
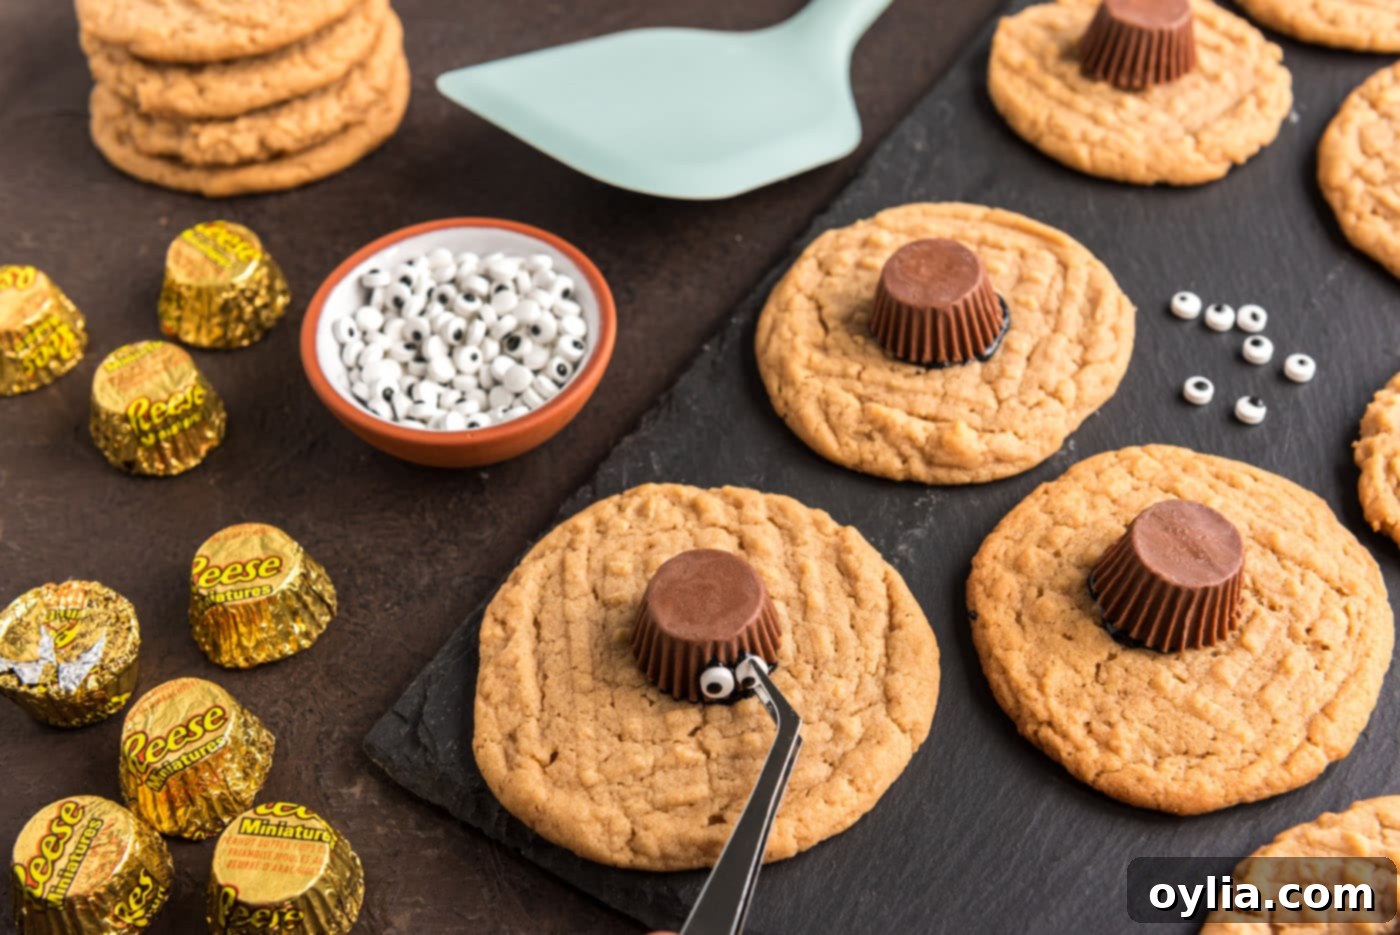
- Apply a small dot of black decorator gel to the bottom of each mini Reese’s cup. Gently press the Reese’s cup onto the center of a cooled cookie, using the gel as an edible “glue.” Be careful not to use too much gel, as it might squeeze out from under the Reese’s cup when pressed.
TIP – While we don’t typically recommend it due to the melting risk, if you’re in a hurry, you *can* place the Reese’s cup onto cookies that are still warm (but not hot). The residual heat will help the chocolate adhere, but be warned, it will likely soften and slightly melt the Reese’s cup. If attempting this, ensure the cookies are just warm, not fresh out of the oven.

- Next, place a tiny dot of black decorator gel on the back of two candy eyeballs. Carefully position and stick these onto the front lower half of the Reese’s cup, creating the spider’s adorable (or menacing, depending on your perspective!) eyes.

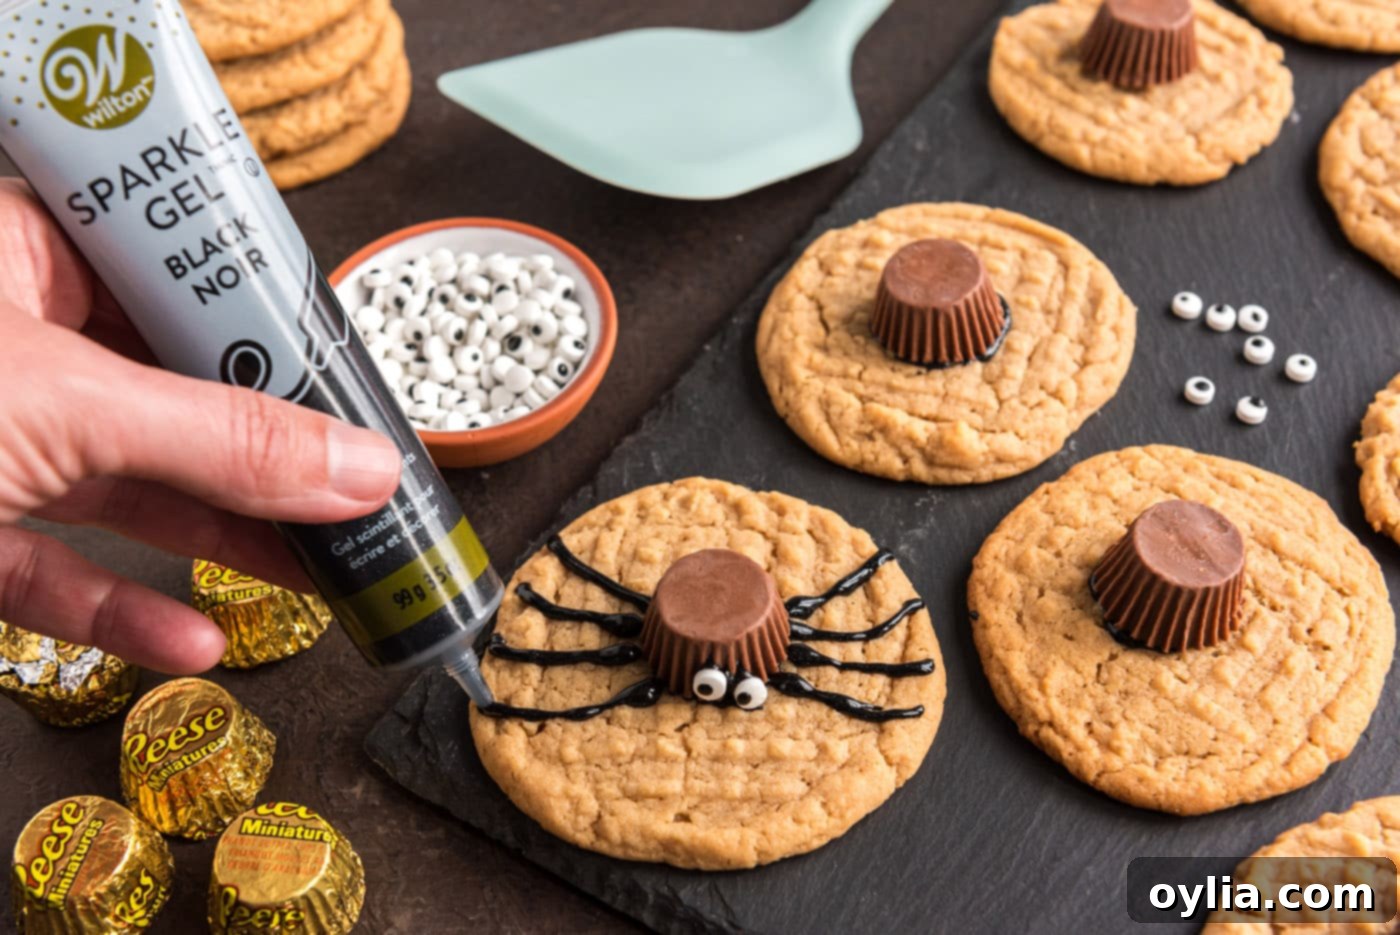
- Now, for the legs! Gently squeeze the black decorator gel, starting from the base of the Reese’s cup. Pipe four curved lines on each side of the Reese’s cup, extending onto the cookie, to create a total of eight spider legs. Try to make them relatively thin and slightly bent to give the appearance of movement.

- Finally, allow your beautifully decorated spider cookies to set undisturbed for an hour or two. As mentioned, black decorator gel can take some time to firm up completely, so handling them too soon might smudge your designs. Once set, they are ready to serve and delight!

Frequently Asked Questions & Expert Tips for Perfect Spider Cookies
Absolutely! In fact, I highly recommend preparing these cookies in advance, ideally the morning of your event or even the night before. This crucial step allows ample time for the decorator gel to fully set and harden. Properly set decorations mean your adorable spider cookies will maintain their integrity during transportation and display, arriving at your party looking as perfect as when you made them. When storing, arrange them in a single layer within an air-tight container to prevent any smudging or damage to the delicate decorations on top.
To keep your spider cookies fresh and delicious, store them in an air-tight container or a large zip-top bag. It’s best to arrange them in a single layer to protect the piped legs and candy eyeballs from being crushed or smudged. Keep the container at room temperature, away from direct sunlight or heat, and they will stay fresh for up to 5 days. For longer storage, you can freeze undecorated cookies and decorate them closer to your event.
For the best results, ensure all your cookie ingredients are at room temperature before mixing – this creates a smoother dough and more consistent bake. When piping the legs, a steady hand and even pressure will yield the neatest lines. If your decorator gel is too thick, try warming the tube slightly in your hands. If it’s too runny, chill it briefly. If involving kids, let them help with rolling the dough and placing the candy eyeballs, as these are easy and fun tasks. Always allow the cookies to cool completely before decorating to prevent any melting of the chocolate components or smudging of the gel.
Serving Suggestions for Your Spooky Spider Cookies
These delightful spider cookies are fantastic on their own, but a thoughtful presentation can make them even more special. Arrange them artfully on a large platter, a tiered dessert tray, or even individually wrapped as party favors for your Halloween bash. They pair wonderfully with a cold glass of milk, hot chocolate, or a festive Halloween punch. For a playful touch, scatter some extra candy eyeballs or a sprinkle of Halloween-themed sprinkles around the platter. As a reminder, if black decorator gel isn’t your preference or is hard to find, feel free to substitute with melted chocolate chips (semi-sweet or dark for contrast), candy melts, white almond bark tinted black, or baking chocolate for piping the legs and adhering the decorations. The key is to have fun and make them your own!
Explore More Spooky & Sweet Halloween Dessert Recipes
If you’re looking to expand your collection of Halloween treats, we’ve got plenty more spooky and delicious ideas to inspire your festive baking. These recipes are just as fun and easy to make, perfect for adding variety to your holiday spread:
- Adorable Mummy Cookies
- Spooky Ghost Brownies
- Fun Monster Cupcakes
- Creepy-Crawly Halloween Dirt Cups
- Easy Halloween Oreo Truffles
I absolutely love creating and sharing delicious recipes and kitchen experiences with all of you! To make sure you never miss out on new culinary inspirations, I offer a convenient newsletter delivered right to your inbox every time a fresh recipe is posted. Simply subscribe today and start receiving your free daily recipes to spice up your cooking routine!
Spider Cookies
IMPORTANT – There are often Frequently Asked Questions within the blog post that you may find helpful. Simply scroll back up to read them!
Print It
Pin It
Rate It
Save ItSaved!
Ingredients
Peanut Butter Cookies
- ½ cup shortening or butter flavored shortening
- ¾ cup creamy peanut butter
- 1 ¼ cups light brown sugar firmly packed
- 3 Tablespoons milk
- 1 teaspoon vanilla
- 1 large egg
- 1 ¾ cups all purpose flour
- ¾ teaspoon salt
- ¾ teaspoon baking soda
Decorations
- black decorator gel or cookie icing. see notes below
- 36 mini Reese’s peanut butter cups unwrapped
- 72 candy eyeballs
Things You’ll Need
-
Electric mixer
-
Wire cooling racks
-
Baking sheet
Before You Begin
- When you bake the cookies, start with a small batch and check them after 7 minutes. Mine are always perfect at 8 minutes. They will look a little underdone and puffy. Once you remove them from the oven and let them cool a bit, they will relax and settle.
- If preferred, you can skip the step of creating fork marks. Underbake the cookies by a minute or so for a chewy cookie. You can also substitute with cake mix peanut butter cookies! Sugar cookies, chocolate chip cookies, and pumpkin cookies would be great substitutes as well.
- Decorator gel can take a while to set so try not to move the cookies around too much at first or you’ll risk the Reese’s cup or candy eyes sliding off! In place of the decorator gel, you can easily use cookie icing or melt semi-sweet chocolate chips, baking chocolate, almond bark, or candy melts and get the same results.
- Do not stick the Reese’s cup onto hot cookies, it will cause them to melt.
- Store the spider cookies in an air-tight container or large ziptop bag in a single layer kept at room temperature for up to 5 days.
Instructions
To Make the Cookies
-
Preheat oven to 375 degrees F.
-
Combine shortening, peanut butter, brown sugar, milk, and vanilla in a large bowl. Beat with an electric mixer at medium speed until well blended. Add egg. Beat just until blended.
-
Combine flour, salt and baking soda. Add to creamed mixture at low speed. Mix just until blended.
-
Drop by heaping tablespoonfuls (using a cookie scoop works great) 2 inches apart onto an ungreased baking sheet. Flatten slightly in a crisscross pattern with the tines of the fork. You can optionally skip the fork marks in the cookie if desired.
-
Bake for 7 to 8 minutes, or until set and just beginning to brown. DO NOT OVERBAKE. Cool for 2 minutes on a baking sheet. Remove cookies to racks to cool completely.
-
After the cookies are fully cooled, you can begin decorating.
To Decorate
-
“Glue” the mini Reese’s cup to the top of the cookies with a small amount of decorator gel. Don’t add too much or it may overflow when you press it onto the cookie.
-
Dot the back side of the candy eyeballs with black decorator gel and stick onto the bottom of the Reese’s cup.
-
Gently squeeze the black decorator gel starting at the base of the Reese’s cup to create the legs. Pipe 4 legs on both sides of the Reese’s cup for a total of 8 legs.
-
Allow the decorated cookies to set for an hour or two. Black decorator gel can take a while to set so be careful when handling!
Nutrition
The recipes on this blog are tested with a conventional gas oven and gas stovetop. It’s important to note that some ovens, especially as they age, can cook and bake inconsistently. Using an inexpensive oven thermometer can assure you that your oven is truly heating to the proper temperature. If you use a toaster oven or countertop oven, please keep in mind that they may not distribute heat the same as a conventional full sized oven and you may need to adjust your cooking/baking times. In the case of recipes made with a pressure cooker, air fryer, slow cooker, or other appliance, a link to the appliances we use is listed within each respective recipe. For baking recipes where measurements are given by weight, please note that results may not be the same if cups are used instead, and we can’t guarantee success with that method.
