Spooktacular Mini Candy Corn Cheesecakes: The Ultimate Halloween Dessert Recipe
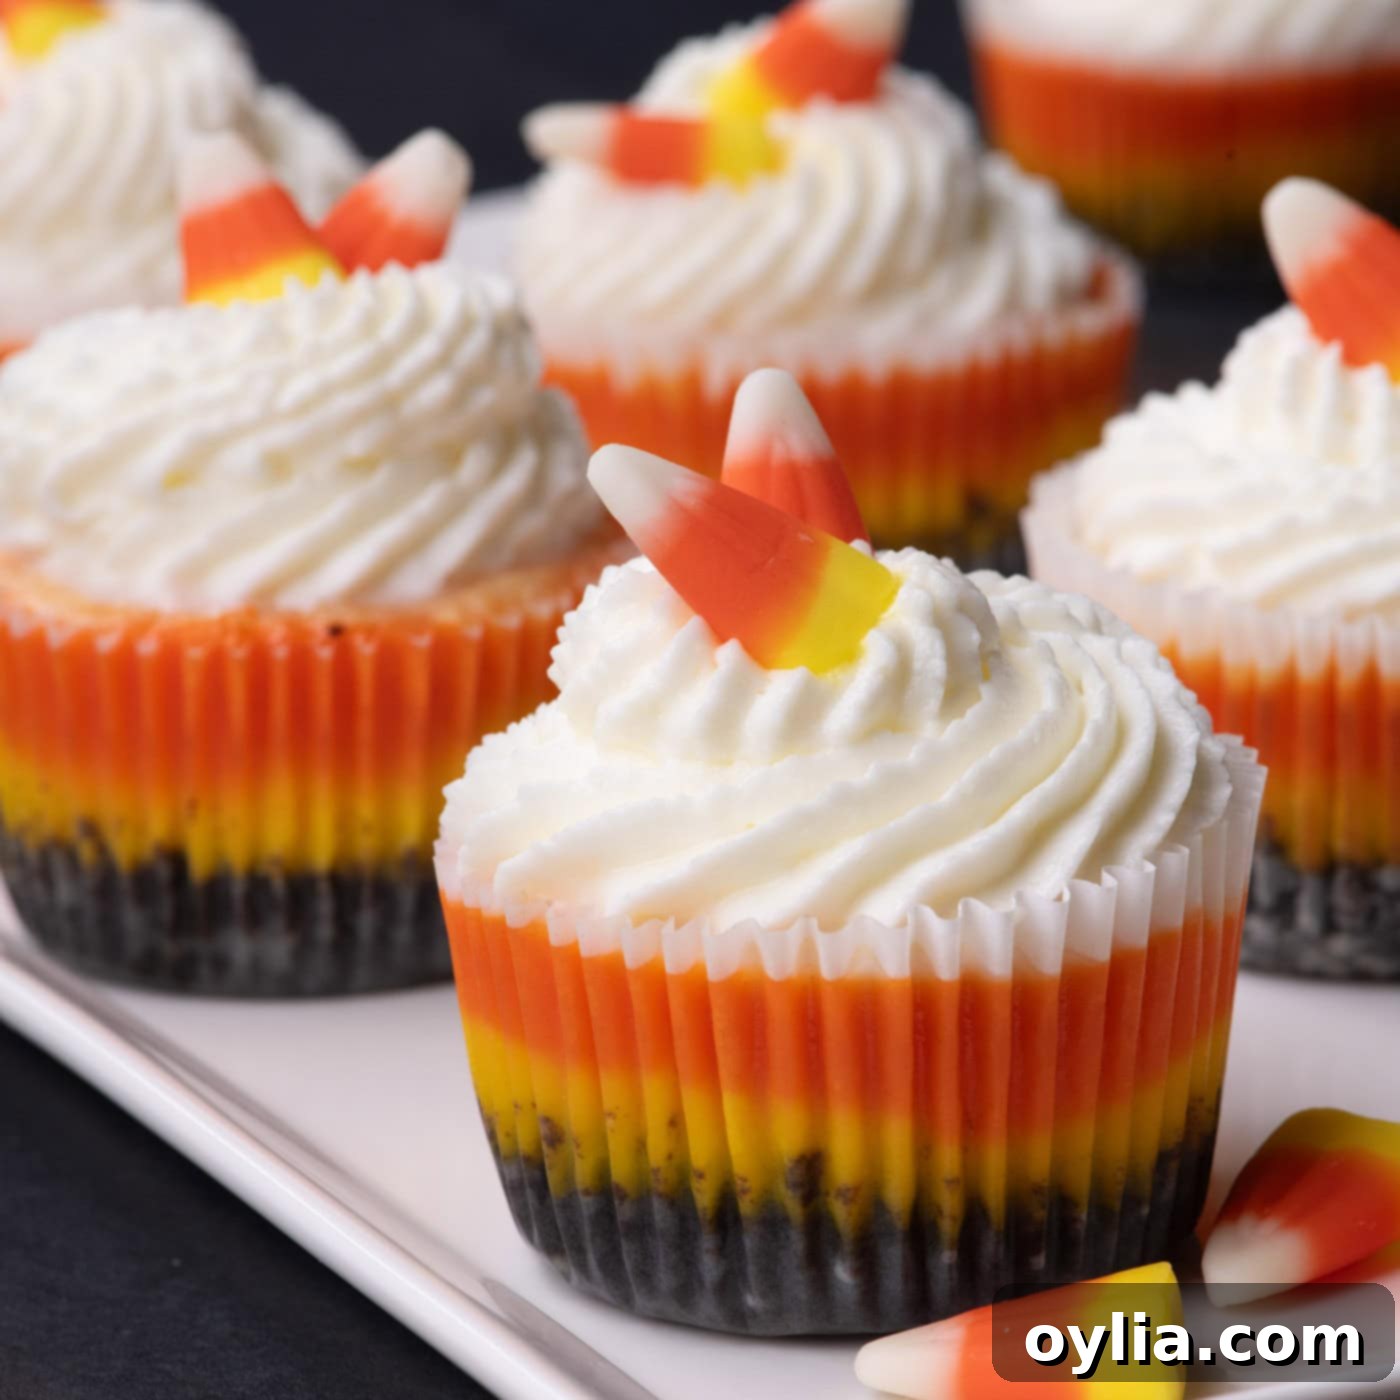
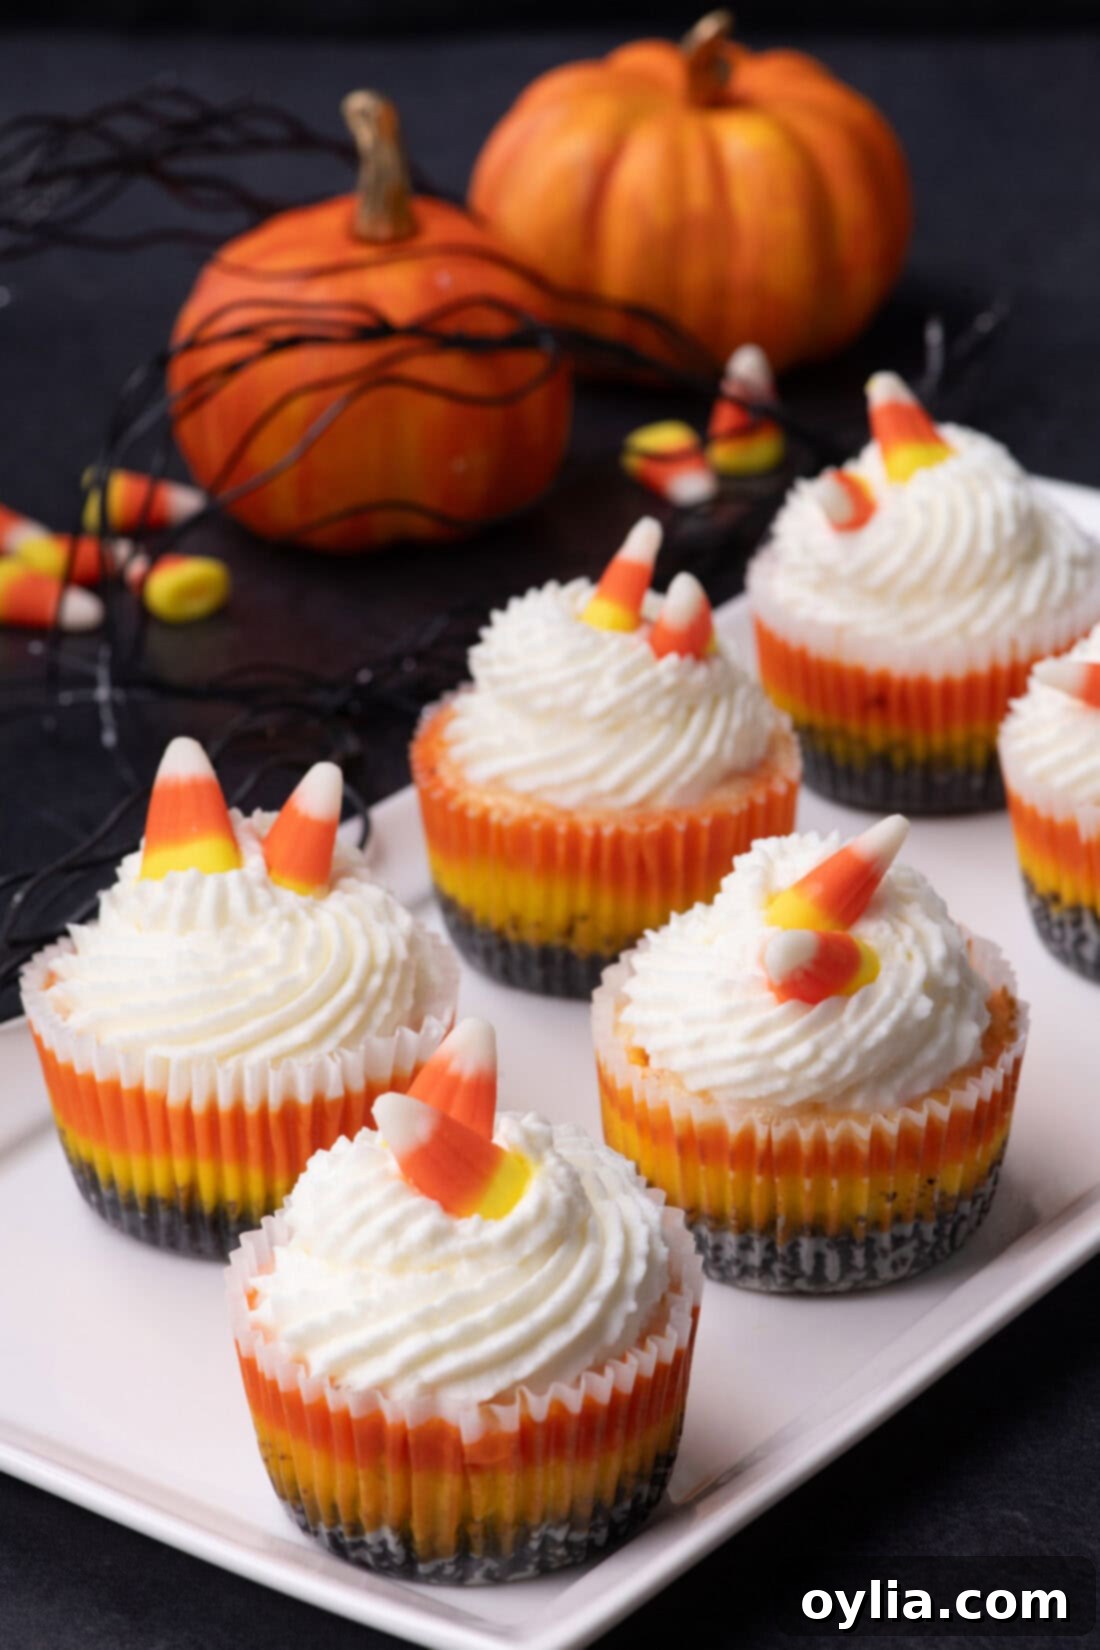
Prepare to enchant your taste buds and dazzle your guests with these irresistible mini candy corn cheesecakes! Combining the luscious creaminess of vanilla cheesecake with playful yellow and orange layers, these delightful treats perfectly capture the iconic look of classic Halloween candy. They’re not just a feast for the eyes but a symphony of flavors that will make your Halloween celebration truly memorable.
Why These Mini Candy Corn Cheesecakes Are a Must-Try for Halloween
When it comes to Halloween treats, these mini candy corn cheesecakes effortlessly steal the show. They are far more than just a pretty dessert; they offer a delightful combination of ease, visual appeal, and scrumptious taste, making them the perfect addition to any spooky party spread.
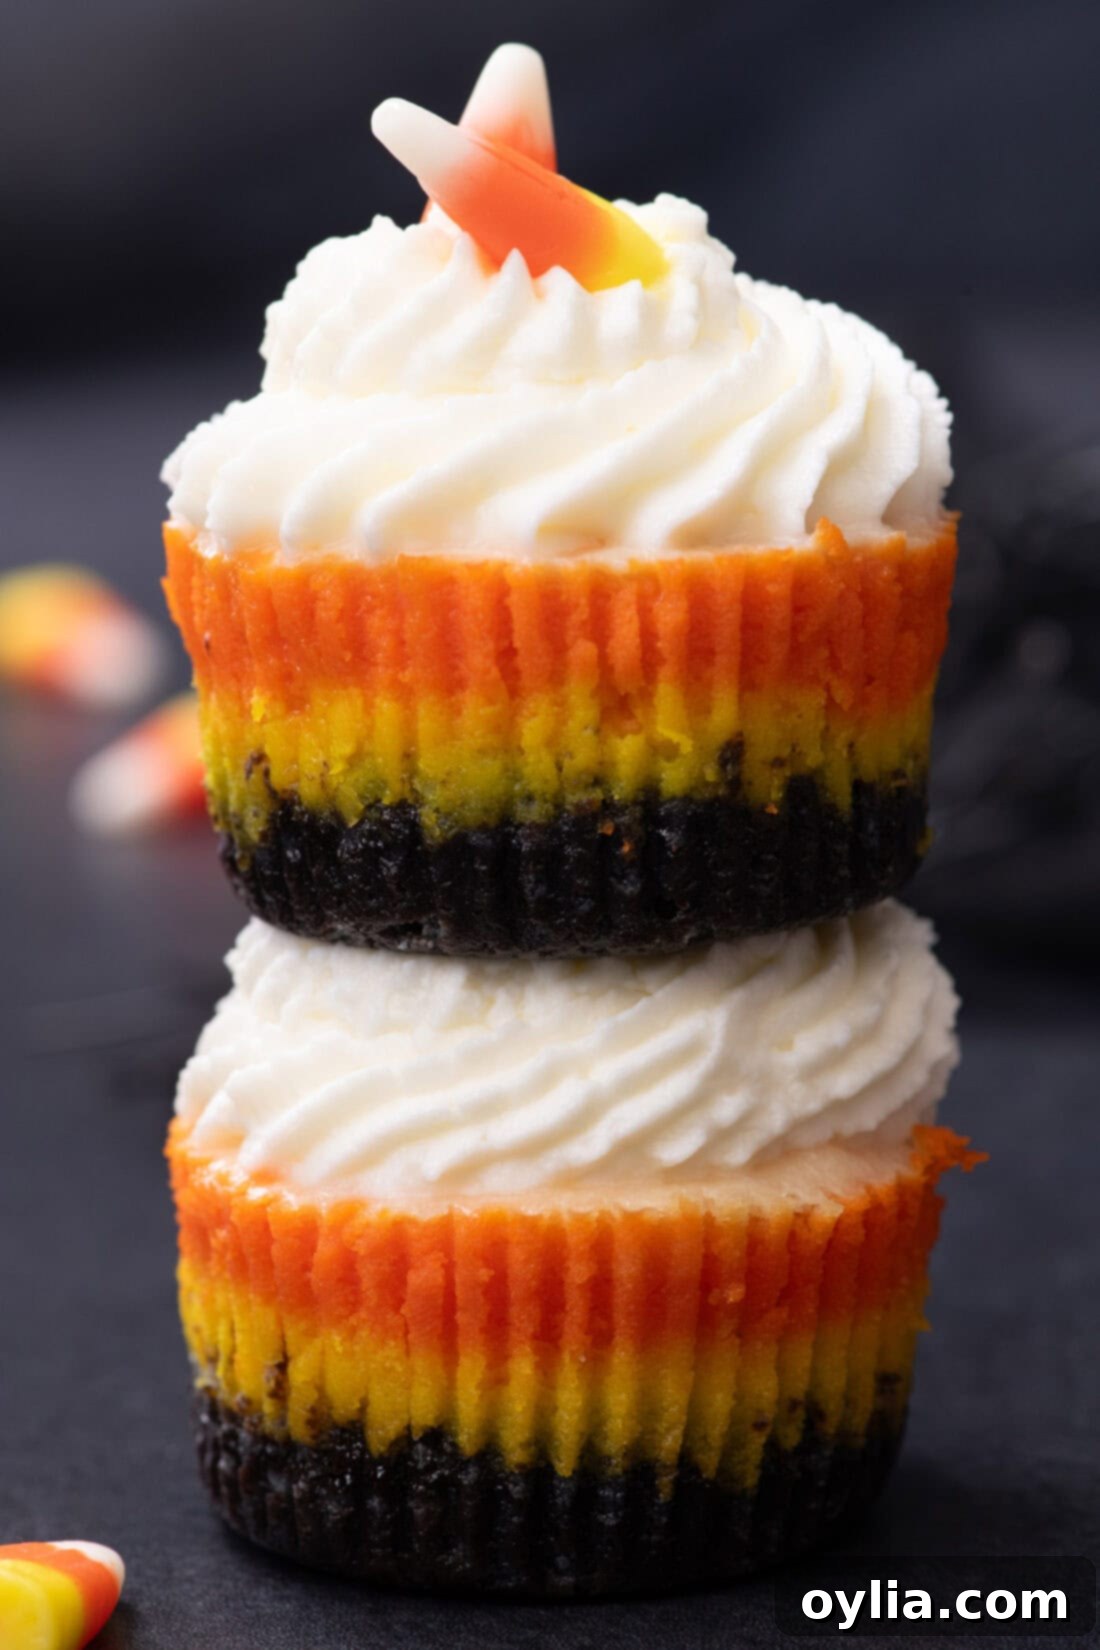
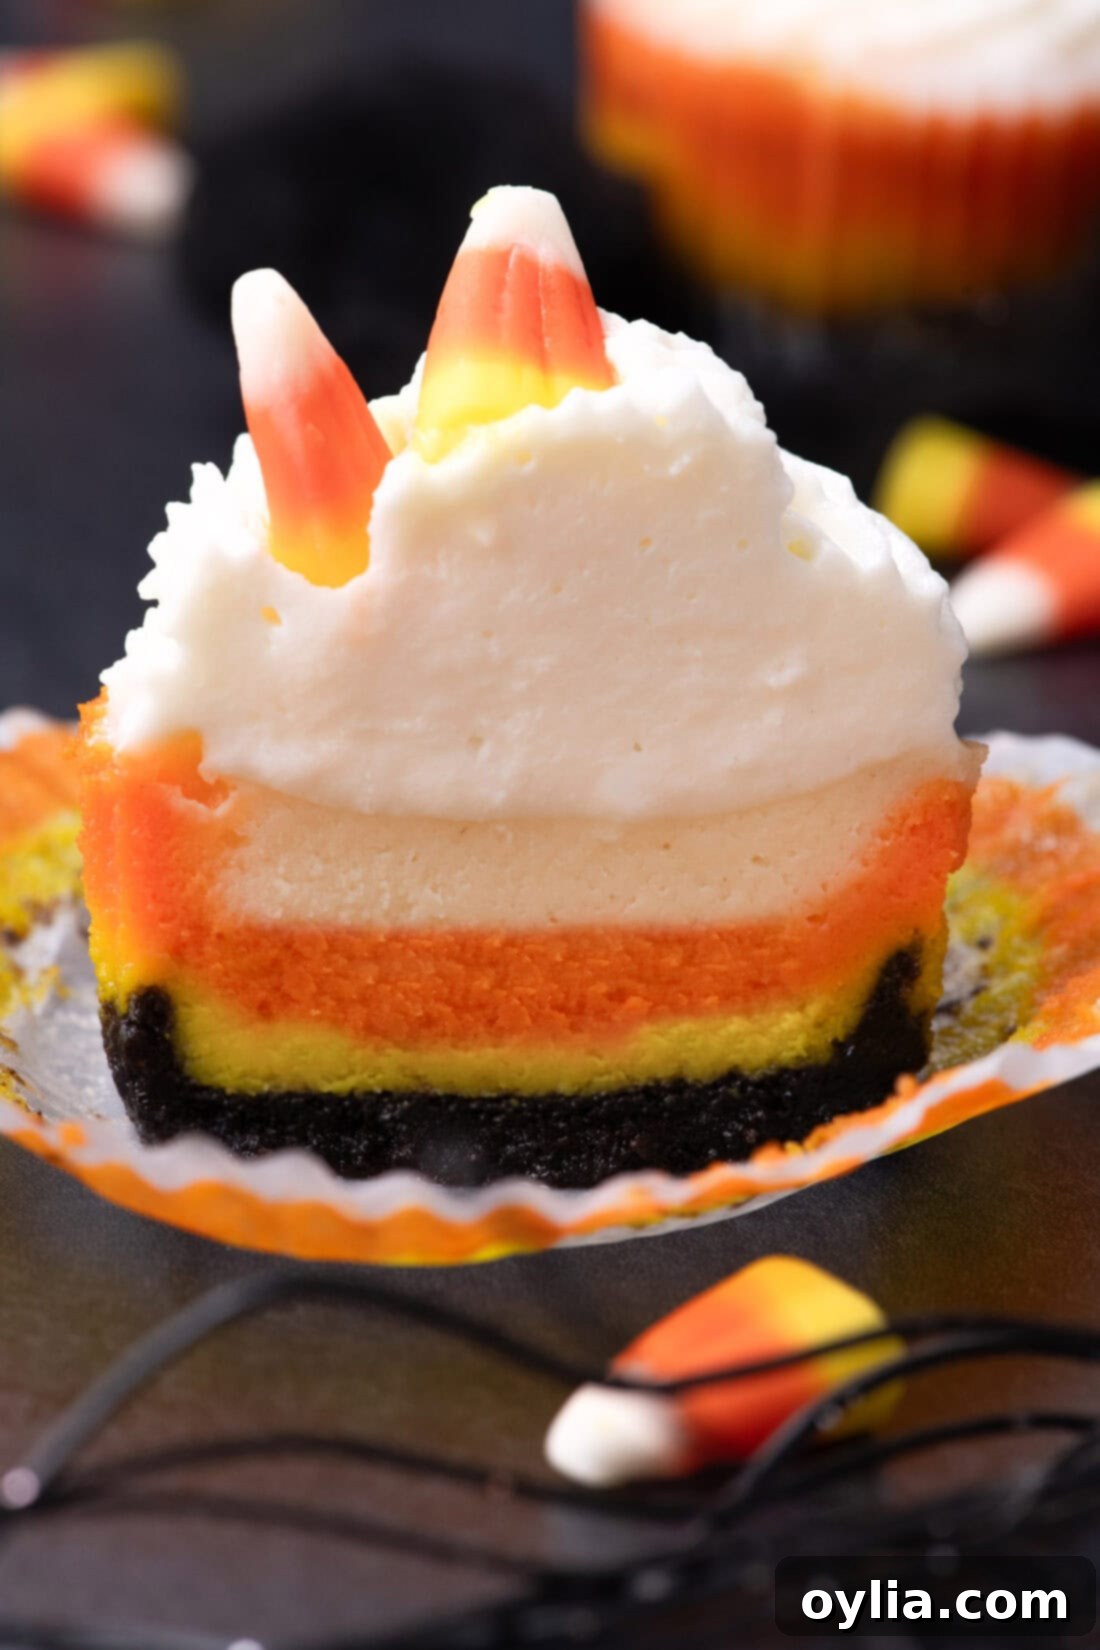
While the taste is pure, creamy vanilla cheesecake, the magic truly lies in their vibrant costume. Each individual cheesecake boasts striking layers of yellow and orange, meticulously tinted to mimic the beloved (or sometimes debated!) candy corn. These colorful layers rest atop a rich, dark Oreo cookie crust, providing a wonderful contrast in both color and texture. To complete the festive look, they are crowned with a swirl of fluffy whipped cream and a sweet piece of actual candy corn. This clever design ensures that even those who aren’t fans of the traditional candy corn flavor will absolutely adore these charming cheesecakes. They’re perfectly portioned, incredibly easy to serve, and will undoubtedly be a conversation starter at your Halloween gathering.
Essential Ingredients for Your Halloween Mini Cheesecakes
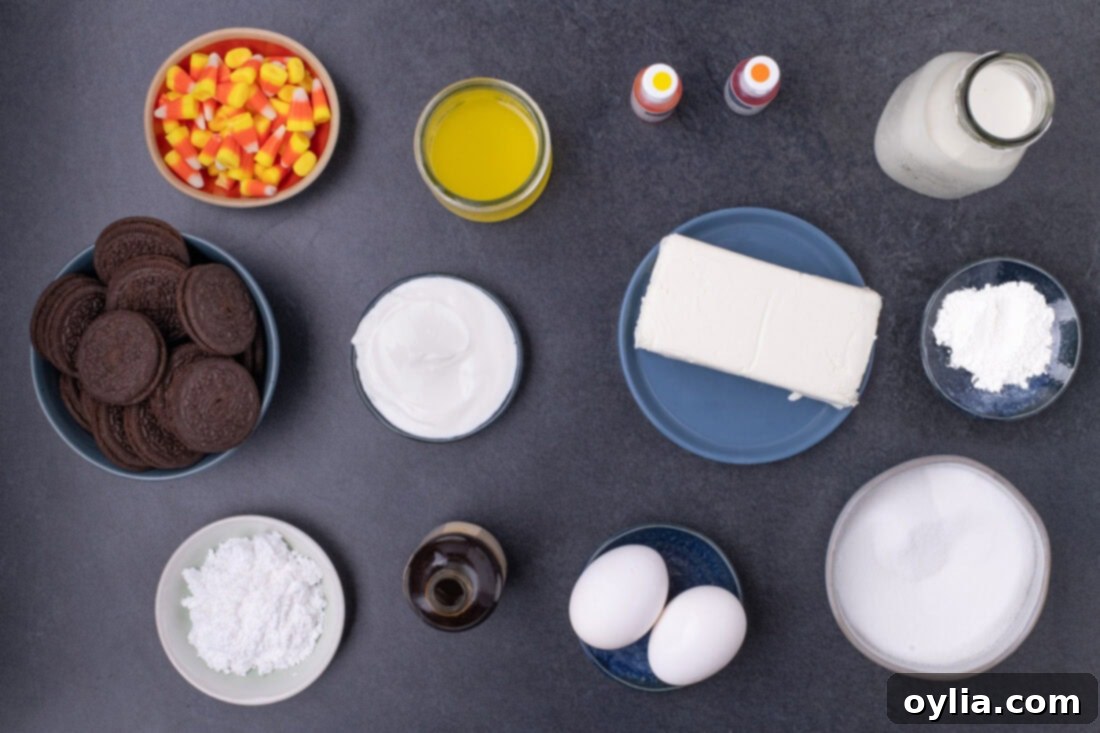
Crafting these adorable mini candy corn cheesecakes requires a few staple baking ingredients, most of which you likely already have in your pantry or can easily find at any grocery store. For precise measurements, a full list of ingredients, and detailed instructions, please refer to the printable recipe card located at the end of this post. Getting your ingredients prepped and at the right temperature is key to cheesecake success!
Ingredient Spotlight & Expert Substitution Tips
Understanding the role of each ingredient and knowing when to substitute can make all the difference in your baking. Here’s a closer look at what goes into these mini cheesecakes and how to make sure they turn out perfectly every time.
CRUST – Our recipe calls for classic Oreo cookies for the crust, and there’s no need to remove the creamy white filling! In fact, the filling contributes extra moisture and binds the crumbs together beautifully. For the best, most stable crust, aim for finely crushed Oreo crumbs. Use a food processor to pulse them until they resemble fine, wet sand with no visible cookie chunks. A finer crumb creates a more cohesive and less crumbly base, ensuring your mini cheesecakes hold their shape when removed from the muffin liners. If you don’t have Oreos, feel free to experiment with other dark chocolate cookies or even graham crackers for a different flavor profile, though you might need to adjust the melted butter quantity slightly.
CHEESECAKE FILLING – The heart of any great cheesecake is the cream cheese. For optimal results, always use full-fat, brick-style cream cheese at room temperature. This is crucial for achieving a super smooth, lump-free batter. Cold cream cheese will result in a clumpy mixture that’s hard to work with and can lead to overmixing. To speed up the room temperature process, simply unwrap your cream cheese blocks, slice them into smaller cubes, and let them sit on your counter for 30-40 minutes. For those vibrant yellow and orange layers that truly pop, we highly recommend using gel food coloring. Gel colors are concentrated and deliver intense hues without adding excess liquid to your delicate cheesecake batter, which can impact texture. Liquid food colorings may require more drops to achieve the desired shade, potentially thinning the batter.
SOUR CREAM – Full-fat sour cream adds a wonderful tang and extra creaminess to the cheesecake, balancing the sweetness and creating a rich texture. Ensure it’s also at room temperature to blend seamlessly with the cream cheese.
EGGS – Large eggs act as a binder and add richness to the cheesecake. Again, having them at room temperature prevents them from seizing the other ingredients and helps create a smooth emulsion.
VANILLA EXTRACT – Pure vanilla extract enhances the overall flavor profile of the cheesecake, making it even more delicious.
Step-by-Step: Crafting Your Mini Candy Corn Cheesecakes
These step-by-step photos and detailed instructions are here to guide you through the process of making this festive recipe. For a quick jump to the printable version, complete with all measurements and instructions, simply Jump to Recipe at the bottom of this page.
- Preheat your oven to 325°F (160°C). Line two standard 12-capacity muffin pans with cupcake liners. This recipe makes 20 cheesecakes, so you’ll have a few empty spots in your pans.
- Prepare your Oreo crust: Place the Oreo cookies in a food processor and pulse them until they form very fine crumbs. There should be no large chunks of cookie left. Add the melted butter and continue pulsing until the mixture resembles wet sand. This ensures the crust will be firm and hold together.
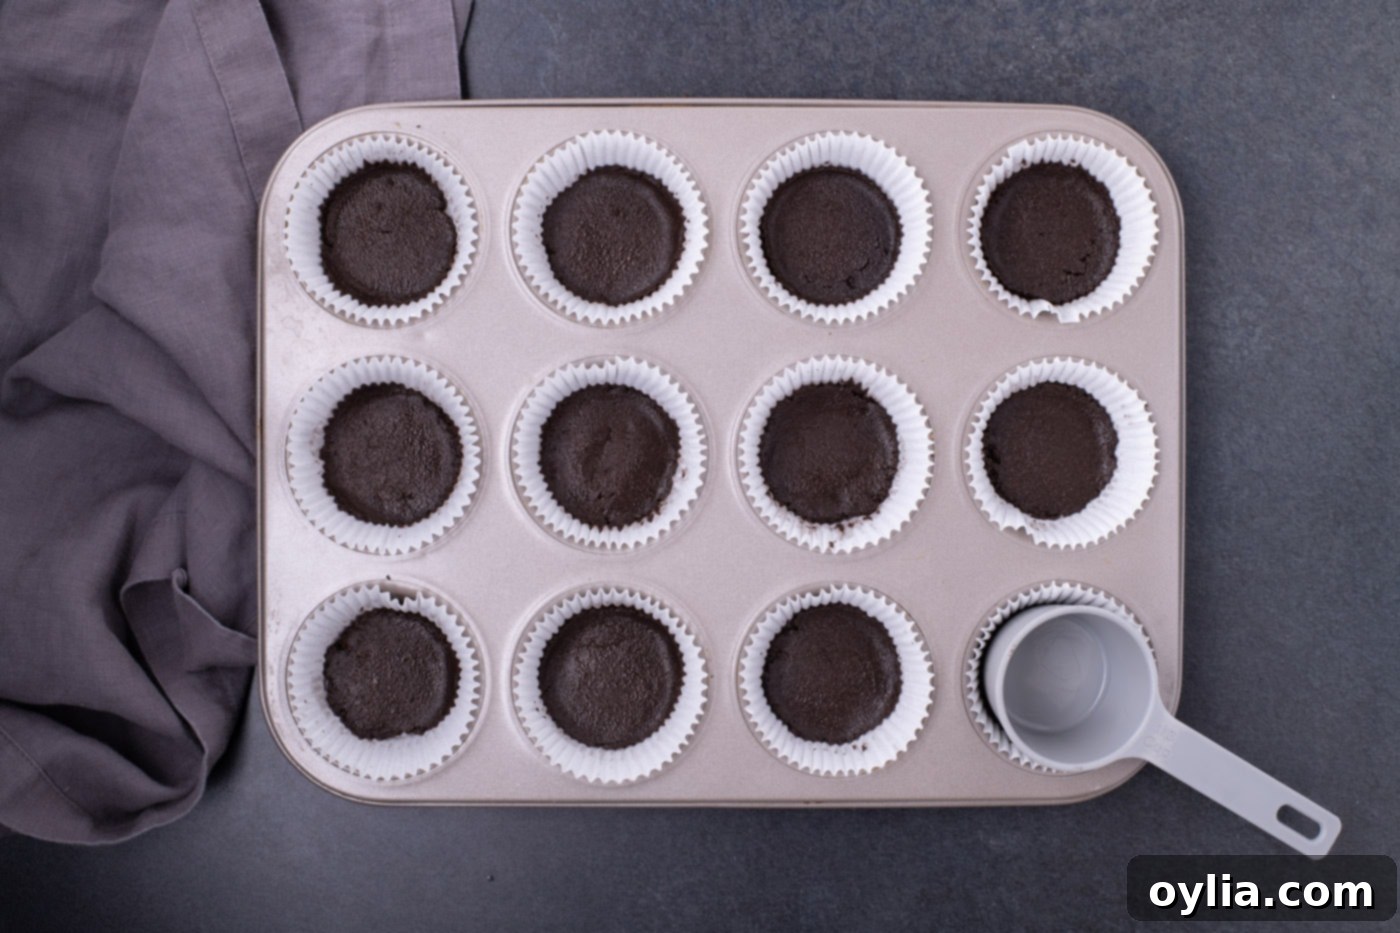
- Evenly distribute the crust: Using a 1-tablespoon cookie scoop, portion the Oreo crumbs into each cupcake liner. Use the bottom of a small measuring cup or a tart tamper to firmly flatten the crumbs into an even layer at the bottom of each liner. This creates a solid base for your cheesecake.

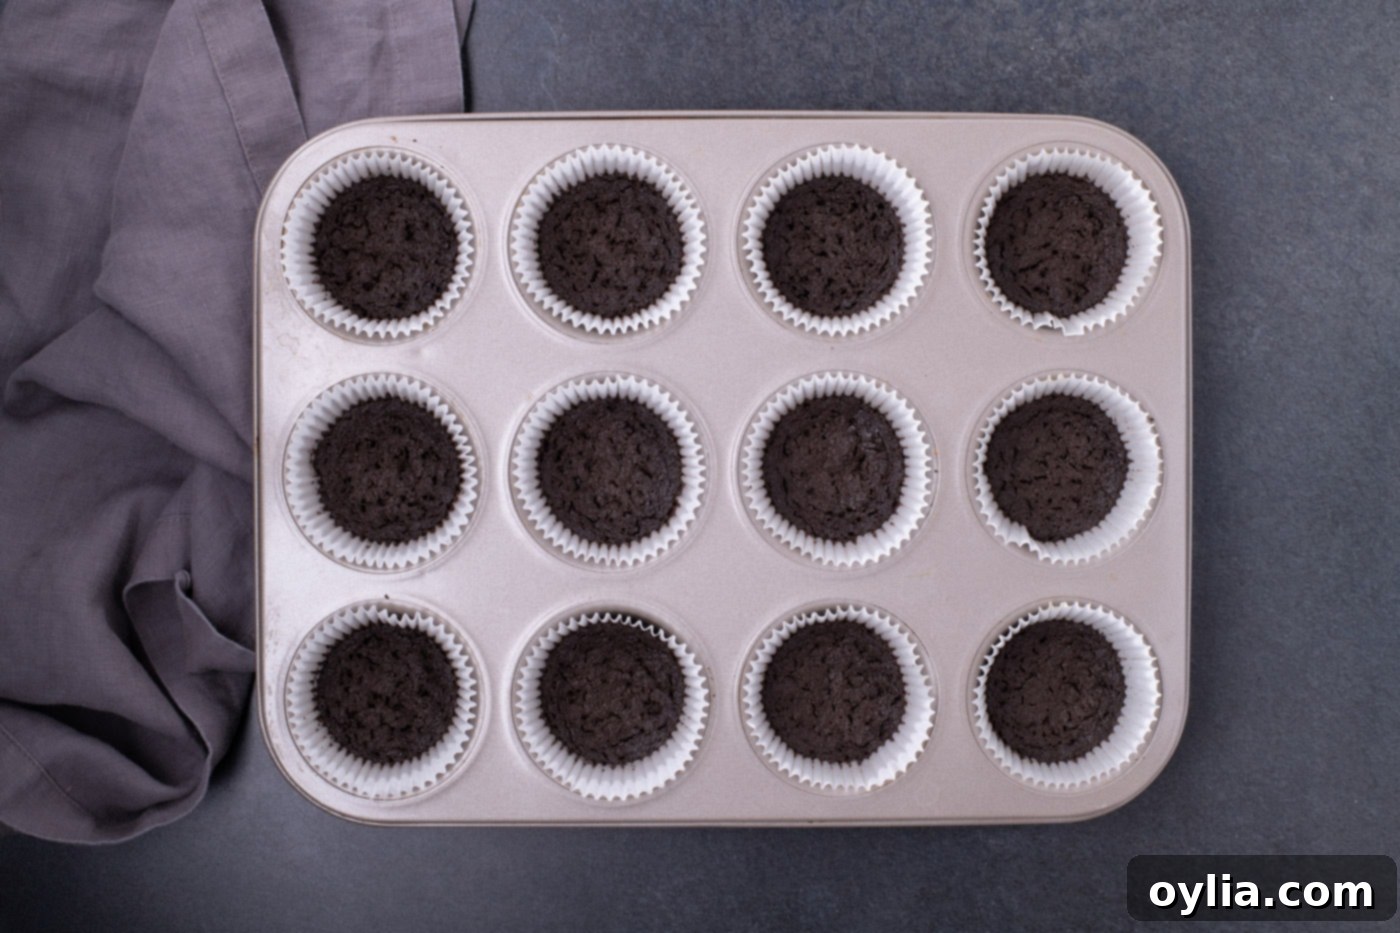
- Bake the crust: Bake the prepared crusts for 5 to 8 minutes, or until they are set and slightly fragrant. This initial bake helps to firm up the crust and prevents it from becoming soggy. Remove from the oven and set aside to cool completely while you prepare the cheesecake filling.

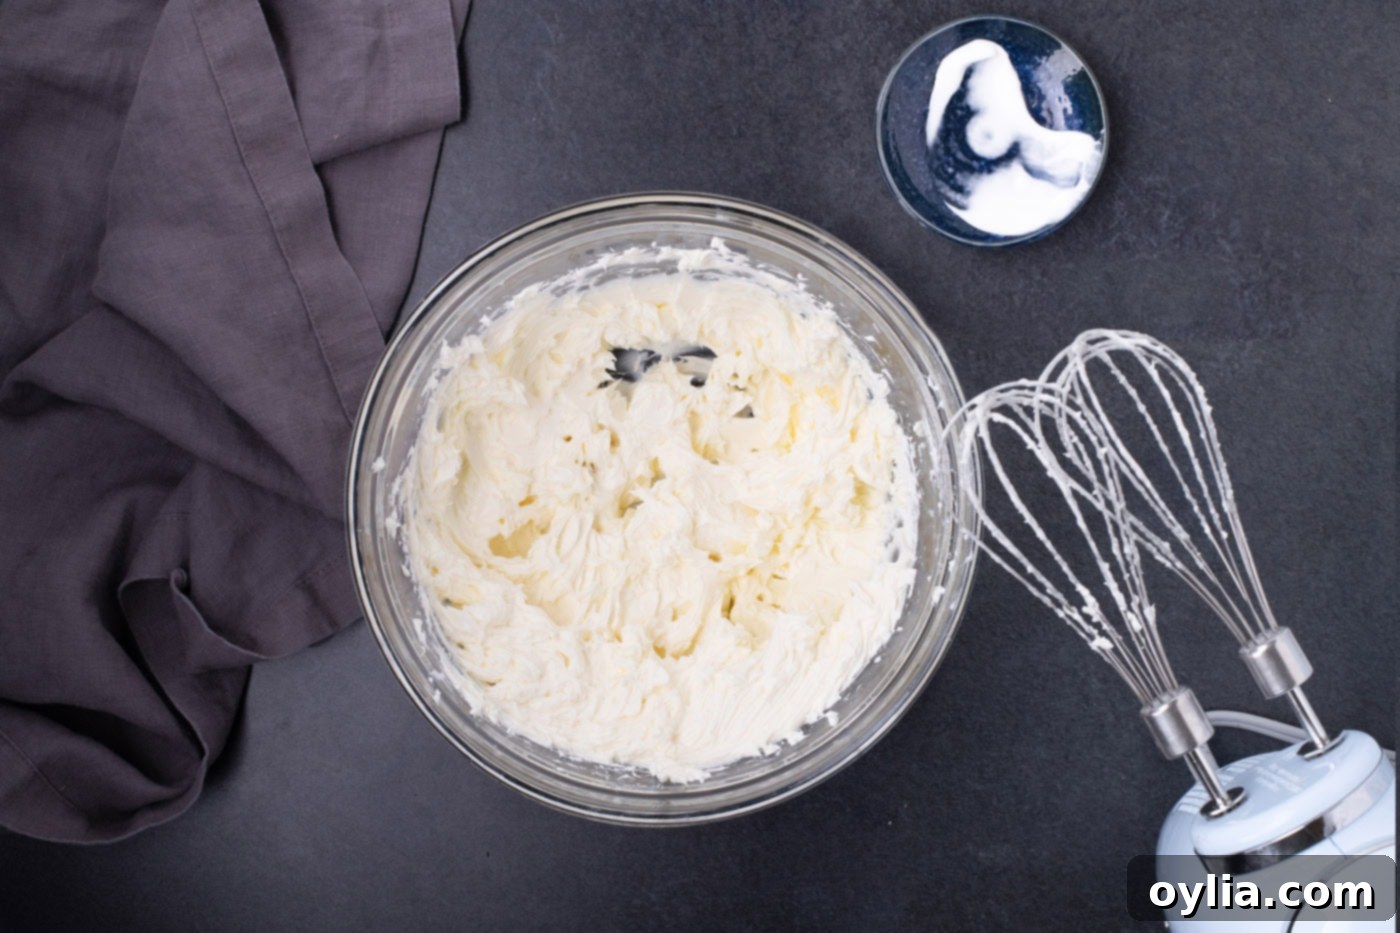
- Prepare the cheesecake base: In a large mixing bowl, beat the room temperature cream cheese and sour cream together using a hand mixer. Beat on medium speed until the mixture is light, creamy, and visibly fluffy, with no lumps remaining. Scrape down the sides of the bowl as needed.

- Add dry ingredients: Gently stir in the granulated sugar and all-purpose flour using a wooden spoon or a soft silicone spatula. Mix just until combined.
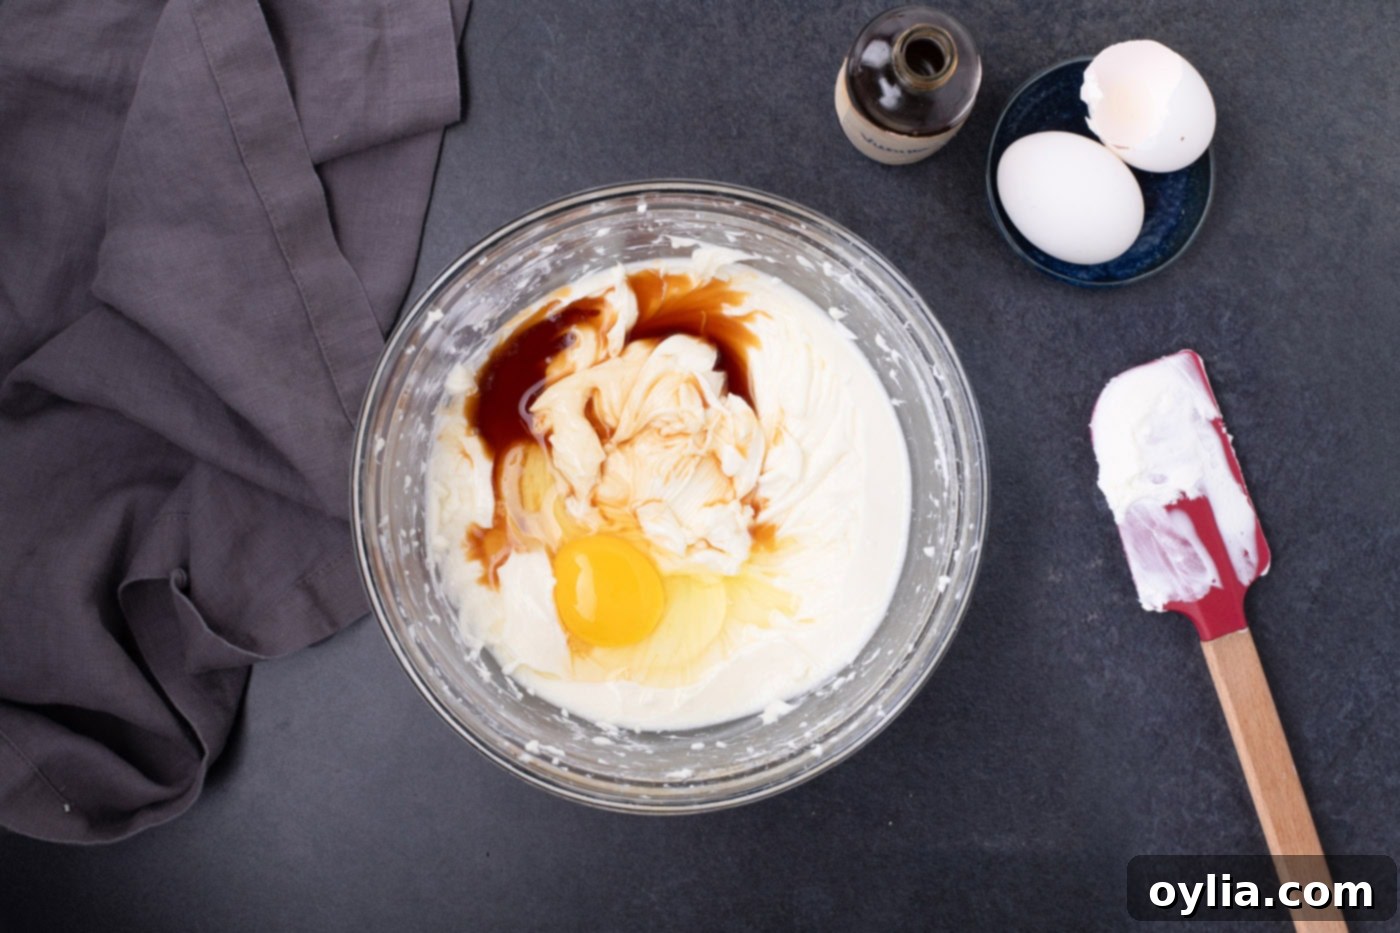
- Incorporate wet ingredients: Stir in the vanilla extract, then add the eggs one at a time, mixing only until each egg is just combined into the batter. It’s crucial not to use the hand mixer for this step, as overmixing after adding the eggs can incorporate too much air, which can cause the cheesecakes to crack or sink during baking.

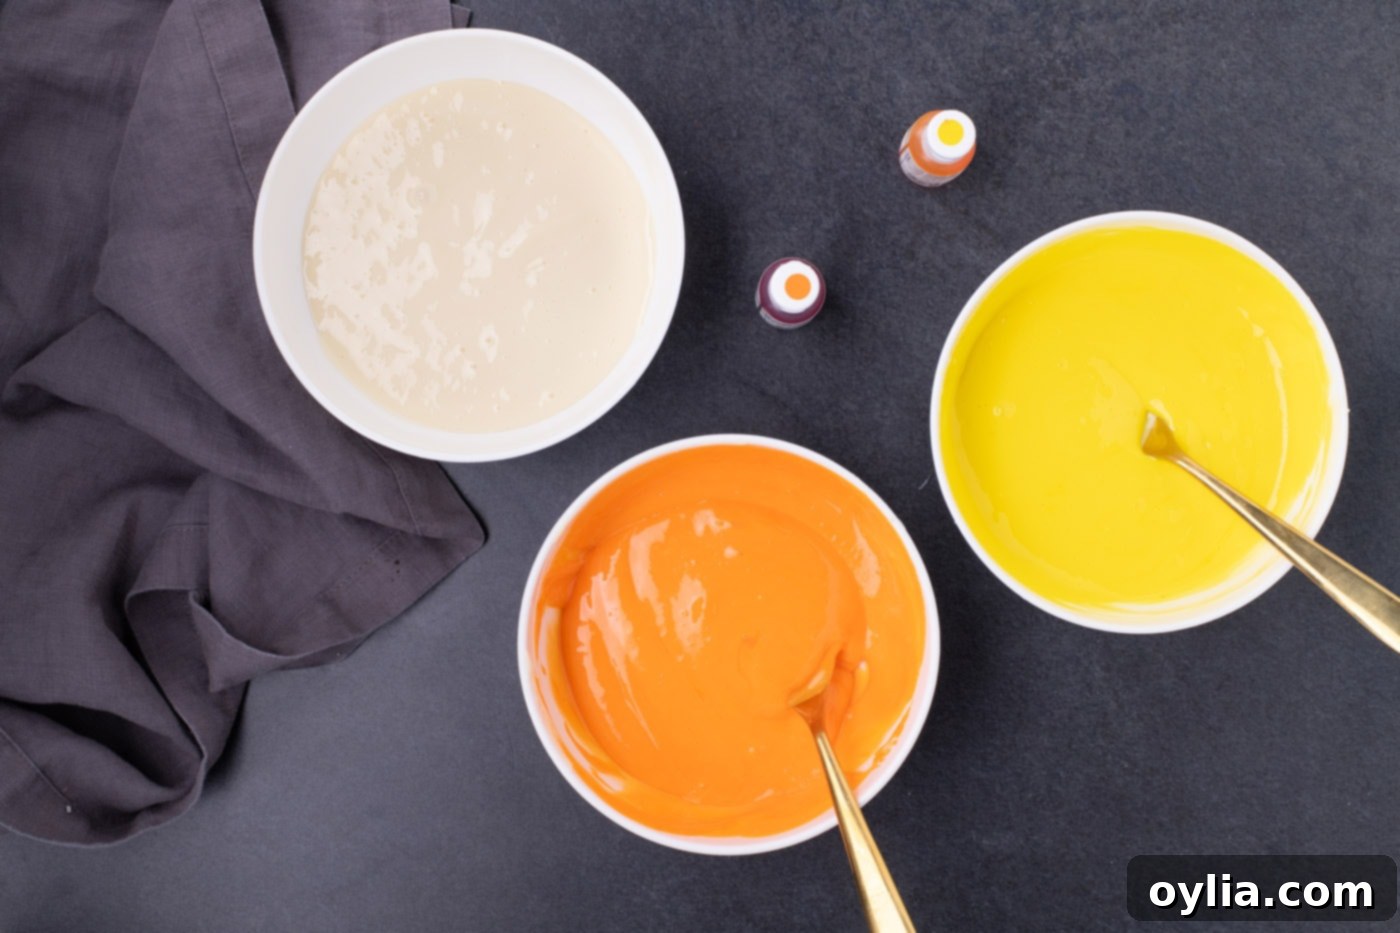
- Divide and color the batter: Divide the cheesecake filling into three separate bowls. Transfer ¾ cup of the filling to the first bowl and add 3 drops of yellow gel food coloring. Transfer 1 cup of filling to the second bowl and add 3 drops of orange gel food coloring. The remaining 1 ¼ cups of filling will stay white (cream-colored) in the third bowl.
- Mix colors: Stir each bowl of filling separately until the food coloring is thoroughly and evenly incorporated. If you desire a more intense or darker shade for your yellow or orange layers, add more drops of food coloring one at a time until you achieve your preferred vibrant hue.

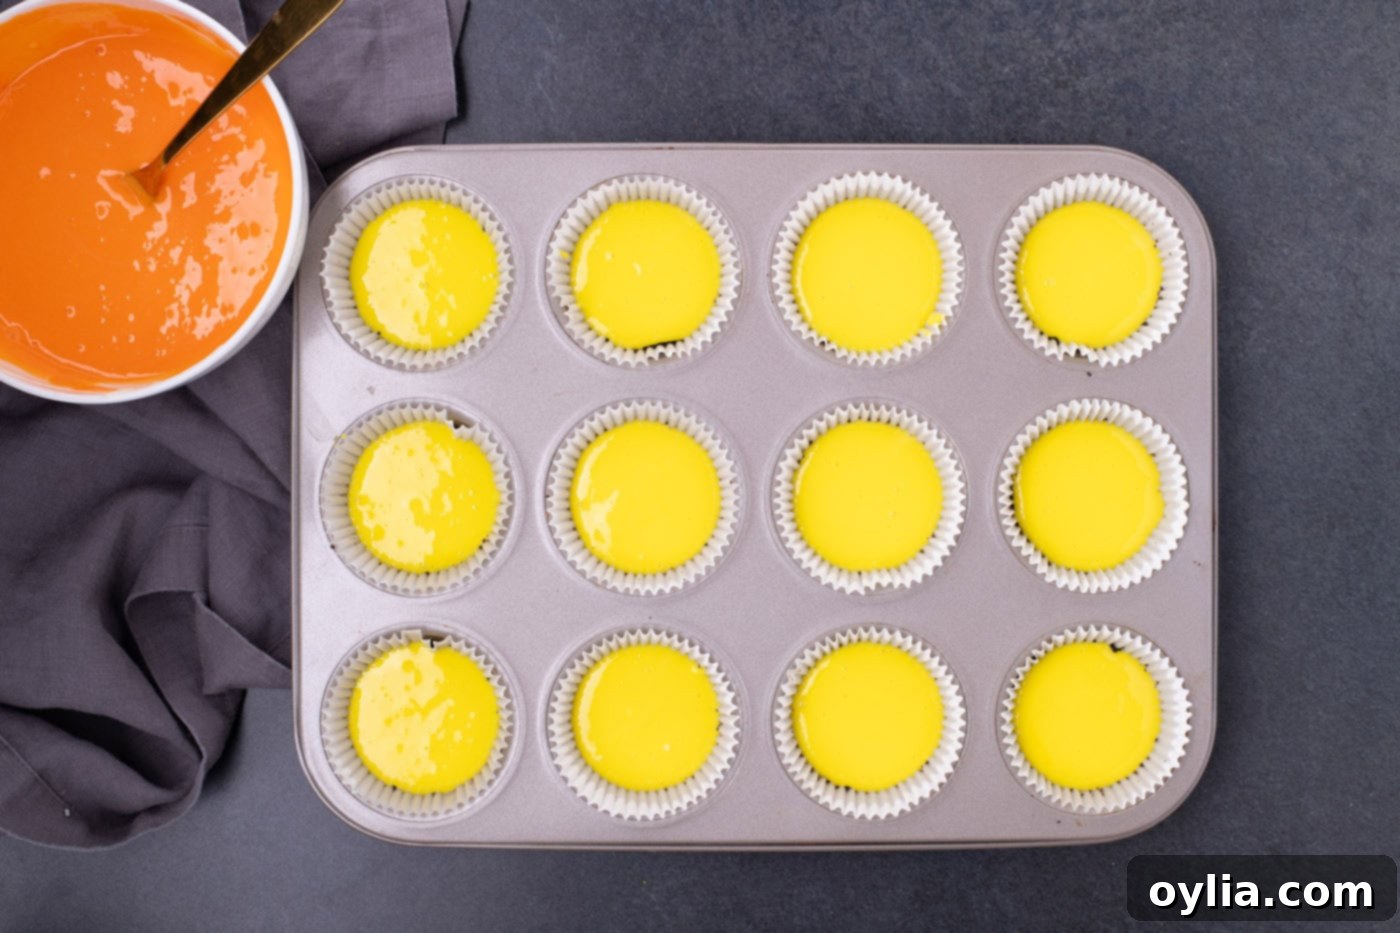
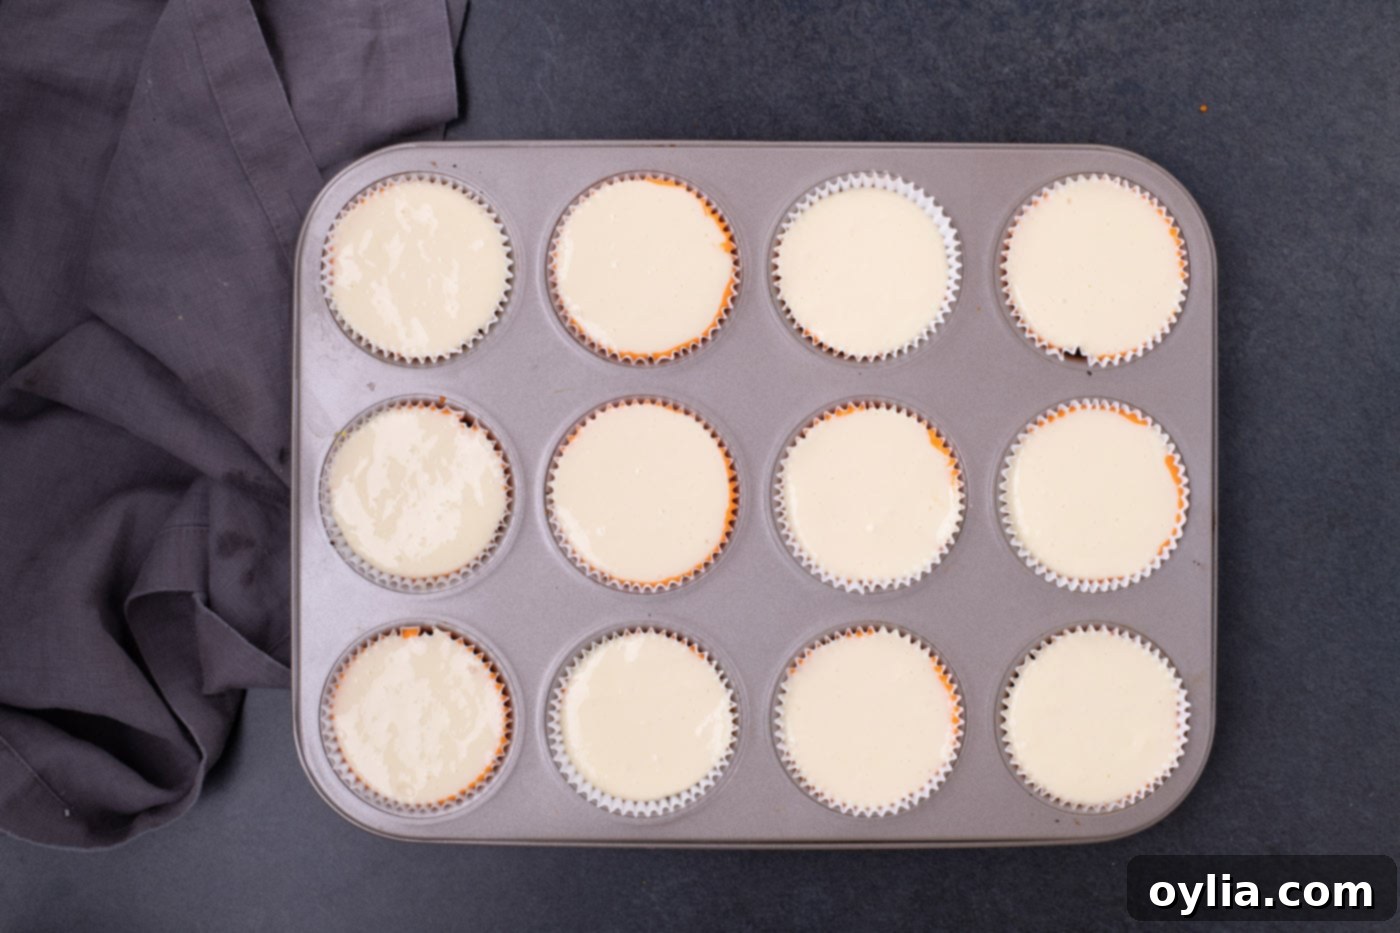
- Layer the colors – Yellow: Place a heaping teaspoon of the yellow-tinted cheesecake filling onto each cooled Oreo crust. Gently spread it into an even layer without disturbing the crust.

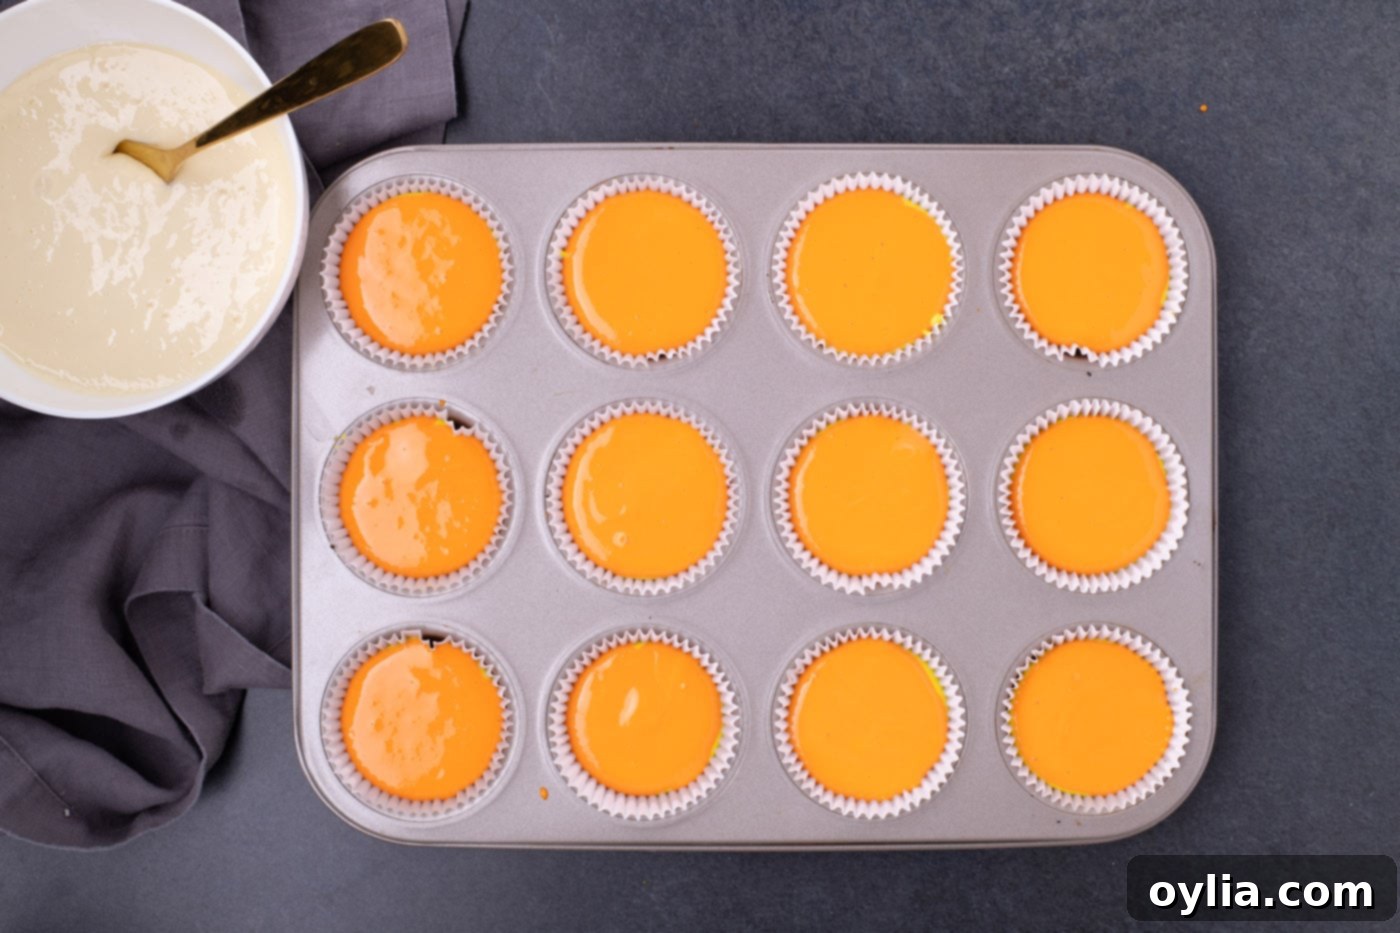
- Layer the colors – Orange & White: Next, place 1 tablespoon of the orange filling directly on top of the yellow layer. Finally, top each with 2 tablespoons of the cream-colored (white) filling. Try to keep the layers as distinct as possible for that classic candy corn look.


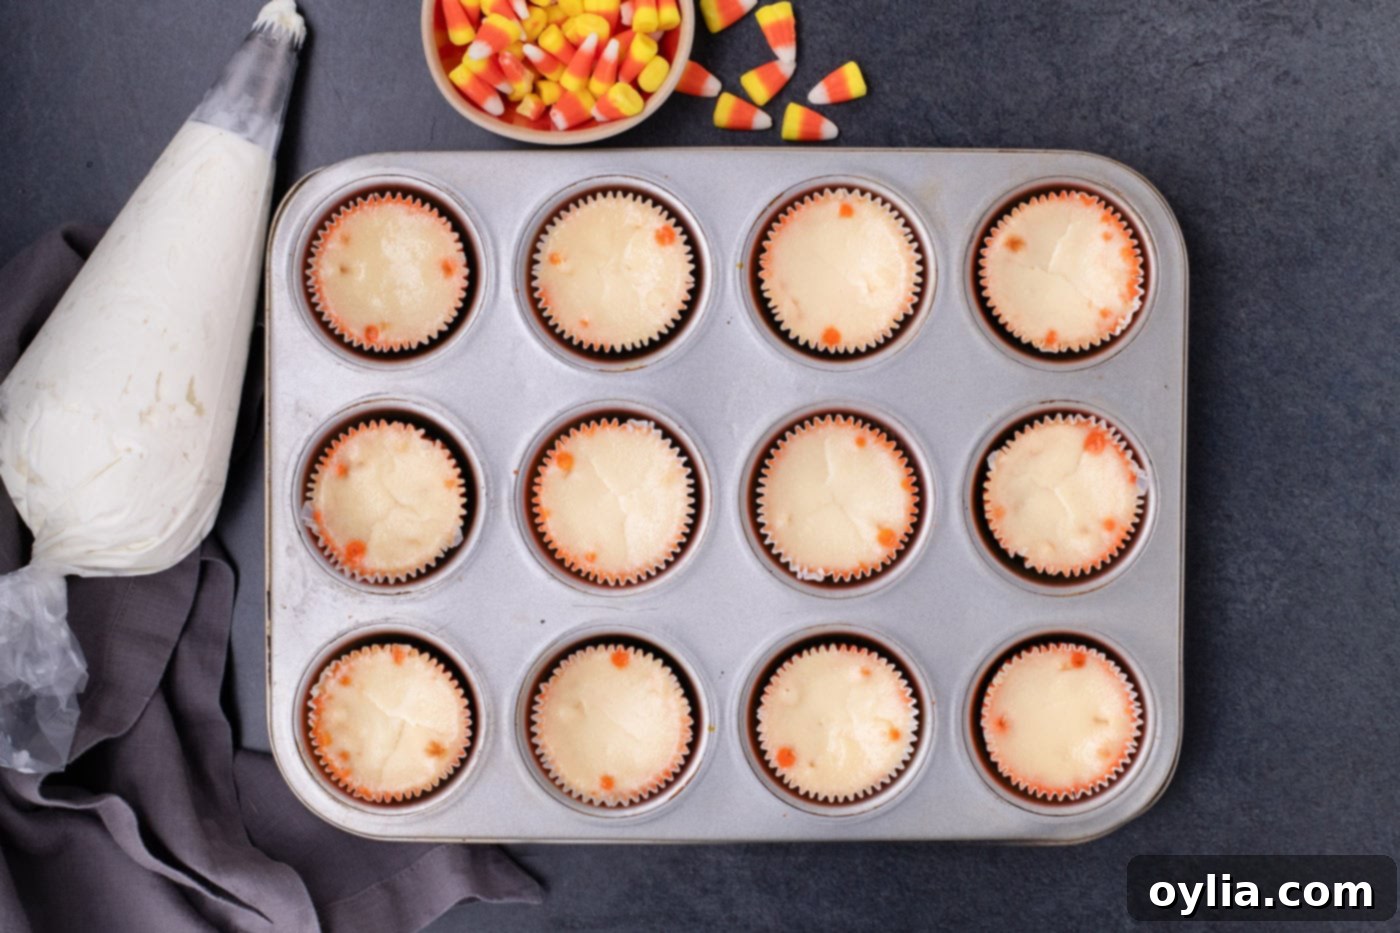
- Bake the cheesecakes: Place the muffin pans on a sturdy baking sheet (this helps prevent spills and makes transferring easier). Bake on the middle rack for approximately 15-20 minutes. The cheesecakes are done when the edges are set and slightly puffed, but the very centers still have a slight jiggly movement when gently shaken. Overbaking can cause cracks, so keep a close eye on them!
- Cool slowly: Once baked, turn off the oven, but do not remove the cheesecakes immediately. Prop the oven door ajar (about 3-4 inches) and allow the cheesecakes to cool slowly inside the turned-off oven for 1 hour. This gradual cooling process is absolutely crucial for preventing the cheesecakes from sinking in the middle or cracking due to a sudden temperature change.

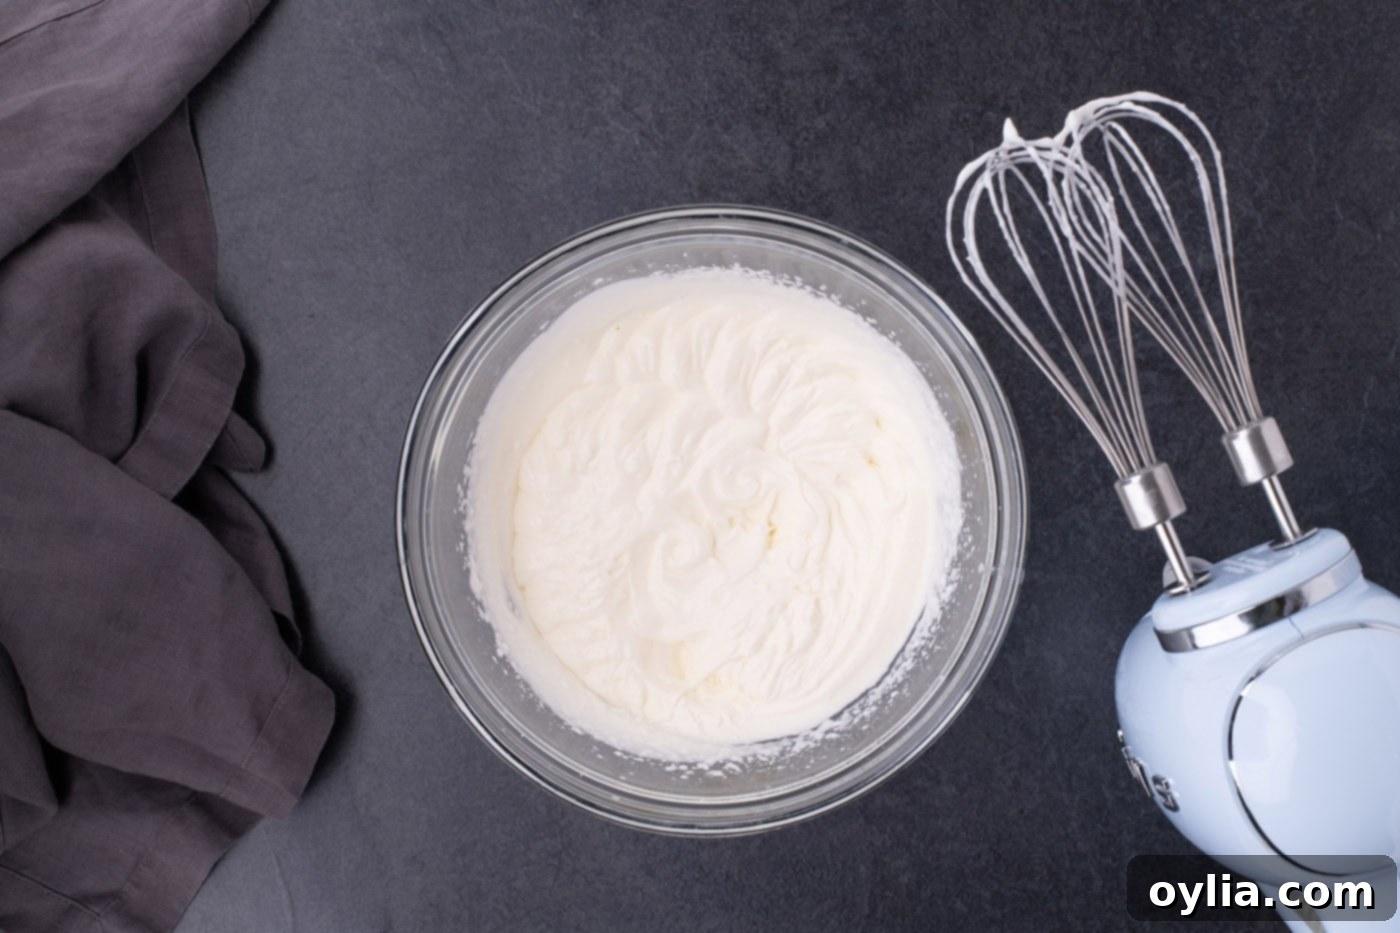
- Prepare the whipped cream: While the cheesecakes are cooling, prepare your topping. In a clean, chilled mixing bowl, combine the cold heavy cream and powdered sugar. Using a hand mixer, start beating at a low speed to incorporate the ingredients, then gradually increase the speed to medium-high. Continue beating until soft peaks form. Be careful not to overbeat, or you’ll end up with butter!

- Chill the whipped cream: Transfer the freshly made whipped cream into a pastry bag fitted with your desired piping tip (or a ziplock bag with a corner snipped off). Refrigerate the whipped cream until you are ready to garnish the cheesecakes.
- Final cooling & storage: After the slow oven cooling, remove the muffin pans and place them on a wire rack to cool completely to room temperature. Once cooled, if you’re not serving them immediately, cover the muffin pans loosely or transfer the cheesecakes to an airtight container and refrigerate for at least 4 hours, or preferably overnight, to allow them to fully set and chill.
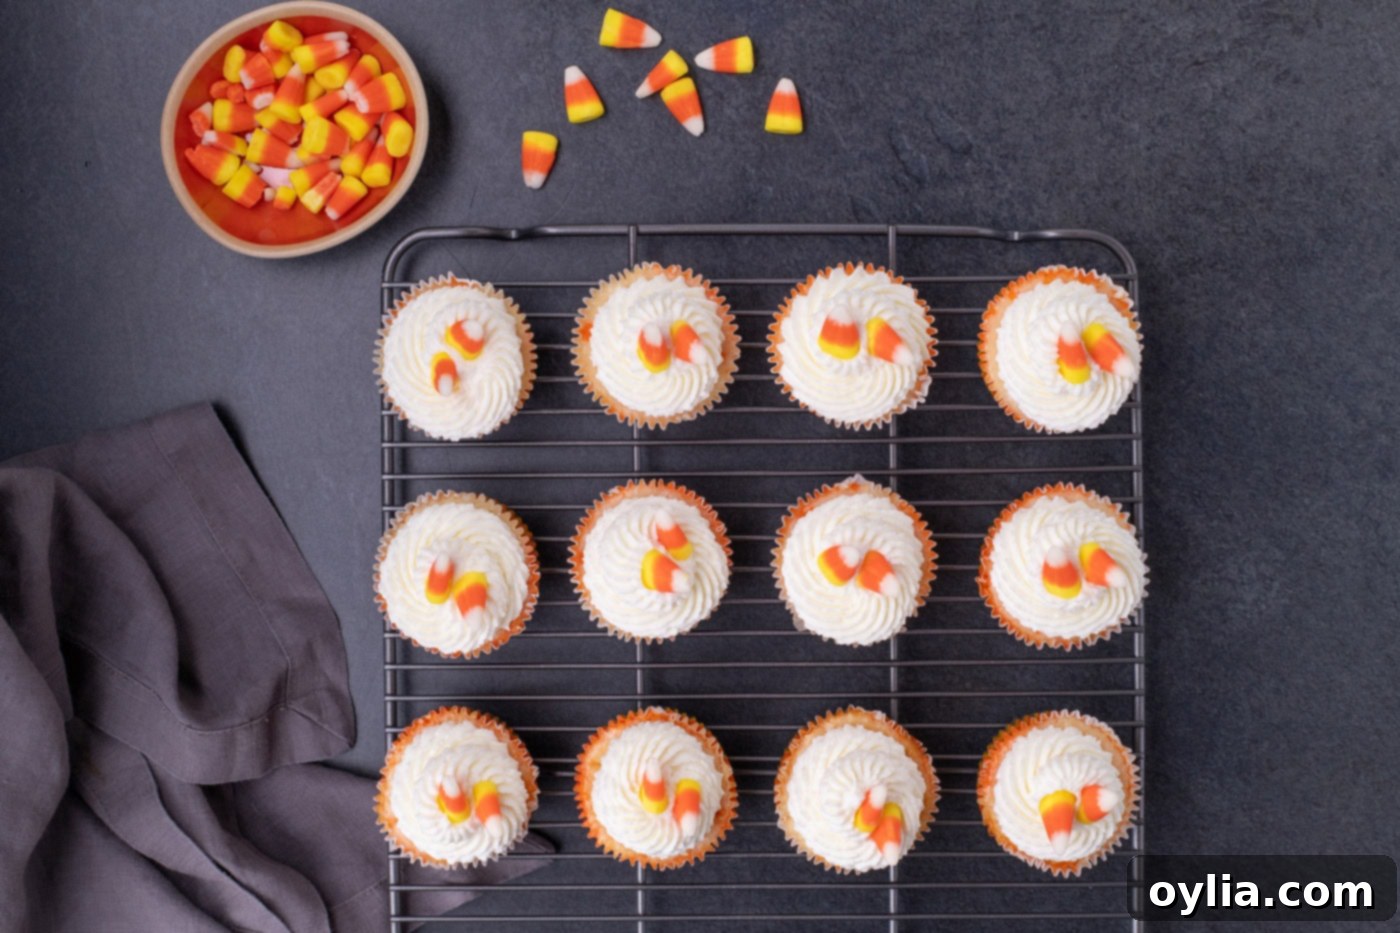
- Garnish and serve: Just before serving, take out your chilled mini cheesecakes and the prepared whipped cream. Pipe a beautiful swirl of whipped cream onto the top of each cheesecake. Finish by placing a single candy corn on top for the perfect festive flourish.

Frequently Asked Questions & Expert Tips for Perfect Mini Cheesecakes
Absolutely! These mini candy corn cheesecakes freeze exceptionally well, making them a fantastic make-ahead option. If you plan to freeze them, I highly recommend waiting to add the whipped cream and candy corn garnish until after they have thawed. Once your cheesecakes are completely cooled to room temperature, place them in a single layer in an airtight freezer-safe container. You can layer them with parchment paper in between if needed. Freeze for up to 2 months. To serve, simply transfer them to the refrigerator overnight to thaw, then top with freshly piped whipped cream and candy corn.
The key to perfectly baked cheesecake is to avoid overbaking. You should turn off your oven when the edges of the mini cheesecakes appear slightly puffed and set, but the centers still exhibit a gentle wiggle when you lightly jiggle the muffin pan. They won’t look completely firm in the middle, and that’s exactly what you want! The residual heat in the turned-off oven, combined with the slow cooling process (door ajar), will allow them to finish setting beautifully without drying out or cracking.
While tiny surface cracks can occasionally appear and are easily covered by the whipped cream, you can definitely take steps to prevent more significant cracking and deflating:
- Accurate Oven Temperature: Ensure your oven is heating correctly. Ovens can vary, especially older ones, so using an inexpensive oven thermometer can provide an accurate reading and help you maintain the proper temperature. Too high a temperature can cause the cheesecake to cook too quickly and crack.
- Avoid Overmixing: This is crucial. Overmixing, especially after adding the eggs, incorporates too much air into the batter. These air bubbles expand during baking and then collapse upon cooling, leading to cracks and a sunken center. Beat the cream cheese until fluffy, but once the sugar, flour, and eggs are added, mix only until just combined, preferably with a wooden spoon or spatula.
- Gradual Cooling: Sudden temperature changes are a cheesecake’s worst enemy. The method of turning off the oven and leaving the door ajar for an hour allows the cheesecakes to cool very slowly and gently, preventing them from shrinking rapidly and cracking or deflating.
- Room Temperature Ingredients: Always ensure your cream cheese, sour cream, and eggs are at room temperature before mixing. This allows them to combine smoothly and evenly, preventing lumps that can lead to an uneven bake and potential cracks.
Once fully cooled, store your mini candy corn cheesecakes in an airtight container in the refrigerator for 4-5 days. They are a perfect make-ahead dessert; you can prepare the cheesecakes a day or two before your event. However, for the freshest look and texture, it’s best to pipe on the whipped cream and add the candy corn garnish shortly before you plan to serve them.
To get those beautifully defined yellow, orange, and white layers, precision is key. Use separate spoons or small scoops for each color of batter to prevent accidental mixing. Gently spoon or pipe each layer on top of the previous one, being careful not to disturb the layer beneath. Don’t press down too hard, just let the batter settle naturally. A slightly thicker batter (ensured by using gel food coloring and not overmixing) also helps prevent colors from bleeding into one another.
Delightful Serving Suggestions
The simplest and most classic way to serve your mini candy corn cheesecakes is with a generous, elegant piping of freshly made whipped cream, crowned with a single, perfectly placed candy corn on top. However, don’t stop there! Consider these additional touches to elevate your presentation:
- Festive Sprinkles: Add a sprinkle of Halloween-themed nonpareils or jimmies over the whipped cream for extra sparkle and color.
- Chocolate Drizzle: A light drizzle of melted dark chocolate or white chocolate over the whipped cream can add another layer of flavor and visual appeal.
- Alongside Hot Beverages: Pair these sweet treats with a warm mug of apple cider, hot chocolate, or a festive pumpkin spice latte for a cozy Halloween experience.
- On a Themed Platter: Arrange the cheesecakes on a black or orange platter, perhaps with some small decorative pumpkins, gourds, or faux spiderwebs to enhance the Halloween ambiance.
- Fruit Garnish: While not part of the candy corn theme, a few fresh berries (like blackberries or raspberries) can add a burst of freshness and a contrasting color.
No matter how you choose to present them, these mini candy corn cheesecakes are guaranteed to be a hit!
More Spooktacular Halloween Recipes to Try
Looking for more hauntingly good treats and savory bites for your Halloween festivities? Explore these other fantastic recipes that are perfect for the season:
- Halloween Dirt Cups – A classic, fun, and easy treat for kids and adults alike.
- Halloween Candy Apples – The quintessential fall treat, given a spooky makeover.
- Candy Corn Jello Shots – A grown-up take on the iconic candy, perfect for adult parties.
- Jalapeno Popper Mummies – A deliciously cheesy and spicy appetizer with a festive twist.
I love to bake and cook and share my kitchen experience with all of you! Remembering to come back each day can be tough, that’s why I offer a convenient newsletter every time a new recipe posts. Simply subscribe and start receiving your free daily recipes!
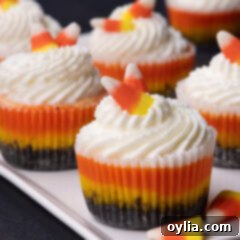
Mini Candy Corn Cheesecakes
IMPORTANT – There are often Frequently Asked Questions within the blog post that you may find helpful. Simply scroll back up to read them!
Print It
Pin It
Rate It
Save It
Saved!
Prevent your screen from going dark
Course:
Dessert
Cuisine:
American
20
servings
2 hours
5 minutes
210
Amanda Davis
Ingredients
Oreo Crust
-
16
Oreo cookies
regular. Do not use Double Stuf -
½
cup
unsalted butter
melted
Cheesecake Filling
-
16
ounces
cream cheese
at room temperature -
¼
cup
full fat sour cream -
¾
cup
granulated sugar -
2
Tablespoons
all purpose flour -
2
teaspoons
vanilla extract -
2
large
eggs -
gel food coloring
in yellow and orange. We used Americolor Yellow (#107) and Orange (#113)
Things You’ll Need
-
2 Muffin pan
12-cup capacity -
Food processor -
1 Tablespoon cookie scoop -
Hand mixer -
Mixing bowls
Before You Begin
- There is no need to remove the Oreo filling when making the crust; in fact, it helps add moisture to the mixture. Try to get the Oreo crumbs as fine as possible without any cookie chunks remaining. The finer the crumb, the better it will hold its shape.
- Use room temperature brick-style, full-fat cream cheese for best results. To help cream cheese come to room temperature quicker, you can slice it into cubes and allow it to rest on the counter for 30-40 minutes.
- You should turn the oven off when the cupcakes are slightly puffed up around the edges but still have a wiggle in the middle. Keeping them in the turned-off oven for an additional hour will ensure they finish setting during the cooling phase.
Instructions
-
Preheat the oven to 325°F and place cupcake liners in two 12-capacity muffin pans.
-
Place the Oreo cookies in a food processor and pulse until they resemble a fine crumb. Add the melted butter and continue pulsing until it has the texture of wet sand.
-
Using a 1-tablespoon cookie scoop, portion the Oreo crumbs among the cupcake liners. Using the bottom of a measuring cup, flatten them out.
-
Bake for 5 to 8 minutes (or until the crust has set). Set aside to cool while making the filling.
-
In a large mixing bowl, beat the cream cheese and sour cream with a hand mixer until fluffy.
-
Stir in the sugar and flour using a wooden spoon or soft silicone spatula.
-
Stir in the vanilla and one egg at a time until just combined. (Don’t use the hand mixer for this step, as you want to avoid incorporating any air into the mixture.)
-
Transfer ¾ cups of the filling to the first bowl and add 3 drops of yellow food coloring. Transfer 1 cup of filling to the second bowl and add 3 drops of orange food coloring. Transfer the remaining 1 ¼ cups of filling to the third bowl.
-
Stir the food coloring until well combined. At this point, if you want a darker shade, continue adding more food coloring until you achieve the desired color.
-
Place a heaping teaspoon of the yellow filling onto the cooled Oreo crust.
-
Place 1 tablespoon of the orange filling on top of the yellow layer, and finally, top with 2 tablespoons of the cream-colored filling.
-
Set the muffin pans on a baking sheet (to catch any spills) and bake on the middle rack until the centers of the cheesecakes are still jiggly (about 15-20 minutes). It is important not to overbake the cheesecakes as you don’t want them to crack.
-
Turn the oven off and leave the door ajar for 1 hour to allow the cheesecakes to set and cool down slowly. (This step is crucial so the cheesecakes do not sink in the middle).
-
While the cheesecakes are cooling down, prepare the whipped cream by combining the chilled heavy cream and powdered sugar. With a hand mixer, beat at a low speed to build up volume, and then increase the speed to medium/high until soft peaks form.
-
Place the whipped cream in a pastry bag (or ziplock bag with the corner cut) and refrigerate until needed.
-
Remove the muffin pans from the oven and place them on a wire rack to cool to room temperature. If you don’t plan on serving the cheesecakes immediately, store them in the fridge.
-
Just before serving, pipe the cheesecakes with the whipped cream and garnish with candy corn.
Expert Tips & FAQs
- Store them in an air-tight container kept in the refrigerator for 4-5 days. They can easily be made the day before you plan on serving them, but I would suggest making and piping on the whipped cream shortly before serving.
- Freezing – I would recommend waiting to add the whipped cream if you plan on freezing them. Place the fully cooled cheesecakes in an air-tight container and freeze for up to 2 months. Thaw in the refrigerator overnight then top with whipped cream.
Nutrition
Serving:
1
cheesecake
|
Calories:
210
cal
|
Carbohydrates:
16
g
|
Protein:
3
g
|
Fat:
15
g
|
Saturated Fat:
8
g
|
Polyunsaturated Fat:
1
g
|
Monounsaturated Fat:
4
g
|
Trans Fat:
0.2
g
|
Cholesterol:
55
mg
|
Sodium:
117
mg
|
Potassium:
66
mg
|
Fiber:
0.3
g
|
Sugar:
12
g
|
Vitamin A:
492
IU
|
Vitamin C:
0.03
mg
|
Calcium:
31
mg
|
Iron:
1
mg
Tried this Recipe? Pin it for Later!
Follow on Pinterest @AmandasCookin or tag #AmandasCookin!
The recipes on this blog are tested with a conventional gas oven and gas stovetop. It’s important to note that some ovens, especially as they age, can cook and bake inconsistently. Using an inexpensive oven thermometer can assure you that your oven is truly heating to the proper temperature. If you use a toaster oven or countertop oven, please keep in mind that they may not distribute heat the same as a conventional full sized oven and you may need to adjust your cooking/baking times. In the case of recipes made with a pressure cooker, air fryer, slow cooker, or other appliance, a link to the appliances we use is listed within each respective recipe. For baking recipes where measurements are given by weight, please note that results may not be the same if cups are used instead, and we can’t guarantee success with that method.
