Easy Cherry Slab Pie: Your Ultimate Crowd-Pleasing Dessert Recipe
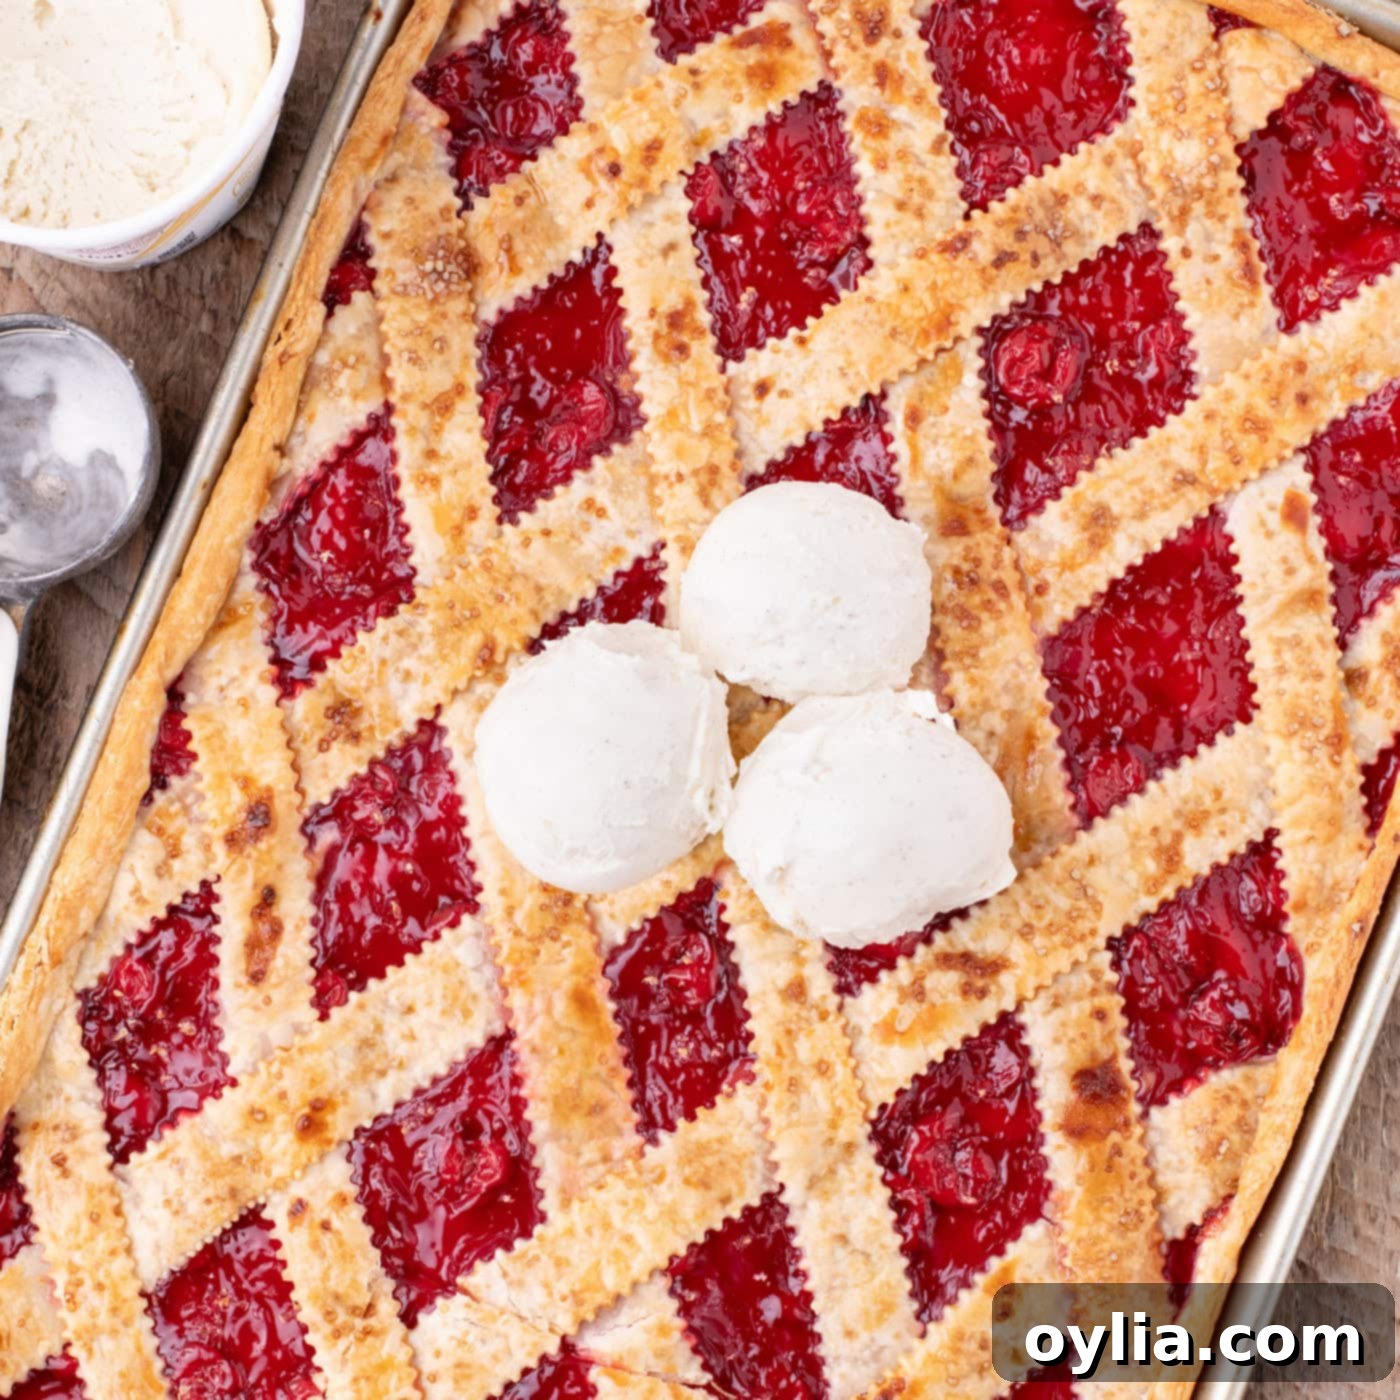
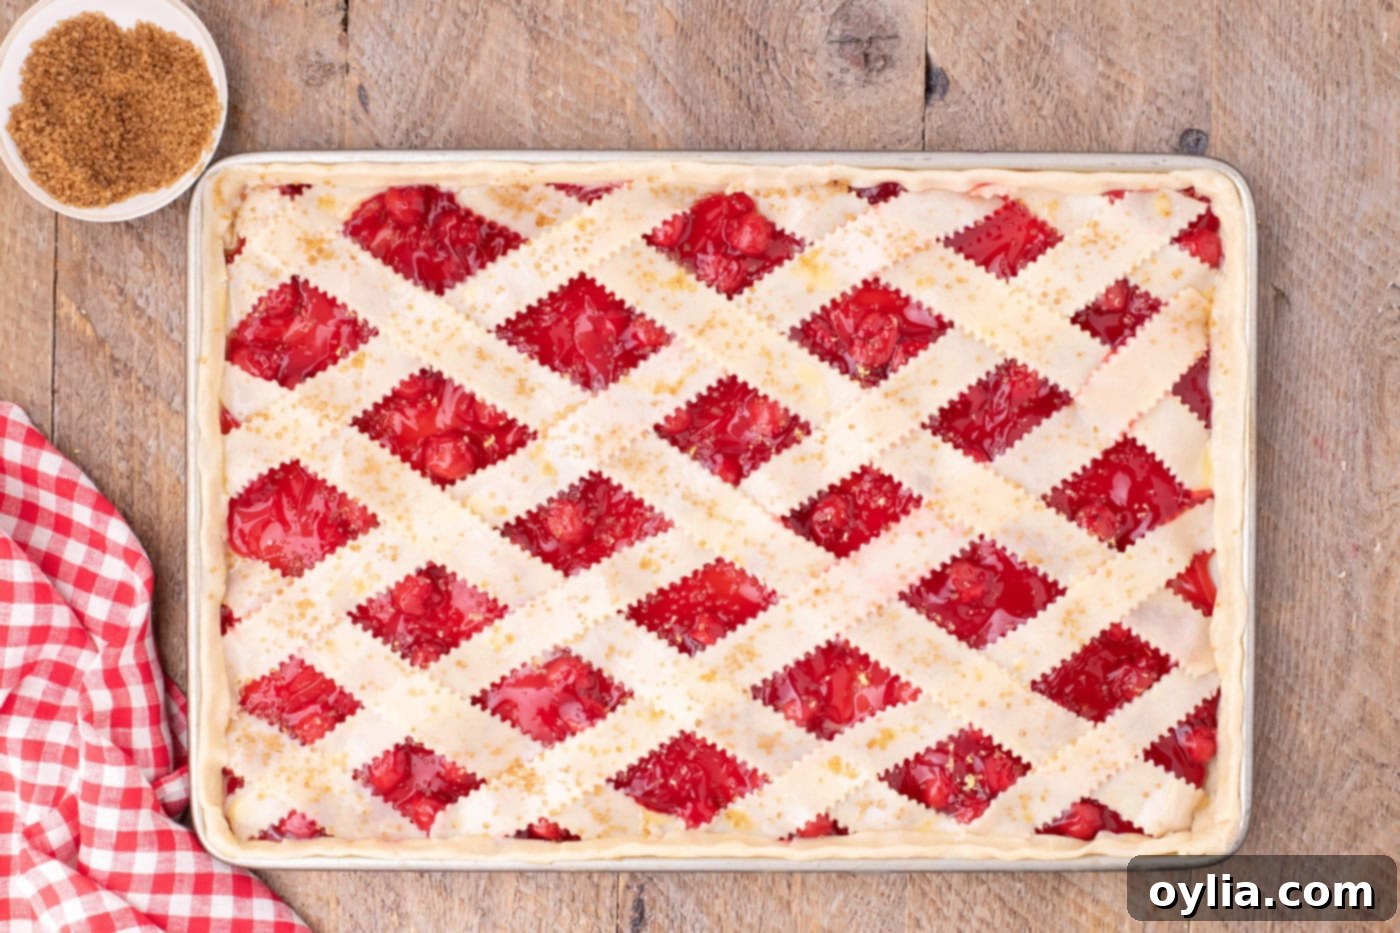
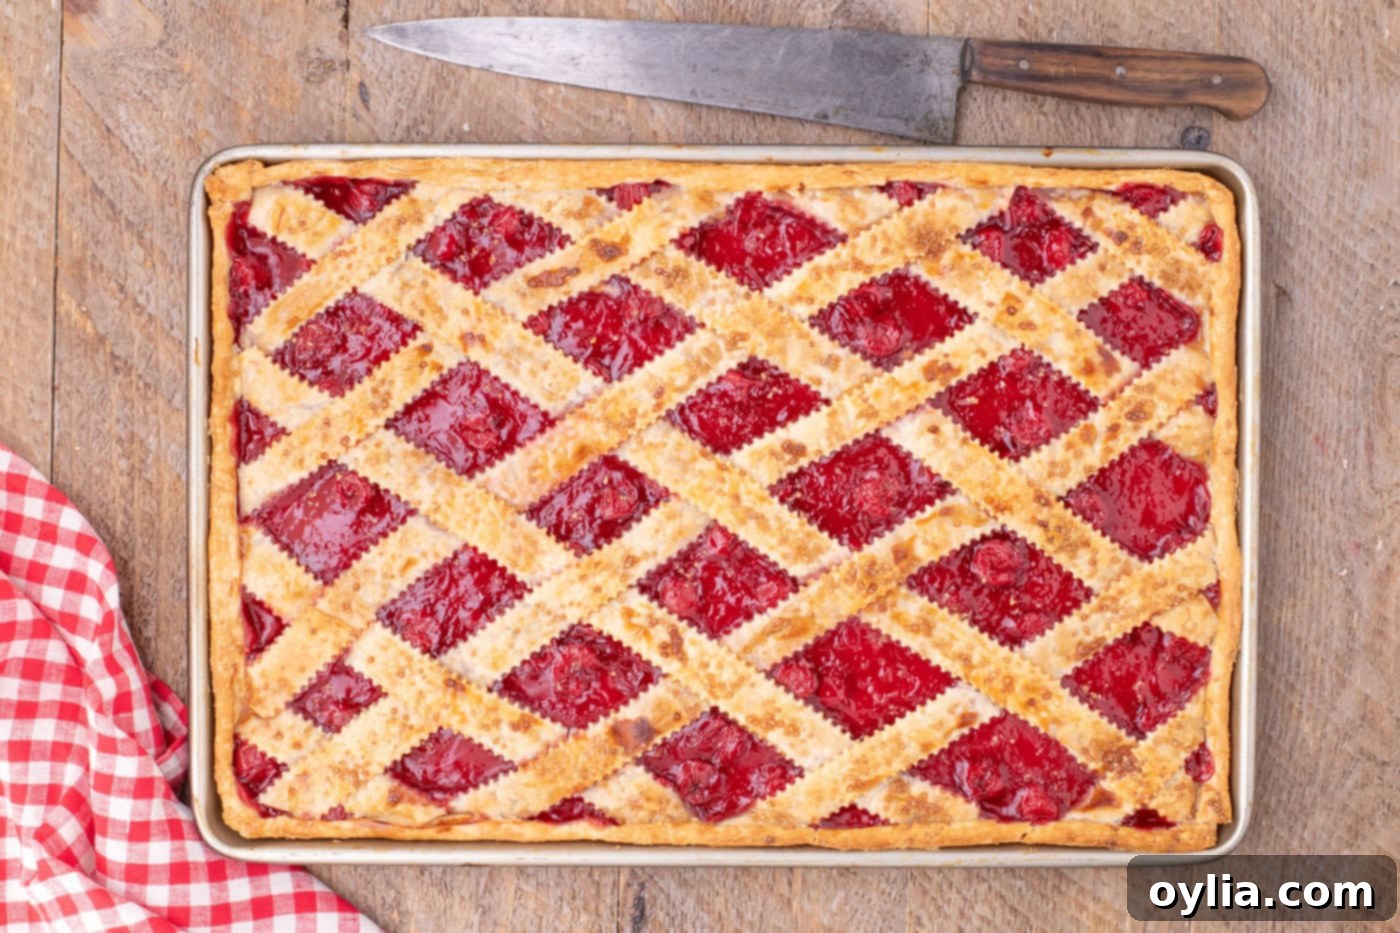
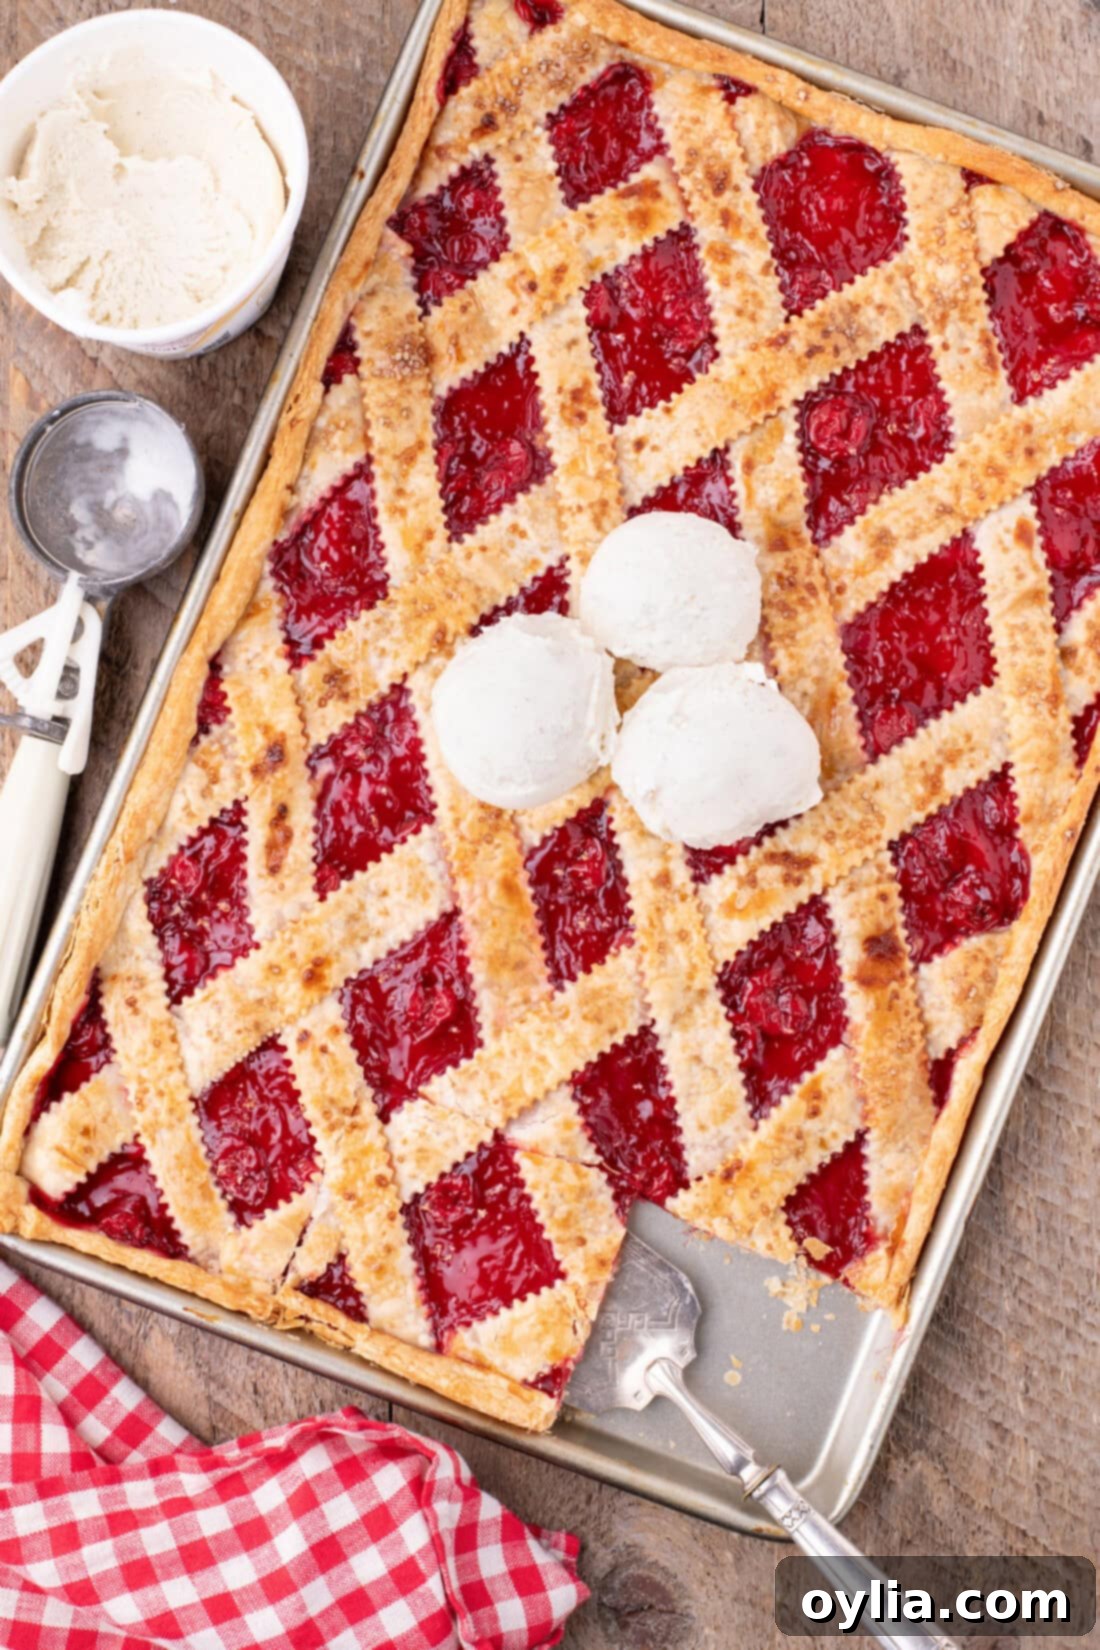
Imagine a vibrant, juicy cherry pie filling bubbling through a perfectly golden, intricately woven lattice top. This isn’t just any pie; it’s our 5-ingredient easy cherry slab pie recipe, designed to impress without the stress. Serve it warm with a generous scoop of creamy vanilla ice cream, and watch it disappear in minutes!
Why This Easy Cherry Slab Pie Recipe Works Wonders
This stunning cherry slab pie isn’t just a dessert; it’s a statement. Perfect for feeding larger crowds at summer parties, potlucks, or family gatherings, it offers all the charm of a homemade pie with significantly less effort than a traditional, time-intensive round cherry pie. The secret to its convenience lies in store-bought pie crust and pre-made cherry pie filling, which transform this recipe into a quick and convenient baking project. However, for those who relish a true labor of love, feel free to substitute these with your favorite homemade versions – the choice is yours!
Slab pies are a fantastic solution when you need to serve many guests. Baked in sheet pans or jelly roll pans, they naturally yield more slices than a standard round pie. One of the main benefits is the higher crust-to-filling ratio, offering more of that delicious, flaky pastry in every bite. Beyond cherries, this versatile recipe allows for endless creativity. You can easily swap out the filling to create a delectable blackberry, blueberry, peach, or even a strawberry slab pie. Imagine the possibilities!
The appeal of cherry pie is timeless. Its sweet-tart flavor profile, combined with a buttery crust, evokes feelings of warmth and nostalgia. This slab pie takes that classic comfort and elevates it for modern entertaining, making it accessible even for novice bakers. The lattice top, while looking sophisticated, is surprisingly manageable with a few simple techniques, adding an artisanal touch to your dessert spread. It’s truly a show-stopper that promises to be the star of any dessert table.
Key Ingredients for Your Delicious Cherry Slab Pie
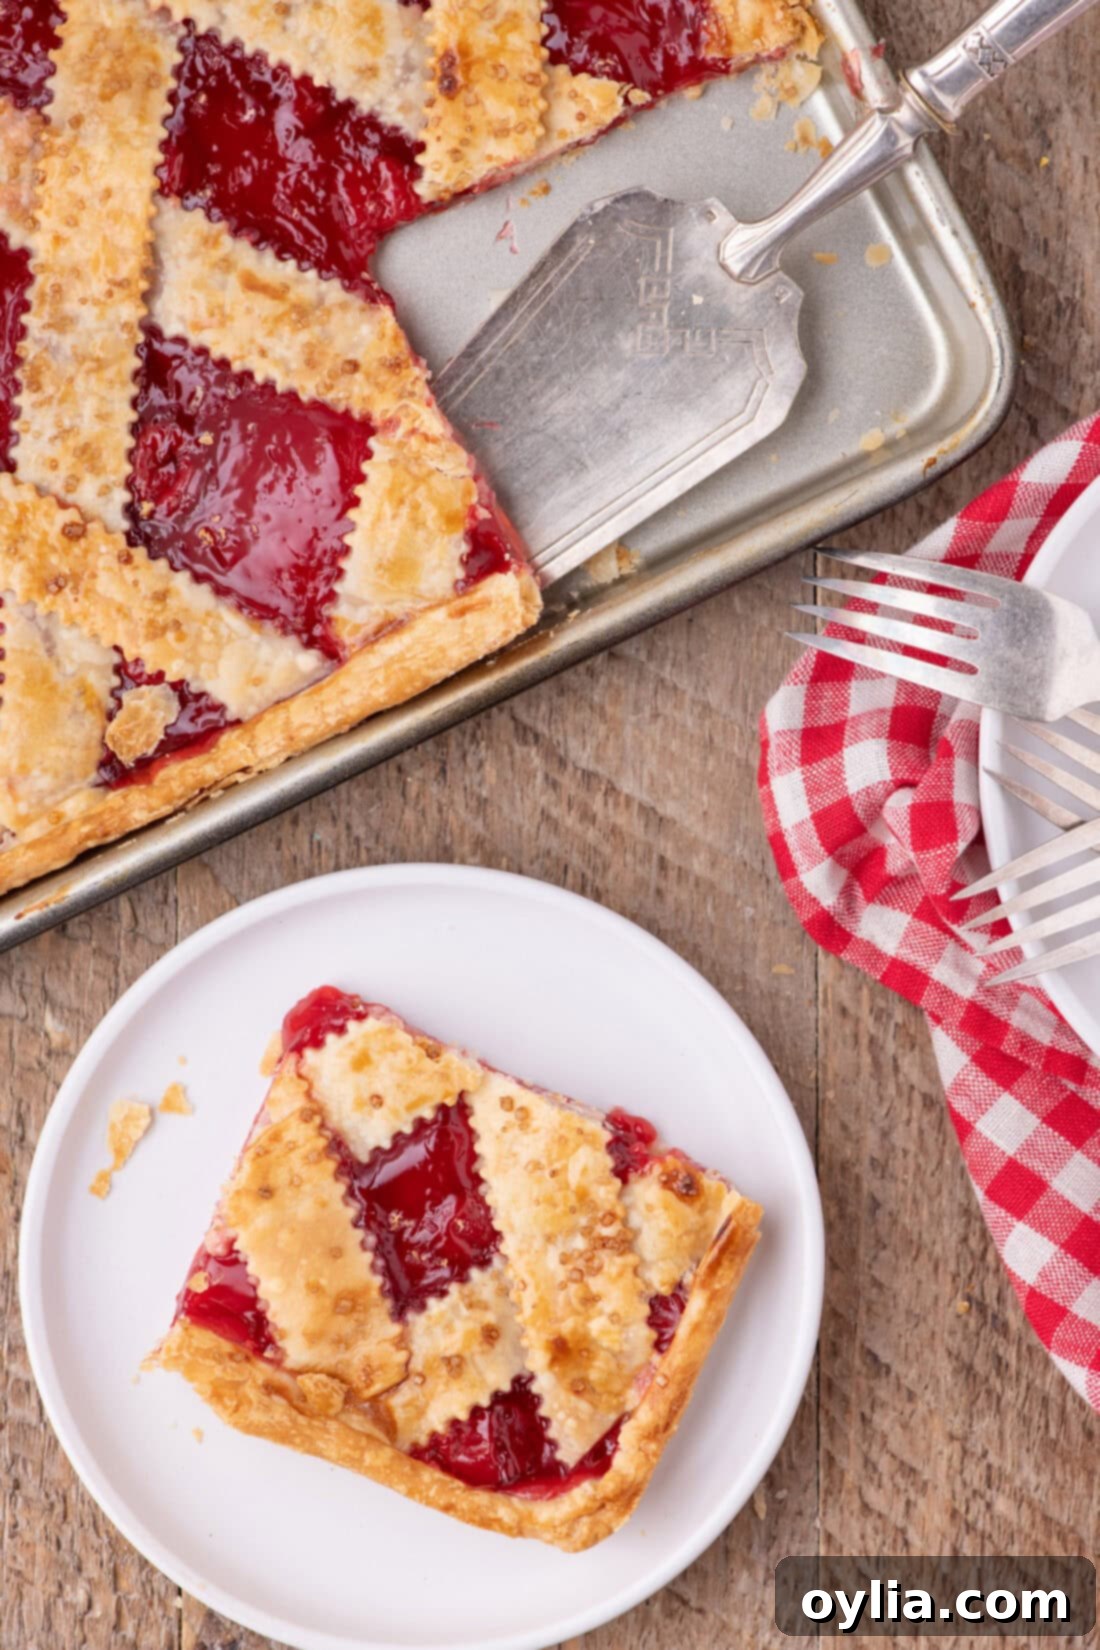
Crafting this delightful cherry slab pie requires just a handful of simple ingredients. While we’re focusing on convenience, quality ingredients will always elevate your dessert. You’ll find all precise measurements, a complete ingredient list, and detailed instructions in the printable recipe card located at the end of this post. Don’t worry, we’ll walk through each one to ensure your pie is a resounding success!
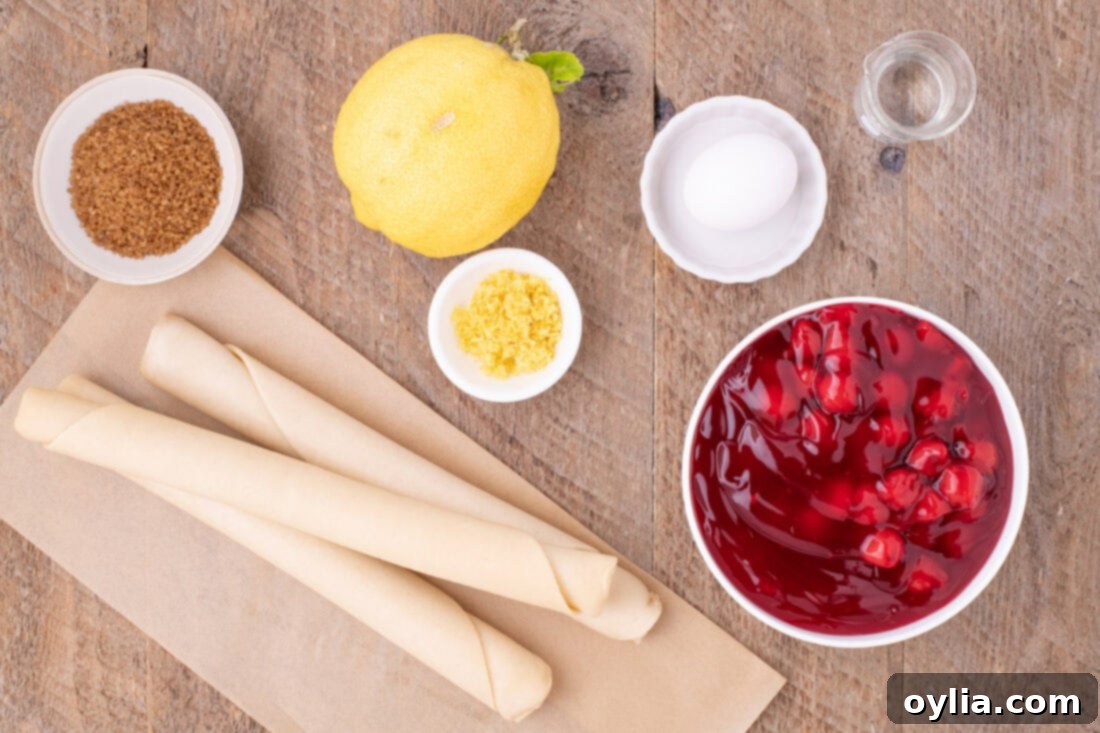
Ingredient Info and Smart Substitution Suggestions
Understanding your ingredients and their roles is key to successful baking. Here’s a deeper dive into what you’ll need for this cherry slab pie, along with helpful substitution tips:
FILLING – The star of the show! Canned cherry pie filling is incredibly convenient and makes this recipe quick. Two 20-ounce cans are usually perfect for a slab pie. For a more robust, personalized flavor, you can absolutely opt for homemade cherry pie filling. If making your own, ensure it’s sufficiently thick so it doesn’t make the crust soggy. You can also experiment with different fruit fillings like apple, peach, or mixed berries.
CRUST – Using premade pie crusts is what makes this cherry slab pie so effortlessly simple. We recommend two 14.1-ounce boxes of Pillsbury pie crusts (which typically contain two rolls each, totaling four crusts, but you’ll only need three for this recipe). These unroll easily and provide a consistently flaky base. For a truly homemade touch, a classic all-butter pie crust or a sturdy shortening-based crust would also work beautifully. Just be sure to prepare enough dough to cover a large jelly roll pan, with extra for the lattice.
LEMON ZEST – This small addition makes a big difference! Freshly grated lemon zest brightens the cherry filling, adding a subtle tang that complements the sweetness of the cherries without making the pie taste lemony. It awakens the fruit flavors. Don’t skip it!
EGG WASH – A simple mixture of one egg beaten with one tablespoon of water, the egg wash is crucial for achieving that beautiful golden-brown, shiny finish on your lattice top. It also helps the turbinado sugar adhere to the crust, adding to the visual appeal and texture.
LATTICE TOP – While the lattice weave adds an elegant touch, we understand it might seem intimidating at first. If you prefer a simpler approach, you can easily cover the pie with a full, regular pie crust. Just remember to cut several slits into the top of the crust to allow steam to escape during baking. This prevents the crust from puffing up excessively and ensures the filling cooks properly. If you do attempt the lattice, remember practice makes perfect, and even imperfect weaves look charmingly rustic!
TURBINADO SUGAR – This is our secret weapon for an irresistible crunchy crust! Turbinado sugar, often called “sugar in the raw,” is less processed than granulated sugar, retaining more of its natural molasses. This gives it a beautiful golden-brown color and a richer, deeper caramel-like flavor. Its larger crystals also provide a wonderful textural contrast. If you don’t have turbinado sugar, you can swap it at a 1:1 ratio with granulated sugar, but you’ll miss out on that signature crunch and subtle flavor depth.
Step-by-Step Guide: How to Make Cherry Slab Pie
These step-by-step photos and instructions are designed to help you visualize each stage of making this delightful cherry slab pie. For a convenient printable version of this recipe, complete with precise measurements and full instructions, you can Jump to Recipe at the bottom of this page.
- Preheat your oven to 375° F (190°C). This ensures your pie bakes evenly from the moment it enters the oven, resulting in a perfectly golden crust.
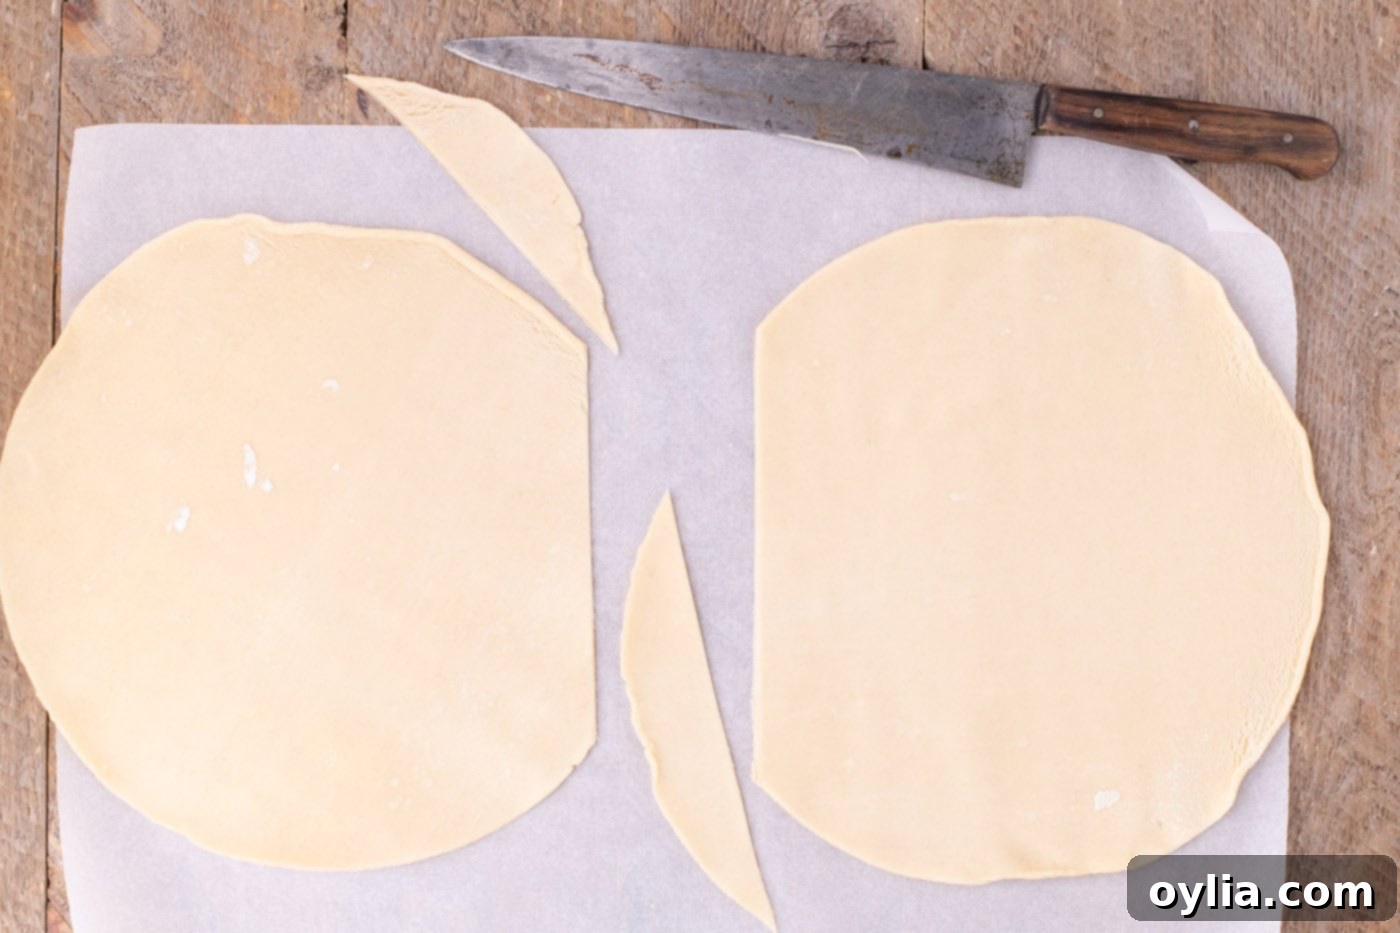
- Carefully remove two pie crusts from their packaging and unroll them onto a parchment-lined or lightly floured surface. Parchment paper is highly recommended for easy handling and cleanup. Trim approximately 2 inches from the side of each crust. Set these trimmed scraps aside; they can be useful later for repairs or if you need additional lattice strips.
TIP – This recipe typically uses 3 out of the 4 pie crusts provided in two standard boxes. You can save the fourth for another small baking project or extra lattice!

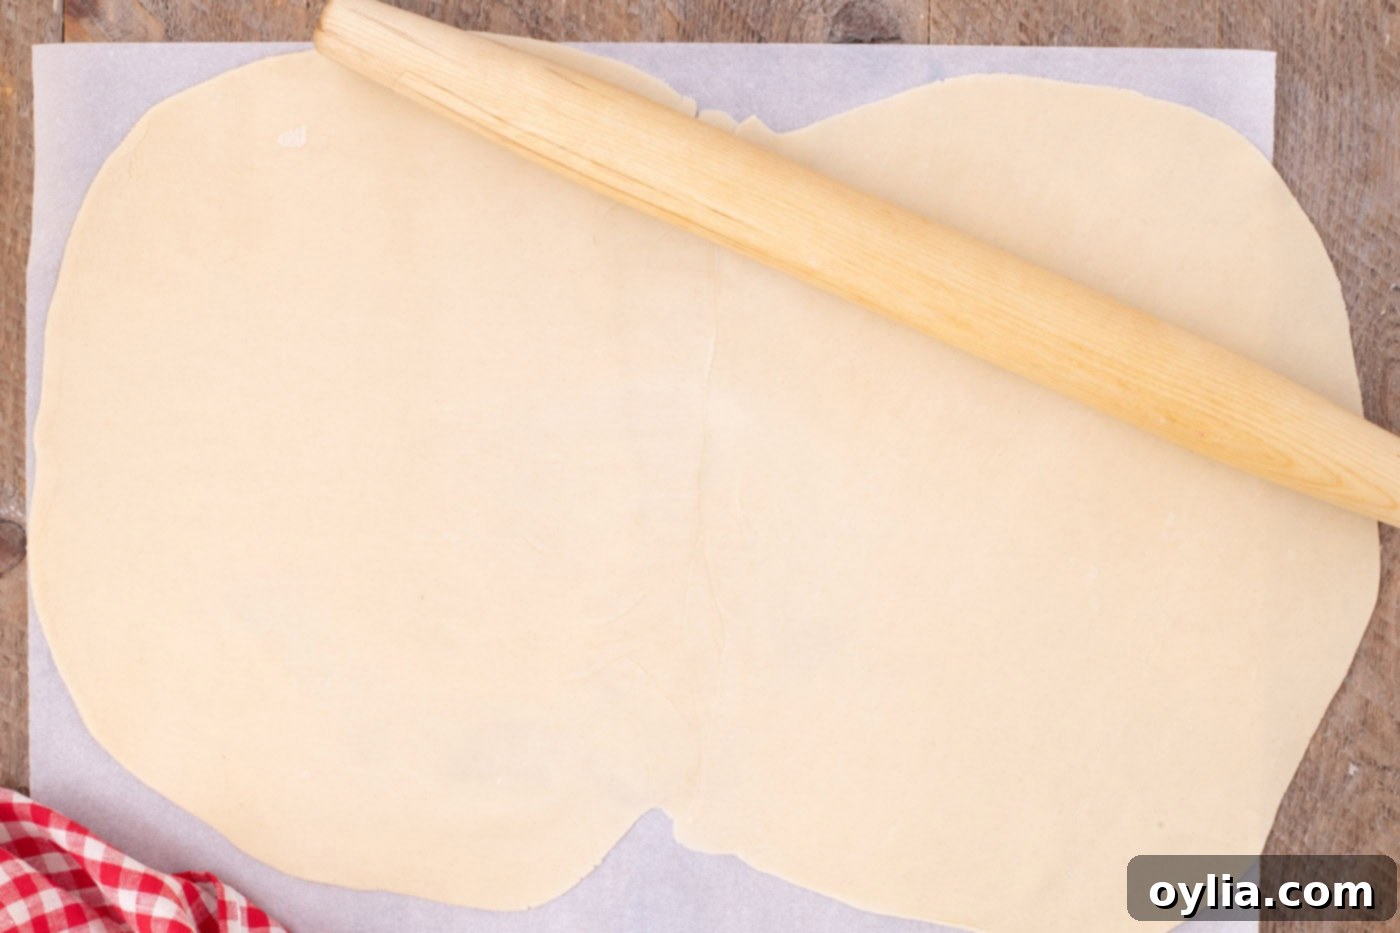
- Overlap the trimmed edges of the two crusts slightly, pressing them together firmly. Then, using a rolling pin, carefully roll them out to form one large, single rectangular shape. Aim for a size that is approximately 3 inches larger on all sides than your standard jelly roll pan (typically 10×15 inches). This extra overhang will be used to create a sealed edge.

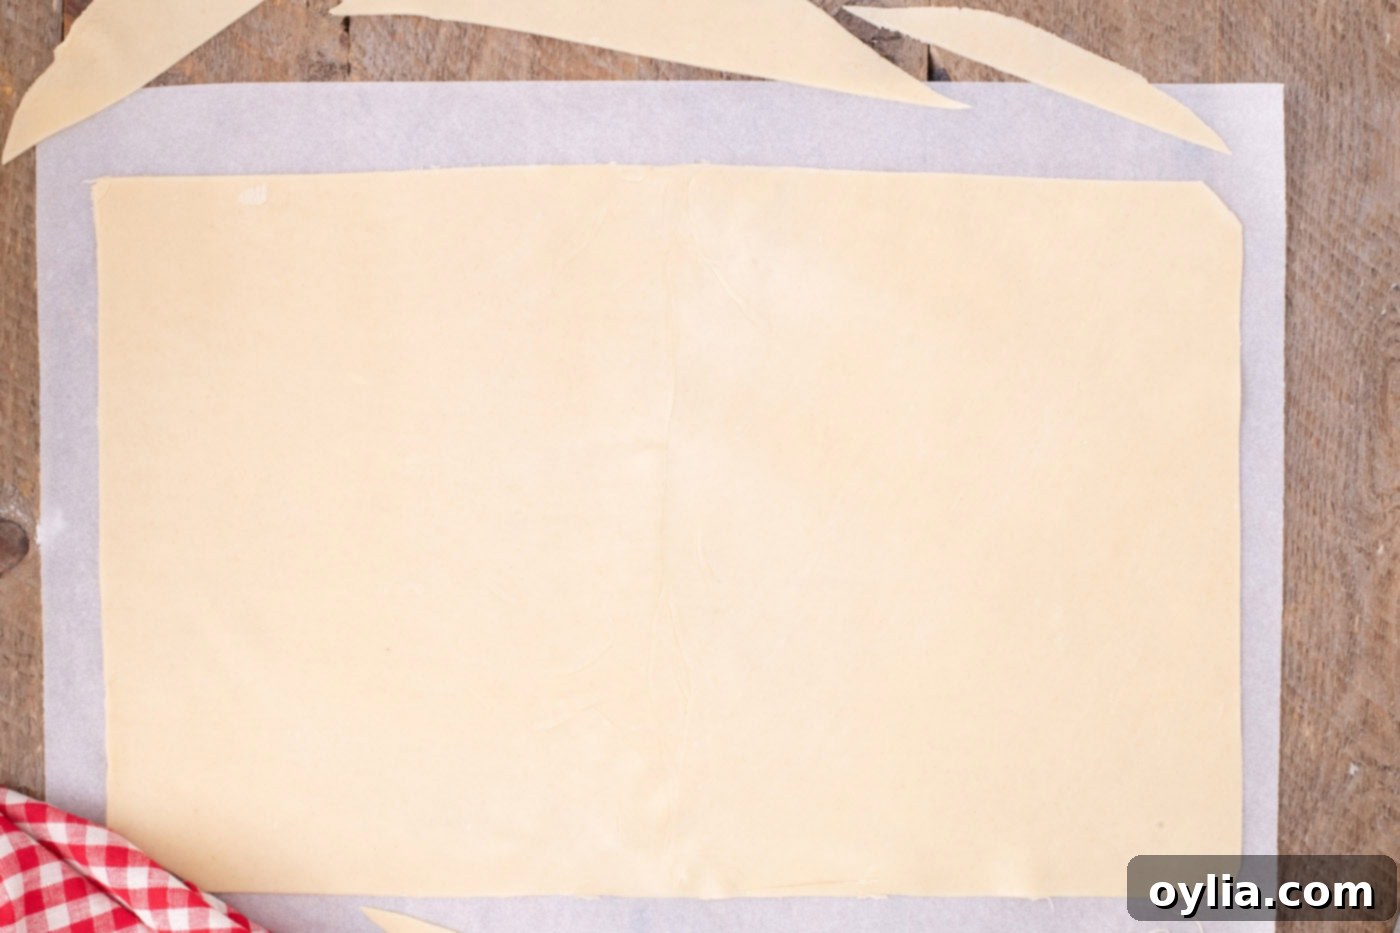
- Once rolled, trim about an inch from each side of the crust to create a neat, uniform rectangle. Your goal is a crust that is roughly 1 1/2 to 2 inches larger than the dimensions of your jelly roll pan on all sides. This extra dough is crucial for forming the crimped edges of your pie.

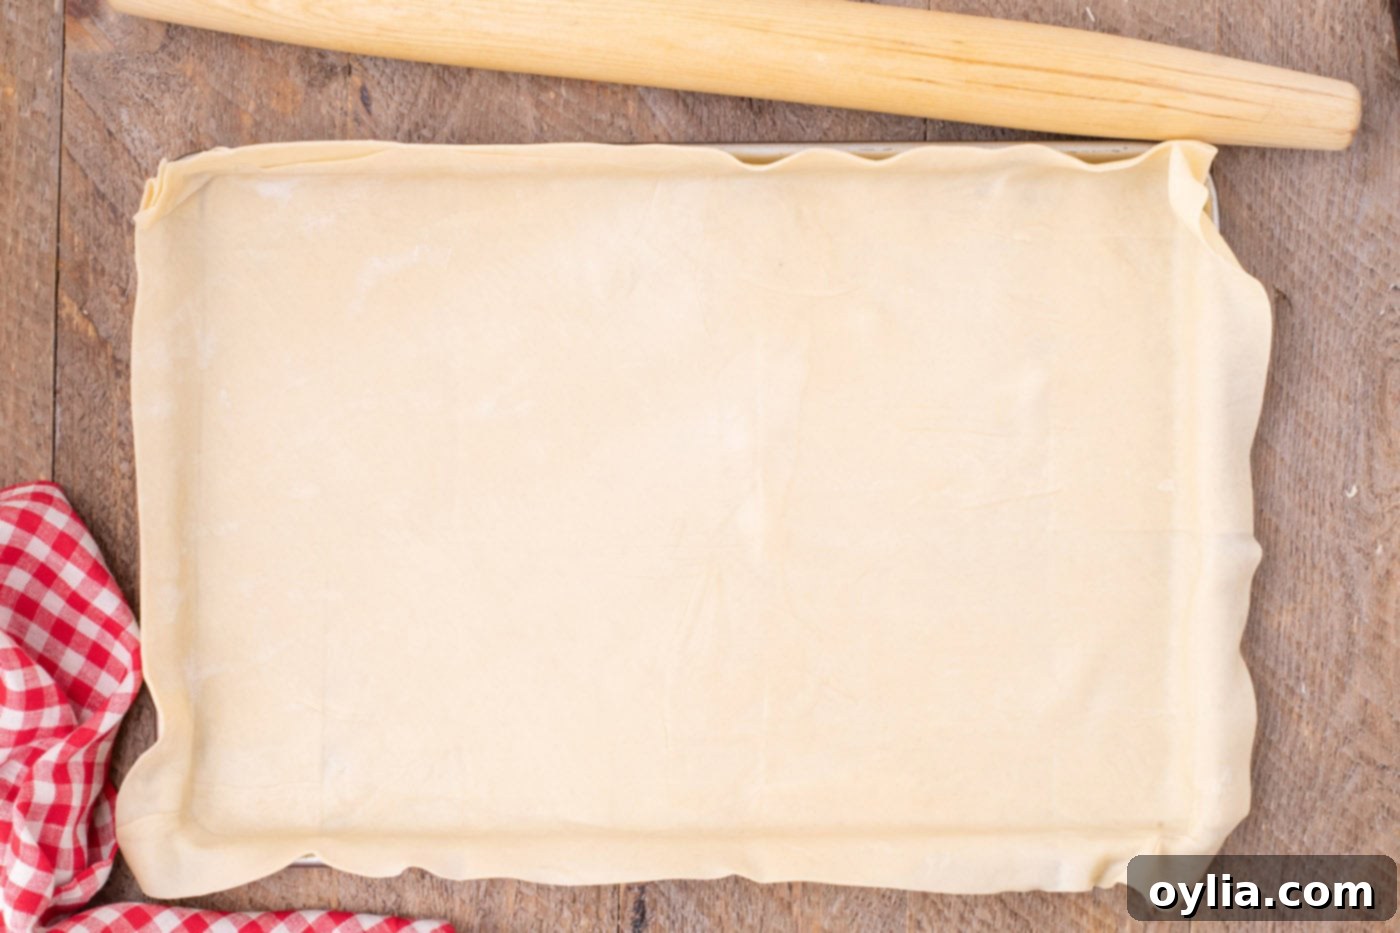
- Gently drape the prepared pie crust over your rolling pin – this helps transport it without tearing. Carefully unroll it into an ungreased 10×15-inch jelly roll pan. Press the dough firmly along the bottom and up the sides of the pan, ensuring there are no air gaps or loose spots. This creates a secure base for your filling.

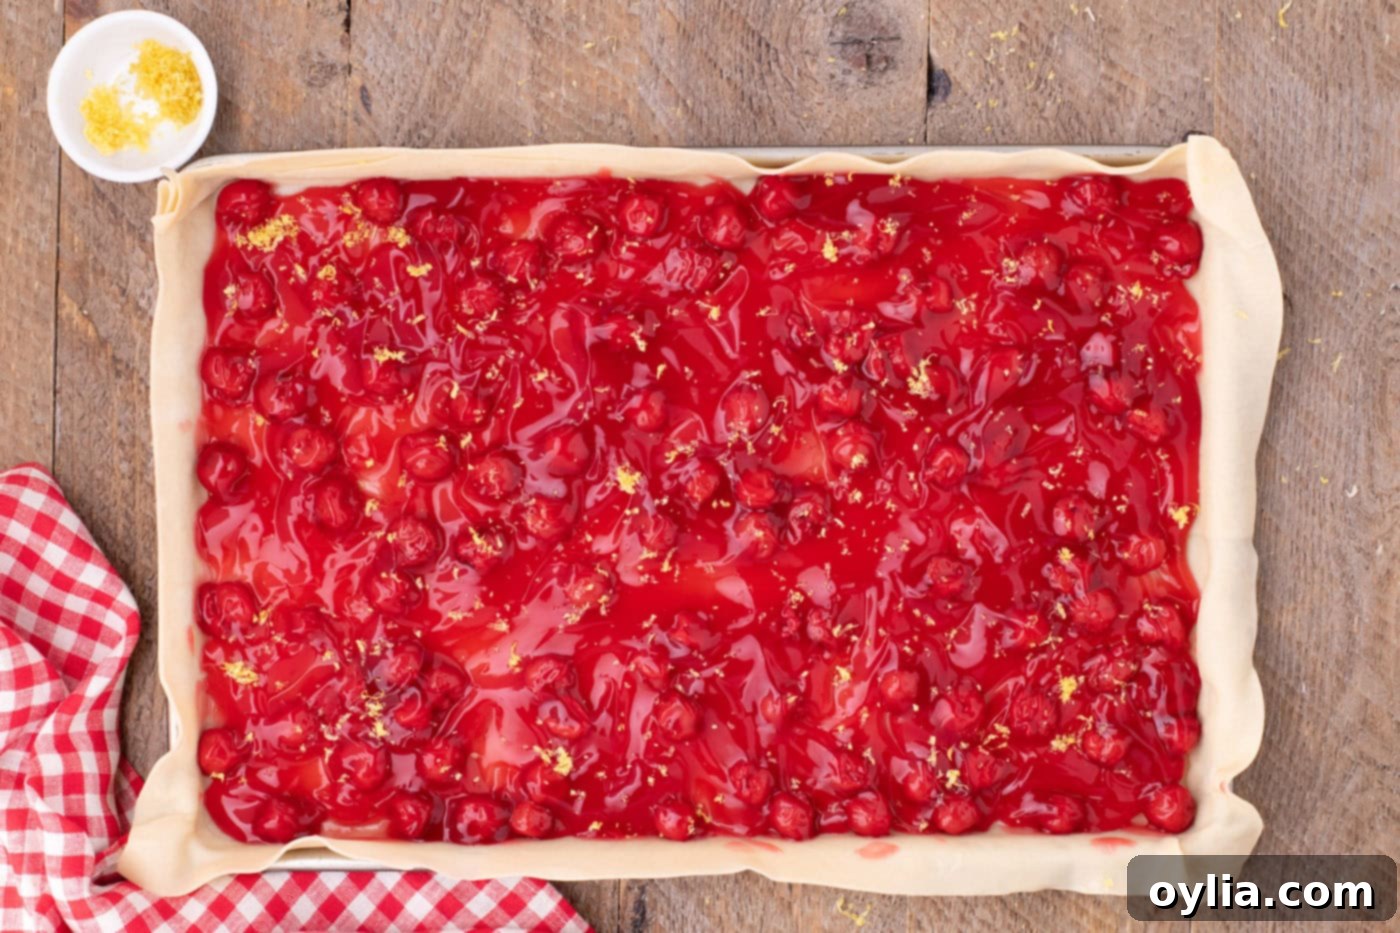
- Pour the entire cherry pie filling into the prepared crust. Use a spatula to gently spread the filling evenly into all corners of the pan, creating a consistent layer.
- Generously sprinkle the fresh lemon zest over the cherry pie filling. This brightens the flavor and adds a wonderful aroma. Place the jelly roll pan into the refrigerator to chill while you prepare the lattice strips for the top. Chilling helps the crust maintain its shape during the weaving process.

Mastering the Art of the Lattice Weave
Creating a beautiful lattice top might seem complex, but with these clear steps, you’ll achieve an impressive design every time. Patience is key!
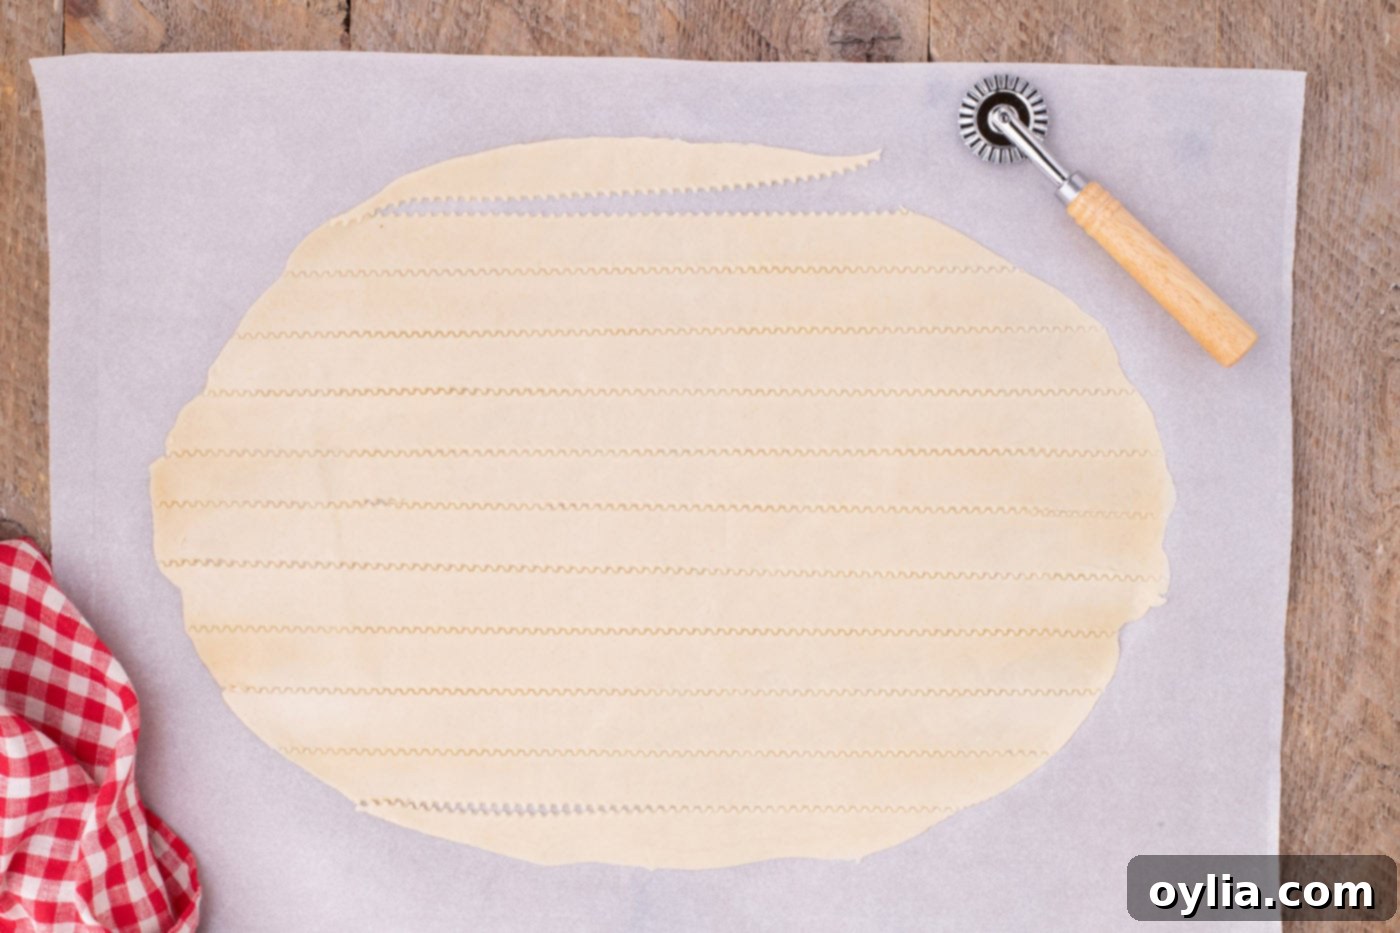
- Unroll the third piece of pie crust and place it on your parchment-lined or floured surface. Roll it gently into an oblong shape, ensuring it’s large enough to yield enough strips for your pan. Using a pizza cutter or a pastry cutter and a metal ruler for precision, cut 12 evenly sized horizontal strips, each approximately 1 inch wide. Uniformity here makes the weaving much easier.

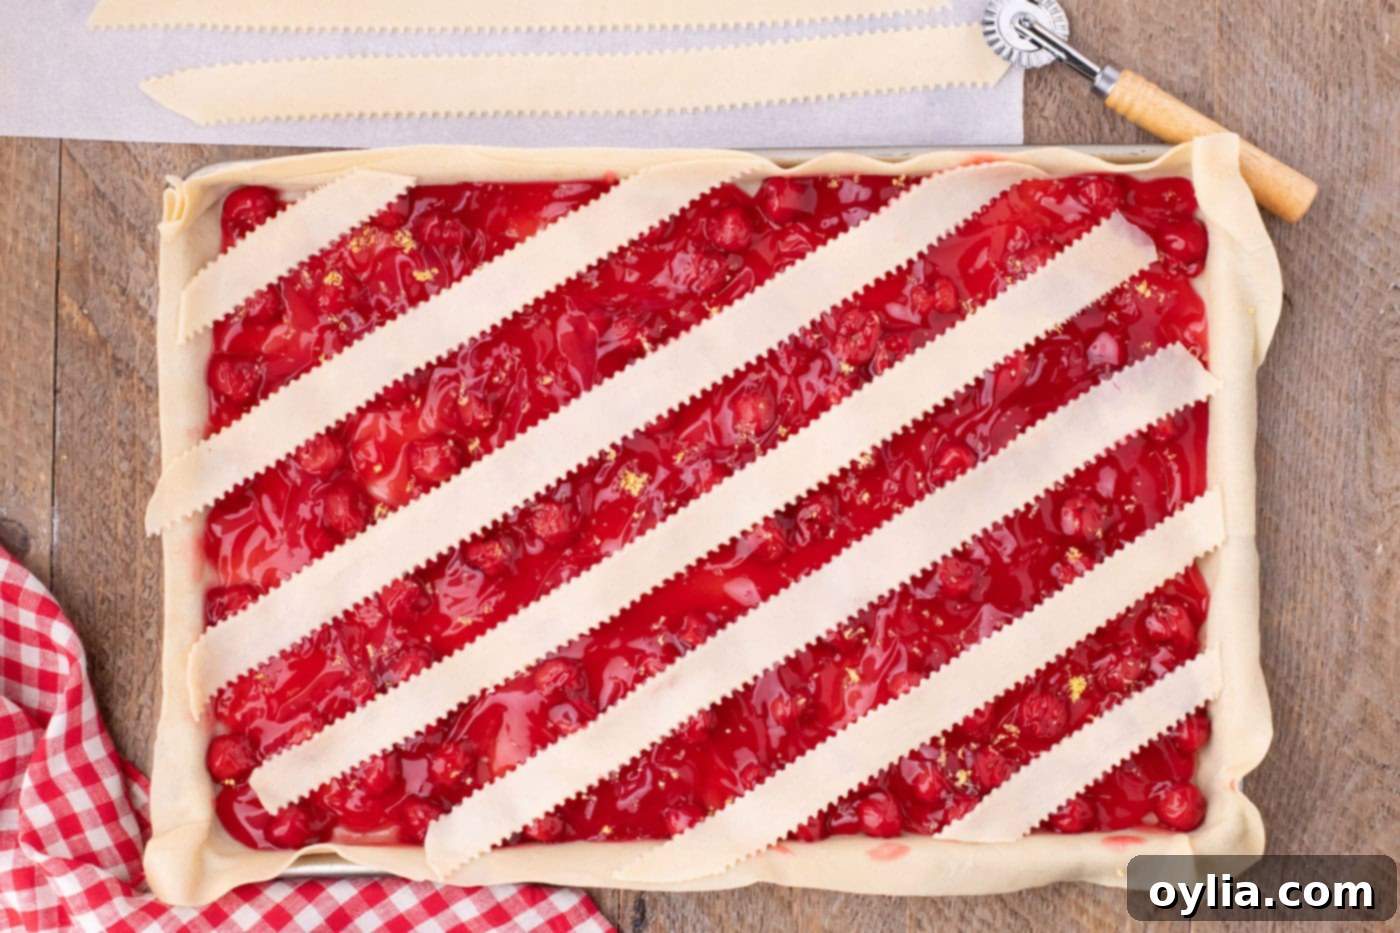
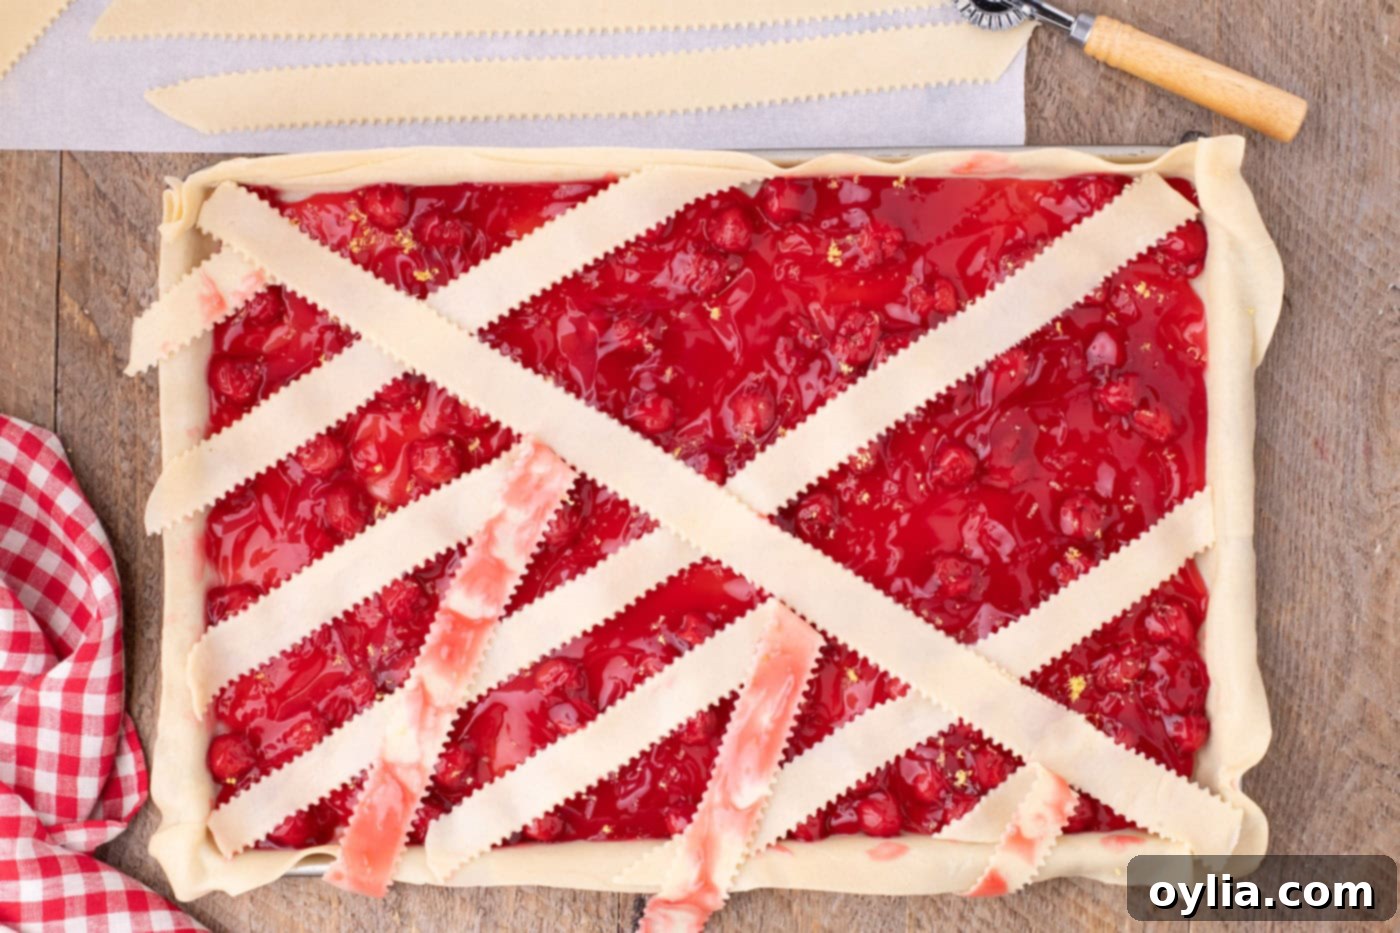
- Retrieve your chilled jelly roll pan with the filling. Take one of the two longest strips you cut and place it diagonally across the widest part of the pan. This will form the first foundational strip of your lattice. Then, lay out the remaining shorter strips next to each other, spacing them about 1 1/2 to 2 inches apart across the top of the pie. These will be your main horizontal (or vertical, depending on your starting orientation) strips.

- Starting from one end (e.g., the top), gently fold back every other strip (for example, strips 1, 3, 5, and 7) about halfway towards the opposite side (the left-hand side/bottom of the pan). This creates space for the next set of strips.
- Now, take the second of your two longest strips. Place it across the widest part of the jelly pan, perpendicular to the strips you’ve already laid down. This strip should go over the folded-back strips and under the ones that are still flat. When done correctly, this foundational step will begin to form a large ‘X’ shape or a cross-hatch pattern with your initial diagonal strip.

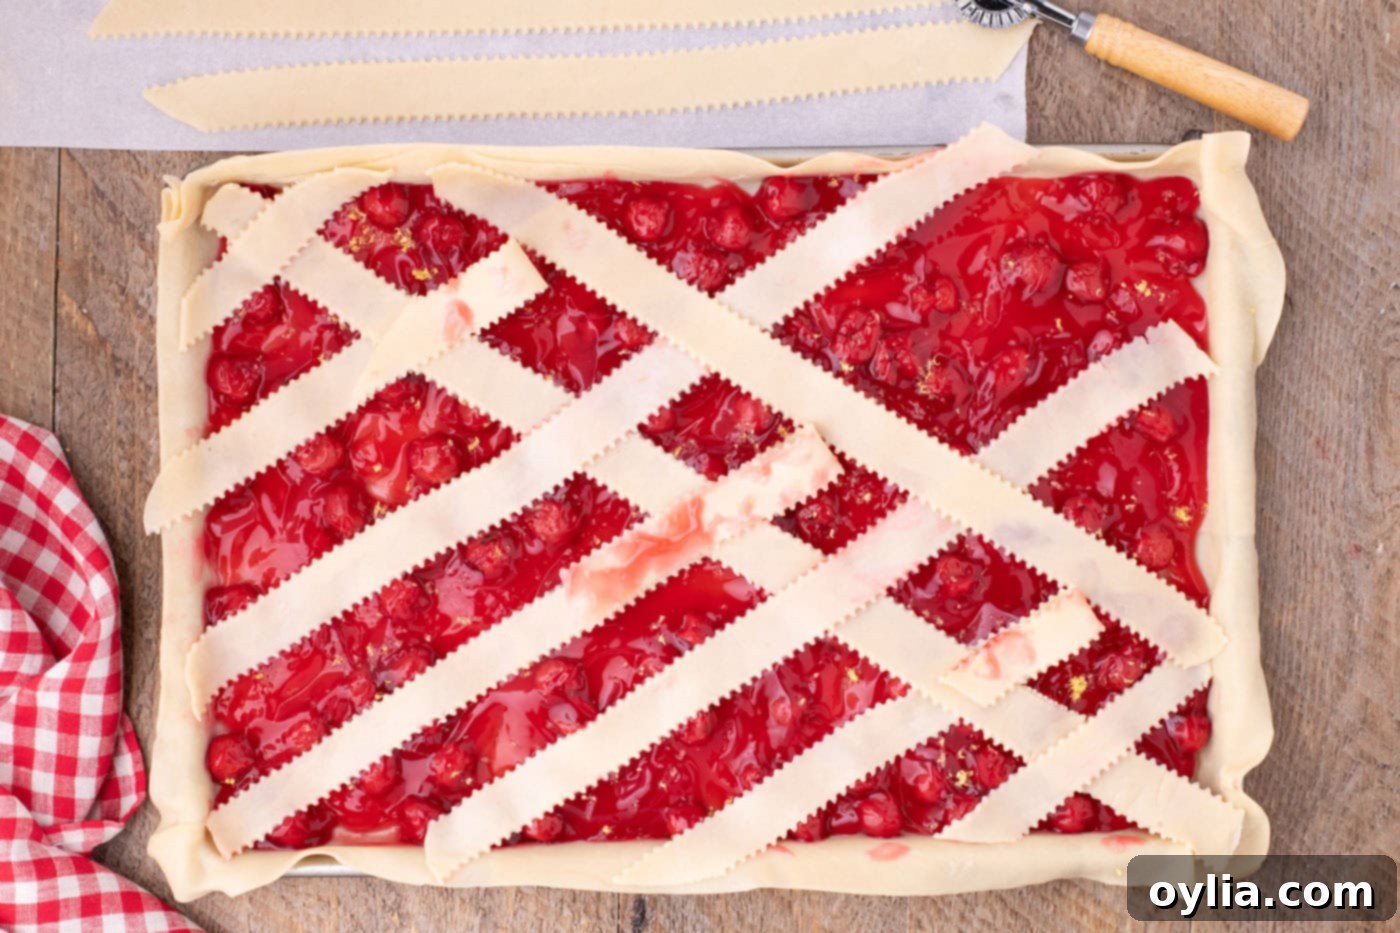
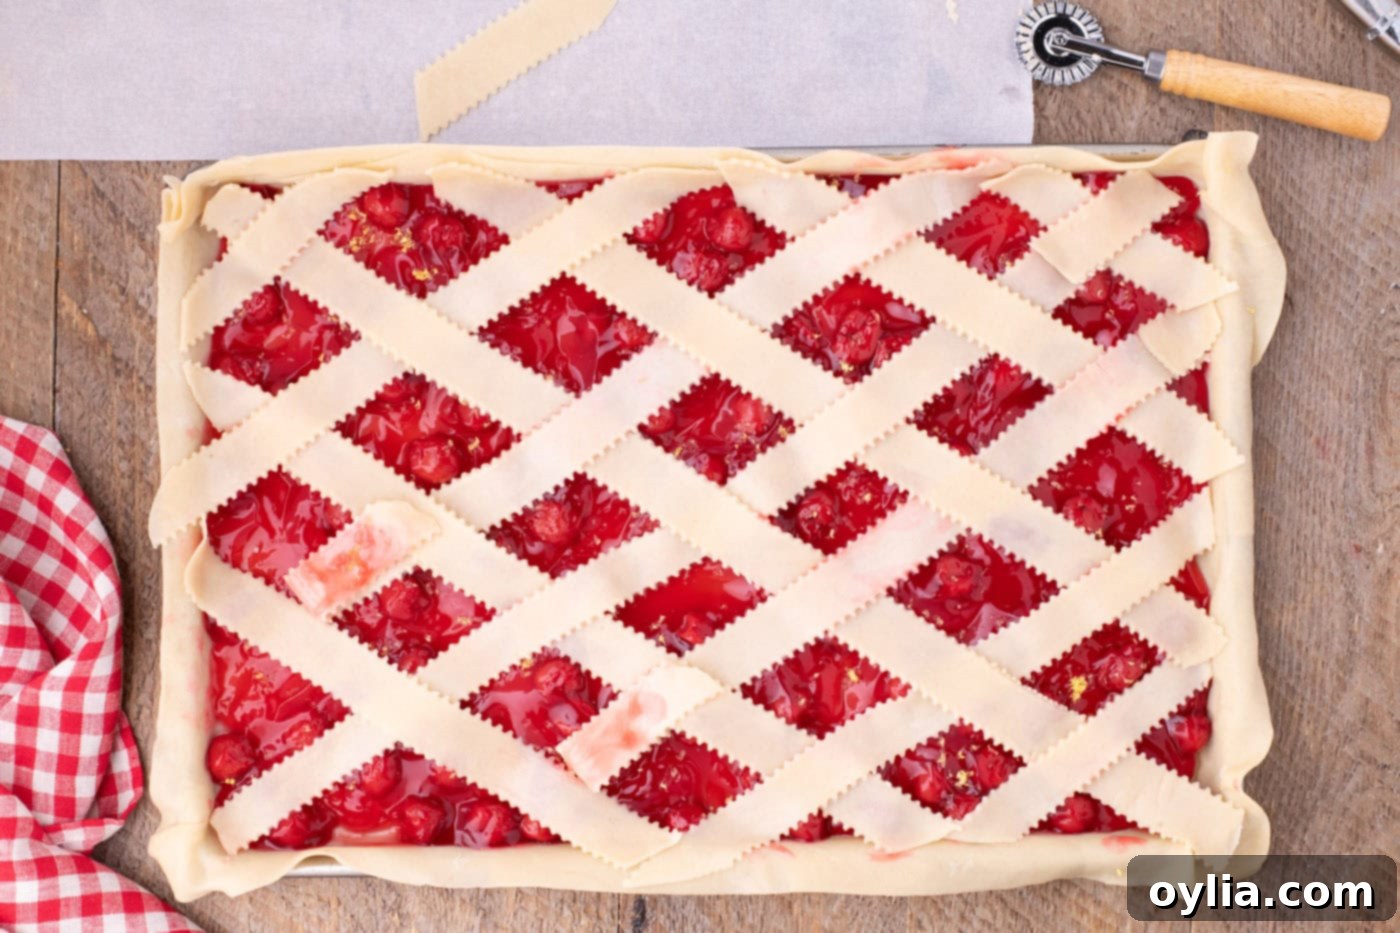
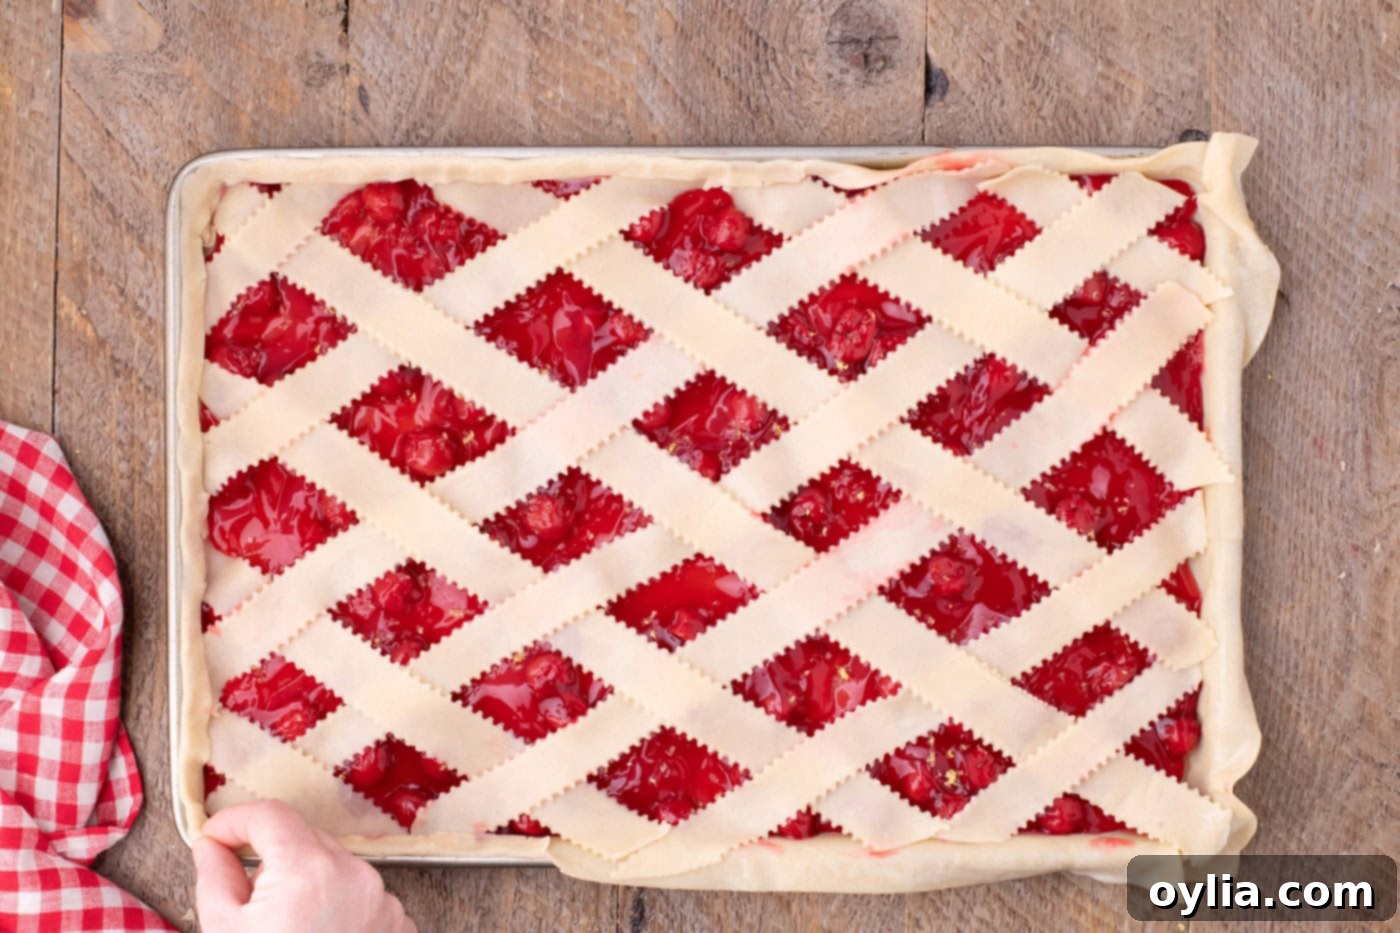
- Carefully unfold the strips you initially folded back over the long strip you just placed. Now, proceed to fold back the *alternating* strips (e.g., strips 2, 4, 6, and 8, if you started with odds). Insert another perpendicular strip, then unfold. Repeat this “fold-back, insert, unfold” process until all your strips have been beautifully woven into a complete lattice pattern. Don’t worry if it’s not perfect; a rustic look is part of its charm.


- Once the lattice is complete, carefully fold the excess bottom crust up and over the ends of your lattice strips. Pinch the two layers of crust together firmly to form a sealed edge all around the perimeter of the pie. This creates a neat finish and helps contain the bubbling fruit filling during baking.

- In a small bowl, whisk together the egg and 1 tablespoon of water to create your egg wash. Using a pastry brush, lightly and evenly brush the egg wash over all the lattice strips and the sealed edges of the pie crust. This ensures a beautiful golden color and a slight sheen once baked.
- Generously sprinkle the turbinado sugar over the entire top of the pie. The large crystals will add a delightful crunch and sparkle. Carefully place the prepared pie into your preheated oven to bake for 30-35 minutes, or until the cherry filling is visibly bubbling through the lattice and the crust has turned a rich, golden brown. Keep an eye on it to prevent over-browning.

- Once baked to perfection, remove the pan from the oven. It’s crucial to let the cherry slab pie cool completely before attempting to slice it. This allows the filling to set properly, preventing it from running out when cut. Patience here will be rewarded with perfect, neat slices.

Frequently Asked Questions & Expert Tips for Perfect Cherry Slab Pie
Here are some common questions and essential tips to help you master your cherry slab pie:
Leftovers of your delicious cherry slab pie should be kept in the refrigerator. You can either store it directly in the jelly roll pan, tightly covered with plastic wrap, or transfer individual slices to an airtight container. For optimal taste and texture, we highly recommend enjoying your Cherry Slab Pie within 1 to 2 days of baking. Beyond this, the crust may start to soften and become soggy, especially if stored with the moist fruit filling.
Yes, you can! For best results, freeze the baked pie whole or in individual slices. Wrap it tightly in plastic wrap, then an additional layer of aluminum foil. It can be frozen for up to 2-3 months. To reheat, thaw overnight in the refrigerator, then warm in a preheated oven at 350°F (175°C) until heated through and the crust crisps up again.
A standard 10×15-inch jelly roll pan (also known as a half-sheet pan) is ideal for this recipe. Its shallow sides and rectangular shape are perfect for creating a large, flat pie that can be cut into many squares. While it’s generally recommended not to grease the pan for pie crusts (as the butter/fat in the crust prevents sticking), ensure your pan is clean and free of any residue.
If your store-bought pie crust is too cold, it can crack. Let it sit at room temperature for 10-15 minutes before unrolling. If it still cracks, gently pinch the cracks together with your fingers or use a tiny bit of water to help seal them. The scraps you trimmed earlier can also be used to patch any larger holes or tears.
If you notice the edges or lattice top browning too quickly, you can create a foil shield. Loosely tent a piece of aluminum foil over the pie for the remaining baking time. This will protect the crust from over-browning while allowing the filling to continue cooking.
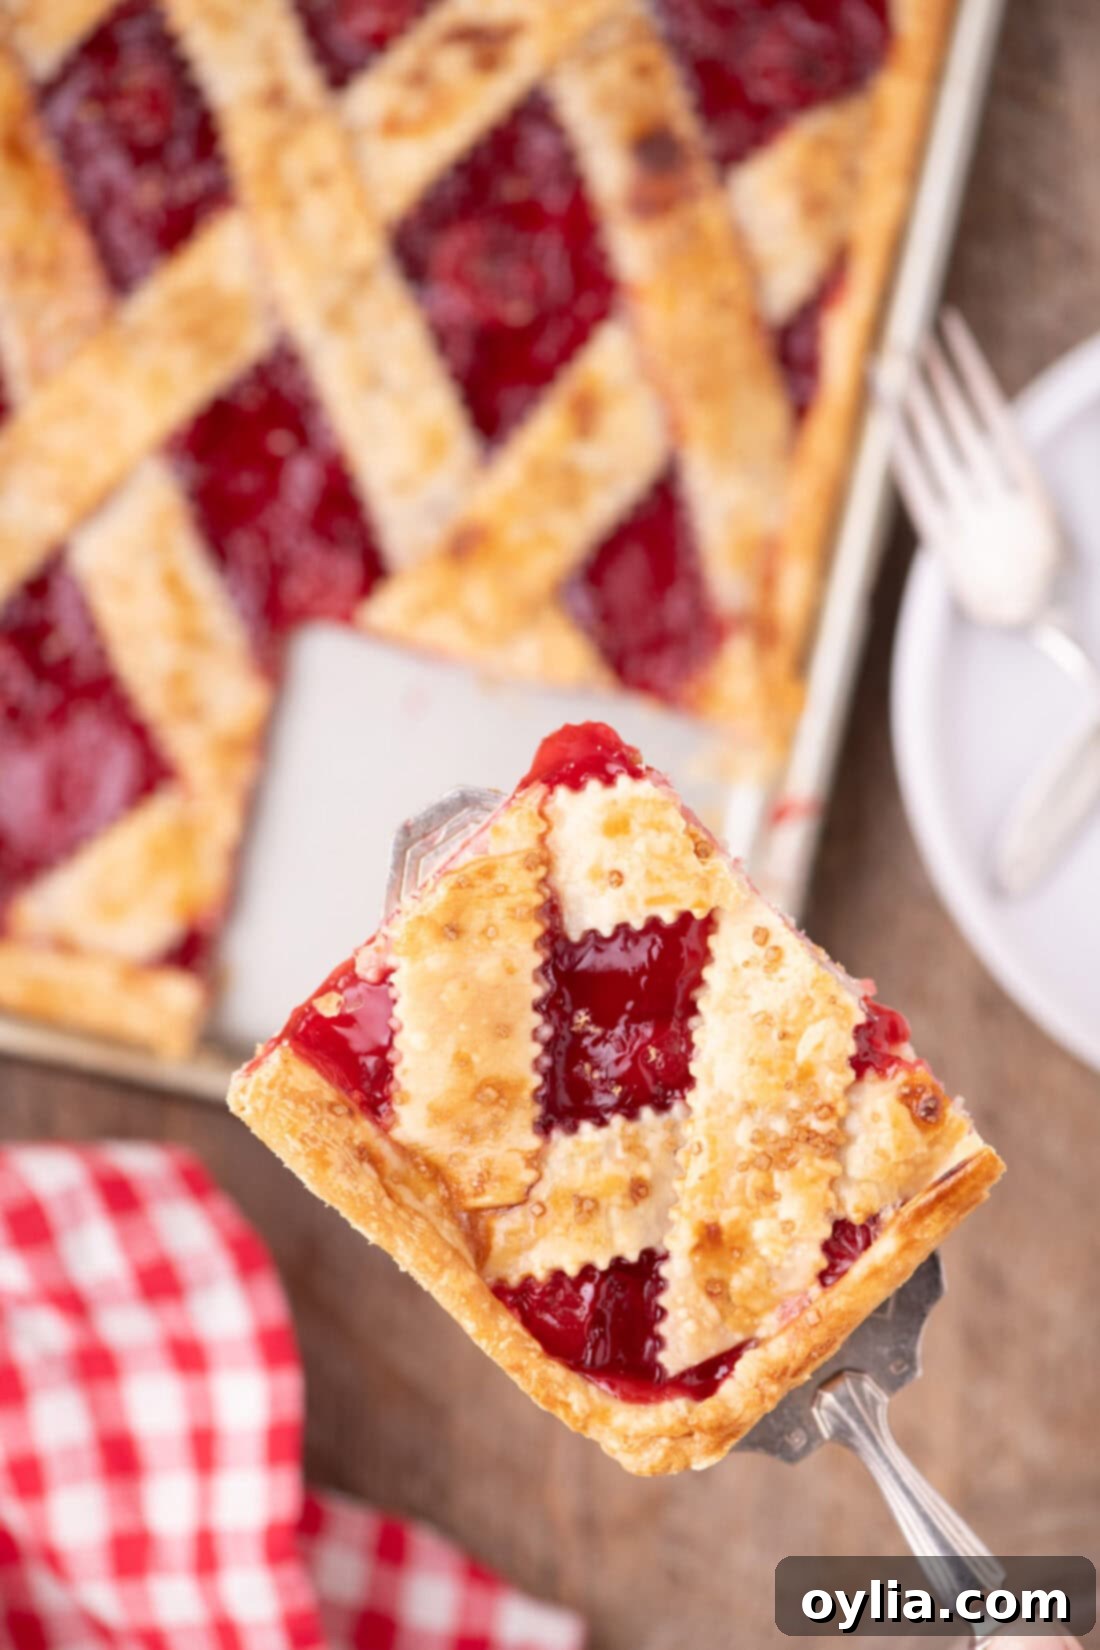
Serving Suggestions for Your Cherry Slab Pie
The beauty of this cherry slab pie is its versatility in serving. While it’s absolutely divine on its own, here are a few suggestions to elevate the experience:
- Classic Combo: Serve your cherry slab pie slices warm, topped with a generous scoop of classic vanilla bean ice cream. The contrast of warm pie and cold, melting ice cream is irresistible.
- Creamy Topping: A dollop of freshly whipped cream or a swirl of cool whip makes for a lighter, yet equally indulgent, topping.
- Plain & Simple: Enjoy it as is! This pie is delicious whether chilled, gently warmed, or simply served at room temperature. It’s a fantastic grab-and-go dessert.
- Seasonal Flair: Garnish with fresh mint leaves or a few fresh cherries (if in season) for an extra pop of color and freshness.
- Beverage Pairing: Pair a warm slice with a hot cup of coffee, a glass of cold milk, or even a sparkling rosé for an adult gathering.
More Delightful Cherry & Pie-Inspired Recipes to Try
If you’ve enjoyed this cherry slab pie, you might love exploring these other delicious recipes:
- Cherry Lush: A layered, no-bake dessert bursting with cherry flavor.
- Cherry Pie Cookies: All the goodness of cherry pie in a bite-sized cookie form.
- Deep Dish Peach Pie: Another fantastic fruit pie, perfect for peach lovers.
- Blueberry Hand Pies: Individual pies, easy to make and perfect for sharing.
- Rhubarb Pie: A classic tart and sweet pie, a true spring delight.
I absolutely adore sharing my passion for baking and cooking with all of you! To make sure you never miss out on a new culinary adventure, I offer a convenient newsletter delivered right to your inbox every time a new recipe posts. Simply subscribe today and start receiving your free daily recipes, bringing fresh inspiration to your kitchen!
Cherry Slab Pie
IMPORTANT – There are often Frequently Asked Questions within the blog post that you may find helpful. Simply scroll back up to read them!
Print It
Pin It
Rate It
Save It
Saved!
Course: Dessert
Cuisine: American
Ingredients
- 40 ounces cherry pie filling two 20 ounce cans
- 28.2 ounces premade pie crusts two 14.1 ounce boxes of Pillsbury pie crusts
- 2 teaspoons grated lemon zest
- 1 egg
- 1 Tablespoon water
- 3 Tablespoons turbinado sugar
Things You’ll Need
-
15×10 jelly roll pan
-
Pastry cutter wheel
-
Pastry brush
Before You Begin
- You will only use 3 of the 4 pie crusts (you can save the 4th one for another use).
- If you have any holes or uneven edges after trimming your pie crust into a rectangular shape, you can use the extra scraps to fill them in and seamlessly patch the dough. Additionally, any scraps you have set aside can be used if you need extra dough for lattice strips.
- If you find the dough is starting to dry out a bit when pinching the top and bottom crusts together to seal the edges, a little bit of water added to the crust edges will help make it easier to pinch and form a secure seal.
- If you feel intimidated by creating the lattice top weave, you can always cover the entire pie with a regular, solid pie crust. Just ensure you cut several slits into the top of the crust to allow the steam to vent during baking, which is essential for proper cooking.
Instructions
-
Preheat your oven to 375° F (190°C).
-
Remove 2 pie crusts from their packaging and unroll them. Lay the crusts side by side on a parchment-lined (or floured) surface, and trim 2 inches from the side of each. Set these scraps aside for later use.
-
Overlap the cut edges slightly and roll out the pie crusts to form one large rectangular shape that is approximately 3 inches larger on all sides than your jelly roll pan.
-
Trim about an inch from the sides of the crust to create a neat rectangle. It should now measure 1 1/2 to 2 inches larger than the size of your jelly roll pan.
-
Drape the pie crust over a rolling pin and gently place it into an ungreased 10×15-inch jelly pan. Press it down along the sides and the bottom to ensure there are no gaps.
-
Add the cherry pie filling and evenly distribute it into all corners of the crust.
-
Sprinkle the lemon zest over the cherry pie filling. Place the jelly roll pan in the refrigerator to chill while you prepare the lattice strips.
To Make the Lattice Top
-
Unroll the third piece of pie crust, place it on a parchment-lined (or floured) surface, and roll it into an oblong shape. Using a pizza cutter or pastry cutter and a metal ruler, cut 12 evenly sized horizontal strips (each 1 inch wide).
-
Take one of the two longest strips and place it diagonally across the widest part of the jelly roll pan. Then, lay out the remaining shorter strips next to each other, spacing them 1 1/2 to 2 inches apart over the filling.
-
Starting from the top, fold every other strip (e.g., strips 1, 3, 5, and 7) halfway back towards the left-hand side/bottom of the pan.
-
Place the second of the two longest strips across the widest part of the jelly pan, perpendicular to the strips already there. This will start to resemble a large ‘X’ shape with the first long strip.
-
Unfold the strips you just folded back over the long strip you laid down. Then, continue to fold back the alternating strips (e.g., strips 2, 4, 6, and 8). Repeat this “fold-back, insert, unfold” process until all your strips have been woven into a complete lattice pattern.
-
Fold the excess bottom crust over the lattice strips and gently pinch them together to form a sealed edge all around the pie.
-
Add the water to a gently beaten egg and brush this egg wash over the lattice strips using a pastry brush.
-
Sprinkle the turbinado sugar evenly over the pie. Place the pie in the preheated oven and bake for 30-35 minutes, or until the fruit filling is actively bubbling and the crust has turned a beautiful golden brown.
-
Remove the pan from the oven and allow it to cool completely on a wire rack before attempting to slice and serve. This cooling time is essential for the filling to set properly.
Expert Tips & FAQs
- Leftovers should be kept in the fridge, either in the jelly roll pan covered with plastic wrap or stored in an air-tight container. For optimal taste and texture, I recommended eating the cherry slab pie within 1 or 2 days, otherwise the crust will start to get soggy.
- To avoid a soggy bottom crust, you can blind bake your bottom crust for about 10-15 minutes before adding the filling. This creates a barrier and helps keep it crisp.
- If your crust starts browning too quickly during baking, gently tent a piece of aluminum foil over the pie to protect it from further browning while the filling finishes cooking.
- Don’t rush the cooling process! Letting the pie cool completely is crucial for the filling to set, ensuring clean slices when you cut into it.
Nutrition
Tried this Recipe? Pin it for Later!Follow on Pinterest @AmandasCookin or tag #AmandasCookin!
The recipes on this blog are tested with a conventional gas oven and gas stovetop. It’s important to note that some ovens, especially as they age, can cook and bake inconsistently. Using an inexpensive oven thermometer can assure you that your oven is truly heating to the proper temperature. If you use a toaster oven or countertop oven, please keep in mind that they may not distribute heat the same as a conventional full sized oven and you may need to adjust your cooking/baking times. In the case of recipes made with a pressure cooker, air fryer, slow cooker, or other appliance, a link to the appliances we use is listed within each respective recipe. For baking recipes where measurements are given by weight, please note that results may not be the same if cups are used instead, and we can’t guarantee success with that method.
