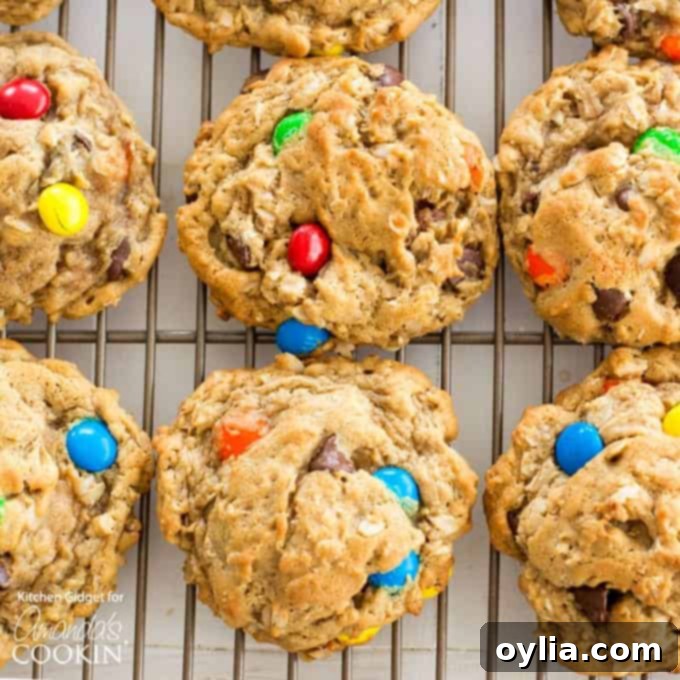
The Ultimate Chewy Monster Cookies: Peanut Butter, Oatmeal & M&M’s
Prepare to meet your new favorite cookie! These irresistible Monster Cookies are a delightful fusion of all things delicious: soft, chewy peanut butter and oatmeal cookies generously studded with rich chocolate chips and vibrant M&M’s. They’re truly a monster of flavor and texture, offering a satisfying bite that appeals to cookie lovers of all ages. This easy-to-follow recipe is not just about baking a fantastic treat; it’s also a wonderfully fun activity to share with children, creating sweet memories along with sweet cookies.
If you’re already a fan of classic peanut butter cookies, then you’re in for an absolute treat. Our Monster Cookies take that beloved flavor to the next level, incorporating a symphony of textures and tastes that make them truly unique and utterly addictive.
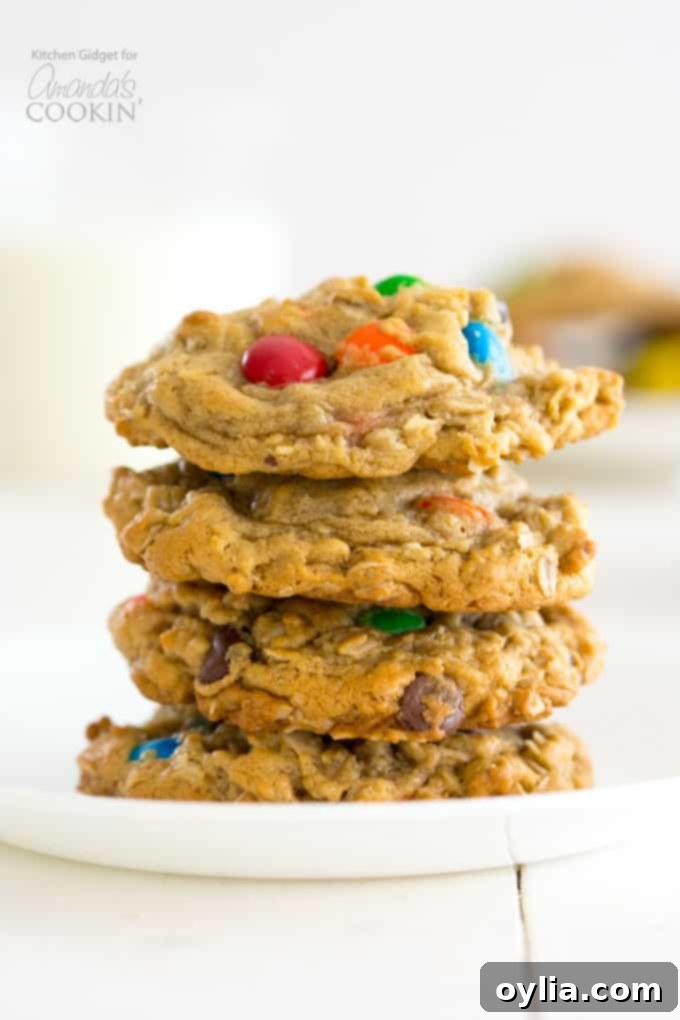
What Exactly Are Monster Cookies?
Imagine combining the hearty chewiness of a perfect oatmeal cookie with the rich, comforting taste of peanut butter, then elevating it with generous helpings of chocolate chips and vibrant M&M’s. The result? The legendary Monster Cookie! These aren’t just any cookies; they’re celebrated for their generous size, incredible softness, and the sheer abundance of delicious mix-ins that make every bite an adventure. They are guaranteed to be a hit with both adults and children, offering a delightful treat that pairs perfectly with a cold glass of milk. Best of all, this recipe makes baking these magnificent monsters surprisingly simple!
(By the way, if you were searching for Cookie Monster cookies, we have a recipe for those too – blue frosting and all!)
The name “Monster Cookies” is quite fitting, isn’t it? There are a few theories about their intriguing moniker. Some believe they were christened “monster” due to their impressive size and the colossal amount of diverse, tasty ingredients crammed into each cookie. Others suggest the name comes from the “monster” appetite you’ll need to satisfy once you start eating them – because stopping at just one is nearly impossible! Regardless of the origin, one thing is certain: these cookies live up to their monstrous reputation in the most delicious way possible.
The Delicious Anatomy of a Monster Cookie
What makes a monster cookie so utterly irresistible? It’s all about the ingredients – and lots of them! A classic monster cookie recipe is a delightful symphony of flavors and textures, typically featuring creamy peanut butter, wholesome old-fashioned rolled oats, a generous scattering of M&M’s, and rich chocolate chips. However, the beauty of these cookies lies in their versatility. You can easily customize them by adding or swapping out mix-ins to suit your preferences. I’ve seen fantastic variations that include chewy raisins, soft miniature marshmallows, tropical coconut flakes, and various nuts for added crunch.
Years ago, I cherished a recipe from one of my favorite cookbooks for “Chockablock Cookies.” While similar in their abundance of ingredients, those included molasses and coconut, offering a slightly different flavor profile. Our Monster Cookies, however, stand out as a unique and equally beloved classic.
Can I Replace the Peanut Butter?
Absolutely! If you have allergies, dietary restrictions, or simply prefer a different flavor, there are many excellent substitutes for peanut butter these days. Any creamy nut butter, such as almond butter or cashew butter, will work wonderfully. For those with nut allergies, sunflower seed butter (often called “SunButter”) is a fantastic, widely available option that mimics the texture and richness of peanut butter without the allergens. Just ensure your chosen substitute has a similar consistency to creamy peanut butter for the best results in the cookie dough.
Choosing Your Chocolate Chips
When most recipes mention “chocolate chips,” it’s generally assumed you’ll reach for semi-sweet chocolate. However, this is your chance to get creative and tailor the flavor profile to your liking! The world of chocolate chips is vast and exciting. You can opt for decadent dark chocolate chips for a more intense cocoa flavor, classic milk chocolate for a sweeter, creamier touch, or even bright white chocolate chips for a different visual and taste experience. Beyond traditional chocolate, consider butterscotch chips, mint chips, or even a mix of different varieties to create a truly personalized monster cookie that makes you happy!
Which Oats to Use for the Perfect Chewy Texture
The type of oats you use is crucial for achieving that characteristic chewy texture in Monster Cookies. You’ll definitely want to use old-fashioned oats, also widely known as rolled oats. These oats are steamed and flattened, giving them a substantial texture that holds up well during baking and contributes significantly to the cookie’s satisfying chewiness.
Avoid steel-cut oats, which are cut into pieces rather than rolled. They have a tougher texture and require a much longer cooking time, making them unsuitable for cookies. Similarly, steer clear of instant oats (also called quick-cooking oats). While convenient for a fast breakfast, their finely processed nature means they break down too quickly in baking, resulting in a less desirable, almost mushy texture in your cookies.
M&M’s: The Iconic Colorful Touch
No Monster Cookie is complete without the signature burst of color and chocolatey goodness from M&M’s candy-coated chocolate pieces. The classic recipe calls for traditional milk chocolate M&M’s, but the possibilities for customization are endless! You can experiment with peanut M&M’s for an extra nutty crunch, peanut butter M&M’s for an intensified PB flavor, miniature M&M’s for a finer distribution of candy, or even Crispy M&M’s for a light, airy texture. Imagine the fun of using holiday-themed M&M’s for special occasions like Easter, Halloween, or Christmas, adding a festive touch to your baking. If you’re lucky enough to live near an M&M’s store, you can even buy bags of single colors to perfectly match any celebration or theme!
Beyond M&M’s, you have other fantastic candy options. Reese’s Pieces are an excellent substitute if you want to emphasize the peanut butter flavor and add a different orange and yellow color palette. You could also use Sixlets for their smaller size and diverse colors. For our European friends, the popular candy Smarties would work perfectly (just be sure not to confuse them with the little pastel-colored discs known as Smarties in the U.S.).
Can I Freeze the Dough for Later?
Yes, absolutely! Freezing Monster Cookie dough is a fantastic way to prepare ahead and enjoy freshly baked cookies whenever a craving strikes.
- First, prepare the cookie dough according to the recipe instructions below.
- Next, line a cookie sheet with parchment paper or a silicone baking mat. Scoop your cookie dough into individual balls (about 3 tablespoons each for large cookies, or 1.5-2 tablespoons for regular size) and place them on the lined sheet, ensuring they don’t touch.
- Flash freeze the dough balls for about 2 hours, or until they are solid. This step is crucial as it prevents them from sticking together.
- Once frozen, remove the solid dough balls from the sheet and transfer them into a large, airtight gallon freezer bag.
- Don’t forget to label the freezer bag with the baking temperature (350°F) and the recommended baking time (9-13 minutes). You can even write this information on a small piece of paper and tuck it inside the bag. Frozen cookie dough can last for up to 3 months in the freezer.
- To bake, simply remove the desired number of dough balls from the freezer and place them directly onto a lined baking sheet. You can let them thaw at room temperature for about ten minutes before baking as directed, or place them straight into a preheated oven, adding an extra 3-4 minutes to the original baking time. Enjoy freshly baked cookies with minimal effort!
Can I Make Monster Cookie Bars Instead of Individual Cookies?
Absolutely! Monster Cookies adapt beautifully into bar form, making them perfect for potlucks, parties, or simply a quick-to-bake family treat. This specific recipe is quite generous and will actually yield enough dough for two (13×9 inch) pans of cookie bars. If you only want one pan, simply halve all the ingredient measurements.
To make Monster Cookie Bars: Spread the prepared dough evenly into a greased 13×9 inch baking pan. Keep the oven temperature the same at 350°F, but adjust the baking time to approximately 25-27 minutes. To check for doneness, insert a toothpick into the center of the bars after about 23 minutes; it should come out with moist crumbs, but not wet batter. Allow the bars to cool completely in the pan before cutting them into squares for easy serving.
Mom’s Easy Monster Cookies Recipe: A Treasured Family Classic
When I set out to make and photograph what I hoped would be the best Monster Cookies around, I realized I didn’t have the recipe readily available in my collection. I remember when I was preparing for college, I meticulously copied a stack of cherished family recipes, hoping to take a little piece of home with me. However, this particular gem wasn’t among them.
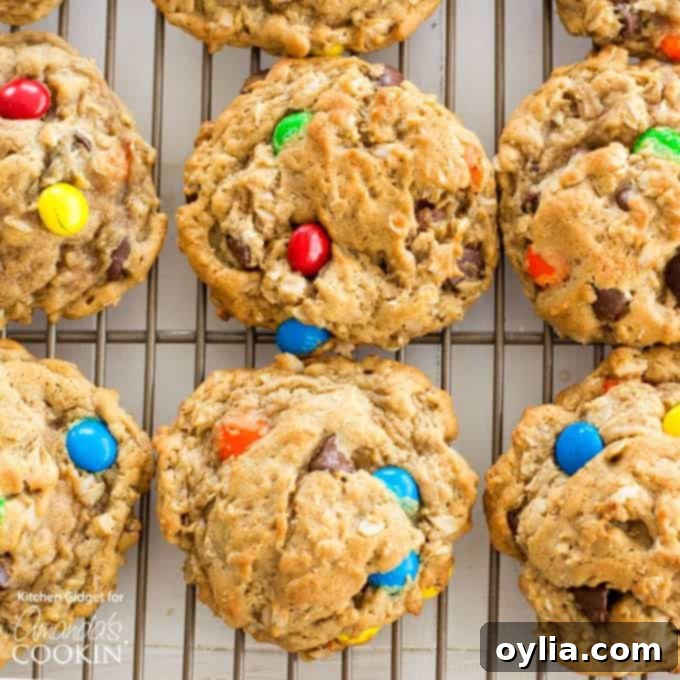
[Side note: To all parents out there, this is a truly wonderful idea for your almost-adult children! Even if they aren’t cooking in their dorm rooms, these recipes will undoubtedly become treasured possessions later in life. It’s been over a decade since I painstakingly transcribed those recipes, and my siblings still frequently ask me for Dad’s famous Cauliflower Casserole or Mom’s delicious Fiesta Bean Dip.]
Anyway, when I called Mom for the Monster Cookie recipe, she couldn’t immediately locate it. She did recall that it had been passed down from my aunt, which gave me the lead I needed to track it down. And oh, am I glad I did! These Monster Cookies are truly exceptional. My aunt shared that she loves making them with her grandkids, and they especially enjoy the hands-on, sensory experience of mixing the dough with their hands. It’s a wonderful way to connect with food and family, fostering a love for baking from an early age!
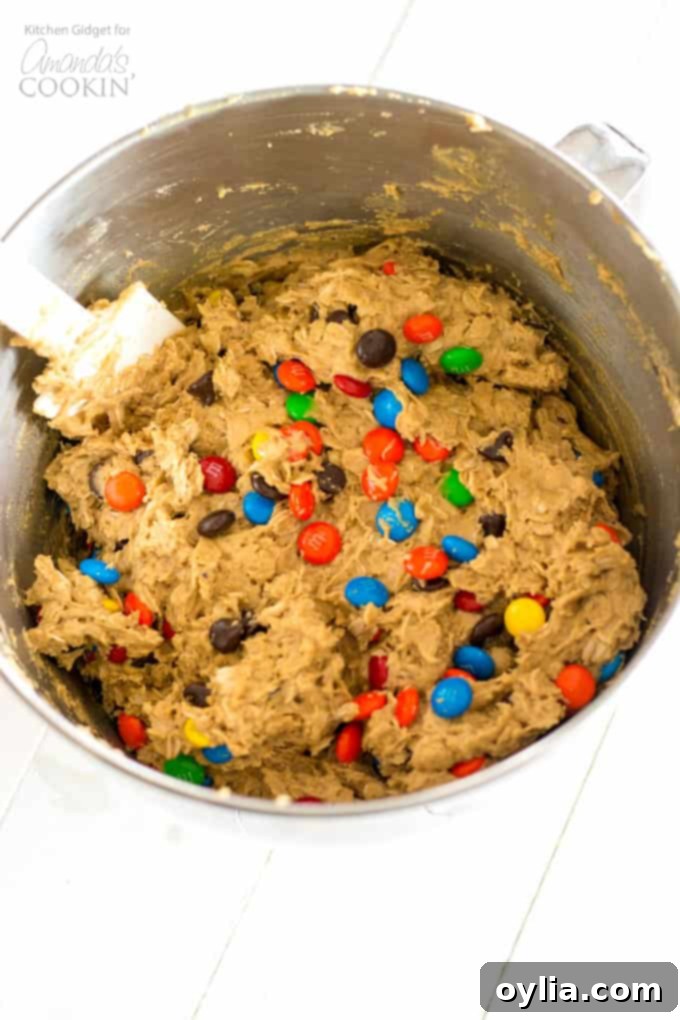
Making Monster Cookies: Tools to Make it Easy
While my aunt and her grandkids enjoy mixing by hand, I, on the other hand, often find joy in utilizing my trusty kitchen gadgets. For these Monster Cookies, I got to employ two of my all-time favorites: my reliable KitchenAid Stand Mixer and my incredibly useful adjustable measuring cup. A stand mixer makes creaming butter and sugars a breeze, ensuring a light and fluffy base for your dough, and handles the thick cookie dough with ease.
The adjustable measuring cup is a true game-changer, especially for sticky ingredients like peanut butter, shortening, honey, or corn syrup. Its unique design features a plunger at the bottom that pushes the ingredient right out, eliminating waste and the frustrating effort of scraping down the sides of a traditional measuring cup. Plus, it’s versatile enough to be used as a regular measuring cup for both dry and liquid ingredients. While I’m not specifically endorsing a brand, this type of measuring cup is a brilliant invention that I highly recommend for any baker!
Let’s Talk About the Key Ingredients for Monster Cookies:
Understanding the role of each ingredient will help you achieve perfect Monster Cookies every time and confidently make substitutions if needed.
- Unsalted Butter (softened): Softened butter is crucial for creaming properly with sugar, creating air pockets that contribute to a light and fluffy cookie texture. “Softened” means it should yield slightly when you press your finger into it, but not be melted or greasy. Take it out of the fridge about 10-15 minutes before you start. Can you use salted butter? Yes, in this recipe, it won’t significantly alter the final flavor.
- Packed Brown Sugar: Brown sugar adds moisture, chewiness, and a lovely molasses flavor to the cookies. When measuring, make sure to firmly pack it into the measuring cup and level off the top. This ensures you get the correct amount and desired texture.
- White Granulated Sugar: Granulated sugar contributes to crispness and helps the cookies spread slightly. While we recommend regular white sugar for this recipe, you can certainly substitute it with an equal amount of brown sugar for an even chewier, richer cookie. Alternatively, you can use your favorite sugar substitute, but always check the product packaging for proper measurement equivalents, as they can vary.
- Eggs (room temperature): Room temperature eggs emulsify better with fats (like butter and peanut butter), creating a smoother, more uniform batter. This leads to a more consistent cookie texture. Take your eggs out of the fridge about 20-30 minutes before you begin mixing.
- Creamy Peanut Butter: This is the star flavor of Monster Cookies! Its rich, nutty taste and creamy texture are essential. As mentioned earlier, you can substitute with other nut or seed butters like almond butter or sunflower seed butter if you prefer or have allergies.
- Corn Syrup: A small amount of corn syrup acts as a humectant, contributing to the cookies’ soft and chewy texture and preventing them from drying out too quickly. If you prefer not to use corn syrup, agave nectar or honey are good substitutes, though they might impart a slightly different flavor.
- Pure Vanilla Extract: Vanilla enhances all the other flavors in the cookie, adding a warm, aromatic note. Pure vanilla extract offers the best flavor, but imitation vanilla extract can be used in a pinch without significantly impacting the recipe’s success.
- All-Purpose Flour: Both bleached and unbleached all-purpose flour will work. Proper measurement is key: spoon the flour into your measuring cup and then level off the top with a straight edge (like the back of a knife). Do not pack the flour or scoop directly from the bag, as this can lead to too much flour, resulting in dense, dry cookies.
- Baking Soda: This leavening agent helps the cookies rise and spread, contributing to their soft and chewy texture.
- Old-Fashioned Oats: As discussed, these are non-negotiable for the signature chewy texture and wholesome heartiness of Monster Cookies. Do not substitute with steel-cut or instant oats.
- M&M’s: We used classic regular M&M’s for their colorful appeal and chocolatey centers. Feel free to use any variety you love, or switch it up with Reese’s Pieces for a different candy burst.
- Semisweet Chocolate Chips: These add a delightful melty chocolate element. You can use any type or flavor of chips you like – milk chocolate, dark chocolate, white chocolate, or even a mix – just keep the measurements the same.
Helpful Kitchen Tools for Your Monster Cookie Adventure:
- Cookie Sheets: I’m a huge advocate for insulated baking sheets. They distribute heat more evenly than dark-coated pans, preventing burnt bottoms and ensuring uniformly baked cookies. Plus, they’re surprisingly affordable!
- Silicone Baking Mat: If you’re looking for an eco-friendly alternative to parchment paper, a silicone baking mat is an excellent investment. It provides a non-stick surface, promotes even baking, and can be reused for years.
- Adjustable Measuring Cup: As detailed above, this gadget is a lifesaver for sticky ingredients. It minimizes mess and ensures accurate measurements, making your baking process much smoother.
- Large Cookie Scoop: This tool is invaluable for creating perfectly uniform cookies, ensuring they bake evenly. Not to be confused with an ice cream scoop (though one can work in a pinch), a cookie scoop helps you portion the dough consistently for that ideal monster-sized treat.
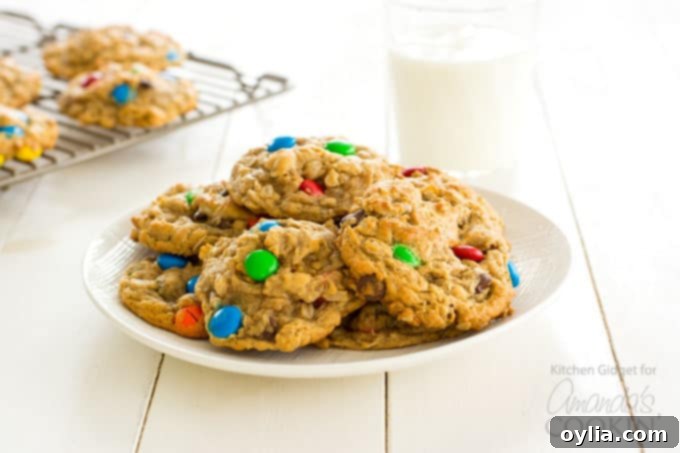
Because these are fittingly called “Monster Cookies,” I personally love to make them extra large, using about 3 tablespoons of dough per cookie. This yields approximately 3 dozen impressively-sized cookies that truly embody the “monster” name. If you prefer a more “regular” cookie size, you can reduce the amount of dough to 1 1/2 to 2 tablespoons per cookie, which will, of course, result in a larger batch.
More Cookie Recipes to Love!
If you’ve enjoyed baking these Monster Cookies, be sure to explore more of our favorite cookie recipes from the blog:
- Italian Anisette Cookies: A super popular Italian dessert, these cookies are flavored with anise for a distinct licorice taste.
- Peanut Butter Chocolate Chunk Bars: If you adore the combination of peanut butter and chocolate, this is the indulgent recipe you’ve been searching for!
- Grandma’s All-Occasion Sugar Cookies: You can never go wrong with a perfectly baked, classic sugar cookie. Simple, sweet, and always a crowd-pleaser!
- Pretzel Chocolate Chip Cookies: Indulge in the ultimate salty-sweet combo with these ultra-satisfying and wonderfully crunchy cookies.
- Sweet Potato Oat Cookies: Discover a surprisingly delicious and moist chocolatey cookie packed with the goodness of sweet potato.
- Thumbprint Cookies: Especially popular around the holidays, these charming cookies are perfect for cookie exchanges or adding a festive touch to any gathering.
Monster Cookies
IMPORTANT – There are often Frequently Asked Questions within the blog post that you may find helpful. Simply scroll back up to read them!
Print It
Rate It
Save ItSaved!
Ingredients
- ½ cup butter softened
- 1 cup brown sugar packed
- 1 cup granulated sugar
- 3 large eggs room temperature
- 1 ½ cups peanut butter
- 1 ½ teaspoons corn syrup
- 1 ½ teaspoons vanilla extract
- 1 cup all purpose white flour
- 2 teaspoons baking soda
- 3 ½ cups old fashioned oats
- 208 grams M&M candies 1 cup
- ½ cup semi sweet chocolate chips
Before You Begin
Instructions
-
Preheat oven to 350°F (175°C). Line cookie sheets with silicone baking mats or parchment paper; set aside.
-
In a large mixing bowl (preferably using an electric mixer), cream together the softened butter, packed brown sugar, and granulated white sugar until the mixture is light, fluffy, and well combined. This usually takes about 2-3 minutes.
-
Add the room temperature eggs one at a time, beating well after each addition until fully incorporated into the sugar mixture.
-
Next, beat in the creamy peanut butter, corn syrup, and pure vanilla extract until everything is thoroughly mixed. In a separate bowl, whisk together the all-purpose flour and baking soda, then gradually add this dry mixture to the wet ingredients, mixing until just combined. Finally, fold in the M&M’s and chocolate chips by hand, being careful not to overmix.
-
If the dough feels too sticky to handle easily, cover it and refrigerate for at least 30 minutes. This will firm it up and make it easier to scoop. Using a large cookie scoop (about 3 tablespoons), drop rounded portions of dough onto the prepared cookie sheets, spacing cookies at least 2 inches apart to allow for spreading. For a more vibrant and appealing look, gently press a few extra M&M’s onto the tops of each cookie dough ball before baking, if desired. Bake at 350°F (175°C) for 9-13 minutes.
-
A shorter baking time will result in softer, chewier cookies, with the centers looking slightly under-baked. For these softer cookies, allow them to cool on the baking sheet for 5-10 minutes before carefully transferring them to a wire rack to cool completely. If you prefer crispier cookies or if the dough has been chilled for an extended period, use the longer bake time. After baking, cool on the cookie sheet for 2 minutes, then move to a wire rack to cool completely.
Nutrition
The recipes on this blog are tested with a conventional gas oven and gas stovetop. It’s important to note that some ovens, especially as they age, can cook and bake inconsistently. Using an inexpensive oven thermometer can assure you that your oven is truly heating to the proper temperature. If you use a toaster oven or countertop oven, please keep in mind that they may not distribute heat the same as a conventional full sized oven and you may need to adjust your cooking/baking times. In the case of recipes made with a pressure cooker, air fryer, slow cooker, or other appliance, a link to the appliances we use is listed within each respective recipe. For baking recipes where measurements are given by weight, please note that results may not be the same if cups are used instead, and we can’t guarantee success with that method.
Enjoy Your Homemade Monster Cookies!
Whether you’re baking a batch for a special occasion, preparing a fun activity with the kids, or simply treating yourself to a delightful homemade dessert, these Monster Cookies are sure to impress. Their perfect blend of peanut butter, oatmeal, chocolate chips, and colorful M&M’s creates an unforgettable taste and texture experience that truly earns them their “monster” name. Dive into the joy of baking and savor every soft, chewy, and utterly delicious bite!
This post was originally published on this blog on Jan 17, 2018, and has been updated and expanded for clarity, completeness, and enhanced reader experience.
