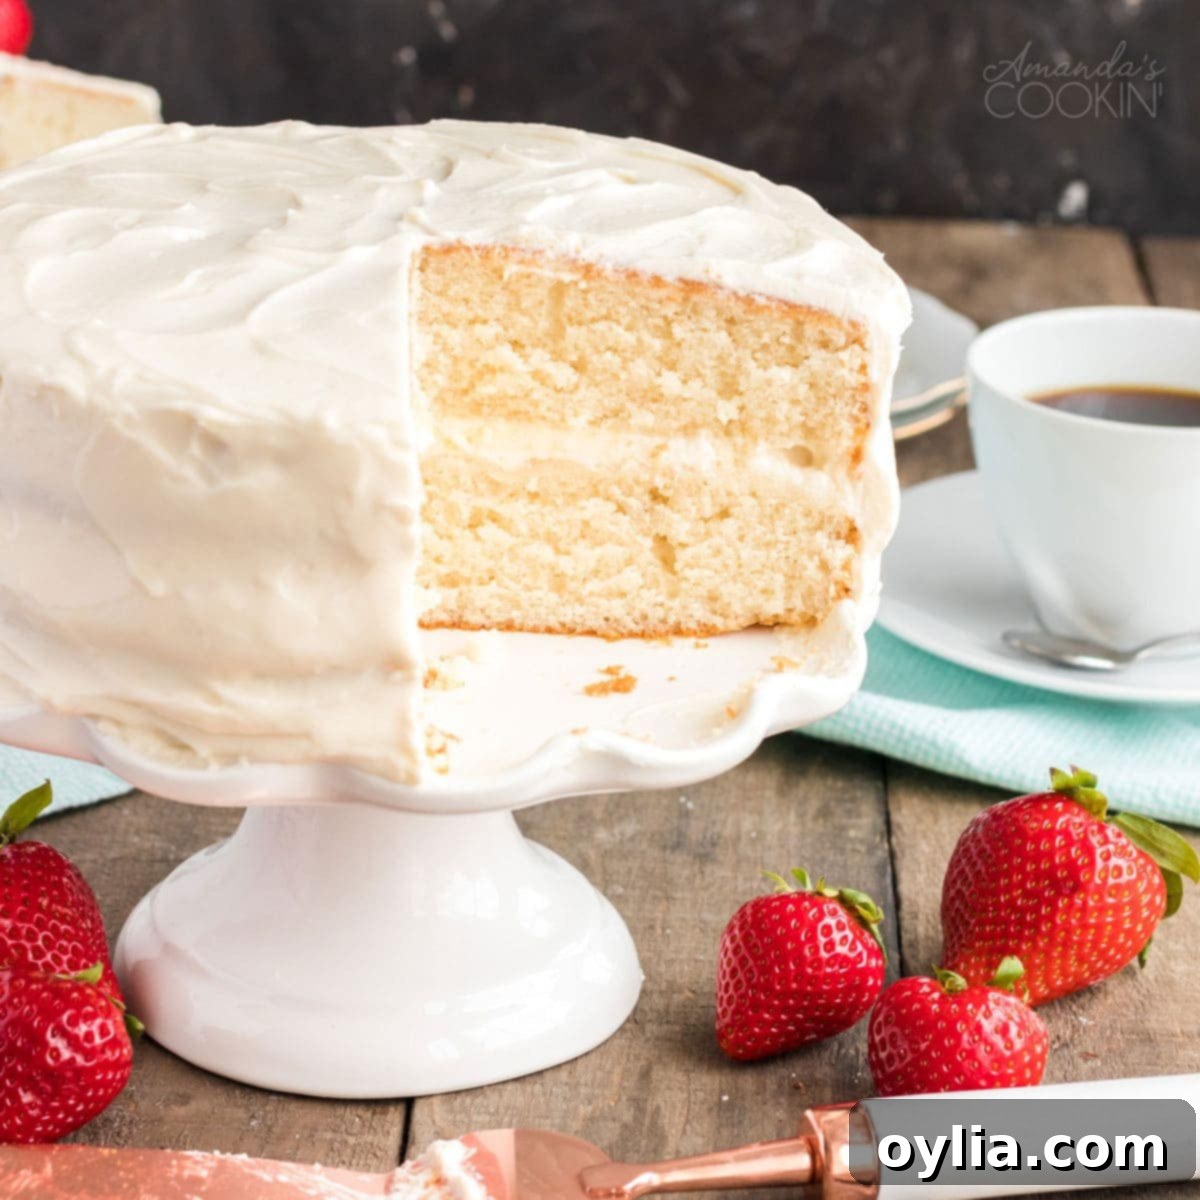
The Ultimate Fluffy White Cake Recipe with Dreamy Cream Cheese Frosting
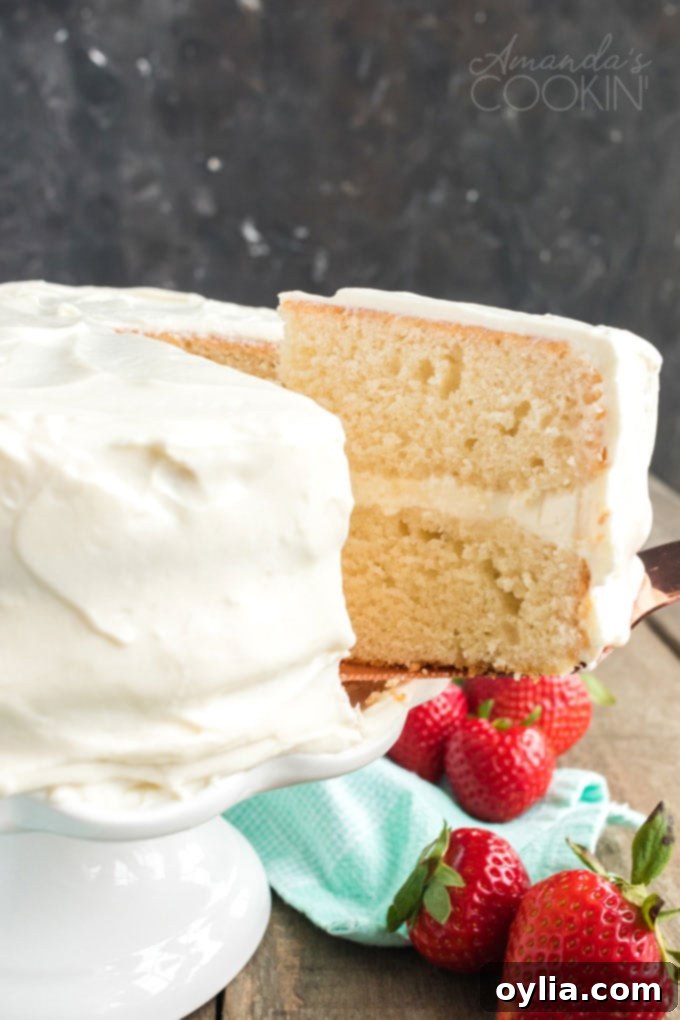
Prepare to be enchanted by the delicate charm of the perfect homemade white cake! This recipe delivers an incredibly light, fluffy, and utterly delicious cake that requires only 8 core ingredients and bakes in a swift 30-35 minutes. Whether you’re celebrating a special occasion like a birthday or bridal shower, or simply craving a comforting treat, this classic white cake is designed for versatility. It’s magnificent when baked in elegant layers, serving as the centerpiece of any dessert table, or equally wonderful as a simple sheet cake for effortless enjoyment. Paired with our luscious, velvety cream cheese frosting — enhanced with a secret ingredient for an extra ethereal texture — this isn’t just a dessert; it’s an experience. Get ready to bake a memory!
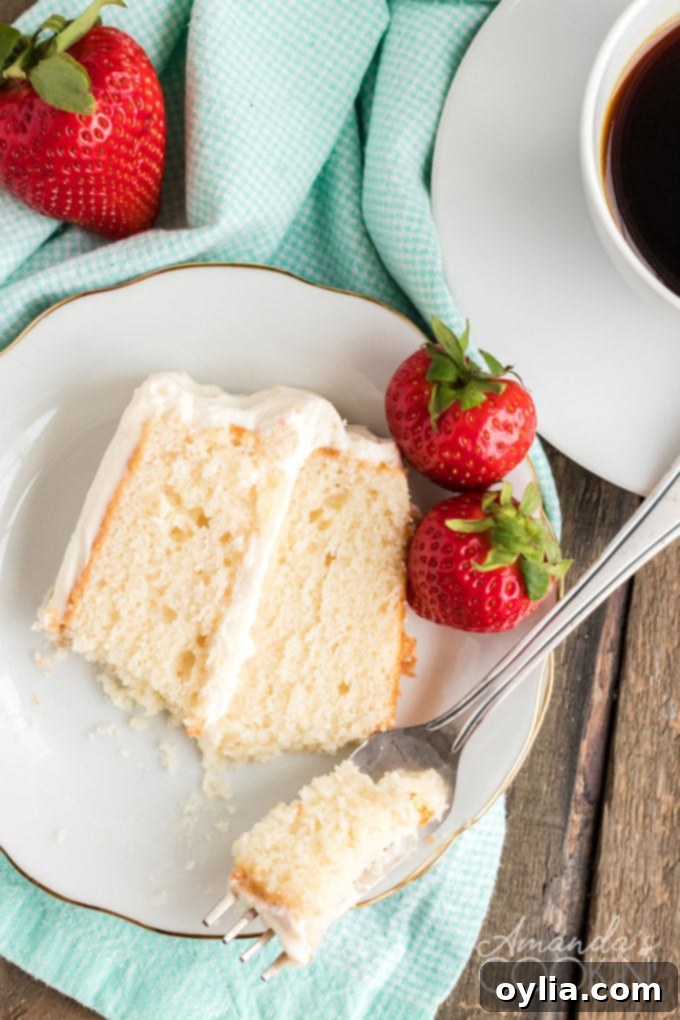
Why This Homemade White Cake Will Become Your Go-To Recipe
There’s a reason this particular white cake recipe stands out as a true favorite in our kitchen and will soon be in yours too. It’s not just a cake; it’s a testament to simple ingredients yielding extraordinary results. The texture is what truly captivates – it’s incredibly light, wonderfully spongy, and oh-so-delicate, practically melting in your mouth with every bite. Unlike dense or heavy cakes, this recipe achieves a perfect airy crumb that makes it feel like a cloud, making it the best fluffy white cake you’ll ever bake.
Its elegant simplicity makes it incredibly versatile for any celebration. Picture it as the star of a beautiful bridal shower, a joyous birthday party, or a heartwarming centerpiece for any family gathering. This easy white cake can be “dressed up” with elaborate decorations and fresh fruits for grand events, or served with nothing more than a simple, luscious white frosting for a pure, unadulterated treat. We’ve even successfully adapted this very base recipe to create a vibrant vanilla bean mulberry cake and a refreshing pink lemonade cake, proving its foundational excellence for various flavor profiles, especially for summer. You’ll be amazed at how such minimal effort can produce a cake that tastes like it came from a professional bakery, making it your go-to classic white cake recipe.
RELATED: If you adore fruity flavors, you might also be keen on trying our delightful Strawberry Cake recipe!
Essential Ingredients and Expert Baking Tips for Your Perfect White Cake
Crafting the perfect fluffy white cake starts with understanding your ingredients and a few expert tricks. You’ll be pleased to know that the items required for this recipe are likely already staples in your pantry, making this a convenient choice for spontaneous baking endeavors. Here’s a closer look at the key components and how to ensure the best results for your homemade white cake:
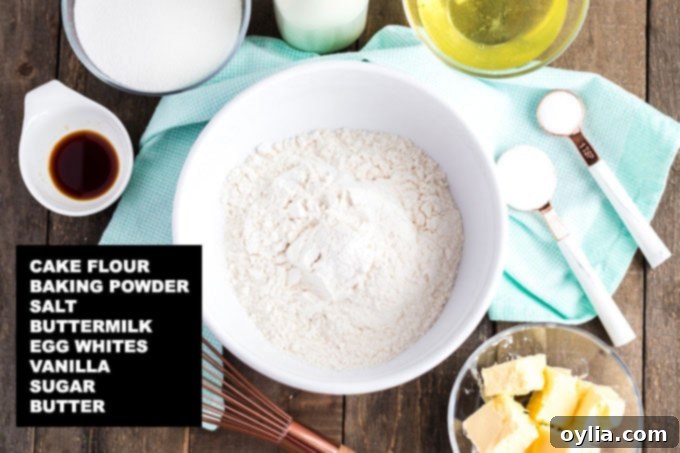
- Cake Flour: The Secret to a Tender Crumb. We recommend using cake flour for that signature delicate and tender crumb characteristic of the best white cakes. It has a lower protein content than all-purpose flour, which prevents the cake from becoming tough and creates a wonderfully soft texture. However, if you don’t have any on hand, don’t fret! You can easily make a substitute: for every 1 cup of cake flour, use 1 cup of all-purpose flour MINUS 2 tablespoons of all-purpose flour, PLUS 2 tablespoons of cornstarch. Sift this mixture together thoroughly before using to ensure an even distribution and an ultimately smooth batter.
- Buttermilk: For Moisture and Tang. Buttermilk is crucial for a moist cake with a subtle tang that balances the sweetness beautifully. Its natural acidity also reacts with the baking powder, contributing significantly to the cake’s light and airy texture. If you find yourself without buttermilk, you can create a simple, effective substitute: add 1 tablespoon of white vinegar or lemon juice to a measuring cup, then fill the rest of the cup with enough regular milk (dairy or non-dairy works) to reach 1 1/4 cups. Let it sit for 5-10 minutes until it slightly curdles before adding to your batter.
- Egg Whites: The Key to a Pure White Hue. Some recipes for “white cake” oddly call for whole eggs, but that simply makes it a yellow cake due to the yolks’ natural color. For a truly pristine, bright white cake, it’s essential to use only the egg whites. They contribute to the cake’s structure and lightness without imparting any yellow tint. Don’t let those leftover yolks go to waste! They are perfect for enriching other delightful desserts such as a creamy banana cream pie, tangy Key Lime pie, classic homemade banana pudding, or even a decadent white chocolate ice cream!
- Unsalted Butter & Granulated Sugar: The Foundation. Ensure your unsalted butter is at room temperature for optimal creaming with the granulated sugar. This process, known as creaming, incorporates air into the butter, which is vital for a light and airy cake structure, ensuring your fluffy white cake lives up to its name.
- Pure Vanilla Extract: Flavor Perfection. Always opt for pure vanilla extract over imitation for the best, most authentic flavor in your white cake. It makes a noticeable difference in the overall taste profile, providing a rich aromatic base without coloring the cake.
General Baking Tips for Unforgettable Results:
- Room Temperature Ingredients: This tip is paramount for success with any white cake recipe. Make sure your butter, eggs, and buttermilk are all at true room temperature. This helps them emulsify properly, creating a smooth, consistent batter that traps air more effectively, leading to a much lighter and finer crumb.
- Accurate Measurements: Baking is a science! Use proper measuring cups and spoons, and for flour, spoon it into your measuring cup and level it off with a straight edge (the “spoon and level” method) rather than scooping directly from the bag. This prevents adding too much flour, which can lead to a dry cake.
- Don’t Overmix: Once you add the dry ingredients, mix only until just combined. Overmixing develops the gluten in the flour, which can result in a dense, tough cake – the exact opposite of the fluffy white cake we’re aiming for.
- Prepare Pans Properly: Always butter and flour your pans, or line them with parchment paper (as instructed in the recipe card), to prevent sticking and ensure your beautiful cakes release easily without any tears or breaks.
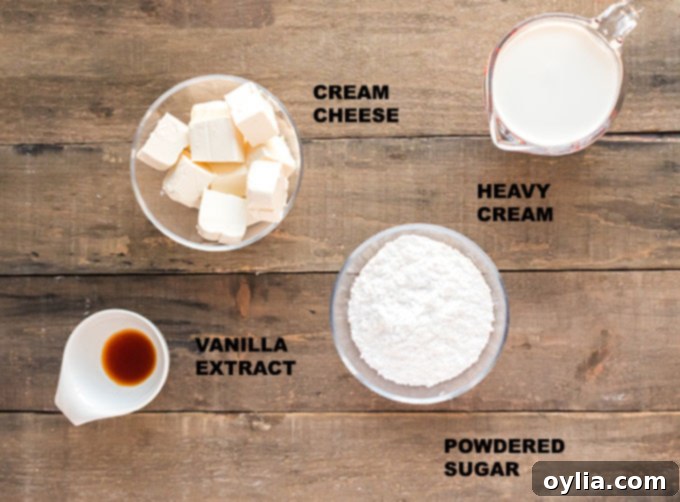
And let’s not forget the star of the show when it comes to topping this white cake: the frosting! While classic cream cheese frosting is delightful on its own with its tangy sweetness, it reaches a whole new level of decadence and airiness when you delicately fold in some freshly whipped cream. This technique creates an incredibly light, airy, and truly dreamy frosting that perfectly complements the delicate texture of the white cake, adding a cloud-like finish. I guarantee you will absolutely adore its rich yet ethereal consistency – it’s the perfect pairing for this fluffy white cake!
Crafting Your Homemade White Cake: Step-by-Step Instructions
Baking a cake from scratch can seem daunting, but with this straightforward recipe, you’ll be amazed at how easily you can create a bakery-quality dessert in your own kitchen. Follow these steps carefully to achieve that perfect fluffy white cake texture and flavor:
- Prepare Dry Ingredients: In a medium-sized bowl, thoroughly whisk together the cake flour, baking powder, and salt. Whisking ensures these dry ingredients are evenly distributed, which is crucial for the cake’s consistent rise and delicate texture. Set this mixture aside.
- Prepare Wet Ingredients: In a separate medium bowl, combine the buttermilk, egg whites, and pure vanilla extract. Whisk these wet ingredients until they are well combined. This ensures even flavor and moisture distribution throughout the batter. Set this aside.
- Cream Butter and Sugar: Using a stand mixer with a paddle attachment, or a reliable hand mixer, beat the softened butter and granulated sugar at medium speed. It’s vital to beat this mixture for a full 3 minutes. This creaming process incorporates a significant amount of air, making the mixture incredibly light and fluffy, which is essential for the cake’s airy texture. Don’t rush this step, as it forms the foundation of your cake’s lightness!
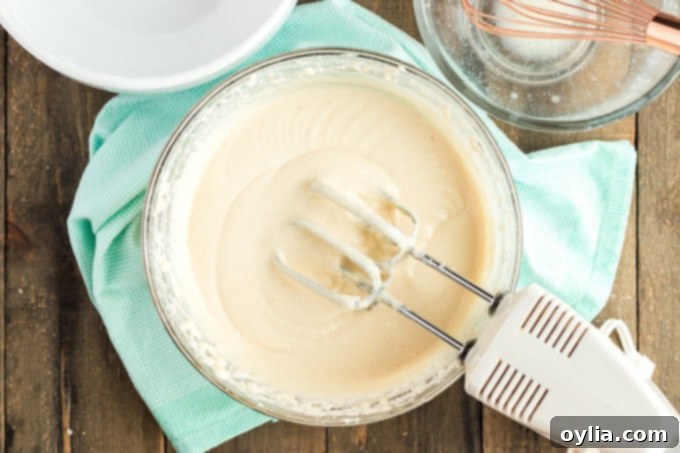
- Combine Wet and Dry: Reduce the mixer speed to low. Gradually add about half of your whisked dry ingredient mixture, followed by half of the wet ingredients. Mix only until just combined. Then, add the remaining dry and wet ingredients, beating just until they are fully incorporated. Be sure to scrape down the sides of the bowl with a rubber spatula as needed to ensure everything is mixed evenly. To further aerate the batter and ensure a super light crumb, beat the mixture for two more minutes on medium speed. This final aeration step is key to a truly fluffy white cake.
- Prepare for Baking: Evenly divide the prepared batter between your two 9-inch round cake pans that have been properly greased and floured (or lined with parchment paper). Use a rubber spatula to gently smooth the tops of the batter in each pan. This helps ensure even baking and flat cake layers, making them easier to stack and frost.
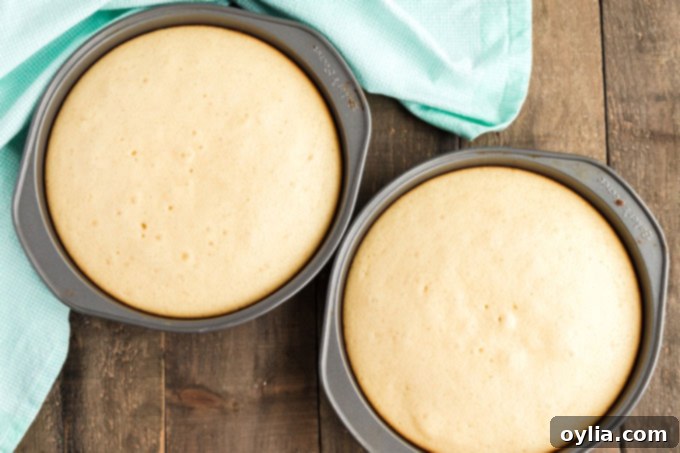
- Bake to Perfection: Bake the cakes in your preheated oven for 30-35 minutes. Baking times can vary slightly depending on your oven, so it’s best to start checking around the 30-minute mark. The cakes are perfectly baked when they are beautifully risen, golden around the edges (but still pristine white in the center), and springy to the touch when lightly pressed. To double-check for doneness, insert a thin knife or a wooden skewer into the centers; it should come out clean.
- Cooling Process: Once baked, carefully transfer the hot cake pans to wire cooling racks. Let them cool in the pans for about 5 minutes. This brief cooling period helps the cakes firm up before you handle them, reducing the risk of breakage. After 5 minutes, gently invert the cakes onto the cooling racks, peel off any parchment paper, and allow them to cool completely. It’s crucial that the cakes are entirely cool before frosting to prevent the frosting from melting and sliding off, which can ruin your beautiful presentation.
Creating and Applying Our Signature Cream Cheese & Whipped Cream Frosting
This frosting isn’t just an afterthought; it’s a critical component that elevates this white cake to dessert royalty. The delightful combination of rich cream cheese and airy whipped cream creates a frosting that’s both decadently flavorful and incredibly light, never overly sweet, and utterly irresistible. Here’s how to master this dreamy topping for your fluffy white cake:
- Prepare the Cream Cheese Base: Using the paddle attachment of your stand mixer, beat the softened cream cheese, sifted powdered sugar, and vanilla extract until the mixture is beautifully smooth and creamy. Sifting the powdered sugar beforehand is key to preventing lumps and achieving a silky texture. Once smooth, transfer this cream cheese mixture to another bowl and thoroughly clean out your mixing bowl – it needs to be completely grease-free for the next step of whipping cream.
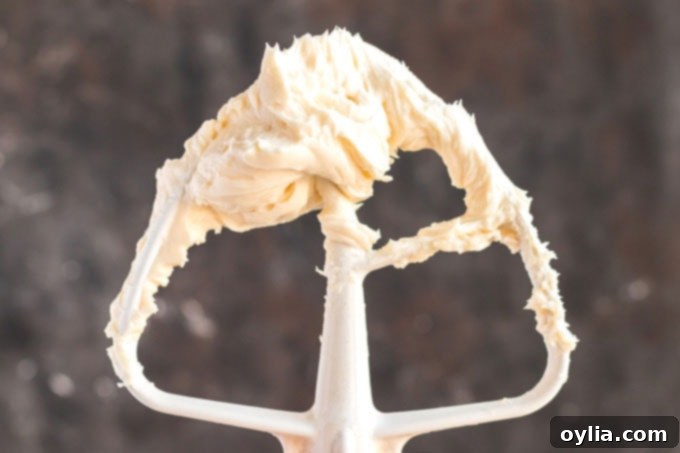
- Whip the Heavy Cream: Switch your mixer to the whisk attachment. Pour the very cold heavy cream into the now clean bowl and beat it at medium-high speed until stiff peaks form. This means when you lift the whisk, the cream should hold its shape firmly. Be careful not to over-whip, or it will turn grainy and lose its desired texture.
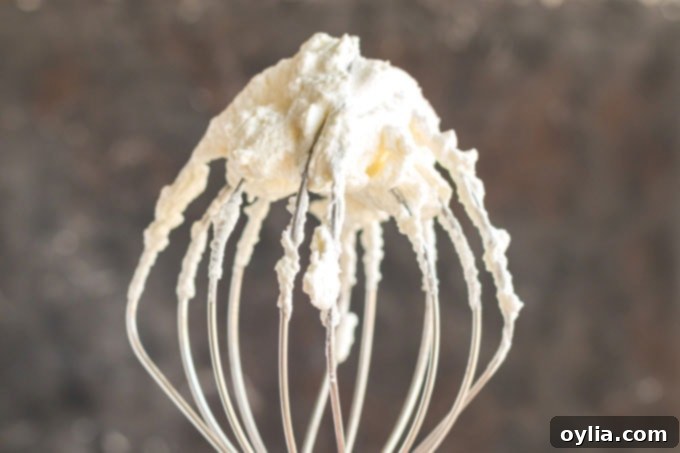
- Gently Fold Together: Now for the magic! Gently fold the freshly whipped cream into the prepared cream cheese mixture using a rubber spatula. The goal is to incorporate the whipped cream without deflating it too much, which would compromise the airy texture of your frosting. Once most of the whipped cream is incorporated, give the frosting a quick whisk (about one minute) to ensure it’s completely smooth and evenly blended. This creates a light, stable, and incredibly delicious frosting.
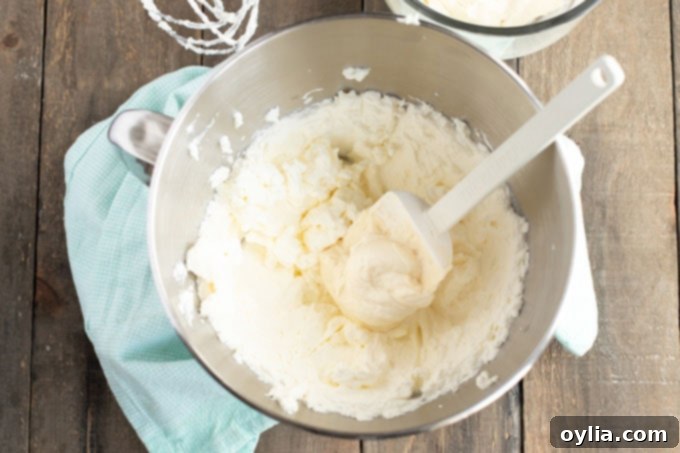
- Frosting the First Layer: Place one completely cooled cake layer onto your serving plate or cake stand. Spread about 1/2 to 3/4 cup of the glorious cream cheese and whipped cream frosting evenly over the top. If you’re a frosting enthusiast and prefer a thicker middle layer, feel free to add a bit more – this is your cake, after all!
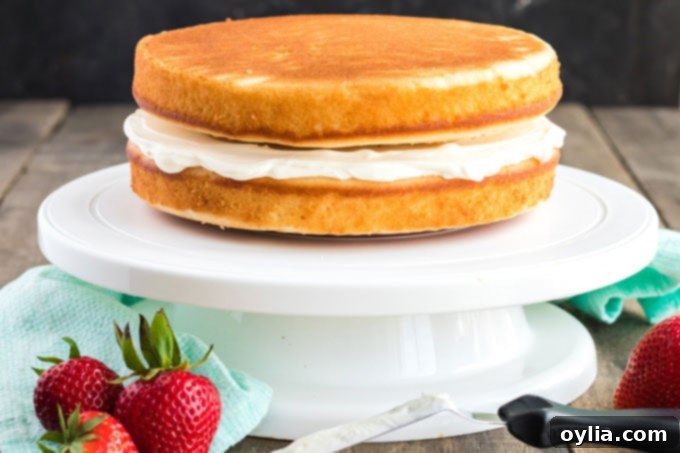
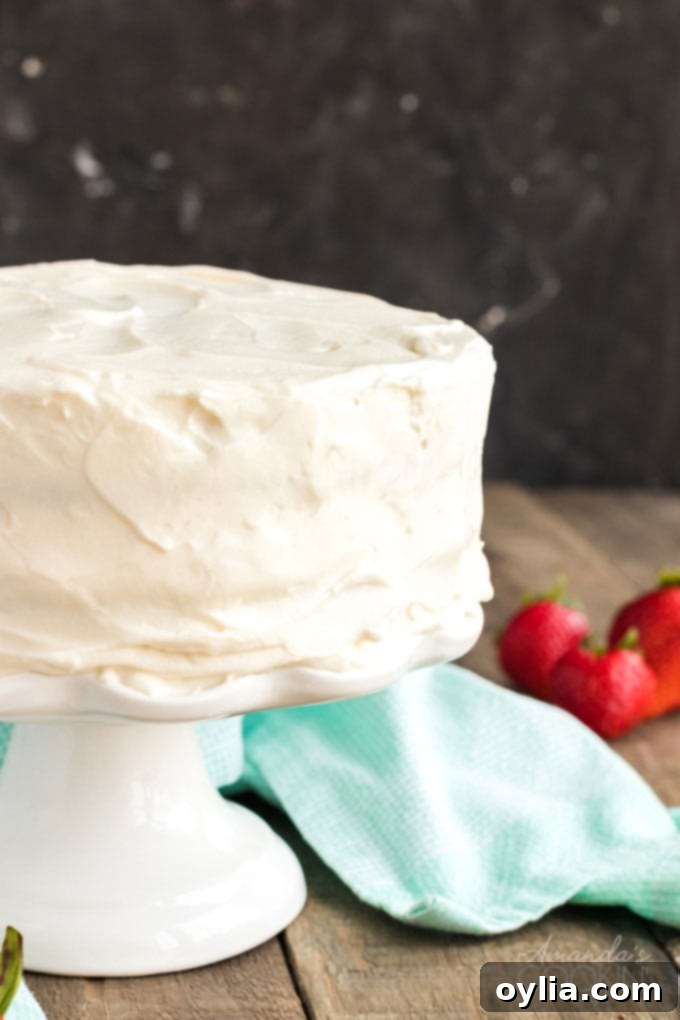
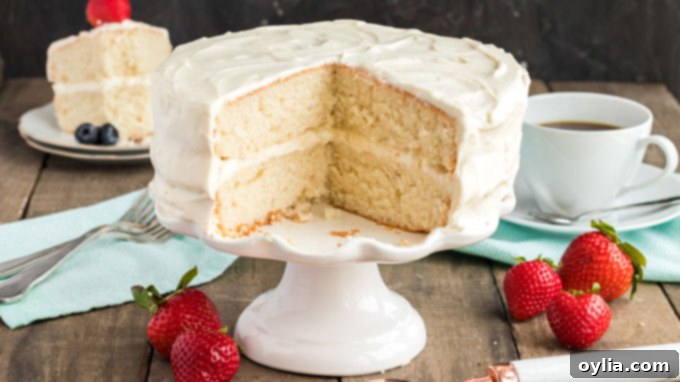
- Assemble and Finish: Carefully place the second cooled cake layer directly on top of the first, aligning it as best as possible. Then, using an offset spatula or a butter knife, generously frost the top and sides of the entire cake with the remaining cream cheese and whipped cream frosting. You can create a smooth, elegant finish or decorative swirls, depending on your preference. For an extra touch, garnish your beautiful white cake with fresh berries, sprinkles, or citrus zest!
Smart Storage: How to Freeze Your Fluffy White Cake for Later Enjoyment
One of the best features of this homemade white cake recipe is how incredibly well it freezes, allowing you to enjoy a slice of pure delight whenever the craving strikes! This method is perfect for meal prepping desserts, ensuring you always have a sweet treat on hand, or simply preserving leftovers without needing to bake from scratch every time. Here’s my favorite way to freeze it:
If I’m not preparing this beautiful white cake for an immediate party or celebration, I often bake the two round layers and frost them individually. This means I’ll have two separate frosted cake rounds, which is great for portioning. Then, I cut each frosted round into individual triangle slices. Place these individual slices on a jelly roll pan (or any baking sheet) that has been lined with wax paper or parchment paper. Pop the pan into the freezer for a couple of hours. This step, known as “flash freezing,” allows the slices to firm up and prevents them from sticking together or damaging the delicate cream cheese frosting when wrapped. This is a crucial step for maintaining the cake’s quality during freezing.
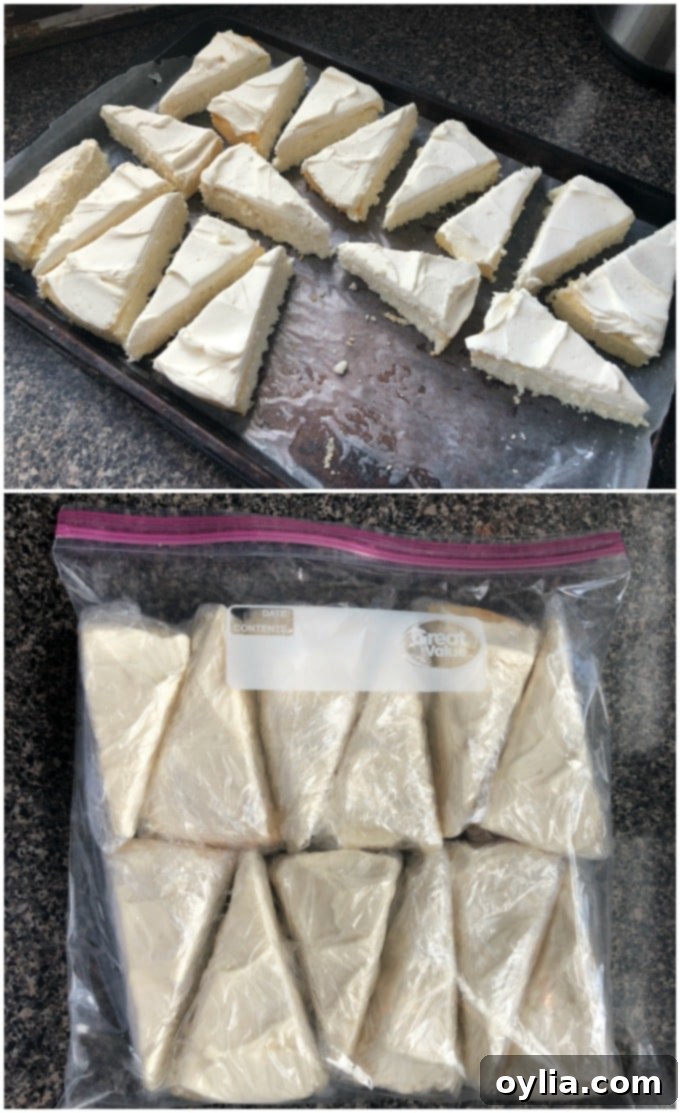
Once the slices are thoroughly frozen and firm, remove them from the pan. Wrap each individual slice tightly in plastic wrap, ensuring no air can get in (this helps prevent freezer burn and keeps the cake moist). Then, store all the individually wrapped slices together in a large freezer bag or an airtight container. Whenever you desire a piece of delicious white cake, simply remove one frozen slice, unwrap it while it’s still frozen, and place it on a plate. Allow it to thaw at room temperature for about 20-30 minutes, and it will be perfectly delicious, moist, and ready to enjoy, tasting as fresh as the day it was baked! You can also freeze and thaw an entire frosted cake in the same manner by wrapping it well after it has completely cooled and flash-frozen, then allowing it to thaw slowly in the refrigerator overnight.
This method ensures you always have a delightful treat at your fingertips, making it a fantastic solution for unexpected guests, a quick dessert craving, or simply indulging in a moment of sweet bliss.
Discover More Delicious Cake Recipes!
If you’ve fallen in love with baking this fluffy white cake, you’ll be thrilled to explore other fantastic cake recipes from our collection. Each one is crafted to bring joy and deliciousness to your kitchen and your taste buds. Expand your baking repertoire with these irresistible options:
- Classic Carrot Cake with Cream Cheese Frosting
- Homemade Strawberry Shortcake
- Moist Banana Cake with Vanilla Cream Cheese Frosting
- Elegant Chantilly Cake
- Easy Dutch Apple Snack Cake
- Unique Chocolate Prune Cake
- Beautiful Marble Cake
I love to bake and cook and share my recipes with you! I know it’s hard to remember to come back and search, so I’ve made it easy for you will my weekly newsletter! You can subscribe for free and I’ll send you delicious recipes every week.
Best Classic White Cake
IMPORTANT – There are often Frequently Asked Questions within the blog post that you may find helpful. Simply scroll back up to read them!
Print It
Rate It
Save ItSaved!
Ingredients
For the Cake
- 2 ¼ cups cake flour
- 1 Tablespoon baking powder
- ½ teaspoon salt
- 1 ¼ cups buttermilk
- 4 large egg whites
- 1 teaspoon pure vanilla extract
- 1 ½ cups granulated sugar
- ½ cup unsalted butter 1 stick, softened
Cream Cheese Frosting
- 8 oz cream cheese softened
- ¾ cup powdered sugar sifted
- ½ tablespoon vanilla extract
- 1 cup heavy whipping cream
Things You’ll Need
-
9-inch round cake pans
-
Stand mixer
-
Whisk
-
Mixing bowls
Before You Begin
- I use cake flour, but if you don’t have any you can use all purpose flour by following this calculation. Replace 1 cup of cake flour with 1 cup all purpose flour MINUS 2 tablespoons all purpose flour PLUS 2 tablespoons of cornstarch.
- If you don’t have buttermilk, you can add 1 tablespoon of white vinegar or lemon juice plus enough milk to measure 1 1/4 cups.
- Some white cake recipes call for whole eggs, which makes no sense to me. That makes it a yellow cake simply because of the yellow from the yolks. Separate the eggs and only use the egg whites. You can save the yolks for making banana cream pie, Key Lime pie, homemade banana pudding, or my white chocolate ice cream!
- I love cream cheese frosting, but it’s even better when you fold in some whipped cream. I guarantee you will love it!
Instructions
-
Preheat the oven to 350°F. Butter or spray two 9-inch round cake pans and line the bottom of each pan with a round of parchment paper.
Cake
-
Whisk together the cake flour, baking powder and salt. Set aside.
-
Whisk together the buttermilk, egg whites, and vanilla in a medium bowl. Set aside.
-
In mixer with paddle attachment, or with a hand mixer, beat butter and sugar at medium speed for a full 3 minutes, until the mixture is very light.
-
Reduce speed to low and gradually add half of the dry ingredients and half of the wet ingredients. When combined add the remaining dry and wet ingredients. Beat until combined, scrape down side of bowl if needed. Beat two minutes more on medium speed to aerate the batter.
-
Divide the batter between the two pans and smooth the tops with a rubber spatula.
-
Bake for 30-35 minutes, or until the cakes are well risen and springy to the touch – a thin knife inserted into the centers should come out clean.
-
Transfer the cakes to cooling racks and cool for about 5 minutes, then remove from pans, peel off parchment, and let cool completely.
Cream Cheese Frosting
-
Using the paddle attachment, beat the cream cheese, sifted powdered sugar, and vanilla until smooth and creamy. Remove to another bowl and clean out mixing bowl.
-
Switch to the whisk attachment and beat the heavy cream at medium-high until stiff peaks form.
-
Gently fold the whipped cream into the cream cheese mixture. When most of the cream cheese and whipped cream are incorporated, whisk the frosting together to make smooth, about one minute.
-
Place one cake layer onto a plate and spread 1/2 – 3/4 cup of the frosting on top. If you prefer more frosting in the middle, feel free to add more!
-
Place the second cake layer on top of the first, and frost the top and sides of the cake.
Nutrition
The recipes on this blog are tested with a conventional gas oven and gas stovetop. It’s important to note that some ovens, especially as they age, can cook and bake inconsistently. Using an inexpensive oven thermometer can assure you that your oven is truly heating to the proper temperature. If you use a toaster oven or countertop oven, please keep in mind that they may not distribute heat the same as a conventional full sized oven and you may need to adjust your cooking/baking times. In the case of recipes made with a pressure cooker, air fryer, slow cooker, or other appliance, a link to the appliances we use is listed within each respective recipe. For baking recipes where measurements are given by weight, please note that results may not be the same if cups are used instead, and we can’t guarantee success with that method.
This recipe was originally published on June 29, 2009 but has since been updated to include helpful tips and new photos.
