The Ultimate Chocolate Chip Cookie Tower: A Decadent, Stacked Dessert for Every Celebration
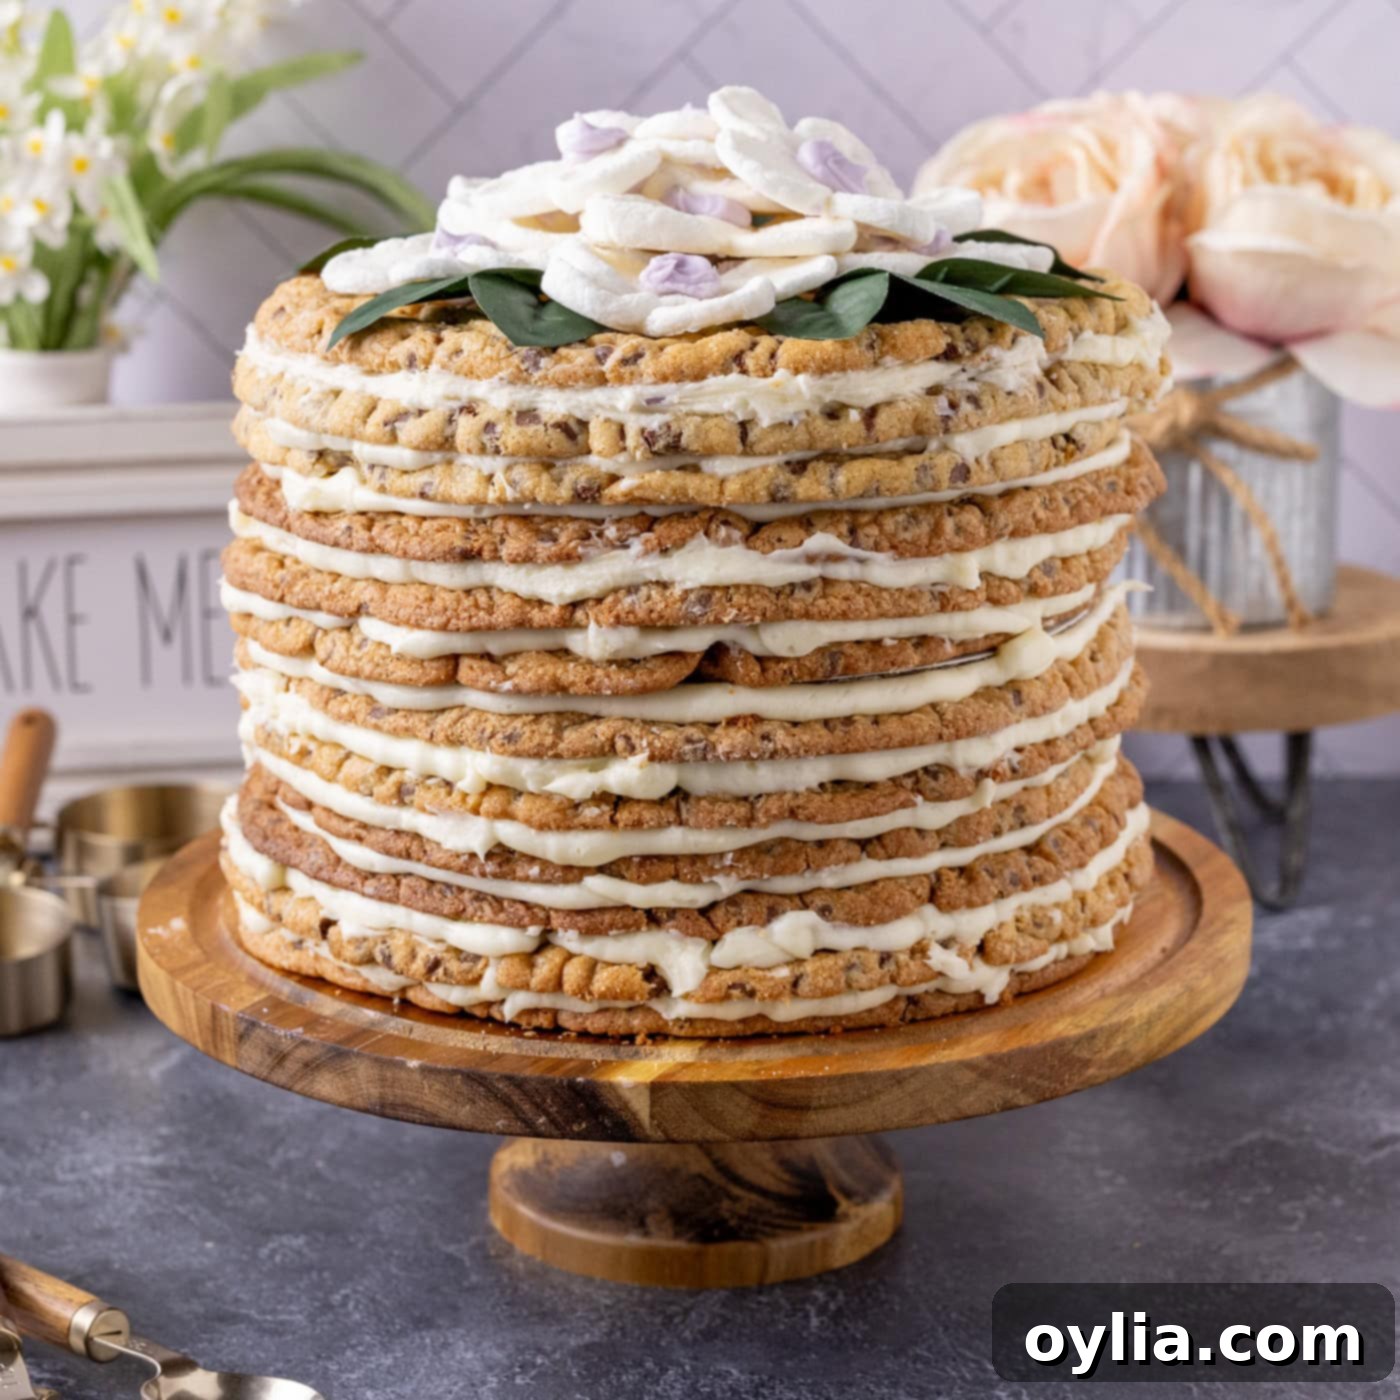
Imagine a towering masterpiece of chewy, golden-brown chocolate chip cookies, each layer generously spread with rich, velvety buttercream frosting. This isn’t just a dessert; it’s a magnificent statement, a true show-stopper that promises to impress guests at any event. Our chocolate chip cookie tower is a breathtaking alternative to traditional cakes, offering the comforting appeal of classic cookies elevated to an extraordinary level. Perfect for grand celebrations, this impressive edible skyscraper is sure to be the star of your dessert table.
Why This Show-Stopping Cookie Tower Recipe Works Wonders
Forget the single-layer cookie cakes! Our chocolate chip cookie tower is designed to stand tall and deliver a truly memorable experience. This isn’t just a pretty face; it’s engineered for success and incredible flavor. Here’s why this recipe stands out:
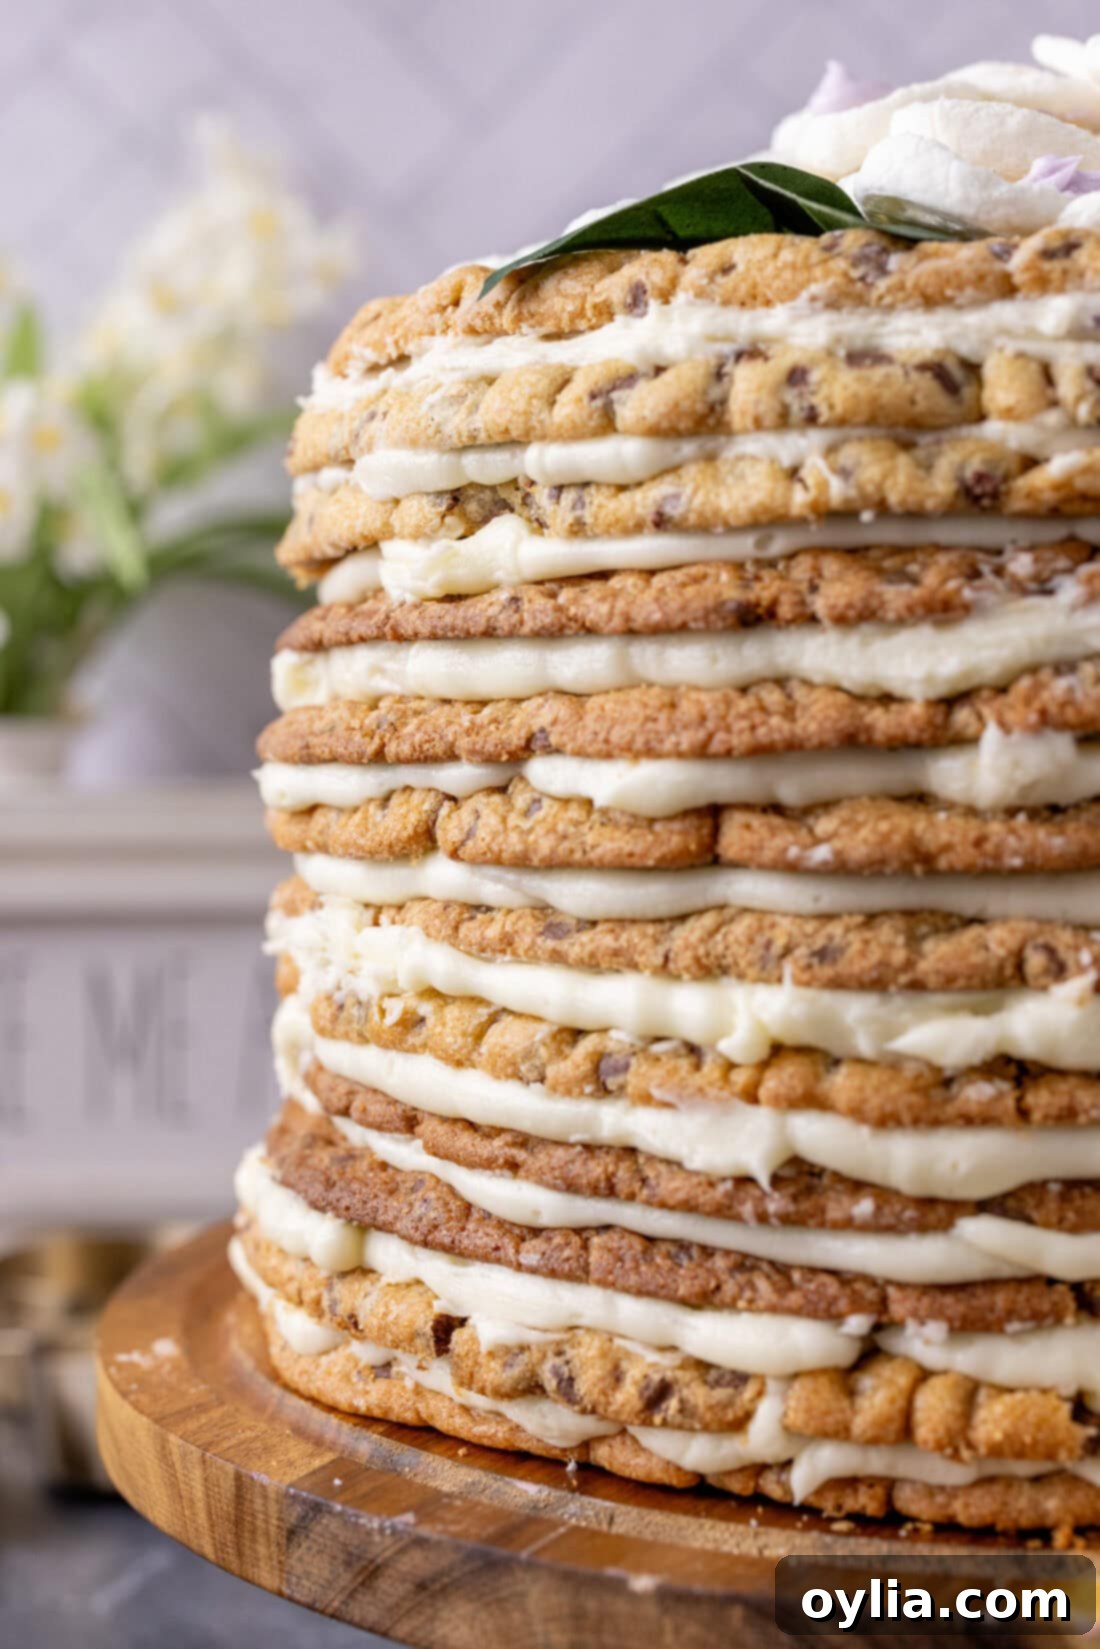
- Impressive Height and Volume: With twelve giant, perfectly baked chocolate chip cookies, this tower reaches impressive heights, creating a stunning visual centerpiece. Each cookie is thick and satisfyingly chewy, providing a substantial bite.
- Decadent Buttercream Layers: Each cookie layer is separated by a generous spread of homemade, luscious buttercream frosting. The creamy frosting perfectly complements the sweet, rich cookies, adding moisture and a luxurious texture that makes every mouthful heavenly.
- Structural Integrity for Large Events: To ensure this cookie skyscraper remains perfectly stable, the recipe incorporates cardboard cake rounds between every four cookies. This ingenious technique provides critical support, making it easy to slice and serve without any wobbling, even at its grandest height.
- Feeds a Crowd Effortlessly: This recipe is designed to serve a large gathering. Comprising three tiers, it yields approximately 32 slices, making it ideal for big celebrations where you need a dessert that can truly feed everyone and still leave a lasting impression.
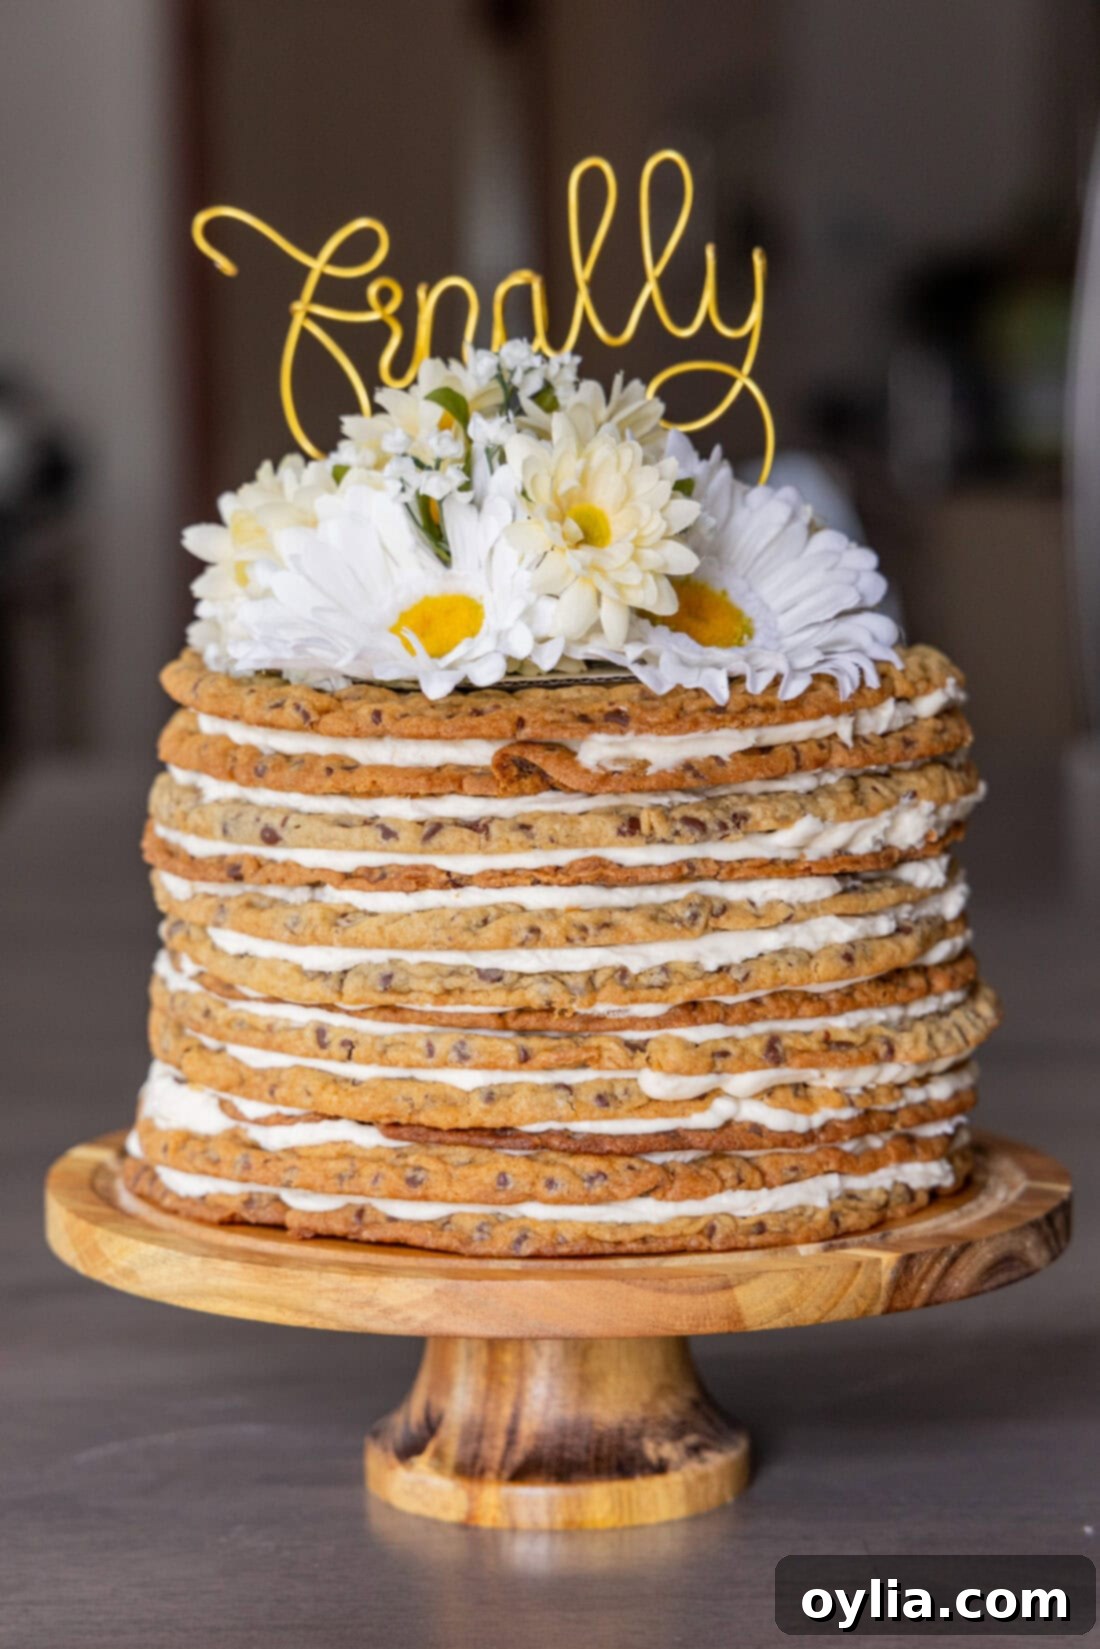
- Versatile for Any Occasion: I’ve had the pleasure of making this show-stopping dessert twice for my youngest sons’ weddings, and it was a massive hit each time. But its versatility extends far beyond weddings. Imagine it gracing the table at birthdays, graduation parties, family reunions, or large potlucks. Its universal appeal makes it a perfect fit for any event calling for a grand and delicious dessert. You can see both wedding versions in this post, each with their unique cake toppers, showcasing just how adaptable it is!
Essential Ingredients for Your Cookie Tower Masterpiece
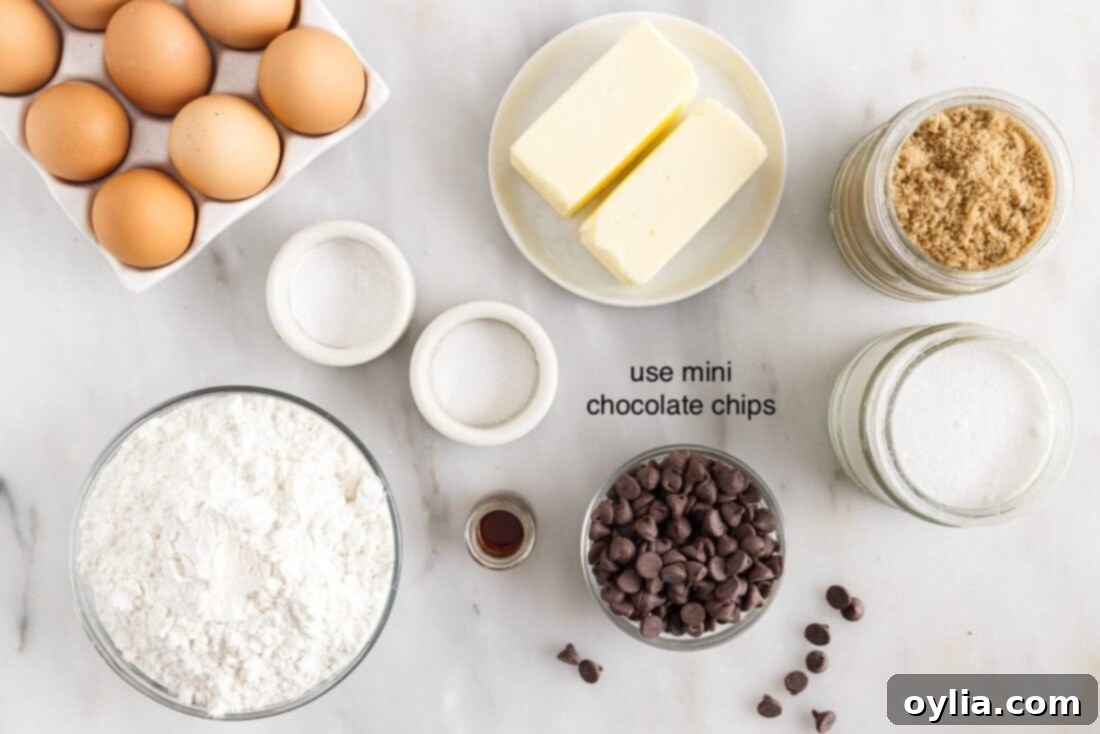
To embark on creating your own impressive chocolate chip cookie tower, you’ll need a carefully selected list of ingredients for both the cookies and the rich buttercream frosting. While the full, precise measurements and instructions are conveniently located in the printable recipe version at the end of this post, let’s quickly overview what you’ll be gathering to bring this magnificent dessert to life.
Having all your ingredients measured and ready before you begin, often called “mise en place,” will make the baking process much smoother and more enjoyable, ensuring you can focus on perfecting each delicious layer of your cookie tower.
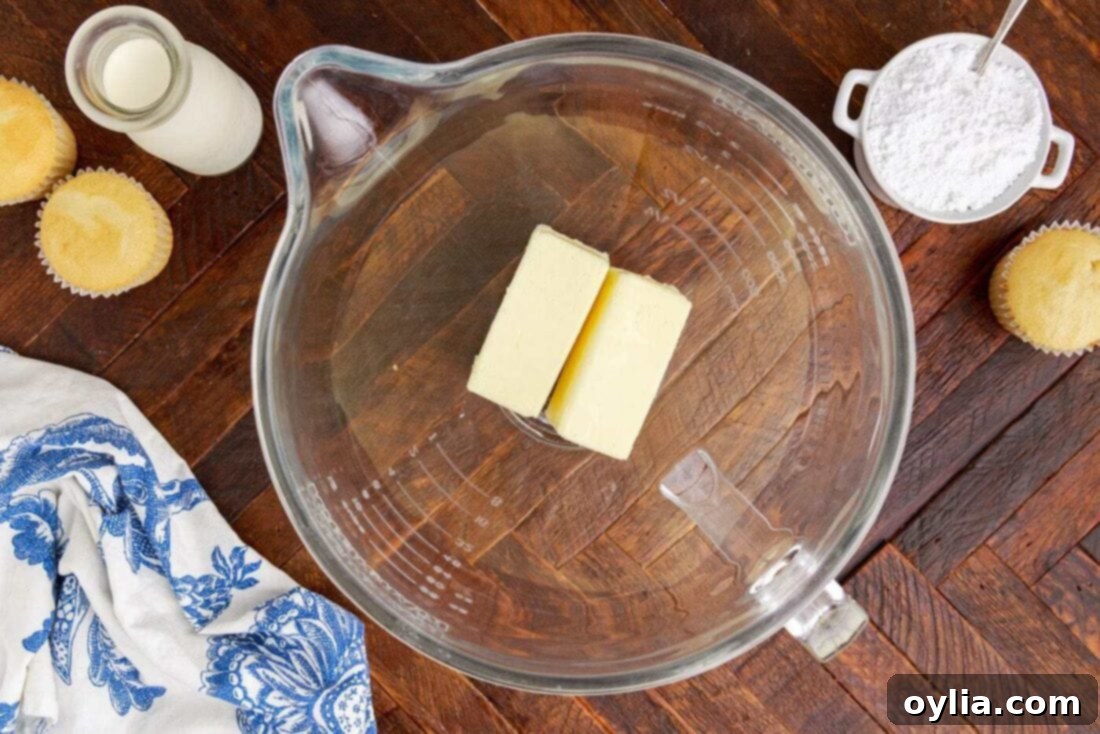
Ingredient Insights and Smart Substitution Suggestions
Crafting the perfect cookie tower requires specific ingredients for optimal results, but it’s also good to know your options for variations or dietary needs. Here’s a closer look at the key components:
-
Cookies: You’ll need three full batches of cookie dough to create the twelve giant cookies required for this tower. We’ve experimented with several recipes, and while our favorite big soft chocolate chip cookie recipe is fantastic for individual cookies, the classic Toll House recipe proved superior for these large, structural layers. Its consistent texture and ability to hold shape during baking and stacking are crucial for a sturdy tower.
- Flour: All-purpose flour is standard. For a slightly softer texture, you could try a cake flour blend, but ensure the dough remains firm enough for handling.
- Butter: Unsalted butter is preferred as it allows you to control the salt content. Make sure it’s softened to room temperature for proper creaming with the sugars.
- Sugars: The combination of granulated sugar and brown sugar is essential. Granulated sugar provides crispness, while brown sugar adds moisture, depth of flavor, and that delightful chewiness we love in a good chocolate chip cookie. Pack your brown sugar firmly when measuring!
- Chocolate Chips: Mini semi-sweet chocolate chips are recommended for these large cookies. Their smaller size ensures an even distribution throughout the dough and prevents them from tearing the cookie apart when rolling or shaping. You can also experiment with milk chocolate, dark chocolate, or a mix, or even add some white chocolate chips for variety.
-
Buttercream Frosting: Just as you multiply the cookie recipe, you’ll need to do the same for the buttercream. To ensure you have enough decadent frosting to lavishly fill and pipe around all the layers, you will need to make four batches. This might seem like a lot, but a giant cookie cake requires a generous hand with the frosting!
- Butter: Again, softened unsalted butter is key for a light and fluffy buttercream.
- Powdered Sugar: Also known as confectioners’ sugar, this provides the smooth texture of the frosting. Sifting it can help prevent lumps, though mixing slowly usually takes care of this.
- Heavy Cream: This gives the buttercream its rich, creamy consistency and helps it whip up beautifully. Whole milk can be substituted in a pinch, but heavy cream will yield a richer, more stable frosting.
- Vanilla Extract: Pure vanilla extract offers the best flavor. For a different twist, you could try almond extract or a combination of extracts.
Making a giant cookie cake is indeed a labor of love, but the rewarding smiles and “oohs” and “aahs” from your guests will make every moment spent in the kitchen utterly worth it.
How to Master the Chocolate Chip Cookie Tower
These step-by-step photos and instructions are here to help you visualize how to make this recipe. You can Jump to Recipe to get the printable version of this recipe, complete with measurements and instructions at the bottom.
Preparing Your Giant Cookie Dough Layers
- Prepare 3 separate batches of cookie dough. The instructions below detail how to make ONE batch. It’s crucial not to try to make all three batches simultaneously in one bowl, as this can lead to overmixing or uneven distribution of ingredients. Working in separate batches ensures perfect cookie consistency.
- In a small mixing bowl, whisk together the flour, baking soda, and salt. This ensures these dry ingredients are evenly distributed, preventing pockets of leavening agents or salt in your cookies. Set this mixture aside.
- In a large mixing bowl, using either a hand mixer or a stand mixer fitted with the paddle attachment, cream together the softened unsalted butter, granulated sugar, packed brown sugar, and pure vanilla extract. Beat until the mixture is light and fluffy, usually 2-3 minutes. This process incorporates air, contributing to the cookies’ texture.
- Add the eggs one at a time, beating well after each addition. Ensure each egg is fully incorporated before adding the next. This helps create an emulsified, smooth batter.
- Gradually add the reserved flour mixture to the wet ingredients, mixing on low speed until just combined. Be careful not to overmix, as this can develop the gluten too much, resulting in tough cookies. Finally, stir in the mini chocolate chips by hand until they are evenly distributed throughout the dough.
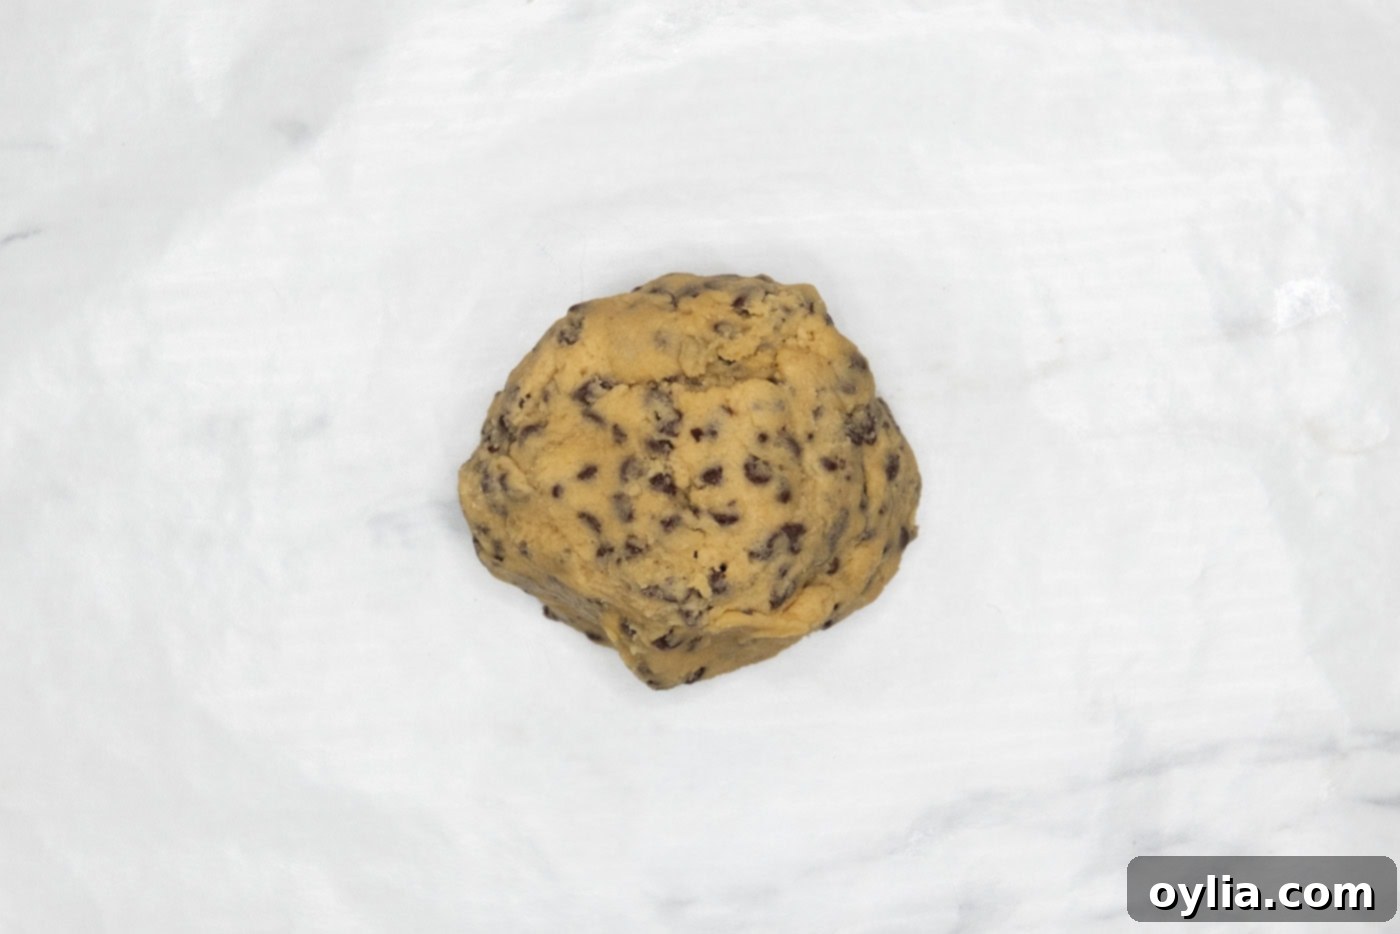
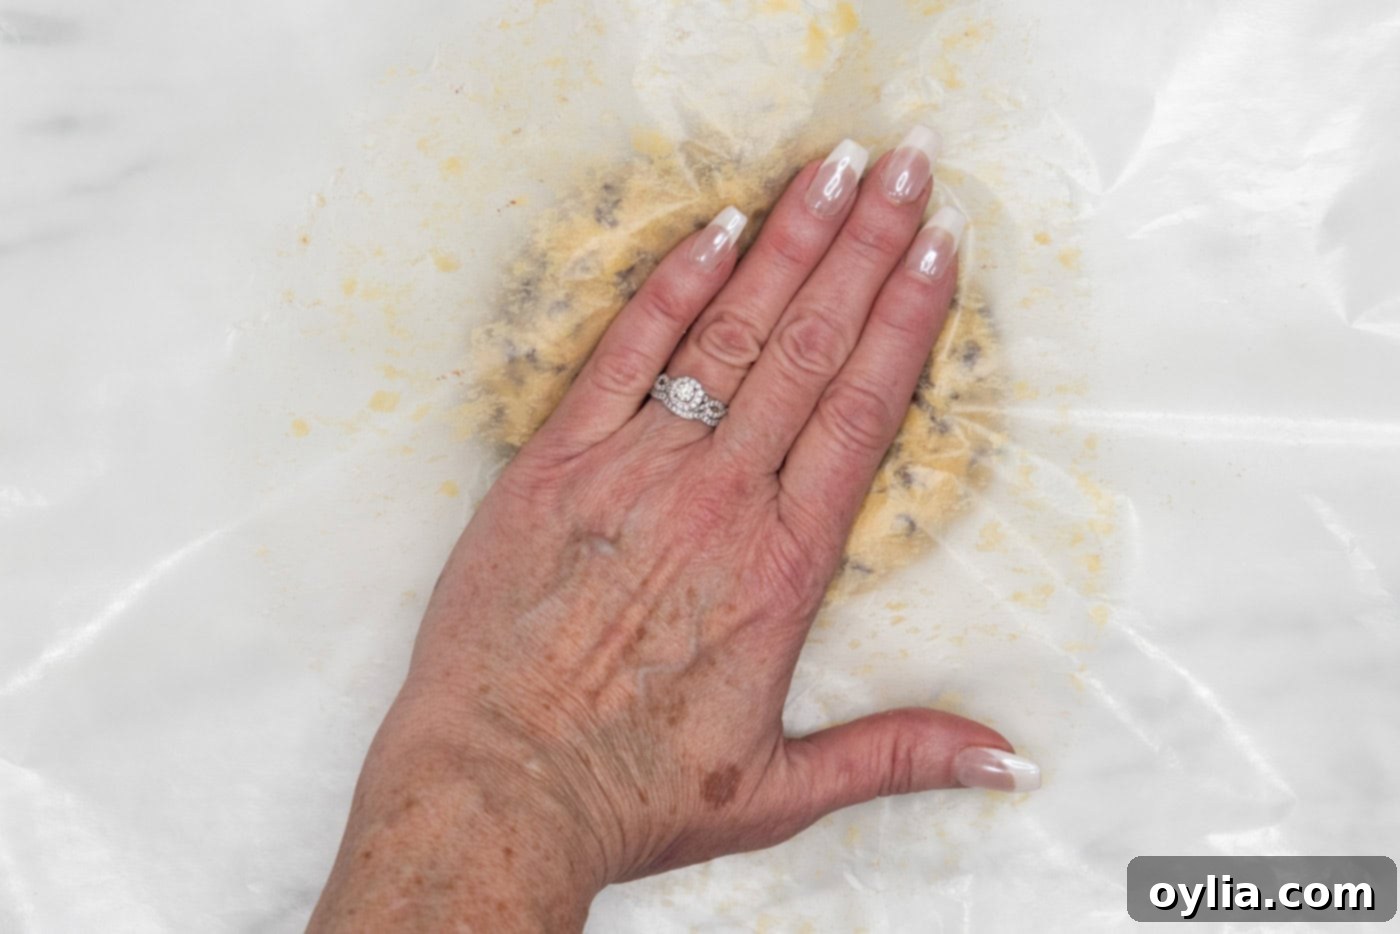
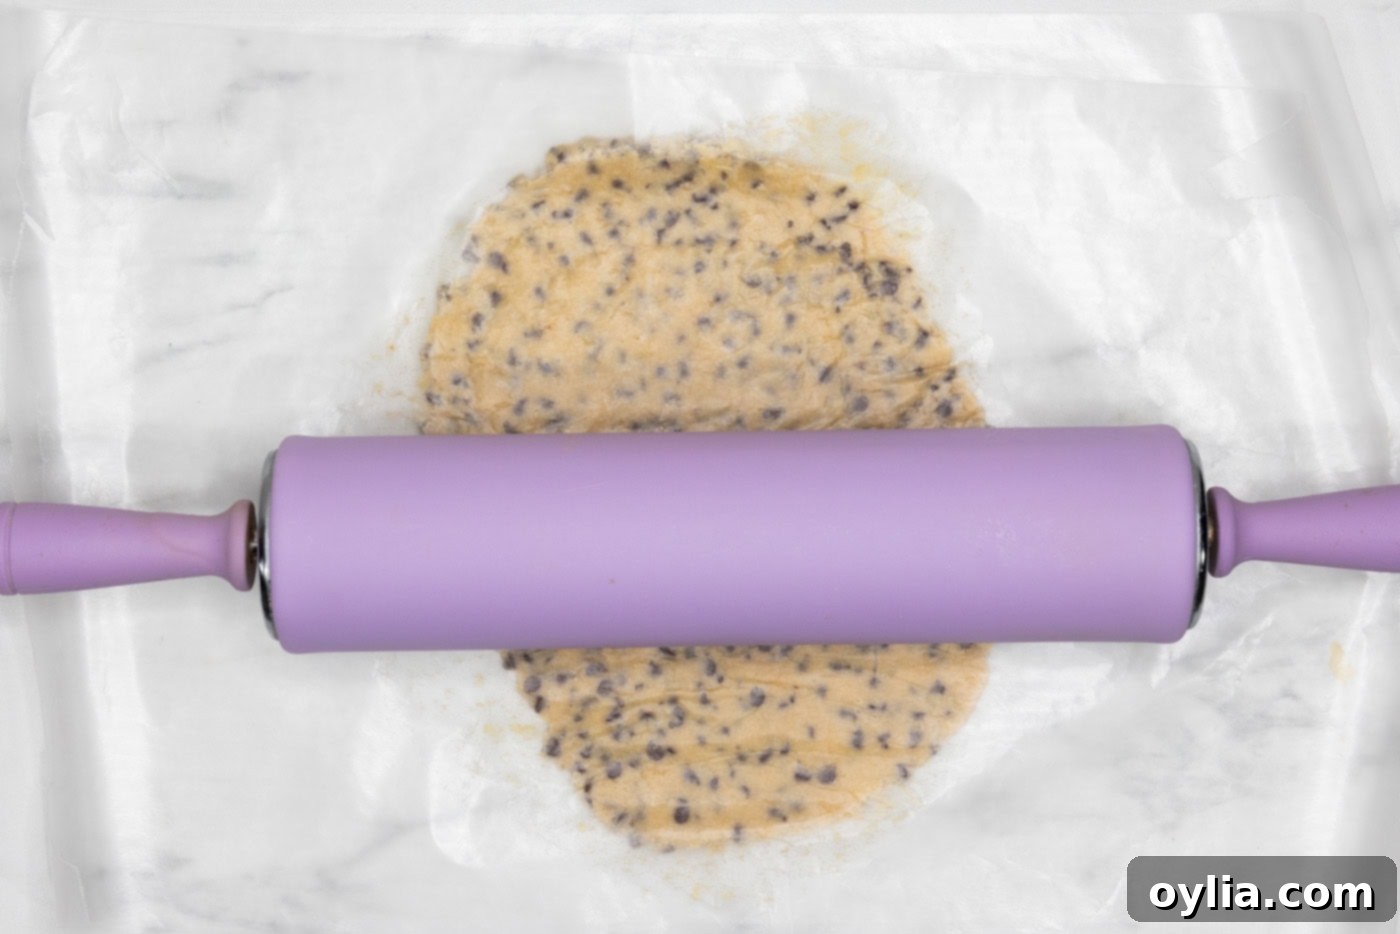
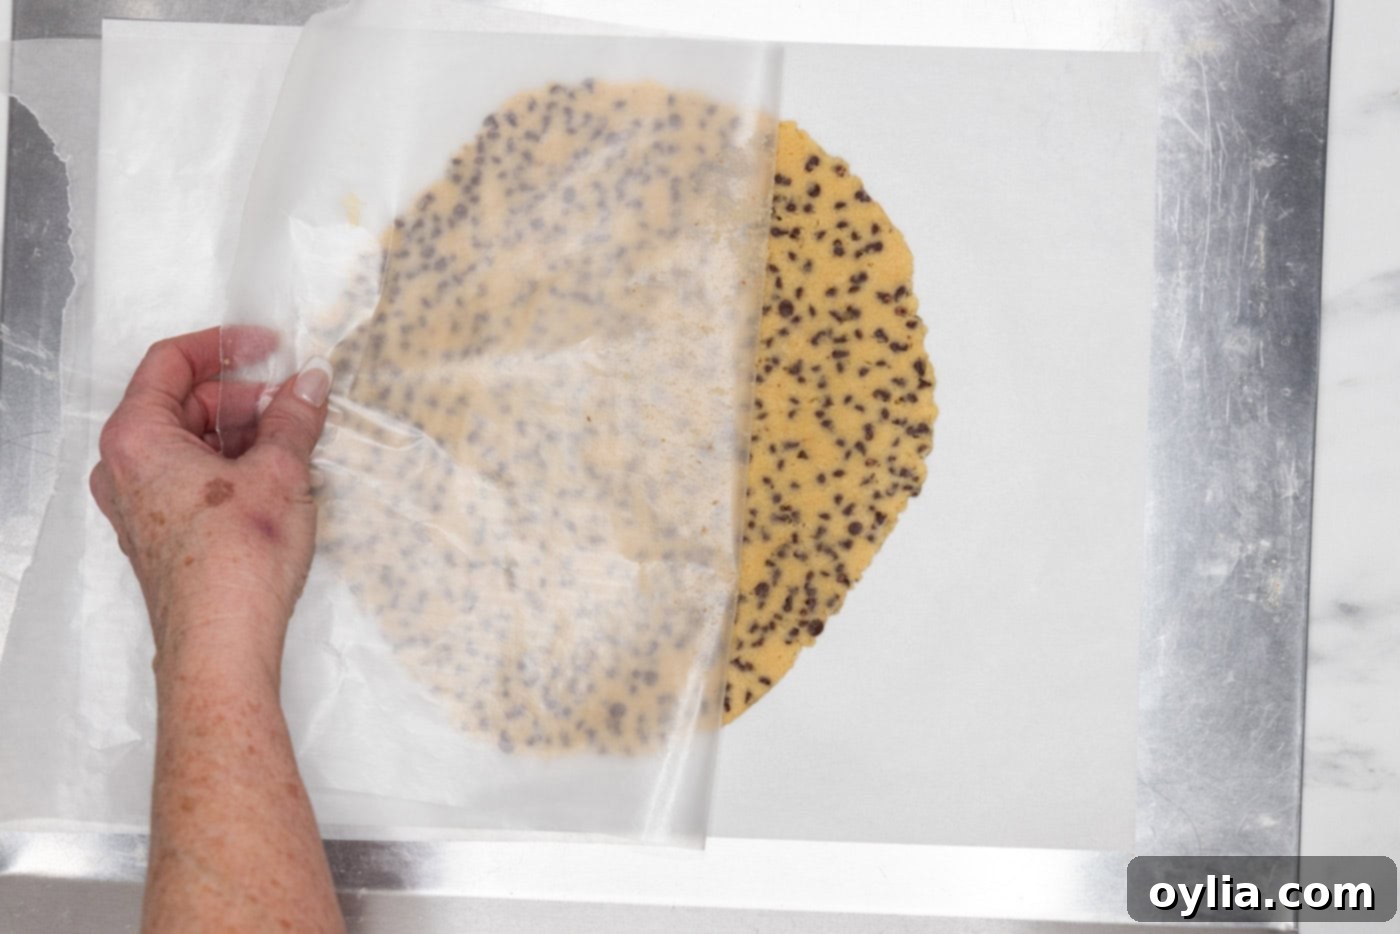
- Weigh the entire batch of dough, then divide it into 4 equal smaller portions. Form each portion into a circular disk. Place each disk between two pieces of wax paper or parchment paper. Using a rolling pin, flatten each disk evenly until the rolling pin just starts to hit the mini chocolate chips, ensuring an even thickness across the cookie. This will give you consistently sized cookies.


- Freeze these flattened cookie circles, separated by sheets of wax paper or parchment to prevent sticking, for at least 2 hours. This chilling step is vital as it prevents the cookies from spreading too much during baking, ensuring they maintain their shape for stacking. You can freeze them for up to a month, making this a great make-ahead step.
- Repeat this entire process for two more batches of cookie dough, so you have a total of 12 frozen cookie discs.
Whipping Up the Velvety Buttercream Frosting
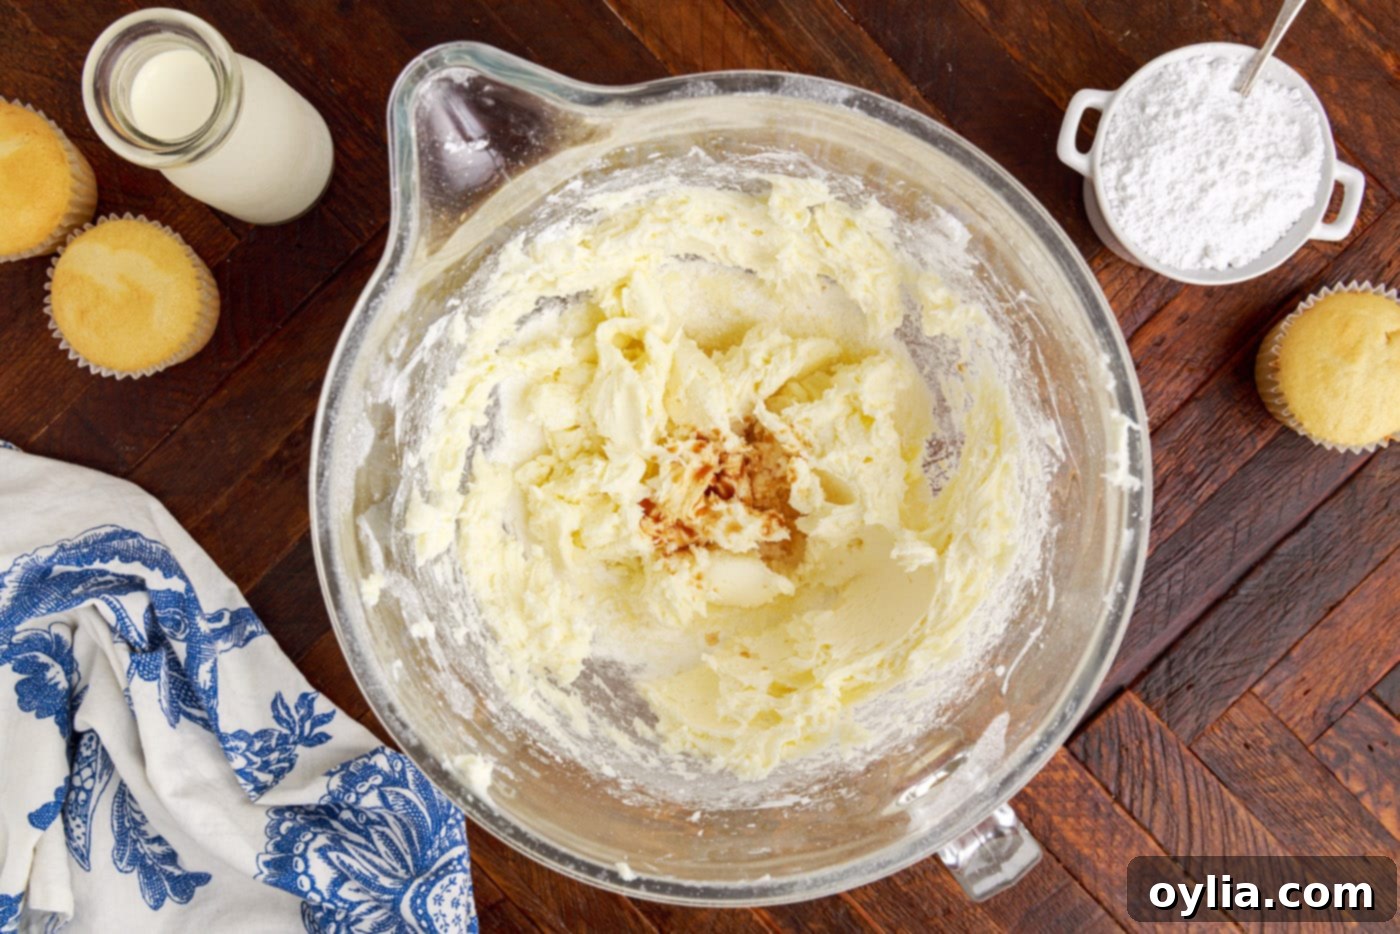
- In the bowl of a stand mixer fitted with the whisk attachment, beat the softened unsalted butter on medium-high speed until it becomes very light and fluffy. This can take about 3-5 minutes and is crucial for a smooth, airy buttercream.
- Gradually add the powdered sugar, starting on a very low speed to avoid a cloud of sugar in your kitchen! Once incorporated, slowly increase the speed to medium.
- Beat in the pure vanilla extract until fully combined.

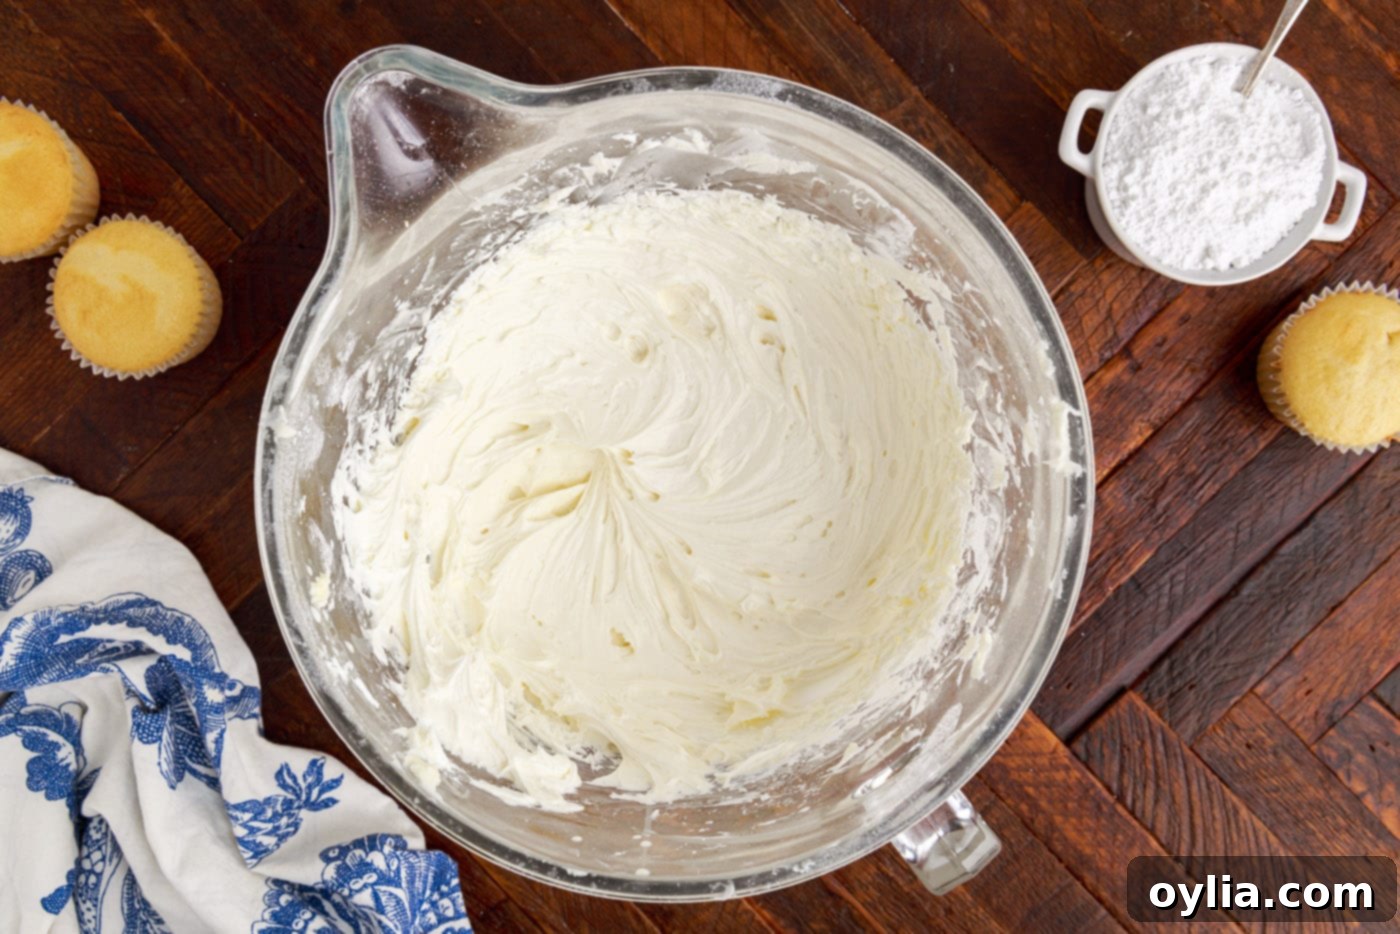
- Pour in the heavy cream and whisk on high speed for about 5 minutes. Stop periodically to scrape down the sides and bottom of the bowl to ensure all ingredients are thoroughly mixed. Continue beating until the buttercream reaches your desired light and fluffy consistency. It should be easily spreadable but hold its shape well.

- Repeat this entire process for 3 more batches of buttercream. You will need a significant amount of frosting for all 12 cookie layers and for piping around the edges, so don’t skimp on this step.
Baking the Perfect Cookie Layers
- Preheat your oven to 375°F (190°C). Line an insulated baking sheet with parchment paper. Insulated sheets help prevent the edges of the cookies from browning too quickly. If you only have one or two, that’s perfectly fine; you’ll just need to bake in more rounds.
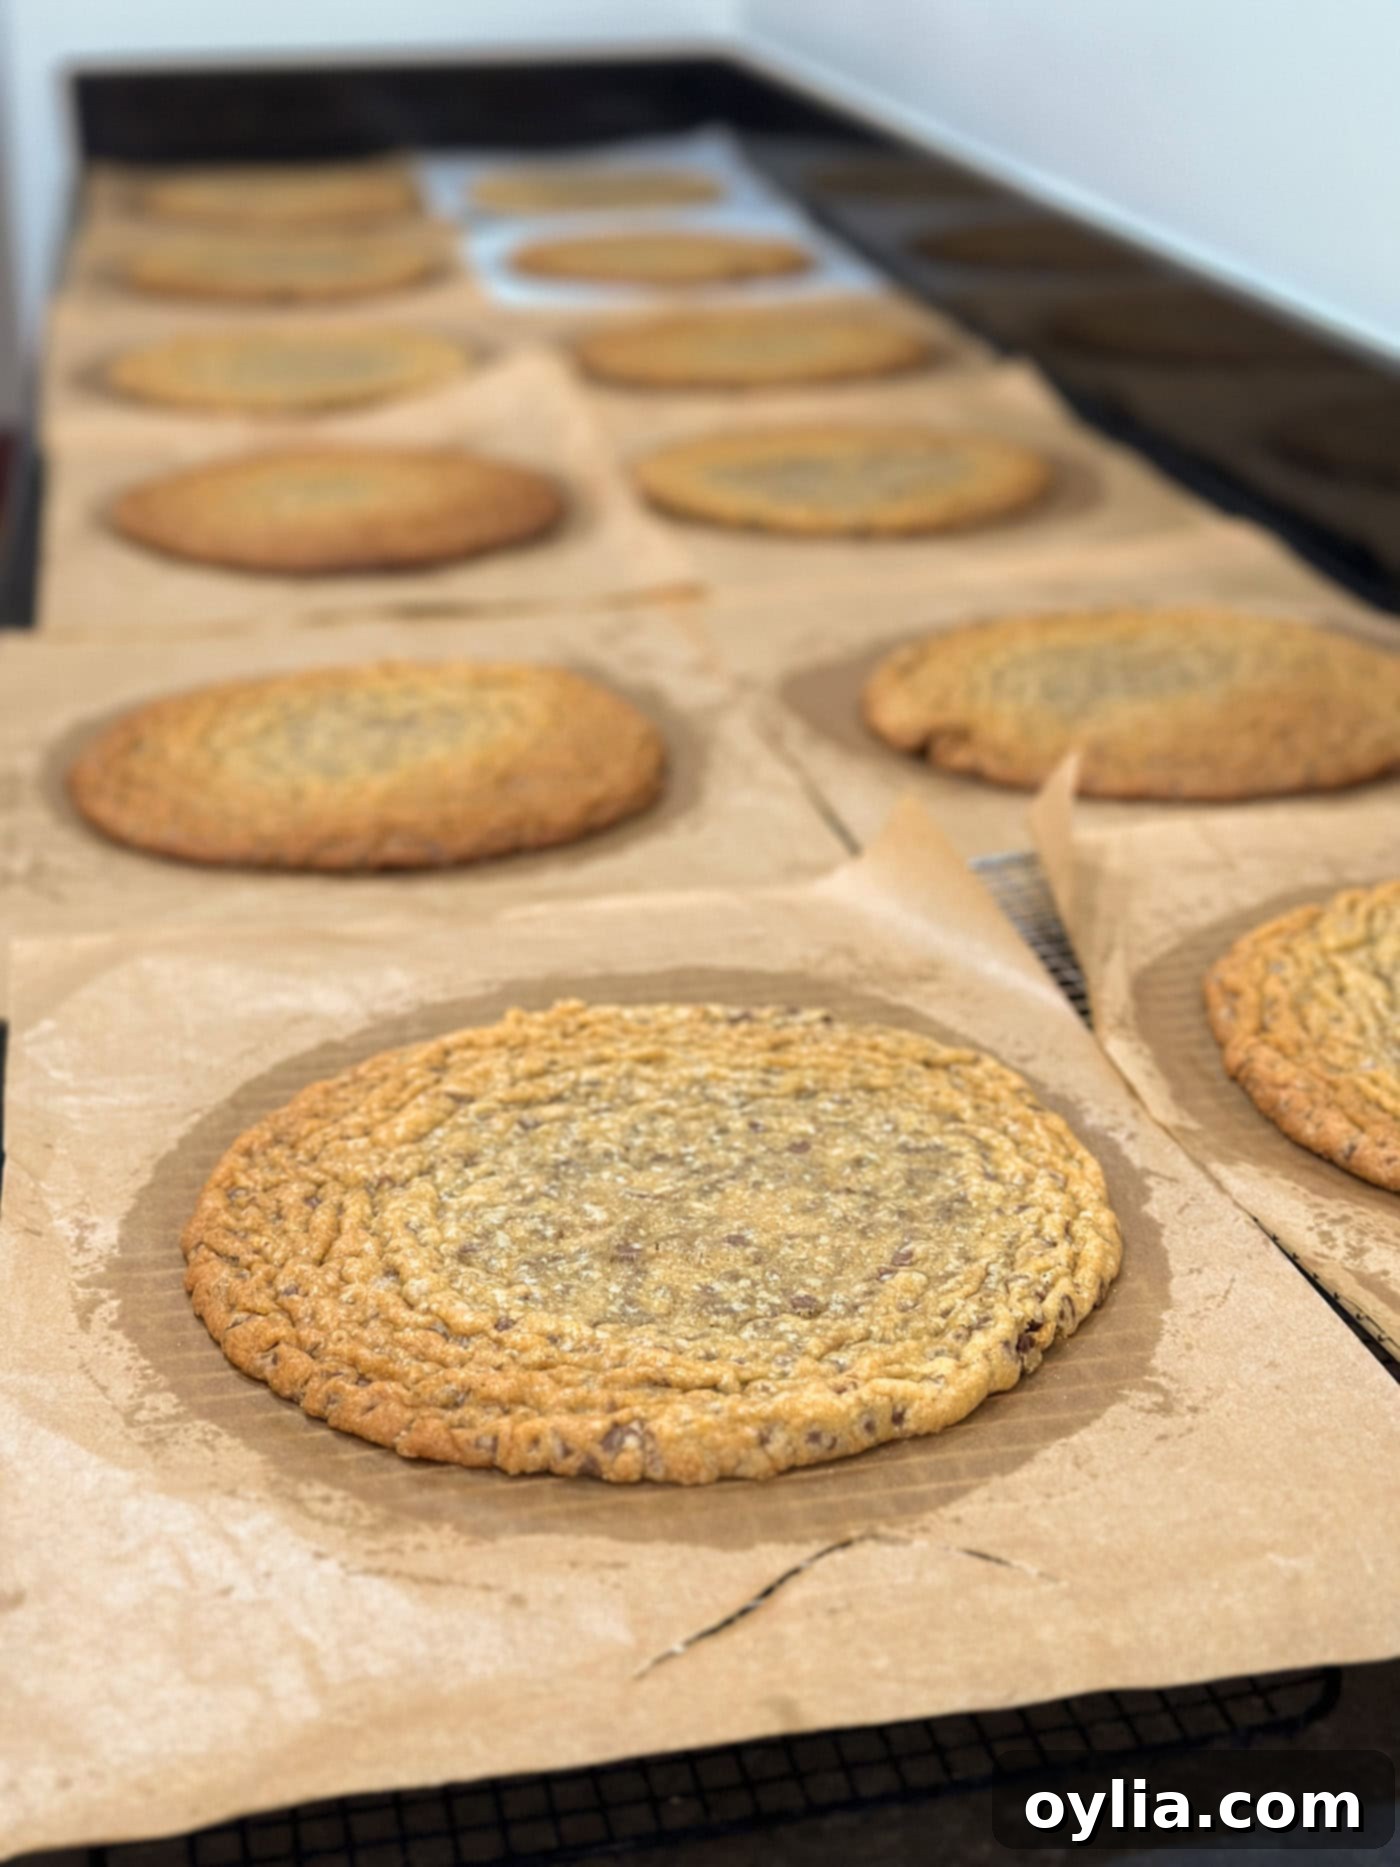
- Bake the cookie layers one at a time, directly from the freezer. This ensures they maintain their shape and do not spread excessively. Bake for 10-12 minutes; I found 11.5 minutes to be just right for a perfectly chewy yet firm cookie. The edges should be lightly golden, and the center still slightly soft.

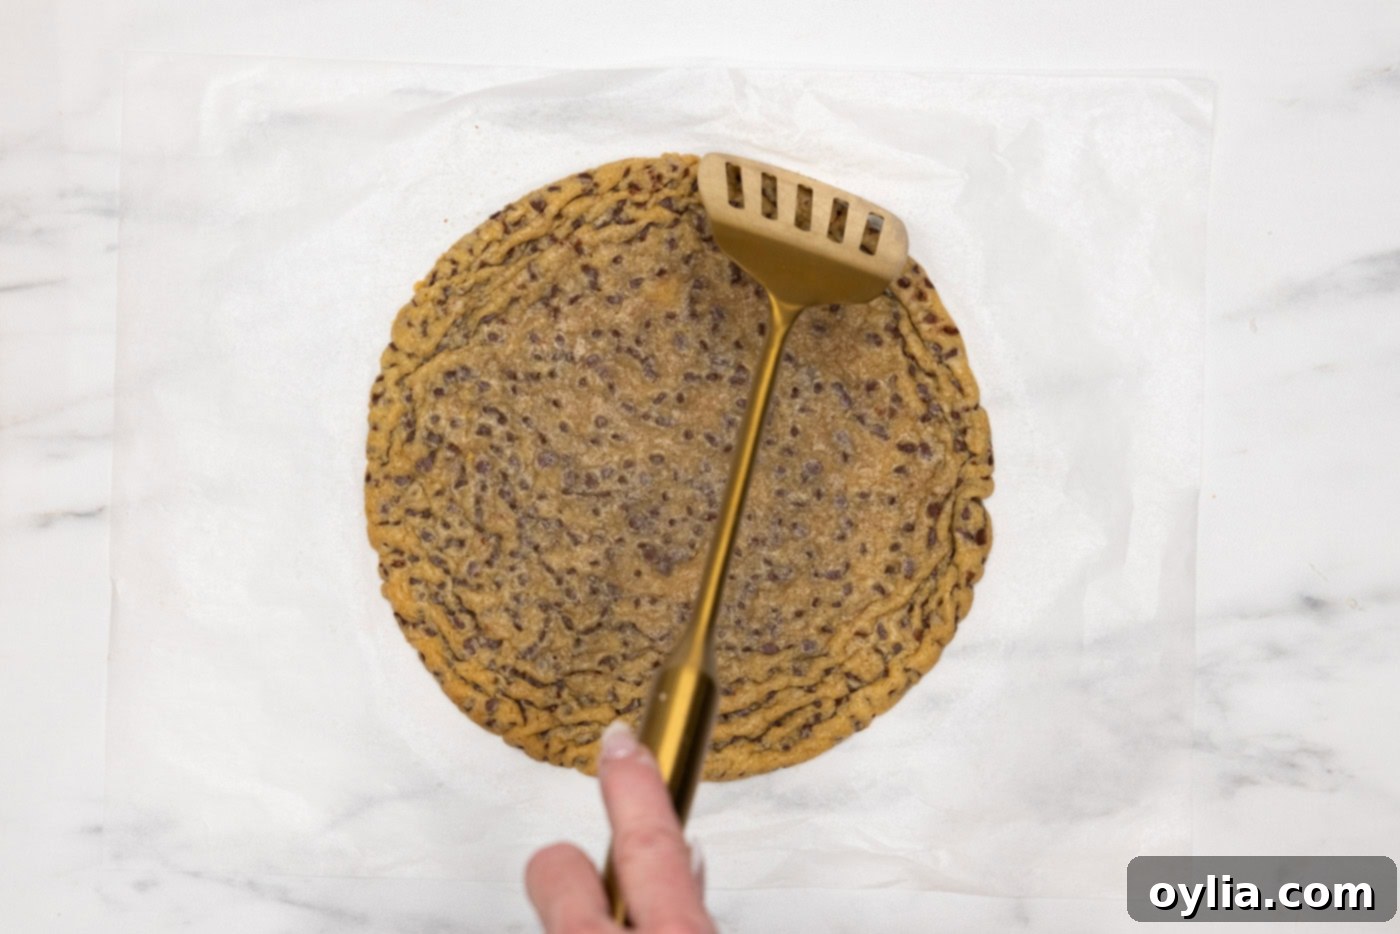
- As soon as you remove the baking sheet from the oven, while the cookie is still hot and pliable, use the edge of a spatula to gently push and form the cookie into a perfect 9-inch circle. This quick shaping ensures uniformly sized layers for a neat tower.

- Carefully slide the parchment paper with the hot cookie onto a wire cooling rack. Allow the cookie to cool completely before handling. Attempting to move or frost a warm cookie will result in crumbling.

- Repeat this baking and shaping process for all remaining cookie layers until you have 12 fully cooled, perfectly circular cookies.
Frosting and Assembling Your Magnificent Cookie Tower
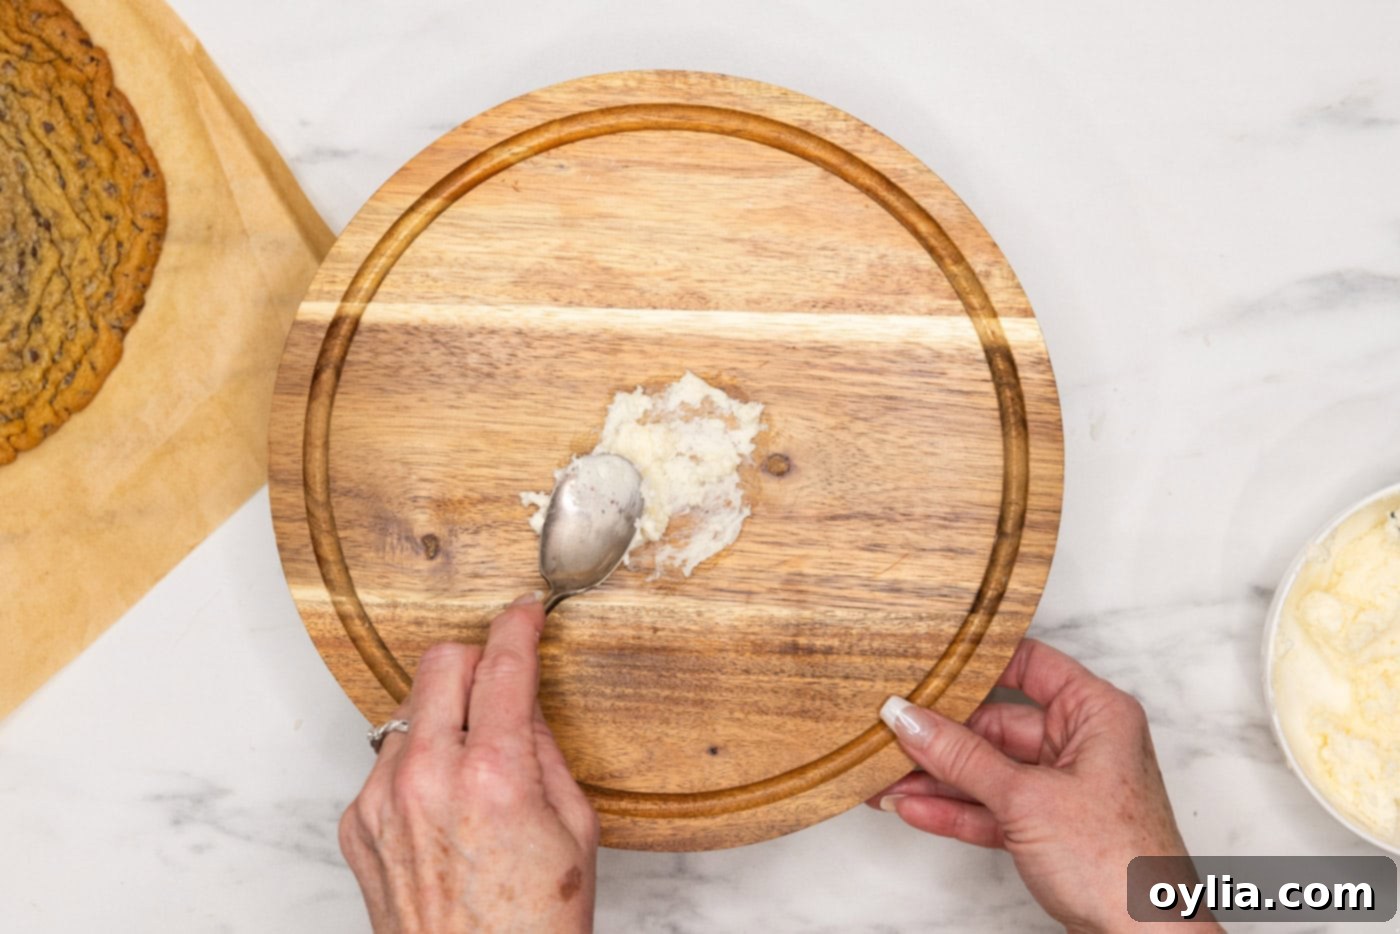
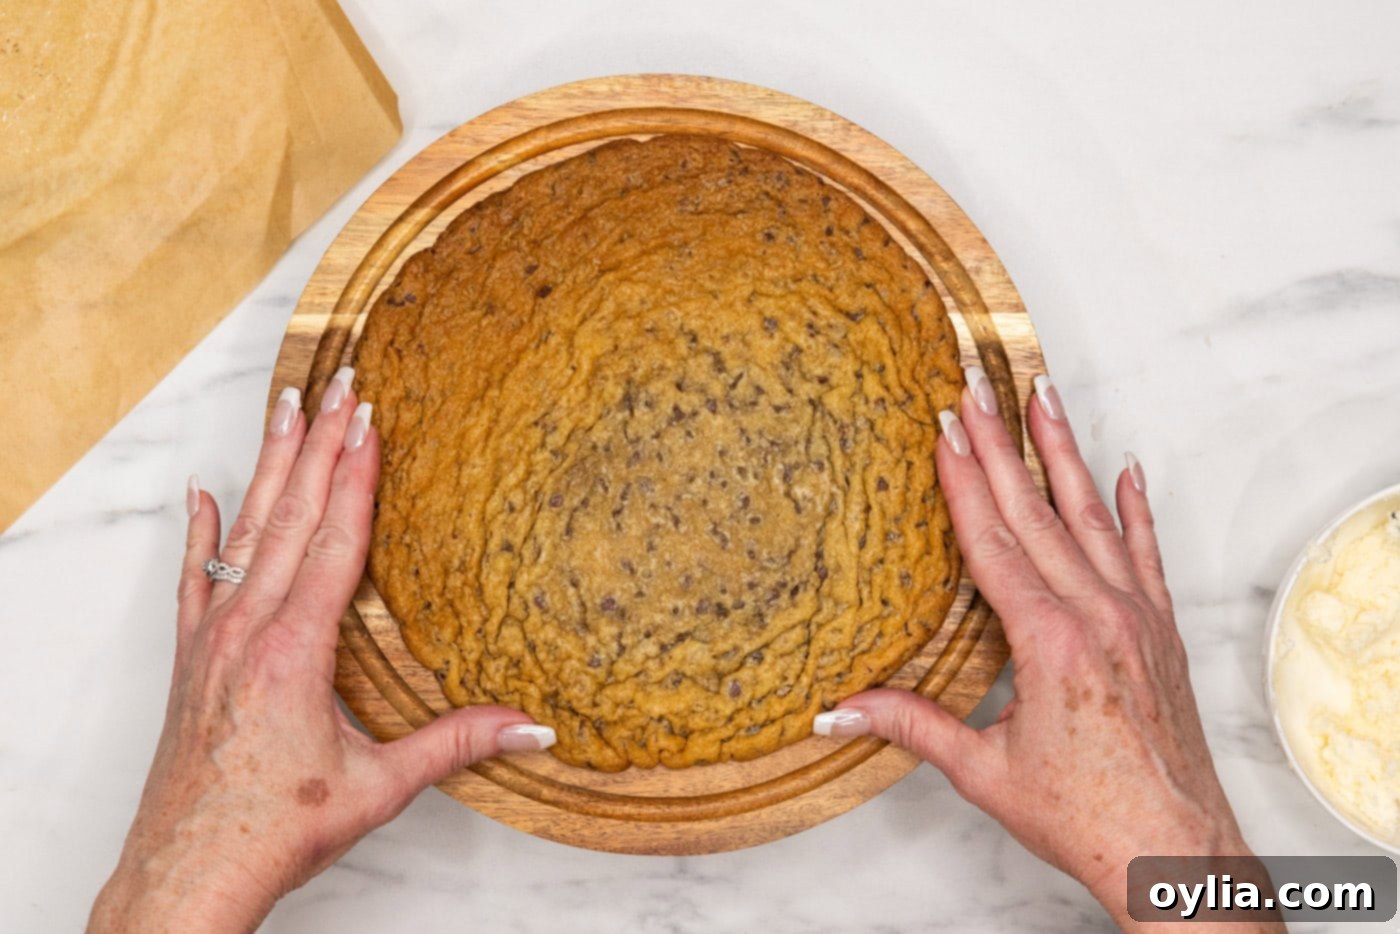
- Begin by placing a small dollop (about a tablespoon) of buttercream frosting in the center of your chosen cake stand or serving plate. This acts as an anchor to prevent the bottom cookie layer from sliding. Carefully place your first cooled cookie layer directly on top of the frosting.


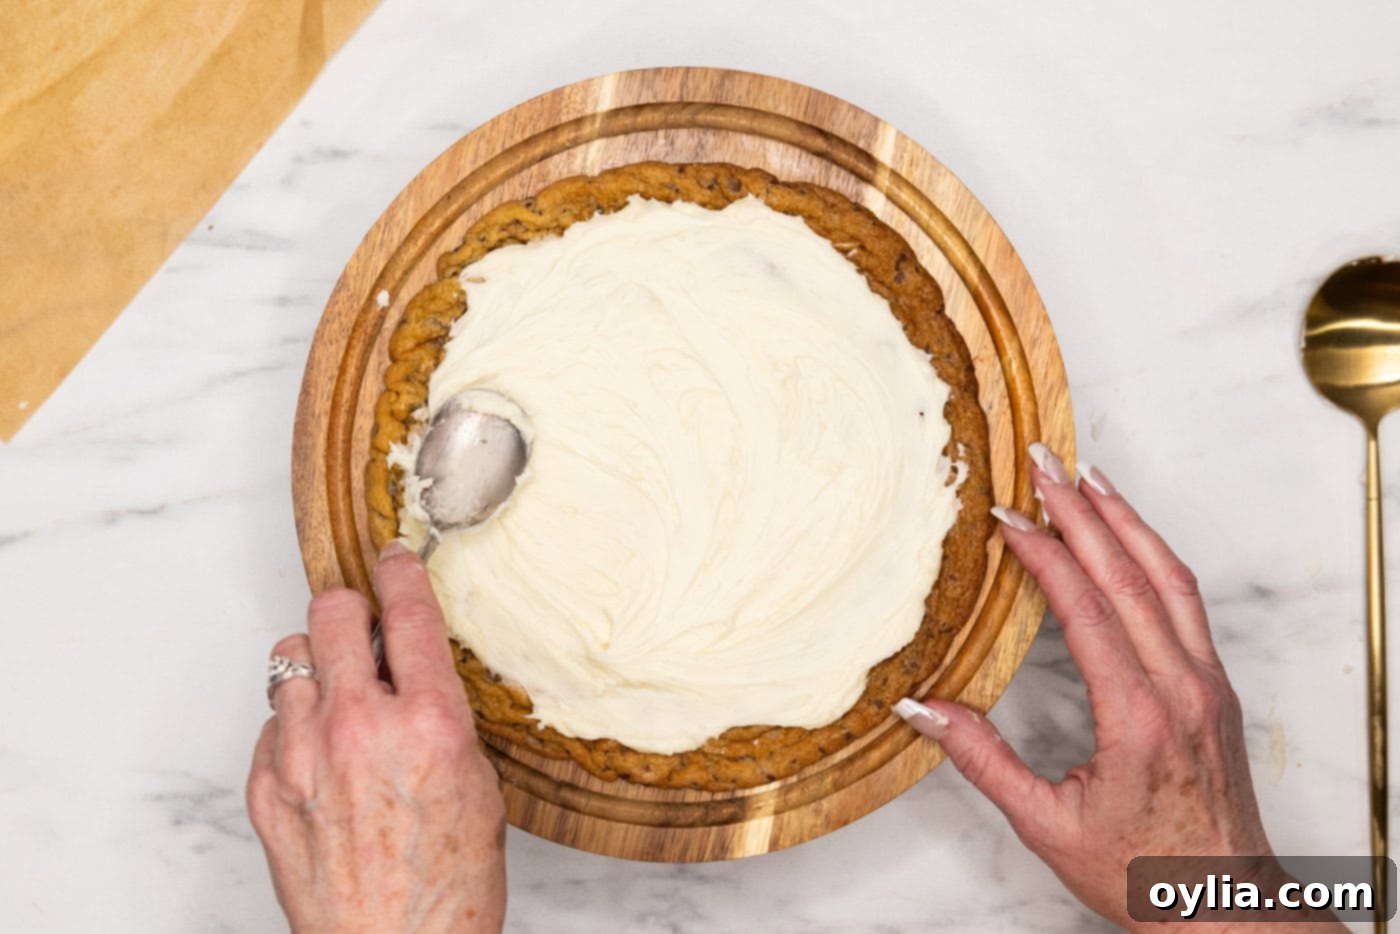
- Scoop about 1 cup of buttercream frosting onto the first cookie layer. Using an offset spatula, spread the frosting almost to the edges, creating an even layer. For a polished look, you can then pipe a decorative border of frosting around the very edge of the cookie.

- Carefully place a second cookie layer on top of the frosted first layer, aligning it as precisely as possible. Repeat the frosting process as described in step 2.
- Now, place the third cookie layer on top of the second frosted layer. For crucial structural support, add a tablespoon of buttercream to the center of this third cookie, then place an 8-inch cardboard cake circle directly on top. The buttercream will help secure the cake circle and prevent it from sliding.
- Pipe buttercream around the edges of the third cookie, creating a border. Add another tablespoon of buttercream to the center of the cardboard cake circle. This will serve as an anchor for your next cookie layer.
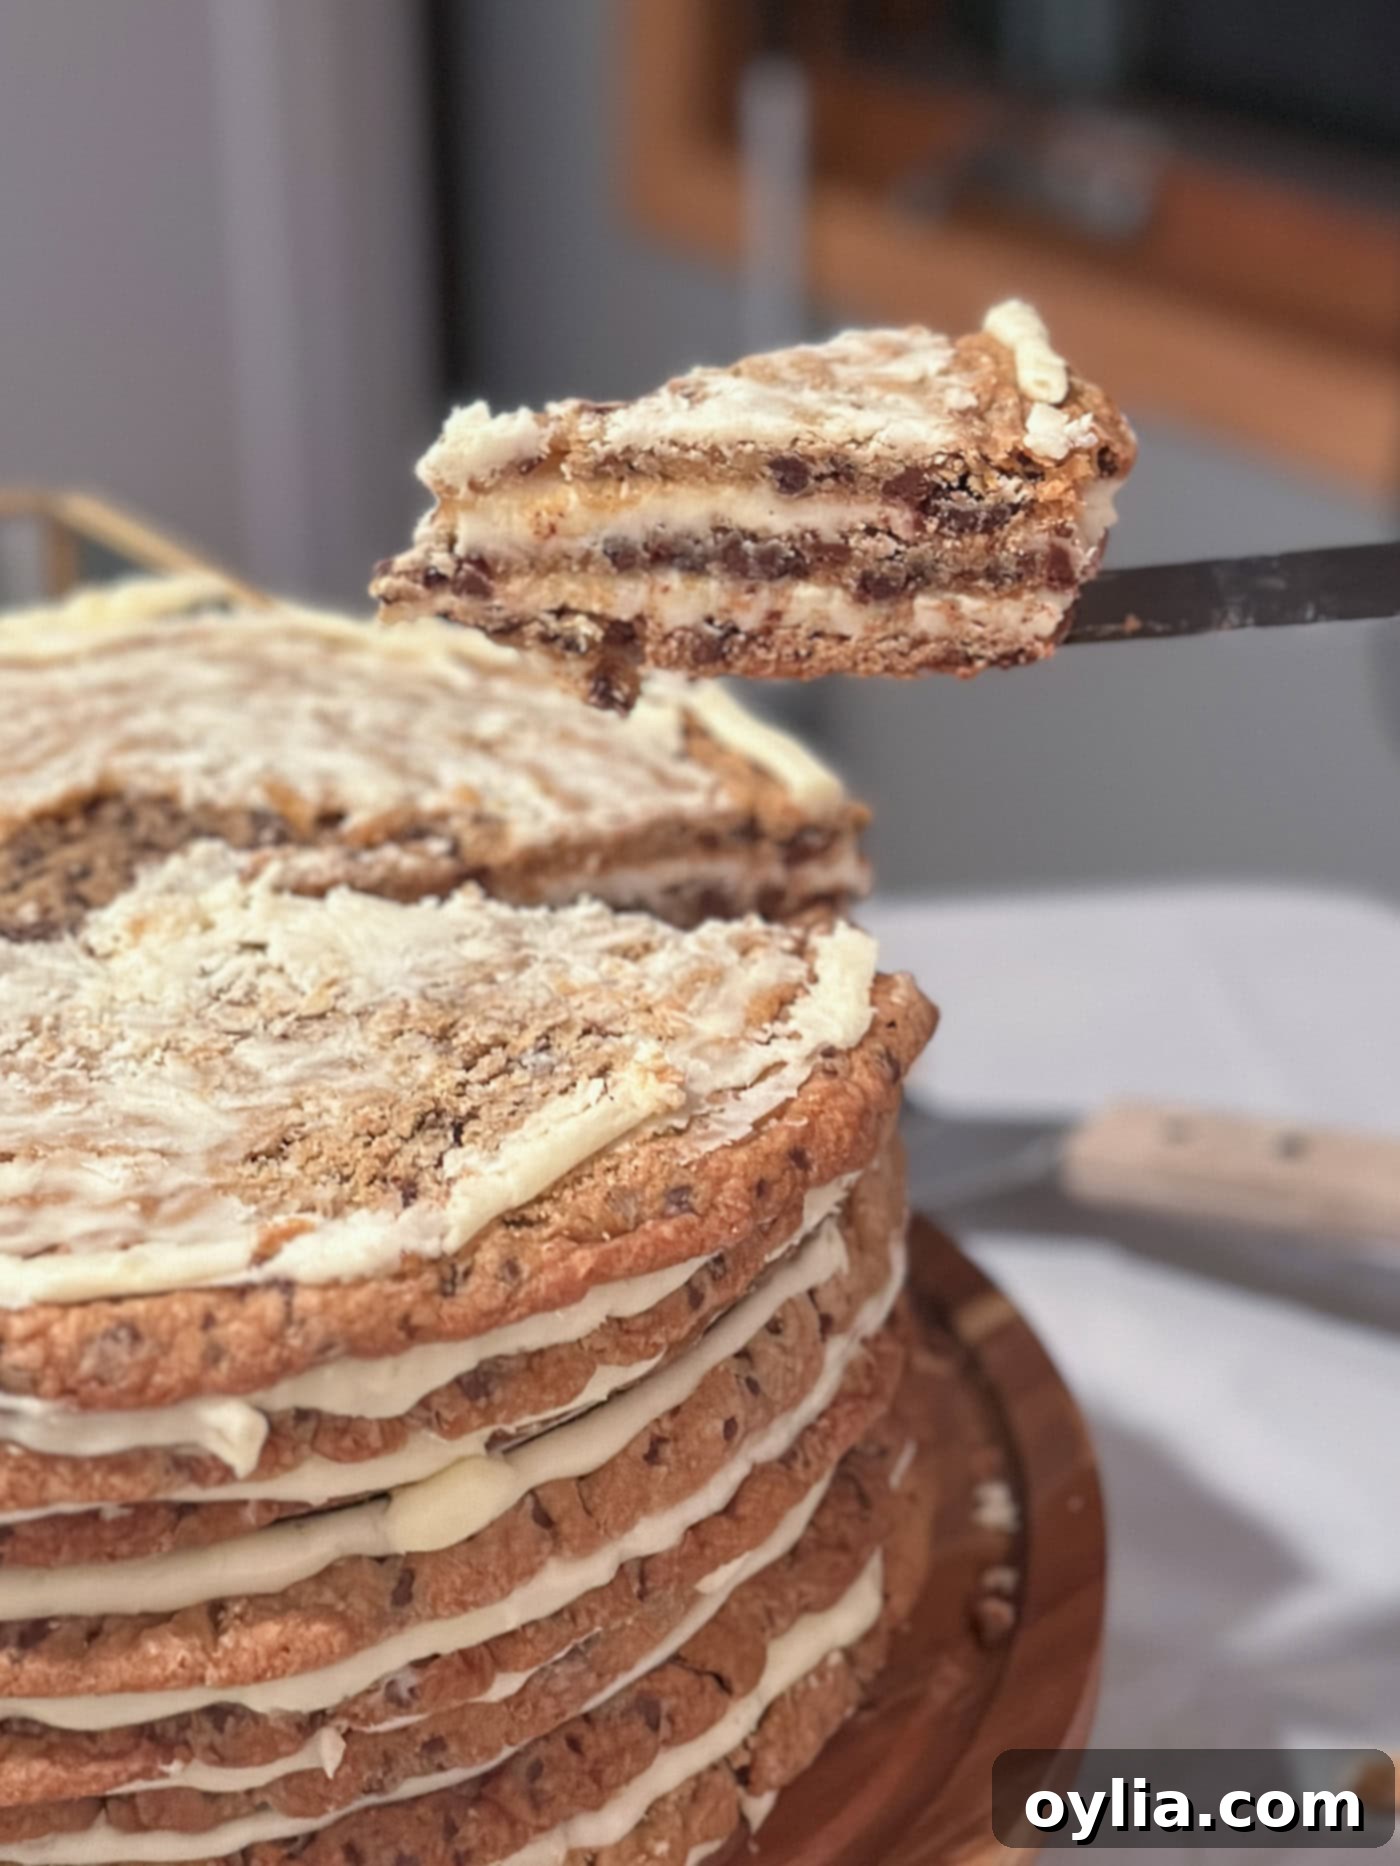
- Place the fourth cookie layer on top of the cake circle and repeat the entire process (frosting, adding cookies, then a cake circle after every three layers). The intention is to have a cardboard cake circle supporting every three layers of cookies. This design allows for easier slicing; you can cut the top tier into wedges, remove the cardboard, and then move on to slice the tier below. This modular approach makes serving a large, tall cookie tower much more manageable.
PRO TIP: The photo below illustrates how one tier has already been removed and sliced, showing the ease of serving the subsequent tiers.

- You will likely have some buttercream left over. Don’t worry, it’s always better to have too much than too little! You can use it for extra decorative piping, a small side treat, or simply enjoy a spoonful (we won’t tell!).
Frequently Asked Questions & Expert Tips for Cookie Tower Success
Absolutely! In fact, I highly recommend preparing the cookie tower a day in advance. This approach significantly reduces stress on the day of your event and allows the frosting to set and the flavors to meld beautifully. If you need to prepare further in advance, it’s best to make the cookie dough batches, form them into discs, and freeze them for up to a month. Then, thaw slightly, bake, and assemble the day before serving. If preparing the assembled tower one day ahead, cover the entire cookie tower loosely but completely with plastic wrap to prevent any air exposure, which can dry out the cookies. Store it at room temperature for optimal cookie softness.
Proper storage is key to maintaining the freshness and chewiness of your cookie tower. For leftovers or if you made it a day ahead, ensure the entire tower is well-covered with plastic wrap. This is crucial to prevent the cookies from drying out and becoming crumbly. Alternatively, you can slice individual wedges and store them in a large zip-top bag or an airtight container. The cookie tower can be stored at room temperature for up to 2 days, or in the refrigerator for up to 4 days. If refrigerated, allow it to come to room temperature for about 30-60 minutes before serving for the best texture.
Transporting such an impressive dessert can be a bit daunting, but with the right precautions, it’s perfectly manageable. It’s best to assemble the tower directly on the cake stand you plan to serve it on. Once assembled, wrap the entire cake stand and tower loosely with several layers of plastic wrap. Place the wrapped tower into a sturdy, large box. To prevent any shifting or damage during transit, surround the cake with soft cushioning materials. Bubble wrap, crumpled grocery bags, towels, or even soft blankets can help fill any gaps and absorb shocks without squishing the delicate frosting. Drive carefully and avoid sudden stops or turns. If traveling a long distance or on a warm day, ensure your car is cool to prevent the buttercream from melting.
Cookie spreading can often be attributed to warm dough or too much leavening. Ensure your cookie dough is thoroughly chilled – freezing the discs for at least 2 hours, or even up to a month, is crucial. Also, double-check your baking soda measurement. If cookies still spread, try increasing your oven temperature by 10-15 degrees F, as a hotter oven can set the edges faster, limiting spread.
Buttercream consistency is key. If your frosting is too soft, it might be too warm. Try refrigerating it for 15-20 minutes, then re-whipping it. If it’s still too soft, you can add a tablespoon or two more of powdered sugar. If it’s too stiff, add heavy cream (or milk) one teaspoon at a time, beating until you reach the desired spreadable consistency. Remember, softened but not melted butter is crucial for the initial step.
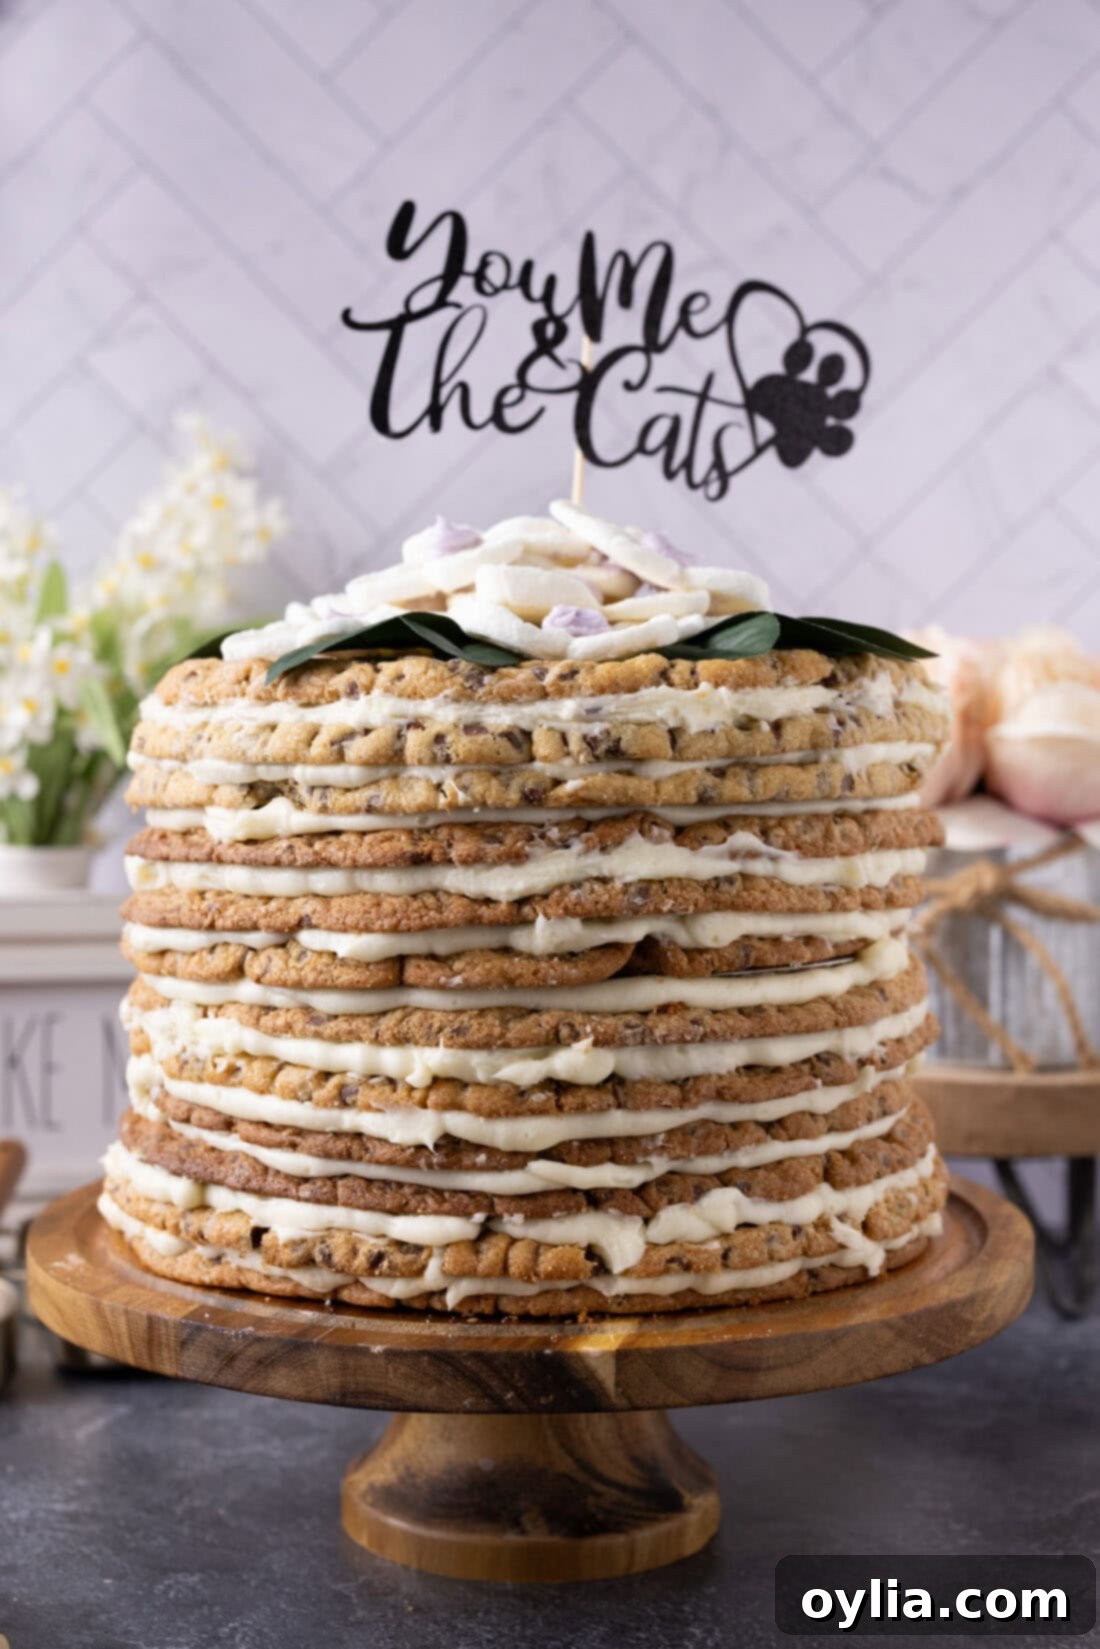
Creative Serving and Decoration Ideas
The beauty of this chocolate chip cookie tower is that it’s inherently impressive, but there are countless ways to customize and decorate it to perfectly match your event’s theme or your personal style. Here are a few ideas to make your cookie tower truly unique:
- Personalized Cake Toppers & Candles: Elevate the celebration with a themed cake topper (e.g., “Finally,” “Happy Birthday,” “Mr. & Mrs.”) or classic birthday candles for a festive touch. Personalized toppers can add a special sentimental value.
- Elegant Buttercream Details: Utilize your leftover buttercream to pipe beautiful dollops, swirls, or shell borders around the perimeter of each cookie layer. This adds a refined, professional finish and extra texture.
- Floral Accents: Adorn the top and around the base of the tower with faux flowers for a reusable decoration, or use fresh flowers for a touch of natural elegance. If using fresh flowers, ensure they are food-safe and consider wrapping the stems with floral tape or plastic wrap before placing them on the dessert.
- Handcrafted Fondant Decorations: For those with experience in fondant work, crafting delicate fondant flowers, leaves, or even small figures can add an exquisite, artistic charm to your cookie tower, making it look even more bespoke.
- Simple & Stunning: Remember, the cookie tower is already a work of art on its own! It’s absolutely fantastic as-is, without any additional toppers or elaborate decorations. The rustic charm of stacked cookies and generous frosting is often all you need to make a statement.
- Drizzles and Sprinkles: For an extra touch of decadence, consider drizzling melted chocolate or caramel sauce over the top layer just before serving. A scattering of colorful sprinkles or extra mini chocolate chips can also add a playful and celebratory feel.
Explore More Delicious Dessert Recipes
If you’ve enjoyed creating and devouring this magnificent cookie tower, you’re in for a treat with more of our beloved dessert recipes. Whether you’re craving classic cakes or other delightful cookie creations, we have something to satisfy every sweet tooth:
- Funfetti Cake: A joyful explosion of color and flavor, perfect for any celebration.
- Chantilly Cake: Layers of delicate cake with fresh berries and fluffy whipped cream frosting.
- Lemon Lush Trifle: A bright and zesty layered dessert that’s refreshingly delicious.
- Skillet Chocolate Chip Cookie: A giant, warm, gooey cookie baked and served right in a skillet.
I love to bake and cook and share my kitchen experience with all of you! Remembering to come back each day can be tough, that’s why I offer a convenient newsletter every time a new recipe posts. Simply subscribe and start receiving your free daily recipes!
Chocolate Chip Cookie Tower
IMPORTANT – There are often Frequently Asked Questions within the blog post that you may find helpful. Simply scroll back up to read them!
Print It
Pin It
Rate It
Save ItSaved!
Ingredients
One Batch of Cookie Dough (x3)
- 2 ¼ cups all purpose flour
- 1 teaspoon baking soda
- 1 teaspoon salt
- 1 cup unsalted butter 2 sticks, softened
- ¾ cup granulated sugar
- ¾ cup brown sugar packed
- 1 teaspoon pure vanilla extract
- 2 large eggs
- 10 ounces semi-sweet mini chocolate chips
One Batch of Buttercream Frosting (x4)
- 1 cup unsalted butter softened. 2 sticks
- 1 teaspoon pure vanilla extract
- 4 ½ cups powdered sugar
- 3 Tablespoons heavy whipping cream
Things You’ll Need
-
Stand mixer or hand mixer
-
Insulated baking sheets
-
Parchment paper
-
Spatula
-
Wire cooling racks
-
3 8-inch cardboard cake circles
Before You Begin
- IMPORTANT – you will need 3 batches of cookie dough (one listed above) and 4 batches of buttercream (one listed above). You will not be able to make 3 batches of cookie dough in one bowl, it’s easiest to separate them and work in batches. The listed ingredients above are for ONE batch of cookie dough and ONE batch of frosting.
- I prefer to make the buttercream when I’m getting ready to assemble the cake. I don’t like to refrigerate it because it starts to get hard to spread.
Instructions
Making the Cookie Dough
-
Make 3 separate batches of cookie dough. Instructions for ONE batch follows.
-
Combine the flour, baking soda, and salt in a small mixing bowl and set aside.2 1/4 cups all purpose flour, 1 teaspoon baking soda, 1 teaspoon salt
-
In a large bowl, beat the butter, granulated sugar, brown sugar, and vanilla extract with a hand mixer or stand mixer.1 cup unsalted butter, 3/4 cup granulated sugar, 3/4 cup brown sugar, 1 teaspoon pure vanilla extract
-
Add the eggs, one at a time, beating well after each addition.2 large eggs
-
Slowly add in the flour mixture until combined. Stir in mini chocolate chips.10 ounces semi-sweet mini chocolate chips
-
Weigh the dough then divide into 4 smaller batches. Form each smaller batch into a circle. Flatten between 2 pieces of wax paper or parchment paper, rolling until the rolling pin is hitting the mini chocolate chips.
-
Freeze circles, separated between sheets of wax paper or parchment, for 2 hours or up to a month.
-
Repeat for 2 more batches.
Making the Buttercream
-
Beat softened butter in the bowl of a stand mixer using the whisk attachment until light and fluffy.1 cup unsalted butter
-
Add in powdered sugar. Mix slowly, gradually increasing the speed so that the powdered sugar stays in the mixing bowl.4 1/2 cups powdered sugar
-
Beat in vanilla extract.1 teaspoon pure vanilla extract
-
Add the heavy cream and whisk on high speed. Scrape down the sides of the bowl, beat until desired consistency is achieved (about 5 minutes).3 Tablespoons heavy whipping cream
-
Repeat for 3 more batches.
Baking the Layers
-
Preheat oven to 375 F. Line an insulated baking sheet with parchment paper. I used 4 total, but if you only have 1 or 2 that’s fine as well.
-
Bake the cookie layers, one at a time, straight from freezer. Bake for 10-12 minutes, mine were good at 11.5 minutes.
-
As soon as you remove the cookie sheet from the oven, use the edge of the spatula to form the hot cookie into a 9-inch circle.
-
Slide parchment with cookie onto a cooling rack and cool completely.
-
Repeat for remaining cookie layers.
Frost and Assemble
-
Add a tablespoon of buttercream to the center of your cake plate. Place a cookie layer on the cake plate.
-
Spread 1 cup of the buttercream on top of the first cookie and spread almost to the edges. Pipe frosting around the cookie along the edge.
-
Place second cookie on top of that and repeat.
-
Place third cookie on top of that. Add a tablespoon of buttercream in the center of that cookie and place a cardboard cake circle on top of that. This keeps the cake circle from sliding.
-
Pipe buttercream on the edges of the cookie. Add a tablespoon of buttercream to the center of the cake circle.
-
Place fourth cookie on top and repeat the above process. You want a cake circle every three layers. This allows you to cut the cake into 3 layer wedges, then remove the cake circle to move down to the next tier.
-
You will probably have buttercream left over.
Expert Tips & FAQs
- Make Ahead – I recommend making the cookie tower a day in advance. However, any longer than that I would suggest preparing the cookie dough batches and freezing them until you are ready to bake and serve. If you are preparing it a day ahead of time, cover the entire cookie tower in plastic wrap so that no air penetrates and store at room temperature.
- Storing – Store the leftover chocolate chip cookie tower wrapped with plastic wrap, or slice it and put in a large ziptop bag or air-tight container. Store at room temperature for up to 2 days or in the refrigerator for up to 4. Your cookie tower needs to be covered well so that the cookies do not dry out and become crumbly.
- Transporting – Transporting the cookie tower can be a little tricky, which is why it’s best to prepare the tower on a cake stand. Wrap the entire cake loosely in plastic wrap (including the stand) and place it in a large box. Surround the cake with bubble wrap, grocery bags, or any kind of soft material to help cushion it without squishing.
Nutrition
The recipes on this blog are tested with a conventional gas oven and gas stovetop. It’s important to note that some ovens, especially as they age, can cook and bake inconsistently. Using an inexpensive oven thermometer can assure you that your oven is truly heating to the proper temperature. If you use a toaster oven or countertop oven, please keep in mind that they may not distribute heat the same as a conventional full sized oven and you may need to adjust your cooking/baking times. In the case of recipes made with a pressure cooker, air fryer, slow cooker, or other appliance, a link to the appliances we use is listed within each respective recipe. For baking recipes where measurements are given by weight, please note that results may not be the same if cups are used instead, and we can’t guarantee success with that method.
