Ultimate Indulgence: The Most Decadent Layered Slutty Brownies Recipe
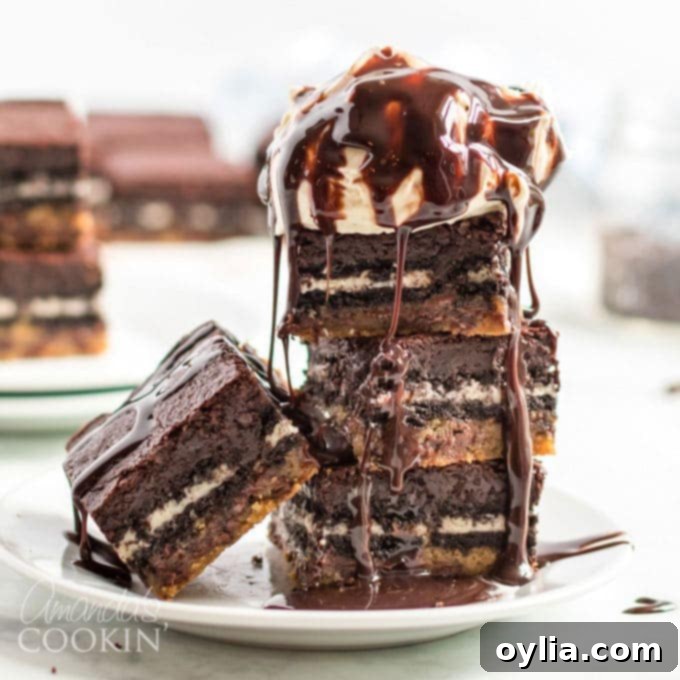
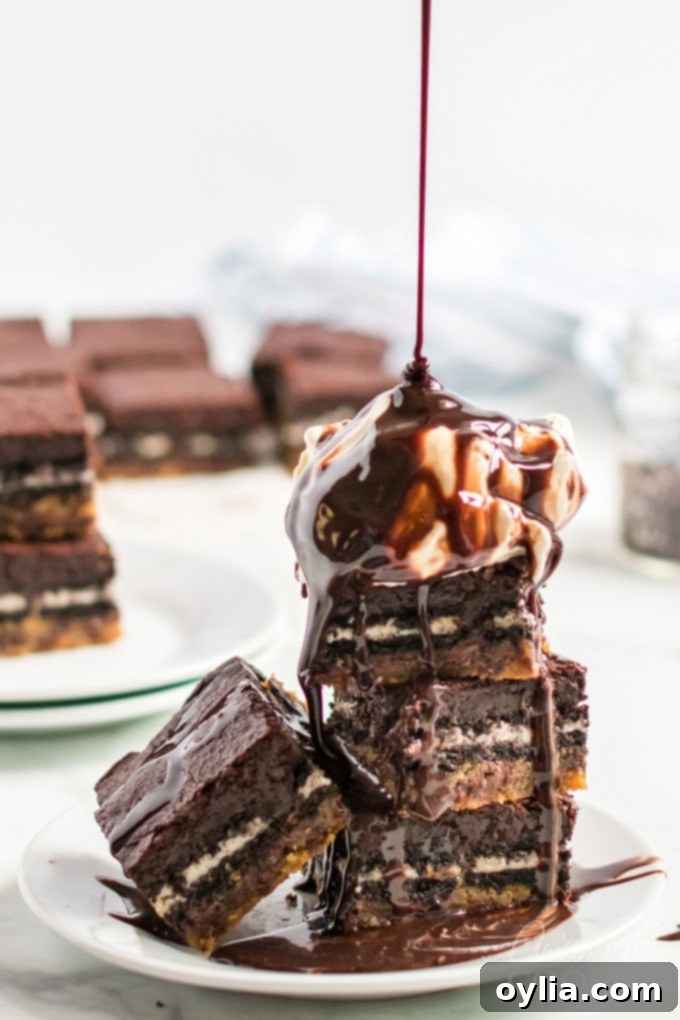
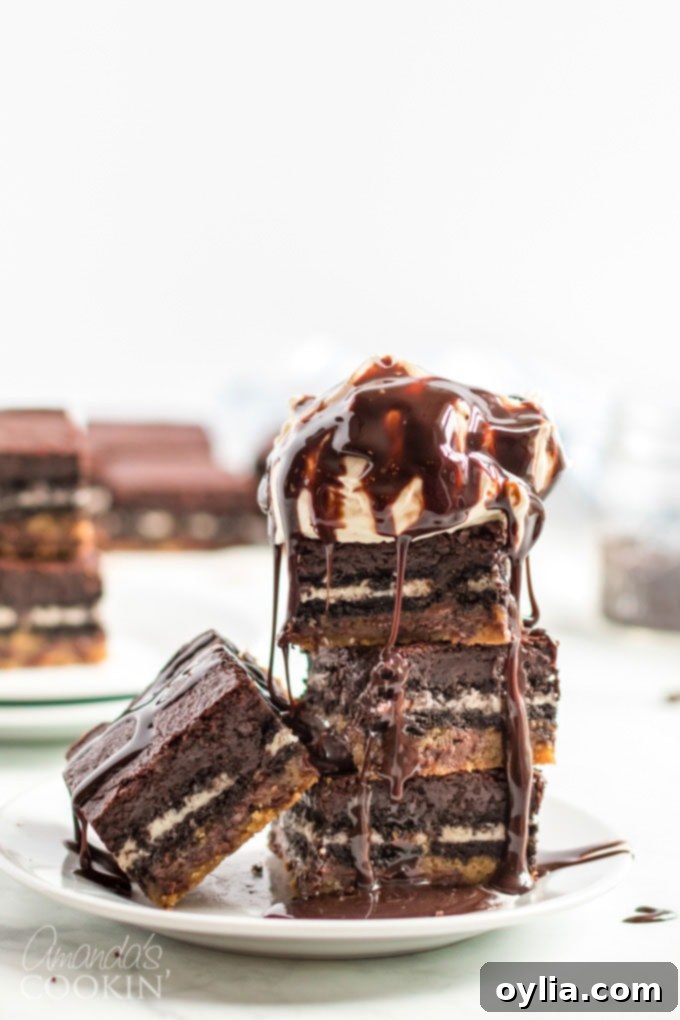
Prepare your taste buds for an unforgettable journey into pure indulgence! Imagine this: luscious chocolate chip cookie dough, perfectly chewy and sweet, forms the foundation. On top, a delightful layer of crisp, classic Oreo cookies adds a delightful crunch and iconic flavor. And finally, everything is crowned with a rich, fudgy brownie batter, baking together into a symphony of textures and tastes. If that description alone isn’t enough to make your mouth water, picture serving these magnificent bars warm, topped with a generous scoop of your favorite vanilla ice cream and a luxurious drizzle of chocolate syrup. This isn’t just a dessert; it’s an experience – quite possibly the most decadent treat you’ll enjoy all year!
Are you a true chocolate lover? You absolutely must try our Chocolate Lasagna. It’s a dream come true for chocoholics and a guaranteed showstopper at any gathering, always met with rave reviews!
Decoding Slutty Brownies: The Unapologetically Delicious Layered Treat
When we say this dessert is truly over-the-top, we mean it! Slutty Brownies are not your average weekly indulgence. These rich, multi-layered bars are designed for those moments when you want to make a statement, when you crave something truly special and memorable. Think birthdays, Father’s Day celebrations, or any occasion that calls for an unapologetically decadent treat. This recipe allows you to completely dive into a world of chocolatey goodness, combining three beloved desserts into one glorious creation.
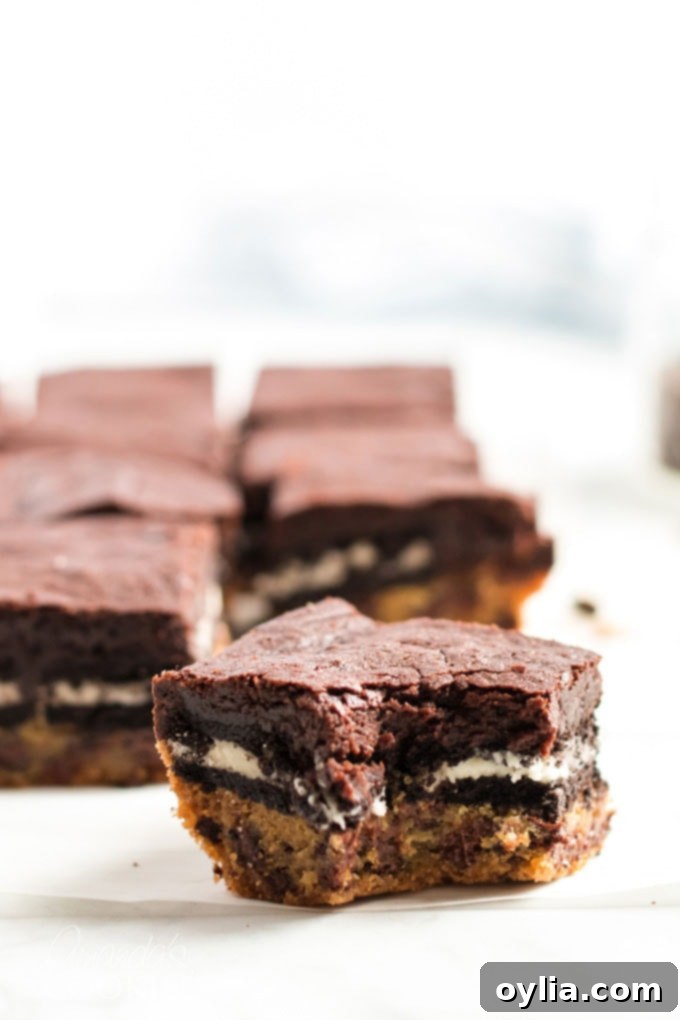
The magic of these layered brownie bars lies in their harmonious combination: a bottom layer of soft, chewy chocolate chip cookie dough, a middle layer of crunchy, creamy Oreo cookies, and a top layer of rich, dense fudgy brownies. While we provide detailed instructions for making both the brownie batter and cookie dough from scratch – which we highly recommend for the best flavor and texture – you can certainly opt for convenience. Feel free to use your favorite store-bought refrigerated cookie dough and a quality box of brownie mix to save time, without sacrificing too much on the delicious outcome. The choice is yours, but the result will always be spectacular!
Essential Ingredients for Your Layered Slutty Brownies
Crafting these incredible layered brownies requires a few pantry staples, ensuring each layer contributes to the overall exquisite flavor and texture. For the fudgy brownie layer and the chewy chocolate chip cookie dough, quality ingredients make all the difference.
- Unsalted Butter: Essential for both the brownie and cookie dough, providing rich flavor and perfect texture. Using unsalted allows you to control the salt content.
- Granulated Sugar & Brown Sugar: A blend of sugars ensures the brownies are moist and fudgy, while the cookie dough achieves that classic chewy yet slightly crisp edge.
- Unsweetened Cocoa Powder: The key to a deep, intense chocolate flavor in your brownie layer. Opt for a good quality cocoa for the best results.
- All-Purpose Flour: The structural backbone for both your cookie and brownie layers.
- Kosher Salt & Table Salt: A touch of salt enhances all the sweet flavors, balancing the richness.
- Baking Soda & Baking Powder: These leavening agents give your cookie dough the right rise and chewiness.
- Vanilla Extract: Pure vanilla extract is crucial for adding warmth and depth to both chocolate and cookie flavors. Don’t skimp on quality!
- Large Eggs: Binds the ingredients, adds moisture, and contributes to the structure of both batters.
- Oreo Cookies (regular or double stuffed): The star of the middle layer! Regular or double stuffed work equally well; double stuffed offers an extra creamy crunch.
- Miniature Semi-Sweet Chocolate Chips: These tiny chips melt beautifully throughout the cookie dough, ensuring chocolate in every bite.
Helpful Kitchen Tools for Perfect Layered Brownies
Having the right tools on hand will make the baking process smooth and enjoyable. Here’s what you’ll need to assemble these magnificent treats:
- Medium-heavy bottomed saucepan: Ideal for melting butter and combining brownie ingredients evenly.
- Whisk: Essential for thoroughly mixing ingredients, especially in the brownie batter.
- Electric stand mixer or hand mixer: Perfect for creaming butter and sugars for the cookie dough, ensuring a light and fluffy base.
- Mixing bowl: For preparing your cookie dough and handling various ingredients.
- Rubber spatula: Great for scraping down the sides of bowls and gently folding in chocolate chips.
- 9×9 baking pan: The perfect size for these layered bars, ensuring adequate thickness for each layer.
- Parchment paper: Crucial for easy removal of the baked brownies from the pan, preventing sticking.
Crafting Your Slutty Brownies: Step-by-Step Guide
Patience is a virtue, especially when it comes to these incredibly gooey brownies! While the aroma filling your kitchen will be irresistibly tempting, it is absolutely crucial to resist cutting into these beauties immediately after they emerge from the oven. These layered bars need ample time to set up properly. Cutting them too soon will result in a delicious, but messy, gooey disaster. Allow them to rest on a cooling rack for a minimum of 2 hours, or even longer, for perfectly structured, clean-cut squares that hold their shape beautifully.
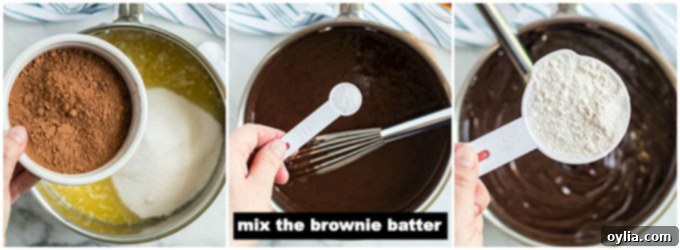
First, Prepare the Fudgy Brownie Batter:
- In a medium-heavy bottomed saucepan, melt the unsalted butter over medium-high heat. Once the butter is completely melted, add the granulated sugar and unsweetened cocoa powder. Stir well to combine these ingredients until a thick, dark paste forms.
- Remove the saucepan from the heat. Add the Kosher salt, pure vanilla extract, and large eggs. Continuously whisk the mixture until the eggs are fully incorporated and the batter is smooth and glossy. This quick whisking helps to emulsify the batter, leading to a fudgier brownie.
- Finally, gently fold in the all-purpose flour. Mix just until no dry streaks of flour remain. Be careful not to overmix, as this can lead to a tougher brownie. Set this rich brownie batter aside while you prepare the next layer.
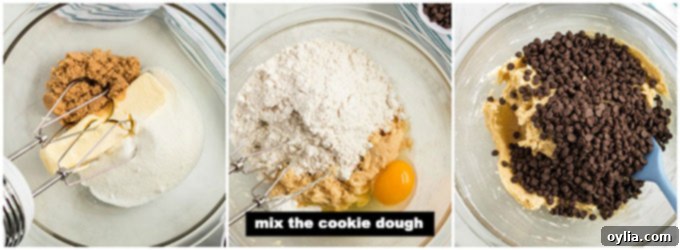
Next, Prepare the Chewy Chocolate Chip Cookie Dough:
- In the bowl of an electric stand mixer (or using a hand mixer), cream together the softened unsalted butter, brown sugar, and granulated sugar until the mixture is light and fluffy. This can take 2-3 minutes.
- Add the large egg and pure vanilla extract, mixing until just combined. Make sure to scrape down the sides of the mixing bowl with your rubber spatula to ensure all ingredients are evenly incorporated.
- In a separate bowl, whisk together the all-purpose flour, table salt, baking soda, and baking powder. Gradually add these dry ingredients to the wet ingredients in the mixer, mixing on low speed until everything is just incorporated. Again, avoid overmixing.
- Remove the bowl from the mixer and, using your rubber spatula, gently fold in the miniature semi-sweet chocolate chips. Distribute them evenly throughout the dough. Set this delicious cookie dough aside.
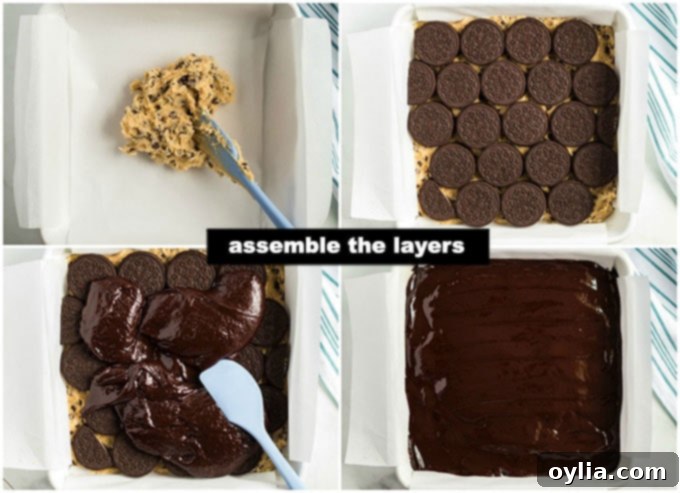
Now, Let’s Assemble the Delicious Layers:
- Preheat your oven to 350 degrees F (175 degrees C). Line the bottom and sides of a 9×9 inch baking pan with parchment paper. It’s highly recommended to leave a generous overhang on all sides; these “handles” will make it incredibly easy to lift the entire batch of brownies out of the pan once cooled.
- Evenly spread the chocolate chip cookie dough into the prepared pan. Press it down firmly with a fork or your fingers to create a uniform bottom layer. Ensure it reaches all the way to the edges.
- Carefully arrange a single layer of Oreo cookies directly on top of the cookie dough. Use as many as will fit snugly, covering the entire surface. We found that 21 cookies typically fit, sometimes requiring one broken in half to fill any gaps perfectly.
- Gently pour and spread the rich brownie batter over the layer of Oreos. Take your time to ensure the brownie batter completely covers the cookies from edge to edge. A rubber spatula works well for this, carefully smoothing it out without disturbing the Oreo layer too much.
Finally, Bake Them to Perfection:
- Bake the layered brownies for 35-40 minutes. To test for doneness, insert a toothpick into the center of the pan. The toothpick should come out mostly clean, with perhaps a few moist crumbs attached. If it comes out with wet batter, continue baking for a few more minutes.
- Once baked, immediately transfer the pan to a wire cooling rack and allow the brownies to cool completely for at least two hours. This step is crucial for the layers to set and for the brownies to achieve their perfect fudgy, yet structured, consistency.
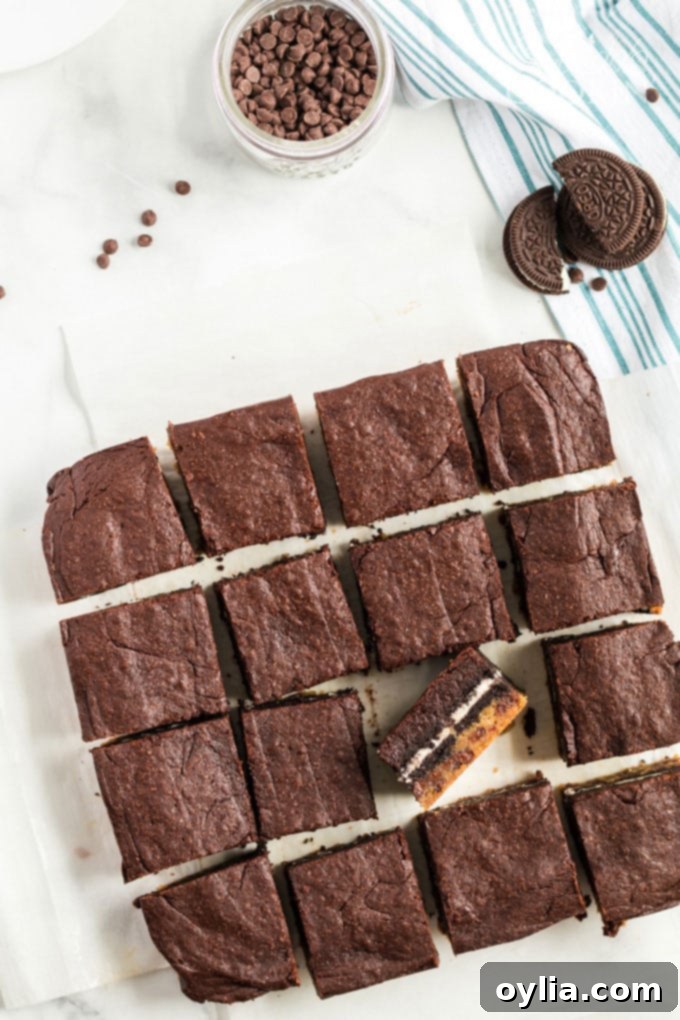
- After cooling, use the parchment paper overhangs to carefully lift the entire slab of brownies out of the pan. Transfer to a cutting board and cut into 16 even squares. Enjoy your masterpiece!
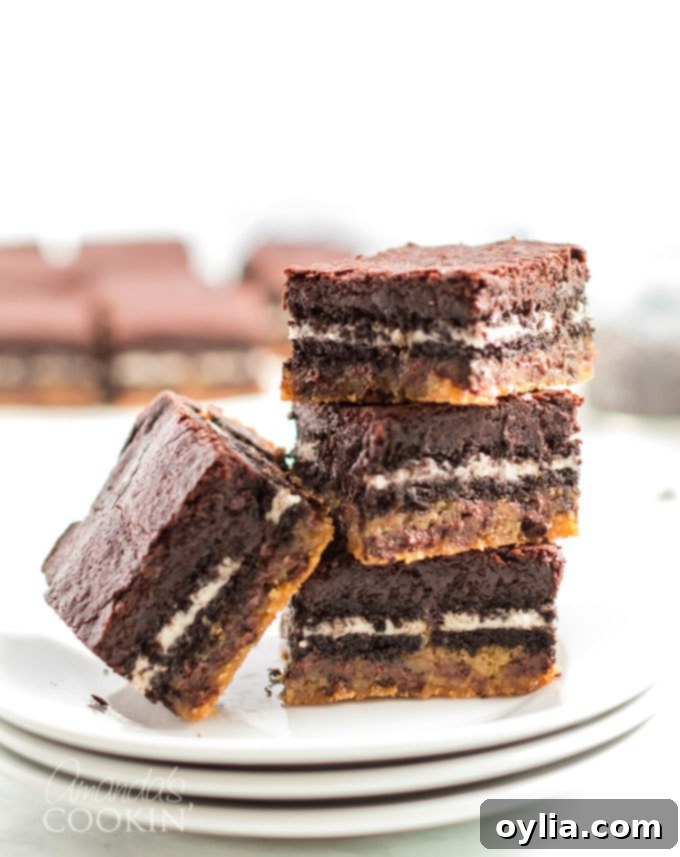
The Ultimate Serving Experience for Slutty Brownies
You might think serving these glorious Slutty Brownies is a simple affair – just grab a square and take a bite, right? And while that’s certainly an acceptable way to enjoy them, why stop there when you can elevate the experience to legendary status? These over-the-top brownie bars deserve an equally dramatic presentation and an extra layer of deliciousness.
For the ultimate indulgence, serve your warm Slutty Brownies with a generous scoop of your favorite vanilla bean ice cream. The contrast between the warm, fudgy brownie and the cold, creamy ice cream is simply divine. But don’t stop there! Drizzle that ice cream and brownie with a rich chocolate syrup, or perhaps a caramel sauce for an added layer of sweetness. A sprinkle of sea salt, chopped nuts, or even whipped cream can take this dessert from amazing to absolutely unforgettable. When you’re diving into Slutty Brownies, commit fully to the experience – every extra topping makes it all the more special. Enjoy every single, decadent bite!
We are undeniably passionate about desserts here, and if you loved these Slutty Brownies, there’s a whole world of sweet treats waiting for you! Feel free to explore our entire collection of dessert recipes, or get started with some of our other crowd-pleasing favorites listed below. Each one is designed to bring joy and deliciousness to your table!
- Lemon Streusel Squares: Bright, zesty, and crumbly — a perfect contrast to chocolate.
- Monster Cookies: Packed with oats, peanut butter, M&Ms, and chocolate chips for a truly monstrous flavor.
- Boston Cream Poke Cake: All the classic flavors of Boston Cream Pie in an easy-to-make cake.
- Blueberry Lush: A refreshing, creamy, and fruity layered dessert, perfect for summer.
- Strawberry Shortcake Trifle: Layers of cake, fresh strawberries, and whipped cream create an elegant dessert.
- Pineapple Dream Dessert: Light, airy, and bursting with tropical pineapple flavor.
- Brookies: The best of both worlds – a brownie and a cookie in one delightful bite.
Slutty Brownies: The Ultimate Layered Dessert
IMPORTANT – There are often Frequently Asked Questions within the blog post that you may find helpful. Simply scroll back up to read them!
Print It
Rate It
Save ItSaved!
Ingredients
For the Fudgy Brownie Layer:
- 10 tablespoons unsalted butter
- 1 ¼ cups granulated sugar
- ¾ cup unsweetened cocoa powder
- ½ teaspoon Kosher salt
- 2 teaspoons pure vanilla extract
- 2 large eggs
- ½ cup all-purpose flour
For the Oreo Layer:
- 20-22 Oreo cookies (regular or double stuffed for extra creaminess)
For the Chocolate Chip Cookie Dough Layer:
- ½ cup unsalted butter (softened)
- ¼ cup packed brown sugar
- ¾ cup granulated sugar
- 1 large egg
- 1 ¼ teaspoons pure vanilla extract
- 1 ¼ cups all-purpose flour
- ½ teaspoon table salt
- ½ teaspoon baking soda
- ½ teaspoon baking powder
- 1 cup miniature semi-sweet chocolate chips
Things You’ll Need
-
Saucepan
-
Whisk
-
Stand mixer
-
Mixing bowls
-
Rubber spatula
-
9×9 baking pan
Before You Begin
Instructions
Brownie Layer:
-
In a medium saucepan, melt the butter over medium-high heat. Once melted, add the granulated sugar and cocoa powder, then whisk to combine.
-
Remove from heat. Add the salt, vanilla extract, and eggs. Continuously whisk until the eggs are fully combined and the mixture is smooth.
-
Stir in the all-purpose flour until just combined, being careful not to overmix. Set this rich brownie batter aside.
Cookie Layer:
-
In a mixer, cream together the softened butter, brown sugar, and granulated sugar until light and fluffy. Add the egg and vanilla extract, scraping down the sides of the bowl as needed.
-
Gradually add the flour, table salt, baking soda, and baking powder. Mix on low speed until all ingredients are just incorporated.
-
Fold in the miniature semi-sweet chocolate chips evenly.
-
Set the cookie dough aside.
Assemble Layers:
-
Preheat your oven to 350 degrees F (175 C). Line a 9×9 inch baking pan with parchment paper, leaving an overhang on all sides for easy removal.
-
Spread the chocolate chip cookie dough evenly into the bottom of the prepared pan, pressing down with a fork or your fingers.
-
Arrange a single layer of 20-22 Oreo cookies (regular or double stuffed) over the cookie dough, fitting them snugly. You may need to break one in half to fill any gaps.
-
Carefully pour the brownie batter on top of the Oreo layer.
-
Gently spread the brownie batter so that it completely covers the Oreo layer from edge to edge.
Bake:
-
Bake for 35-40 minutes. To check for doneness, insert a toothpick into the center; it should come out mostly clean with a few moist crumbs (no wet batter).
-
Transfer the pan to a wire cooling rack and allow the brownies to cool completely for at least two hours. This crucial step ensures clean cuts and proper setting.
-
Using the parchment paper overhangs, lift the cooled brownies out of the pan. Place them on a cutting board and slice into 16 delicious squares.
Nutrition Information (per brownie)
The recipes on this blog are tested with a conventional gas oven and gas stovetop. It’s important to note that some ovens, especially as they age, can cook and bake inconsistently. Using an inexpensive oven thermometer can assure you that your oven is truly heating to the proper temperature. If you use a toaster oven or countertop oven, please keep in mind that they may not distribute heat the same as a conventional full sized oven and you may need to adjust your cooking/baking times. In the case of recipes made with a pressure cooker, air fryer, slow cooker, or other appliance, a link to the appliances we use is listed within each respective recipe. For baking recipes where measurements are given by weight, please note that results may not be the same if cups are used instead, and we can’t guarantee success with that method.
