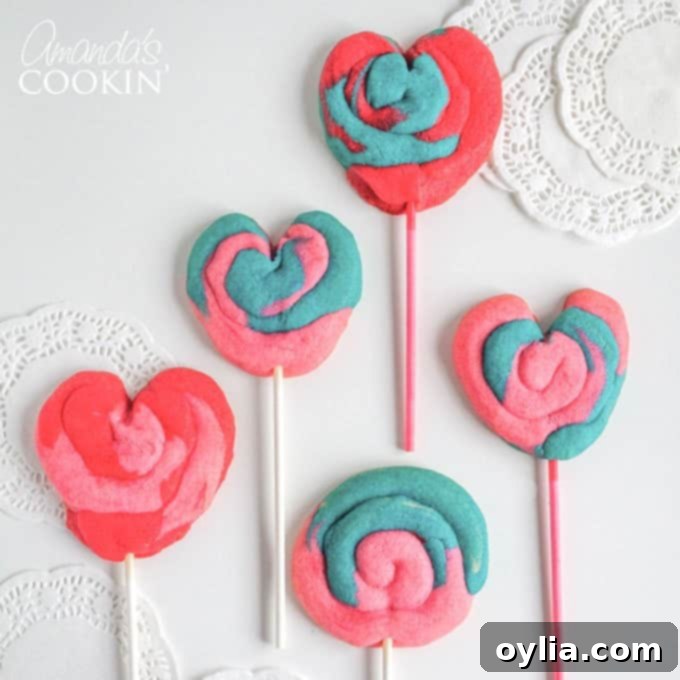
Easy Valentine Play Dough Cookie Pops: A Fun & Colorful Sugar Cookie Recipe for Kids
Get ready to infuse your Valentine’s Day with an extra dash of charm and sweetness! These delightful Valentine Play Dough Cookie Pops are designed to be a vibrant, engaging, and utterly delicious treat. While they may not be actual play dough, their captivating colors and the hands-on fun of shaping the dough will undoubtedly bring back fond memories of creative play. These unique cookie pops are a fantastic project for children to help make, transforming baking into a joyful, interactive experience. They are then perfect for giving to friends, teachers, or any special person you want to surprise with a homemade token of affection.
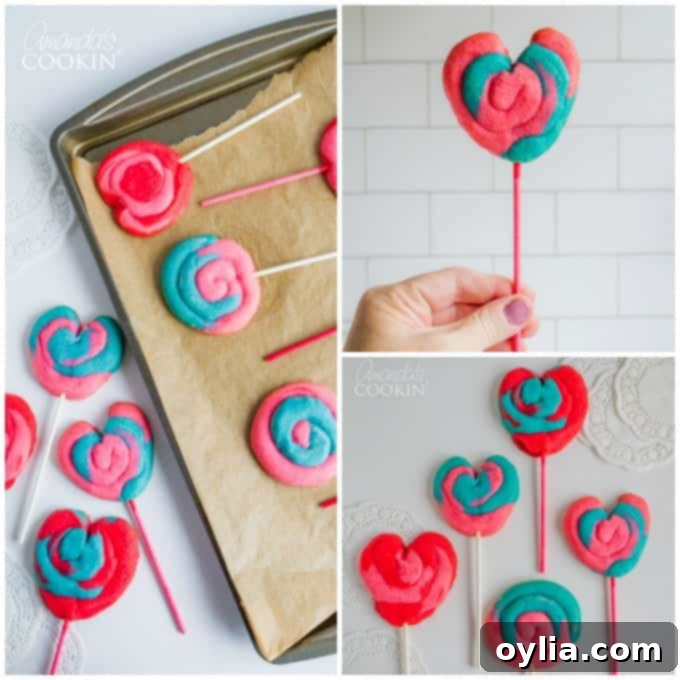
For an even more festive touch, shaping these cookies into adorable hearts elevates them into truly special Valentine’s Day goodies. Much like our popular Heart Shaped Valentine Cupcakes, these cookie pops offer a creative and heartfelt way to celebrate the holiday. The simplicity of the recipe, combined with the exciting coloring and shaping process, makes them an ideal choice for bakers of all skill levels, ensuring that every batch is filled with love and deliciousness.
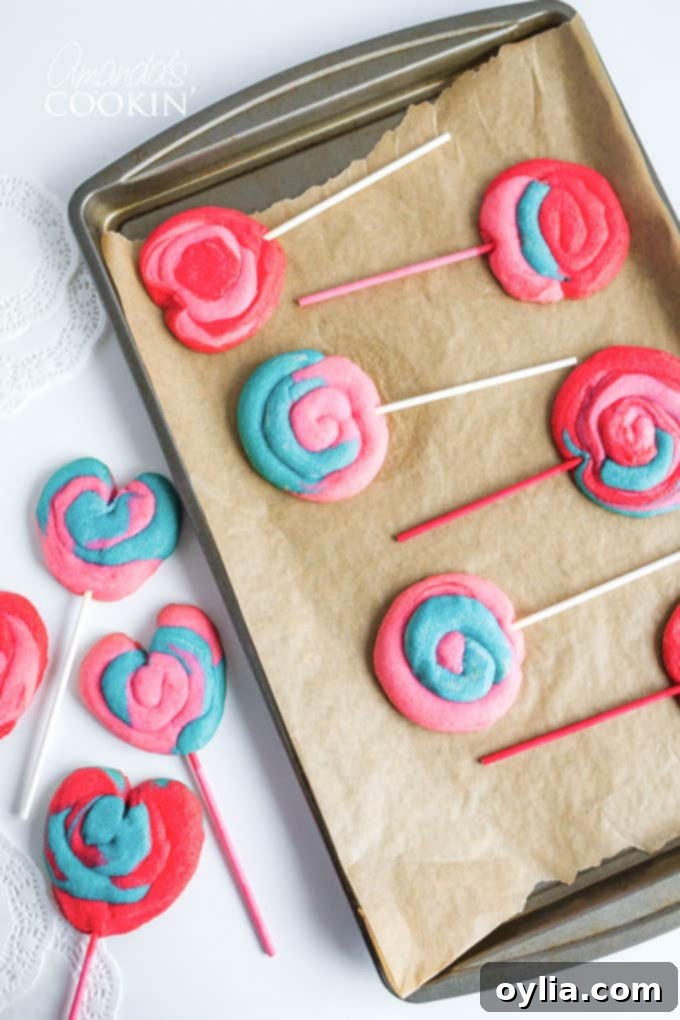
Unveiling the Charm of Valentine Play Dough Cookie Pops
The allure of our Play Dough cookies stems from a straightforward, yet incredibly adaptable, sugar cookie dough. The real magic unfolds when we introduce paste food coloring. This allows us to divide the dough into several portions, each tinted with a different vibrant shade – think passionate reds, soft pinks, gentle purples, and crisp whites – mirroring the delightful palette of modeling clay. Once colored, the dough is transformed: rolled into small, uniform balls, then elongated into “snakes,” which are subsequently twisted together. This twisting technique creates mesmerizing, multi-colored swirls that are visually stunning and unique to each cookie.
This hands-on shaping phase is precisely what makes this recipe a hit with kids, turning the kitchen into a vibrant art studio. It’s an engaging way to combine baking with creative play, allowing little chefs to experiment with color combinations and patterns. While variations of this recipe can be found in several places, our special Valentine’s edition emphasizes heart shapes and a festive color scheme, making them truly perfect for the season. It’s more than just a cookie; it’s an edible expression of joy and creativity, perfect for celebrating love and friendship.
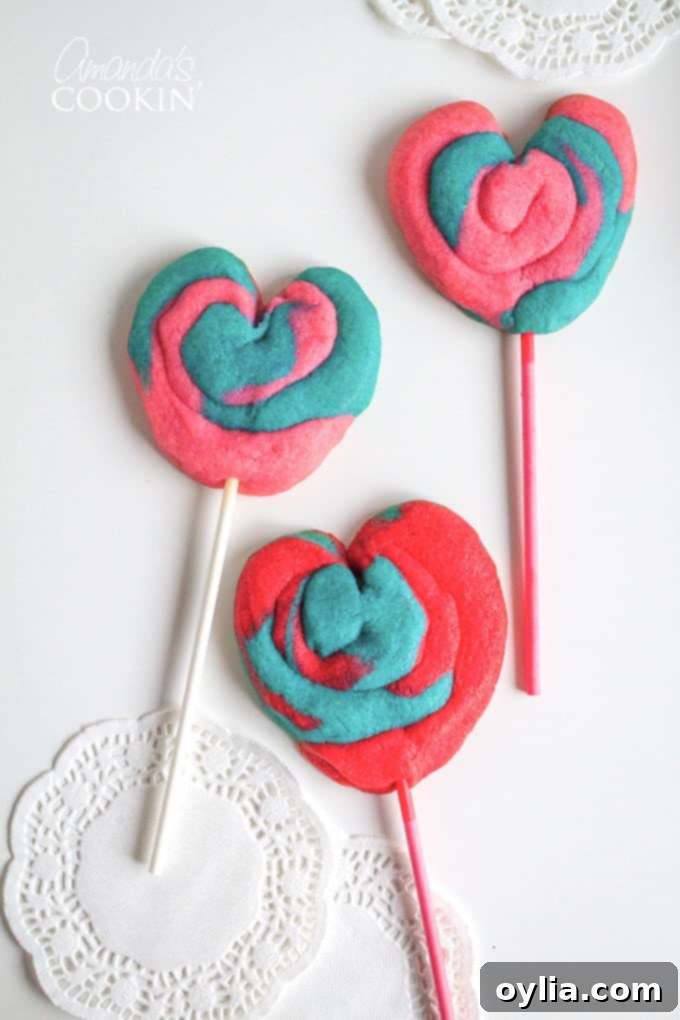
Why These Cookie Pops Are Your Ultimate Valentine’s Day Baking Project
Beyond their charming aesthetic, these Valentine Play Dough Cookie Pops offer practical benefits that cement their status as a top choice for the holiday. One of their most impressive qualities is their longevity and ability to retain freshness. Through personal testing, I’ve found that when wrapped individually in plastic, these cookies taste just as delightful on the sixth day as they did fresh from the oven. This means you can prepare them well in advance, reducing stress during busy holiday periods, whether for school exchanges, family gatherings, or unexpected guests.
Furthermore, the “pop” format makes these cookies incredibly convenient for serving and enjoying. They are perfectly portioned and easy to handle, eliminating the need for plates or extra utensils – just pick one up and savor! They consistently receive rave reviews, bringing smiles and compliments to everyone who tries them. The simple yet enjoyable baking process, combined with the creative freedom in coloring and shaping, positions them as an ideal family activity. It’s a wonderful opportunity to bond in the kitchen and create delicious, handmade gifts that are truly from the heart.

Essential Ingredients for Crafting Your Valentine Play Dough Cookie Pops
To embark on your cookie pop adventure, you’ll need a selection of common baking ingredients, with a special emphasis on quality paste food coloring to achieve those signature vibrant hues. This recipe, thoughtfully adapted from a trusted source like All Recipes, ensures a reliable and delicious outcome every time.
- ¾ cup butter, softened: The foundation for a tender and flavorful cookie. It’s crucial that your butter is properly softened (at room temperature) but not melted, to ensure it creams effectively with the sugar and cream cheese, resulting in a light and airy dough.
- 1 teaspoon vanilla extract: A classic and indispensable ingredient that imparts a warm, aromatic depth to the sugar cookie base, complementing the sweetness.
- 3 ounces cream cheese: This often-overlooked ingredient is a game-changer! It adds a subtle tang, a richer flavor profile, and contributes significantly to the cookies’ wonderfully soft and moist texture. Like butter, ensure it’s softened.
- 1 cup white sugar: Provides the necessary sweetness and plays a role in the cookie’s structure and golden-brown edges.
- 2 ¾ cups all-purpose flour: The primary structural component of the cookies. Measure accurately to avoid a dry or overly dense result.
- 1 egg: Acts as a crucial binder, holding the dough together, and adds richness and moisture to the cookies.
- 1 teaspoon baking powder: A leavening agent that gives the cookies a delicate lift, contributing to their signature tender bite.
- ¼ teaspoon salt: A small but mighty ingredient! Salt helps to balance the sweetness of the sugar and enhances all the other flavors in the cookie dough.
- Assorted colors of paste food coloring: These are the true stars for achieving the vibrant “play dough” effect. Paste or gel food colorings are highly recommended over liquid ones because they offer intense, concentrated pigmentation without introducing excess moisture, which could alter the dough’s consistency. Think a spectrum of reds, pinks, purples, and even a natural white for a truly festive Valentine’s Day palette.
- 24 lollipop sticks: These simple sticks are what transform your beautiful cookies into fun, portable, and easy-to-eat cookie pops!
Recommended Kitchen Tools for a Smooth Baking Experience
Equipping your kitchen with the right tools will make the cookie-making process even more efficient, enjoyable, and mess-free, especially when little helpers are involved.
- Stand mixer or hand mixer: Essential for effortlessly creaming together the butter, cream cheese, and sugar until they’re light and fluffy. A mixer ensures consistency and saves time and effort.
- Baking sheet: A good quality baking sheet is crucial for even baking. Non-stick options or lining with parchment paper are highly recommended to prevent sticking.
- Food coloring: Specifically, a set of paste or gel food colorings will provide the vibrant, concentrated colors needed for these cookies without diluting your dough.
- Lollipop sticks: These are the defining element of your cookie pops, making them fun to hold and eat. Ensure you have enough for all 24 cookies!
Your Detailed Guide: How to Master Play Dough Cookie Pops
Follow these comprehensive, step-by-step instructions to create your own batch of stunning and delicious Valentine Play Dough Cookie Pops. This process is not only straightforward but also incredibly fun and a fantastic activity to share with family!
- Creaming the Wet Ingredients: Begin by combining the softened butter, cream cheese, and white sugar in a large mixing bowl. Using your stand mixer fitted with the paddle attachment, or a hand mixer, beat these ingredients together on medium speed until the mixture becomes wonderfully light, fluffy, and pale in color. This creaming process is vital as it incorporates air, which will contribute to the tender, melt-in-your-mouth texture of your finished cookies. Once fluffy, add the egg and vanilla extract, continuing to beat until everything is smoothly and thoroughly combined. Remember to occasionally scrape down the sides of the bowl with a spatula to ensure all ingredients are evenly mixed.
- Combining Dry Ingredients, Tinting, and Chilling: In a separate medium bowl, whisk together the all-purpose flour, baking powder, and salt. This ensures the leavening and seasoning are evenly distributed. Gradually add these dry ingredients to your creamed wet mixture, mixing on low speed until a soft, cohesive dough just begins to form. Be careful not to overmix at this stage, as excessive mixing can develop the gluten in the flour, leading to tougher cookies. Now for the truly creative part: divide the dough into as many portions as you desire different colors. For a classic Valentine’s theme, think 3-5 colors like red, various shades of pink, purple, and white. Using paste or gel food coloring, thoroughly knead each portion until the color is vibrant and evenly distributed. Wrap each colored dough portion tightly in plastic wrap and chill it in the refrigerator for a minimum of 2 hours. This chilling step is absolutely crucial; it firms up the dough, making it much easier to handle and shape, and significantly helps to prevent the colors from bleeding excessively during the next steps.
- Shaping the Playful Swirls: Preheat your oven to 350 degrees F (175 degrees C). Once your dough is perfectly chilled and firm, remove small, roughly ¾-inch balls from 3 or 4 different colored doughs. Gently press these distinct colored balls together in your palm to form one larger, combined ball, approximately the size of a small golf ball. This is where the mesmerizing swirls begin to take shape! Roll this multi-colored ball just enough to smooth it into a slightly larger, rough ball. Then, continuing to roll gently, shape it into a 12-inch long “snake” or log. As you roll, the different colors will beautifully intertwine and swirl, creating a unique pattern for each cookie.
- Coiling the Cookies and Inserting Lollipop Sticks: Take one end of your colorful dough snake and carefully begin to coil it tightly, creating a round, spiral-patterned cookie. Aim for a diameter of about 2 ¾ inches for each coiled cookie. Place these beautifully coiled cookies approximately 3 inches apart on a lightly greased baking sheet (or one lined with parchment paper or a silicone mat). Adequate spacing is essential to ensure they don’t spread into one another during baking. Once the cookies are arranged, carefully insert a lollipop stick into the bottom of each cookie, pushing it gently about halfway through the dough. This will secure the stick and create your cookie pop!
- Crafting Perfect Heart Shapes (Optional but Highly Recommended!): To add an extra touch of Valentine’s Day charm, you can easily shape your coiled cookies into hearts. First, follow steps 1-4 to prepare, coil, and insert the lollipop stick into your dough. Once the stick is in place, gently use your fingers to pinch and squeeze the dough at the very bottom of the circular cookie, combining the dough slightly around the stick. This will start to form the pointed base of the heart. Next, take a separate clean lollipop stick or the back of a butter knife and carefully press it into the top-center of the coiled cookie. Push inwards and slightly downwards to create the characteristic indent of a heart’s top. Gently manipulate and round out the sides with your fingers to perfect the heart shape.
- Baking to Perfection and Cooling: Carefully place your baking sheet with the shaped cookie pops into the preheated oven. Bake for approximately 8 minutes, or until the edges of the cookies are just lightly golden brown. It’s crucial not to overbake sugar cookies, as they can quickly become dry and lose their tender texture. Keep a close eye on them! Once baked, remove the baking sheet from the oven and allow the cookie pops to cool on the sheet for a few minutes. This initial cooling period helps them firm up and prevents them from breaking when you transfer them. After a few minutes, carefully move them to a wire rack to cool completely. Once fully cooled, store your beautiful and delicious cookie pops in an airtight container to maintain their freshness and prevent them from drying out.
Creative Gifting & Optimal Storage for Your Sweet Treats
Once your Valentine Play Dough Cookie Pops have cooled, they are not just ready to eat, but also perfectly poised for gifting! Their eye-catching colors and convenient pop format make them exceptionally suitable for presentation. Consider wrapping each cookie pop individually in clear cellophane bags, tying them off with festive ribbons in shades of red, pink, or white, and perhaps adding a small, handwritten tag for a personal touch. These make adorable and thoughtful gifts for classmates, cherished tokens for dedicated teachers, or delightful surprises for neighbors, grandparents, and any loved one you wish to acknowledge this Valentine’s Day. After all, who could resist a charming, homemade, heart-shaped sugar cookie on a stick?
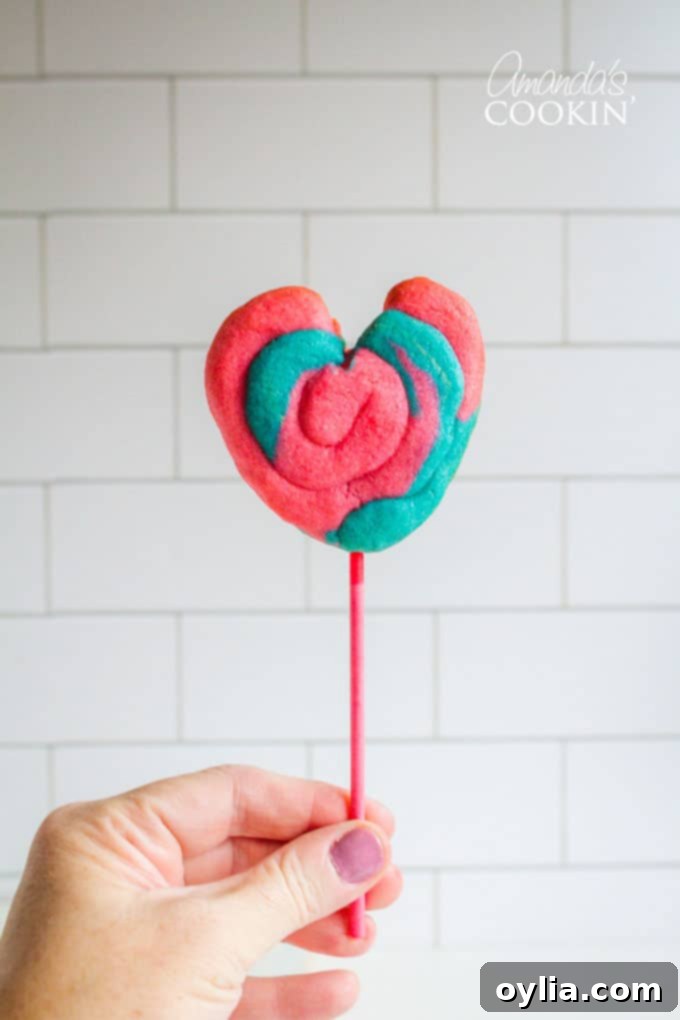
As highlighted earlier, these cookies boast excellent keeping qualities, ensuring your hard work lasts. When stored in an airtight container at room temperature, they will remain wonderfully fresh and delicious for up to 5-6 days. For those who like to plan ahead, the prepared and colored cookie dough can be kept chilled in the refrigerator, tightly wrapped, for up to 2-3 days before you’re ready to shape and bake. For longer preservation, both the unbaked dough (double-wrapped in plastic and then foil) and the baked, completely cooled cookies (in an airtight freezer-safe container, separated by parchment paper) can be frozen for up to 3 months. Thaw frozen dough in the refrigerator overnight before shaping, and let frozen baked cookies come to room temperature before serving.

We genuinely hope that the process of making and the joy of sharing these Play Dough Cookie Pops bring a unique blend of creativity, deliciousness, and festive spirit to your Valentine’s Day celebrations. They are truly a treat for both the eyes and the taste buds!
Frequently Asked Questions About Our Play Dough Cookie Pops
- Can I use liquid food coloring instead of paste or gel?
- While liquid food coloring can be used, paste or gel food coloring is strongly recommended for these cookie pops. Liquid food coloring adds more moisture to the dough, which can alter its consistency and potentially require you to add more flour, leading to tougher cookies. Paste or gel colors provide intense, vibrant hues without significantly impacting the dough’s texture or requiring extra flour.
- Is it possible to prepare the cookie dough in advance?
- Absolutely! In fact, chilling the dough for at least 2 hours is a crucial step in the recipe, making it firmer and easier to handle. You can prepare and color the dough portions, wrap them tightly in plastic wrap, and refrigerate them for up to 2-3 days before you plan to shape and bake your cookies. This makes these cookie pops an excellent make-ahead option for busy schedules.
- How long do these Valentine Play Dough Cookie Pops stay fresh?
- When stored in an airtight container at room temperature, your cookie pops will remain wonderfully fresh and delicious for up to 5-6 days. For optimal freshness, especially if gifting, consider wrapping each cooled cookie pop individually in plastic wrap before placing them in the airtight container.
- Can I freeze these colorful cookie pops?
- Yes, both the unbaked cookie dough and the baked cookies can be frozen. To freeze unbaked dough, wrap each colored portion tightly in plastic wrap, then again in aluminum foil, and store in the freezer for up to 3 months. Thaw the dough in the refrigerator overnight before proceeding with shaping. To freeze baked cookies, ensure they are completely cooled, then arrange them in an airtight freezer-safe container, separated by layers of parchment paper, and freeze for up to 3 months. Thaw them at room temperature before serving.
- Are the lollipop sticks mandatory for this recipe?
- Not at all! If you prefer a traditional cookie, or if you don’t have lollipop sticks on hand, you can certainly skip them. Your cookies will still be incredibly delicious and fun, just without the “pop” factor. They’ll simply be known as “Play Dough Cookies.”
- What if my colors mix too much during the shaping process?
- A slight mixing of colors creates beautiful, natural swirls, which is part of their charm! However, if your colors are blending excessively and losing their distinctiveness, it might indicate that your dough is too warm or hasn’t been chilled sufficiently. Ensure your dough has been properly refrigerated for the recommended time (at least 2 hours). Working quickly and with cool hands can also help maintain the separation and vibrancy of the different colors.
Explore More Valentine’s Day Goodies to Share the Love
‘Tis the season for all things heart-shaped, sweet, and full of love! If you delighted in creating these colorful and whimsical cookie pops, we invite you to explore more of my cherished Valentine’s Day recipes. Each one is designed to bring joy and sweetness to your celebrations:
- Heart Oreo Truffles: Decadent, easy-to-make truffles in a festive shape.
- Valentine’s Mudslide: A creamy, dreamy drink perfect for a romantic evening.
- Chocolate Covered Fruit Truffles: A lighter, fruity indulgence coated in rich chocolate.
- Red Velvet Oatmeal Fudge Bars: A hearty and sweet treat with classic red velvet flavor.
- Conversation Heart Brownies: Fun brownies topped with iconic candy hearts.
- Red Velvet Fudge: Rich, creamy, and vibrantly colored fudge squares.
- Cupid’s Cocktail: A celebratory drink to toast to love and friendship.
- Chocolate Chip Cookies for Two: A small-batch recipe perfect for a sweet duo.
- Valentine Cherry Hand Pies: Individual, portable pies bursting with cherry flavor.
- Conversation Heart Cookies: Classic sugar cookies decorated with sweet messages.

Valentine Play Dough Cookie Pops
IMPORTANT – There are often Frequently Asked Questions within the blog post that you may find helpful. Simply scroll back up to read them!
Print It
Pin It
Rate It
Save ItSaved!
Ingredients
- ¾ cup butter softened
- 3 ounces cream cheese
- 1 cup white sugar
- 1 large egg
- 1 teaspoon vanilla extract
- 2 ¾ cups all-purpose flour
- 1 teaspoon baking powder
- ¼ teaspoon salt
- assorted colors of paste food coloring
- 24 lollipop sticks
Instructions
-
In a bowl cream butter, cream cheese and sugar until fluffy. Add egg and vanilla; beat until smooth.
-
In a medium bowl combine flour, baking powder and salt. Add dry ingredients to the creamed mixture. Stir till soft dough forms. Divide dough according to however many colors you plan to use. Tint each with a different food color. Wrap in plastic wrap and chill for 2 hours.
-
Preheat oven to 350 degrees F. Shape dough into 3/4 inch balls and for each cookie place 3-4 different colored balls together to make 1 large ball. Roll it just enough to form a rough ball, then shape into a 12-inch long roll (like a snake).
-
Starting at one end, coil roll to make a 2 3/4 inch round cookie. Place cookies 3 inches apart on lightly greased baking sheet. Carefully insert lollipop sticks into bottoms of cookies.
-
For hearts, follow the instructions above. After inserting the stick, use your fingers to squeeze the dough at the bottom of the circle and combine at the stick, then use a separate lollipop stick or a butter knife to create an indent in the top and shape the heart.
-
Bake cookies for 8 minutes or until lightly browned. Cool and store in an airtight container.
Nutrition
The recipes on this blog are tested with a conventional gas oven and gas stovetop. It’s important to note that some ovens, especially as they age, can cook and bake inconsistently. Using an inexpensive oven thermometer can assure you that your oven is truly heating to the proper temperature. If you use a toaster oven or countertop oven, please keep in mind that they may not distribute heat the same as a conventional full sized oven and you may need to adjust your cooking/baking times. In the case of recipes made with a pressure cooker, air fryer, slow cooker, or other appliance, a link to the appliances we use is listed within each respective recipe. For baking recipes where measurements are given by weight, please note that results may not be the same if cups are used instead, and we can’t guarantee success with that method.

This post was originally published on this blog on Jan 19, 2014.
