The Ultimate Guide to Homemade Southern Sausage Gravy: A Comfort Food Classic
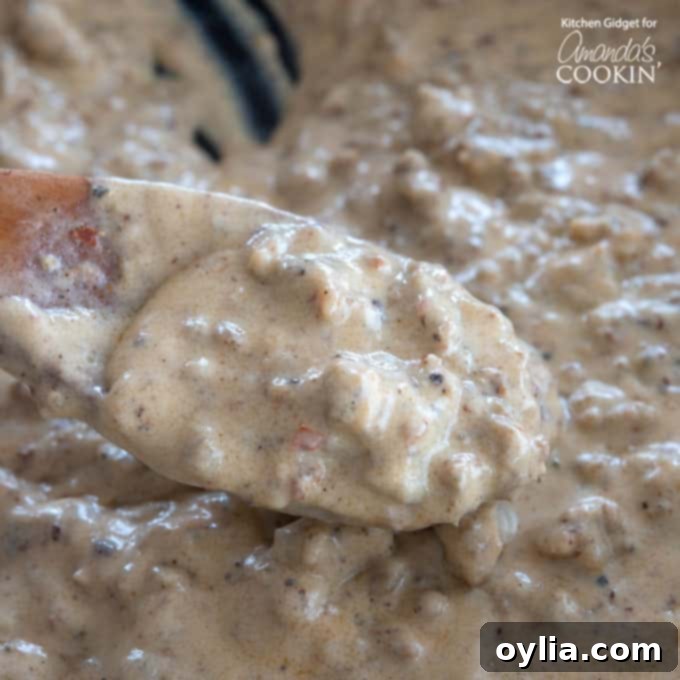
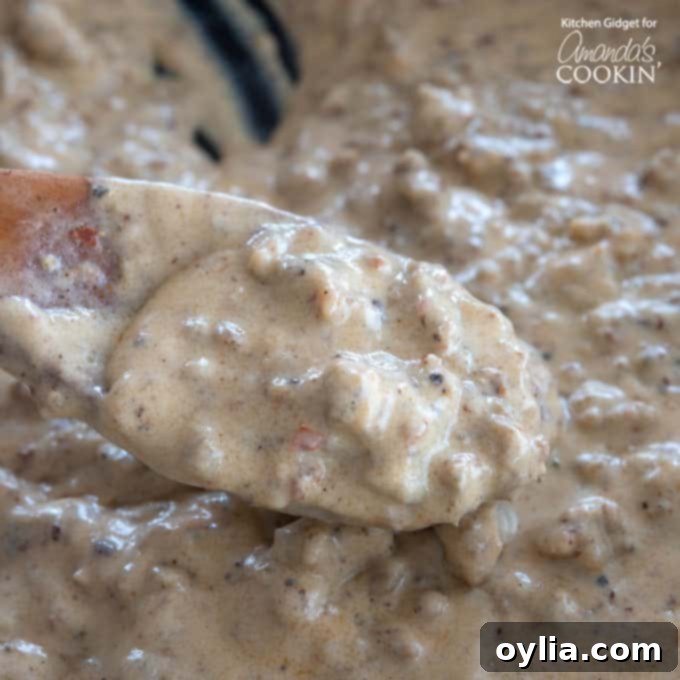
Prepare to create a truly unforgettable Southern staple: rich, savory sausage gravy from scratch in an astonishingly quick 20 minutes! This beloved dish masterfully combines perfectly browned, flavorful sausage crumbles suspended in a luxuriously thick, wonderfully creamy, and generously peppery milk gravy. It’s the epitome of hearty, comforting food, guaranteed to satisfy your deepest cravings any time of day.

Why You’ll Fall in Love with This Easy Sausage Gravy Recipe
This homemade sausage gravy isn’t just a recipe; it’s an experience. Its appeal lies in its incredible simplicity paired with an undeniably delicious flavor profile that transcends breakfast. While it’s famously associated with Southern breakfast tables, its hearty nature makes it equally perfect for a comforting lunch or a fuss-free weeknight dinner. Imagine the joy of serving this on a cozy Saturday morning, or watching it become the star of your holiday brunch, like a memorable Christmas feast or a special Mother’s Day treat. It’s incredibly versatile and always a crowd-pleaser.
One of the many advantages of this particular sausage gravy recipe is its impressive make-ahead potential. It holds up beautifully in the refrigerator for up to 5 days, making meal prep a breeze. For example, when catering to a large gathering, like my Christmas breakfast last year for nearly 20 people, preparing a double batch the day before saved immense time and stress. The next morning, a quick reheat with a splash of milk to restore its creamy consistency (as it naturally thickens upon cooling) and a final taste adjustment for salt and pepper, allowed me to serve it warm and ready from a slow cooker. It was, without a doubt, a huge hit, especially when paired with a Cheesy Hashbrown Potato Casserole.
A Staple of Southern Comfort: Beyond Biscuits
While fluffy, homemade biscuits are undeniably the classic accompaniment to Southern sausage gravy – a pairing as iconic as peanut butter and jelly – don’t limit yourself! This versatile gravy can elevate a multitude of dishes. Spoon it generously over crispy toast, hearty English muffins, or even a steaming bowl of grits for a truly authentic Southern experience. For a unique twist, try it over rice, or integrate it into your breakfast tacos! If you’re a fan of my Papas con Huevos (potato & egg tacos) recipe, add a generous spoonful of this creamy sausage gravy along with shredded cheese into each tortilla – the result is absolutely *amazing* and a guaranteed flavor explosion.
Mastering the Ingredients for Perfect Gravy
Creating the perfect sausage gravy starts with understanding the role of each key ingredient. While seemingly simple, the combination of these components is what truly defines this Southern delicacy.
Ingredients You Will Need:
- 1 lb fresh pork sausage
- 2 tablespoons unsalted butter
- ¼ cup all-purpose flour
- 3 cups milk
- 1 teaspoon kosher salt
- 1 teaspoon freshly ground black pepper
Choosing Your Sausage: The Foundation of Flavor
For an authentic and rich sausage gravy, always opt for bulk pork sausage. This is typically sold in a tube and is uncooked, allowing you to render its flavorful fats directly into your skillet – fats that are essential for building the gravy’s base. I often stock up on a few tubes at a time and keep them frozen, ready for whenever a gravy craving strikes. Don’t shy away from experimenting with different sausage flavors beyond the “original” mild variety. A maple-flavored sausage can introduce a delightful sweet and savory note, while a hot or spicy version, perhaps with added red pepper flakes, will give your gravy a kick. In our household, the hot version is a favorite, often enhanced with an extra dash of Tabasco sauce for that extra fiery touch!
The Essential Flour and Fat Base (Roux)
The magic of a truly thick and creamy gravy lies in the roux. This classic French technique involves cooking a mixture of fat and flour, which serves as the primary thickening agent for our gravy. Here’s why it’s so vital:
- Fat from the Sausage: As the pork sausage cooks, it releases delicious rendered fat. This fat is packed with flavor and is the ideal base for our roux.
- Added Butter: Depending on how much fat the sausage renders, a couple of tablespoons of unsalted butter are often added. This ensures there’s enough fat to properly coat the flour and create a smooth roux.
- All-Purpose Flour: While other thickening agents exist, all-purpose flour provides the best taste and texture for traditional sausage gravy. When sprinkled into the hot fat, it absorbs it to form a thick paste. Cooking the flour for a minute or two is crucial; it helps to cook out the raw flour taste, ensuring your gravy is wonderfully savory, not pasty.
The Creamy Liquid: Milk
Milk is what transforms your roux into a luscious, pourable gravy. While the recipe calls for 3 cups, the type of milk you choose can slightly impact the final richness. Whole milk will yield the creamiest, most decadent gravy, but 2% milk works perfectly fine for a slightly lighter version without sacrificing much flavor. For an extra indulgent gravy, you could even substitute a portion of the milk with half-and-half or heavy cream. The key is to add it gradually and stir continuously to prevent lumps and ensure a perfectly smooth consistency.
Seasoning: The Soul of the Gravy
Beyond the inherent flavor of the sausage, the seasoning for this gravy is refreshingly simple: salt and pepper. However, the quality and quantity of these two ingredients make all the difference. Always use freshly ground black pepper if possible; its robust, aromatic kick is unparalleled. Don’t be shy with it! A truly authentic sausage gravy should have a pronounced peppery flavor. Start with the recommended amount, then taste and adjust to your personal preference. While not strictly traditional, a tiny pinch of cayenne pepper can add a subtle warmth without overpowering the dish if you enjoy a bit more heat.
Helpful Kitchen Tools:
- Cast iron skillet (excellent for even heating and developing flavor)
- Liquid measuring cup
- Wooden spoon or whisk
- Measuring cups and spoons
Step-by-Step Perfection: How to Make Sausage Gravy
Follow these simple steps to create a flawless, delicious sausage gravy every time. The key is to manage your heat and stir consistently for a smooth, lump-free result.
1. Browning the Sausage
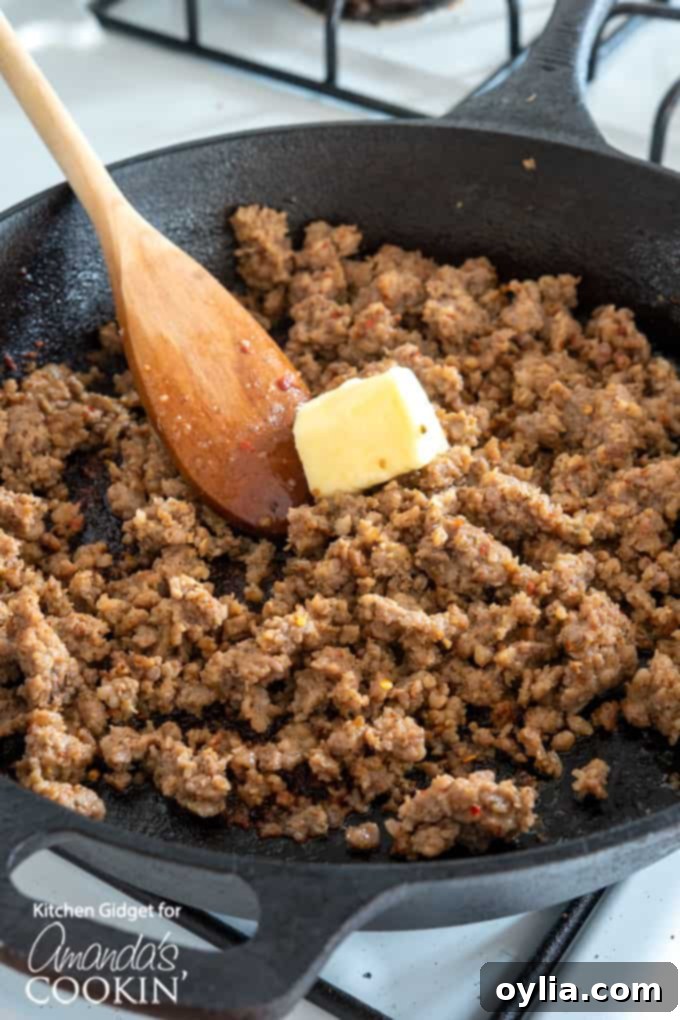
Begin by placing your pound of fresh bulk pork sausage in a large skillet, preferably cast iron, over medium heat. As it cooks, use a wooden spoon or spatula to vigorously crumble the sausage into small, even pieces. Continue to cook, stirring occasionally, until the sausage is no longer pink and is beautifully browned, which usually takes about 8 minutes. It’s important not to drain the excess fat unless there’s an unusually large amount, as this rendered fat is crucial for making your roux.
2. Creating the Flavorful Roux
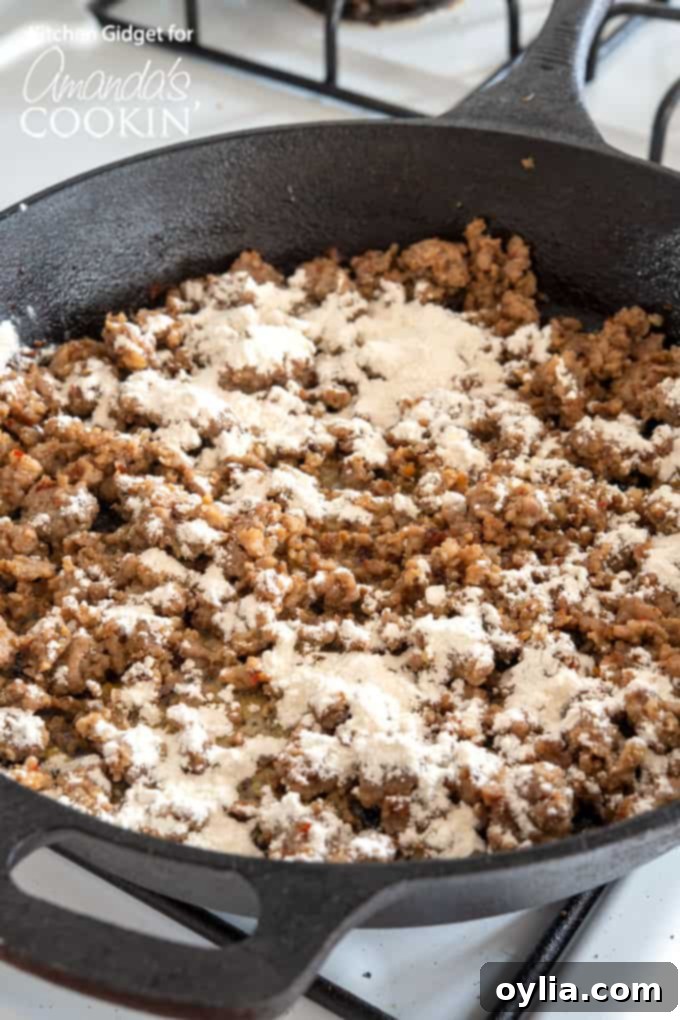
Once your sausage is perfectly browned, stir in the 2 tablespoons of unsalted butter (if needed) until it’s completely melted and combined with the sausage drippings. Next, evenly sprinkle the ¼ cup of all-purpose flour over the sausage and fat mixture. Stir continuously for about 1 minute. The flour will absorb the fat, creating a thick, fragrant paste – this is your roux. Cooking it for this short period helps to eliminate any raw flour taste, ensuring your gravy has a clean, rich flavor.
3. Achieving Creamy Consistency
Now comes the crucial step for a silky-smooth gravy. Gradually pour in the 3 cups of milk, a little at a time, while stirring constantly with your wooden spoon or a whisk. Continuous stirring is essential to prevent the flour from clumping and to ensure a homogenous, creamy mixture. Initially, the mixture will appear quite watery, but as you continue to stir and bring it to a gentle simmer, it will begin to thicken. This process can take anywhere from 8 to 10 minutes. Once it starts bubbling and visibly thickening, let it simmer for another 2 full minutes, or until it reaches your desired consistency. Remember, gravy will always continue to thicken further as it cools, so it’s often best to remove it from the heat slightly before it reaches its ultimate thickness. If your gravy becomes too thick for your liking (or when reheating leftovers), simply add a splash of milk to thin it out to perfection.
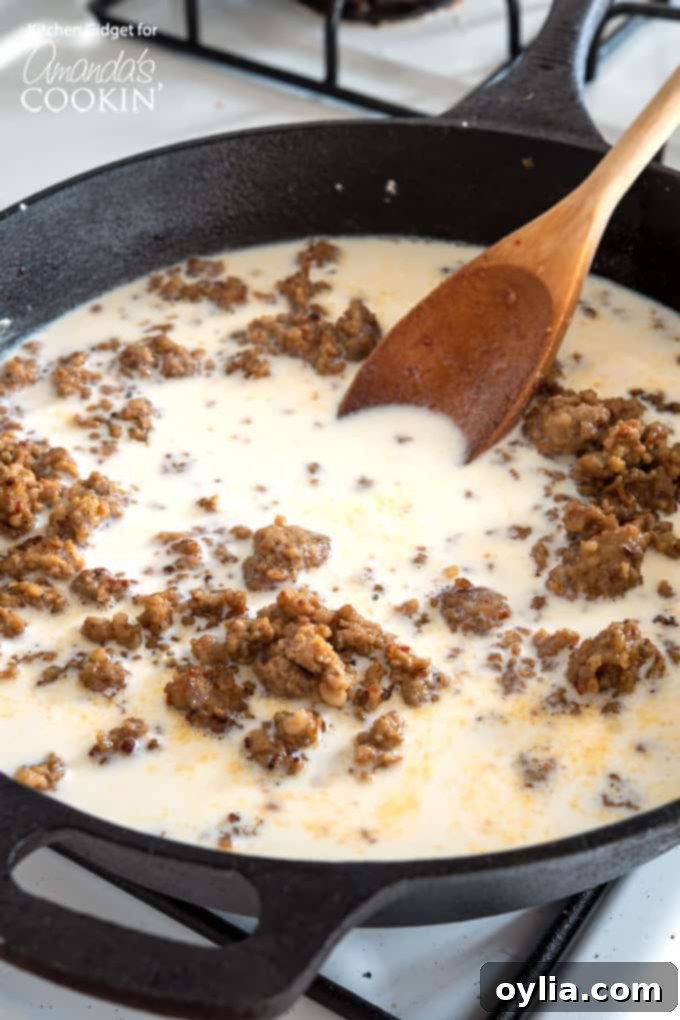
4. Final Seasoning
Once your gravy has reached its ideal consistency, stir in the kosher salt and, most importantly, the freshly ground black pepper. As mentioned, don’t be shy with the pepper – it’s a signature flavor of Southern sausage gravy. Taste the gravy and adjust the seasoning as needed. You want it to be robustly flavored with the savory sausage and a delightful peppery kick.
Common Questions & Troubleshooting for Sausage Gravy
My Gravy is Too Thick/Too Thin – How Do I Fix It?
Don’t worry, adjusting gravy consistency is a common practice! If your gravy is too thick, simply whisk in additional milk, a tablespoon at a time, until it reaches your desired pourable texture. If it’s too thin, you have a couple of options. You can continue to simmer it gently, stirring often, to allow more liquid to evaporate and thicken the gravy naturally. Alternatively, you can create a quick slurry: mix a teaspoon of flour or cornstarch with an equal amount of cold milk or water until smooth, then slowly whisk this into the simmering gravy. Let it cook for another minute or two to thicken.
How Can I Avoid Lumpy Gravy?
Lumps are the enemy of good gravy, but they’re easily preventable! The secret lies in a smooth roux and gradual liquid addition. Ensure your flour is fully incorporated into the hot fat and cooked for a minute before adding any liquid. When adding the milk, do so slowly, a little at a time, while whisking vigorously and constantly. This technique helps the flour absorb the liquid evenly without forming clumps.
Can I Make Sausage Gravy Ahead of Time?
Absolutely! This recipe is fantastic for making ahead. As mentioned, it can be stored in an airtight container in the refrigerator for up to 5 days. When you’re ready to serve, gently reheat it on the stovetop over medium-low heat, stirring frequently. You’ll likely need to add a splash or two of milk, or even a bit of water, to thin it back to its original creamy consistency as it will have thickened considerably in the fridge. For larger quantities, reheating in a slow cooker on the “warm” setting is also an excellent option.
For longer storage, sausage gravy can also be frozen! Allow it to cool completely, then transfer it to freezer-safe containers or bags, leaving a little headspace. It can be frozen for up to 2-3 months. Thaw overnight in the refrigerator, then reheat as described above, adding milk to adjust consistency.

Serving Suggestions Beyond Biscuits
While biscuits and gravy are a match made in heaven, don’t stop there! This delightful Southern gravy is incredibly versatile and can enhance a variety of meals:
- Classic Biscuits: Whether you bake them from scratch, use a can, or opt for frozen, warm, flaky biscuits are the quintessential canvas for this savory gravy.
- Toast or English Muffins: For a simpler approach, spread a generous amount of gravy over buttered toast or toasted English muffins.
- Grits: A true Southern experience involves serving sausage gravy over creamy, hot grits. It’s a comforting combination that’s hard to beat.
- Breakfast Potatoes & Hash Browns: Elevate your home fries, roasted potatoes, or crispy hash browns by smothering them in sausage gravy. It adds incredible flavor and moisture.
- Breakfast Bowls: Create a hearty breakfast bowl by layering scrambled eggs, crispy bacon bits, roasted potatoes, and then topping it all with a generous ladle of sausage gravy.
- Breakfast Tacos: As mentioned earlier, add a spoonful to your breakfast tacos (like Papas con Huevos) with some shredded cheese for an unexpected and delicious twist.
- Open-Face Sandwiches: Serve a slice of toast or a biscuit topped with gravy and perhaps an extra fried egg for a filling lunch.
More Delicious Breakfast & Brunch Ideas
Looking for other delectable ways to start your day or host a brunch? Explore these fantastic recipes:
- Breakfast Casserole with Ham and Cheese
- Blueberry Breakfast Cake
- Turkey Hash Brown Casserole
- Breakfast Burritos
- Slow Cooker Breakfast Quinoa
- Loaded Coffee Smoothie
- Corned Beef Hash

Classic Southern Sausage Gravy
IMPORTANT – There are often Frequently Asked Questions within the blog post that you may find helpful. Simply scroll back up to read them!
Print It
Pin It
Rate It
Save ItSaved!
Ingredients
- 1 lb fresh pork sausage
- 2 tablespoons unsalted butter
- ¼ cup all-purpose flour
- 3 cups milk
- 1 teaspoon kosher salt
- 1 teaspoon black pepper freshly ground
Instructions
-
In a large skillet over medium heat, cook and crumble sausage until no longer pink, about 8 minutes. Do not drain excess fat.
-
Stir in the butter until melted and combined with sausage drippings, then sprinkle with flour. Stir and cook for 1 minute until flour is absorbed and forms a smooth paste.
-
Add the milk gradually, whisking constantly to ensure there are no lumps and the gravy remains smooth.
-
Bring to a gentle simmer, stirring occasionally. This process may take 8-10 minutes. Once simmering with visible bubbling, continue to cook for 2 full minutes, or until the gravy reaches your desired thickened consistency. Remember, the gravy will continue to thicken further as it cools.
-
Stir in the kosher salt and freshly ground black pepper. Taste and adjust seasoning as necessary, ensuring a robust and peppery flavor. Serve warm.
Nutrition
The recipes on this blog are tested with a conventional gas oven and gas stovetop. It’s important to note that some ovens, especially as they age, can cook and bake inconsistently. Using an inexpensive oven thermometer can assure you that your oven is truly heating to the proper temperature. If you use a toaster oven or countertop oven, please keep in mind that they may not distribute heat the same as a conventional full sized oven and you may need to adjust your cooking/baking times. In the case of recipes made with a pressure cooker, air fryer, slow cooker, or other appliance, a link to the appliances we use is listed within each respective recipe. For baking recipes where measurements are given by weight, please note that results may not be the same if cups are used instead, and we can’t guarantee success with that method.

