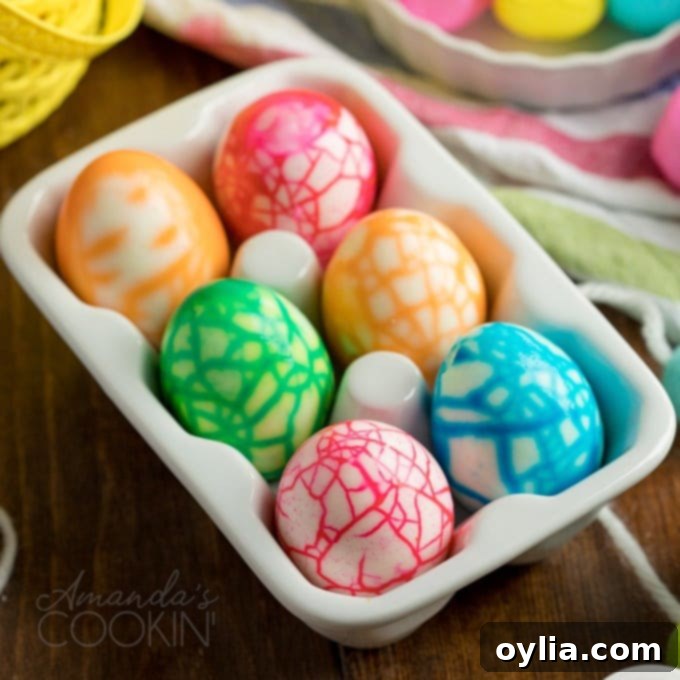
Vibrant Cracked Easter Eggs: Easy DIY Dyeing for Stunning “Spiderweb” Designs
Looking for a unique and eye-catching way to decorate your Easter eggs this year? Move beyond the traditional solid colors and discover the mesmerizing beauty of cracked colored eggs, often referred to as “spiderweb” eggs. This gorgeous variation of coloring Easter eggs, inspired by the simple elegance of tea-dyed eggs, creates a stunning, intricate pattern that will leave everyone in awe. Best of all, this fun and creative project is simple enough for kids to master, yet captivating enough to engage adults in the joyful process. If you enjoy unique dyeing methods, be sure to also try my tie dye Easter eggs for another splash of color!
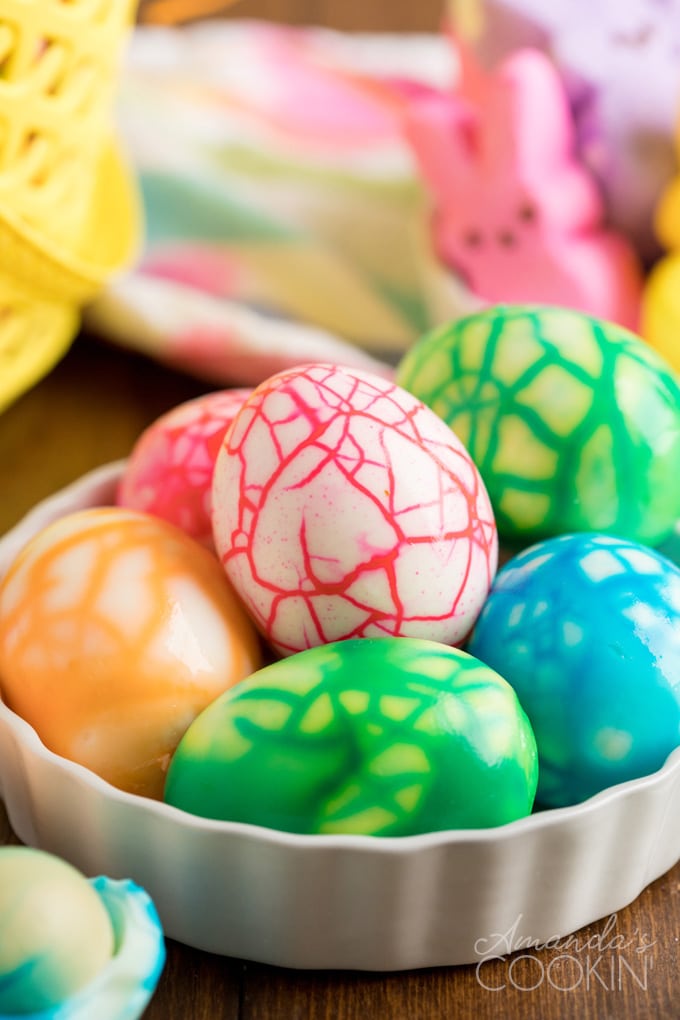
Cracked Colored Eggs for Easter: A Stunning Alternative
The first time I made these vibrant cracked colored eggs, I was absolutely in awe of the results. The intricate patterns, where the dye seeps into the tiny cracks of the shell, create a beautiful mosaic effect on the egg white itself. This technique offers a wonderfully colorful and pretty alternative to the standard, uniformly colored Easter eggs, transforming a simple hard-boiled egg into a miniature work of art. Imagine the delight on faces as you reveal these unique creations at your Easter brunch or dinner!
Beyond their decorative appeal, these eggs are also incredibly versatile. Once peeled, their stunning patterns make them perfect for showcasing in a clear egg carton or a decorative bowl. And if you’re looking for a creative twist on a classic dish, these beautifully dyed eggs make truly exceptional and vibrant deviled eggs, adding an unexpected burst of color to your appetizer platter. Their visual charm is undeniable, making them a fantastic conversation starter and a memorable part of any festive gathering.
Gathering Your Supplies for Stunning Results
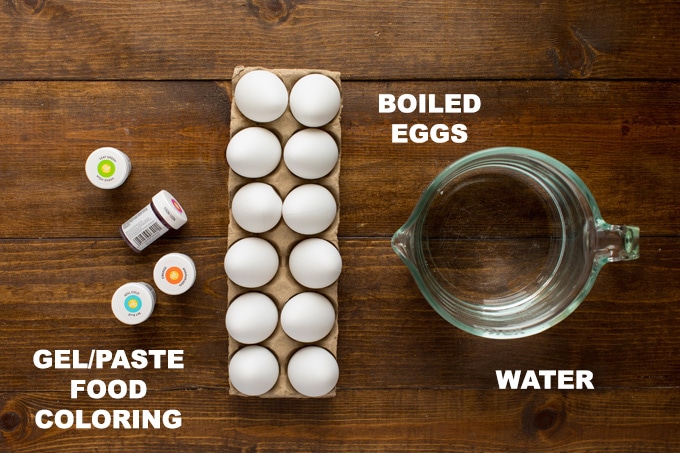
Creating these beautiful cracked colored eggs requires only a few basic ingredients and common kitchen tools. The beauty of this project lies in its simplicity, making it accessible for everyone, from novice crafters to seasoned Easter egg decorators. Here’s what you’ll need to get started on your vibrant egg journey.
Essential Ingredients:
- Hard-boiled eggs: For best results, use freshly hard-boiled eggs that are fully cooled. The fresher the eggs, the easier they generally are to peel after dyeing. You can boil a dozen eggs for a good variety of colors.
- Gel/paste food coloring in red, blue, orange, green, purple: Gel or paste food coloring is crucial for achieving deep, vibrant colors. Unlike liquid food coloring, a small amount goes a long way, providing intense saturation for a truly stunning effect. Feel free to experiment with any colors you love!
- Water: Warm water helps dissolve the gel food coloring thoroughly, ensuring an even dye bath.
Helpful Kitchen Tools:
- Saucepan: Essential for perfectly hard-boiling your eggs. A good saucepan ensures even cooking.
- Kitchen towel: A clean, soft kitchen towel is perfect for gently rolling the eggs to create the delicate cracks without breaking the shell entirely.
- Deep bowls or coffee mugs: You’ll need one bowl or mug for each color of dye you plan to use. Deep containers ensure the eggs are fully submerged for comprehensive coloring.
Expert Kitchen Tips for Success:
- Liquid food coloring vs. gel/paste: While liquid food coloring is readily available, it simply won’t achieve the vibrant, intense hues that gel or paste food coloring provides. The concentrated nature of gel/paste dye allows for richer, more striking colors to seep into the egg cracks, resulting in a much more dramatic and beautiful “spiderweb” effect. Investing in gel food coloring is highly recommended for this project.
- Where to find gel/paste food coloring: Don’t worry if you don’t typically use these. You can easily find high-quality gel or paste food coloring online from retailers like Amazon, as well as in the cake decorating sections of large box stores (like Walmart or Target) and dedicated craft stores (like Hobby Lobby or Michaels). Look for brands like Wilton or AmeriColor for excellent results.
- Plan ahead! Soaking time is key: Patience is a virtue with these eggs! For the dye to properly penetrate the delicate cracks and create those stunning patterns, the eggs need adequate soaking time. Plan to let them sit in the dye baths for several hours, ideally 4 hours, or even better, overnight in the refrigerator. The longer they soak, the more vibrant and defined your cracked patterns will be.
- Perfect hard-boiled eggs: Start with perfectly cooked hard-boiled eggs. Avoid overcooking, which can lead to a greenish-gray yolk, and undercooking, which makes peeling difficult. A good method is to place eggs in a saucepan, cover with an inch of cold water, bring to a rolling boil, then immediately turn off the heat, cover, and let sit for 10-12 minutes. Transfer to an ice bath to cool quickly.
- Cool the eggs completely: Ensure your hard-boiled eggs are completely cool before you begin the cracking process. Warm eggs are more fragile and prone to breaking too much, rather than just cracking.
- Achieving specific color blends: Don’t be afraid to experiment! For unique shades, you can create a secondary dye bath by mixing two primary colors. For example, a little red and blue will give you purple, or yellow and blue will create green.
Step-by-Step Guide: How to Create Your Cracked Dyed Eggs
Ready to transform ordinary eggs into extraordinary Easter masterpieces? Follow these detailed instructions to create stunning cracked colored eggs that will impress everyone.
Detailed Instructions:
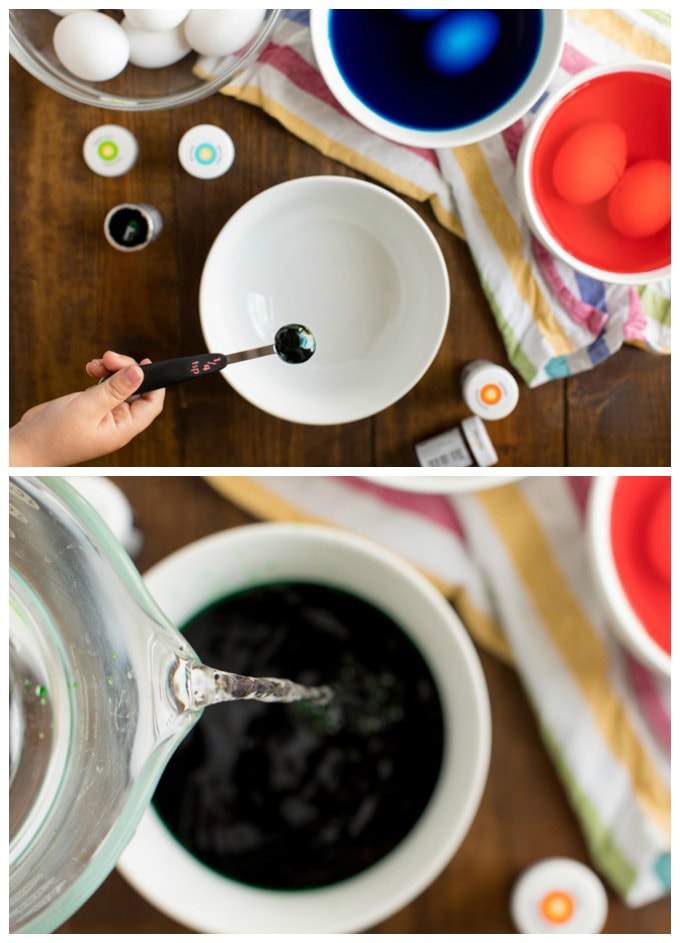
- Prepare your dye baths: Begin by adding warm water to your deep bowls or coffee mugs – one for each color you intend to use. The warm water helps the gel coloring dissolve more effectively. Next, add about 1/4 teaspoon of your chosen gel/paste food coloring to each bowl. Stir or whisk the mixture thoroughly until the food coloring is completely dissolved and the water has a uniform, rich color. Feel free to adjust the amount of food coloring; more will result in a deeper, more intense final color.
- Gently crack your hard-boiled eggs: After your eggs are hard-boiled and thoroughly cooled, resist the urge to peel them! Instead, place an egg on a clean kitchen towel or a hard surface. Gently roll the egg around, applying light pressure, to create a network of fine cracks in the shell. The goal is to crack the outer shell all over, creating a “spiderweb” effect, without actually removing any pieces of the shell. Be careful not to press too hard, as you want the shell to remain mostly intact, just fractured. These cracks are what will allow the dye to seep in and create the beautiful patterns.
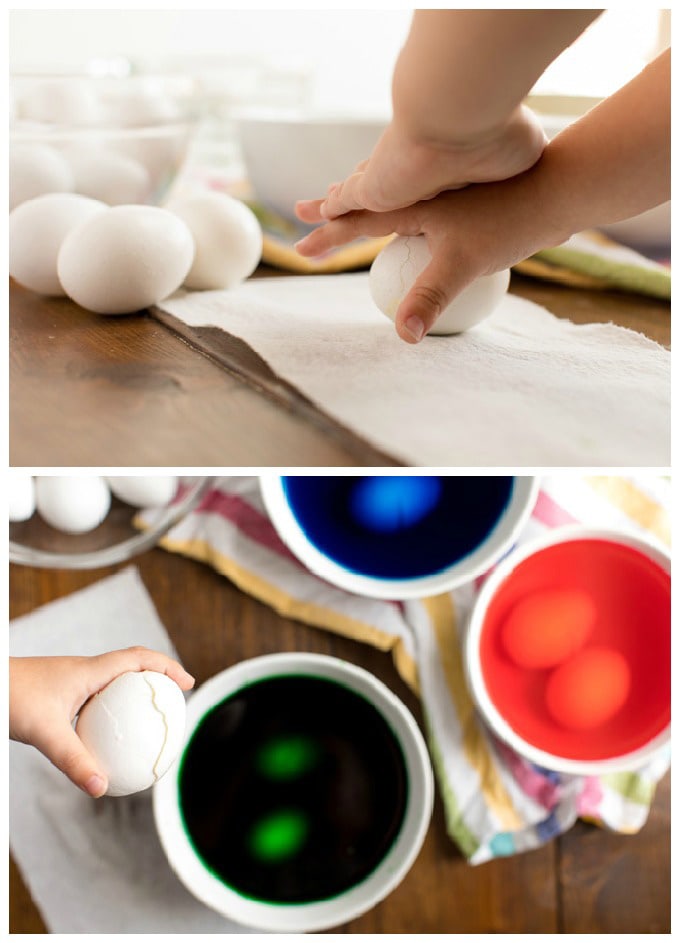
- Immerse eggs in color: Carefully place your cracked egg(s) into each of the bowls containing the dye solution. Ensure that the eggs are fully submerged in the water. If an egg floats slightly, you can gently weigh it down with a small plate or simply add a bit more water until it’s completely covered. The dye will begin to seep through the tiny cracks immediately.
- The waiting game: soaking for vivid colors: Once all your cracked eggs are happily soaking in their vibrant baths, cover the bowls (plastic wrap works well) and place them into the refrigerator. This is where the magic truly happens! Allow the eggs to soak for several hours, with a minimum of 4 hours recommended for noticeable patterns. For the most dramatic and intensely colored “spiderweb” effects, let them soak overnight. The longer the soak, the more defined and brilliant your colors will be.
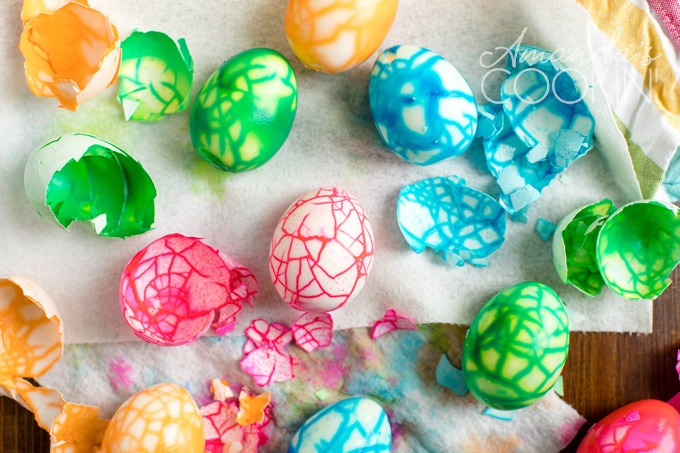
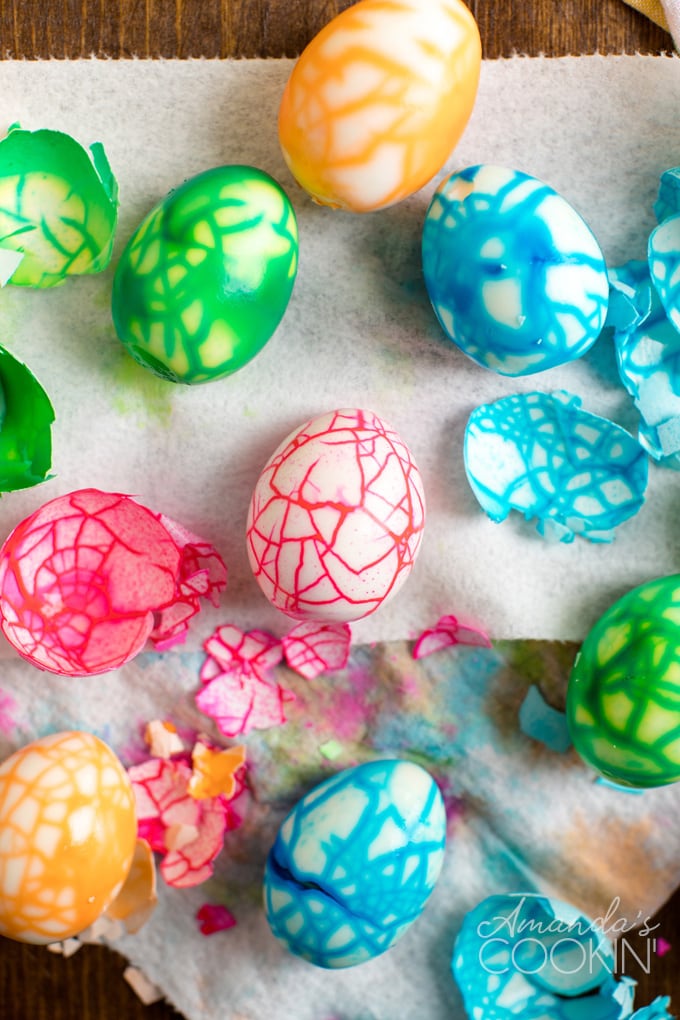
- Reveal your masterpiece: peel and rinse: After the desired soaking time, carefully remove the eggs from their dye baths. Now comes the exciting reveal! Gently peel away the cracked shells to expose the beautifully patterned egg whites beneath. Work slowly and carefully to avoid damaging the delicate surface and to fully appreciate the intricate designs. Once peeled, give each egg a gentle rinse with cool water to remove any residual dye from the surface. Pat them dry with a paper towel.
These pretty colored cracked eggs will undoubtedly be the hit of your Easter gathering. Kids and adults alike will marvel at their unique appearance and appreciate this creative alternative to classic Easter egg dyeing. Prepare for compliments!
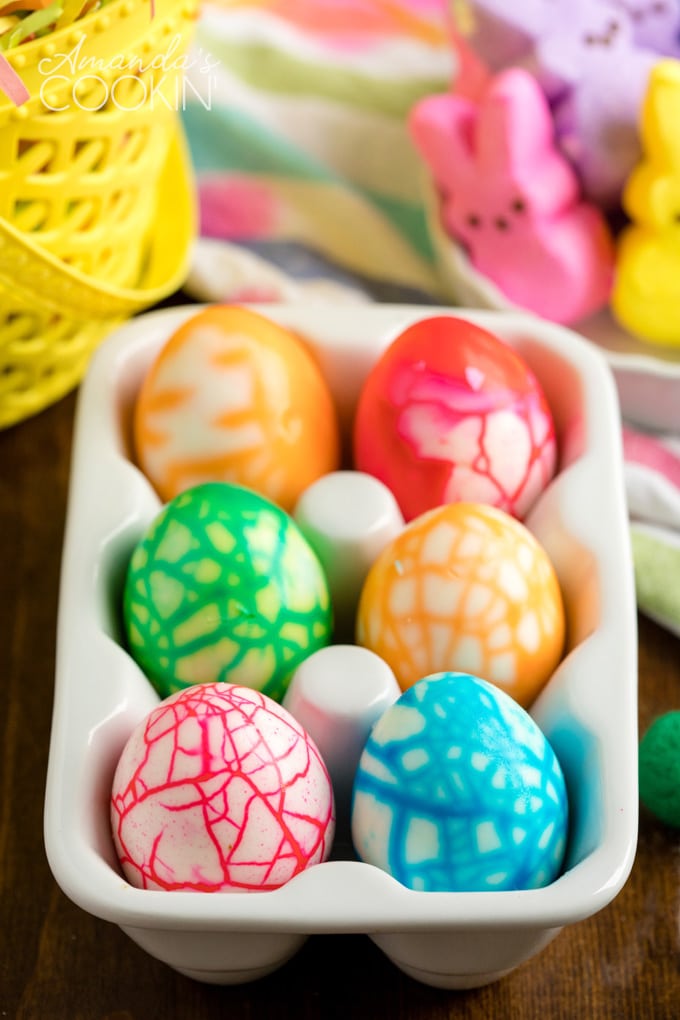
Creative Ways to Enjoy Your Cracked Easter Eggs
Once you’ve created your batch of stunning cracked Easter eggs, the possibilities for enjoying them are endless! Their unique aesthetic makes them perfect for both eating and decorating.
- Easter Brunch Centerpiece: Arrange them artfully in a basket with some festive grass or on a beautiful platter to create a show-stopping centerpiece for your Easter table.
- Unique Deviled Eggs: As mentioned, their internal patterns make for incredibly beautiful deviled eggs. Imagine a platter of vibrant, marbled deviled eggs – a true culinary delight!
- Gift Baskets: Include a few of these special eggs in Easter gift baskets for friends and family. They add a handmade, personalized touch that is sure to be appreciated.
- Egg Hunt Surprise: While they can’t be rolled without damage, you can hide them in soft places for a visually rewarding “find” in your Easter egg hunt.
- Salad Toppers: Slice them and add them to salads for a burst of color and protein, transforming a simple side dish into something special.
More Festive Easter Fun:
If you’re looking for other delightful Easter-themed recipes and crafts, check out these popular ideas:
- Easter Bunny Cupcakes: Adorably decorated treats perfect for any Easter celebration.
- Bunny Butt Cupcakes: Whimsical and fun cupcakes featuring a cute bunny peeking out.
- Rice Krispie Nests: Sweet and crunchy nests, perfect for holding candy eggs.
- Frosted Sugar Cookie Bars: Easy-to-make sugar cookie bars with a festive frosting.
- Rainbow Deviled Eggs: Another vibrant take on deviled eggs, showcasing a spectrum of colors.
Frequently Asked Questions About Cracked Colored Eggs
Here are some common questions you might have when making these beautiful cracked colored eggs:
- Q: Can I use brown eggs for this method?
A: While you can use brown eggs, the colors will appear much more subdued and less vibrant than on white eggs. The darker shell tint will affect how brightly the dye shows through the cracks. For the most vivid and striking results, white eggs are recommended. - Q: What if my eggs crack too much and pieces come off?
A: This usually means you applied too much pressure when rolling them. The goal is a network of fine cracks, not large breaks. If a few small pieces come off, it’s usually fine, but avoid large sections detaching. Practice on one egg first to get the feel for the right amount of pressure. - Q: Are the colors food safe after soaking for so long?
A: Yes, gel/paste food colorings are designed for consumption and are food safe. Since the eggs are hard-boiled, the dye only penetrates the egg white, which is perfectly safe to eat. Always use food-grade dyes. - Q: Can I use natural dyes like fruit juices or vegetable skins?
A: While natural dyes can be used for traditional egg coloring, they typically do not have the same intensity and concentration as gel food coloring. This means they might not produce as vibrant or defined a “spiderweb” pattern when soaking through cracks. You can certainly try, but expect lighter, more subtle results. - Q: How long can I store the cracked colored eggs?
A: Like any hard-boiled egg, these cracked colored eggs should be stored in the refrigerator. They are best consumed within 5-7 days of being hard-boiled. Ensure they are kept cool to maintain freshness and safety. - Q: Can I use more than one color on a single egg?
A: Absolutely! For an even more artistic effect, you can try cracking an egg and dipping it partially into one color, then partially into another, or even dipping it into one color for a while, then transferring it to a second color. This can create beautiful marbled or rainbow effects. Just be sure not to over-mix the colors if you want distinct sections.
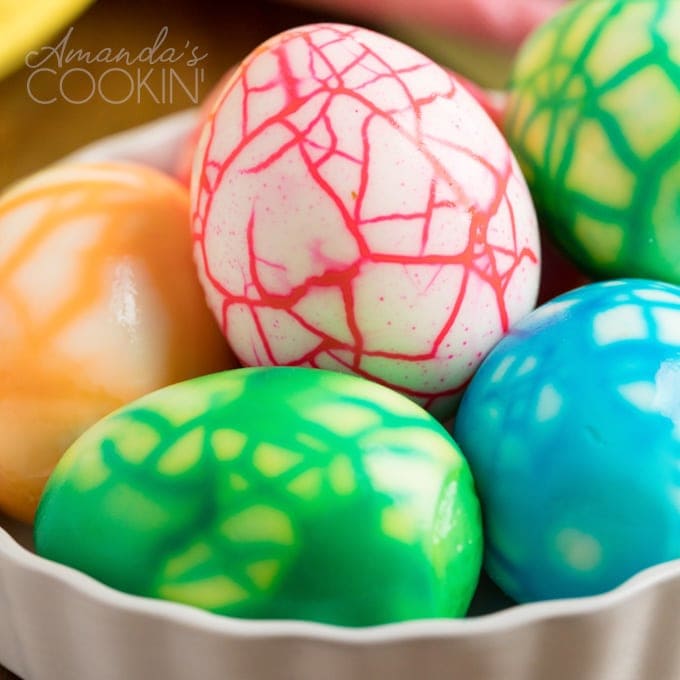
Cracked Colored Eggs
IMPORTANT – There are often Frequently Asked Questions within the blog post that you may find helpful. Simply scroll back up to read them!
Print It
Rate It
Save ItSaved!
Ingredients
- Hard boiled eggs
- Gel/paste food coloring in red blue, orange, green, purple
- Water
Things You’ll Need
-
Saucepan
-
Kitchen towel
-
Deep bowls or coffee mugs
Before You Begin
- Liquid food coloring is not as vibrant as gel or paste food coloring.
- You can find gel or paste food coloring online and in the cake decorating section of big box stores and craft stores.
- Plan ahead! These eggs have to sit and soak for several hours or even overnight for the best results.
Instructions
-
After boiling your eggs and allowing them to cool completely, do not peel them. Gently roll them around on a towel or a hard surface to create fine cracks in the shell. Ensure you crack the outer shell thoroughly without removing any large pieces.
-
Add warm water to deep bowls or coffee mugs. Add about 1/4 teaspoon of gel/paste food coloring for each color and stir/whisk until dissolved completely.
-
Place your cracked egg(s) into each of the bowls, making sure the eggs are fully covered with the dye solution.
-
Cover the bowls and place them into the refrigerator to soak for several hours (a minimum of 4 hours) or up to overnight for the most vibrant and defined patterns.
-
Once soaking is complete, carefully remove the eggs and gently peel away the cracked shells to reveal the stunning patterns. Rinse gently with cool water and pat dry.
The recipes on this blog are tested with a conventional gas oven and gas stovetop. It’s important to note that some ovens, especially as they age, can cook and bake inconsistently. Using an inexpensive oven thermometer can assure you that your oven is truly heating to the proper temperature. If you use a toaster oven or countertop oven, please keep in mind that they may not distribute heat the same as a conventional full sized oven and you may need to adjust your cooking/baking times. In the case of recipes made with a pressure cooker, air fryer, slow cooker, or other appliance, a link to the appliances we use is listed within each respective recipe. For baking recipes where measurements are given by weight, please note that results may not be the same if cups are used instead, and we can’t guarantee success with that method.
This post originally appeared here on Apr 12, 2009.
